User:The Jacketed Terrapin/Statistics/Classic Mode Routes: Difference between revisions
m (Text replacement - "(\| *)tab(\d+ *=)" to "$1content$2") |
|||
| (4 intermediate revisions by 2 users not shown) | |||
| Line 52: | Line 52: | ||
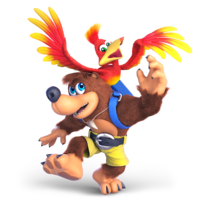
**{{head|Banjo & Kazooie|g=SSBU|s=20px}}[[Banjo & Kazooie (SSBU)#Classic Mode: Perfect Partners|Perfect Partners]]: Round 6 ({{head|Donkey Kong|g=SSBU|s=20px}}) | **{{head|Banjo & Kazooie|g=SSBU|s=20px}}[[Banjo & Kazooie (SSBU)#Classic Mode: Perfect Partners|Perfect Partners]]: Round 6 ({{head|Donkey Kong|g=SSBU|s=20px}}) | ||
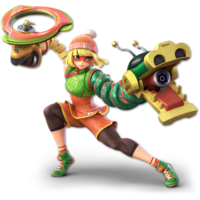
**{{head|Min Min|g=SSBU|s=20px}}[[Min Min (SSBU)#Classic Mode: ARMS at the Ready|ARMS at the Ready]]: Round 4 ({{head|Donkey Kong|g=SSBU|s=20px|cl=White}}) | **{{head|Min Min|g=SSBU|s=20px}}[[Min Min (SSBU)#Classic Mode: ARMS at the Ready|ARMS at the Ready]]: Round 4 ({{head|Donkey Kong|g=SSBU|s=20px|cl=White}}) | ||
**{{head|Kazuya|g=SSBU|s=20px}}[[Kazuya (SSBU)#Classic Mode: Fighting Fists with Fists|Fighting Fists with Fists]]: Round 4 ({{head|Donkey Kong|g=SSBU|s=20px|cl=Black}}) | |||
{{clr}} | {{clr}} | ||
| Line 79: | Line 80: | ||
**{{head|Steve|g=SSBU|s=20px}}[[Steve (SSBU)#Classic Mode: Journey to the Far Lands|Journey to the Far Lands]]: Round 3 ({{head|Link|g=SSBU|s=20px|cl=White}}×3) | **{{head|Steve|g=SSBU|s=20px}}[[Steve (SSBU)#Classic Mode: Journey to the Far Lands|Journey to the Far Lands]]: Round 3 ({{head|Link|g=SSBU|s=20px|cl=White}}×3) | ||
**{{head|Pyra|g=SSBU|s=20px}}{{head|Mythra|g=SSBU|s=20px}}[[Pyra (SSBU)#Classic Mode: Shared Destinies|Shared]] [[Mythra (SSBU)#Classic Mode: Shared Destinies|Destinies]]: Round 6 ({{head|Link|g=SSBU|s=20px}}{{head|Link|g=SSBU|s=20px|cl=Black}}) | **{{head|Pyra|g=SSBU|s=20px}}{{head|Mythra|g=SSBU|s=20px}}[[Pyra (SSBU)#Classic Mode: Shared Destinies|Shared]] [[Mythra (SSBU)#Classic Mode: Shared Destinies|Destinies]]: Round 6 ({{head|Link|g=SSBU|s=20px}}{{head|Link|g=SSBU|s=20px|cl=Black}}) | ||
**{{head|Sora|g=SSBU|s=20px}}[[Sora (SSBU)#Classic Mode: The Light That Clears the Darkness|The Light That Clears the Darkness]]: Round 1 ({{head|Link|g=SSBU|s=20px|cl=Black}}) | |||
*'''As both a CPU ally and an opponent''': | *'''As both a CPU ally and an opponent''': | ||
**{{head|Joker|g=SSBU|s=20px}}[[Joker (SSBU)#Classic Mode: Shadows|Shadows]]: | **{{head|Joker|g=SSBU|s=20px}}[[Joker (SSBU)#Classic Mode: Shadows|Shadows]]: | ||
| Line 251: | Line 253: | ||
**{{head|Little Mac|g=SSBU|s=20px}}[[Little Mac (SSBU)#Classic Mode: Friendly Sparring|Friendly Sparring]]: Round 4 ({{head|Captain Falcon|g=SSBU|s=20px}}) | **{{head|Little Mac|g=SSBU|s=20px}}[[Little Mac (SSBU)#Classic Mode: Friendly Sparring|Friendly Sparring]]: Round 4 ({{head|Captain Falcon|g=SSBU|s=20px}}) | ||
**{{head|Cloud|g=SSBU|s=20px}}[[Cloud (SSBU)#Classic Mode: A Ride? Not Interested.|A Ride? Not Interested.]]: Round 5 ({{head|Captain Falcon|g=SSBU|s=20px}}) | **{{head|Cloud|g=SSBU|s=20px}}[[Cloud (SSBU)#Classic Mode: A Ride? Not Interested.|A Ride? Not Interested.]]: Round 5 ({{head|Captain Falcon|g=SSBU|s=20px}}) | ||
**{{head|Kazuya|g=SSBU|s=20px}}[[Kazuya (SSBU)#Classic Mode: Fighting Fists with Fists|Fighting Fists with Fists]]: Round 2 ({{head|Captain Falcon|g=SSBU|s=20px}}) | |||
{{clr}} | {{clr}} | ||
| Line 451: | Line 454: | ||
**{{head|Wolf|g=SSBU|s=20px}}[[Wolf (SSBU)#Classic Mode: Reunited Roster|Reunited Roster]]: Round 2 ({{head|Young Link|g=SSBU|s=20px}}) | **{{head|Wolf|g=SSBU|s=20px}}[[Wolf (SSBU)#Classic Mode: Reunited Roster|Reunited Roster]]: Round 2 ({{head|Young Link|g=SSBU|s=20px}}) | ||
**{{head|Joker|g=SSBU|s=20px}}[[Joker (SSBU)#Classic Mode: Shadows|Shadows]]: Round 5 ({{head|Young Link|g=SSBU|s=20px|cl=Black}}) | **{{head|Joker|g=SSBU|s=20px}}[[Joker (SSBU)#Classic Mode: Shadows|Shadows]]: Round 5 ({{head|Young Link|g=SSBU|s=20px|cl=Black}}) | ||
**{{head|Sora|g=SSBU|s=20px}}[[Sora (SSBU)#Classic Mode: The Light That Clears the Darkness|The Light That Clears the Darkness]]: Round 1 ({{head|Young Link|g=SSBU|s=20px|cl=Black}}) | |||
{{clr}} | {{clr}} | ||
| Line 471: | Line 475: | ||
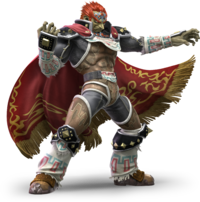
**{{head|Incineroar|g=SSBU|s=20px}}[[Incineroar (SSBU)#Classic Mode: Burning Pro Wrestling Spirit!|Burning Pro Wrestling Spirit!]]: Round 2 ({{head|Ganondorf|g=SSBU|s=20px}}) | **{{head|Incineroar|g=SSBU|s=20px}}[[Incineroar (SSBU)#Classic Mode: Burning Pro Wrestling Spirit!|Burning Pro Wrestling Spirit!]]: Round 2 ({{head|Ganondorf|g=SSBU|s=20px}}) | ||
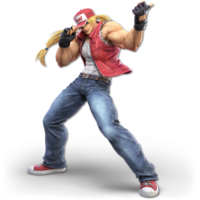
**{{head|Terry|g=SSBU|s=20px}}[[Terry (SSBU)#Classic Mode: The King of Smash|The King of Smash]]: Round 6 ({{head|Ganondorf|g=SSBU|s=20px}}) | **{{head|Terry|g=SSBU|s=20px}}[[Terry (SSBU)#Classic Mode: The King of Smash|The King of Smash]]: Round 6 ({{head|Ganondorf|g=SSBU|s=20px}}) | ||
**{{head|Sora|g=SSBU|s=20px}}[[Sora (SSBU)#Classic Mode: The Light That Clears the Darkness|The Light That Clears the Darkness]]: Round 5 ({{head|Ganondorf|g=SSBU|s=20px|cl=White}}) | |||
{{clr}} | {{clr}} | ||
| Line 534: | Line 539: | ||
**{{head|R.O.B.|g=SSBU|s=20px}}[[R.O.B. (SSBU)#Classic Mode: Unreadable Expressions|Unreadable Expressions]]: Round 3 ({{head|Mr. Game & Watch|g=SSBU|s=20px}}{{head|Mr. Game & Watch|g=SSBU|s=20px|cl=Red}}{{head|Mr. Game & Watch|g=SSBU|s=20px|cl=Yellow}}{{head|Mr. Game & Watch|g=SSBU|s=20px|cl=Blue}}{{head|Mr. Game & Watch|g=SSBU|s=20px|cl=Teal}}) | **{{head|R.O.B.|g=SSBU|s=20px}}[[R.O.B. (SSBU)#Classic Mode: Unreadable Expressions|Unreadable Expressions]]: Round 3 ({{head|Mr. Game & Watch|g=SSBU|s=20px}}{{head|Mr. Game & Watch|g=SSBU|s=20px|cl=Red}}{{head|Mr. Game & Watch|g=SSBU|s=20px|cl=Yellow}}{{head|Mr. Game & Watch|g=SSBU|s=20px|cl=Blue}}{{head|Mr. Game & Watch|g=SSBU|s=20px|cl=Teal}}) | ||
**{{head|Corrin|g=SSBU|s=20px}}[[Corrin (SSBU)#Classic Mode: Between White and Black|Between White and Black]]: Round 5 ({{head|Mr. Game & Watch|g=SSBU|s=20px|cl=White}}×3{{head|Mr. Game & Watch|g=SSBU|s=20px}}×3) | **{{head|Corrin|g=SSBU|s=20px}}[[Corrin (SSBU)#Classic Mode: Between White and Black|Between White and Black]]: Round 5 ({{head|Mr. Game & Watch|g=SSBU|s=20px|cl=White}}×3{{head|Mr. Game & Watch|g=SSBU|s=20px}}×3) | ||
**{{head|Sora|g=SSBU|s=20px}}[[Sora (SSBU)#Classic Mode: The Light That Clears the Darkness|The Light That Clears the Darkness]]: Round 2 ({{head|Mr. Game & Watch|g=SSBU|s=20px}}×8) | |||
*'''As both a CPU ally and an opponent''': | *'''As both a CPU ally and an opponent''': | ||
**{{head|Joker|g=SSBU|s=20px}}[[Joker (SSBU)#Classic Mode: Shadows|Shadows]]: | **{{head|Joker|g=SSBU|s=20px}}[[Joker (SSBU)#Classic Mode: Shadows|Shadows]]: | ||
| Line 775: | Line 781: | ||
**{{head|Greninja|g=SSBU|s=20px}}[[Greninja (SSBU)#Classic Mode: Your Turn, Greninja!|Your Turn, Greninja!]]: Round 3 ({{head|Lucario|g=SSBU|s=20px}}) | **{{head|Greninja|g=SSBU|s=20px}}[[Greninja (SSBU)#Classic Mode: Your Turn, Greninja!|Your Turn, Greninja!]]: Round 3 ({{head|Lucario|g=SSBU|s=20px}}) | ||
**{{head|Inkling|g=SSBU|s=20px}}[[Inkling (SSBU)#Classic Mode: An Inkredible Journey|An Inkredible Journey]]: Round 1 ({{head|Lucario|g=SSBU|s=20px|cl=Green}}) | **{{head|Inkling|g=SSBU|s=20px}}[[Inkling (SSBU)#Classic Mode: An Inkredible Journey|An Inkredible Journey]]: Round 1 ({{head|Lucario|g=SSBU|s=20px|cl=Green}}) | ||
**{{head|Kazuya|g=SSBU|s=20px}}[[Kazuya (SSBU)#Classic Mode: Fighting Fists with Fists|Fighting Fists with Fists]]: Round 5 ({{head|Lucario|g=SSBU|s=20px}}) | |||
{{clr}} | {{clr}} | ||
| Line 889: | Line 896: | ||
**{{head|Ryu|g=SSBU|s=20px}}[[Ryu (SSBU)#Classic Mode: Seeking a Challenge|Seeking a Challenge]]: Round 5 ({{head|Little Mac|g=SSBU|s=20px}}) | **{{head|Ryu|g=SSBU|s=20px}}[[Ryu (SSBU)#Classic Mode: Seeking a Challenge|Seeking a Challenge]]: Round 5 ({{head|Little Mac|g=SSBU|s=20px}}) | ||
**{{head|Min Min|g=SSBU|s=20px}}[[Min Min (SSBU)#Classic Mode: ARMS at the Ready|ARMS at the Ready]]: Round 2 ({{head|Little Mac|g=SSBU|s=20px}}) | **{{head|Min Min|g=SSBU|s=20px}}[[Min Min (SSBU)#Classic Mode: ARMS at the Ready|ARMS at the Ready]]: Round 2 ({{head|Little Mac|g=SSBU|s=20px}}) | ||
**{{head|Kazuya|g=SSBU|s=20px}}[[Kazuya (SSBU)#Classic Mode: Fighting Fists with Fists|Fighting Fists with Fists]]: Round 3 ({{head|Little Mac|g=SSBU|s=20px}}) | |||
{{clr}} | {{clr}} | ||
| Line 944: | Line 952: | ||
**{{head|Hero|g=SSBU|s=20px}}[[Hero (SSBU)#Classic Mode: A History of Heroism|A History of Heroism]]: Round 2 ({{head|Robin|g=SSBU|s=20px|cl=Red}}), Final Round ({{head|Robin|g=SSBU|s=20px|cl=Blue}}) | **{{head|Hero|g=SSBU|s=20px}}[[Hero (SSBU)#Classic Mode: A History of Heroism|A History of Heroism]]: Round 2 ({{head|Robin|g=SSBU|s=20px|cl=Red}}), Final Round ({{head|Robin|g=SSBU|s=20px|cl=Blue}}) | ||
**{{head|Steve|g=SSBU|s=20px}}[[Steve (SSBU)#Classic Mode: Journey to the Far Lands|Journey to the Far Lands]]: Round 4 ({{head|Robin|g=SSBU|s=20px}}) | **{{head|Steve|g=SSBU|s=20px}}[[Steve (SSBU)#Classic Mode: Journey to the Far Lands|Journey to the Far Lands]]: Round 4 ({{head|Robin|g=SSBU|s=20px}}) | ||
**{{head|Sora|g=SSBU|s=20px}}[[Sora (SSBU)#Classic Mode: The Light That Clears the Darkness|The Light That Clears the Darkness]]: Round 4 ({{head|Robin|g=SSBU|s=20px}}×2{{head|Robin|g=SSBU|s=20px|cl=Female}}) | |||
*'''As both a CPU ally and an opponent''': | *'''As both a CPU ally and an opponent''': | ||
**{{head|Byleth|g=SSBU|s=20px}}[[Byleth (SSBU)#Classic Mode: A Heroic Legacy|A Heroic Legacy]]: | **{{head|Byleth|g=SSBU|s=20px}}[[Byleth (SSBU)#Classic Mode: A Heroic Legacy|A Heroic Legacy]]: | ||
| Line 1,001: | Line 1,010: | ||
**{{head|Terry|g=SSBU|s=20px}}[[Terry (SSBU)#Classic Mode: The King of Smash|The King of Smash]]: Final Round ({{head|Ryu|g=SSBU|s=20px}}) | **{{head|Terry|g=SSBU|s=20px}}[[Terry (SSBU)#Classic Mode: The King of Smash|The King of Smash]]: Final Round ({{head|Ryu|g=SSBU|s=20px}}) | ||
**{{head|Pyra|g=SSBU|s=20px}}{{head|Mythra|g=SSBU|s=20px}}[[Pyra (SSBU)#Classic Mode: Shared Destinies|Shared]] [[Mythra (SSBU)#Classic Mode: Shared Destinies|Destinies]]: Round 4 ({{head|Ryu|g=SSBU|s=20px}}) | **{{head|Pyra|g=SSBU|s=20px}}{{head|Mythra|g=SSBU|s=20px}}[[Pyra (SSBU)#Classic Mode: Shared Destinies|Shared]] [[Mythra (SSBU)#Classic Mode: Shared Destinies|Destinies]]: Round 4 ({{head|Ryu|g=SSBU|s=20px}}) | ||
**{{head|Kazuya|g=SSBU|s=20px}}[[Kazuya (SSBU)#Classic Mode: Fighting Fists with Fists|Fighting Fists with Fists]]: Round 1 ({{head|Ryu|g=SSBU|s=20px}}) | |||
{{clr}} | {{clr}} | ||
| Line 1,034: | Line 1,044: | ||
**{{head|Palutena|g=SSBU|s=20px}}[[Palutena (SSBU)#Classic Mode: A Little Divine Intervention|A Little Divine Intervention]]: Round 2 ({{head|Cloud|g=SSBU|s=20px}}) | **{{head|Palutena|g=SSBU|s=20px}}[[Palutena (SSBU)#Classic Mode: A Little Divine Intervention|A Little Divine Intervention]]: Round 2 ({{head|Cloud|g=SSBU|s=20px}}) | ||
**{{head|Shulk|g=SSBU|s=20px}}[[Shulk (SSBU)#Classic Mode: Witness the Monado's Power|Witness the Monado's Power]]: Round 4 ({{head|Cloud|g=SSBU|s=20px}}) | **{{head|Shulk|g=SSBU|s=20px}}[[Shulk (SSBU)#Classic Mode: Witness the Monado's Power|Witness the Monado's Power]]: Round 4 ({{head|Cloud|g=SSBU|s=20px}}) | ||
**{{head|Sora|g=SSBU|s=20px}}[[Sora (SSBU)#Classic Mode: The Light That Clears the Darkness|The Light That Clears the Darkness]]: Round 3 ({{head|Cloud|g=SSBU|s=20px|cl=Advent}}) | |||
*'''As both a CPU ally and an opponent''': | *'''As both a CPU ally and an opponent''': | ||
**{{head|Mewtwo|g=SSBU|s=20px}}[[Mewtwo (SSBU)#Classic Mode: Psychic Control|Psychic Control]]: | **{{head|Mewtwo|g=SSBU|s=20px}}[[Mewtwo (SSBU)#Classic Mode: Psychic Control|Psychic Control]]: | ||
| Line 1,156: | Line 1,167: | ||
**{{head|Terry|g=SSBU|s=20px}}[[Terry (SSBU)#Classic Mode: The King of Smash|The King of Smash]]: Round 3 ({{head|King K. Rool|g=SSBU|s=20px}}) | **{{head|Terry|g=SSBU|s=20px}}[[Terry (SSBU)#Classic Mode: The King of Smash|The King of Smash]]: Round 3 ({{head|King K. Rool|g=SSBU|s=20px}}) | ||
**{{head|Steve|g=SSBU|s=20px}}[[Steve (SSBU)#Classic Mode: Journey to the Far Lands|Journey to the Far Lands]]: Round 5 ({{head|King K. Rool|g=SSBU|s=20px|cl=Pink}}×2) | **{{head|Steve|g=SSBU|s=20px}}[[Steve (SSBU)#Classic Mode: Journey to the Far Lands|Journey to the Far Lands]]: Round 5 ({{head|King K. Rool|g=SSBU|s=20px|cl=Pink}}×2) | ||
**{{head|Kazuya|g=SSBU|s=20px}}[[Kazuya (SSBU)#Classic Mode: Fighting Fists with Fists|Fighting Fists with Fists]]: Round 4 ({{head|King K. Rool|g=SSBU|s=20px|cl=Blue}}) | |||
{{clr}} | {{clr}} | ||
| Line 1,250: | Line 1,262: | ||
Appears in: | Appears in: | ||
*Does not appear in any Classic Mode route. | *Does not appear in any Classic Mode route. | ||
{{clr}} | |||
===={{SSBU|Kazuya}}==== | |||
[[File:Kazuya SSBU.png|thumb|200px|right]] | |||
Appears in: | |||
*'''As an opponent''': | |||
**{{head|Kazuya|g=SSBU|s=20px}}[[Kazuya (SSBU)#Classic Mode: Fighting Fists with Fists|Fighting Fists with Fists]]: Final Round ({{head|Kazuya|g=SSBU|s=20px|cl=Red}}×2) | |||
{{clr}} | |||
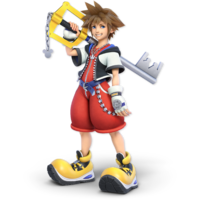
===={{SSBU|Sora}}==== | |||
[[File:Sora SSBU.png|thumb|200px|right]] | |||
Appears in: | |||
*'''As an opponent''': | |||
**{{head|Sora|g=SSBU|s=20px}}[[Sora (SSBU)#Classic Mode: The Light That Clears the Darkness|The Light That Clears the Darkness]]: Round 6 ({{head|Sora|g=SSBU|s=20px}}) | |||
{{clr}} | {{clr}} | ||
| Line 1,289: | Line 1,315: | ||
***'''#1:''' Spring Man Mask and Spring Man Outfit | ***'''#1:''' Spring Man Mask and Spring Man Outfit | ||
***'''#2:''' Ribbon Girl Mask and Ribbon Girl Outfit | ***'''#2:''' Ribbon Girl Mask and Ribbon Girl Outfit | ||
**{{head|Kazuya|g=SSBU|s=20px}}[[Kazuya (SSBU)#Classic Mode: Fighting Fists with Fists|Fighting Fists with Fists]]: Round 6 (Bionic Helmet and Bionic Armor×6) | |||
{{clr}} | {{clr}} | ||
| Line 1,396: | Line 1,423: | ||
**{{head|Sephiroth|g=SSBU|s=20px}}[[Sephiroth (SSBU)#Classic Mode: The Chosen Ones|The Chosen Ones]]: Final Round | **{{head|Sephiroth|g=SSBU|s=20px}}[[Sephiroth (SSBU)#Classic Mode: The Chosen Ones|The Chosen Ones]]: Final Round | ||
**{{head|Pyra|g=SSBU|s=20px}}{{head|Mythra|g=SSBU|s=20px}}[[Pyra (SSBU)#Classic Mode: Shared Destinies|Shared]] [[Mythra (SSBU)#Classic Mode: Shared Destinies|Destinies]]: Final Round | **{{head|Pyra|g=SSBU|s=20px}}{{head|Mythra|g=SSBU|s=20px}}[[Pyra (SSBU)#Classic Mode: Shared Destinies|Shared]] [[Mythra (SSBU)#Classic Mode: Shared Destinies|Destinies]]: Final Round | ||
**{{head|Sora|g=SSBU|s=20px}}[[Sora (SSBU)#Classic Mode: The Light That Clears the Darkness|The Light That Clears the Darkness]]: Final Round | |||
*'''Intensity 7.0 or higher only''': | *'''Intensity 7.0 or higher only''': | ||
**{{head|Falco|g=SSBU|s=20px}}[[Falco (SSBU)#Classic Mode: Soar Above the Darkness|Soar Above the Darkness]]: Final Round | **{{head|Falco|g=SSBU|s=20px}}[[Falco (SSBU)#Classic Mode: Soar Above the Darkness|Soar Above the Darkness]]: Final Round | ||
| Line 1,418: | Line 1,446: | ||
**{{head|Sephiroth|g=SSBU|s=20px}}[[Sephiroth (SSBU)#Classic Mode: The Chosen Ones|The Chosen Ones]]: Final Round | **{{head|Sephiroth|g=SSBU|s=20px}}[[Sephiroth (SSBU)#Classic Mode: The Chosen Ones|The Chosen Ones]]: Final Round | ||
**{{head|Pyra|g=SSBU|s=20px}}{{head|Mythra|g=SSBU|s=20px}}[[Pyra (SSBU)#Classic Mode: Shared Destinies|Shared]] [[Mythra (SSBU)#Classic Mode: Shared Destinies|Destinies]]: Final Round | **{{head|Pyra|g=SSBU|s=20px}}{{head|Mythra|g=SSBU|s=20px}}[[Pyra (SSBU)#Classic Mode: Shared Destinies|Shared]] [[Mythra (SSBU)#Classic Mode: Shared Destinies|Destinies]]: Final Round | ||
**{{head|Sora|g=SSBU|s=20px}}[[Sora (SSBU)#Classic Mode: The Light That Clears the Darkness|The Light That Clears the Darkness]]: Final Round | |||
*'''Intensity 7.0 or higher only''': | *'''Intensity 7.0 or higher only''': | ||
**{{head|Donkey Kong|g=SSBU|s=20px}}[[Donkey Kong (SSBU)#Classic Mode: Journey to New Donk City|Journey to New Donk City]]: Final Round | **{{head|Donkey Kong|g=SSBU|s=20px}}[[Donkey Kong (SSBU)#Classic Mode: Journey to New Donk City|Journey to New Donk City]]: Final Round | ||
| Line 1,492: | Line 1,521: | ||
{{clr}} | {{clr}} | ||
=====[[Dracula]]===== | =====[[Dracula]]===== | ||
{{tabber|title1=Phase 1| | {{tabber|title1=Phase 1|content1=[[File:Dracula Phase 1 SSBU.png|200px]]|title2=Phase 2|content2=[[File:Dracula Phase 2 SSBU.png|200px]]}} | ||
Appears in: | Appears in: | ||
*{{head|Luigi|g=SSBU|s=20px}}[[Luigi (SSBU)#Classic Mode: Luigi's Nightmares|Luigi's Nightmares]]: Final Round | *{{head|Luigi|g=SSBU|s=20px}}[[Luigi (SSBU)#Classic Mode: Luigi's Nightmares|Luigi's Nightmares]]: Final Round | ||
Latest revision as of 09:04, October 30, 2023
These are the statistics for each fighters' appearances in certain Classic Mode routes.
By Character[edit]
Mario[edit]
Appears in:
- As a CPU ally:
 Hey, Little Buddy!: Round 1 (
 )
) One Star after Another: Rounds 6-Final (
 )
)
- As an opponent:
 Journey to New Donk City: Round 6 (
 )
) The Great Poison Given Form: Round 5 (
 )
) All Original, All 64: Round 2 (
 )
) The Red One. Every Red One!: Final Round (
 )
) Duos for Days: Round 6 (
 )
) Encroaching Darkness: Round 1 (
 )
) Planetary Explorer: Round 1 (
 )
) The Teamwork of Courage: Round 1 (
 )
) Ageless Classic: Round 1 (
 )
) Mama Peach, Where Are You?: Round 6 (
 )
) A Ride? Not Interested.: Round 4 (
 )
) It Can't Be! Space Pirates!: Round 4 (
 )
) The King of Smash: Round 1 (
 )
)
- As both a CPU ally and an opponent:
Donkey Kong[edit]
Appears in:
- As a CPU ally:
 Hey, Little Buddy!: Rounds 6-Final (
 )
)
- As an opponent:
 Let's-a Go!: Round 3 (
 )
) Gourmet Clash: Round 3 (
 )
) Up Close and Personal: Round 1 (
 )
) All Original, All 64: Final Round (
 )
) No Damsel in Distress: Round 3 (
 )
) Duos for Days: Round 4 (
 )
) Fight as One: Round 4 (
 )
) A Long Legacy: Round 5 (
 )
) Variable Weapons System: Online!: Round 3 (
 )
) Friendly Sparring: Round 6 (
 )
) Ageless Classic: Round 1 (
 )
) Dog, Duck, Zapper: Round 1 (
 )
) Seeking a Challenge: Round 4 (
 )
) Super Heavyweight Class: Round 6 (
 )
) Burning Pro Wrestling Spirit!: Round 5 (
 )
) Perfect Partners: Round 6 (
 )
) ARMS at the Ready: Round 4 (
 )
) Fighting Fists with Fists: Round 4 (
 )
)
Link[edit]
Appears in:
- As an opponent:
 Let's-a Go!: Round 1 (
 )
) A Quest to Seal the Darkness: Round 6 (
 )
) The Great Poison Given Form: Round 1 (
 )
) Luigi's Nightmares: Round 5 (
 )
) All Original, All 64: Round 1 (
 )
) Duos for Days: Round 1 (
 )
) Wisdom Prevails: Round 6 (
 ×4)
×4) Soar Above the Darkness: Round 3 (
 )
) Hyrule Smash!: Round 6 (
 )
) Encroaching Darkness: Round 6 (
 )
) A Journey of Swords: Round 3 (
 )
) Two Sides of the Same Coin: Round 1 (
 )
) Created Warriors: Round 3 (
 ×3)
×3) Weapons and Equipment OSP: Round 4 (
 )
) The Black-Clad Warriors: Round 6 (
 )
) A Little Divine Intervention: Round 1 (
 )
) Red-Hot Rivalry: Round 4 (
 )
) Perfect Partners: Round 4 (
 )
) The King of Smash: Round 2 (
 )
) Journey to the Far Lands: Round 3 (
 ×3)
×3)
 Shared Destinies: Round 6 (
 )
) The Light That Clears the Darkness: Round 1 (
 )
)
- As both a CPU ally and an opponent:
Samus[edit]
Appears in:
- As an opponent:
 The Great Poison Given Form: Round 6 (
 )
) Spaceborne Smash: Round 1 (
 )
) All Original, All 64: Round 3 (
 )
) The Red One. Every Red One!: Round 3 (
 )
) Masquerade: Round 3 (
 )
) Two Sides of the Same Coin: Round 5 (
 )
) Weapons and Equipment OSP: Round 5 (
 )
) Variable Weapons System: Online!: Round 2 (
 )
) One Star after Another: Round 3 (
 )
) Ageless Classic: Round 4 (
 )
) It Can't Be! Space Pirates!: Round 1 (
 )
) Best in Show: Round 4 (
 )
) Shadows: Round 3 (
 )
) ARMS at the Ready: Round 3 (
 )
)
 Shared Destinies: Round 2 (
 )
)
Dark Samus[edit]
Appears in:
- As an opponent:
 A Quest to Seal the Darkness: Round 4 (
 )
) Another Planet, Another Bounty: Round 6 (
 )
) Spaceborne Smash: Round 4 (
 )
) Wisdom Prevails: Round 5 (
 )
) Soar Above the Darkness: Round 1 (
 )
) Two Sides of the Same Coin: Round 5 (
 )
) Fighting for the Goddess!: Round 1 (
 )
) Created Warriors: Round 2 (
 )
) Grapplers! Whips! Claws!: Round 3 (
 )
) Hey, Little Buddy!: Round 2 (
 )
) Unreadable Expressions: Round 2 (
 )
) Red-Hot Rivalry: Round 3 (
 )
) Between White and Black: Round 2 (
 )
) Smash Echoes: Round 1 (
 )
) New Bloom: Round 2 (
 )
)
 Shared Destinies: Round 2 (
 )
)
- As both a CPU ally and an opponent:
Yoshi[edit]
Appears in:
- As an opponent:
 Gourmet Clash: Round 2 (
 )
) All Original, All 64: Round 3 (
 )
) Colorful Treatment Plan: Round 3 (

 )
) A Kingdom of Dragons: Round 2 (


 )
) Grapplers! Whips! Claws!: Round 4 (
 )
) The Teamwork of Courage: Round 1 (
 )
) A Ride? Not Interested.: Round 4 (
 )
) An Inkredible Journey: Round 4 (
 )
)
Kirby[edit]
Appears in:
- As a CPU ally:
 Hey, Little Buddy!: Round 5 (
 )
)
- As an opponent:
 Let's-a Go!: Round 2 (
 )
) All Original, All 64: Round 4 (
 )
) Colorful Treatment Plan: Round 2 (

 )
) Lightweight Fracas: Round 5 (
 )
) A Long Legacy: Round 1 (
 )
) The Black-Clad Warriors: Round 1 (
 )
) At the Speed of Sound: Round 4 (

 )
) Planetary Explorer: Round 3 (
 )
) Aerobic Smash: Round 2 (
 ×3)
×3) One Star after Another: Round 5 (


 )
) Ageless Classic: Round 6 (
 )
) A History of Heroism: Round 1 (
 ×3
×3 )
) Journey to the Far Lands: Round 5 (
 ×2)
×2)
 Shared Destinies: Round 5 (
 )
)
- As both a CPU ally and an opponent:
Fox[edit]
Appears in:
- As an opponent:
 All Original, All 64: Round 4 (
 )
) Encroaching Darkness: Round 2 (
 )
) Fight as One: Round 2 (
 )
) At the Speed of Sound: Round 1 (
 )
) Planetary Explorer: Round 5 (
 )
) One Star after Another: Round 2 (
 )
) Dog, Duck, Zapper: Round 3 (
 )
) A Ride? Not Interested.: Round 2 (
 )
) It Can't Be! Space Pirates!: Round 2 (
 )
) Perfect Partners: Round 5 (
 )
)
Pikachu[edit]
Appears in:
- As an opponent:
 Let's-a Go!: Round 4 (
 )
) The Great Poison Given Form: Round 4 (
 )
) All Original, All 64: Round 5 (
 )
) The Future Champion: Round 1 (
 )
) Your Turn, Greninja!: Round 2 (
 )
) Thunder and Flames: Round 3 (
 )
) Best in Show: Round 2 (
 )
) A History of Heroism: Round 5 (
 )
)
- As both a CPU ally and an opponent:
Luigi[edit]
Appears in:
- As a CPU ally:
 The Great Poison Given Form: Round 5 (
 )
)
- As an opponent:
 Journey to New Donk City: Round 6 (
 )
) All Original, All 64: Round 6 (
 )
) Encroaching Darkness: Round 1 (
 )
) A Long Legacy: Round 4 (
 )
) The Teamwork of Courage: Round 1 (
 )
) Ageless Classic: Round 1 (
 )
) Mama Peach, Where Are You?: Round 3 (
 )
) Red-Hot Rivalry: Round 5 (
 )
)
Ness[edit]
Appears in:
- As an opponent:
 Journey to New Donk City: Round 4 (
 )
) Home to Onett!: Round 1 (
 )
) All Original, All 64: Round 6 (
 )
) Psychic Control: Round 1 (
 )
) Fight as One: Round 3 (
 )
) Magic, Sacred Powers, and PSI!: Round 1 (
 )
) Mistake to Underestimate: Round 3 (
 )
) Your Turn, Greninja!: Round 5 (
 )
) An Inkredible Journey: Round 5 (
 )
)
Captain Falcon[edit]
Appears in:
- As an opponent:
 Journey to New Donk City: Round 3 (
 )
) All Original, All 64: Round 6 (
 )
) Masquerade: Round 2 (
 )
) Soar Above the Darkness: Round 5 (
 )
) Two Sides of the Same Coin: Round 3 (
 )
) Created Warriors: Round 5 (
 )
) At the Speed of Sound: Round 2 (
 )
) Variable Weapons System: Online!: Round 4 (
 )
) Friendly Sparring: Round 4 (
 )
) A Ride? Not Interested.: Round 5 (
 )
) Fighting Fists with Fists: Round 2 (
 )
)
Jigglypuff[edit]
Appears in:
- As an opponent:
 I Choose You!: Round 2 (


 )
) All Original, All 64: Round 6 (
 )
) Lightweight Fracas: Round 1 (
 )
) Psychic Control: Round 6 (
 )
) The Future Champion: Round 2 (
 )
) Aerobic Smash: Round 6 (
 )
)
Peach[edit]
Appears in:
- As a CPU ally:
 Between White and Black: Round 3 (
 )
)
- As an opponent:
 The Great Poison Given Form: Round 5 (
 )
) Sarasaland Represent!: Round 6 (
 )
) Duos for Days: Round 6 (
 )
) Fight as One: Round 5 (
 )
) Royal Rumble: Round 4 (
 )
) The Teamwork of Courage: Round 1 (
 )
) Mama Peach, Where Are You?: Round 6 (
 )
) A Ride? Not Interested.: Round 4 (
 )
) It Can't Be! Space Pirates!: Round 4 (
 )
) Best in Show: Round 5 (
 )
) The King of Smash: Round 1 (
 )
)
Daisy[edit]
Appears in:
- As an opponent:
 The Great Poison Given Form: Round 5 (
 )
) Fight as One: Round 5 (
 )
) Royal Rumble: Round 4 (
 )
) Mama Peach, Where Are You?: Round 3 (
 )
) Between White and Black: Round 3 (
 )
) Smash Echoes: Round 2 (
 )
) Best in Show: Round 5 (
 )
) New Bloom: Round 5 (
 )
)
Bowser[edit]
Appears in:
- As an opponent:
 Let's-a Go!: Final Round (
 )
) Another Planet, Another Bounty: Round 5 (
 )
) Jurassic Journey: Round 6 (
 )
) Up Close and Personal: Final Round (
 )
) No Damsel in Distress: Round 6 (
 )
) Wisdom Prevails: Round 2 (
 )
) Fighting for the Goddess!: Round 2 (
 )
) Hey, Little Buddy!: Round 1 (
 )
) Royal Rumble: Round 5 (
 )
) One Star after Another: Round 6 (
 )
) Your Turn, Greninja!: Round 1 (
 )
) Thunder and Flames: Round 5 (
 )
) Smash-vania: Round 5 (
 )
) Super Heavyweight Class: Round 2 (
 )
) Burning Pro Wrestling Spirit!: Round 1 (
 )
) The King of Smash: Round 3 (
 )
)
Ice Climbers[edit]
Appears in:
- As a CPU ally:
 Best in Show: Round 4 (
 )
)
- As an opponent:
 Reunited Roster: Round 1 (
 )
) Variable Weapons System: Online!: Round 1 (
 )
) Ageless Classic: Round 3 (
 )
) Perfect Partners: Round 3 (
 )
)
Sheik[edit]
Appears in:
- As an opponent:
 Home to Onett!: Round 4 (
 )
) Hyrule Smash!: Round 3 (
 )
) At the Speed of Sound: Round 5 (
 )
) An Inkredible Journey: Round 1 (
 )
) Best in Show: Round 6 (
 )
) The King of Smash: Round 2 (
 )
)
 Shared Destinies: Round 1 (
 )
)
Zelda[edit]
Appears in:
- As a CPU ally:
 A Quest to Seal the Darkness: Round 5 (
 )
) The Great Poison Given Form: Round 1 (
 )
) Hey, Little Buddy!: Round 3 (
 )
)
- As an opponent:
 Let's-a Go!: Round 1 (
 )
) Sarasaland Represent!: Round 1 (
 )
) Duos for Days: Round 1 (
 )
) Hyrule Smash!: Round 1 (
 )
) Encroaching Darkness: Round 6 (
 )
) Royal Rumble: Round 3 (
 )
) A Little Divine Intervention: Round 1 (
 )
) Mama Peach, Where Are You?: Round 4 (
 )
) Best in Show: Round 3 (
 )
) Perfect Partners: Round 4 (
 )
) The King of Smash: Round 2 (
 )
)
 Shared Destinies: Round 1 (
 )
)
Dr. Mario[edit]
Appears in:
- As a CPU ally:
 Aerobic Smash: Round 4 (
 )
)
- As an opponent:
 Mistake to Underestimate: Round 4 (
 )
) Variable Weapons System: Online!: Final Round (
 )
) Ageless Classic: Round 6 (
 )
) Thunder and Flames: Round 5 (
 )
)
Pichu[edit]
Appears in:
- As an opponent:
 I Choose You!: Round 3 (
 )
) Psychic Control: Round 6 (
 )
) Reunited Roster: Round 3 (
 )
) Your Turn, Greninja!: Round 2 (
 )
) Thunder and Flames: Round 1 (
 )
)
Falco[edit]
Appears in:
- As an opponent:
 Encroaching Darkness: Round 2 (
 )
) Fight as One: Round 2 (
 )
) Planetary Explorer: Round 5 (
 )
) Witness the Monado's Power: Round 1 (
 )
) Dog, Duck, Zapper: Round 3 (
 )
) A Ride? Not Interested.: Round 2 (
 )
) The Requiem of Fallen Wings: Round 2 (
 )
) It Can't Be! Space Pirates!: Round 2 (
 )
) Perfect Partners: Round 5 (
 )
)
Marth[edit]
Appears in:
- As a CPU ally:
 Between White and Black: Round 6 (
 )
)
- As an opponent:
 Let's-a Go!: Round 5 (
 )
) A Path of Heroes: Round 6 (
 )
) Encroaching Darkness: Round 4 (
 )
) A Journey of Swords: Round 6 (
 )
) Royal Rumble: Round 2 (
 )
) Counter Encounters: Round 3 (
 )
) Ageless Classic: Round 6 (
 )
)
- As both a CPU ally and an opponent:
Lucina[edit]
Appears in:
- As an opponent:
 The Great Poison Given Form: Round 2 (
 )
) Sarasaland Represent!: Round 2 (
 )
) A Journey of Swords: Round 1 (
 )
) Counter Encounters: Round 3 (
 )
) Mama Peach, Where Are You?: Round 2 (
 )
) Between White and Black: Round 6 (
 )
) Smash Echoes: Round 3 (
 )
) Best in Show: Round 3 (
 )
) A Heroic Legacy: Round 4 (
 )
)
- As both a CPU ally and an opponent:
Young Link[edit]
Appears in:
- As an opponent:
 Hyrule Smash!: Round 2 (
 )
) Grapplers! Whips! Claws!: Round 1 (
 )
) Reunited Roster: Round 2 (
 )
) Shadows: Round 5 (
 )
) The Light That Clears the Darkness: Round 1 (
 )
)
Ganondorf[edit]
Appears in:
- As an opponent:
 A Quest to Seal the Darkness: Round 5 (
 )
) Up Close and Personal: Round 2 (
 )
) No Damsel in Distress: Round 2 (
 )
) Wisdom Prevails: Final Round (
 )
) Hyrule Smash!: Round 5 (
 )
) Fighting for the Goddess!: Round 3 (
 )
) I'm-a Gonna Win!: Round 1 (
 )
) Hey, Little Buddy!: Round 3 (
 )
) Royal Rumble: Round 6 (
 )
) The Teamwork of Courage: Round 6 (
 )
) Smash-vania: Round 5 (
 )
) Super Heavyweight Class: Round 5 (
 )
) Burning Pro Wrestling Spirit!: Round 2 (
 )
) The King of Smash: Round 6 (
 )
) The Light That Clears the Darkness: Round 5 (
 )
)
Mewtwo[edit]
Appears in:
- As an opponent:
 Another Planet, Another Bounty: Round 5 (
 )
) I Choose You!: Final Round (
 )
) Lightweight Fracas: Round 6 (
 )
) Created Warriors: Round 1 (
 )
) The Future Champion: Final Round (
 )
) Hey, Little Buddy!: Round 4 (
 )
) Magic, Sacred Powers, and PSI!: Round 6 (
 )
) Variable Weapons System: Online!: Final Round (
 )
) Your Turn, Greninja!: Round 5 (
 )
) An Inkredible Journey: Round 5 (
 )
) Smash-vania: Round 5 (
 )
)
Roy[edit]
Appears in:
- As an opponent:
 Up Close and Personal: Round 4 (
 )
) A Path of Heroes: Round 5 (
 )
) Encroaching Darkness: Round 4 (
 )
) Royal Rumble: Round 2 (
 )
) Counter Encounters: Round 5 (
 )
) Thunder and Flames: Round 2 (
 )
)
- As both a CPU ally and an opponent:
Chrom[edit]
Appears in:
- As a CPU ally:
 Between White and Black: Round 6 (
 )
)
- As an opponent:
 Let's-a Go!: Round 5 (
 )
) The Great Poison Given Form: Round 2 (
 )
) A Path of Heroes: Round 2 (
 )
) A Journey of Swords: Round 1 (
 )
) Mama Peach, Where Are You?: Round 2 (
 )
) Smash Echoes: Round 4 (
 )
) New Bloom: Round 4 (
 )
) A Heroic Legacy: Round 4 (
 )
)
Mr. Game & Watch[edit]
Appears in:
- As an opponent:
 Luigi's Nightmares: Round 6 (
 )
) Colorful Treatment Plan: Round 1 (

 )
) Lightweight Fracas: Round 3 (
 )
) Soar Above the Darkness: Round 6 (
 )
) A Long Legacy: Round 6 (


 )
) The Black-Clad Warriors: Round 5 (
 )
) Unreadable Expressions: Round 3 (


 )
) Between White and Black: Round 5 (
 ×3
×3 ×3)
×3) The Light That Clears the Darkness: Round 2 (
 ×8)
×8)
- As both a CPU ally and an opponent:
Meta Knight[edit]
Appears in:
- As an opponent:
 Let's-a Go!: Round 2 (
 )
) Spaceborne Smash: Round 3 (
 )
) Masquerade: Round 1 (
 )
) Lightweight Fracas: Round 5 (
 )
) A Journey of Swords: Round 2 (
 )
) Two Sides of the Same Coin: Round 6 (
 )
) The Black-Clad Warriors: Round 1 (
 )
) Hey, Little Buddy!: Round 5 (
 )
) Unreadable Expressions: Round 1 (
 )
) Seeking a Challenge: Round 6 (
 )
) A Ride? Not Interested.: Round 3 (
 )
) The Requiem of Fallen Wings: Round 5 (
 )
) It Can't Be! Space Pirates!: Round 5 (
 )
)
 Shared Destinies: Round 5 (
 )
)
- As both a CPU ally and an opponent:
Pit[edit]
Appears in:
- As an opponent:
 Duos for Days: Round 5 (
 )
) Encroaching Darkness: Round 5 (
 )
) Two Sides of the Same Coin: Round 2 (
 )
) Weapons and Equipment OSP: Round 3 (
 )
) A Little Divine Intervention: Round 6 (

 )
) Ageless Classic: Round 4 (
 )
) Between White and Black: Round 4 (
 )
) The Requiem of Fallen Wings: Round 6 (


 )
) The King of Smash: Round 4 (
 )
) Journey to the Far Lands: Round 4 (
 ×3)
×3)
 Shared Destinies: Round 3 (
 )
)
- As both a CPU ally and an opponent:
Dark Pit[edit]
Appears in:
- As an opponent:
 A Quest to Seal the Darkness: Round 1 (
 )
) Soar Above the Darkness: Round 2 (
 )
) Two Sides of the Same Coin: Round 2 (
 )
) The Black-Clad Warriors: Round 3 (
 )
) A Little Divine Intervention: Round 6 (

 )
) Red-Hot Rivalry: Round 1 (
 )
) Between White and Black: Round 4 (
 )
) The Requiem of Fallen Wings: Round 1 (
 )
) Smash-vania: Round 3 (
 )
) Smash Echoes: Round 5 (
 )
) The King of Smash: Round 4 (
 )
)
 Shared Destinies: Round 3 (
 )
)
- As both a CPU ally and an opponent:
Zero Suit Samus[edit]
Appears in:
- As a CPU ally:
 Spaceborne Smash: Round 4 (
 )
) Hey, Little Buddy!: Round 2 (
 )
)
- As an opponent:
 Planetary Explorer: Round 4 (
 )
) Your Turn, Greninja!: Round 2 (
 )
) Thunder and Flames: Round 2 (
 )
) Seeking a Challenge: Round 2 (
 )
) It Can't Be! Space Pirates!: Round 6 (
 )
) Best in Show: Round 4 (
 )
)
Wario[edit]
Appears in:
- As an opponent:
 Journey to New Donk City: Round 3 (
 )
) Gourmet Clash: Round 4 (
 )
) Wisdom Prevails: Round 1 (
 )
) Colorful Treatment Plan: Round 6 (

 )
) Aerobic Smash: Round 1 (
 )
) An Inkredible Journey: Round 3 (
 )
) Journey to the Far Lands: Round 2 (
 ×4)
×4)
Snake[edit]
Appears in:
- As an opponent:
 Weapons and Equipment OSP: Round 6 (
 )
) Reunited Roster: Round 6 (
 )
) Ageless Classic: Round 5 (
 )
)
Ike[edit]
Appears in:
- As an opponent:
 Let's-a Go!: Round 5 (
 )
) A Path of Heroes: Round 4 (
 )
) Encroaching Darkness: Round 4 (
 )
) A Journey of Swords: Round 1 (
 )
) I'm-a Gonna Win!: Round 3 (
 )
) Counter Encounters: Round 5 (
 )
)
- As both a CPU ally and an opponent:
Pokémon Trainer[edit]
Appears in:
- As a CPU ally:
 Hey, Little Buddy!: Round 4 (
 )
)
- As an opponent:
 Let's-a Go!: Round 4 (

 )
) Another Planet, Another Bounty: Round 5 (
 )
) Jurassic Journey: Round 1 (
 ), Round 5 (
 )
) I Choose You!: Round 1 (
 )
) The Red One. Every Red One!: Round 4 (
 )
) Lightweight Fracas: Round 2 (
 )
) A Kingdom of Dragons: Round 1 (
 )
) Grapplers! Whips! Claws!: Round 2 (
 )
) I'm-a Gonna Win!: Round 2 (
 )
) The Future Champion: Round 6 (
 if male,
  if female)
 The Teamwork of Courage: Round 4 (

 )
) Reunited Roster: Round 4 (
 ), Round 5 (
 )
) Mistake to Underestimate: Round 2 (
 )
) Your Turn, Greninja!: Round 1 (
 ), Round 4 (
 ), Round 6 (
 )
) Thunder and Flames: Round 1 (
 )
) The Requiem of Fallen Wings: Round 4 (
 )
) Smash-vania: Round 4 (
 )
) Super Heavyweight Class: Round 1 (
 )
) Best in Show: Round 2 (
 )
) A History of Heroism: Final Round (
 )
)
- As both a CPU ally and an opponent:
Diddy Kong[edit]
Appears in:
- As an opponent:
 Let's-a Go!: Round 3 (
 )
) The Red One. Every Red One!: Round 5 (
 )
) Duos for Days: Round 4 (
 )
) Fight as One: Round 4 (
 )
) Weapons and Equipment OSP: Round 2 (
 )
) Dog, Duck, Zapper: Round 1 (
 )
) Perfect Partners: Round 6 (
 )
)
- As both a CPU ally and an opponent:
Lucas[edit]
Appears in:
- As an opponent:
 Journey to New Donk City: Round 4 (
 )
) Home to Onett!: Round 2 (
 )
) Soar Above the Darkness: Round 4 (
 )
) Fight as One: Round 3 (
 )
) Two Sides of the Same Coin: Round 4 (
 )
) Mistake to Underestimate: Round 3 (
 )
) Your Turn, Greninja!: Round 5 (
 )
)
- As both a CPU ally and an opponent:
Sonic[edit]
Appears in:
- As an opponent:
 The Black-Clad Warriors: Round 2 (
 )
) At the Speed of Sound: Round 3 (
 )
) Witness the Monado's Power: Round 2 (
 )
) Dog, Duck, Zapper: Round 2 (
 )
) The King of Smash: Round 5 (
 )
)
King Dedede[edit]
Appears in:
- As an opponent:
 Let's-a Go!: Round 2 (
 )
) Gourmet Clash: Round 6 (
 )
) I'm-a Gonna Win!: Round 4 (
 )
) Hey, Little Buddy!: Round 5 (
 )
) Planetary Explorer: Round 3 (
 )
) Aerobic Smash: Round 5 (
 )
) Smash-vania: Round 4 (
 )
) Super Heavyweight Class: Round 3 (
 )
) The King of Smash: Round 3 (
 )
)
Olimar[edit]
Appears in:
- As an opponent:
 Spaceborne Smash: Round 5 (
 )
) Lightweight Fracas: Round 4 (
 )
) Planetary Explorer: Round 6 (
 )
) One Star after Another: Round 1 (
 )
) It Can't Be! Space Pirates!: Round 3 (
 )
)
Lucario[edit]
Appears in:
- As an opponent:
 I Choose You!: Round 4 (
 )
) Psychic Control: Round 6 (
 )
) The Future Champion: Round 3 (
 )
) Your Turn, Greninja!: Round 3 (
 )
) An Inkredible Journey: Round 1 (
 )
) Fighting Fists with Fists: Round 5 (
 )
)
R.O.B.[edit]
Appears in:
- As a CPU ally:
 Journey to the Far Lands: Round 2 (
 )
)
- As an opponent:
 Another Planet, Another Bounty: Round 3 (


 )
) Home to Onett!: Round 3 (
 ×4)
×4) Colorful Treatment Plan: Round 5 (

 )
) Weapons and Equipment OSP: Round 5 (
 )
) Unreadable Expressions: Round 6 (
 ×2
×2


 )
) The Teamwork of Courage: Round 3 (

 )
) Ageless Classic: Round 3 (
 )
) Thunder and Flames: Round 4 (
 )
) ARMS at the Ready: Round 5 (
 ×5
×5 )
)
Toon Link[edit]
Appears in:
- As a CPU ally:
 The Teamwork of Courage: Rounds 1-Final (
 )
)
- As an opponent:
 Luigi's Nightmares: Round 1 (
 ×4)
×4) Home to Onett!: Round 5 (
 ×2)
×2) Soar Above the Darkness: Round 3 (
 )
) Hyrule Smash!: Round 4 (


 )
) Grapplers! Whips! Claws!: Round 1 (
 )
) The Black-Clad Warriors: Round 6 (
 )
) A Ride? Not Interested.: Round 1 (
 )
) Shadows: Round 5 (
 )
)
Wolf[edit]
Appears in:
- As an opponent:
 Another Planet, Another Bounty: Round 1 (
 )
) Spaceborne Smash: Round 6 (
 )
) Planetary Explorer: Round 2 (
 )
) One Star after Another: Round 2 (
 )
) Dog, Duck, Zapper: Round 3 (
 )
) Red-Hot Rivalry: Round 2 (
 )
) A Ride? Not Interested.: Round 6 (
 )
)
Villager[edit]
Appears in:
- As a CPU ally:
 Journey to the Far Lands: Round 2 (
 )
)
- As an opponent:
 Home to Onett!: Round 6 (
 )
) Duos for Days: Round 3 (
 )
) The Teamwork of Courage: Round 2 (
 )
) Mistake to Underestimate: Round 1 (


 )
) Best in Show: Round 1 (


 )
)
Mega Man[edit]
Appears in:
- As an opponent:
 Variable Weapons System: Online!: Round 5 (
 ×2
×2


 )
) Ageless Classic: Round 5 (
 )
) Witness the Monado's Power: Round 6 (
 )
) The King of Smash: Round 5 (
 )
) ARMS at the Ready: Round 3 (
 )
)
Wii Fit Trainer[edit]
Appears in:
- As an opponent:
 Colorful Treatment Plan: Round 4 (

 )
) Unreadable Expressions: Round 5 (
 )
) Mistake to Underestimate: Round 5 (
 )
) Best in Show: Round 2 (
 )
)
Rosalina & Luma[edit]
Appears in:
- As a CPU ally:
 Between White and Black: Round 3 (
 )
)
- As an opponent:
 Spaceborne Smash: Round 2 (
 )
) Sarasaland Represent!: Round 3 (
 )
) Magic, Sacred Powers, and PSI!: Round 3 (
 )
) Planetary Explorer: Round 1 (
 )
) Mama Peach, Where Are You?: Round 1 (
 )
) It Can't Be! Space Pirates!: Round 4 (
 )
) Best in Show: Round 5 (
 )
) Perfect Partners: Round 2 (
 )
) The King of Smash: Round 1 (
 )
)
Little Mac[edit]
Appears in:
- As an opponent:
 Luigi's Nightmares: Round 6 (
 )
) Up Close and Personal: Round 6 (
 )
) Masquerade: Round 5 (
 )
) Grapplers! Whips! Claws!: Round 6 (
 ×3
×3 ×3)
×3) Counter Encounters: Round 1 (
 )
) Unreadable Expressions: Round 4 (
 )
) Friendly Sparring: Round 5 (
 )
) Ageless Classic: Round 5 (
 )
) Witness the Monado's Power: Round 5 (
 )
) Seeking a Challenge: Round 5 (
 )
) ARMS at the Ready: Round 2 (
 )
) Fighting Fists with Fists: Round 3 (
 )
)
Greninja[edit]
Appears in:
- As a CPU ally:
 Burning Pro Wrestling Spirit!: Rounds 3 and Final (
 )
)
- As an opponent:
 I Choose You!: Round 5 (
 )
) The Black-Clad Warriors: Round 2 (
 )
) The Future Champion: Round 5 (
 )
) Counter Encounters: Round 6 (
 )
) Your Turn, Greninja!: Round 6 (
 )
)
Palutena[edit]
Appears in:
- As an opponent:
 Duos for Days: Round 5 (
 )
) Encroaching Darkness: Round 5 (
 )
) Psychic Control: Round 5 (
 )
) Fighting for the Goddess!: Round 6 (
 )
) Magic, Sacred Powers, and PSI!: Round 4 (
 )
) Counter Encounters: Round 2 (
 )
) Between White and Black: Round 3 (
 )
) The Requiem of Fallen Wings: Final Round (
 )
) Best in Show: Round 3 (
 )
) The King of Smash: Round 4 (
 )
)
Pac-Man[edit]
Appears in:
- As an opponent:
 Gourmet Clash: Round 1 (
 )
) A Long Legacy: Round 2 (
 )
) Aerobic Smash: Round 3 (
 )
) The King of Smash: Round 5 (
 )
)
Robin[edit]
Appears in:
- As a CPU ally:
 The Great Poison Given Form: Round 2 (
 )
) Fight as One: Rounds 3 and Final (
 ), Round 5 (
 )
)
- As an opponent:
 A Path of Heroes: Round 3 (
 )
) Magic, Sacred Powers, and PSI!: Round 2 (
 )
) Thunder and Flames: Round 6 (
 if male,
  if female)
 Between White and Black: Round 6 (
 )
) Best in Show: Round 3 (
 )
) A History of Heroism: Round 2 (
 ), Final Round (
 )
) Journey to the Far Lands: Round 4 (
 )
) The Light That Clears the Darkness: Round 4 (
 ×2
×2 )
)
- As both a CPU ally and an opponent:
Shulk[edit]
Appears in:
- As an opponent:
 Encroaching Darkness: Round 3 (
 )
) A Journey of Swords: Round 4 (
 )
) Counter Encounters: Round 1 (
 )
) A Little Divine Intervention: Round 4 (
 )
) An Inkredible Journey: Round 5 (
 )
)
Bowser Jr.[edit]
Appears in:
- As an opponent:
 Let's-a Go!: Round 6 (


 )
) Jurassic Journey: Round 4 (


 )
) No Damsel in Distress: Round 1 (
 ), Round 4 (


 )
) Masquerade: Round 4 (
 )
) Fighting for the Goddess!: Round 2 (
 )
) The Black-Clad Warriors: Round 2 (
 )
) Hey, Little Buddy!: Round 1 (
 )
) Royal Rumble: Round 5 (
 )
) Best in Show: Round 5 (
 )
) Burning Pro Wrestling Spirit!: Round 3 (
 )
)
Duck Hunt[edit]
Appears in:
- As an opponent:
 A Long Legacy: Round 3 (
 )
) Ageless Classic: Round 2 (
 )
) Dog, Duck, Zapper: Round 6 (
 ×2
×2


 )
) An Inkredible Journey: Round 3 (
 )
) Perfect Partners: Round 1 (
 )
)
Ryu[edit]
Appears in:
- As an opponent:
 The Great Poison Given Form: Round 3 (
 )
) Up Close and Personal: Round 3 (
 )
) Duos for Days: Round 2 (
 )
) Psychic Control: Round 3 (
 )
) Friendly Sparring: Round 2 (
 )
) Your Turn, Greninja!: Round 3 (
 )
) Red-Hot Rivalry: Round 6 (
 )
) The King of Smash: Final Round (
 )
)
 Shared Destinies: Round 4 (
 )
) Fighting Fists with Fists: Round 1 (
 )
)
Ken[edit]
Appears in:
- As a CPU ally:
 The Great Poison Given Form: Round 3 (
 )
)
- As an opponent:
 The Red One. Every Red One!: Round 2 (
 )
) Duos for Days: Round 2 (
 )
) Your Turn, Greninja!: Round 3 (
 )
) Thunder and Flames: Round 4 (
 )
) Smash Echoes: Round 6 (
 )
) New Bloom: Round 6 (
 )
) The King of Smash: Final Round (
 )
)
 Shared Destinies: Round 4 (
 )
)
- As both a CPU ally and an opponent:
Cloud[edit]
Appears in:
- As an opponent:
 A Journey of Swords: Round 5 (
 )
) Created Warriors: Round 4 (
 )
) A Little Divine Intervention: Round 2 (
 )
) Witness the Monado's Power: Round 4 (
 )
) The Light That Clears the Darkness: Round 3 (
 )
)
- As both a CPU ally and an opponent:
Corrin[edit]
Appears in:
- As an opponent:
 Sarasaland Represent!: Round 4 (
 )
) A Kingdom of Dragons: Round 6 (
 )
) A Path of Heroes: Round 1 (
 )
) A Journey of Swords: Round 6 (
 )
) Counter Encounters: Round 5 (
 )
) Best in Show: Round 3 (
 )
)
- As both a CPU ally and an opponent:
Bayonetta[edit]
Appears in:
- As an opponent:
 A Quest to Seal the Darkness: Round 3 (
 )
) Luigi's Nightmares: Round 3 (
 )
) Fighting for the Goddess!: Round 5 (
 )
) The Black-Clad Warriors: Round 4 (
 )
) Magic, Sacred Powers, and PSI!: Round 5 (
 )
) Counter Encounters: Round 2 (
 )
) A Little Divine Intervention: Round 5 (
 )
) Smash-vania: Round 3 (
 )
) Best in Show: Round 4 (
 )
) The King of Smash: Round 6 (
 )
)
Inkling[edit]
Appears in:
- As a CPU ally:
 Best in Show: Round 4 (
 )
)
- As an opponent:
 Journey to New Donk City: Round 5 (
 )
) Weapons and Equipment OSP: Round 1 (
 )
) The Teamwork of Courage: Round 5 (


 )
) An Inkredible Journey: Round 6 (
 )
) New Bloom: Round 1 (


 )
)
Ridley[edit]
Appears in:
- As an opponent:
 A Quest to Seal the Darkness: Round 2 (
 )
) Another Planet, Another Bounty: Round 4 (
 )
) The Great Poison Given Form: Round 6 (
 )
) Jurassic Journey: Round 2 (
 )
) Luigi's Nightmares: Round 2 (
 )
) A Kingdom of Dragons: Round 5 (
 )
) Hey, Little Buddy!: Round 2 (
 )
) One Star after Another: Round 4 (
 )
) The Requiem of Fallen Wings: Round 3 (
 )
) Smash-vania: Round 2 (
 )
) Super Heavyweight Class: Round 4 (
 )
) New Bloom: Round 2 (
 )
) The King of Smash: Round 6 (
 )
) Journey to the Far Lands: Final Round (
 )
)
Simon[edit]
Appears in:
- As an opponent:
 Fight as One: Round 6 (
 )
) Grapplers! Whips! Claws!: Round 5 (
 )
) A Little Divine Intervention: Round 3 (
 )
) Ageless Classic: Round 4 (
 )
) New Bloom: Round 3 (
 )
)
Richter[edit]
Appears in:
- As an opponent:
 Fight as One: Round 6 (
 )
) Grapplers! Whips! Claws!: Round 5 (
 )
) A Little Divine Intervention: Round 3 (
 )
) Smash-vania: Round 6 (
 )
) New Bloom: Round 3 (
 )
)
- As both a CPU ally and an opponent:
King K. Rool[edit]
Appears in:
- As an opponent:
 Journey to New Donk City: Round 2 (
 )
) Another Planet, Another Bounty: Round 2 (
 )
) Jurassic Journey: Round 3 (
 )
) Gourmet Clash: Round 5 (
 )
) No Damsel in Distress: Round 5 (
 )
) Wisdom Prevails: Round 4 (
 )
) A Kingdom of Dragons: Round 3 (
 )
) I'm-a Gonna Win!: Round 5 (
 )
) Hey, Little Buddy!: Round 6 (
 )
) Royal Rumble: Round 1 (
 )
) Aerobic Smash: Round 4 (
 )
) Witness the Monado's Power: Round 3 (
 )
) Dog, Duck, Zapper: Round 4 (
 )
) Smash-vania: Round 1 (
 )
) Burning Pro Wrestling Spirit!: Round 4 (
 )
) New Bloom: Round 4 (
 )
) The King of Smash: Round 3 (
 )
) Journey to the Far Lands: Round 5 (
 ×2)
×2) Fighting Fists with Fists: Round 4 (
 )
)
Isabelle[edit]
Appears in:
- As an opponent:
 Home to Onett!: Round 6 (
 )
) Duos for Days: Round 3 (
 )
) The Teamwork of Courage: Round 2 (
 )
) Mistake to Underestimate: Round 6 (
 )
) New Bloom: Round 5 (
 )
)
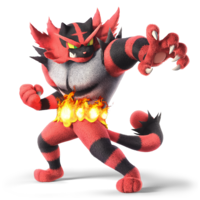
Incineroar[edit]
Appears in:
- As an opponent:
 I Choose You!: Round 6 (
 )
) The Red One. Every Red One!: Round 4 (
 )
) I'm-a Gonna Win!: Round 6 (
 )
) The Future Champion: Round 4 (
 )
) At the Speed of Sound: Round 6 (
 )
) Friendly Sparring: Round 1 (
 )
) Thunder and Flames: Round 3 (
 )
) Seeking a Challenge: Round 3 (
 )
) Smash-vania: Round 1 (
 )
) Burning Pro Wrestling Spirit!: Round 6 (
 )
) New Bloom: Round 6 (
 )
) Shadows: Round 6 (
 )
)
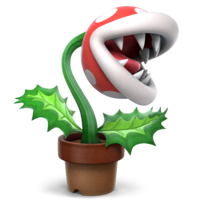
Piranha Plant[edit]
Appears in:
- Does not appear in any Classic Mode route.
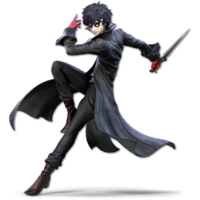
Joker[edit]
Appears in:
- Does not appear in any Classic Mode route.
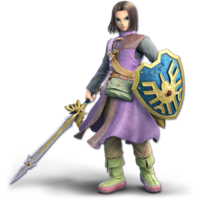
Hero[edit]
Appears in:
- As an opponent:
 A History of Heroism: Round 2 (
 ), Round 3 (
 ), Round 5 (
 ), Round 6 (
 )
)
Banjo & Kazooie[edit]
Appears in:
- Does not appear in any Classic Mode route.
Terry[edit]
Appears in:
- As an opponent:
 The King of Smash: Final Round (
 )
)
Byleth[edit]
Appears in:
- As an opponent:
 A Heroic Legacy: Round 6 (

 )
)
Min Min[edit]
Appears in:
- As an opponent:
 ARMS at the Ready: Round 6 (
 )
)
Steve[edit]
Appears in:
- As an opponent:
 Journey to the Far Lands: Round 1 (
 ×8), Rounds 6 and Final (
 ; ×4 in Round 6, ×2 in Final Round)
Sephiroth[edit]
Appears in:
- Does not appear in any Classic Mode route.
Pyra/Mythra[edit]
Appears in:
- Does not appear in any Classic Mode route.
Kazuya[edit]
Appears in:
- As an opponent:
 Fighting Fists with Fists: Final Round (
 ×2)
×2)
Sora[edit]
Appears in:
- As an opponent:
 The Light That Clears the Darkness: Round 6 (
 )
)
Mii Brawler[edit]
Appears in:
- As an opponent:
 Luigi's Nightmares: Round 4:
- #1: Hockey Mask and SSB T-shirt
- #2: Devil Horns and Vampire Garb
- #3: King K. Rool Hat and King K. Rool Outfit
 Up Close and Personal: Round 5:
- #1: Red Fighter Uniform
- #2: Ninja Headband and Orange Tracksuit
- #3: Ribbon Girl Mask and Ribbon Girl Outfit
- #4: Green Fighter Uniform
- #5: Saki Amamiya Wig and Cyan Tracksuit
- #6: Spring Man Mask and Spring Man Outfit
 Sarasaland Represent!: Round 5:
- #1: Princess Zelda Wig and Nia Outfit
- #2: Daisy Crown and Vampire Garb
 The Red One. Every Red One!: Round 1:
- #1: Mario's Cap and Builder Mario's Outfit
- #2: Mario's Cap and Toad Outfit
 Masquerade: Round 6:
- #1: Majora's Mask and Skull Kid's Outfit
- #2: Hockey Mask and SSB T-Shirt
 A Kingdom of Dragons: Round 4 (Dragon Helmet and Woolly Yoshi Outfit)
 Friendly Sparring: Round 3:
- #1: Red Tracksuit
- #2: Ninja Headband and Purple Fighter Uniform
- #3: Pink Protective Gear
- #4: Flying Man Hat and Flying Man Outfit
 Mama Peach, Where Are You?: Round 5:
- #1: Peach's Crown and Vampire Garb
- #2: Daisy's Crown and Nia Outfit
 Dog, Duck, Zapper: Round 5 (Cat Hat and Cat Suit×2)
 ARMS at the Ready: Round 1:
- #1: Spring Man Mask and Spring Man Outfit
- #2: Ribbon Girl Mask and Ribbon Girl Outfit
 Fighting Fists with Fists: Round 6 (Bionic Helmet and Bionic Armor×6)
Mii Swordfighter[edit]
Appears in:
- As an opponent:
 Luigi's Nightmares: Round 4:
- #1: Magic Hat and Ashley Outfit
- #2: Majora's Mask and SSB T-shirt
 Sarasaland Represent!: Round 5:
- #1: Peach's Crown and Viridi Outfit
- #2: Daisy's Crown and Ashley Outfit
 The Red One. Every Red One!: Round 1 (Mario's Cap and Ninja Suit)
 Masquerade: Round 6:
- #1: Black Knight Helm and Black Knight Armor
- #2: Yiga Clan Mask and Yiga Clan Outfit
 Wisdom Prevails: Round 3 (Yiga Clan Mask and Yiga Clan Outfit×5)
 A Kingdom of Dragons: Round 4 (Dragon Helmet and Black Knight Armor)
 Counter Encounters: Round 4:
- #1: Yiga Clan Mask and Yiga Clan Outfit
- #2: Takamaru Wig and Takamaru Outfit
- #3: Isaac Wig and Isaac's Outfit
- #4: Dunban Wig and Dunban Outfit
- #5: Black Knight Helm and Black Knight Armor
- #6: Vince's Hat and Vince's Outfit
 Mama Peach, Where Are You?: Round 5:
- #1: Daisy's Crown and Viridi Outfit
- #2: Princess's Crown and Ashley Outfit
 Dog, Duck, Zapper: Round 5 (Monkey Hat and Monkey Suit)
Mii Gunner[edit]
- As an opponent:
 Luigi's Nightmares: Round 4 (Bear Hat and Bear Suit)
 Sarasaland Represent!: Round 5:
- #1: Peach's Crown and Steampunk Getup
- #2: Princess's Crown and Isabelle Outfit
 The Red One. Every Red One!: Round 1 (Mario's Cap and Wild West Wear)
 Masquerade: Round 6:
- #1: Shy Guy Mask and Butler Outfit
- #2: Ray Mk III Helmet and Ray Mk III Outfit
 A Kingdom of Dragons: Round 4:
- #1: Dragon Helmet and Yellow Dragon Armor
- #2: Devil Horns and Black Dragon Armor
- #3: Dragon Helmet and White Dragon Armor
- #4: Woolly Yoshi Hat and Red Dragon Armor
 Mama Peach, Where Are You?: Round 5:
- #1: Princess's Crown and Wild West Wear
- #2: Peach's Crown and Steampunk Getup
 Dog, Duck, Zapper: Round 5 (Bear Hat and Bear Suit×2)
Bosses[edit]
Master Hand[edit]
Appears in:
- Always appears:
 Journey to New Donk City: Final Round
 Another Planet, Another Bounty: Final Round
 The Great Poison Given Form: Final Round
 Spaceborne Smash: Final Round
 I Choose You!: Final Round (Crazy Hand never appears in this route)
 Home to Onett!: Final Round
 No Damsel in Distress: Final Round
 Sarasaland Represent!: Final Round
 Duos for Days: Final Round
 Masquerade: Final Round
 Colorful Treatment Plan: Final Round
 Lightweight Fracas: Final Round
 A Path of Heroes: Final Round
 Encroaching Darkness: Final Round
 Psychic Control: Final Round
 A Journey of Swords: Final Round
 Fight as One: Final Round
 A Long Legacy: Final Round
 Two Sides of the Same Coin: Final Round
 Fighting for the Goddess!: Final Round
 Grapplers! Whips! Claws!: Final Round
 I'm-a Gonna Win!: Final Round
 The Black-Clad Warriors: Final Round
 The Future Champion: Final Round (Crazy Hand never appears in this route)
 Hey, Little Buddy!: Final Round
 Magic, Sacred Powers, and PSI!: Final Round
 At the Speed of Sound: Final Round
 Royal Rumble: Final Round
 Planetary Explorer: Final Round
 Counter Encounters: Final Round
 Mistake to Underestimate: Final Round
 Aerobic Smash: Final Round
 Friendly Sparring: Final Round
 Your Turn, Greninja!: Final Round
 A Little Divine Intervention: Final Round
 Thunder and Flames: Final Round
 Witness the Monado's Power: Final Round
 Mama Peach, Where Are You?: Final Round
 Seeking a Challenge: Final Round
 A Ride? Not Interested.: Final Round
 Between White and Black: Final Round
 It Can't Be! Space Pirates!: Final Round
 Best in Show: Final Round
 Burning Pro Wrestling Spirit!: Final Round
 Shadows: Final Round
 Perfect Partners: Final Round
 A Heroic Legacy: Final Round
 The Chosen Ones: Final Round
 Shared Destinies: Final Round
 The Light That Clears the Darkness: Final Round
- Intensity 7.0 or higher only:
 Soar Above the Darkness: Final Round
 Red-Hot Rivalry: Final Round
Crazy Hand[edit]
Appears in:
- Always appears:
 Duos for Days: Final Round
 Soar Above the Darkness: Final Round
 Psychic Control: Final Round
 Fight as One: Final Round
 Two Sides of the Same Coin: Final Round
 Fighting for the Goddess!: Final Round
 Hey, Little Buddy!: Final Round
 Seeking a Challenge: Final Round
 Red-Hot Rivalry: Final Round
 Burning Pro Wrestling Spirit!: Final Round
 Perfect Partners: Final Round
 A Heroic Legacy: Final Round
 The Chosen Ones: Final Round
 Shared Destinies: Final Round
 The Light That Clears the Darkness: Final Round
- Intensity 7.0 or higher only:
 Journey to New Donk City: Final Round
 Another Planet, Another Bounty: Final Round
 The Great Poison Given Form: Final Round
 Spaceborne Smash: Final Round
 Home to Onett!: Final Round
 No Damsel in Distress: Final Round
 Sarasaland Represent!: Final Round
 Masquerade: Final Round
 Colorful Treatment Plan: Final Round
 Lightweight Fracas: Final Round
 A Path of Heroes: Final Round
 Encroaching Darkness: Final Round
 A Journey of Swords: Final Round
 A Long Legacy: Final Round
 Grapplers! Whips! Claws!: Final Round
 I'm-a Gonna Win!: Final Round
 The Black-Clad Warriors: Final Round
 Magic, Sacred Powers, and PSI!: Final Round
 At the Speed of Sound: Final Round
 Royal Rumble: Final Round
 Planetary Explorer: Final Round
 Counter Encounters: Final Round
 Mistake to Underestimate: Final Round
 Aerobic Smash: Final Round
 Friendly Sparring: Final Round
 Your Turn, Greninja!: Final Round
 A Little Divine Intervention: Final Round
 Thunder and Flames: Final Round
 Witness the Monado's Power: Final Round
 Mama Peach, Where Are You?: Final Round
 A Ride? Not Interested.: Final Round
 Between White and Black: Final Round
 It Can't Be! Space Pirates!: Final Round
 Best in Show: Final Round
 Shadows: Final Round
Giga Bowser[edit]
Appears in:
 Let's-a Go!: Final Round
 Up Close and Personal: Final Round
 The Chosen Ones: Round 6
Galleom[edit]
Appears in:
 Created Warriors: Final Round
 Weapons and Equipment OSP: Final Round
 Unreadable Expressions: Final Round
 Reunited Roster: Final Round
 Variable Weapons System: Online!: Round 6
 Super Heavyweight Class: Final Round
 ARMS at the Ready: Final Round
 The Chosen Ones: Round 2
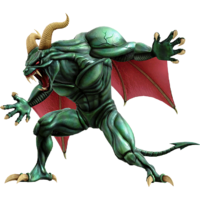
Ganon[edit]
Appears in:
 A Quest to Seal the Darkness: Final Round
 Wisdom Prevails: Final Round
 Hyrule Smash!: Final Round
 The Teamwork of Courage: Final Round
 The Chosen Ones: Round 5
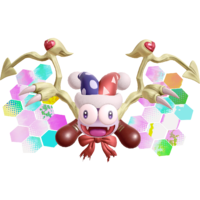
Marx[edit]
Appears in:
 Gourmet Clash: Final Round
 One Star after Another: Final Round
 An Inkredible Journey: Final Round
 The Chosen Ones: Round 3
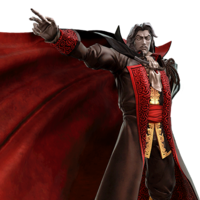
Dracula[edit]
Appears in:
 Luigi's Nightmares: Final Round
 Ageless Classic: Final Round
 Smash-vania: Final Round
 Smash Echoes: Final Round
 The Chosen Ones: Round 4
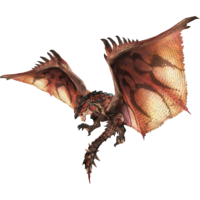
Rathalos[edit]
Appears in:
 Jurassic Journey: Final Round
 The Red One. Every Red One!: Round 6
 A Kingdom of Dragons: Final Round
 Dog, Duck, Zapper: Final Round
 New Bloom: Final Round
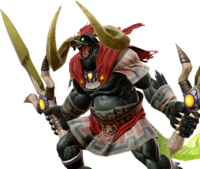
 A History of Heroism: Round 4
 The Chosen Ones: Round 1
