Mii Swordfighter (SSB4): Difference between revisions
John3637881 (talk | contribs) (...) |
No edit summary |
||
| Line 63: | Line 63: | ||
|game=SSB4 | |game=SSB4 | ||
|neutralcount=3 | |neutralcount=3 | ||
|neutralname= | |neutralname=Triple Slash | ||
|neutral1dmg=4% | |neutral1dmg=4% | ||
|neutral2dmg=3% | |neutral2dmg=3% | ||
|neutral3dmg=5% | |neutral3dmg=5% | ||
|neutraldesc=Two downward horizontal slashes followed by an upward vertical slash. | |neutraldesc=Two downward horizontal slashes followed by an upward vertical slash. | ||
|ftiltname= | |ftiltname=Steel Arc | ||
|ftiltdmg=12% | |ftiltdmg=12% | ||
|ftiltdesc=Swipes the blade once in a wide arc in front of himself/herself. | |ftiltdesc=Swipes the blade once in a wide arc in front of himself/herself. | ||
|utiltname= | |utiltname=Vorpal Swing | ||
|utiltdmg=7% | |utiltdmg=7% | ||
|utiltdesc=A single slash in an arc above his/her head. Covers the Swordfighter's entire upper body. Has good juggling capabilities at low percentages, great combo potential at medium percentages and KOing potential at very high percentages. | |utiltdesc=A single slash in an arc above his/her head. Covers the Swordfighter's entire upper body. Has good juggling capabilities at low percentages, great combo potential at medium percentages and KOing potential at very high percentages. | ||
|dtiltname= | |dtiltname=Low Stab | ||
|dtiltdmg=8% | |dtiltdmg=8% | ||
|dtiltdesc=Stabs along the ground, similar to {{SSB4|Marth}}'s down tilt. Decently fast and can combo into a jab or an up, forward, or down aerial. | |dtiltdesc=Stabs along the ground, similar to {{SSB4|Marth}}'s down tilt. Decently fast and can combo into a jab or an up, forward, or down aerial. | ||
|dashname= | |dashname=Sliding Thrust | ||
|dashdmg=10% (early), 6% (late) | |dashdmg=10% (early), 6% (late) | ||
|dashdesc=Thrusts the sword forward. Good knockback, but punishable if shielded. | |dashdesc=Thrusts the sword forward. Good knockback, but punishable if shielded. | ||
|fsmashname= | |fsmashname=Heavy Metal Slash | ||
|fsmashdmg={{ChargedSmashDmgSSB4|14}} (hilt), {{ChargedSmashDmgSSB4|15}} (blade), {{ChargedSmashDmgSSB4|16}} (tip) | |fsmashdmg={{ChargedSmashDmgSSB4|14}} (hilt), {{ChargedSmashDmgSSB4|15}} (blade), {{ChargedSmashDmgSSB4|16}} (tip) | ||
|fsmashdesc=Holds the sword with two hands, then steps forward and swings it in front of his/herself similar to Roy's forward smash (although the Swordfighter actually predates Roy). Deals good knockback and has surprisingly high range, but suffers from startup and ending lag. | |fsmashdesc=Holds the sword with two hands, then steps forward and swings it in front of his/herself similar to Roy's forward smash (although the Swordfighter actually predates Roy). Deals good knockback and has surprisingly high range, but suffers from startup and ending lag. | ||
|usmashname= | |usmashname=Sabre Hurricane | ||
|usmashdmg={{ChargedSmashDmgSSB4|4}} (hit 1), {{ChargedSmashDmgSSB4|3}} (hits 2 and 3), {{ChargedSmashDmgSSB4|7}} (last hit) | |usmashdmg={{ChargedSmashDmgSSB4|4}} (hit 1), {{ChargedSmashDmgSSB4|3}} (hits 2 and 3), {{ChargedSmashDmgSSB4|7}} (last hit) | ||
|usmashdesc= Jumps and performs a series of three corkscrewing slashes over him/herself before touching the ground, launching the enemy on the last hit, similar to [[Pit]]'s up smash. Has trouble hitting opponents behind the Swordfighter, requiring foes to be in almost direct contact with them. | |usmashdesc= Jumps and performs a series of three corkscrewing slashes over him/herself before touching the ground, launching the enemy on the last hit, similar to [[Pit]]'s up smash. Has trouble hitting opponents behind the Swordfighter, requiring foes to be in almost direct contact with them. | ||
|dsmashname= | |dsmashname=Blade Sweep | ||
|dsmashdmg={{ChargedSmashDmgSSB4|12}} (hit 1), {{ChargedSmashDmgSSB4|15}} (hit 2) | |dsmashdmg={{ChargedSmashDmgSSB4|12}} (hit 1), {{ChargedSmashDmgSSB4|15}} (hit 2) | ||
|dsmashdesc=Slashes along the ground in front of and behind his/herself. Slight ending lag. | |dsmashdesc=Slashes along the ground in front of and behind his/herself. Slight ending lag. | ||
|nairname= | |nairname=Sword Spin | ||
|nairdmg=8% | |nairdmg=8% | ||
|nairdesc=Slashes in a circle around himself/herself while doing a corkscrew in the air. A good spacing and approach move that can be used similarly to {{SSB4|Shulk}}'s neutral aerial, although with much less range. | |nairdesc=Slashes in a circle around himself/herself while doing a corkscrew in the air. A good spacing and approach move that can be used similarly to {{SSB4|Shulk}}'s neutral aerial, although with much less range. | ||
|fairname= | |fairname=Aerial Multi-Thrust | ||
|fairdmg=3% (hits 1 and 2), 5% (hit 3) | |fairdmg=3% (hits 1 and 2), 5% (hit 3) | ||
|fairdesc=Stabs forward multiple times, similar in function to {{SSB4|Kirby}}'s forward aerial. The first two hits trap opponents into the final hit, which deals good knockback. Spammable when short hopped, although the Swordfighter must be careful not to land too early or the opponent will end up right beside them. | |fairdesc=Stabs forward multiple times, similar in function to {{SSB4|Kirby}}'s forward aerial. The first two hits trap opponents into the final hit, which deals good knockback. Spammable when short hopped, although the Swordfighter must be careful not to land too early or the opponent will end up right beside them. | ||
|bairname= | |bairname=Aerial Reverse Slash | ||
|bairdmg=14% | |bairdmg=14% | ||
|bairdesc=Swipes the blade behind himself/herself. Extremely fast, very similar to [[Ike]]'s back air, except with less range. One of the Swordfighter's reliable aerial finishers. | |bairdesc=Swipes the blade behind himself/herself. Extremely fast, very similar to [[Ike]]'s back air, except with less range. One of the Swordfighter's reliable aerial finishers. | ||
|uairname= | |uairname=Aerial Heaven Thrust | ||
|uairdmg=16% (early), 10% (late) | |uairdmg=16% (early), 10% (late) | ||
|uairdesc=Points the sword above his/her head and spins, similar to [[Link]]'s up aerial (except the Swordfighter spins). Excellent for juggling, much like {{SSB4|Cloud}}'s up aerial. Very good knockback when sweetspotted, being a good finishing move especially since it stays out for a long time. | |uairdesc=Points the sword above his/her head and spins, similar to [[Link]]'s up aerial (except the Swordfighter spins). Excellent for juggling, much like {{SSB4|Cloud}}'s up aerial. Very good knockback when sweetspotted, being a good finishing move especially since it stays out for a long time. | ||
|dairname= | |dairname=Drill Dive | ||
|dairdmg=1% (hits 1-5), 5% (landing hit) | |dairdmg=1% (hits 1-5), 5% (landing hit) | ||
|dairdesc=Points the sword below himself/herself and spins. The attack hits multiple times before ending with a strong final hit. Acts as a [[Drill (archetype)|drill]] that weakly [[meteor smash]]es opponents with set knockback on the final hit, and lasts for a decently long time. Unlike most aerials, the landing hit while using the move is actually its main form of offense, causing a shockwave around the fighter that knocks others away with high knockback. The attack autocancels starting at frame 80 while being interruptible at frame 51, meaning that it can never autocancel. | |dairdesc=Points the sword below himself/herself and spins. The attack hits multiple times before ending with a strong final hit. Acts as a [[Drill (archetype)|drill]] that weakly [[meteor smash]]es opponents with set knockback on the final hit, and lasts for a decently long time. Unlike most aerials, the landing hit while using the move is actually its main form of offense, causing a shockwave around the fighter that knocks others away with high knockback. The attack autocancels starting at frame 80 while being interruptible at frame 51, meaning that it can never autocancel. | ||
|grabname= | |grabname= | ||
|grabdesc=Grabs the foe with their free hand. | |grabdesc=Grabs the foe with their free hand. | ||
|pummelname= | |pummelname=Hilt Smack | ||
|pummeldmg=3.25% | |pummeldmg=3.25% | ||
|pummeldesc=Pounds the opponent with the hilt of their sword. Incredibly slow, being in fact the slowest pummel in the game, even slower than {{SSB4|Robin}}'s, and like Robin's, it's endlag means opponent's can potentially break out at lower percent's is even one pummel is used before a throw. It is a bit safer to do so at higher percent's, however. | |pummeldesc=Pounds the opponent with the hilt of their sword. Incredibly slow, being in fact the slowest pummel in the game, even slower than {{SSB4|Robin}}'s, and like Robin's, it's endlag means opponent's can potentially break out at lower percent's is even one pummel is used before a throw. It is a bit safer to do so at higher percent's, however. | ||
|fthrowname= | |fthrowname=Boot Kick | ||
|fthrowdmg=3% (kick), 3% (throw) | |fthrowdmg=3% (kick), 3% (throw) | ||
|fthrowdesc=Front kicks the enemy away. Above-average knockback for a throw. | |fthrowdesc=Front kicks the enemy away. Above-average knockback for a throw. | ||
|bthrowname= | |bthrowname=Reverse Boot Kick | ||
|bthrowdmg=3% (kick), 3% (throw) | |bthrowdmg=3% (kick), 3% (throw) | ||
|bthrowdesc=Hits the enemy away with a back kick. Like forward throw, it has above-average knockback. It's the Mii Swordfighter's strongest throw, but it doesn't start KOing until very high percentages. | |bthrowdesc=Hits the enemy away with a back kick. Like forward throw, it has above-average knockback. It's the Mii Swordfighter's strongest throw, but it doesn't start KOing until very high percentages. | ||
|uthrowname= | |uthrowname=Upward Slash | ||
|uthrowdmg=2% (slash), 3% (throw) | |uthrowdmg=2% (slash), 3% (throw) | ||
|uthrowdesc=Slashes the enemy above his/her head, similar to Link's. Can combo into up-tilt from its low knockback. | |uthrowdesc=Slashes the enemy above his/her head, similar to Link's. Can combo into up-tilt from its low knockback. | ||
|dthrowname= | |dthrowname=Boot Stomp | ||
|dthrowdmg=2% (stomp), 2% (throw) | |dthrowdmg=2% (stomp), 2% (throw) | ||
|dthrowdesc=Drops the enemy to the ground and stomps on them. Very similar to [[Ike]]'s down throw. Can follow into an up air until KO percentages (depending on the opponent's weight and DI, particularly effective on mediumweights). | |dthrowdesc=Drops the enemy to the ground and stomps on them. Very similar to [[Ike]]'s down throw. Can follow into an up air until KO percentages (depending on the opponent's weight and DI, particularly effective on mediumweights). | ||
| Line 132: | Line 132: | ||
|edgename= | |edgename= | ||
|edgedmg=7% | |edgedmg=7% | ||
|edgedesc= | |edgedesc=Climbing Thrust | ||
|nsdefname=Gale Strike | |nsdefname=Gale Strike | ||
|nsdefdmg=3.7%, 2.9%, or 2% per hit | |nsdefdmg=3.7%, 2.9%, or 2% per hit | ||
Revision as of 16:09, June 14, 2016
| Mii Swordfighter in Super Smash Bros. 4 | |
|---|---|
 
| |
| Universe | Super Smash Bros. |
| Shares character slot with | Mii Brawler Mii Gunner |
| Availability | Starter |
| Final Smash | Final Edge |
| Tier | J (53) |
| “ | Swordfighters are weapon masters. They stay cool and calm as they chase down opponents. | ” |
A Mii Swordfighter (剣術タイプ, Fencing Type), or Mii Sword Fighter in the PAL version, is one of the three different types of Mii Fighters that appear in Super Smash Bros. 4, along with Mii Brawlers and Mii Gunners.
Mii Swordfighter is ranked 53rd out of 56th on the tier list, making them the lowest ranked newcomer and Mii Fighter. Although it does have strengths, such as disjointed range, fast grab, and the versatility in its moveset, it is weighed down by unimpressive mobility, surprisingly weak KO moves, laggy moveset, and the banning of custom moves. Because of this, Mii Swordfighter has virtually no results in competitive play outside of custom tournaments.
Attributes
Mii Swordfighters have average mobility, as they run noticeably slower than Mii Brawlers (though faster than Mii Gunners and that their walking speed is faster as well) and have the lowest jump height of the Mii Fighters, along with being the only Mii Fighter incapable of wall jumping. This prevents them from chasing and keeping close to opponents like their Brawler counterparts, along with giving them one of the less reliable recoveries compared to the other two Mii Fighters. Also, their attacks are weaker and aren't dealt as quickly than the Brawler, nor do they have as much range as the Mii Gunner, though the Mii Swordfighter outreaches the former and is faster than the latter.
Although they possess the ability to keep opponents at a distance with their disjointed hitboxes, the Swordfighter is particularly hampered by their previously mentioned mobility, along with surprisingly weak KO moves that are equally punishable. Of all their attacks, their reliable and strongest finishers are their forward and down smashes, ftilt, up and back aerials (along with Blade Flurry, Power Thrust, and Hero's Spin). Many of these moves have high endling lag, making whiffing them highly punishable. The Swordfighter's grounded moveset can be quite easy to punish with characters that are quick on the ground (like Little Mac), because of their low mobility. The Swordfighter is more at home in the air thanks to their quicker aerial moves that can either be used for low-percentage combos or gimping, notably their neutral and forward aerial, two of their fastest moves, their surprisingly powerful up and back aerials which can KO at a respectable percentage, and their down aerial which can semi spike. They additionally possess a decent throw combo game thanks to their moderately fast aerial moves and their throws and down tilt, notably their down throw to up aerial or down tilt to neutral or forward air, although they lose viability once the opponent is above a certain percentage and require bad DI on the opponent's part when above these percentages.
Regardless, to make up for the lack of mobility and power of the other Miis, the Swordfighter comes packed with versatility in their special moves. Other than Link, Toon Link, and Robin, the Swordfighter is the only sword wielding character to wield projectiles, and the only one to bear a projectile reflector. The Swordfighter also possesses the fastest grab out of any sword character. Compared to a Mii of average height and weight, a larger Mii improves their range, weight, and damage while giving up speed in their attacks, while a smaller Mii does the opposite - becoming faster on the ground and the air, jumping higher, having less endlag and attacking faster, at the cost of weight and range.
The Swordfighter can also potentially have some of the more interesting custom movesets in the game: with access to three projectiles, the Swordfighter can be played as a solely camping character with their push-inducing and projectile eating Gale Strike, damage-over-distance Shuriken of Light and approach-stopping Chakram, allowing them to pester opponents from a distance or force opponents into a bad position (especially with a small Mii, allowing them to quickly position themselves once needed). This projectile playstyle can be stacked with Power Thrust, which allows the Swordfighter to quickly move around the stage. Blade Flurry and Hero's Spin give the Swordfighter a few more finishing options that are welcomed to the Mii's moveset, and being the only Mii Fighters to possess a Counter and a move similar to Mario's Cape also allows them to create distance against combo fighters and projectiles, birthing a more patient playstyle in favor of an aggressive one. Their recoveries can additionally be improved with Hero's Spin (their most reliable recovery), Airborne Assault (which gives the most amount of horizontal distance) and Skyward Slash Dash. However, most of these moves have flaws: Shuriken of Light is useless at point blank as it causes no hitstun, and many of their projectiles are dangerous for the sword fighter to use up close. Outside of Airborne Assault's incredible horizontal recovery, the Swordfigher's other horizontal recoveries, Slash Launcher and Skyward Slash Dash, give sub-par distance. Stone Scabbard gives high vertical distance, but the risk of SDing as a result of its complete lack of horizontal distance.
Overall, the Swordfighter possesses versatility and can compliment different playstyles depending on their customization. However, they are held back by their lack of kill setups, generally riskier finishing options, along with a lack of competitive representation, although few dedicated players such as Trela have brought some degree of tournament success and continue to develop the character's metagame.
Update history
The Mii Swordfighter is notorious for receiving buffs in many updates (as well as having not received any nerfs whatsoever). The lag on its moveset has been reduced, its damage output has been increased and the range of its attacks is also slightly higher. The Mii Swordfighter also seems to benefit from the changes on shield mechanics more than the other types of Miis, due to it making its forward smash safer on shield and the Blade Flurry's and Chakram's multi-hit nature being notably benefited.
 Certain hitbox properties have been adjusted.
 Down tilt damage increased by 2%: 6% → 8%
- Neutral aerial damage increased by 3%: 5% → 8%
- Hero's Spin (grounded) damage increased: 12-16% → 14-19%
- Jab improved. It has 2 less frames of startup, transitions faster, and link all hits more reliably. It additionally has less ending lag.
- Forward tilt has less ending lag.
- Dash attack's hitboxes are larger.
- Down smash has less ending lag.
- Neutral aerial has 2 less frames of ending lag.
- Forward aerial has larger hitboxes, in addition to reduced landing lag.
- Back aerial deals 2% more damage: 12% → 14%, with the increased knockback making it a more reliable KO move.
- Airborne Assault launches at a lower trajectory.
- Up smash hitbox timings changed.
- Power Thrust's repeated hits have increased weight-based knockback (10 → 22), and the final hitbox is bigger size (4.5u → 5.1u).
- Grounded Slash Launcher attack lasts for 2 more frames.
- Chakram has 10 frames less of ending lag: 62 → 52 frames.
- Shuriken of Light deals increased damage: 1.2%/3.2%/4.8%/8.8% → 2%/4%/6.6%/10%.
- Reversal Slash ending lag reduced by 2: 40 → 38.
- Slash Launcher start-up reduced by 4: 17 → 13 frames.
- Skyward Slash Dash now gives the Swordfighter some momentum at the end of the move, increasing its distance.
Moveset
All damage listed in this table assumes a default Mii of perfectly average height and weight.
| Name | Damage | Description | ||
|---|---|---|---|---|
| Neutral attack | Triple Slash | 4% | Two downward horizontal slashes followed by an upward vertical slash. | |
| 3% | ||||
| 5% | ||||
| Forward tilt | Steel Arc | 12% | Swipes the blade once in a wide arc in front of himself/herself. | |
| Up tilt | Vorpal Swing | 7% | A single slash in an arc above his/her head. Covers the Swordfighter's entire upper body. Has good juggling capabilities at low percentages, great combo potential at medium percentages and KOing potential at very high percentages. | |
| Down tilt | Low Stab | 8% | Stabs along the ground, similar to Marth's down tilt. Decently fast and can combo into a jab or an up, forward, or down aerial. | |
| Dash attack | Sliding Thrust | 10% (early), 6% (late) | Thrusts the sword forward. Good knockback, but punishable if shielded. | |
| Forward smash | Heavy Metal Slash | 14% (hilt), 15% (blade), 16% (tip) | Holds the sword with two hands, then steps forward and swings it in front of his/herself similar to Roy's forward smash (although the Swordfighter actually predates Roy). Deals good knockback and has surprisingly high range, but suffers from startup and ending lag. | |
| Up smash | Sabre Hurricane | 4% (hit 1), 3% (hits 2 and 3), 7% (last hit) | Jumps and performs a series of three corkscrewing slashes over him/herself before touching the ground, launching the enemy on the last hit, similar to Pit's up smash. Has trouble hitting opponents behind the Swordfighter, requiring foes to be in almost direct contact with them. | |
| Down smash | Blade Sweep | 12% (hit 1), 15% (hit 2) | Slashes along the ground in front of and behind his/herself. Slight ending lag. | |
| Neutral aerial | Sword Spin | 8% | Slashes in a circle around himself/herself while doing a corkscrew in the air. A good spacing and approach move that can be used similarly to Shulk's neutral aerial, although with much less range. | |
| Forward aerial | Aerial Multi-Thrust | 3% (hits 1 and 2), 5% (hit 3) | Stabs forward multiple times, similar in function to Kirby's forward aerial. The first two hits trap opponents into the final hit, which deals good knockback. Spammable when short hopped, although the Swordfighter must be careful not to land too early or the opponent will end up right beside them. | |
| Back aerial | Aerial Reverse Slash | 14% | Swipes the blade behind himself/herself. Extremely fast, very similar to Ike's back air, except with less range. One of the Swordfighter's reliable aerial finishers. | |
| Up aerial | Aerial Heaven Thrust | 16% (early), 10% (late) | Points the sword above his/her head and spins, similar to Link's up aerial (except the Swordfighter spins). Excellent for juggling, much like Cloud's up aerial. Very good knockback when sweetspotted, being a good finishing move especially since it stays out for a long time. | |
| Down aerial | Drill Dive | 1% (hits 1-5), 5% (landing hit) | Points the sword below himself/herself and spins. The attack hits multiple times before ending with a strong final hit. Acts as a drill that weakly meteor smashes opponents with set knockback on the final hit, and lasts for a decently long time. Unlike most aerials, the landing hit while using the move is actually its main form of offense, causing a shockwave around the fighter that knocks others away with high knockback. The attack autocancels starting at frame 80 while being interruptible at frame 51, meaning that it can never autocancel. | |
| Grab | — | Grabs the foe with their free hand. | ||
| Pummel | Hilt Smack | 3.25% | Pounds the opponent with the hilt of their sword. Incredibly slow, being in fact the slowest pummel in the game, even slower than Robin's, and like Robin's, it's endlag means opponent's can potentially break out at lower percent's is even one pummel is used before a throw. It is a bit safer to do so at higher percent's, however. | |
| Forward throw | Boot Kick | 3% (kick), 3% (throw) | Front kicks the enemy away. Above-average knockback for a throw. | |
| Back throw | Reverse Boot Kick | 3% (kick), 3% (throw) | Hits the enemy away with a back kick. Like forward throw, it has above-average knockback. It's the Mii Swordfighter's strongest throw, but it doesn't start KOing until very high percentages. | |
| Up throw | Upward Slash | 2% (slash), 3% (throw) | Slashes the enemy above his/her head, similar to Link's. Can combo into up-tilt from its low knockback. | |
| Down throw | Boot Stomp | 2% (stomp), 2% (throw) | Drops the enemy to the ground and stomps on them. Very similar to Ike's down throw. Can follow into an up air until KO percentages (depending on the opponent's weight and DI, particularly effective on mediumweights). | |
| Floor attack (front) | 7% | |||
| Floor attack (back) | 7% | |||
| Floor attack (trip) | 5% | |||
| Edge attack | 7% | Climbing Thrust | ||
| Neutral special | Default | Gale Strike | 3.7%, 2.9%, or 2% per hit | Creates a mini-tornado and sends it forwards. The damage that it deals decreases the farther it travels and it can push opponents during the end. Aesthetically, this move resembles Link's Gale Boomerang, and functions similarly to a toned-down version of the Ore Club's smash attack tornadoes. Excellent for nullifying physical-based projectile camping. |
| Custom 1 | Shuriken of Light | 2%, 4%, 6.6%, or 10% depending on distance | Throws a bright, translucent shuriken forwards. The shuriken gains more damaging power as it travels, unable to flinch opponents at point-blank range but doing more knockback at maximum range. Useful for camping. Resembles Greninja's uncharged Water Shuriken, but uses light instead of water. | |
| Custom 2 | Blurring Blade | 9.9-23.75% if all hits connect | Charges briefly before stabbing with the sword forward multiple times before finishing in a high-knockback thrust, which looks similar to Shield Breaker. It is able to heavily damage a shield if fully charged. | |
| Side special | Default | Airborne Assault | 7.2-16% | Charges up then launches at the enemy, somersaulting with the blade. Travels in a light arc, and the Swordfighter bounces off opponents if it hits, making it function similarly to a long-range Bouncing Fish, or Raptor Boost to a lesser extent. |
| Custom 1 | Slash Launcher | 6-10.2% | Charges, then dashes forward with a sword strike. Can slice through multiple opponents. Resembles Ike's Quick Draw in function. | |
| Custom 2 | Chakram | 7% if all hits connect (slow chakram), 6.5% (fast chakram) | Throws a chakram that can be sent upwards, downwards, or straight forward. If inputted like a Smash attack, it will fly faster with increased range and damage. Otherwise, it will fly in front of the Swordfighter and stall in mid-air, hitting multiple times. The chakram can be lodged into the floor and walls like Mega Man's Metal Blade, but cannot be picked up. | |
| Up special | Default | Stone Scabbard | 5% (hit 1), 3% (hit 2), 5% (hit 3), 6% (sword when going through platforms) | Slashes upwards while jumping and then downwards while falling. The second hit is a powerful meteor smash. Similar to Kirby's Final Cutter or Ike's Aether. |
| Custom 1 | Skyward Slash Dash | 12% if all hits connect | A series of sword strikes while rising into the air. The dash can be aimed in any direction using the control stick. Similar to Falco's Fire Bird in that it hits multiple times. | |
| Custom 2 | Hero's Spin | 14-19% (ground), 14% in the air if all hits connect | Spins with sword; if used in the air, the Mii will rise, doing multiple hits. Functions like Link's Spin Attack. On the ground, it is capable of KO'ing Fox as early as 35%, at the ledge of any tourney-legal stage. | |
| Down special | Default | Blade Counter | 1.25x the damage of countered attacks, 8% minimum | Functions similarly to other characters' counterattacks; The Mii holds his/her sword behind them in a reverse grip, and strikes with a retaliatory slash when hit. |
| Custom 1 | Reversal Slash | 6% to opponents. Reflected projectiles deal 1.5x damage | A rainbow-coloured slash that reflects projectiles and turns around characters hit by it. Gives the Swordfighter a slight air boost when used in the air. Similar to Mario's Cape, but harder to land. | |
| Custom 2 | Power Thrust | 10%/8% (grounded sourspot hit); 13%/11%/8% (grounded and aerial sweetspot hit); 10%/8%/5.5% (aerial sourspot hit); 7% (landing hit) | Shoots forward quickly, stabbing with the sword. When used in the air, the Swordfighter launches at a downwards diagonal direction. The tip of the sword deals more damage, much like most of Marth's attacks. This move acts similar to Captain Falcon's Falcon Kick, but much quicker with less range and power. | |
| Final Smash | Final Edge | 8% (wave, close), 6% (wave, far) | Displays their sword and fires waves of energy off of it. Functions similarly to Wii Fit. In the 3DS version, the energy waves are all aimed horizontally, while in the Wii U version, this move appears to send out energy waves in more directions, thus having more range. The projectiles bear resemblance to the Sword Beam from the Legend of Zelda series. | |
On-screen appearance
- Appears from a whirlwind, then unsheathes their sword.

|
|---|
Taunts
- Up taunt: Throws sword in the air, spins, and catches sword similar to what Fox does with his blaster in one of his taunts.
- Side taunt: Twirls sword, then holds it in reverse grip behind.
- Down taunt: Performs a pose similar to one of Link's taunts. Also sets them back a little.
| Up taunt | Side taunt | Down taunt |
|---|---|---|
| File:MiiSwordfighterUpTauntSSB4.jpg | File:MiiSwordfighterSideTauntSSB4.jpg | File:MiiSwordfighterDownTauntSSB4.jpg |
Idle poses
- Points their sword up to the sky.
- Looks around cautiously.
 |

|
|---|
Crowd cheer
| English | Japanese | |
|---|---|---|
| Cheer | ||
| Description | Mii! | Mii-Mii-Mii! Mii-Mii-Mii! Mii-Mii-Mii-Mii-Mii-Mii-Mii! |
| Pitch | Group chant | Group chant |
Victory poses
- Drops from the sky, spins and poses.
- Throws sword up while spinning, then points it in front.
- Stabs multiple times, then spins and poses, facing the screen.
 |
 |

|
|---|
In competitive play
Official Custom Moveset Project
| Character | Custom sets available | ||||
|---|---|---|---|---|---|
| 2131 | 2111 | 2132 | 2112 | 2133 | |
| 2113 | 2231 | 2211 | 2232 | 2212 | |
| 2233 | 2213 | 1332 | 1312 | 1132 | |
| 1112 | 1232 | 3231 | 1212 | ||
Notable players
Active
Inactive
Trophies
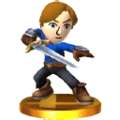
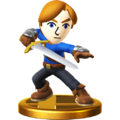
- Mii Swordfighter
 / Mii Sword Fighter
- This fighter is based on a player's Mii and favors a sword in battle. Enjoy the extra reach the sword offers, but remember that it takes a bit longer for strikes to reach your opponent as a result. Customize your Mii with chargeable moves, counters, or projectile attacks.
- A fighter based on your Mii! The main draw of Sword Fighters is the extra reach that they get thanks to their swords. On top of that, they have a lot of varied moves to choose from. Unfortunately, a lot of sword attacks have a bit of delay between pressing the button and landing the attack, so you'll need to be very careful not to leave yourself open!
 : Super Smash Bros. for Wii U
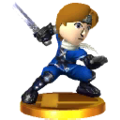
- Mii Swordfighter (Alt.) / Mii Sword Fighter (Alt.)
- One of the Mii Swordfighter side specials actually uses a throwing disc called a chakram! How quickly you press your desired direction controls how fast and far the chakram flies and how much damage it does. Several other moves, like Skyward Slash Dash, also work in this manner.
- One of the Mii Sword Fighter side specials actually uses a throwing disc called a chakram! How quickly you choose a direction controls how far and fast the chakram flies, as well as the kind of damage it does. This kind of quick-aiming action also applies to other special moves, like Super Slash Dash.
- : Super Smash Bros. for Wii U
- Final Edge
- The Mii Swordfighter will rise its sword, firing multiple shock waves forward in its Final Smash. The waves will expand outward and push foes off the screen. Walls and the ground can't stop this display of power, so this Final Smash is exceptional at taking out several rivals at the same time.
- With sword held high, Mii Sword Fighter unleashes a barrage of shock waves. They spread out in a fan pattern, dealing multiple blows to foes they touch, while also pushing them towards the edge of the screen. This Final Smash can even hit through walls and floors, making it easy to attack lots of opponents at once!
Classic (3DS)
Alt. (3DS)
Classic (Wii U)
Alt. (Wii U)


Alternate costumes
Base game
.png)
| Cybernetic Suit | Ninja Outfit | Standard Outfit | Pirate Outfit | Plate Armor | Samurai Armor | Neon Suit |
- The color of the costume depends on the Mii's original color from the Mii Maker.
Downloadable content
 |
 |
 |

|
 |
 |
 |

|
 |
 |
 |

|
 |
 |
 |

|
| SSB T-Shirt | Link Outfit | Dunban Outfit | Monkey Suit |
| Zero's Armor | Hoodie | Chrom Outfit | Black Knight Outfit |
| Lloyd Outfit | Business Suit | Viridi Outfit | Hunter's Mail |
| Rathalos Mail | Ashley Outfit | Takamaru Outfit | Gil Outfit |
Gallery
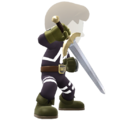
Mii Fighting Team Swordfighter
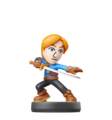
Mii Swordfighter's amiibo.
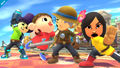
Posing with a Mii Brawler and Mii Gunner.
A Swordfighter attacking Little Mac.

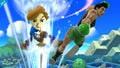
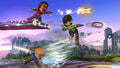
Two Swordfighters fighting a pair of Gunners.
With Villager, Mii Gunner, and Mii Brawler.

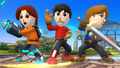
All three Mii fighters with different heights.
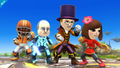
All three Mii fighters with different costumes.
Mii Swordfighters using Gale Strike, Shuriken of Light, and Chakram.
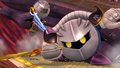
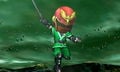
Mii Swordfighter vs Meta Knight.
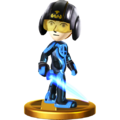
Mii swordfighter with a Captain Falcon helmet.


Trivia
- The design of the Mii Swordfighter used in promotional material and in-game renders is based on a slightly edited version of Guest B, one of the pre-loaded Miis available for use in titles with Mii support. Of the three, the Mii Swordfighter has the least drastic change in design; simply changing the design of his hair and widening the eye placement a bit.
- The Mii Swordfighter's sword trail varies with the outfit he/she is currently wearing: most outfits use Link's afterimage-heavy sword trail, while the Neon and Cybernetic Suits give the Mii's sword Marth's glowing tipper (although this is only aesthetic).
- The Swordfighter's Dunban outfit shows them holding the sword with their right hand. However, in Xenoblade Chronicles, Dunban is unable to use his right arm from overexposure of the Monado's power, so he can only attack with his left arm.
- A similar situation applies to the Link costume. However, Link has wield the sword with his right hand in the Wii version of Twilight Princess and Skyward Sword.
- There seems to be an oddity if the Mii Swordfighter equips the Chrom outfit. When using Blade Counter, the Mii will hold the crossguard of the sword instead of the handle (during the swing).
- All of the Swordfighter's chargeable special moves share the same charging sound.
- The default Mii Swordfighter has a slightly larger nose in his trophies than in his promotional art and the Mii Fighter character select art.
- When editing a Mii Swordfighter with the Viridi costume, the staff appears to be much larger and longer, however it reverts to normal size in a match.
- The Mii Swordfighter is the only character in Smash 4 to have a move that behaves differently between the two versions (in this case, that would be Final Edge, which possesses a much broader range in the Wii U version).
| Fighters in Super Smash Bros. 4 | |
|---|---|
| Veterans | Bowser · Captain Falcon · Charizard · Diddy Kong · Donkey Kong · Dr. Mario · Falco · Fox · Ganondorf · Ike · Jigglypuff · King Dedede · Kirby · Link · Lucario · Lucas · Luigi · Mario · Marth · Meta Knight · Mewtwo · Mr. Game & Watch · Ness · Olimar · Peach · Pikachu · Pit · R.O.B. · Roy · Samus · Sheik · Sonic · Toon Link · Wario · Yoshi · Zelda · Zero Suit Samus |
| Newcomers | Bayonetta · Bowser Jr. · Cloud · Corrin · Dark Pit · Duck Hunt · Greninja · Little Mac · Lucina · Mega Man · Mii Fighter (Mii Brawler · Mii Gunner · Mii Swordfighter) · Pac-Man · Palutena · Robin · Rosalina & Luma · Ryu · Shulk · Villager · Wii Fit Trainer |