Yoshi (SSB4): Difference between revisions
m (→Notable players: all you did by adding Williams was break the link.) |
(→Special moves: Minor fix for Egg Throw nerf: It read "Eggs travel less distance when the B button HIS held") Tag: Mobile edit |
||
| (377 intermediate revisions by more than 100 users not shown) | |||
| Line 2: | Line 2: | ||
{{Disambig2|Yoshi's appearance in ''Super Smash Bros. 4''|the character in other contexts|Yoshi}} | {{Disambig2|Yoshi's appearance in ''Super Smash Bros. 4''|the character in other contexts|Yoshi}} | ||
{{Infobox Character | {{Infobox Character | ||
|name=Yoshi | |name = Yoshi | ||
|image = [[File:Yoshi SSB4.png|250px]] | |||
|image=[[File:Yoshi SSB4.png|250px | |universe = Yoshi | ||
|universe=Yoshi | |game = SSB4 | ||
|ssbgame1=SSB | |ssbgame1 = SSB | ||
|ssbgame2=SSBM | |ssbgame2 = SSBM | ||
|ssbgame3=SSBB | |ssbgame3 = SSBB | ||
|ssbgame4 = SSBU | |||
|availability = [[Starter character|Starter]] | |availability = [[Starter character|Starter]] | ||
|tier = D | |tier = D | ||
|ranking = | |ranking = 33 | ||
}} | }} | ||
:{{Cquote|Yoshi Rolls into Battle!|cite=Introduction Tagline}} | :{{Cquote|''Yoshi Rolls into Battle!''|cite=Introduction Tagline}} | ||
'''Yoshi''' ({{ja|ヨッシー|Yosshī}}, ''Yoshi'') is a playable character in ''[[Super Smash Bros. 4]]''. His return to the series was | '''Yoshi''' ({{ja|ヨッシー|Yosshī}}, ''Yoshi'') is a playable character in ''[[Super Smash Bros. 4]]''. His return to the series was announced during a [[Nintendo Direct|''Super Smash Bros.'' Direct]] on April 8th, 2014, making him the last of the [[List of Super Smash Bros. series characters#"Perfect-attendance crew"|"perfect-attendance crew"]] to be announced.<ref name="Direct">[https://www.youtube.com/watch?v=7xUWnQu2Grs Super Smash Bros. Direct 4.8.2014]</ref> He was also among the first wave of [[amiibo]] figures. Yoshi's voice consists of all of Kazumi Totaka's ''Yoshi's Story'' clips last used in ''Brawl''. | ||
Yoshi is ranked 33rd out of 54 on the [[tier list]], placing him in the D tier. This is a moderate improvement from his placement in ''[[Super Smash Bros. Brawl]]'', where he was ranked 27th out of 38. As in previous installments, Yoshi boasts excellent aerial mobility: he has the fastest [[air speed]] in the game by default, while his [[double jump]] is the second highest in the game and grants him nearly 70 frames of [[armor]]. Yoshi's grounded mobility has also been improved, as his already fast [[dash]]ing speed is now considerably faster. | |||
Yoshi is | Another of Yoshi's strengths is the utility of his moveset: neutral attack and up tilt are very useful combo starters, down tilt can be used for [[tech-chasing]], neutral aerial is very useful for approaching and edge-guarding, [[Egg Lay]] is a [[Grab#Special attacks as grabs|command grab]], [[Egg Roll]] can force approaches or escape from pressure, [[Egg Throw]] is a projectile that has recovery and [[mindgame]] potential, and [[Yoshi Bomb]] is strong enough to KO outright and heavily pressure [[shield]]s. Yoshi's shield is also fairly useful, as it is completely immune to [[shield stab]]bing and, for the first time since ''[[Super Smash Bros.]]'', enables him to jump out of it. | ||
However, Yoshi | However, Yoshi has noticeable flaws. His [[grab]] game is still infamously poor: all of his grabs are among the slowest in the game, while his throws have almost nonexistent utility. Yoshi's defensive presence on the ground is also surprisingly lacking for a few reasons. His [[roll]]s and [[sidestep]] are among the unsafest, and he has the dubious distinction of being the only character who is unable to [[Shield platform dropping|shield platform drop]]. By extension, Yoshi's shield is the smallest among the cast, while his very low [[traction]] significantly hinders his [[out of shield]] options. | ||
Yoshi's KO potential is also problematic for a heavyweight: although his smash attacks, up aerial, and grounded Yoshi Bomb are powerful, each of them are burdened with very short durations and punishable amounts of ending lag. Lastly, Yoshi has a very short vertical [[recovery]] outside of his double jump, as his primary recovery move, Egg Throw, grants minimal vertical distance and deteriorates when used consecutively without landing on the ground. | |||
Overall, Yoshi's strengths outweigh his weaknesses, yet his tier placement is heavily debatable. Despite being initially perceived as an impressively well-rounded character, and having achieved instances of national-level tournament success, Yoshi's placement has dropped throughout ''SSB4''{{'}}s lifespan. This is largely because of his results waning in lieu of his metagame stagnating. When coupled with many characters that were previously considered inferior to him (such as {{SSB4|Mewtwo}}, {{SSB4|Marth}}, and {{SSB4|Mega Man}}) having attained vastly greater viability thanks to more consistent success and/or expanded metagames, Yoshi's ranking is viewed by some top players, such as {{Sm|ZeRo}}, as too high. | |||
==Attributes== | ==Attributes== | ||
Yoshi is a [[Weight|heavyweight]] that deviates quite noticeably from his weight class' archetype. This is most obvious with his [[air speed]], which is the fastest in the game by default, though it is surpassed under certain conditions ([[Giga Mac]], [[Wario-Man]], the lightest possible {{SSB4|Mii Brawler}}, and a fully [[Limit Charge]]d {{SSB4|Cloud}}). By extension, Yoshi has the second highest [[double jump]] in the game (surpassed only by {{SSB4|Mewtwo}}'s), which also grants him 68 frames of [[armor]] that can withstand a maximum of 120 units of knockback. Yoshi's other attributes also deviate from the mold of an archetypical heavyweight, albeit not to same the degree as his air speed and double jump. He has an above average [[walk]]ing speed, a fast [[dash]]ing speed (the 14th fastest in the game) and the 11th fastest [[air acceleration]], but in contrast has moderately low [[gravity]], the eighth slowest [[Falling speed|falling]] and [[fast fall]]ing speeds, and the fourth lowest [[traction]] in the game. Yoshi is also capable of [[crawling]]. Overall, these attributes grant him strong mobility, especially in the air, and also make him very floaty despite being heavy, yet do not render him frail or susceptible to [[juggling]]. | |||
Yoshi's greatest strength is the utility of his moveset. His neutral and tilt attacks are all very fast, leaving him exposed only very briefly. They additionally launch opponents either vertically or horizontally, which makes them reliable as set-ups for combos or [[edge-guarding]]. Yoshi's dash attack has high base knockback and long range, which allows for easy [[cross-up]]s and make it useful for [[punish]]ing rolls or techs. His smash attacks possess decent power, with his forward smash being the strongest among them. However, each of Yoshi's smashes also have certain perks. Forward and clean up smash grant [[intangibility]] to his head and legs, respectively, whereas down smash is a [[semi-spike]] like his down tilt. | |||
Yoshi's air game is also versatile and synchronizes very well with his attributes. Due to it hitting on frame 3, neutral aerial is the second fastest of its kind; when coupled with its [[sex kick]] properties, it is useful for edge-guarding, stopping approaches and breaking out of combos or juggles. Forward aerial can either [[meteor smash]] or powerfully launch opponents diagonally, and is capable of [[auto-canceling]] with a [[short hop]]. Up aerial is one of Yoshi's most viable KOing options: due to it hitting on frame 5 and possessing a respectable damage output, very high knockback growth and disjointed [[hitbox]], it can quickly and reliably KO any opponent of any weight while near the upper [[blast line]]. Back aerial is excellent at edge-guarding, as its first two hits launch opponents at the [[Autolink angle|auto-link angle]], whereas its third hit has extremely high knockback growth. Lastly, Yoshi's renowned down aerial hits repeatedly and is the most damaging aerial in the game. By extension, it can strongly pressure [[shield]]s to the point of potentially breaking one if it is auto-canceled with a jump and followed by [[Yoshi Bomb]]. | |||
The respectable utility of Yoshi's moveset also extends to his [[special move]]s. [[Egg Lay]] is a [[command grab]] that immobilizes opponents and thus allows for free hits. If opponents do not break out of the Yoshi Egg while near the edge, they also face the risk of being unable to recover. [[Egg Roll]] functions similarly to [[Spin Dash]], as it can be used to approach or retreat quickly. [[Egg Throw]] is a [[projectile]] that can be used to stop approaches; allow Yoshi to close in on the opponent; and, when continuously B-reversed in the air, keep the opponent guessing as to where he is going to go next. Although it is not a traditional recovery move, it nevertheless grants minimal vertical recovery upon its first use in midair. Lastly, Yoshi Bomb is useful for pressuring shields, thanks to it dealing considerable [[shield damage]]. Outside of this, its grounded version's respectable damage output and deceptively low start-up lag make it one of Yoshi's most viable KOing options. | |||
However, Yoshi has noticeable weaknesses, with his main one being his vertical [[recovery]]. Although his attributes allow for long horizontal recovery, Egg Throw grants only minimal vertical distance. By extension, Yoshi is overly reliant on his [[double jump]] for recovery, and will be unable to reuse it if he is hit out of it. As such, Yoshi is heavily susceptible to meteor smashes and [[footstool jump]]s, as a single opening he makes off-stage could potentially prove fatal. | |||
Another very glaring weakness is his grab game, which is widely considered to be among the worst in the game. Yoshi's [[pummel]] is the only positive trait of his grab game, thanks to its quick speed; average damage output; and its release being a useful set-up into his neutral attack. Outside of this, his grabs' good ranges are offset by their very punishable amounts of start-up and ending lag. Yoshi's forward and back throws are his fastest and most damaging throws. However, they have average damage outputs; below-average base knockback; and low knockback growth, which make them unreliable for scoring KOs or starting combos. His up and down throws are also unable to KO reliably and, despite having low damage outputs, lack combo potential because of their lag. Yoshi's ability to escape pressure is also limited, as his rolls and sidestep are short-distanced, among the slowest in the game, and have some of the lowest amounts of intangibility frames. By extension, his shield is the smallest in the game, and he is the only character who is unable to perform [[shield platform dropping]]. | |||
Yoshi's | Lastly, Yoshi's KO potential is problematic for a heavyweight. Although his smash attacks, up aerial and grounded Yoshi Bomb are his most reliable KOing options thanks to their respectable power, they are burdened with very short durations and punishable amounts of ending lag. However, forward smash, down smash and Yoshi Bomb also suffer from other particular flaws. Forward smash has noticeable start-up lag, down smash's back hit is more effective for KOing than its front hit, and Yoshi Bomb's short range makes it best suited from [[out of shield]]. While Yoshi's neutral, forward and back aerials also possess KO potential, their very low base knockback makes them best suited for doing so while near the left or right blast line. | ||
Yoshi | Yoshi gains noticeable benefits from his [[Character customization|custom moves]]. Lick is effectively his best custom move: it is a semi-spike that is powerful enough to KO reliably, yet can also provide function as a horizontal recovery option, thanks to it slightly boosting Yoshi forward. Egg Launch deals more damage and launches opponents away, which can be used as a potent way minimize their chances of recovering. Heavy Egg Roll is slower, but deals much more damage and has armor throughout its duration. Conversely, Light Egg Roll has more power and moves higher and faster, but ends after its bounce. High Jump covers noticeably more distance, but in turn removes Yoshi's only projectile. Star Bomb has less power, but its stars are larger and more damaging. Conversely, Crushing Bomb is strong enough to easily KO opponents of any weight, yet is punishable because of its much slower speed and lack of stars. | ||
Overall, Yoshi is effectively a heavyweight version of the all-rounder archetype, thanks to his lack of glaring issues against the majority of the cast. Due to his strengths and low learning curve, Yoshi has managed to achieve respectable placings at all levels of play, thanks to the likes of {{Sm|Raptor}}, {{Sm|Sky}}, {{Sm|Papa Wall}}, {{Sm|Poltergust}}, {{Sm|Kamikaze}}, {{Sm|Seth}}, {{Sm|Snoop}}, and {{Sm|Ron}}. However, Yoshi's easily exploitable weaknesses have nevertheless resulted in his representation remaining below-average in competitive play. | |||
Yoshi | ==Changes from ''[[Super Smash Bros. Brawl]]''== | ||
Yoshi has been [[buff]]ed overall in the transition from ''Brawl'' to ''SSB4''. Many of his attacks have more speed, are stronger and have more utility, while the issues that plagued him in ''Brawl'' were fixed: thanks to the changes to [[hitstun canceling]], his combo game has improved to the point of granting him new KO set-up, and his smash attacks while dealing less damage are stronger. Yoshi's biggest buff however was to his shield game which was previously the main issue that plagued him. Yoshi's shield [[grab]] is faster and for the first time since ''Smash 64'', Yoshi can jump [[out of shield]]. The other issues which plagued his shield in Brawl such as his longer shield drop, his inability to [[powershield canceling|powershield cancel]] and his inability to throw items out of a [[roll]] were all fixed, making his out of shield game much better; no longer being the worst in the game by a huge margin (although his out of shield game is still rather poor). The only new disadvantages Yoshi has while in shield is that he cannot [[shield platform drop]] and his [[spot dodge]] is significantly worse (going from one of the best to being fairly mediocre) but the buffs to his shields far outweigh these nerfs. | |||
However, Yoshi has also received some noticeable [[nerf]]s. Yoshi's grab game was made even worse. He can no longer [[air release]] his opponents while he is pummeling them and the general changes to air releases hinder him more than almost any other character as he has now lost all of the followups he had out of an air release and the removal of [[chain grab]]bing further exacerbates this issue. His previously excellent pivot grab is also much laggier making it far less spammable and much easier to punish. His damage output is also lower and his forward and up tilts are laggier making them worse spacing tools and his down tilt is much weaker. His aerial game has also seen various downgrades. His air speed is lower, neutral aerial lingers for a shorter amount of time, forward aerial is weaker and has a stricter [[auto-cancel]] window, up aerial is weaker and down aerial has less edgeguarding potential. Back aerial while connecting more reliably and having a stronger final hit, it only has three hits making it weaker and it has drastically reduced combo potential as the first two hits have higher knockback and altered angles and the move has much higher ending and landing lag while also being unable to auto-cancel in a short hop which also greatly hinders its safety and spacing potential. The eggs from his [[Egg Throw]] also deal less damage and Yoshi can no longer edge cancel Egg Toss hindering its camping potential when used at the ledge although Egg Throw is faster. | |||
Overall, Yoshi's main issue from ''Brawl'' was fixed resulting in him being stronger overall especially when relative to the cast although the general changes to ''Smash 4''{{'}}s mechanics do not benefit him as much as other characters. While Yoshi was initially regarded highly when ''Smash 4'' was first released, his perception overtime decreased as many characters were buffed significantly more than he was and the inclusion of {{SSB4|Bayonetta}} and {{SSB4|Cloud}} proved to be problematic for him. When combined with his overall low representation, he is now generally agreed upon to be a mid tier character. | |||
===Aesthetics=== | ===Aesthetics=== | ||
*{{change|Yoshi | *{{change|Due to the aesthetic used in ''SSB4'', Yoshi has a sleeker design, and his overall color scheme is significantly more vibrant. His body has a more chartreuse color, consistent with his appearance outside of ''Smash Bros.'' as well as ''[[Smash 64]]''. Unlike in previous installments, he now stands upright, as with his standard appearances outside of mainline Mario games.<ref name="Direct"/> Altogether, these changes make Yoshi appear virtually identical to his appearance as of ''{{s|mariowiki|Mario & Sonic at the London 2012 Olympic Games}}''.}} | ||
*{{change| | *{{change|Yoshi has received two new [[alternate costume]]s. The first is {{s|mariowiki|Purple Yoshi}}, and the second is {{s|mariowiki|Black Yoshi}}.}} | ||
*{{ | *{{change|Yoshi now faces the foreground at a slight angle, instead of facing directly forward.}} | ||
*{{change| | *{{change|Yoshi is slightly more expressive. His irises now shrink during the end of his pivot grab and when he is hit, launched, or [[Floor recovery|prone/supine]].}} | ||
*{{change|Yoshi's boots and [[double jump]]'s sound clips are lower pitched. He also vocalizes less frequently while double jumping.}} | |||
*{{change|{{s|mariowiki|Yoshi Egg}}s now match Yoshi's selected color scheme. This also applies to {{SSB4|Kirby}}'s [[Inhale (Kirby)|copied]] [[Egg Lay]].}} | |||
===Attributes=== | ===Attributes=== | ||
*{{change|Yoshi | *{{change|Yoshi has a new default idle animation where he stands more upright. This makes him harder to hit horizontally but easier to hit vertically.}} | ||
**As a sidenote, Yoshi retains his idle pose from ''Brawl'' while holding a small [[item]]. | |||
*{{change|Yoshi's upright posture has translated into various moves in his moveset, be it through a tweaked animation or a completely new move.}} | |||
*{{buff|Yoshi [[dash]]es faster (1.68 → 1.86).}} | *{{buff|Yoshi [[dash]]es faster (1.68 → 1.86).}} | ||
*{{nerf|Yoshi's [[air speed]] is slower (1.316 → 1.28) | *{{nerf|Yoshi's [[air speed]] is slower (1.316 → 1.28) although it is still the fastest in the game (excluding [[Giga Mac]], [[Wario-Man]] and lightest {{SSB4|Mii Brawler}}).}} | ||
*{{buff|Yoshi | *{{buff|Yoshi's [[air acceleration]] is higher (0.08 → 0.098).}} | ||
*{{change|[[ | *{{buff|As with all returning veterans from ''Brawl'', Yoshi’s [[Fast-fall|fast-falling speed]] is faster (1.806 → 2.064). However, it has gone from the 11th lowest out of 39 characters to the 8th lowest out of 58.}} | ||
*{{nerf|Yoshi is [[Weight|lighter]] (107 → 104), hindering his endurance.}} | |||
*{{change|Yoshi's [[gravity]] is higher (0.07347 → 0.08).}} | |||
*{{buff|Yoshi's [[shield]] drop is significantly shorter (16 frames → 7), now matching the rest of the cast.}} | |||
*{{buff|For the first time since Smash 64, Yoshi can now jump [[out of shield]].}} | |||
*{{buff|Yoshi can now [[powershield canceling|powershield cancel]].}} | |||
*{{buff|Yoshi can once again throw [[item]]s out of a roll however due to the removal of [[glide toss]]ing, this has minimal impact. The removal of glide tossing benefits Yoshi more than any other returning veteran as it hinders much of the rest of the cast's approach with items and Yoshi still has access to his long super glide toss, making his approach with items much better relative to the cast.}} | |||
**{{buff|Altogether, these changes significantly improve Yoshi's out of shield options; resulting in his shield no longer being near unusable.}} | |||
*{{nerf|Yoshi can no longer [[shield platform drop]], slightly hindering his out of shield game on platforms although the other changes to his shield more than make up for it.}} | |||
*{{change|Yoshi's double jump now functions more like other double jumps, with Yoshi now rising immediately, instead of moving downwards for some time before rising upwards.}} | |||
**{{buff|This improves Yoshi's ability to chase opponents vertically, as well as improving his vertical recovery potential.}} | |||
**{{change|This also means it can now be affected by special gravity conditions.}} | |||
**{{nerf|However, this also reduces its horizontal distance as Yoshi reaches maximum height and starts falling sooner.}} | |||
**{{nerf|This also removes Yoshi's [[Dragonic Reverse]] and triple jump techniques, hindering double jump's utility.}} | |||
*{{nerf|Yoshi can no longer grab ledges during the beginning of his double jump. When combined with the altered way the double jump functions, this makes it harder for Yoshi to grab ledges from behind.}} | |||
*{{buff|[[Roll]]s have a longer duration (frames 4-19 → 4-21), especially when compared to the rest of the cast.}} | |||
*{{buff|Back roll has less ending lag (FAF 38 → 36).}} | |||
*{{nerf|Forward roll has more ending lag (FAF 35 → 36).}} | |||
*{{buff|Air dodge has less startup (frame 4 → 3) and ending lag (FAF 50 → 34).}} | |||
*{{nerf|[[Spot dodge]] has more startup lag, a shorter duration (frames 2-20 → 3-18) and more ending lag (FAF 23 → 28), no longer being one of the fastest spot dodges in the game.}} | |||
*{{nerf|The removal of [[meteor cancel]]ing significantly hinders Yoshi's endurance against meteor smashes more than any other returning veteran besides {{SSB4|Olimar}} and {{SSB4|Zero Suit Samus}} due to him previously having a shorter meteor-cancel window than most other characters.}} | |||
===Ground attacks=== | ===Ground attacks=== | ||
*{{nerf| | *[[Neutral attack]]: | ||
*{{buff| | **{{change|Neutral attack has an altered animation. Yoshi now jumps up when performing the first kick and the second hit is now a roundhouse kick.}} | ||
*{{nerf| | **{{change|The near hitbox on both hits now has the lowest hitbox priority out of all the hitboxes rather than the highest (ID# 0 → 2).}} | ||
*{{buff| | **{{nerf|Yoshi's attacking foot is no longer intangible when performing either hit of neutral attack.}} | ||
*{{ | **{{nerf|Both hits have smaller hitboxes (5u/4u/4u → 3.3u/4.5u/3.3u).}} | ||
*{{nerf| | **{{buff|The first hit has higher base knockback (8 → 30), significantly improving its [[jab cancel]]ing potential.}} | ||
*{{ | ***{{nerf|However, this also makes it connect less reliably into the second hit at higher percents especially against aerial opponents.}} | ||
*{{nerf|Up smash | **{{buff|The first hit has a lower [[SDI]] multiplier (1.5x → 1x).}} | ||
*{{buff| | **{{nerf|The first hit has a shorter duration (frames 3-5 → 3-4).}} | ||
**{{nerf|The first hit's near hitbox has been moved further outwards, reducing its range inside Yoshi.}} | |||
**{{change|Yoshi now moves forwards when performing the second hit however, Yoshi does not stretch hit foot out as far. This gives it a similar amount of range overall.}} | |||
**{{nerf|The second hit deals less damage (6% → 4%) and knockback (25 (base), 100 (scaling) → 56/70).}} | |||
***{{buff|However, the move is still capable of leading into followups at lower percents due to Yoshi's new dash attack.}} | |||
**{{nerf|On the second hit's second active frame, Yoshi now moves his foot slightly backwards rather than moving it backwards and upwards, reducing its vertical range.}} | |||
***{{buff|However, this also gives it more consistent horizontal range.}} | |||
*[[Forward tilt]]: | |||
**{{buff|Forward tilt has less startup lag (frame 6 → 5).}} | |||
**{{buff|Forward tilt has higher base knockback (40 → 50), making the down angled version stronger.}} | |||
**{{nerf|Forward tilt has more ending lag (FAF 30 → 39), hindering its ability to set up juggles.}} | |||
**{{nerf|Forward tilt has smaller hitboxes (5u (near)/4.25u (mid)/3.5u (up/non-angled tip)/4u (down tip) → 4u/3.5u/2.8u) and the middle/far hitboxes have been moved closer to Yoshi (x offsets: 8/15 → 7.5/13.5), reducing its range.}} | |||
**{{nerf|The up and non-angled versions deal less damage (10% (up)/9% (non-angled) → 8%/7%).}} | |||
**{{nerf|The up angled version's mid hitbox launches opponents at a lower, more horizontal angle (70° → 65°), now matching the other variants.}} | |||
*[[Up tilt]]: | |||
**{{buff|Up tilt has a longer duration (frames 7-11 → 8-15).}} | |||
**{{buff|Up tilt has an altered animation where Yoshi swings his tail at a much wider arc. This gives up tilt more horizontal and vertical range.}} | |||
**{{nerf|Up tilt deals less damage (11% (tail)/10% (tip) → 7%), without full compensation on its knockback scaling (40 → 45).}} | |||
***{{buff|However, when combined with the changes to hitstun canceling and [[DI]], this improves its combo potential despite its higher ending lag.}} | |||
**{{nerf|Up tilt has more startup (frame 7 → 8) and ending lag (FAF 30 → 32).}} | |||
***{{nerf|The move's higher startup lag makes the hitboxes start higher, with shorter characters now being able to consistently crouch underneath it.}} | |||
**{{nerf|Up tilt has smaller hitboxes (6u/6u/5u → 4u/4.5u/2.5u) with the move having less range inside of Yoshi.}} | |||
*[[Down tilt]]: | |||
**{{buff|Down tilt has an altered animation where Yoshi moves forwards before he swings his tail and his tail no longer becomes much longer. The tail's hitboxes have also been extended further outwards (x offset: 0/1.2/0.5 → 1/3/3.5). Both of these changes combined results in the move no longer having deceptively short range, with the move now actually matching Yoshi's tail.}} | |||
***{{change|Despite this, down tilt still has roughly the same horizontal range overall.}} | |||
***{{nerf|This new animation is longer however (23 frames → 41), increasing the amount of time Yoshi cannot crawl or turn around.}} | |||
**{{nerf|Down tilt deals much less damage (10% (near)/5% (far) → 5% (near)/4.5% (mid)/4% (far)) without compensation on its knockback, significantly hindering its edgeguarding potential.}} | |||
***{{buff|However, these changes improve down tilt's tech-chasing potential when combined with the changes to hitstun canceling and DI.}} | |||
**{{nerf|Down tilt has smaller hitboxes (5u/5u/4u → 3.5u/3.5u/3u). This gives the move less vertical range as well as less range inside of Yoshi.}} | |||
*[[Dash attack]]: | |||
**{{change|Yoshi has a new dash attack, a side kick.}} | |||
**{{buff|Dash attack covers much more space in a shorter period of time, going from covering just over 25% of [[Final Destination]] to now covering just over 40% of Final Destination. This not only makes it a much better burst movement option as well as greatly improving its approach and cross-up potential but this also makes it a much better combo extender.}} | |||
**{{buff|The clean hit's far hitbox has been positioned further away from Yoshi (z offset: 6 → 9), improving its range.}} | |||
**{{change|Dash attack has much more base knockback but much less knockback scaling (15 (base), 100 (scaling) → 90/52). This drastically improves the move's safety on hit at lower percents but hinders its overall KO potential.}} | |||
**{{change|Dash attack launches opponents at a higher angle ([[Sakurai angle|361°]] → 65°). When combined with its increased distance and higher knockback, this enables it to set up juggles but hinders its edgeguarding potential as well as removing its ability to [[lock]] opponents.}} | |||
**{{change|Dash attack's hitboxes are positioned lower (y offset: 7.5 → 6.2 (clean)/7 (late)).}} | |||
**{{nerf|Dash attack has a shorter duration (frames 10-13 (clean)/14-23 (late) → 10-12/13-20).}} | |||
**{{nerf|Dash attack has more ending lag (FAF 42 → 50).}} | |||
**{{nerf|Dash attack no longer grants intangibility to Yoshi's head.}} | |||
**{{nerf|Dash attack has smaller hitboxes (5.5u/4u → 5u/3.5u).}} | |||
**{{nerf|The near hitbox has been moved closer to Yoshi (z offset: 0 → 4 (clean)/3 (late)), giving dash attack less range inside of Yoshi.}} | |||
**{{nerf|The late hit deals less damage (7% → 6%).}} | |||
*[[Forward smash]]: | |||
**{{buff|Forward smash deals more knockback (20 (base), 92 (scaling) → 30/(97/98/97)) improving the head hitbox's KO potential.}} | |||
**{{buff|The head hitboxes are larger (3.7u/4.2u → 4.8u/5u) and they have been moved further away from Yoshi (x/y offsets: 0/(2.8/-1) → (3.2/5.8)/1.2). This gives forward smash more range, giving it a smaller blindspot.}} | |||
**{{buff|The far hitbox now has the lowest hitbox priority (ID# 0 → 2). As the far hitbox is now a sourspot, this benefits the move.}} | |||
**{{change|The near hitbox now always launches opponents in the direction Yoshi is facing.}} | |||
**{{nerf|Forward smash has a shorter duration (frames 14-16 → 14).}} | |||
**{{nerf|Forward smash grants less intangibility to Yoshi's head (frames 12-16 → 12-14).}} | |||
**{{nerf|Forward smash has more ending lag (FAF 50 → 53).}} | |||
**{{nerf|Forward smash deals less damage (16% → 15.5% (head)/14% (body)/13% (head's tip), hindering the near and especially the far hit's KO potential.}} | |||
**{{nerf|The near hitbox is slightly smaller (3u → 2.9u) and it has been moved closer to Yoshi, with it now only covering Yoshi's front foot rather than covering the lower end of his saddle up to the top of his back foot. This gives the move less range inside of Yoshi despite the near hitbox now being extended.}} | |||
**{{nerf|The near hitbox now has the highest hitbox priority (ID# 2 → 0). As the near hitbox is now a sourspot, this hinders the move.}} | |||
*[[Up smash]]: | |||
**{{change|Yoshi has a new up smash, a bicycle kick. The move now hits in front of Yoshi and then behind rather than from behind to in front.}} | |||
**{{buff|Up smash deals more knockback (23 (base), 83 (scaling) → 37/95), improving its KO potential despite its lower damage.}} | |||
**{{buff|Up smash has more vertical range and downwards range in front of Yoshi due to its new animation.}} | |||
**{{nerf|Up smash has more ending lag (FAF 43 → 47).}} | |||
**{{nerf|Up smash deals less damage (16% → 14% ).}} | |||
**{{nerf|Up smash now has a late hit for the second half of its duration which deals much less damage (16% → 12%), hindering its KO potential despite its higher knockback.}} | |||
**{{nerf|Up smash has smaller hitboxes (6u/5u → 5u/3.5u). When combined with its new animation, this gives the move less horizontal range both in front of and especially behind Yoshi.}} | |||
**{{nerf|Up smash has much less downwards range behind Yoshi, with the move now failing to hit smaller characters if they are behind Yoshi.}} | |||
**{{nerf|Up smash grants less intangibility (frames 11-16 → 11-13).}} | |||
***{{nerf|Additionally, since Yoshi's right foot is now intangible rather than his large head, this makes the move easier to intercept.}} | |||
**{{nerf|Up smash covers less distance out of an initial dash unless Yoshi jump cancels the up smash, making it harder to use as an approach tool.}} | |||
*[[Down smash]]: | |||
**{{buff|Down smash deals more knockback (30 (base), 63/53 (scaling) → 40/73 (front sweetspot), 43/57 (front sourspot), 40/81 (back sweetspot), 43/75 (back sourspot)) improving the first hit's sweetspot's and the second hit's KO potential despite its lower damage, especially the second hit.}} | |||
***{{nerf|However, the first hit's sourspot's knockback was not fully compensated for its lower damage, hindering its KO potential.}} | |||
**{{nerf|Down smash deals less damage (14% (front)/13% (back) → 12% (mid tail)/10% (body/far tail)).}} | |||
**{{nerf|Down smash has more startup lag (frame 6 → 7).}} | |||
***{{buff|However, its total duration was unchanged, slightly decreasing its ending lag.}} | |||
**{{nerf|Down smash has smaller htiboxes which are now extended (6u/5u/4.3u → 3.5u/2u), reducing its range.}} | |||
**{{nerf|The sourspot now uses an extended hitbox which stretches from Yoshi's body to the end of his tail. This means that the sourspot can now connect if the opponent is inside of Yoshi, as well as still connecting if they are far away from Yoshi.}} | |||
===Aerial attacks=== | ===Aerial attacks=== | ||
*{{nerf| | *[[Neutral aerial]]: | ||
*{{nerf| | **{{buff|Neutral aerial now uses one extended hitbox rather than multiple normal hitboxes. This gives neutral aerial more consistent vertical range.}} | ||
*{{ | **{{buff|The clean hit has a larger hitbox (4.3u/4.3u/3.5u → 4.8u) which gives it more vertical range as well as slightly more range behind Yoshi.}} | ||
*{{nerf|Back aerial | **{{buff|The mid and late hit have higher base knockback (0 → 30), improving their KO potential, despite their lower damage.}} | ||
*{{ | ***{{nerf|However, this also hinders their locking potential as well as their followup potential at higher percents, especially when combined with neutral aerial's shorter duration/higher landing lag.}} | ||
*{{ | **{{buff|The mid and late hits are positioned further away from Yoshi (z offset: 3.3 → 4 (mid)/3.5 (late)) with the mid hit's hitbox also being larger than its previous foot hitbox (3.3u → 3.6u). This gives them slightly more range in front of Yoshi, especially the mid hit.}} | ||
*{{ | **{{nerf|Neutral aerial has a shorter duration (frames 3-5 (clean)/6-15 (mid)/16-31 (late) → 3-4/5-11/12-25).}} | ||
*{{ | **{{nerf|Neutral aerial has more landing lag (9 frames → 11).}} | ||
**{{nerf|The clean hit deals less damage (12% → 10%) without full compensation on its knockback (15 (base), 100 (scaling) → 40/86), hindering its KO potential.}} | |||
**{{nerf|The clean hit now has a static hitbox, rather than hitboxes attached to Yoshi's body. This gives it slightly less horizontal range during its later active frames.}} | |||
**{{nerf|The mid and late hits deal less damage (9% (mid)/6% (late) → 7%/5%).}} | |||
**{{nerf|The mid and late hits do not extend as far behind Yoshi and they have smaller hitboxes compared to their previous body hitboxes (4u (mid)/3.5u (late) → 3.6u/3u), giving them less range behind Yoshi.}} | |||
**{{nerf|Yoshi can no longer perform a double jump after a short hop neutral aerial due to his lower short hop/higher gravity.}} | |||
*[[Forward aerial]]: | |||
**{{buff|Forward aerial has less startup lag with a longer duration (frames 19-21 → 16-20).}} | |||
***{{nerf|However, its total duration was unchanged, giving it more ending lag.}} | |||
**{{buff|Forward aerial has a new animation where Yoshi now slightly turns his head before and during the headbutt. Yoshi extends his head out further, giving the move considerably more range.}} | |||
***{{nerf|However, this animation is also longer (49 frames → 67), increasing the amount of time Yoshi cannot grab ledges after using the move.}} | |||
**{{buff|Forward aerial has received a new horizontal launching hitbox which is positioned in front of the head hitbox. When combined with the move's new animation, this significantly improves forward aerial's horizontal range.}} | |||
***{{nerf|However, this new hitbox has priority over the head hitbox and it overlaps with the head hitbox, making the head hitbox harder to land.}} | |||
**{{buff|The removal of [[meteor canceling]] improves the head hitbox's reliability.}} | |||
**{{nerf|Forward aerial has slightly more landing lag (16 frames → 17).}} | |||
**{{nerf|Forward aerial [[auto-cancel]]s later (frame 36 → 40).}} | |||
**{{nerf|Forward aerial deal less damage (16% (back)/15% (head) → 15% (back/nose)/14% (head)), hindering its KO potential as its knockback was not compensated.}} | |||
**{{nerf|The back and head hitboxes are slightly smaller (2.5u/5.5u → 2.4u/5.3u).}} | |||
*[[Back aerial]]: | |||
**{{change|Yoshi has an altered back aerial where he now only performs three tail swipes instead of four.}} | |||
**{{buff|The first two hits now use an [[Autolink angle]] against aerial opponents (60° → 366°) and they deal more knockback (10/20 (base), 100 (scaling) → 30/200), making the move connect more reliably against aerial opponents, especially if Yoshi is falling.}} | |||
**{{buff|The first two hits have a lower SDI multiplier (1.5x (hit 1)/1.3x (hit 2) → 0.5x). When combined with the move's altered angle against aerial opponents, this makes the move much more difficult to escape from.}} | |||
***{{buff|The higher knockback and altered angle also allows Yoshi to drag opponents downwards if they fall out of the move, granting the first two hits edgeguarding potential.}} | |||
***{{nerf|However, this does also hinders the move's followup potential against aerial opponents who are close to the ground.}} | |||
**{{buff|The final hit deals more damage (4% → 5%) and much more knockback (50 (base), 100 (scaling) → 30/184), now being a viable KO move.}} | |||
**{{buff|The final hit consists of one much larger extended hitbox (5.5u → 8u), giving it considerably more range.}} | |||
**{{change|Back aerial has a higher hitlag multiplier (1x → 2x). This allows the move to significantly benefit from the introduction of [[frame cancel]]ing but makes it easier to DI.}} | |||
**{{change|As with most back aerials, back aerial now always launches opponents behind Yoshi.}} | |||
**{{change|The first two hits now have weight independent knockback.}} | |||
**{{change|The final hit launches opponents at a higher angle (361° → 54°). This improves its followup potential but hinders its edgeguarding potential.}} | |||
**{{nerf|Back aerial has more startup lag with a shorter duration (frames 10-12 (hit 1)/16-18 (hit 2)/23-25 (hit 3)/28-30 (hit 4) → 11/17/25-26).}} | |||
**{{nerf|Back aerial has much more ending lag (FAF 40 → 56) and a longer animation (39 frames → 62).}} | |||
**{{nerf|Back aerial has much more landing lag (9 frames → 19).}} | |||
**{{nerf|Back aerial has a shorter initial auto-cancel window (frames 1-9 → 1-5).}} | |||
**{{nerf|Back aerial auto-cancels later (frame 38 → 44), no longer doing so in a short hop.}} | |||
***{{nerf|Altogether, these changes considerably hinder back aerial's approach potential and safety.}} | |||
**{{nerf|Back aerial deals less damage (4% (hit 1)/3% (hits 2 & 3)/4% (hit 4)/14% (total) → 2.5% (hits 1 and 2)/5% (hit 3)/10% (total)).}} | |||
**{{nerf|The first two hits now launch grounded opponents horizontally (60° → 361°) and they deal more knockback (10/20 (base), 100 (scaling) → 50/150). This makes the move connect less reliably when used from a distance (especially at higher percents) as well as greatly hindering its followup potential if Yoshi lands, especially when combined with its higher landing lag.}} | |||
**{{nerf|The first two hits now use one static extended hitbox instead of three normal hitboxes attached to Yoshi's tail. While this does give the move more consistent vertical range, this also reduces its horizontal range, especially for the first hit.}} | |||
*[[Up aerial]]: | |||
**{{nerf|Up aerial deal less damage (13% → 12%), hindering its KO potential as its knockback was not compensated.}} | |||
**{{nerf|The upper hitbox is now attached to Yoshi's lower tail, rather than his upper tail, with its position altered (x offset: 0 → 6). This overall gives up aerial less vertical range on its second active frame.}} | |||
**{{nerf|Up aerial can no longer be performed twice in a short hop due to Yoshi's lower short hop/higher gravity.}} | |||
*[[Down aerial]]: | |||
**{{buff|Down aerial now has a landing hitbox, which deals 1% and low horizontal set knockback. This makes down aerial safer on hit at lower percents, as well as making it safer on shield.}} | |||
***{{nerf|However, this also hinders its safety on hit at higher percents, especially for hits 8-12.}} | |||
**{{buff|The weakening of SDI makes down aerial more difficult to escape from despite its higher SDI multiplier on its first twelve hits (1.4x → 1.5x).}} | |||
**{{buff|The universal increase to shield damage significantly improves down aerial's shield pressuring potential.}} | |||
**{{nerf|Down aerial has more ending lag (FAF 53 → 57) and a longer animation (59 frames → 65).}} | |||
**{{nerf|Hit 7 deals less damage (3%/2% → 2.2%/1.5%).}} | |||
**{{buff|Hits 8-12 deals more damage (2%/1% → 2.2%/1.5%).}} | |||
**{{nerf|The final hit deals less damage (2%/1% → 1%).}} | |||
***{{change|Altogether, these changes slightly decrease down aerial's maximum damage potential (33% → 32.2%) but increase its minimum damage potential if all hits connect (20% → 22%).}} | |||
**{{buff|Hit 7 has higher knockback scaling (80 → 100), making it stronger despite its lower damage.}} | |||
**{{buff|The final hit deals more knockback (5 (base), 100 (scaling) → 60/200), granting it KO potential at very high percents depending on Yoshi's stage position.}} | |||
**{{buff|The final hit has larger hitboxes (6u/4.5u/4.5u → 7u/5u/5u).}} | |||
**{{buff|The final hit has a lower SDI multiplier (1.4x → 1x).}} | |||
**{{change|The final hit launches opponents at different angles (270°/260°/280° → 80°/40°).}} | |||
***{{buff|When combined with its higher knockback, this grants the final hit combo potential at lower percents if the middle hitbox connects.}} | |||
***{{nerf|However, this also hinders its edgeguarding potential.}} | |||
**{{nerf|The final hit has more startup lag (frame 40 → 41).}} | |||
===Throws/other attacks=== | ===Throws/other attacks=== | ||
*{{ | *[[Grab]]s: | ||
*{{nerf| | **{{buff|Standing grab has less startup (frame 17 → 14) and ending lag (FAF 63 → 56), no longer being one of the slowest.}} | ||
*{{ | **{{buff|The grounded tongue grabbox has been moved further away from Yoshi (x offset: 0 → 1.2), giving standing grab slightly more range against grounded opponents.}} | ||
*{{nerf| | ***{{nerf|However, this also gives pivot grab less range against grounded opponents.}} | ||
*{{buff|Front and back floor attacks deal 1% more damage (6% → 7%).}} | **{{buff|Dash grab has received a mouth grabbox (much like his other grabs) during its first two active frames, preventing the grab from whiffing against nearby characters.}} | ||
**{{buff|Pivot grab has a larger mouth grabbox (5u → 5.5u).}} | |||
**{{nerf|Dash and pivot grab have a shorter duration (frames 11-22 (dash)/10-20 (pivot) → 11-21/10-19).}} | |||
**{{nerf|Dash and especially pivot grab have more ending lag (FAF 63 (dash)/36 (pivot) → 68/65), making pivot grab in particular drastically more punishable.}} | |||
**{{nerf|All grabs have smaller tongue grabboxes (4u/3.2u → 3.5u/2.8u (standing/pivot)/3.3u/2.2u (dash)).}} | |||
**{{nerf|The aerial tongue grabbox has been moved closer to Yoshi (x/z offsets: 0/1 → -2/0), giving standing and dash grab less range against aerial opponents.}} | |||
***{{buff|However, this also gives pivot grab more range against aerial opponents.}} | |||
**{{nerf|Standing grab has a smaller mouth grabbox (7u → 5.5u) which has been moved further away from Yoshi (z offset: 5 → 7.5), making it less effective at grabbing opponents inside of Yoshi.}} | |||
**{{bugfix|The opponent can no longer escape from Yoshi's tongue during his grab and before they enter his mouth, preventing a [[game crash]] which could previously happen.}} | |||
*[[Pummel]]: | |||
**{{change|Pummel now launches bystanders horizontally (80° → 361°).}} | |||
**{{nerf|Yoshi can no longer force his opponent into an aerial [[grab release]] while pummeling them. When combined with the removal of chain grabbing and the universal decrease to aerial grab release's ending lag, this completely removes his grab release's followup potential outside of very rare and specific situations.}} | |||
*[[Forward throw]]: | |||
**{{change|Yoshi releases opponents from forward throw earlier (frame 20 → 15). This makes it harder to DI at higher percents but this also gives it more ending lag, as its total duration was unchanged.}} | |||
***{{nerf|When combined with the removal of [[chain grab]]bing, this hinders forward throw's damage racking potential at lower percents, especially against light fast fallers.}} | |||
*[[Down throw]]: | |||
**{{buff|The changes to hitstun canceling and DI improves down throw's followup potential although the throw is still too laggy to possess true followups in most cases.}} | |||
*[[Floor attack]]s: | |||
**{{buff|Front and back floor attacks deal 1% more damage (6% → 7%).}} | |||
===Special moves=== | ===Special moves=== | ||
*{{buff|[[Egg Roll]] no longer renders Yoshi [[helpless]], improving its safety. | *[[Egg Lay]]: | ||
*{{nerf| | **{{buff|Egg Lay's aerial grabbox has been moved slightly further away from Yoshi (z offset: -1 → x offset: -0.9).}} | ||
*{{buff|Egg Throw | **{{buff|The grounded grabbox is larger (2.5u → 3.5u) and it has been moved further away from Yoshi (z offset: -3.5 → x offset: -2).}} | ||
*{{ | **{{buff|Opponents take more damage while inside an Egg (0.5x → 0.66x).}} | ||
*{{change|Yoshi no longer vocalizes when using Yoshi Bomb.}} | **{{change|After releasing an opponent in the air, Yoshi will now gain a small vertical boost.}} | ||
*{{nerf|[[Super Dragon]] deals 5% less damage | **{{change|Egg Lay can no longer be used to [[double jump cancel]]. This improves its ability to catch opponents high up but hinders its movement and mixup potential.}} | ||
**{{change|It has an altered animation, having Yoshi briefly close his eyes as he swallows the opponent.}} | |||
**{{nerf|Egg Lay has more startup lag (frame 17 → 21) with its total duration equally increased (FAF 40 → 44).}} | |||
**{{nerf|Egg Lay has a shorter duration (frames 17-18 (clean)/19-21 (late) → 21/22-24).}} | |||
**{{nerf|The mouth grabbox is slightly smaller (6u → 5.9u) and it has been moved much further away from Yoshi, significantly reducing Egg Lay's range inside of Yoshi.}} | |||
**{{nerf|Egg Lay no longer has a hitbox against boss enemies.}} | |||
*[[Egg Roll]]: | |||
**{{buff|Egg Roll no longer renders Yoshi [[helpless]], improving its safety when used in the air.}} | |||
**{{buff|Yoshi can now jump while using Egg Roll, improving its approach potential.}} | |||
**{{buff|Egg Roll's base speed is higher (0.08 → 0.1).}} | |||
**{{nerf|Yoshi has to use Egg Roll for longer before he can cancel it (30 frames → 35).}} | |||
**{{nerf|Egg Roll's maximum damage is lower (12% → 9%).}} | |||
**{{nerf|Egg Roll has smaller hitboxes (3.36u/5.76u → 2.3u/3.5u).}} | |||
***{{nerf|Additionally, the larger hitbox can no longer hit aerial opponents with the move now having deceptively small hitboxes, especially against aerial opponents.}} | |||
**{{nerf|The changes to hitstun canceling and DI have effectively removed Egg Roll's already situational and risky [[momentum canceling]] ability.}} | |||
*[[Egg Throw]]: | |||
**{{buff|Egg Throw's Eggs have less startup lag with a longer duration (frames 19-59 → 15-59).}} | |||
***{{nerf|However, its total duration was unchanged, giving it more ending lag.}} | |||
**{{buff|The Eggs have increased knockback scaling (40 → 55).}} | |||
**{{buff|Egg Throw grants Yoshi more height during his first aerial Egg Throw (1.8 → 1.9).}} | |||
**{{buff|Yoshi retains his horizontal momentum for a longer period of time after using Egg Throw, improving its horizontal recovery potential.}} | |||
**{{buff|The changes to hitstun canceling and DI improves the Egg's combo potential at high percents.}} | |||
**{{change|The Egg's have increased gravity (0.07 → 0.088).}} | |||
**{{change|Egg Throw's visual effects have changed. The Yoshi Egg now emits a rainbow-colored trail during its flight trajectory, making the move resemble Yoshi's "Rainbow Ball" Star Pitch and his "Rainbow Swing" Star Swing from ''{{s|mariowiki|Mario Super Sluggers}}''.}} | |||
**{{nerf|Egg Throw's explosion deals less damage (8% → 5%), although its knockback was compensated (40 (base), 40 (scaling) → 60/50).}} | |||
**{{nerf|The Eggs have smaller hitboxes, especially the explosion (3.8u (egg)/12u (explosion) → 2.5u/6.5u).}} | |||
**{{nerf|The Eggs and the explosion no longer deal extra shield damage (5/5 → 0/0).}} | |||
**{{nerf|Eggs travel less distance when the B button is held, hindering its spacing potential.}} | |||
**{{nerf|Yoshi can no longer slide off ledges when using Egg Throw, hindering its use as a movement tool.}} | |||
**{{nerf|Consecutive uses of aerial Egg Throw grant Yoshi less height (0.84 → 0.5) and Yoshi cannot use it as many times before gaining no height (5 times → 3).}} | |||
**{{nerf|The removal of ledge intangibility for consecutive ledge grabs combined with the reduced distance of held Egg Throws and the reduced height of consecutive Egg Throws has significantly hindered Egg Throw's camping potential.}} | |||
*[[Yoshi Bomb]]: | |||
**{{buff|Grounded Yoshi Bomb's fall has higher knockback scaling (70 → 72), slightly improving its KO potential.}} | |||
**{{buff|The aerial version deals more kncokback (55 (base), 70 (scaling) → 70/68), improving its KO potential.}} | |||
**{{buff|The changes to hitstun canceling and DI improves the grounded version's first hit's ability to lead into the second hit, with lighter characters no longer being capable of air dodging to avoid the second hit.}} | |||
***{{nerf|However, heavier characters are now capable of DIing the first hit if Yoshi is at higher percents due to the introduction of [[rage]].}} | |||
**{{buff|The universal increase to shield damage significantly improve Yoshi Bomb's shield pressuring potential, with the grounded version now being able to lead into a guaranteed shield break if the opponent shields the whole attack.}} | |||
**{{change|Yoshi no longer vocalizes when using Yoshi Bomb.}} | |||
**{{change|The falling hitbox is positioned lower (y offset: 10 → 7). This gives it more range below Yoshi but less range above him.}} | |||
**{{nerf|The falling hitbox is smaller (7u (grounded)/6.8u (aerial) → 6.8u/6.4u).}} | |||
**{{change|The stars now jump upwards at an arc rather than travelling horizontally.}} | |||
**{{nerf|The stars have more startup lag with a shorter duration (frames 1-17 → 3-13).}} | |||
**{{nerf|The stars travel slower (0.8 → 0.6).}} | |||
*[[Super Dragon]]: | |||
**{{buff|Super Dragon's Fireball can now pierce multiple opponents.}} | |||
**{{nerf|Super Dragon deals 5% less damage on contact (8% → 3%) and its {{s|mariowiki|Fire Breath}} no longer deals consistent damage (6% → 6% (near)/4% (mid)/3% (far)). It also has a shorter duration.}} | |||
**{{change|Super Dragon's {{s|mariowiki|Fireball}} no longer deals consistent damage (17% → 18% (near)/14% (mid)/12% (far)).}} | |||
==Update history== | ==Update history== | ||
Unlike the majority of the cast, Yoshi's most notable changes from game updates have been fixes to [[glitch]]es associated with him. Although game updates also granted him buffs and nerfs, the majority of them did so ambivalently. Update [[1.0.4]] granted Yoshi partial [[intangibility]] in certain situations, yet increased the lag of his dash attack, down aerial and [[Egg Lay]]. Updates [[1.0.6]] and [[1.1.0]] followed similar formats, as they each granted a single buff and a single nerf to his forward smash and back aerial, respectively. | |||
The changes to shield mechanics brought about by updates 1.1.0 and [[1.1.1]] also indirectly buffed and nerfed Yoshi: they enable his down aerial and Yoshi Bomb to wear down shields much better than before, yet hinder his out of shield options because of his very low traction. Lastly, update [[1.1.4]] shortened the duration of his [[invincibility]] he receives after [[tripping]] or during any trip follow-ups aside from his floor attack. | |||
'''{{GameIcon|ssb4-3ds}} [[1.0.4]]''' | '''{{GameIcon|ssb4-3ds}} [[1.0.4]]''' | ||
{{UpdateList/1.0.4|char=Yoshi}} | |||
'''{{GameIcon|ssb4}} [[1.0.6]]''' | '''{{GameIcon|ssb4}} [[1.0.6]]''' | ||
*{{buff|Upward angled forward tilt's start-up lag decreased|frame 6|5. This matches its other angles' start-up lag.}} | |||
*{{buff|Part of forward smash has been made irreversible.}} | *{{buff|Part of forward smash has been made irreversible.}} | ||
*{{nerf|Forward smash's body hitbox's size decreased|3.1u|2.9u | *{{nerf|Forward smash's body hitbox's size decreased|3.1u|2.9u.}} | ||
*{{buff|Edge attack's ending lag decreased.}} | *{{buff|Edge attack's ending lag decreased.}} | ||
'''{{GameIcon|ssb4}} [[1.1.0]]''' | '''{{GameIcon|ssb4}} [[1.1.0]]''' | ||
*{{buff|Back aerial's | *{{buff|Back aerial's first two hits' angles altered|365° (grounded/aerial opponents)|[[Sakurai angle|361°]] (grounded opponents)/[[Autolink angle|366°]] (aerial opponents) and its SDI multiplier decreased: 1× → 0.5×. These changes make its hits connect together better.}} | ||
*{{nerf|Back aerial | *{{nerf|Back aerial has a shorter initial auto-cancel window|frames 1-10|1-5.}} | ||
*{{bugfix|Fixed a glitch that allowed Yoshi to grab an edge as long as he used Yoshi Bomb while being very close to it and the control stick was tilted upward or toward the stage.}} | *{{bugfix|Fixed a glitch that allowed Yoshi to grab an edge as long as he used Yoshi Bomb while being very close to it and the [[Control stick|control stick/circle pad]] was tilted upward or toward the stage.}} | ||
'''{{GameIcon|ssb4}} [[1.1.1]]''' | '''{{GameIcon|ssb4}} [[1.1.1]]''' | ||
*{{buff|Edge attack deals more [[shield damage]]|0|1.}} | |||
*{{buff|High Jump's ending lag decreased.}} | *{{buff|High Jump's ending lag decreased.}} | ||
'''{{GameIcon|ssb4}} [[1.1.4]]''' | '''{{GameIcon|ssb4}} [[1.1.4]]''' | ||
| Line 119: | Line 350: | ||
==Moveset== | ==Moveset== | ||
*Yoshi can [[Crawling|crawl]]. | *Yoshi can [[Crawling|crawl]]. | ||
''For a gallery of Yoshi's hitboxes, see [[/Hitboxes|here]].'' | |||
{{MovesetTable | {{MovesetTable | ||
|game=SSB4 | |game=SSB4 | ||
| Line 125: | Line 357: | ||
|neutral1dmg=3% | |neutral1dmg=3% | ||
|neutral2dmg=4% | |neutral2dmg=4% | ||
|neutraldesc=A front kick followed by a roundhouse kick. | |neutraldesc=A front kick followed by a roundhouse kick. Its first hit can be [[jab cancel]]ed reliably into his tilt attacks; down smash; and [[Yoshi Bomb]] at low percentages, and into his forward and up smashes at low to high percentages, the latter of which KO reliably. Conversely, its second hit can act as a set-up into a dash attack or a dash grab at low percentages. | ||
|ftiltangles=3 | |ftiltangles=3 | ||
|ftiltname= | |ftiltname= | ||
| Line 131: | Line 363: | ||
|ftiltsidedmg=7% | |ftiltsidedmg=7% | ||
|ftiltdowndmg=8% | |ftiltdowndmg=8% | ||
|ftiltdesc=Spins around to swing his tail. It | |ftiltdesc=Spins around to swing his tail. Due to it hitting on frame 5, it has the lowest amount of start-up out of Yoshi's tilt attacks, which makes it useful via [[pivoting]]. It can also be angled, and deals slightly more damage when angled upward or downward. The base of Yoshi's tail launches opponents vertically, whereas the tip launches them diagonally. However, it has very short range and the highest amount of ending lag out of his tilts, which make it virtually unusable for set-ups. | ||
|utiltname= | |utiltname= | ||
|utiltdmg=7% | |utiltdmg=7% | ||
|utiltdesc=Crouches | |utiltdesc=Crouches and flicks his tail upward. A good combo starter, it can combo into itself and up smash from 0% to low percentages, and a neutral aerial and up aerial at low to medium percentages. | ||
|dtiltname= | |dtiltname= | ||
|dtiltdmg=5% (base), 4.5% (mid), 4% (tip) | |dtiltdmg=5% (base), 4.5% (mid), 4% (tip) | ||
|dtiltdesc= | |dtiltdesc=Lays in a prone position and spins around to swing his tail forward, similarly to {{SSB4|Pikachu}}'s down tilt. It is a [[semi-spike]] and has the lowest amount of ending lag out of his tilts, which make it useful for [[tech-chasing]]. It can also interrupt an opponent's attempt at grabbing an edge. However, it is Yoshi's least damaging tilt attack. | ||
|dashname= | |dashname= | ||
|dashdmg=9% (clean), 6% (late) | |dashdmg=9% (clean), 6% (late) | ||
|dashdesc=A side kick. | |dashdesc=A side kick. Its long range and duration allow for easy [[cross-up]]s, and make it capable of punishing [[roll]]s or [[tech]]s. However, its 37 frames of ending lag make it punishable if it is not spaced properly. | ||
|fsmashname= | |fsmashname= | ||
|fsmashdmg={{ChargedSmashDmgSSB4|13}} (tip), {{ChargedSmashDmgSSB4|15.5}} ( | |fsmashdmg={{ChargedSmashDmgSSB4|13}} (head's tip), {{ChargedSmashDmgSSB4|15.5}} (head), {{ChargedSmashDmgSSB4|14}} (body) | ||
|fsmashdesc= | |fsmashdesc=Rears back his head and then performs a headbutt. It has a sweetspot on Yoshi's head that is strong enough to KO middleweights at 94%/85% (''3DS''/''Wii U'') while near the edge of {{SSB4|Final Destination}}. Although its other hitboxes deal slightly less damage, they are still strong enough to KO reliably: its head's tip hitbox KOs middleweights at 116%/105% (''3DS''/''Wii U''), whereas its body hitbox KOs them at 107%/97% (''3DS''/''Wii U''). It can also be angled and renders his head [[Intangibility|intangible]]. Despite being a headbutt, it also has a hitbox around Yoshi's body. However, its 38 frames of ending lag make it punishable, and its hitboxes only last for 1 frame. | ||
|usmashname= | |usmashname= | ||
|usmashdmg={{ChargedSmashDmgSSB4|14}} (clean), {{ChargedSmashDmgSSB4|12}} (late) | |usmashdmg={{ChargedSmashDmgSSB4|14}} (clean), {{ChargedSmashDmgSSB4|12}} (late) | ||
|usmashdesc=A | |usmashdesc=A bicycle kick, similar to {{SSB4|Fox}}'s up smash. Its clean hitbox renders Yoshi's legs intangible and is strong enough to KO middleweights at 120%/112% (''3DS''/''Wii U'') from anywhere on Final Destination. Although its late hitbox deals slightly less damage, it is still strong enough to KO middleweights at 127%/119% (''3DS''/''Wii U''). Despite its appearance, it can hit opponents behind Yoshi, such as immediately after using [[Egg Lay]] at low percentages. However, its 30 frames of ending lag make it punishable, and its late hitbox lacks intangibility. Since Yoshi is slightly above the ground for a short time during the move, it can actually dodge some attacks. | ||
|dsmashname= | |dsmashname= | ||
|dsmashdmg={{ChargedSmashDmgSSB4|12}} (tail), {{ChargedSmashDmgSSB4|10}} (body) | |dsmashdmg={{ChargedSmashDmgSSB4|12}} (tail), {{ChargedSmashDmgSSB4|10}} (body) | ||
|dsmashdesc=Quickly swings his tail forward and then backward. It is a semi-spike like his down tilt, but | |dsmashdesc=Quickly swings his tail forward at a low angle, and then backward at a low angle. It hits on frame 7, which is fast for a smash attack. In addition to being useful for punishing rolls, it is a semi-spike like his down tilt. Its back hit has higher knockback growth than its front hit, but it is overall Yoshi's weakest smash attack. While near the edge of Final Destination, its tail hitbox's front hit KOs middleweights at 150%/135% (''3DS''/''Wii U''). In comparison, its tail hitbox's back hit KOs them at 132%/119% (''3DS''/''Wii U''). | ||
|nairname= | |nairname= | ||
|nairdmg=10% (clean), 7% (mid), 5% (late) | |nairdmg=10% (clean), 7% (mid), 5% (late) | ||
|nairdesc=A flying kick. It is a | |nairdesc=A flying kick. It is a [[sex kick]] and hits on frame 3, which is the lowest amount of start-up lag out of Yoshi's aerials. It also has high knockback growth and the lowest amount of landing lag out of Yoshi's aerials. Altogether, these traits make it very useful from out of shield and for approaching, edge-guarding, or breaking out of combos and juggles. While near the left/right [[blast line]] of Final Destination, its clean hitbox KOs middleweights at 118%/104% (''3DS''/''Wii U''). | ||
|fairname= | |fairname=Noggin Dunk ({{ja|かいてんずつき|Kaiten Zutsuki}}, ''Rotating Headbutt'') | ||
|fairdmg=15% ( | |fairdmg=15% (head), 14% (nose) | ||
|fairdesc=Rears his head | |fairdesc=Rears back his head and then performs a downward headbutt. Its nose hitbox deals impressive damage and has a sweetspot that is a [[meteor smash]]. However, its head hitbox also deals impressive damage and has high knockback growth, which enable it to KO middleweights at 108%/97% (''3DS''/''Wii U'') while near the left/right blast zones of Final Destination. It is also capable of auto-canceling with a short hop, which allows it to function either as an approach option, or as a way to hinder approaches. Due to it hitting on frame 16, however, it is tied with down aerial for the highest amount of start-up lag out of Yoshi's aerials. | ||
|bairname= | |bairname= | ||
|bairdmg=2.5% (hits 1-2), 5% (hit 3) | |bairdmg=2.5% (hits 1-2), 5% (hit 3) | ||
|bairdesc=Rapidly flicks his tail up and down repeatedly. Its first two hits launch at the [[ | |bairdesc=Rapidly flicks his tail up and down repeatedly. Its first two hits launch at the [[Autolink angle|auto-link angle]], which can enable it to drag opponents down to the stage for a set-up. In comparison, its third hit has extremely high knockback growth, which makes useful for edge-guarding. While near the left/right blast line of Final Destination, its last hit KOs middleweights at 104%/100% (''3DS''/''Wii U''). However, it has the second highest amount of landing lag out of Yoshi's aerials. | ||
|uairname= | |uairname= | ||
|uairdmg=12% | |uairdmg=12% | ||
|uairdesc=Somersaults to flick his tail upward. | |uairdesc=Somersaults to flick his tail upward. Due to it hitting on frame 5 and having a respectable damage output, very high knockback growth, and a disjointed hitbox, it is one of Yoshi's most useful moves. It can combo into itself or juggle at low to medium percentages, and KOs middleweights at 112%/98% (''3DS''/Wii U'') while near the upper blast line of Final Destination. | ||
|dairname= | |dairname=Flutter Kick ({{ja|ばたあしキック|Bata Ashi Kikku}}) | ||
|dairdmg=3% (hits 1-6 | |dairdmg=3% (center hits 1-6), 2% (side hits 1-6), 2.2% (center hits 7-13), 1.5% (side hits 7-13), 1% (hit 14), 1% (landing) | ||
|dairdesc=A {{s|mariowiki|Flutter Jump}}-style series of kicks. | |dairdesc=A {{s|mariowiki|Flutter Jump}}-style series of kicks. Its multiple hits make it very useful for damage racking and pressuring shields, whereas its last hit has deceptive horizontal range. It is still as powerful as ever, being potentially the most damaging aerial in the game. Due to it hitting on frame 16, however, it is tied with forward aerial for the highest amount of start-up lag of Yoshi's aerials. It also has the highest amount of ending and landing lag out of his aerials, which make it punishable if used unwisely. | ||
|grabname= | |grabname= | ||
|grabdesc=Uses his tongue to grab an opponent and pull them into his mouth | |grabdesc=Uses his tongue to grab an opponent and pull them into his mouth. Despite its appearance, Yoshi's tongue is not a [[tether recovery|tether]]. Instead, its range and lag are between those of tether grabs and normal grabs. As a result, Yoshi's grabs have fairly long ranges, but punishable amounts of start-up and ending lag. | ||
|pummelname= | |pummelname= | ||
|pummeldmg=2% | |pummeldmg=2% | ||
|pummeldesc=Chews | |pummeldesc=Chews the opponent. A fairly fast pummel. | ||
|fthrowname= | |fthrowname= | ||
|fthrowdmg=7% | |fthrowdmg=7% | ||
|fthrowdesc=Spits the opponent forward. It has very minimal | |fthrowdesc=Spits the opponent forward. It has very minimal combo potential, as its only follow-ups are forward aerial or [[Egg Throw]] when throwing the opponent off-stage. However, both of these are largely situational. | ||
|bthrowname= | |bthrowname= | ||
|bthrowdmg=7% | |bthrowdmg=7% | ||
| Line 181: | Line 413: | ||
|dthrowname= | |dthrowname= | ||
|dthrowdmg=4% | |dthrowdmg=4% | ||
|dthrowdesc=Spits the opponent | |dthrowdesc=Spits the opponent onto the ground. Although it has very high base knockback and very low knockback growth like {{SSB4|R.O.B.}}'s down throw, it has extremely minimal combo potential in comparison because of its very slow speed. Its only follow-up is up aerial, although it requires a proper read. | ||
|floorfname= | |floorfname= | ||
|floorfdmg=7% | |floorfdmg=7% | ||
|floorfdesc=Spins around and swings his tail around himself. | |floorfdesc=Spins around and swings his tail around himself before getting up. | ||
|floorbname= | |floorbname= | ||
|floorbdmg=7% | |floorbdmg=7% | ||
|floorbdesc= | |floorbdesc=Headbutts behind himself and then in front of himself before getting up. | ||
|floortname= | |floortname= | ||
|floortdmg=5% | |floortdmg=5% | ||
|floortdesc=Spins around and swings his tail around himself. | |floortdesc=Spins around and swings his tail around himself before getting up. | ||
|edgename= | |edgename= | ||
|edgedmg=7% | |edgedmg=7% | ||
| Line 196: | Line 428: | ||
|nsdefname=Egg Lay | |nsdefname=Egg Lay | ||
|nsdefdmg=7% | |nsdefdmg=7% | ||
|nsdefdesc=Swallows the opponent and encases them | |nsdefdesc=Swallows the opponent and encases them in a {{s|mariowiki|Yoshi Egg}}. While trapped, the opponent receives roughly 2/3 the normal damage and can they use [[button mashing]] in order to break free, but they are completely immobile and vulnerable to Yoshi's attacks while trapped. They also stay trapped longer the more damaged they are, though the difference is small. | ||
|nsc1name=Lick | |nsc1name=Lick | ||
|nsc1dmg=10% | |nsc1dmg=10% | ||
|nsc1desc=Pokes the opponent with his tongue, | |nsc1desc=Pokes the opponent with his tongue. Deals more damage and, unlike Egg Lay or Egg Launch, it has high knockback growth and is a semi-spike. Altogether, these traits make it a viable KOing option, as it KOs middleweights at 126% while near the edge of Final Destination in the ''3DS'' version. It also slightly boosts Yoshi forward, similarly to [[Jumping Inhale]]. This quirk allows it to function as a punishment option when spaced properly, and even as a horizontal recovery option. It is comparable to how Egg Lay functioned in [[Adventure Mode: The Subspace Emissary|The Subspace Emissary]]. | ||
|nsc2name=Egg Launch | |nsc2name=Egg Launch | ||
|nsc2dmg=10% | |nsc2dmg=10% | ||
|nsc2desc=Deals more damage and the | |nsc2desc=Deals more damage, has slightly less start-up lag, and the Yoshi Egg laid is launched much farther away from Yoshi, which makes it capable of spacing. However, the Yoshi Egg is even easier to break out of, barely gaining increased duration from higher percentages. | ||
|ssdefname=Egg Roll | |ssdefname=Egg Roll | ||
|ssdefdmg=4% | |ssdefdmg=4%-9% | ||
|ssdefdesc= | |ssdefdesc=Encases himself inside a Yoshi Egg in order to roll around. Yoshi can barrel through opponents, which deals a maximum of 9% with sufficient momentum, or quickly retreat. Unlike in previous installments, it no longer renders Yoshi [[helpless]] and allows him to jump once while rolling, the latter of which grants it [[mindgame]] potential. | ||
|ssc1name=Heavy Egg Roll | |ssc1name=Heavy Egg Roll | ||
|ssc1dmg=4% | |ssc1dmg=4%-15% | ||
|ssc1desc=The roll is significantly | |ssc1desc=The roll is significantly stronger, to the point that it deals a maximum of 15% in one roll with sufficient momentum. It also grants [[armor]], but is significantly slower. | ||
|ssc2name=Light Egg Roll | |ssc2name=Light Egg Roll | ||
|ssc2dmg=4% | |ssc2dmg=10%-12% (ram), 4% (melee hit 1), 1% (melee hit 2) | ||
|ssc2desc=The roll is considerably stronger | |ssc2desc=Unlike the other two variants, this Egg Roll makes Yoshi bounce in place once, propelling himself forward a sizable set distance, and then immediately leaving the egg after the second bounce. The roll is considerably faster and stronger, dealing higher consistent damage. The egg will bounce higher if the move is initiated in mid air. After launching forward, the egg will bounce again in that direction, unless the control stick is tilted in either horizontal direction, in which case it’ll bounce straight up. The egg will not bounce forward if it strikes something during the initial bounce, also dealing considerably less damage. Striking a wall or initiating the move higher in the air will end the move earlier. | ||
|usdefname=Egg Throw | |usdefname=Egg Throw | ||
|usdefdmg=1% (contact), 5% (explosion) | |usdefdmg=1% (contact), 5% (explosion) | ||
|usdefdesc=Throws | |usdefdesc=[[mariowiki:Egg Throw|Throws a Yoshi Egg]] on a controllable, parabolic arc. When used in midair, it grants Yoshi a small vertical and horizontal boost, which loses effectiveness with each consecutive use (4th egg does nothing) until he touches the ground. A very versatile projectile, it can be used for pressuring, edge-guarding, approaching, hindering approaches, and performing mindgames. The egg can be angled in a roughly 90° radius; tilting the control stick in the opposite direction will cause Yoshi to launch the egg straight up. | ||
|usc1name=High Jump | |usc1name=High Jump | ||
|usc1dmg=— | |usc1dmg=— | ||
|usc1desc= | |usc1desc=Grants a considerably higher vertical boost, but Yoshi does not throw a Yoshi Egg. Like Egg Throw, it can grant momentum up to three times until landing. | ||
|usc2name=Timed Egg Throw | |usc2name=Timed Egg Throw | ||
|usc2dmg=9% | |usc2dmg=9% | ||
|usc2desc= | |usc2desc=The Yoshi Egg is larger and its explosion deals more damage. However, it travels harmlessly through opponents instead of exploding on contact. It also has slightly more start-up, while the aerial version grants a shorter vertical boost. | ||
|dsdefname=Yoshi Bomb | |dsdefname=Yoshi Bomb | ||
|dsdefdmg=4% (hop), 15% (grounded | |dsdefdmg=4% (hop), 15% (grounded Ground Pound), 12% (aerial Ground Pound), 4% (stars) | ||
|dsdefdesc=A {{s|mariowiki|Ground Pound}} | |dsdefdesc=A {{s|mariowiki|Ground Pound}} that produces damaging stars in front and behind himself when he lands. It boasts impressive power and has very minimal start-up lag, which allow it to function as a viable surprise KOing option, especially from [[out of shield]]. The grounded version's Ground Pound KOs middleweights at 119%/113% (''3DS''/''Wii U'') from anywhere on Final Destination. Both versions also deal bonus amounts of [[shield damage]], with the grounded version being capable of almost breaking a full shield when each of its hitboxes connect. However, the aerial version's slightly lower damage output and knockback growth result in it being less effective at KOing in comparison. The aerial version KOs middleweights at 156%/145% (''3DS''/Wii U'') from anywhere on Final Destination. | ||
|dsc1name=Star Bomb | |dsc1name=Star Bomb | ||
|dsc1dmg=3% (hop), 4% ( | |dsc1dmg=3% (hop), 4% (Ground Pound), 8%/6%/4% (stars) | ||
|dsc1desc=The Ground Pound deals less damage and knockback, | |dsc1desc=The Ground Pound produces much larger stars that deal more damage. However, the Ground Pound itself deals much less damage and has much lower knockback, to the point that it has virtually no KO potential. | ||
|dsc2name=Crushing Bomb | |dsc2name=Crushing Bomb | ||
|dsc2dmg=5% (hop), 18% ( | |dsc2dmg=5% (hop), 18% (Ground Pound) | ||
|dsc2desc=The Ground Pound deals more damage and knockback, | |dsc2desc=The Ground Pound deals more damage and has much higher knockback, to the point that even its aerial version KOs reliably. The grounded version's Ground Pound KOs middleweights at 78% from anywhere on Final Destination in the ''3DS'' version. In comparison, the aerial version KOs them at 90% from anywhere on Final Destination in the ''3DS'' version. However, it has significantly more start-up and ending lag, and produces no stars. | ||
|fsname=Super Dragon | |fsname=Super Dragon | ||
|fsdmg=3% ( | |fsdmg=3% (idle/ram), 18% (near Fireball), 14% (mid Fireball), 12% (far Fireball), 6% (near Fire Breath), 4% (mid Fire Breath), 3% (far Fire Breath) | ||
|fsdesc=[[mariowiki:Winged Yoshi| | |fsdesc=[[mariowiki:Winged Yoshi|Grows a pair of angelic wings]] that allow him to freely fly around. While transformed, Yoshi can fire large {{s|mariowiki|Fireball}}s from his mouth when the attack or special attack buttons are pressed. The Fireballs deal respectable damage and have high knockback; the most damaging Fireball is strong enough to KO middleweights at 99% while near the edge of Final Destination in the ''3DS'' version. Conversely, not pressing any buttons will result in him briefly [[mariowiki:Fire Breath|exhaling a continuous stream of flames]]. Yoshi can also make use of his flight and invincibility to ram into opponents, although it is significantly weaker than his Fireball and Fire Breath. | ||
}} | |||
===Stats=== | |||
{{Attributes | |||
|cast = 58 | |||
|weight = 104 | |||
|rweight = 11-13 | |||
|dash = 1.33 | |||
|rdash = 48 | |||
|run = 1.86 | |||
|rrun = 14 | |||
|walk = 1.15 | |||
|rwalk = 24-27 | |||
|trac = 0.0426 | |||
|rtrac = 55 | |||
|airfric = 0.005 | |||
|rairfric = 52-54 | |||
|air = 1.28 | |||
|rair = 1 | |||
|baseaccel = 0.03 | |||
|rbaseaccel = 6-7 | |||
|addaccel = 0.068 | |||
|raddaccel = 29 | |||
|gravity = 0.08 | |||
|rgravity = 41-43 | |||
|fall = 1.29 | |||
|rfall = 51 | |||
|ff = 2.064 | |||
|rff = 51 | |||
|jumpsquat = 6 | |||
|rjumpsquat = 42-51 | |||
|jumpheight = 36.094189 | |||
|rjumpheight = 14 | |||
|shorthop = 17.434723 | |||
|rshorthop = 15 | |||
|djump = 51.56 | |||
|rdjump = 2 | |||
}} | }} | ||
===[[Announcer]] call=== | |||
{{audio|Needs announcer calls from other languages.}} | |||
<gallery> | |||
Yoshi English Announcer SSB4-SSBU.wav|English/Japanese/Chinese | |||
</gallery> | |||
===[[On-screen appearance]]=== | ===[[On-screen appearance]]=== | ||
{{Appearance | {{Appearance | ||
|desc=Bursts out of a | |desc=Bursts out of a Yoshi Egg and strikes a pose. | ||
|char=Yoshi | |char=Yoshi | ||
|game=SSB4}} | |game=SSB4}} | ||
| Line 244: | Line 519: | ||
{{Taunt/SSB4 | {{Taunt/SSB4 | ||
|char=Yoshi | |char=Yoshi | ||
|desc-up=Dances around in a circle and says "Yoshi!" upon finishing. | |desc-up=Dances around in a circle and then says "Yoshi!" upon finishing. | ||
|desc-side=Chases his tail, then briefly pauses to stare at it. | |desc-side=Chases his tail, then briefly pauses to stare at it. | ||
|desc-down=Looks towards the screen | |desc-down=Looks towards the screen, then jumps excitedly up and down while flailing his arms and saying "Yoshi! Yoshi!"}} | ||
===[[Idle pose]]s=== | ===[[Idle pose]]s=== | ||
| Line 268: | Line 543: | ||
|victory-theme=YoshiTheme.ogg | |victory-theme=YoshiTheme.ogg | ||
|victory-desc=A flourished remix of Yoshi's Story, the title screen theme of [[mariowiki:Yoshi's Story|the game of the same name]]. | |victory-desc=A flourished remix of Yoshi's Story, the title screen theme of [[mariowiki:Yoshi's Story|the game of the same name]]. | ||
|desc-1= | |desc-1=Angrily performs two alternating punches, then turns his back to the screen while looking to the right. | ||
|desc-2=Looks up at the sky with his hands together, spins once, and then strikes the {{s|wikipedia|V sign}}. | |desc-2=Looks up at the sky with his hands together, spins once, and then strikes the {{s|wikipedia|V sign}}. | ||
|desc-3= | |desc-3=Punches the air, then strikes a pose with his arms outstretched. It appears very similar to his "character chosen" animation in ''SSB''. | ||
|char=Yoshi}} | |char=Yoshi}} | ||
==In competitive play== | ==In [[competitive play]]== | ||
===[[Official Custom Moveset Project]]=== | ===[[Official Custom Moveset Project]]=== | ||
{{OfficialCustomMoves | {{OfficialCustomMoves | ||
| Line 288: | Line 563: | ||
|set10=3112 | |set10=3112 | ||
}} | }} | ||
=== | ===Most historically significant players=== | ||
<!-- | <!--This character has a ten player limit for this section. Before adding and/or removing a player, read these guidelines: https://www.ssbwiki.com/SmashWiki:Notability#%22Most_historically_significant_players%22_guidelines --> | ||
''See also: [[:Category:Yoshi players (SSB4)]]'' | |||
:: | |||
*{{Sm|DIO|Japan}} - One of the best Yoshi players in Japan. He became one of the first Yoshi players to garner results in 2015 at Karisuma and [[Sumabato]] events, most notably placing 5th at {{Trn|Sumabato 14}} and 7th at {{Trn|Sumabato 13}}. He eventually picked up {{SSB4|Ryu}}, but even after the switch in mains, he still used Yoshi at many tournaments to varying success such as 5th at {{Trn|Sumabato 26}}. | |||
*{{Sm|Raptor|USA}} - The best Yoshi player in the United States, in contention for best in the world during early meta. He headlined the character at Tri-state events with 9th at {{Trn|KTAR XIII}} and 13th at {{Trn|Apex 2016}} and also placed 9th at {{Trn|Super Smash Con 2015}} and 17th at {{Trn|Pound 2016}}, marking the best solo-Yoshi placements at a major/supermajor. His major results declined past 2017, but still retained a decent string of placements at regionals before the release of ''Ultimate''. | |||
*{{Sm|Ron|Japan}} - The best Yoshi player in Japan after DIO and the best Yoshi player of ''Smash 4''. While he tri-mained the character with {{SSB4|Mario}} and {{SSB4|Luigi}}, he still has performed notable feats with the character such as winning {{Trn|Sumabato 18}}, using Yoshi to beat {{Sm|Shuton}} and {{Sm|HIKARU}} in his bracket. He was the only player to be ranked globally with Yoshi, placing 57th on the [[PGR 100]] as one of his characters. | |||
*{{Sm|Seth|USA}} - The best solo-Yoshi player by the end of the game's lifespan. He became the highest placing solo-Yoshi at notable majors such as 17th at {{Trn|Smash 'N' Splash 3}}, 25th at {{Trn|Super Smash Con 2017}}, and 33rd at {{Trn|Frostbite 2018}}. He also consistently placed well at multiple [[Midwest Mayhem (tournament series)|Midwest Mayhem]] events, placing 9th at {{Trn|Midwest Mayhem 10}} as an example. | |||
*{{Sm|Snoop|USA}} - A Yoshi player from Las Vegas that notably made top 64 at supermajors on most occasions, including 33rd at {{Trn|GENESIS 5}} defeating {{Sm|6WX}} and 49th at {{Trn|EVO 2018}} defeating {{Sm|K9sbruce}}. In terms of local rankings, he consistently remained a top 5 player, often peaking at 3rd on multiple [[Las Vegas Power Rankings]]. | |||
===Tier placement and history=== | |||
Yoshi's perception has been positive since ''SSB4''{{'}}s release, as many considered him to be as one of the best characters in the game with Japan putting him at 2nd on their 3DS tier list. Players pointed out how his buffs made him an extremely threatening character with "a lot of potential". Despite this, his tournament representation and results was never as high as some of the other characters, with very sparse results from professionals, such as {{Sm|Papa Wall}} placing 13th at [[2GGT: Mexico Saga]]. As a result, Yoshi was ranked 15th on the first [[tier list]], which resulted in him becoming the second highest ranking mid-tier character after {{SSB4|Captain Falcon}} with some smashers still claiming that his spot is debatable. | |||
Although Yoshi has achieved more tournament success since then, his continually sparse results negatively affected his tier status in subsequent tier lists. On top of this, the additions of {{SSB4|Cloud}}, {{SSB4|Bayonetta}} and {{SSB4|Corrin}} hurt Yoshi as they proved to be very troublesome matchups. {{SSB4|Marth}} and {{SSB4|Lucina}} were also buffed durring patch 1.1.4 and they also proved to be difficult matchups for Yoshi. Yoshi's flaws such as his terrible grab game, poor range, being prone to edgeguarding, and lackluster landing capabilities became much more apparent. He would be ranked 23rd on the second tier list, but because of tier restructuring and Captain Falcon being reassessed as a high-tier character, Yoshi serendipitously became the highest ranking mid-tier character. | |||
By the time of the third tier list, Yoshi was ranked 29th, which was largely owed to the debut of both {{SSB4|Cloud}} and {{SSB4|Bayonetta}}, both of whom are widely agreed upon as being his most challenging matchups as well as his results continuing to be inconsistent and not as impressive as other mid- and high-tier characters. In addition to resulting in Yoshi losing his status as the highest ranking mid-tier character, this tier drop was tied with {{SSB4|Kirby}} and {{SSB4|Pit}}'s for the second largest between the second and third tier lists. As of the fourth and current tier list, Yoshi is ranked 33rd, with this tier drop owing to both his results and metagame stagnating with some smashers like {{Sm|ZeRo}} claiming that he should be even lower. Other smashers such as {{Sm|ESAM}} however think that he is slightly underrated and that he should be ranked fairly higher with {{Sm|ESAM}} putting him above some characters ranked above him such as {{SSB4|Link}}, {{SSB4|Ness}}, {{SSB4|Lucas}}, {{SSB4|Pit}} and {{SSB4|Dark Pit}}. | |||
{{Trophy games|console1=SNES|game1=Super Mario World | ==[[Trophies]]== | ||
{{Trophy/Fighter | |||
|name=Yoshi | |||
|image-3ds=YoshiTrophy3DS.png | |||
|image-wiiu=YoshiTrophyWiiU.png | |||
|mode=Classic | |||
|desc-ntsc=As dependable a partner as one could hope for, Yoshi often aids Mario in his adventures. Yoshi can swallow just about anything and make an egg of it instantly. He's got some serious airborne power, making launching opponents skyward and then following up with more attacks a wise choice. | |||
|desc-pal=They say man's best friend is a dog, but Mario's may well be Yoshi. He lives on Yoshi's Island, and can swallow up just about anything, then lay it as an egg. In this game, jumping is his forte – he can leap really high, then quickly land again, making chasing after launched opponents and getting in sneaky follow-up strikes easy. | |||
|gamelist-ntsc={{Trophy games|console1=SNES|game1=Super Mario World|release1=08/1991|console2=SNES|game2=Super Mario World 2: Yoshi's Island|release2=10/1995}} | |||
|gamelist-pal={{Trophy games|console1=SNES|game1=Super Mario World|release1=04/1992|console2=SNES|game2=Super Mario World 2: Yoshi's Island|release2=10/1995}} | |||
}} | |||
{{clrl}} | |||
{{Trophy/Fighter | |||
|name=Yoshi (Alt.) | |||
|image-3ds=YoshiAltTrophy3DS.png | |||
|image-wiiu=YoshiAltTrophyWiiU.png | |||
|mode=Alt | |||
|desc-3ds-ntsc=Yoshi's up special move Egg Throw is a projectile attack that travels farther the longer the button is held. Yoshi will also rise a bit if this move is used in midair. The side special Egg Roll turns Yoshi into a rolling, damaging egg. Yoshi won't roll off an edge if no directions are pressed. | |||
|desc-wiiu-ntsc=Yoshi's up-special move Egg Throw is a projectile attack that travels farther the longer the button is held. Yoshi will also rise a bit if this move is used in midair. The side special Egg Roll turns Yoshi into a rolling, damaging egg. Yoshi won't roll off an edge if no directions are pressed. | |||
|desc-pal=When you use the Egg Throw up special, how far Yoshi throws the egg depends on how long you hold the button. In mid-air, the move also makes him rise a bit. Egg Roll, a side special, sends him rolling inside an egg. If you don't control him while he's rolling, he'll stop just before he rolls off the edge of a platform. | |||
|gamelist-ntsc={{Trophy games|console1=SNES|game1=Super Mario World|release1=08/1991|console2=SNES|game2=Super Mario World 2: Yoshi's Island|release2=10/1995}} | |||
|gamelist-pal={{Trophy games|console1=SNES|game1=Super Mario World|release1=04/1992|console2=SNES|game2=Super Mario World 2: Yoshi's Island|release2=10/1995}} | |||
}} | |||
{{clrl}} | |||
{{Trophy/Fighter | |||
|name=Super Dragon | |||
|image=SuperDragonTrophyWiiU.png | |||
|desc-ntsc=Wings sprout from Yoshi's back, and he transforms into a super-cool dragon! While transformed, Yoshi is invincible and will constantly breathe fire. He can also ram into foes and shoot fireballs at them. The fireballs are great for launching foes and most powerful when used at close range. | |||
|desc-pal=A pair of wings appear on Yoshi's back, turning him into an angelic dragon. While the Final Smash is active, he can fly freely through the air, and is invincible to boot. He constantly breathes fire, can ram into opponents, and can also shoot fireballs that deal a lot of damage and have great launching power, especially at close range. | |||
|game=ssb4-wiiu | |||
}} | |||
{{clrl}} | |||
==In [[Event Match]]es== | ==In [[Event Match]]es== | ||
| Line 346: | Line 623: | ||
===Co-op Events=== | ===Co-op Events=== | ||
* '''[[Food Fight]]''': {{SSB4|Kirby}} and {{SSB4|King Dedede}} must defeat Yoshi, {{SSB4|Wario}}, and {{SSB4|Pac-Man}}. | * '''[[Food Fight]]''': {{SSB4|Kirby}} and {{SSB4|King Dedede}} must defeat Yoshi, {{SSB4|Wario}}, and {{SSB4|Pac-Man}}. | ||
* '''[[Robots vs. Dragons]]''': {{SSB4|R.O.B.}} and {{SSB4|Mega Man}} must defeat a giant Yoshi, a giant {{SSB4|Charizard}} and [[Ridley]] in a [[Stamina Mode|Stamina Battle]]. | * '''[[Robots vs. Dragons]]''': {{SSB4|R.O.B.}} and {{SSB4|Mega Man}} must defeat a giant Yoshi, a giant {{SSB4|Charizard}}, and [[Ridley]] in a [[Stamina Mode|Stamina Battle]]. | ||
* '''[[Scheming Sorcerer]]''': Yoshi and {{SSB4|Toon Link}} must defeat a male and a female {{SSB4|Robin}}, followed by a metal male Robin and a giant metal female Robin. | * '''[[Scheming Sorcerer]]''': Yoshi and {{SSB4|Toon Link}} must defeat a male and a female {{SSB4|Robin}}, followed by a metal male Robin and a giant metal female Robin. | ||
* '''[[The Ultimate Battle]]''': Two players select a character and must defeat the entire roster. | * '''[[The Ultimate Battle]]''': Two players select a character and must defeat the entire roster. | ||
==[[Alternate costume (SSB4)#Yoshi|Alternate costumes]]== | ==[[Alternate costume (SSB4)#Yoshi|Alternate costumes]]== | ||
{|style="margin:1em auto 1em auto;text-align:center" | {|style="margin:1em auto 1em auto;text-align:center" | ||
|- | |- | ||
| Line 374: | Line 649: | ||
SSB4 - Yoshi Screen-2.jpg|Using his forward tilt against {{SSB4|Zelda}}'s [[Phantom Slash]]. | SSB4 - Yoshi Screen-2.jpg|Using his forward tilt against {{SSB4|Zelda}}'s [[Phantom Slash]]. | ||
SSB4 - Yoshi Screen-3.jpg|Using [[Egg Throw]] on a [[Smash Ball]]. | SSB4 - Yoshi Screen-3.jpg|Using [[Egg Throw]] on a [[Smash Ball]]. | ||
SSB4 - Yoshi Screen-4.jpg|Using [[Egg Lay]]. | SSB4 - Yoshi Screen-4.jpg|Using [[Egg Lay]] alongside {{SSB4|Mega Man}} and {{SSB4|Little Mac}}. | ||
SSB4 - Yoshi Screen-5.jpg|One of Yoshi's | SSB4 - Yoshi Screen-5.jpg|One of Yoshi's [[idle pose]]s. | ||
SSB4 - Yoshi Screen-6.jpg|Using [[Yoshi Bomb]] alongside {{SSB4|Bowser}}'s [[Bowser Bomb]] and {{SSB4|Toon Link}}'s down aerial. | SSB4 - Yoshi Screen-6.jpg|Using [[Yoshi Bomb]] alongside {{SSB4|Bowser}}'s [[Bowser Bomb]] and {{SSB4|Toon Link}}'s down aerial. | ||
SSB4 - Yoshi Screen-7.jpg|Using Egg Lay. | SSB4 - Yoshi Screen-7.jpg|Using Egg Lay while behind {{SSB4|Olimar}}. | ||
Food U.jpg|Using his down taunt alongside {{SSB4|Kirby}}. | Food U.jpg|Using his down taunt alongside {{SSB4|Kirby}}. | ||
SSB4 - Yoshi Screen-8.jpg|Getting hit by {{SSB4|Diddy Kong}}'s [[Banana Peel (move)|Banana Peel]]. | SSB4 - Yoshi Screen-8.jpg|Getting hit by {{SSB4|Diddy Kong}}'s [[Banana Peel (move)|Banana Peel]]. | ||
SSB4 - Yoshi Screen-9.jpg|Alongside [[Rosalina (SSB4)|Luma]]. | SSB4 - Yoshi Screen-9.jpg|Alongside [[Rosalina & Luma (SSB4)|Luma]]. | ||
SSB4 - Yoshi Screen-10.jpg| | SSB4 - Yoshi Screen-10.jpg|[[Jump]]ing away from a shark alongside Pikachu and Diddy Kong. | ||
Yoshi_Cover.png|Yoshi on the cover of {{for3ds}}. | Yoshi_Cover.png|Yoshi on the cover of {{for3ds}}. | ||
</gallery> | </gallery> | ||
==Trivia== | ==Trivia== | ||
*Yoshi is the only member of [[List of Super Smash Bros. series characters#"Perfect-attendance crew"|"The Original 8"]] to not be revealed at E3 2013 and the last one to be revealed | *Yoshi is the only member of [[List of Super Smash Bros. series characters#"Perfect-attendance crew"|"The Original 8"]] to not be revealed at E3 2013, and is once again the last one to be revealed in general. | ||
* | *Yoshi, {{SSB4|Ness}}, and {{SSB4|Jigglypuff}} are also the only members of the "perfect-attendance crew" to be absent from non-DLC posters containing [[newcomer]]s. In Yoshi's case, the only poster he appears on is {{SSB4|Bayonetta}}'s. | ||
*Yoshi is the only non-DLC [[veteran]] that is not an alternate form or part of a set to have splash art and an introduction tagline accompany his reveal. | *Yoshi is the only non-DLC [[veteran]] that is not an alternate form or part of a set to have splash art and an introduction tagline accompany his reveal. | ||
* | *[[Yoshi Bomb]]'s voice clip is still available in [[Sound Test]], even though Yoshi no longer vocalizes upon using Yoshi Bomb. | ||
*Yoshi is the only [[veteran]] who can no longer be rendered [[helpless]] upon using any of his special moves. | *Yoshi is the only [[veteran]] who can no longer be rendered [[helpless]] upon using any of his special moves. | ||
*Although Yoshi's back aerial now consists of three hits instead of four, the sound effect of the removed fourth hit can still be heard if one listens closely. This is much more noticeable in [[Training Mode]]'s 1/4× speed setting. | |||
*Yoshi is the only character to debut in a {{uv|Mario}} game who does not have "Congratulations" written in ''Mario''-themed font for his [[congratulations screen]]. | |||
==References== | |||
{{reflist}} | |||
{{SSB4Characters}} | {{SSB4Characters}} | ||
{{Yoshi universe}} | {{Yoshi universe}} | ||
[[Category:Yoshi (SSB4)| ]] | |||
[[Category:Yoshi (SSB4)]] | |||
[[Category:Trophies (SSB4-3DS)]] | [[Category:Trophies (SSB4-3DS)]] | ||
[[Category:Trophies (SSB4-Wii U)]] | |||
[[es:Yoshi (SSB4)]] | |||
Latest revision as of 17:04, April 9, 2024
| Yoshi in Super Smash Bros. 4 | |
|---|---|
 
| |
| Universe | Yoshi |
| Other playable appearances | in SSB in Melee in Brawl in Ultimate |
| Availability | Starter |
| Final Smash | Super Dragon |
| Tier | D (33) |
| “ | Yoshi Rolls into Battle! | ” |
| —Introduction Tagline | ||
Yoshi (ヨッシー, Yoshi) is a playable character in Super Smash Bros. 4. His return to the series was announced during a Super Smash Bros. Direct on April 8th, 2014, making him the last of the "perfect-attendance crew" to be announced.[1] He was also among the first wave of amiibo figures. Yoshi's voice consists of all of Kazumi Totaka's Yoshi's Story clips last used in Brawl.
Yoshi is ranked 33rd out of 54 on the tier list, placing him in the D tier. This is a moderate improvement from his placement in Super Smash Bros. Brawl, where he was ranked 27th out of 38. As in previous installments, Yoshi boasts excellent aerial mobility: he has the fastest air speed in the game by default, while his double jump is the second highest in the game and grants him nearly 70 frames of armor. Yoshi's grounded mobility has also been improved, as his already fast dashing speed is now considerably faster.
Another of Yoshi's strengths is the utility of his moveset: neutral attack and up tilt are very useful combo starters, down tilt can be used for tech-chasing, neutral aerial is very useful for approaching and edge-guarding, Egg Lay is a command grab, Egg Roll can force approaches or escape from pressure, Egg Throw is a projectile that has recovery and mindgame potential, and Yoshi Bomb is strong enough to KO outright and heavily pressure shields. Yoshi's shield is also fairly useful, as it is completely immune to shield stabbing and, for the first time since Super Smash Bros., enables him to jump out of it.
However, Yoshi has noticeable flaws. His grab game is still infamously poor: all of his grabs are among the slowest in the game, while his throws have almost nonexistent utility. Yoshi's defensive presence on the ground is also surprisingly lacking for a few reasons. His rolls and sidestep are among the unsafest, and he has the dubious distinction of being the only character who is unable to shield platform drop. By extension, Yoshi's shield is the smallest among the cast, while his very low traction significantly hinders his out of shield options.
Yoshi's KO potential is also problematic for a heavyweight: although his smash attacks, up aerial, and grounded Yoshi Bomb are powerful, each of them are burdened with very short durations and punishable amounts of ending lag. Lastly, Yoshi has a very short vertical recovery outside of his double jump, as his primary recovery move, Egg Throw, grants minimal vertical distance and deteriorates when used consecutively without landing on the ground.
Overall, Yoshi's strengths outweigh his weaknesses, yet his tier placement is heavily debatable. Despite being initially perceived as an impressively well-rounded character, and having achieved instances of national-level tournament success, Yoshi's placement has dropped throughout SSB4's lifespan. This is largely because of his results waning in lieu of his metagame stagnating. When coupled with many characters that were previously considered inferior to him (such as Mewtwo, Marth, and Mega Man) having attained vastly greater viability thanks to more consistent success and/or expanded metagames, Yoshi's ranking is viewed by some top players, such as ZeRo, as too high.
Attributes[edit]
Yoshi is a heavyweight that deviates quite noticeably from his weight class' archetype. This is most obvious with his air speed, which is the fastest in the game by default, though it is surpassed under certain conditions (Giga Mac, Wario-Man, the lightest possible Mii Brawler, and a fully Limit Charged Cloud). By extension, Yoshi has the second highest double jump in the game (surpassed only by Mewtwo's), which also grants him 68 frames of armor that can withstand a maximum of 120 units of knockback. Yoshi's other attributes also deviate from the mold of an archetypical heavyweight, albeit not to same the degree as his air speed and double jump. He has an above average walking speed, a fast dashing speed (the 14th fastest in the game) and the 11th fastest air acceleration, but in contrast has moderately low gravity, the eighth slowest falling and fast falling speeds, and the fourth lowest traction in the game. Yoshi is also capable of crawling. Overall, these attributes grant him strong mobility, especially in the air, and also make him very floaty despite being heavy, yet do not render him frail or susceptible to juggling.
Yoshi's greatest strength is the utility of his moveset. His neutral and tilt attacks are all very fast, leaving him exposed only very briefly. They additionally launch opponents either vertically or horizontally, which makes them reliable as set-ups for combos or edge-guarding. Yoshi's dash attack has high base knockback and long range, which allows for easy cross-ups and make it useful for punishing rolls or techs. His smash attacks possess decent power, with his forward smash being the strongest among them. However, each of Yoshi's smashes also have certain perks. Forward and clean up smash grant intangibility to his head and legs, respectively, whereas down smash is a semi-spike like his down tilt.
Yoshi's air game is also versatile and synchronizes very well with his attributes. Due to it hitting on frame 3, neutral aerial is the second fastest of its kind; when coupled with its sex kick properties, it is useful for edge-guarding, stopping approaches and breaking out of combos or juggles. Forward aerial can either meteor smash or powerfully launch opponents diagonally, and is capable of auto-canceling with a short hop. Up aerial is one of Yoshi's most viable KOing options: due to it hitting on frame 5 and possessing a respectable damage output, very high knockback growth and disjointed hitbox, it can quickly and reliably KO any opponent of any weight while near the upper blast line. Back aerial is excellent at edge-guarding, as its first two hits launch opponents at the auto-link angle, whereas its third hit has extremely high knockback growth. Lastly, Yoshi's renowned down aerial hits repeatedly and is the most damaging aerial in the game. By extension, it can strongly pressure shields to the point of potentially breaking one if it is auto-canceled with a jump and followed by Yoshi Bomb.
The respectable utility of Yoshi's moveset also extends to his special moves. Egg Lay is a command grab that immobilizes opponents and thus allows for free hits. If opponents do not break out of the Yoshi Egg while near the edge, they also face the risk of being unable to recover. Egg Roll functions similarly to Spin Dash, as it can be used to approach or retreat quickly. Egg Throw is a projectile that can be used to stop approaches; allow Yoshi to close in on the opponent; and, when continuously B-reversed in the air, keep the opponent guessing as to where he is going to go next. Although it is not a traditional recovery move, it nevertheless grants minimal vertical recovery upon its first use in midair. Lastly, Yoshi Bomb is useful for pressuring shields, thanks to it dealing considerable shield damage. Outside of this, its grounded version's respectable damage output and deceptively low start-up lag make it one of Yoshi's most viable KOing options.
However, Yoshi has noticeable weaknesses, with his main one being his vertical recovery. Although his attributes allow for long horizontal recovery, Egg Throw grants only minimal vertical distance. By extension, Yoshi is overly reliant on his double jump for recovery, and will be unable to reuse it if he is hit out of it. As such, Yoshi is heavily susceptible to meteor smashes and footstool jumps, as a single opening he makes off-stage could potentially prove fatal.
Another very glaring weakness is his grab game, which is widely considered to be among the worst in the game. Yoshi's pummel is the only positive trait of his grab game, thanks to its quick speed; average damage output; and its release being a useful set-up into his neutral attack. Outside of this, his grabs' good ranges are offset by their very punishable amounts of start-up and ending lag. Yoshi's forward and back throws are his fastest and most damaging throws. However, they have average damage outputs; below-average base knockback; and low knockback growth, which make them unreliable for scoring KOs or starting combos. His up and down throws are also unable to KO reliably and, despite having low damage outputs, lack combo potential because of their lag. Yoshi's ability to escape pressure is also limited, as his rolls and sidestep are short-distanced, among the slowest in the game, and have some of the lowest amounts of intangibility frames. By extension, his shield is the smallest in the game, and he is the only character who is unable to perform shield platform dropping.
Lastly, Yoshi's KO potential is problematic for a heavyweight. Although his smash attacks, up aerial and grounded Yoshi Bomb are his most reliable KOing options thanks to their respectable power, they are burdened with very short durations and punishable amounts of ending lag. However, forward smash, down smash and Yoshi Bomb also suffer from other particular flaws. Forward smash has noticeable start-up lag, down smash's back hit is more effective for KOing than its front hit, and Yoshi Bomb's short range makes it best suited from out of shield. While Yoshi's neutral, forward and back aerials also possess KO potential, their very low base knockback makes them best suited for doing so while near the left or right blast line.
Yoshi gains noticeable benefits from his custom moves. Lick is effectively his best custom move: it is a semi-spike that is powerful enough to KO reliably, yet can also provide function as a horizontal recovery option, thanks to it slightly boosting Yoshi forward. Egg Launch deals more damage and launches opponents away, which can be used as a potent way minimize their chances of recovering. Heavy Egg Roll is slower, but deals much more damage and has armor throughout its duration. Conversely, Light Egg Roll has more power and moves higher and faster, but ends after its bounce. High Jump covers noticeably more distance, but in turn removes Yoshi's only projectile. Star Bomb has less power, but its stars are larger and more damaging. Conversely, Crushing Bomb is strong enough to easily KO opponents of any weight, yet is punishable because of its much slower speed and lack of stars.
Overall, Yoshi is effectively a heavyweight version of the all-rounder archetype, thanks to his lack of glaring issues against the majority of the cast. Due to his strengths and low learning curve, Yoshi has managed to achieve respectable placings at all levels of play, thanks to the likes of Raptor, Sky, Papa Wall, Poltergust, Kamikaze, Seth, Snoop, and Ron. However, Yoshi's easily exploitable weaknesses have nevertheless resulted in his representation remaining below-average in competitive play.
Changes from Super Smash Bros. Brawl[edit]
Yoshi has been buffed overall in the transition from Brawl to SSB4. Many of his attacks have more speed, are stronger and have more utility, while the issues that plagued him in Brawl were fixed: thanks to the changes to hitstun canceling, his combo game has improved to the point of granting him new KO set-up, and his smash attacks while dealing less damage are stronger. Yoshi's biggest buff however was to his shield game which was previously the main issue that plagued him. Yoshi's shield grab is faster and for the first time since Smash 64, Yoshi can jump out of shield. The other issues which plagued his shield in Brawl such as his longer shield drop, his inability to powershield cancel and his inability to throw items out of a roll were all fixed, making his out of shield game much better; no longer being the worst in the game by a huge margin (although his out of shield game is still rather poor). The only new disadvantages Yoshi has while in shield is that he cannot shield platform drop and his spot dodge is significantly worse (going from one of the best to being fairly mediocre) but the buffs to his shields far outweigh these nerfs.
However, Yoshi has also received some noticeable nerfs. Yoshi's grab game was made even worse. He can no longer air release his opponents while he is pummeling them and the general changes to air releases hinder him more than almost any other character as he has now lost all of the followups he had out of an air release and the removal of chain grabbing further exacerbates this issue. His previously excellent pivot grab is also much laggier making it far less spammable and much easier to punish. His damage output is also lower and his forward and up tilts are laggier making them worse spacing tools and his down tilt is much weaker. His aerial game has also seen various downgrades. His air speed is lower, neutral aerial lingers for a shorter amount of time, forward aerial is weaker and has a stricter auto-cancel window, up aerial is weaker and down aerial has less edgeguarding potential. Back aerial while connecting more reliably and having a stronger final hit, it only has three hits making it weaker and it has drastically reduced combo potential as the first two hits have higher knockback and altered angles and the move has much higher ending and landing lag while also being unable to auto-cancel in a short hop which also greatly hinders its safety and spacing potential. The eggs from his Egg Throw also deal less damage and Yoshi can no longer edge cancel Egg Toss hindering its camping potential when used at the ledge although Egg Throw is faster.
Overall, Yoshi's main issue from Brawl was fixed resulting in him being stronger overall especially when relative to the cast although the general changes to Smash 4's mechanics do not benefit him as much as other characters. While Yoshi was initially regarded highly when Smash 4 was first released, his perception overtime decreased as many characters were buffed significantly more than he was and the inclusion of Bayonetta and Cloud proved to be problematic for him. When combined with his overall low representation, he is now generally agreed upon to be a mid tier character.
Aesthetics[edit]
 Due to the aesthetic used in SSB4, Yoshi has a sleeker design, and his overall color scheme is significantly more vibrant. His body has a more chartreuse color, consistent with his appearance outside of Smash Bros. as well as Smash 64. Unlike in previous installments, he now stands upright, as with his standard appearances outside of mainline Mario games.[1] Altogether, these changes make Yoshi appear virtually identical to his appearance as of Mario & Sonic at the London 2012 Olympic Games.
- Yoshi has received two new alternate costumes. The first is Purple Yoshi, and the second is Black Yoshi.
- Yoshi now faces the foreground at a slight angle, instead of facing directly forward.
- Yoshi is slightly more expressive. His irises now shrink during the end of his pivot grab and when he is hit, launched, or prone/supine.
- Yoshi's boots and double jump's sound clips are lower pitched. He also vocalizes less frequently while double jumping.
- Yoshi Eggs now match Yoshi's selected color scheme. This also applies to Kirby's copied Egg Lay.
Attributes[edit]
- Yoshi has a new default idle animation where he stands more upright. This makes him harder to hit horizontally but easier to hit vertically.
- As a sidenote, Yoshi retains his idle pose from Brawl while holding a small item.
- Yoshi's upright posture has translated into various moves in his moveset, be it through a tweaked animation or a completely new move.
 Yoshi dashes faster (1.68 → 1.86).
 Yoshi's air speed is slower (1.316 → 1.28) although it is still the fastest in the game (excluding Giga Mac, Wario-Man and lightest Mii Brawler).
- Yoshi's air acceleration is higher (0.08 → 0.098).
- As with all returning veterans from Brawl, Yoshi’s fast-falling speed is faster (1.806 → 2.064). However, it has gone from the 11th lowest out of 39 characters to the 8th lowest out of 58.
- Yoshi is lighter (107 → 104), hindering his endurance.
- Yoshi's gravity is higher (0.07347 → 0.08).
- Yoshi's shield drop is significantly shorter (16 frames → 7), now matching the rest of the cast.
- For the first time since Smash 64, Yoshi can now jump out of shield.
- Yoshi can now powershield cancel.
- Yoshi can once again throw items out of a roll however due to the removal of glide tossing, this has minimal impact. The removal of glide tossing benefits Yoshi more than any other returning veteran as it hinders much of the rest of the cast's approach with items and Yoshi still has access to his long super glide toss, making his approach with items much better relative to the cast.
- Altogether, these changes significantly improve Yoshi's out of shield options; resulting in his shield no longer being near unusable.
- Yoshi can no longer shield platform drop, slightly hindering his out of shield game on platforms although the other changes to his shield more than make up for it.
- Yoshi's double jump now functions more like other double jumps, with Yoshi now rising immediately, instead of moving downwards for some time before rising upwards.
- This improves Yoshi's ability to chase opponents vertically, as well as improving his vertical recovery potential.
- This also means it can now be affected by special gravity conditions.
- However, this also reduces its horizontal distance as Yoshi reaches maximum height and starts falling sooner.
- This also removes Yoshi's Dragonic Reverse and triple jump techniques, hindering double jump's utility.
- Yoshi can no longer grab ledges during the beginning of his double jump. When combined with the altered way the double jump functions, this makes it harder for Yoshi to grab ledges from behind.
- Rolls have a longer duration (frames 4-19 → 4-21), especially when compared to the rest of the cast.
- Back roll has less ending lag (FAF 38 → 36).
- Forward roll has more ending lag (FAF 35 → 36).
- Air dodge has less startup (frame 4 → 3) and ending lag (FAF 50 → 34).
- Spot dodge has more startup lag, a shorter duration (frames 2-20 → 3-18) and more ending lag (FAF 23 → 28), no longer being one of the fastest spot dodges in the game.
- The removal of meteor canceling significantly hinders Yoshi's endurance against meteor smashes more than any other returning veteran besides Olimar and Zero Suit Samus due to him previously having a shorter meteor-cancel window than most other characters.
Ground attacks[edit]
- Neutral attack:
- Neutral attack has an altered animation. Yoshi now jumps up when performing the first kick and the second hit is now a roundhouse kick.
- The near hitbox on both hits now has the lowest hitbox priority out of all the hitboxes rather than the highest (ID# 0 → 2).
- Yoshi's attacking foot is no longer intangible when performing either hit of neutral attack.
- Both hits have smaller hitboxes (5u/4u/4u → 3.3u/4.5u/3.3u).
- The first hit has higher base knockback (8 → 30), significantly improving its jab canceling potential.
- However, this also makes it connect less reliably into the second hit at higher percents especially against aerial opponents.
- The first hit has a lower SDI multiplier (1.5x → 1x).
- The first hit has a shorter duration (frames 3-5 → 3-4).
- The first hit's near hitbox has been moved further outwards, reducing its range inside Yoshi.
- Yoshi now moves forwards when performing the second hit however, Yoshi does not stretch hit foot out as far. This gives it a similar amount of range overall.
- The second hit deals less damage (6% → 4%) and knockback (25 (base), 100 (scaling) → 56/70).
- However, the move is still capable of leading into followups at lower percents due to Yoshi's new dash attack.
- On the second hit's second active frame, Yoshi now moves his foot slightly backwards rather than moving it backwards and upwards, reducing its vertical range.
- However, this also gives it more consistent horizontal range.
- Forward tilt:
- Forward tilt has less startup lag (frame 6 → 5).
- Forward tilt has higher base knockback (40 → 50), making the down angled version stronger.
- Forward tilt has more ending lag (FAF 30 → 39), hindering its ability to set up juggles.
- Forward tilt has smaller hitboxes (5u (near)/4.25u (mid)/3.5u (up/non-angled tip)/4u (down tip) → 4u/3.5u/2.8u) and the middle/far hitboxes have been moved closer to Yoshi (x offsets: 8/15 → 7.5/13.5), reducing its range.
- The up and non-angled versions deal less damage (10% (up)/9% (non-angled) → 8%/7%).
- The up angled version's mid hitbox launches opponents at a lower, more horizontal angle (70° → 65°), now matching the other variants.
- Up tilt:
- Up tilt has a longer duration (frames 7-11 → 8-15).
- Up tilt has an altered animation where Yoshi swings his tail at a much wider arc. This gives up tilt more horizontal and vertical range.
- Up tilt deals less damage (11% (tail)/10% (tip) → 7%), without full compensation on its knockback scaling (40 → 45).
- However, when combined with the changes to hitstun canceling and DI, this improves its combo potential despite its higher ending lag.
- Up tilt has more startup (frame 7 → 8) and ending lag (FAF 30 → 32).
- The move's higher startup lag makes the hitboxes start higher, with shorter characters now being able to consistently crouch underneath it.
- Up tilt has smaller hitboxes (6u/6u/5u → 4u/4.5u/2.5u) with the move having less range inside of Yoshi.
- Down tilt:
- Down tilt has an altered animation where Yoshi moves forwards before he swings his tail and his tail no longer becomes much longer. The tail's hitboxes have also been extended further outwards (x offset: 0/1.2/0.5 → 1/3/3.5). Both of these changes combined results in the move no longer having deceptively short range, with the move now actually matching Yoshi's tail.
- Despite this, down tilt still has roughly the same horizontal range overall.
- This new animation is longer however (23 frames → 41), increasing the amount of time Yoshi cannot crawl or turn around.
- Down tilt deals much less damage (10% (near)/5% (far) → 5% (near)/4.5% (mid)/4% (far)) without compensation on its knockback, significantly hindering its edgeguarding potential.
- However, these changes improve down tilt's tech-chasing potential when combined with the changes to hitstun canceling and DI.
- Down tilt has smaller hitboxes (5u/5u/4u → 3.5u/3.5u/3u). This gives the move less vertical range as well as less range inside of Yoshi.
- Dash attack:
- Yoshi has a new dash attack, a side kick.
- Dash attack covers much more space in a shorter period of time, going from covering just over 25% of Final Destination to now covering just over 40% of Final Destination. This not only makes it a much better burst movement option as well as greatly improving its approach and cross-up potential but this also makes it a much better combo extender.
- The clean hit's far hitbox has been positioned further away from Yoshi (z offset: 6 → 9), improving its range.
- Dash attack has much more base knockback but much less knockback scaling (15 (base), 100 (scaling) → 90/52). This drastically improves the move's safety on hit at lower percents but hinders its overall KO potential.
- Dash attack launches opponents at a higher angle (361° → 65°). When combined with its increased distance and higher knockback, this enables it to set up juggles but hinders its edgeguarding potential as well as removing its ability to lock opponents.
- Dash attack's hitboxes are positioned lower (y offset: 7.5 → 6.2 (clean)/7 (late)).
- Dash attack has a shorter duration (frames 10-13 (clean)/14-23 (late) → 10-12/13-20).
- Dash attack has more ending lag (FAF 42 → 50).
- Dash attack no longer grants intangibility to Yoshi's head.
- Dash attack has smaller hitboxes (5.5u/4u → 5u/3.5u).
- The near hitbox has been moved closer to Yoshi (z offset: 0 → 4 (clean)/3 (late)), giving dash attack less range inside of Yoshi.
- The late hit deals less damage (7% → 6%).
- Forward smash:
- Forward smash deals more knockback (20 (base), 92 (scaling) → 30/(97/98/97)) improving the head hitbox's KO potential.
- The head hitboxes are larger (3.7u/4.2u → 4.8u/5u) and they have been moved further away from Yoshi (x/y offsets: 0/(2.8/-1) → (3.2/5.8)/1.2). This gives forward smash more range, giving it a smaller blindspot.
- The far hitbox now has the lowest hitbox priority (ID# 0 → 2). As the far hitbox is now a sourspot, this benefits the move.
- The near hitbox now always launches opponents in the direction Yoshi is facing.
- Forward smash has a shorter duration (frames 14-16 → 14).
- Forward smash grants less intangibility to Yoshi's head (frames 12-16 → 12-14).
- Forward smash has more ending lag (FAF 50 → 53).
- Forward smash deals less damage (16% → 15.5% (head)/14% (body)/13% (head's tip), hindering the near and especially the far hit's KO potential.
- The near hitbox is slightly smaller (3u → 2.9u) and it has been moved closer to Yoshi, with it now only covering Yoshi's front foot rather than covering the lower end of his saddle up to the top of his back foot. This gives the move less range inside of Yoshi despite the near hitbox now being extended.
- The near hitbox now has the highest hitbox priority (ID# 2 → 0). As the near hitbox is now a sourspot, this hinders the move.
- Up smash:
- Yoshi has a new up smash, a bicycle kick. The move now hits in front of Yoshi and then behind rather than from behind to in front.
- Up smash deals more knockback (23 (base), 83 (scaling) → 37/95), improving its KO potential despite its lower damage.
- Up smash has more vertical range and downwards range in front of Yoshi due to its new animation.
- Up smash has more ending lag (FAF 43 → 47).
- Up smash deals less damage (16% → 14% ).
- Up smash now has a late hit for the second half of its duration which deals much less damage (16% → 12%), hindering its KO potential despite its higher knockback.
- Up smash has smaller hitboxes (6u/5u → 5u/3.5u). When combined with its new animation, this gives the move less horizontal range both in front of and especially behind Yoshi.
- Up smash has much less downwards range behind Yoshi, with the move now failing to hit smaller characters if they are behind Yoshi.
- Up smash grants less intangibility (frames 11-16 → 11-13).
- Additionally, since Yoshi's right foot is now intangible rather than his large head, this makes the move easier to intercept.
- Up smash covers less distance out of an initial dash unless Yoshi jump cancels the up smash, making it harder to use as an approach tool.
- Down smash:
- Down smash deals more knockback (30 (base), 63/53 (scaling) → 40/73 (front sweetspot), 43/57 (front sourspot), 40/81 (back sweetspot), 43/75 (back sourspot)) improving the first hit's sweetspot's and the second hit's KO potential despite its lower damage, especially the second hit.
- However, the first hit's sourspot's knockback was not fully compensated for its lower damage, hindering its KO potential.
- Down smash deals less damage (14% (front)/13% (back) → 12% (mid tail)/10% (body/far tail)).
- Down smash has more startup lag (frame 6 → 7).
- However, its total duration was unchanged, slightly decreasing its ending lag.
- Down smash has smaller htiboxes which are now extended (6u/5u/4.3u → 3.5u/2u), reducing its range.
- The sourspot now uses an extended hitbox which stretches from Yoshi's body to the end of his tail. This means that the sourspot can now connect if the opponent is inside of Yoshi, as well as still connecting if they are far away from Yoshi.
Aerial attacks[edit]
- Neutral aerial:
- Neutral aerial now uses one extended hitbox rather than multiple normal hitboxes. This gives neutral aerial more consistent vertical range.
- The clean hit has a larger hitbox (4.3u/4.3u/3.5u → 4.8u) which gives it more vertical range as well as slightly more range behind Yoshi.
- The mid and late hit have higher base knockback (0 → 30), improving their KO potential, despite their lower damage.
- However, this also hinders their locking potential as well as their followup potential at higher percents, especially when combined with neutral aerial's shorter duration/higher landing lag.
- The mid and late hits are positioned further away from Yoshi (z offset: 3.3 → 4 (mid)/3.5 (late)) with the mid hit's hitbox also being larger than its previous foot hitbox (3.3u → 3.6u). This gives them slightly more range in front of Yoshi, especially the mid hit.
- Neutral aerial has a shorter duration (frames 3-5 (clean)/6-15 (mid)/16-31 (late) → 3-4/5-11/12-25).
- Neutral aerial has more landing lag (9 frames → 11).
- The clean hit deals less damage (12% → 10%) without full compensation on its knockback (15 (base), 100 (scaling) → 40/86), hindering its KO potential.
- The clean hit now has a static hitbox, rather than hitboxes attached to Yoshi's body. This gives it slightly less horizontal range during its later active frames.
- The mid and late hits deal less damage (9% (mid)/6% (late) → 7%/5%).
- The mid and late hits do not extend as far behind Yoshi and they have smaller hitboxes compared to their previous body hitboxes (4u (mid)/3.5u (late) → 3.6u/3u), giving them less range behind Yoshi.
- Yoshi can no longer perform a double jump after a short hop neutral aerial due to his lower short hop/higher gravity.
- Forward aerial:
- Forward aerial has less startup lag with a longer duration (frames 19-21 → 16-20).
- However, its total duration was unchanged, giving it more ending lag.
- Forward aerial has a new animation where Yoshi now slightly turns his head before and during the headbutt. Yoshi extends his head out further, giving the move considerably more range.
- However, this animation is also longer (49 frames → 67), increasing the amount of time Yoshi cannot grab ledges after using the move.
- Forward aerial has received a new horizontal launching hitbox which is positioned in front of the head hitbox. When combined with the move's new animation, this significantly improves forward aerial's horizontal range.
- However, this new hitbox has priority over the head hitbox and it overlaps with the head hitbox, making the head hitbox harder to land.
- The removal of meteor canceling improves the head hitbox's reliability.
- Forward aerial has slightly more landing lag (16 frames → 17).
- Forward aerial auto-cancels later (frame 36 → 40).
- Forward aerial deal less damage (16% (back)/15% (head) → 15% (back/nose)/14% (head)), hindering its KO potential as its knockback was not compensated.
- The back and head hitboxes are slightly smaller (2.5u/5.5u → 2.4u/5.3u).
- Back aerial:
- Yoshi has an altered back aerial where he now only performs three tail swipes instead of four.
- The first two hits now use an Autolink angle against aerial opponents (60° → 366°) and they deal more knockback (10/20 (base), 100 (scaling) → 30/200), making the move connect more reliably against aerial opponents, especially if Yoshi is falling.
- The first two hits have a lower SDI multiplier (1.5x (hit 1)/1.3x (hit 2) → 0.5x). When combined with the move's altered angle against aerial opponents, this makes the move much more difficult to escape from.
- The higher knockback and altered angle also allows Yoshi to drag opponents downwards if they fall out of the move, granting the first two hits edgeguarding potential.
- However, this does also hinders the move's followup potential against aerial opponents who are close to the ground.
- The final hit deals more damage (4% → 5%) and much more knockback (50 (base), 100 (scaling) → 30/184), now being a viable KO move.
- The final hit consists of one much larger extended hitbox (5.5u → 8u), giving it considerably more range.
- Back aerial has a higher hitlag multiplier (1x → 2x). This allows the move to significantly benefit from the introduction of frame canceling but makes it easier to DI.
- As with most back aerials, back aerial now always launches opponents behind Yoshi.
- The first two hits now have weight independent knockback.
- The final hit launches opponents at a higher angle (361° → 54°). This improves its followup potential but hinders its edgeguarding potential.
- Back aerial has more startup lag with a shorter duration (frames 10-12 (hit 1)/16-18 (hit 2)/23-25 (hit 3)/28-30 (hit 4) → 11/17/25-26).
- Back aerial has much more ending lag (FAF 40 → 56) and a longer animation (39 frames → 62).
- Back aerial has much more landing lag (9 frames → 19).
- Back aerial has a shorter initial auto-cancel window (frames 1-9 → 1-5).
- Back aerial auto-cancels later (frame 38 → 44), no longer doing so in a short hop.
- Altogether, these changes considerably hinder back aerial's approach potential and safety.
- Back aerial deals less damage (4% (hit 1)/3% (hits 2 & 3)/4% (hit 4)/14% (total) → 2.5% (hits 1 and 2)/5% (hit 3)/10% (total)).
- The first two hits now launch grounded opponents horizontally (60° → 361°) and they deal more knockback (10/20 (base), 100 (scaling) → 50/150). This makes the move connect less reliably when used from a distance (especially at higher percents) as well as greatly hindering its followup potential if Yoshi lands, especially when combined with its higher landing lag.
- The first two hits now use one static extended hitbox instead of three normal hitboxes attached to Yoshi's tail. While this does give the move more consistent vertical range, this also reduces its horizontal range, especially for the first hit.
- Up aerial:
- Up aerial deal less damage (13% → 12%), hindering its KO potential as its knockback was not compensated.
- The upper hitbox is now attached to Yoshi's lower tail, rather than his upper tail, with its position altered (x offset: 0 → 6). This overall gives up aerial less vertical range on its second active frame.
- Up aerial can no longer be performed twice in a short hop due to Yoshi's lower short hop/higher gravity.
- Down aerial:
- Down aerial now has a landing hitbox, which deals 1% and low horizontal set knockback. This makes down aerial safer on hit at lower percents, as well as making it safer on shield.
- However, this also hinders its safety on hit at higher percents, especially for hits 8-12.
- The weakening of SDI makes down aerial more difficult to escape from despite its higher SDI multiplier on its first twelve hits (1.4x → 1.5x).
- The universal increase to shield damage significantly improves down aerial's shield pressuring potential.
- Down aerial has more ending lag (FAF 53 → 57) and a longer animation (59 frames → 65).
- Hit 7 deals less damage (3%/2% → 2.2%/1.5%).
- Hits 8-12 deals more damage (2%/1% → 2.2%/1.5%).
- The final hit deals less damage (2%/1% → 1%).
- Altogether, these changes slightly decrease down aerial's maximum damage potential (33% → 32.2%) but increase its minimum damage potential if all hits connect (20% → 22%).
- Hit 7 has higher knockback scaling (80 → 100), making it stronger despite its lower damage.
- The final hit deals more knockback (5 (base), 100 (scaling) → 60/200), granting it KO potential at very high percents depending on Yoshi's stage position.
- The final hit has larger hitboxes (6u/4.5u/4.5u → 7u/5u/5u).
- The final hit has a lower SDI multiplier (1.4x → 1x).
- The final hit launches opponents at different angles (270°/260°/280° → 80°/40°).
- When combined with its higher knockback, this grants the final hit combo potential at lower percents if the middle hitbox connects.
- However, this also hinders its edgeguarding potential.
- The final hit has more startup lag (frame 40 → 41).
Throws/other attacks[edit]
- Grabs:
- Standing grab has less startup (frame 17 → 14) and ending lag (FAF 63 → 56), no longer being one of the slowest.
- The grounded tongue grabbox has been moved further away from Yoshi (x offset: 0 → 1.2), giving standing grab slightly more range against grounded opponents.
- However, this also gives pivot grab less range against grounded opponents.
- Dash grab has received a mouth grabbox (much like his other grabs) during its first two active frames, preventing the grab from whiffing against nearby characters.
- Pivot grab has a larger mouth grabbox (5u → 5.5u).
- Dash and pivot grab have a shorter duration (frames 11-22 (dash)/10-20 (pivot) → 11-21/10-19).
- Dash and especially pivot grab have more ending lag (FAF 63 (dash)/36 (pivot) → 68/65), making pivot grab in particular drastically more punishable.
- All grabs have smaller tongue grabboxes (4u/3.2u → 3.5u/2.8u (standing/pivot)/3.3u/2.2u (dash)).
- The aerial tongue grabbox has been moved closer to Yoshi (x/z offsets: 0/1 → -2/0), giving standing and dash grab less range against aerial opponents.
- However, this also gives pivot grab more range against aerial opponents.
- Standing grab has a smaller mouth grabbox (7u → 5.5u) which has been moved further away from Yoshi (z offset: 5 → 7.5), making it less effective at grabbing opponents inside of Yoshi.
 The opponent can no longer escape from Yoshi's tongue during his grab and before they enter his mouth, preventing a game crash which could previously happen.
- Pummel:
- Pummel now launches bystanders horizontally (80° → 361°).
- Yoshi can no longer force his opponent into an aerial grab release while pummeling them. When combined with the removal of chain grabbing and the universal decrease to aerial grab release's ending lag, this completely removes his grab release's followup potential outside of very rare and specific situations.
- Forward throw:
- Yoshi releases opponents from forward throw earlier (frame 20 → 15). This makes it harder to DI at higher percents but this also gives it more ending lag, as its total duration was unchanged.
- When combined with the removal of chain grabbing, this hinders forward throw's damage racking potential at lower percents, especially against light fast fallers.
- Down throw:
- The changes to hitstun canceling and DI improves down throw's followup potential although the throw is still too laggy to possess true followups in most cases.
- Floor attacks:
- Front and back floor attacks deal 1% more damage (6% → 7%).
Special moves[edit]
- Egg Lay:
- Egg Lay's aerial grabbox has been moved slightly further away from Yoshi (z offset: -1 → x offset: -0.9).
- The grounded grabbox is larger (2.5u → 3.5u) and it has been moved further away from Yoshi (z offset: -3.5 → x offset: -2).
- Opponents take more damage while inside an Egg (0.5x → 0.66x).
- After releasing an opponent in the air, Yoshi will now gain a small vertical boost.
- Egg Lay can no longer be used to double jump cancel. This improves its ability to catch opponents high up but hinders its movement and mixup potential.
- It has an altered animation, having Yoshi briefly close his eyes as he swallows the opponent.
- Egg Lay has more startup lag (frame 17 → 21) with its total duration equally increased (FAF 40 → 44).
- Egg Lay has a shorter duration (frames 17-18 (clean)/19-21 (late) → 21/22-24).
- The mouth grabbox is slightly smaller (6u → 5.9u) and it has been moved much further away from Yoshi, significantly reducing Egg Lay's range inside of Yoshi.
- Egg Lay no longer has a hitbox against boss enemies.
- Egg Roll:
- Egg Roll no longer renders Yoshi helpless, improving its safety when used in the air.
- Yoshi can now jump while using Egg Roll, improving its approach potential.
- Egg Roll's base speed is higher (0.08 → 0.1).
- Yoshi has to use Egg Roll for longer before he can cancel it (30 frames → 35).
- Egg Roll's maximum damage is lower (12% → 9%).
- Egg Roll has smaller hitboxes (3.36u/5.76u → 2.3u/3.5u).
- Additionally, the larger hitbox can no longer hit aerial opponents with the move now having deceptively small hitboxes, especially against aerial opponents.
- The changes to hitstun canceling and DI have effectively removed Egg Roll's already situational and risky momentum canceling ability.
- Egg Throw:
- Egg Throw's Eggs have less startup lag with a longer duration (frames 19-59 → 15-59).
- However, its total duration was unchanged, giving it more ending lag.
- The Eggs have increased knockback scaling (40 → 55).
- Egg Throw grants Yoshi more height during his first aerial Egg Throw (1.8 → 1.9).
- Yoshi retains his horizontal momentum for a longer period of time after using Egg Throw, improving its horizontal recovery potential.
- The changes to hitstun canceling and DI improves the Egg's combo potential at high percents.
- The Egg's have increased gravity (0.07 → 0.088).
- Egg Throw's visual effects have changed. The Yoshi Egg now emits a rainbow-colored trail during its flight trajectory, making the move resemble Yoshi's "Rainbow Ball" Star Pitch and his "Rainbow Swing" Star Swing from Mario Super Sluggers.
- Egg Throw's explosion deals less damage (8% → 5%), although its knockback was compensated (40 (base), 40 (scaling) → 60/50).
- The Eggs have smaller hitboxes, especially the explosion (3.8u (egg)/12u (explosion) → 2.5u/6.5u).
- The Eggs and the explosion no longer deal extra shield damage (5/5 → 0/0).
- Eggs travel less distance when the B button is held, hindering its spacing potential.
- Yoshi can no longer slide off ledges when using Egg Throw, hindering its use as a movement tool.
- Consecutive uses of aerial Egg Throw grant Yoshi less height (0.84 → 0.5) and Yoshi cannot use it as many times before gaining no height (5 times → 3).
- The removal of ledge intangibility for consecutive ledge grabs combined with the reduced distance of held Egg Throws and the reduced height of consecutive Egg Throws has significantly hindered Egg Throw's camping potential.
- Yoshi Bomb:
- Grounded Yoshi Bomb's fall has higher knockback scaling (70 → 72), slightly improving its KO potential.
- The aerial version deals more kncokback (55 (base), 70 (scaling) → 70/68), improving its KO potential.
- The changes to hitstun canceling and DI improves the grounded version's first hit's ability to lead into the second hit, with lighter characters no longer being capable of air dodging to avoid the second hit.
- However, heavier characters are now capable of DIing the first hit if Yoshi is at higher percents due to the introduction of rage.
- The universal increase to shield damage significantly improve Yoshi Bomb's shield pressuring potential, with the grounded version now being able to lead into a guaranteed shield break if the opponent shields the whole attack.
- Yoshi no longer vocalizes when using Yoshi Bomb.
- The falling hitbox is positioned lower (y offset: 10 → 7). This gives it more range below Yoshi but less range above him.
- The falling hitbox is smaller (7u (grounded)/6.8u (aerial) → 6.8u/6.4u).
- The stars now jump upwards at an arc rather than travelling horizontally.
- The stars have more startup lag with a shorter duration (frames 1-17 → 3-13).
- The stars travel slower (0.8 → 0.6).
- Super Dragon:
- Super Dragon's Fireball can now pierce multiple opponents.
- Super Dragon deals 5% less damage on contact (8% → 3%) and its Fire Breath no longer deals consistent damage (6% → 6% (near)/4% (mid)/3% (far)). It also has a shorter duration.
- Super Dragon's Fireball no longer deals consistent damage (17% → 18% (near)/14% (mid)/12% (far)).
Update history[edit]
Unlike the majority of the cast, Yoshi's most notable changes from game updates have been fixes to glitches associated with him. Although game updates also granted him buffs and nerfs, the majority of them did so ambivalently. Update 1.0.4 granted Yoshi partial intangibility in certain situations, yet increased the lag of his dash attack, down aerial and Egg Lay. Updates 1.0.6 and 1.1.0 followed similar formats, as they each granted a single buff and a single nerf to his forward smash and back aerial, respectively.
The changes to shield mechanics brought about by updates 1.1.0 and 1.1.1 also indirectly buffed and nerfed Yoshi: they enable his down aerial and Yoshi Bomb to wear down shields much better than before, yet hinder his out of shield options because of his very low traction. Lastly, update 1.1.4 shortened the duration of his invincibility he receives after tripping or during any trip follow-ups aside from his floor attack.
- Four frames of intangibility have been added to Yoshi's head, nose and arms for his initial shielding animation. This leaves him less susceptible to shield poking, as his head is not fully covered by the shield during these first frames.
- Dash attack has more ending lag (FAF 45 → 50).
- Egg Lay has more startup lag (frame 17 → 21) and a longer total duration (FAF 40 → 44).
- Egg Lay and Egg Launch have smaller grabboxes (5u/6.8u → 4u/5.9u).
- Fixed the "Giant Yoshi Glitch", which allowed characters to grow to ridiculous sizes in Multi-Man mode after being swallowed by Egg Lay.
- Fixed a glitch which allowed Yoshi to teleport back to an edge after using his up special after a ledge jump.
- Fixed a glitch that allowed Yoshi to execute a super high High Jump immediately after using Yoshi Bomb.
- Fixed a glitch which allowed Yoshi to slide far forwards with his up special after performing a boost pivot grab.
- Yoshi can no longer slide on slopes with Yoshi Bomb.
- Upward angled forward tilt's start-up lag decreased: frame 6 → 5. This matches its other angles' start-up lag.
- Part of forward smash has been made irreversible.
- Forward smash's body hitbox's size decreased: 3.1u → 2.9u.
- Edge attack's ending lag decreased.
- Back aerial's first two hits' angles altered: 365° (grounded/aerial opponents) → 361° (grounded opponents)/366° (aerial opponents) and its SDI multiplier decreased: 1× → 0.5×. These changes make its hits connect together better.
- Back aerial has a shorter initial auto-cancel window: frames 1-10 → 1-5.
- Fixed a glitch that allowed Yoshi to grab an edge as long as he used Yoshi Bomb while being very close to it and the control stick/circle pad was tilted upward or toward the stage.
- Edge attack deals more shield damage: 0 → 1.
- High Jump's ending lag decreased.
- Trip invincibility and all trip followups except floor attack have one less frame of invincibility.
Moveset[edit]
- Yoshi can crawl.
For a gallery of Yoshi's hitboxes, see here.
| Name | Damage | Description | ||
|---|---|---|---|---|
| Neutral attack | 3% | A front kick followed by a roundhouse kick. Its first hit can be jab canceled reliably into his tilt attacks; down smash; and Yoshi Bomb at low percentages, and into his forward and up smashes at low to high percentages, the latter of which KO reliably. Conversely, its second hit can act as a set-up into a dash attack or a dash grab at low percentages. | ||
| 4% | ||||
| Forward tilt | ↗ | 8% | Spins around to swing his tail. Due to it hitting on frame 5, it has the lowest amount of start-up out of Yoshi's tilt attacks, which makes it useful via pivoting. It can also be angled, and deals slightly more damage when angled upward or downward. The base of Yoshi's tail launches opponents vertically, whereas the tip launches them diagonally. However, it has very short range and the highest amount of ending lag out of his tilts, which make it virtually unusable for set-ups. | |
| → | 7% | |||
| ↘ | 8% | |||
| Up tilt | 7% | Crouches and flicks his tail upward. A good combo starter, it can combo into itself and up smash from 0% to low percentages, and a neutral aerial and up aerial at low to medium percentages. | ||
| Down tilt | 5% (base), 4.5% (mid), 4% (tip) | Lays in a prone position and spins around to swing his tail forward, similarly to Pikachu's down tilt. It is a semi-spike and has the lowest amount of ending lag out of his tilts, which make it useful for tech-chasing. It can also interrupt an opponent's attempt at grabbing an edge. However, it is Yoshi's least damaging tilt attack. | ||
| Dash attack | 9% (clean), 6% (late) | A side kick. Its long range and duration allow for easy cross-ups, and make it capable of punishing rolls or techs. However, its 37 frames of ending lag make it punishable if it is not spaced properly. | ||
| Forward smash | 13% (head's tip), 15.5% (head), 14% (body) | Rears back his head and then performs a headbutt. It has a sweetspot on Yoshi's head that is strong enough to KO middleweights at 94%/85% (3DS/Wii U) while near the edge of Final Destination. Although its other hitboxes deal slightly less damage, they are still strong enough to KO reliably: its head's tip hitbox KOs middleweights at 116%/105% (3DS/Wii U), whereas its body hitbox KOs them at 107%/97% (3DS/Wii U). It can also be angled and renders his head intangible. Despite being a headbutt, it also has a hitbox around Yoshi's body. However, its 38 frames of ending lag make it punishable, and its hitboxes only last for 1 frame. | ||
| Up smash | 14% (clean), 12% (late) | A bicycle kick, similar to Fox's up smash. Its clean hitbox renders Yoshi's legs intangible and is strong enough to KO middleweights at 120%/112% (3DS/Wii U) from anywhere on Final Destination. Although its late hitbox deals slightly less damage, it is still strong enough to KO middleweights at 127%/119% (3DS/Wii U). Despite its appearance, it can hit opponents behind Yoshi, such as immediately after using Egg Lay at low percentages. However, its 30 frames of ending lag make it punishable, and its late hitbox lacks intangibility. Since Yoshi is slightly above the ground for a short time during the move, it can actually dodge some attacks. | ||
| Down smash | 12% (tail), 10% (body) | Quickly swings his tail forward at a low angle, and then backward at a low angle. It hits on frame 7, which is fast for a smash attack. In addition to being useful for punishing rolls, it is a semi-spike like his down tilt. Its back hit has higher knockback growth than its front hit, but it is overall Yoshi's weakest smash attack. While near the edge of Final Destination, its tail hitbox's front hit KOs middleweights at 150%/135% (3DS/Wii U). In comparison, its tail hitbox's back hit KOs them at 132%/119% (3DS/Wii U). | ||
| Neutral aerial | 10% (clean), 7% (mid), 5% (late) | A flying kick. It is a sex kick and hits on frame 3, which is the lowest amount of start-up lag out of Yoshi's aerials. It also has high knockback growth and the lowest amount of landing lag out of Yoshi's aerials. Altogether, these traits make it very useful from out of shield and for approaching, edge-guarding, or breaking out of combos and juggles. While near the left/right blast line of Final Destination, its clean hitbox KOs middleweights at 118%/104% (3DS/Wii U). | ||
| Forward aerial | Noggin Dunk (かいてんずつき, Rotating Headbutt) | 15% (head), 14% (nose) | Rears back his head and then performs a downward headbutt. Its nose hitbox deals impressive damage and has a sweetspot that is a meteor smash. However, its head hitbox also deals impressive damage and has high knockback growth, which enable it to KO middleweights at 108%/97% (3DS/Wii U) while near the left/right blast zones of Final Destination. It is also capable of auto-canceling with a short hop, which allows it to function either as an approach option, or as a way to hinder approaches. Due to it hitting on frame 16, however, it is tied with down aerial for the highest amount of start-up lag out of Yoshi's aerials. | |
| Back aerial | 2.5% (hits 1-2), 5% (hit 3) | Rapidly flicks his tail up and down repeatedly. Its first two hits launch at the auto-link angle, which can enable it to drag opponents down to the stage for a set-up. In comparison, its third hit has extremely high knockback growth, which makes useful for edge-guarding. While near the left/right blast line of Final Destination, its last hit KOs middleweights at 104%/100% (3DS/Wii U). However, it has the second highest amount of landing lag out of Yoshi's aerials. | ||
| Up aerial | 12% | Somersaults to flick his tail upward. Due to it hitting on frame 5 and having a respectable damage output, very high knockback growth, and a disjointed hitbox, it is one of Yoshi's most useful moves. It can combo into itself or juggle at low to medium percentages, and KOs middleweights at 112%/98% (3DS/Wii U) while near the upper blast line of Final Destination. | ||
| Down aerial | Flutter Kick (ばたあしキック) | 3% (center hits 1-6), 2% (side hits 1-6), 2.2% (center hits 7-13), 1.5% (side hits 7-13), 1% (hit 14), 1% (landing) | A Flutter Jump-style series of kicks. Its multiple hits make it very useful for damage racking and pressuring shields, whereas its last hit has deceptive horizontal range. It is still as powerful as ever, being potentially the most damaging aerial in the game. Due to it hitting on frame 16, however, it is tied with forward aerial for the highest amount of start-up lag of Yoshi's aerials. It also has the highest amount of ending and landing lag out of his aerials, which make it punishable if used unwisely. | |
| Grab | — | Uses his tongue to grab an opponent and pull them into his mouth. Despite its appearance, Yoshi's tongue is not a tether. Instead, its range and lag are between those of tether grabs and normal grabs. As a result, Yoshi's grabs have fairly long ranges, but punishable amounts of start-up and ending lag. | ||
| Pummel | 2% | Chews the opponent. A fairly fast pummel. | ||
| Forward throw | 7% | Spits the opponent forward. It has very minimal combo potential, as its only follow-ups are forward aerial or Egg Throw when throwing the opponent off-stage. However, both of these are largely situational. | ||
| Back throw | 7% | Spits the opponent backward. It has no utility outside of dealing damage. | ||
| Up throw | 5% | Spits the opponent upward. Like back throw, it has no utility outside of dealing damage. | ||
| Down throw | 4% | Spits the opponent onto the ground. Although it has very high base knockback and very low knockback growth like R.O.B.'s down throw, it has extremely minimal combo potential in comparison because of its very slow speed. Its only follow-up is up aerial, although it requires a proper read. | ||
| Floor attack (front) | 7% | Spins around and swings his tail around himself before getting up. | ||
| Floor attack (back) | 7% | Headbutts behind himself and then in front of himself before getting up. | ||
| Floor attack (trip) | 5% | Spins around and swings his tail around himself before getting up. | ||
| Edge attack | 7% | Swings his tail inward while climbing up. | ||
| Neutral special | Default | Egg Lay | 7% | Swallows the opponent and encases them in a Yoshi Egg. While trapped, the opponent receives roughly 2/3 the normal damage and can they use button mashing in order to break free, but they are completely immobile and vulnerable to Yoshi's attacks while trapped. They also stay trapped longer the more damaged they are, though the difference is small. |
| Custom 1 | Lick | 10% | Pokes the opponent with his tongue. Deals more damage and, unlike Egg Lay or Egg Launch, it has high knockback growth and is a semi-spike. Altogether, these traits make it a viable KOing option, as it KOs middleweights at 126% while near the edge of Final Destination in the 3DS version. It also slightly boosts Yoshi forward, similarly to Jumping Inhale. This quirk allows it to function as a punishment option when spaced properly, and even as a horizontal recovery option. It is comparable to how Egg Lay functioned in The Subspace Emissary. | |
| Custom 2 | Egg Launch | 10% | Deals more damage, has slightly less start-up lag, and the Yoshi Egg laid is launched much farther away from Yoshi, which makes it capable of spacing. However, the Yoshi Egg is even easier to break out of, barely gaining increased duration from higher percentages. | |
| Side special | Default | Egg Roll | 4%-9% | Encases himself inside a Yoshi Egg in order to roll around. Yoshi can barrel through opponents, which deals a maximum of 9% with sufficient momentum, or quickly retreat. Unlike in previous installments, it no longer renders Yoshi helpless and allows him to jump once while rolling, the latter of which grants it mindgame potential. |
| Custom 1 | Heavy Egg Roll | 4%-15% | The roll is significantly stronger, to the point that it deals a maximum of 15% in one roll with sufficient momentum. It also grants armor, but is significantly slower. | |
| Custom 2 | Light Egg Roll | 10%-12% (ram), 4% (melee hit 1), 1% (melee hit 2) | Unlike the other two variants, this Egg Roll makes Yoshi bounce in place once, propelling himself forward a sizable set distance, and then immediately leaving the egg after the second bounce. The roll is considerably faster and stronger, dealing higher consistent damage. The egg will bounce higher if the move is initiated in mid air. After launching forward, the egg will bounce again in that direction, unless the control stick is tilted in either horizontal direction, in which case it’ll bounce straight up. The egg will not bounce forward if it strikes something during the initial bounce, also dealing considerably less damage. Striking a wall or initiating the move higher in the air will end the move earlier. | |
| Up special | Default | Egg Throw | 1% (contact), 5% (explosion) | Throws a Yoshi Egg on a controllable, parabolic arc. When used in midair, it grants Yoshi a small vertical and horizontal boost, which loses effectiveness with each consecutive use (4th egg does nothing) until he touches the ground. A very versatile projectile, it can be used for pressuring, edge-guarding, approaching, hindering approaches, and performing mindgames. The egg can be angled in a roughly 90° radius; tilting the control stick in the opposite direction will cause Yoshi to launch the egg straight up. |
| Custom 1 | High Jump | — | Grants a considerably higher vertical boost, but Yoshi does not throw a Yoshi Egg. Like Egg Throw, it can grant momentum up to three times until landing. | |
| Custom 2 | Timed Egg Throw | 9% | The Yoshi Egg is larger and its explosion deals more damage. However, it travels harmlessly through opponents instead of exploding on contact. It also has slightly more start-up, while the aerial version grants a shorter vertical boost. | |
| Down special | Default | Yoshi Bomb | 4% (hop), 15% (grounded Ground Pound), 12% (aerial Ground Pound), 4% (stars) | A Ground Pound that produces damaging stars in front and behind himself when he lands. It boasts impressive power and has very minimal start-up lag, which allow it to function as a viable surprise KOing option, especially from out of shield. The grounded version's Ground Pound KOs middleweights at 119%/113% (3DS/Wii U) from anywhere on Final Destination. Both versions also deal bonus amounts of shield damage, with the grounded version being capable of almost breaking a full shield when each of its hitboxes connect. However, the aerial version's slightly lower damage output and knockback growth result in it being less effective at KOing in comparison. The aerial version KOs middleweights at 156%/145% (3DS/Wii U) from anywhere on Final Destination. |
| Custom 1 | Star Bomb | 3% (hop), 4% (Ground Pound), 8%/6%/4% (stars) | The Ground Pound produces much larger stars that deal more damage. However, the Ground Pound itself deals much less damage and has much lower knockback, to the point that it has virtually no KO potential. | |
| Custom 2 | Crushing Bomb | 5% (hop), 18% (Ground Pound) | The Ground Pound deals more damage and has much higher knockback, to the point that even its aerial version KOs reliably. The grounded version's Ground Pound KOs middleweights at 78% from anywhere on Final Destination in the 3DS version. In comparison, the aerial version KOs them at 90% from anywhere on Final Destination in the 3DS version. However, it has significantly more start-up and ending lag, and produces no stars. | |
| Final Smash | Super Dragon | 3% (idle/ram), 18% (near Fireball), 14% (mid Fireball), 12% (far Fireball), 6% (near Fire Breath), 4% (mid Fire Breath), 3% (far Fire Breath) | Grows a pair of angelic wings that allow him to freely fly around. While transformed, Yoshi can fire large Fireballs from his mouth when the attack or special attack buttons are pressed. The Fireballs deal respectable damage and have high knockback; the most damaging Fireball is strong enough to KO middleweights at 99% while near the edge of Final Destination in the 3DS version. Conversely, not pressing any buttons will result in him briefly exhaling a continuous stream of flames. Yoshi can also make use of his flight and invincibility to ram into opponents, although it is significantly weaker than his Fireball and Fire Breath. | |
Stats[edit]
| Stats | Weight | Dash speed | Walk speed | Traction | Air friction | Air speed | Air acceleration | Gravity | Falling speed | Jumpsquat | Jump Height | Double jump Height |
|---|---|---|---|---|---|---|---|---|---|---|---|---|
| Value | 104 | 1.33 – Initial dash 1.86 – Run |
1.15 | 0.0426 | 0.005 | 1.28 | 0.03 – Base 0.068 – Additional |
0.08 | 1.29 – Base 2.064 – Fast-fall |
6 | 36.094189 - Base 17.434723 - Short hop |
51.56 |
Announcer call[edit]

English/Japanese/Chinese
On-screen appearance[edit]
- Bursts out of a Yoshi Egg and strikes a pose.

|
|---|
Taunts[edit]
- Up taunt: Dances around in a circle and then says "Yoshi!" upon finishing.
- Side taunt: Chases his tail, then briefly pauses to stare at it.
- Down taunt: Looks towards the screen, then jumps excitedly up and down while flailing his arms and saying "Yoshi! Yoshi!"
| Up taunt | Side taunt | Down taunt |
|---|---|---|

|

|

|
Idle poses[edit]
- Performs a short dance.
- Looks around.
 |

|
|---|
Crowd cheer[edit]
| English | Japanese | |
|---|---|---|
| Cheer | ||
| Description | Yo-shi! | Yo-shi! *claps 3 times* |
| Pitch | Group chant | Female |
Victory poses[edit]
- Angrily performs two alternating punches, then turns his back to the screen while looking to the right.
- Looks up at the sky with his hands together, spins once, and then strikes the V sign.
- Punches the air, then strikes a pose with his arms outstretched. It appears very similar to his "character chosen" animation in SSB.
 |
 |

|
|---|
In competitive play[edit]
Official Custom Moveset Project[edit]
| Character | Custom sets available | ||||
|---|---|---|---|---|---|
| 3111 | 2111 | 1311 | 1211 | 3211 | |
| 3311 | 2211 | 2311 | 2113 | 3112 | |
Most historically significant players[edit]
See also: Category:Yoshi players (SSB4)
 DIO - One of the best Yoshi players in Japan. He became one of the first Yoshi players to garner results in 2015 at Karisuma and Sumabato events, most notably placing 5th at Sumabato 14 and 7th at Sumabato 13. He eventually picked up Ryu, but even after the switch in mains, he still used Yoshi at many tournaments to varying success such as 5th at Sumabato 26.
 Raptor - The best Yoshi player in the United States, in contention for best in the world during early meta. He headlined the character at Tri-state events with 9th at KTAR XIII and 13th at Apex 2016 and also placed 9th at Super Smash Con 2015 and 17th at Pound 2016, marking the best solo-Yoshi placements at a major/supermajor. His major results declined past 2017, but still retained a decent string of placements at regionals before the release of Ultimate.
- Ron - The best Yoshi player in Japan after DIO and the best Yoshi player of Smash 4. While he tri-mained the character with Mario and Luigi, he still has performed notable feats with the character such as winning Sumabato 18, using Yoshi to beat Shuton and HIKARU in his bracket. He was the only player to be ranked globally with Yoshi, placing 57th on the PGR 100 as one of his characters.
- Seth - The best solo-Yoshi player by the end of the game's lifespan. He became the highest placing solo-Yoshi at notable majors such as 17th at Smash 'N' Splash 3, 25th at Super Smash Con 2017, and 33rd at Frostbite 2018. He also consistently placed well at multiple Midwest Mayhem events, placing 9th at Midwest Mayhem 10 as an example.
- Snoop - A Yoshi player from Las Vegas that notably made top 64 at supermajors on most occasions, including 33rd at GENESIS 5 defeating 6WX and 49th at EVO 2018 defeating K9sbruce. In terms of local rankings, he consistently remained a top 5 player, often peaking at 3rd on multiple Las Vegas Power Rankings.
Tier placement and history[edit]
Yoshi's perception has been positive since SSB4's release, as many considered him to be as one of the best characters in the game with Japan putting him at 2nd on their 3DS tier list. Players pointed out how his buffs made him an extremely threatening character with "a lot of potential". Despite this, his tournament representation and results was never as high as some of the other characters, with very sparse results from professionals, such as Papa Wall placing 13th at 2GGT: Mexico Saga. As a result, Yoshi was ranked 15th on the first tier list, which resulted in him becoming the second highest ranking mid-tier character after Captain Falcon with some smashers still claiming that his spot is debatable.
Although Yoshi has achieved more tournament success since then, his continually sparse results negatively affected his tier status in subsequent tier lists. On top of this, the additions of Cloud, Bayonetta and Corrin hurt Yoshi as they proved to be very troublesome matchups. Marth and Lucina were also buffed durring patch 1.1.4 and they also proved to be difficult matchups for Yoshi. Yoshi's flaws such as his terrible grab game, poor range, being prone to edgeguarding, and lackluster landing capabilities became much more apparent. He would be ranked 23rd on the second tier list, but because of tier restructuring and Captain Falcon being reassessed as a high-tier character, Yoshi serendipitously became the highest ranking mid-tier character.
By the time of the third tier list, Yoshi was ranked 29th, which was largely owed to the debut of both Cloud and Bayonetta, both of whom are widely agreed upon as being his most challenging matchups as well as his results continuing to be inconsistent and not as impressive as other mid- and high-tier characters. In addition to resulting in Yoshi losing his status as the highest ranking mid-tier character, this tier drop was tied with Kirby and Pit's for the second largest between the second and third tier lists. As of the fourth and current tier list, Yoshi is ranked 33rd, with this tier drop owing to both his results and metagame stagnating with some smashers like ZeRo claiming that he should be even lower. Other smashers such as ESAM however think that he is slightly underrated and that he should be ranked fairly higher with ESAM putting him above some characters ranked above him such as Link, Ness, Lucas, Pit and Dark Pit.
Trophies[edit]


- Yoshi
 As dependable a partner as one could hope for, Yoshi often aids Mario in his adventures. Yoshi can swallow just about anything and make an egg of it instantly. He's got some serious airborne power, making launching opponents skyward and then following up with more attacks a wise choice.
 : Super Mario World (08/1991)
- : Super Mario World 2: Yoshi's Island (10/1995)
 They say man's best friend is a dog, but Mario's may well be Yoshi. He lives on Yoshi's Island, and can swallow up just about anything, then lay it as an egg. In this game, jumping is his forte – he can leap really high, then quickly land again, making chasing after launched opponents and getting in sneaky follow-up strikes easy.
- : Super Mario World (04/1992)
- : Super Mario World 2: Yoshi's Island (10/1995)


- Yoshi (Alt.)
 Yoshi's up special move Egg Throw is a projectile attack that travels farther the longer the button is held. Yoshi will also rise a bit if this move is used in midair. The side special Egg Roll turns Yoshi into a rolling, damaging egg. Yoshi won't roll off an edge if no directions are pressed.
 Yoshi's up-special move Egg Throw is a projectile attack that travels farther the longer the button is held. Yoshi will also rise a bit if this move is used in midair. The side special Egg Roll turns Yoshi into a rolling, damaging egg. Yoshi won't roll off an edge if no directions are pressed.
- : Super Mario World (08/1991)
- : Super Mario World 2: Yoshi's Island (10/1995)
- When you use the Egg Throw up special, how far Yoshi throws the egg depends on how long you hold the button. In mid-air, the move also makes him rise a bit. Egg Roll, a side special, sends him rolling inside an egg. If you don't control him while he's rolling, he'll stop just before he rolls off the edge of a platform.
- : Super Mario World (04/1992)
- : Super Mario World 2: Yoshi's Island (10/1995)

- Super Dragon
- Wings sprout from Yoshi's back, and he transforms into a super-cool dragon! While transformed, Yoshi is invincible and will constantly breathe fire. He can also ram into foes and shoot fireballs at them. The fireballs are great for launching foes and most powerful when used at close range.
- A pair of wings appear on Yoshi's back, turning him into an angelic dragon. While the Final Smash is active, he can fly freely through the air, and is invincible to boot. He constantly breathes fire, can ram into opponents, and can also shoot fireballs that deal a lot of damage and have great launching power, especially at close range.
In Event Matches[edit]
Solo Events[edit]
- All-Star Battle: Regulars: Yoshi is one of the opponents fought in this event. All of the opponents are the eight starter characters of the "perfect-attendance crew" from Super Smash Bros.
- King of the Yoshis: Yoshi must defeat seven other Yoshis.
Co-op Events[edit]
- Food Fight: Kirby and King Dedede must defeat Yoshi, Wario, and Pac-Man.
- Robots vs. Dragons: R.O.B. and Mega Man must defeat a giant Yoshi, a giant Charizard, and Ridley in a Stamina Battle.
- Scheming Sorcerer: Yoshi and Toon Link must defeat a male and a female Robin, followed by a metal male Robin and a giant metal female Robin.
- The Ultimate Battle: Two players select a character and must defeat the entire roster.
Alternate costumes[edit]
.png)
| |||||||

|

|

|

|

|

|

|

|
Gallery[edit]
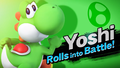
Yoshi's splash art.
Yoshi's amiibo.
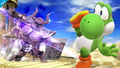
Using his forward tilt against Zelda's Phantom Slash.
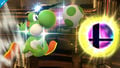
Using Egg Throw on a Smash Ball.
Using Egg Lay alongside Mega Man and Little Mac.
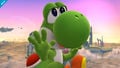
One of Yoshi's idle poses.
Using Yoshi Bomb alongside Bowser's Bowser Bomb and Toon Link's down aerial.
Using Egg Lay while behind Olimar.
Using his down taunt alongside Kirby.
Getting hit by Diddy Kong's Banana Peel.
Alongside Luma.
Jumping away from a shark alongside Pikachu and Diddy Kong.
Yoshi on the cover of Super Smash Bros. for Nintendo 3DS.


Trivia[edit]
- Yoshi is the only member of "The Original 8" to not be revealed at E3 2013, and is once again the last one to be revealed in general.
- Yoshi, Ness, and Jigglypuff are also the only members of the "perfect-attendance crew" to be absent from non-DLC posters containing newcomers. In Yoshi's case, the only poster he appears on is Bayonetta's.
- Yoshi is the only non-DLC veteran that is not an alternate form or part of a set to have splash art and an introduction tagline accompany his reveal.
- Yoshi Bomb's voice clip is still available in Sound Test, even though Yoshi no longer vocalizes upon using Yoshi Bomb.
- Yoshi is the only veteran who can no longer be rendered helpless upon using any of his special moves.
- Although Yoshi's back aerial now consists of three hits instead of four, the sound effect of the removed fourth hit can still be heard if one listens closely. This is much more noticeable in Training Mode's 1/4× speed setting.
- Yoshi is the only character to debut in a Mario game who does not have "Congratulations" written in Mario-themed font for his congratulations screen.
References[edit]
| Fighters in Super Smash Bros. 4 | |
|---|---|
| Veterans | Bowser · Captain Falcon · Charizard · Diddy Kong · Donkey Kong · Dr. Mario · Falco · Fox · Ganondorf · Ike · Jigglypuff · King Dedede · Kirby · Link · Lucario · Lucas · Luigi · Mario · Marth · Meta Knight · Mewtwo · Mr. Game & Watch · Ness · Olimar · Peach · Pikachu · Pit · R.O.B. · Roy · Samus · Sheik · Sonic · Toon Link · Wario · Yoshi · Zelda · Zero Suit Samus |
| Newcomers | Bayonetta · Bowser Jr. · Cloud · Corrin · Dark Pit · Duck Hunt · Greninja · Little Mac · Lucina · Mega Man · Mii Fighter (Mii Brawler · Mii Gunner · Mii Swordfighter) · Pac-Man · Palutena · Robin · Rosalina & Luma · Ryu · Shulk · Villager · Wii Fit Trainer |
|
| |
|---|---|
| Fighter | Yoshi (SSB · SSBM · SSBB · SSB4 · SSBU) |
| Stages | Super Happy Tree · Yoshi's Story · Yoshi's Island (SSBM) · Yoshi's Island (SSBB) · Woolly World |
| Enemies | Shy Guy · Fly Guy |
| Other | Kamek |
| Trophies, Stickers, and Spirits | Trophies (SSBM · SSBB · SSB4) · Stickers · Spirits |
| Music | Brawl · SSB4 · Ultimate |
| Masterpiece | Yoshi |
| Related universe | Mario |