From SmashWiki, the Super Smash Bros. wiki
Jump to navigationJump to search
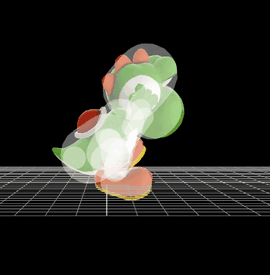
Hitbox visualization showing Yoshi's down aerial.

|
This article or section may require competitive expertise.
You can discuss this issue on the talk page or edit this page to improve it.
|
Hitboxes[edit]
| ID |
Part |
Damage |
SD |
Angle |
BK |
KS |
FKV |
Radius |
Bone |
Offset |
SDIx |
H× |
T% |
Clang |
Rebound |
Type |
Effect |
G |
A |
Sound |
Direct
|
| Hit 1-6 (loop)
|
| 0 |
0 |
3% |
0 |
 |
5 |
80 |
0 |
6.0 |
0 |
0.0 |
0.0 |
2.0 |
1.5x |
1.1x |
0% |
 |
 |
 |
 |
 |
 |
 Kick Kick |

|
| 1 |
0 |
2% |
0 |
 |
5 |
80 |
0 |
4.5 |
0 |
0.0 |
1.0 |
7.0 |
1.5x |
1.1x |
0% |
|
|
|
|
|
|
Kick |
|
| 2 |
0 |
2% |
0 |
 |
5 |
80 |
0 |
4.5 |
0 |
0.0 |
1.0 |
-3.0 |
1.5x |
1.1x |
0% |
|
|
|
|
|
|
Kick |
|
| Hit 7-12 (loop)
|
| 0 |
0 |
2.2% |
0 |
|
5 |
100 |
0 |
7.0 |
0 |
0.0 |
0.0 |
2.0 |
1.5x |
1.1x |
0% |
|
|
|
|
|
|
Kick |
|
| 1 |
0 |
1.5% |
0 |
|
5 |
100 |
0 |
4.5 |
0 |
0.0 |
1.0 |
7.0 |
1.5x |
1.1x |
0% |
|
|
|
|
|
|
Kick |
|
| 2 |
0 |
1.5% |
0 |
|
5 |
100 |
0 |
4.5 |
0 |
0.0 |
1.0 |
-3.0 |
1.5x |
1.1x |
0% |
|
|
|
|
|
|
Kick |
|
| Final hit
|
| 0 |
0 |
1% |
0 |
 |
60 |
200 |
0 |
7.0 |
0 |
0.0 |
0.0 |
2.0 |
1.0x |
1.1x |
0% |
|
|
|
|
|
|
Kick |
|
| 1 |
0 |
1% |
0 |
 |
60 |
200 |
0 |
5.0 |
0 |
0.0 |
1.0 |
7.0 |
1.0x |
1.1x |
0% |
|
|
|
|
|
|
Kick |
|
| 2 |
0 |
1% |
0 |
|
60 |
200 |
0 |
5.0 |
0 |
0.0 |
1.0 |
-3.0 |
1.0x |
1.1x |
0% |
|
|
|
|
|
|
Kick |
|
| Landing
|
| 0 |
0 |
1% |
0 |
 |
0 |
100 |
40 |
5.0 |
0 |
0.0 |
2.5 |
-3.0 |
1.0x |
1.0x |
0% |
|
|
|
|
|
 |
 Kick Kick |
|
| Initial autocancel
|
1-13
|
| Hits 1-6
|
16, 18, 20, 22, 24, 26
|
| Hits 7-12
|
28, 30, 32, 34, 36, 38
|
| Hit 13
|
41
|
| Ending autocancel
|
50-
|
| Interruptible
|
57
|
| Animation length
|
65
|
| Hitbox
|
1
|
| Animation length
|
24
|
