Zelda (SSB4): Difference between revisions
No edit summary |
m (→Attributes) |
||
| Line 26: | Line 26: | ||
Despite being a below average projectile in ''Brawl'', [[Din's Fire]] has been nerfed to the point of having very little utility outside of having a chance of getting extra damage on the opponent when edge-guarding. Even then, it is very easy to jump or air dodge even when the player predicts the opponent's movements. [[Farore's Wind]] is a long-ranged [[Teleport (disambiguation)|teleport]] move with a hitbox and invincibility, giving her a reliable move for recovering. In addition to its long range and being unpredictable for the opponent to counter if used wisely, Farore's Wind is now one of Zelda's most viable KOing options: its powerful disappearing hitbox sends opponents directly upward, and if Zelda follows them straight up with its reappearing hitbox, it can KO characters from 50%-70%. Lastly, [[Nayru's Love]] is known for its reflecting purposes as well as its hitboxes that damage and push opponents far when used, making it an all-around useful move for offense and defense. | Despite being a below average projectile in ''Brawl'', [[Din's Fire]] has been nerfed to the point of having very little utility outside of having a chance of getting extra damage on the opponent when edge-guarding. Even then, it is very easy to jump or air dodge even when the player predicts the opponent's movements. [[Farore's Wind]] is a long-ranged [[Teleport (disambiguation)|teleport]] move with a hitbox and invincibility, giving her a reliable move for recovering. In addition to its long range and being unpredictable for the opponent to counter if used wisely, Farore's Wind is now one of Zelda's most viable KOing options: its powerful disappearing hitbox sends opponents directly upward, and if Zelda follows them straight up with its reappearing hitbox, it can KO characters from 50%-70%. Lastly, [[Nayru's Love]] is known for its reflecting purposes as well as its hitboxes that damage and push opponents far when used, making it an all-around useful move for offense and defense. | ||
Zelda's grab game is also above average. Her grab range is fairly large for a non-tether grab and is disjointed, making it a safe move to use, whereas her pummel has a good damage output despite being moderately slow. Her down throw is a fairly reliable combo starter especially on fast-fallers; while it can combo into several of her aerials sans down aerial, at KO percentages, it can be followed by an up aerial if it is not DI'd properly. Her back throw deals respectable damage and is very strong, able to KO at high percentages, while also being good for putting the opponent off-stage at low percents. Likewise, her forward throw is one of the most damaging throws in the game, and can set the opponent up for an edge-guard. Finally, her up throw deals respectable damage and can work as a combo throw, albeit only on fast-fallers. | Zelda's grab game is also above average. Her grab range is fairly large for a non-tether grab and is disjointed, making it a relatively safe move to use, whereas her pummel has a good damage output despite being moderately slow. Her down throw is a fairly reliable combo starter especially on fast-fallers; while it can combo into several of her aerials sans down aerial, at KO percentages, it can be followed by an up aerial if it is not DI'd properly. Her back throw deals respectable damage and is very strong, able to KO at high percentages, while also being good for putting the opponent off-stage at low percents. Likewise, her forward throw is one of the most damaging throws in the game, and can set the opponent up for an edge-guard. Finally, her up throw deals respectable damage and can work as a combo throw, albeit only on fast-fallers. | ||
Zelda's ground game is below average, though every move does still have its uses. Both her up tilt and down tilt are easy combo starters that have low ending lag and knockback, but can predictable. Her forward tilt has KO power, but suffers from relatively high end lag. Her forward and up smashes have great power, especially the latter, while the former has low ending lag and is useful for pressuring shields. However, but none of them have confirms into them at KOing percentages. Her down smash has the lowest KO power among her smash attacks, but it comes out very quickly, has little ending lag, and is a [[semi-spike]], allowing her to send opponents with poor recoveries too far from the stage to recover. Zelda's neutral attack is a decent combo starter with very low ending lag, though it suffers from the longest start-up of any neutral attack. Lastly, her dash attack has good KO power, though it is often difficult to sweetspot due to Zelda's poor mobility, which hurts both her neutral and punish game. | Zelda's ground game is below average, though every move does still have its uses. Both her up tilt and down tilt are easy combo starters that have low ending lag and knockback, but can predictable. Her forward tilt has KO power, but suffers from relatively high end lag. Her forward and up smashes have great power, especially the latter, while the former has low ending lag and is useful for pressuring shields. However, but none of them have confirms into them at KOing percentages (albeit sometimes falling neutral air combos into up smash). Her down smash has the lowest KO power among her smash attacks, but it comes out very quickly, has little ending lag, and is a [[semi-spike]], allowing her to send opponents with poor recoveries too far from the stage to recover. Zelda's neutral attack is a decent combo starter with very low ending lag, though it suffers from the longest start-up of any neutral attack. Lastly, her dash attack has good KO power, though it is often difficult to sweetspot due to Zelda's poor mobility, which hurts both her neutral and punish game. | ||
Zelda's air game is also decent thanks to her aerial attacks. While they require precision to be truly effective, her [[Lightning Kick]]s, up aerial and down aerial boast enough power to KO easily when sweetspotted. One of them functions differently from them, though: her neutral aerial is one of the most damaging neutral aerials in the game, while also boasting combo potential. Zelda's combo game is also much better than in previous iterations: her combo starters range from a falling neutral aerial (which can chain into a grab or up tilt), up tilt (which can chain into itself or her aerials), down tilt (which can chain into a grab, any of her tilts or any of her aerials) and down throw (which can chain into either her neutral, up or back aerials). Both her down aerial on grounded opponents and her neutral attack can start combos or tech chases, while Nayru's Love can also start tech chases. She has many ways to punish mistakes out of shield, courtesy of her Lightning Kicks, neutral aerial, Nayru's Love and, most notably, Farore's Wind. Lastly, Zelda has some powerful KOing options: her forward and up smashes, all of her aerials (except neutral aerial) and all of her specials (except Nayru's Love and Din's Fire) can score KOs rather easily. | Zelda's air game is also decent thanks to her aerial attacks. While they require precision to be truly effective, her [[Lightning Kick]]s, up aerial and down aerial boast enough power to KO easily when sweetspotted. One of them functions differently from them, though: her neutral aerial is one of the most damaging neutral aerials in the game, while also boasting combo potential. Zelda's combo game is also much better than in previous iterations: her combo starters range from a falling neutral aerial (which can chain into a grab or up tilt), up tilt (which can chain into itself or her aerials), down tilt (which can chain into a grab, any of her tilts or any of her aerials) and down throw (which can chain into either her neutral, up or back aerials). Both her down aerial on grounded opponents and her neutral attack can start combos or tech chases, while Nayru's Love can also start tech chases. She has many ways to punish mistakes out of shield, courtesy of her Lightning Kicks, neutral aerial, Nayru's Love and, most notably, Farore's Wind. Lastly, Zelda has some powerful KOing options: her forward and up smashes, all of her aerials (except neutral aerial) and all of her specials (except Nayru's Love and Din's Fire) can score KOs rather easily. | ||
Revision as of 15:46, September 6, 2016
| Zelda in Super Smash Bros. 4 | |
|---|---|
 
| |
| Universe | The Legend of Zelda |
| Other playable appearances | in Melee in Brawl |
| Availability | Starter |
| Final Smash | Light Arrow |
| Tier | H (55) |
Zelda (ゼルダ, Zelda) is a playable character in Super Smash Bros. 4. She was announced on December 26th, 2013, the date on which The Legend of Zelda: A Link Between Worlds was released in Japan. Jun Mizusawa, who voiced Zelda in Melee, Brawl, The Legend of Zelda: Ocarina of Time, and The Legend of Zelda: Twilight Princess, reprises her role albeit via recycled voice clips from Brawl.
Zelda is currently ranked 55th out of 58 on the tier list, placing her in the H tier. While this continues her trend of being a bottom-tier character, it is still a marginal improvement from her placement in Brawl, where she was ranked 37th out of 38. Zelda possesses some strengths, with Farore's Wind arguably being her most notable one: it has utility as both a long-distanced recovery move and her strongest finisher (especially from out of shield), with its power enabling her to KO middleweights and heavyweights as low as 50% and 70%, respectively. Outside of this, she has retained her fairly powerful attacks, including her fast and strong Lightning Kicks, while also gaining a capable damage racking game.
However, Zelda's numerous flaws are severe enough to completely outweigh these strengths: her mobility, hitbox placements, survivability, and neutral game are all among the worst, while her projectiles are middling. A large number of her attacks are KO moves that require the landing of a sweetspot to be effective, resulting in her KOing ability being rather weak and netting her an abundance of ineffective moves. Din's Fire is slow, easily avoidable and leaves Zelda vulnerable due to its lag and rendering her helpless in midair, though it has use in doubles by supporting a teammate. Phantom Slash requires charging to cover any actual distance and can even be rendered temporarily inactive if the Phantom is destroyed, but it can become a useful edge-guarding option if timed properly and also possesses impressive power when fully charged. Finally and most notably, Zelda can no longer Transform into Sheik to alleviate her weaknesses, due to the latter having become an entirely separate character. This is compounded even further by the massive amount of buffs Sheik received.
As a result of her numerous, glaring weaknesses, Zelda has garnered poor results and representation in competitive play.
Attributes
Zelda's character archetype continues to be the same as in Melee and Brawl: she is tall, light and floaty with a rather slow falling speed, low gravity (though both have become faster since Brawl and when compared to Melee), below average walking speed and the fifth slowest dashing speed in the game. Although her air speed and air acceleration are both above average, her mobility is still rather sub-par overall. When coupled with a poor neutral game, this results in Zelda having a poor approach.
Zelda defies most other character playstyles. While her approach is lacking, her out of shield and punish games are quite strong. She is generally played defensively, but a moderately aggressive playstyle can offer a noticeable benefit. Her special moveset, while not having very useful options, is still decent regardless. In terms of projectiles, she has a notable one in Phantom Slash. As a chargeable attack, Phantom Slash sports both offensive and defensive capabilities and can even be used for edge-guarding against recovering opponents, as it can KO them surprisingly early if fully charged. It also blocks Zelda from many attacks and projectiles, until the Phantom breaks, resulting in the move being rendered inactive for 9 seconds. Phantom Slash can also be used rather effectively when coming down from the upper corners of the stage to apply pressure to an opponent standing at the edge. However, its ending lag, its poor reach at the lowest charges and its susceptibility to being reflected may hinder its use if it is not used wisely.
Despite being a below average projectile in Brawl, Din's Fire has been nerfed to the point of having very little utility outside of having a chance of getting extra damage on the opponent when edge-guarding. Even then, it is very easy to jump or air dodge even when the player predicts the opponent's movements. Farore's Wind is a long-ranged teleport move with a hitbox and invincibility, giving her a reliable move for recovering. In addition to its long range and being unpredictable for the opponent to counter if used wisely, Farore's Wind is now one of Zelda's most viable KOing options: its powerful disappearing hitbox sends opponents directly upward, and if Zelda follows them straight up with its reappearing hitbox, it can KO characters from 50%-70%. Lastly, Nayru's Love is known for its reflecting purposes as well as its hitboxes that damage and push opponents far when used, making it an all-around useful move for offense and defense.
Zelda's grab game is also above average. Her grab range is fairly large for a non-tether grab and is disjointed, making it a relatively safe move to use, whereas her pummel has a good damage output despite being moderately slow. Her down throw is a fairly reliable combo starter especially on fast-fallers; while it can combo into several of her aerials sans down aerial, at KO percentages, it can be followed by an up aerial if it is not DI'd properly. Her back throw deals respectable damage and is very strong, able to KO at high percentages, while also being good for putting the opponent off-stage at low percents. Likewise, her forward throw is one of the most damaging throws in the game, and can set the opponent up for an edge-guard. Finally, her up throw deals respectable damage and can work as a combo throw, albeit only on fast-fallers.
Zelda's ground game is below average, though every move does still have its uses. Both her up tilt and down tilt are easy combo starters that have low ending lag and knockback, but can predictable. Her forward tilt has KO power, but suffers from relatively high end lag. Her forward and up smashes have great power, especially the latter, while the former has low ending lag and is useful for pressuring shields. However, but none of them have confirms into them at KOing percentages (albeit sometimes falling neutral air combos into up smash). Her down smash has the lowest KO power among her smash attacks, but it comes out very quickly, has little ending lag, and is a semi-spike, allowing her to send opponents with poor recoveries too far from the stage to recover. Zelda's neutral attack is a decent combo starter with very low ending lag, though it suffers from the longest start-up of any neutral attack. Lastly, her dash attack has good KO power, though it is often difficult to sweetspot due to Zelda's poor mobility, which hurts both her neutral and punish game.
Zelda's air game is also decent thanks to her aerial attacks. While they require precision to be truly effective, her Lightning Kicks, up aerial and down aerial boast enough power to KO easily when sweetspotted. One of them functions differently from them, though: her neutral aerial is one of the most damaging neutral aerials in the game, while also boasting combo potential. Zelda's combo game is also much better than in previous iterations: her combo starters range from a falling neutral aerial (which can chain into a grab or up tilt), up tilt (which can chain into itself or her aerials), down tilt (which can chain into a grab, any of her tilts or any of her aerials) and down throw (which can chain into either her neutral, up or back aerials). Both her down aerial on grounded opponents and her neutral attack can start combos or tech chases, while Nayru's Love can also start tech chases. She has many ways to punish mistakes out of shield, courtesy of her Lightning Kicks, neutral aerial, Nayru's Love and, most notably, Farore's Wind. Lastly, Zelda has some powerful KOing options: her forward and up smashes, all of her aerials (except neutral aerial) and all of her specials (except Nayru's Love and Din's Fire) can score KOs rather easily.
However, Zelda also posseses numerous weaknesses: like in previous games, she has the inconvenient combination of being tall, light and floaty, making her fairly easy to KO, especially vertically. Her mobility is also slow overall, having a poor dashing speed and falling speed, while her air speed is above average, her falling speed otherwise hinders the powerful aerial prowess on her moves. Her main ways of dealing with pressure projectiles are lacking: short-range pressure means trouble to her since Nayru's Love is rather laggy in terms of ending lag, while Phantom Slash is slightly situational and, like Din's Fire, does not help her camp very well.
She has many laggy attacks with a few poorly placed hitboxes, making it difficult for her to KO despite her power. Because of this, Zelda's only consistently reliable KOing options are her forward and up smashes, back throw, Lightning Kicks and Farore's Wind, with all of them aside from forward smash and back throw being easily punishable. Despite having a reliable recovery, Farore's Wind can also cause her to recover in the wrong direction if she recovers from the stage slopes, and she cannot move in her free fall animation until a long while afterwards due to Farore's Wind's high ending lag.
Zelda's custom moves also include some of the worst in the game, as they fail to fix her significant problems and only a few are slightly better than the default versions. Nayru's Rejection reverses opponents, but has slightly increased starting lag and is overall weaker than Nayru's Love, with the only saving grace being its increased intangibility. It also does not have the same benefits as Mario's Cape, as it does not leave the opponent in free fall. Farore's Windfall meteor smashes opponents, but only travels straight up while still halting her momentum while gaining no benefit from a double jump. Unless used near the edge or in the air, it has very little KO potential, only KOing opponents regularly until the 400% range and higher, removing her most notable KOing option in the process. She does have a few notable ones, however. Her Phantom Breaker can break shields very easily, although it deals less damage and travels a set distance. Din's Blaze moves slower, but explodes with much stronger knockback, and if used carefully, it can be a deadly edge-guarding option. Aside from these, her remaining custom moves are only situational at best.
Overall, Zelda relies on a patient and defensive, yet somewhat slow playstyle to use her superb out of shield game to score KOs. Like in Melee and Brawl, Zelda has very poor tournament representation and little noteworthy results, with only a handful of her notable players being dedicated mains.
Changes from Brawl
Despite her status as the second worst character in Brawl, Zelda has received a mix of buffs and nerfs in the transition to SSB4. Due to her major flaws not being properly alleviated, however, she is considered to be nerfed overall. Most of them were mostly to her power, with her down smash and up tilt having their knockback significantly reduced, her up and down smashes having less range, and Din's Fire being less maneuverable and harder to hit with. Her Lightning Kicks have lost a lot of their utility, due to them having less power and higher ending and landing lag, worsening her approach. Most notably, she has also lost her ability to Transform into Sheik, which is further compounded by the latter having been significantly buffed in the transition from Brawl to SSB4.
However, Zelda also received some buffs. Farore's Wind is now a risky but very viable KOing option, especially from out of shield, due to the significant increases to its damage output and knockback. Due to losing Transform, Zelda received a new down special in Phantom Slash. In addition to being a fairly strong projectile and capable edge-guarding option, the Phantom itself can block opponents' attacks and enable Zelda to attack from behind it, and also helps her cover almost all edge get-up options. Lastly, Zelda's combo game, which was practically nonexistent in previous games, has been noticeably improved; her up tilt's increased speed and lowered knockback enables it to chain into itself much like her down tilt can, her neutral aerial is now better for combos as well, while her down throw's altered launching trajectory sets her up for better aerial follow-ups.
However, these buffs only compensate for Zelda's damage racking game; she still possesses a poor neutral game, while her attacking speed and mobility are still slow despite the buffs they received.
Aesthetics
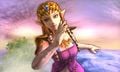
 Zelda once again appears as her The Legend of Zelda: Twilight Princess incarnation, but her overall color scheme is now noticeably brighter to appear in-line with SSB4's vibrant aesthetics. She is also much more expressive.
- Zelda's grieves on her boots are more enunciated with her buckles no longer merging with her soles, although the metal Triforce studs on the said buckles have been removed.
- Most of Zelda's moves have updated visual and sound effects, while all of her magical moves now have a magic effect instead of an electric effect.
- Sidestep's and air dodge's animations have changed.
Attributes
 Zelda walks faster (0.8 → 0.87).
- Zelda dashes faster (1.224 → 1.3).
- Zelda's air speed is faster (0.987 → 1.04).
- Zelda falls faster (1.13 → 1.35).
- Zelda's gravity is higher (0.067 → 0.071), allowing her to reach her maximum falling speed faster.
- Zelda can no longer Transform into Sheik, with the latter becoming her own separate character.
 Due to the removal of Transform, Zelda can no longer access Sheik's mobility to greatly alleviate her own. She also cannot benefit from the plethora of buffs that Sheik received.
Ground attacks
- Neutral attack deals 5% more damage (6% → 11%), has decreased ending lag (25 → 24) and its hits connect together better.
- Sweetspotted dash attack has altered knockback (70 (base)/70 (growth) → 85/70 (body), 50 (base)/70 (growth) → 80/50 (hand)), granting it KO potential at medium percents.
- Dash attack's hitbox duration is shorter (frame 6-13 → 6-10).
- Forward tilt deals less damage (13%/12%/11% → 12%/10%), but with its knockback compensated. Its hitbox duration is also 2 frames shorter (12-14 → 10-11).
- Forward tilt comes out faster (frame 12 → 10) and has decreased ending lag (40 → 38). It also has a larger z-position (3u → 3.5u), improving its range.
- Forward tilt no longer launches opponents backward. While this improves its KO potential when sweetspotted, it can no longer be followed up by her back Lightning Kick as a result.
- Up tilt deals 3.8% less damage (11% → 7.2%) and has altered knockback (65 (base)/105 (growth) → 45/110), hindering its KO potential.
- Up tilt is 3 frames faster (frame 10 → 7), has increased knockback growth and significantly decreased ending lag (48 frames → 29). All these changes significantly improve its combo potential.
- Down tilt deals less damage (8%/7% → 5.5%), but with its knockback growth compensated (80 → 120). It can also no longer trap opponents due to losing its meteor smash hitbox.
- Forward and up smashes have decreased SDI multipliers, which results in opponents no longer escaping them.
- Forward smash's last hit and up smash have increased knockback (30 (base)/105 (growth) → 37/110 (forward), 20 (base)/210 (growth) → 24/214 (up)), slightly improving their KO potentials.
- Forward and up smashes have increased ending lag (40 → 50 (forward), 57 → 64 (up)).
- Up and down smashes have very slightly decreased ranges. Zelda's leg is also no longer intangible during down smash.
- Down smash's first hit has decreased knockback growth (95 → 86), while its second hit has increased knockback growth (85 → 96). This makes it function like several other down smashes, such as Mario's and Luigi's, in which the second hit is stronger than the first.
- Down smash's hits come out 1 frame later (frame 4/12 → 5/13), resulting in it no longer being the fastest down smash. Its hitbox duration is also 1 frame shorter.
- Down smash has decreased ending lag (40 → 37).
Aerial attacks
- Neutral aerial no longer deals consistent damage (13% → 15% (front)/11% (back).
- Neutral aerial's back hits now drag the opponent toward the front hits, allowing the move to deal more damage from that position. The last hit has increased knockback growth (120 → 130), improving its combo and edge-guarding potential.
- Both Lightning Kicks are easier to land due to altered hitbox placements and less freeze frames when sweetspotted (5 frames → 2). This makes them behave similarly to down aerial. Both of them also have altered animations where Zelda leans and faces away from her respective kicking directions with her arms positioned differently, narrowing her own hurtbox during the moves.
- Zelda now recovers in a turn for the forward version and twists her body somewhat before kicking for the backward version, which causes both Lightning Kicks to have significantly increased ending lag (especially for the forward version), on top of decreased base knockback and increased landing lag. Their hitboxes also come out slower (frame 8 → 9 (forward), frame 5 → 6 (back)), although they are still among the fastest and the most powerful aerials in the game.
- Up aerial deals 2% more damage (15% → 17%) and has a larger hitbox (7u → 8u), but with its knockback compensated (110 → 84). It also has more active hitbox frames (frame 14 → 14-16) and decreased landing lag.
- Down aerial's sweetspot has a larger hitbox and can now land on grounded opponents.
- Sweetspotted down aerial has decreased knockback (50 (base)/90 (growth) → 30/65).
Throws/other attacks
- Standing and dash grabs have increased reach (10.5 (standing)/13.5 (dash) → 11.5/14.5).
- Standing and pivot grabs come out faster (frame 12 → 10 (standing), frame 14 → 11 (pivot)).
- Pivot grab has decreased reach (-18.7 → -16.7).
- Up throw has altered knockback (80 (base)/50 (growth) → 50/60), improving its follow-up potential against fast-fallers or heavyweights.
- Down throw deals 4% less damage (10% → 6%).
- Down throw now launches opponents at 100°, improving its follow-up potential.
Special moves
- Nayru's Love deals 4% less damage (15% → 11%). The removal of momentum canceling makes the Nayru's Love Jump gain significantly less vertical height, hindering its recovery potential.
- Nayru's Love has decreased ending lag, more intangibility frames (5-12 → 5-15) and its hits connect together better.
- Nayru's Love's no longer launches the opponent in the direction Zelda is facing. Instead, whatever side of Zelda they are on is the direction they will be launched.
- Din's Fire deals less damage (16%/8% → 14%/7%). Its travel distance, maneuverability and explosion range has been reduced, making it far more unwieldy to control. It must also must travel a set distance away from Zelda before it can be detonated, leaving her open if it misses. Also, directing the move into the stage will no longer make it explode faster, but it will stop moving and explode at the same time as in releasing the special button at the same spot and time.
- Din's Fire has gained a sweetspot in the middle of the explosion that deals increased knockback. However, its sourspot deals decreased knockback and half the damage of what the sweetspot damage would be for its charge level.
- Farore's Wind deals more damage (6% → 13%/14%/16%/18%). Grounded Farore's Wind's first hit launches the opponent directly upward, allowing it to combo into the reappearance hit. When coupled with its decreased start-up and its reappearance hit's altered knockback (40 (base)/100 (growth) → 90/90), this makes it a risky but very effective KOing option, especially from out of shield. It also travels farther and gains significantly more height when used with a jump. Lastly, Zelda now snaps onto the edge when using Farore Wind's instead of having to reappear first.
- Farore's Wind's reappearance hit has received a sourspot that deals less damage and knockback.
- It also has a slash effect instead of a fire effect.
- Zelda has a new down special, Phantom Slash. Phantom Slash enables her to summon a Phantom that is propelled forward before slashing with its sword. The Phantom can block attacks and the move can be charged to shoot the Phantom farther.
- Phantom Slash's charge cannot be stored or held indefinitely. Additionally, the Phantom can be reflected or Pocketed due to it functioning as a projectile. Lastly, the Phantom can be destroyed, which temporarily prevents Zelda from reusing the move.
- Light Arrow deals 2% less damage (42% → 40%) and has decreased knockback.
Update history
Zelda has been heavily buffed via game updates, beginning with update 1.0.6. Her forward tilt became faster, making it a better punishing option, her neutral attack, up tilt, and down tilt had their damage outputs increased, while up tilt gained true combo potential. The hits of her forward and up smashes also connect together much better, while the latter smash attack had its knockback and range increased, and her down smash had its ending lag decreased. Her neutral, up, and down aerials had their ending lag decreased, and her neutral and up aerials' damage outputs were increased. Lastly, Phantom Slash also received improvements in the forms of decreased ending lag the removal of a blind spot. Zelda also benefited from the changes to the shield mechanics brought about in updates 1.1.0 and 1.1.1, due to her multiple hitting moves and Lightning Kicks becoming safer on shield, making her harder to punish.
Update 1.1.5 brought in some of Zelda's more noteworthy buffs, such as increased damage outputs to her neutral attack, neutral aerial and up aerial, with the latter's hitbox size also increasing and thus becoming a more reliable KOing option. In addition, Zelda's grab had its range improved, while her forward tilt and down smash became less laggy. Although some of her attacks also saw a slight decrease in knockback scaling via updates, they all now allow Zelda to rack up damage more reliably to set up a finisher.
- Up tilt's ending lag decreased: frame 35 → 33, improving its combo ability.
- Up tilt deals more damage: 6.5% → 7.2%.
- Pivot grab's Z-offset decreased: -4 – -18.7 → -4 – -15.7. This lowers its range.
![]() 1.0.5
1.0.5
- Pivot grab's animation slightly changed.
- Some attacks' visual effects have improved.
- Forward smash has been improved. Its SDI multipliers decreased and its loop hits' angles altered, enabling opponents to be kept in place better and resulting in its hits connecting together better, respectively.
- Phantom Slash's ending lag decreased.
- The Phantom's on-stage duration increased by roughly a quarter of a second.
- The Phantom's respawn time increased: 6 seconds → 9.
- Back Lightning Kick has improved visual effects.
- Up smash's knockback increased, KOing about 20% earlier.
- Up smash's SDI multipliers decreased, enabling opponents to be kept in place better.
- Up smash's multiple hits' hitbox sizes increased: 3u → 3.5u.
- Neutral, up and down aerials' landing lag decreased: 22 → 19 (neutral, up) 21 → 18 (down).
- Neutral aerial's front hits and back hits' damage outputs reversed: 1% → 2% (front), 2% → 1% (back).
- Neutral attack has been improved. It deals 2% more damage: 6% → 8%, its hits connect together better and its angle altered, improving its combo potential.
- Neutral attack's last hit's knockback altered: 24 (base)/150 (growth) → 35/130.
- Neutral attack's heavy position, bone, angle, size, and weight-based knockback adjusted on all hits.
- Up tilt's ending lag decreased: 32 → 29, improving its combo potential.
- Down tilt deals 1% more damage: 4.5% → 5.5%.
- Phantom Slash received a windbox that pushes opponents into the Phantom's sword at low charges and pushes them away at high charges. This essentially removes the move's blind spot.
- Phantom Slash's ending lag decreased by 5 frames.
- Neutral aerial's back hits now drag opponents toward the front hits, allowing the move to deal more damage from that position.
- Farore's Squall's hitbox duration increased by 1 frame.
- Farore's Squall's ending lag decreased by 6 frames.
- Nayru's Passion's windbox and explosion hitbox's start-up decreased by 2 and 5 frames, respectively.
- Nayru's Passion's windbox's position altered.
- Light Arrow's visual effects modified.
- Jab deals more damage: 8% → 11%. Its knockback was compensated however (35 (base)/130 (growth) → 40/95).
- Forward tilt startup and ending lag decreased: frame 12 (startup)/39 (ending lag) → 10/37. The Z position was also slightly increased to give it more reach: 3u → 3.5u.
- Down smash has less ending lag: 40 frames → 37.
- Neutral air deals more damage: 11% (front)/7% (back) → 15/11%. The knockback was compensated: 160/160/140/140 → 130/130/110/100.
- Up air deals 2% more damage: (15% → 17%), and has a larger hitbox: 7u → 8u. Its knockback was compensated, however (90 → 84).
- Nayru's Love has more intangibility frames: 5-12 → 5-15. This now makes it overlap with the first hitbox's first active frames, making it harder to have another attack cancel it.
- All grabs have more reach: 10.5 (standing)/13.5 (dash)/-15.7 (pivot) → 11.5/14.5/-16.7.
Moveset
| Name | Damage | Description | ||
|---|---|---|---|---|
| Neutral attack | 3% (hits 1-2), 5% (hit 3) | Extends her arm and emits a small blast of magical energy from her hand. It launches opponents slightly backward, making it a decent combo starter at low percents. It hits on frame 11, making it the slowest neutral attack in the game, although its ending lag is minimal. | ||
| Forward tilt | 12% (hand), 10% (arm) | A magically-infused, outward knifehand strike. Can be angled and is moderately powerful for a tilt. | ||
| Up tilt | 7.2% | Waves her arm in an overhead arcing motion, with her hand infused with magical energy. Due to its speed, it can combo into itself at low percents and into an aerial at medium percents. The back hit has much more combo potential than the front hit. | ||
| Down tilt | 5.5% | A crouching shin kick. Due to its speed and how it slightly launches opponents into the air, it is a reliable combo starter. Aside from itself, it can also combo into up tilt and then be followed up with a forward tilt or a forward smash. It also has unexpectedly long duration and very low ending lag. | ||
| Dash attack | 12% (clean base), 9% (clean tip), 6% (late) | A double palm thrust that emits a blast of magical energy from her hands, similarly to Peach's dash attack. Sweetspot is located at the beginning of the move. Can KO at medium to high percents near the edge. | ||
| Forward smash | 1% (hits 1-4), 13% (hit 5) | Rears her right arm back and then performs a palm thrust that emits a blast of magical energy. Hits multiple times and deals decently high knockback, enabling it to KO around 108%. Can also be used to pressure shields. | ||
| Up smash | 2% (hits 1-4), 0.8% (hits 5-7), 5% (hit 8) | Charges magical energy in her left hand and waves in an overhead fanning motion. Hits multiple times and deals high knockback, but has low range. Can KO around 100% when uncharged. | ||
| Down smash | 12% (hit 1), 10% (hit 2) | A spinning shin kick. Hits on both sides and is a semi-spike, which can be used as a set-up for a down aerial when launching the opponent off-stage. | ||
| Neutral aerial | 2.5% (hits 1-4 front), 1.5% (hits 1-4 back), 5% (hit 5) | Twirls with her arms outstretched and emits magical energy along her arms. Hits multiple times around her before launching opponents. Has a fair amount of utility, as it can be used as a follow-up from her down throw, as a short hopped approach option to initiate combos, or as an edge-guarding option. | ||
| Forward aerial | Lightning Kick | 20% (clean foot), 4% (clean leg, late) | A magically-infused flying kick. Its sweetspot lies at the tip of her foot and deals considerable damage and knockback. The sweetspot is easier to connect if it hits the opponent at the beginning of the move. Otherwise, it deals low damage knockback. Despite its positives, its ending lag is considerable enough for Zelda to get punished at low percents, even if the sweetspot connects. Can KO around 70%-90% near the edge if sweetspotted. | |
| Back aerial | Lightning Kick | 20% (clean foot), 4% (clean leg, late) | A magically-infused flying kick. Functions almost identically to her forward aerial, with the only differences being that it comes out 3 frames faster and its sweetspot is slightly stronger, KOing around 65%-85% if sweetspotted. | |
| Up aerial | 17% | Brings her arm above her head and emits a magical explosion from her index and middle fingers. Slow and requires precise timing to connect, but it has impressive knockback and can KO around 118% on a grounded opponent. It can also clip through the bottom of stage edges and have its hitbox go slightly above the edge or narrow areas of the stage. | ||
| Down aerial | 16% (clean), 5% (late leg), 4% (late foot) | A magically-infused stomp. It meteor smashes opponents caught below Zelda's waist; the initial hitbox deals a powerful meteor smash, whereas later hitboxes hit opponents with a weaker meteor smash. A very useful edge-guarding option, especially as a follow-up from a down smash due to the latter's semi-spiking property. | ||
| Grab | — | Waves her left arm down and her right arm up, restraining the opponent in front of her with magical energy. Fairly large grab range. | ||
| Pummel | 3% | A blast of magical energy. Moderately slow, but one of the most damaging pummels in the game. | ||
| Forward throw | 12% | Spins the opponent in front of her and throws her opponent away. One of the most damaging forward throws in the game. Useful for putting the opponent off-stage. | ||
| Back throw | 11% | Spins the opponent and circles them around herself, then throws them behind her. A powerful kill throw, it can KO Bowser at 176% near the edge without rage and with optimal DI from the opponent. | ||
| Up throw | 11% | Forces her opponent above her, throwing it upward. One of the most damaging up throws in the game. On fast-fallers, it can be followed up with a neutral aerial or up aerial if timed precisely. | ||
| Down throw | 1% (hits 1-4), 2% (throw) | Forces her opponent under her and blasts them with fiery magical energy from her hands, which launches them above her. A reliable combo starter, it can be followed up with a neutral aerial and, if timed precisely, an up aerial or a back aerial. At high percents, Zelda can follow it up with an up aerial or back aerial to score a relatively secure KO. | ||
| Forward roll Back roll Spot dodge Air dodge |
— | — | ||
| Techs | — | — | ||
| Floor attack (front) Floor getups (front) |
7% | Kicks in front of herself and then behind herself. | ||
| Floor attack (back) Floor getups (back) |
7% | Same as her front floor attack, but with a different animation. | ||
| Floor attack (trip) Floor getups (trip) |
5% | Same as other floor attacks, but with a different animation. | ||
| Edge attack Edge getups |
7% | Performs a kick while climbing up. | ||
| Neutral special | Default | Nayru's Love | 2% (hits 1-3), 5% (last hit), 1.25x (reflected projectiles) | Creates a crystal barrier that deals damage and reflects projectiles with 25% more power and speed than they originally had. Has 11 frames of intangibility from frames 5-15. |
| Custom 1 | Nayru's Rejection | 1% (loop), 5% (last), 1.2x (reflected projectiles) | Weaker overall in both damage output and reflection multiplier, but reverses opponents and pushes them away. Has more start-up lag in exchange for increased intangibility and has the same speed growth as Nayru's Love. | |
| Custom 2 | Nayru's Passion | 15% | Vacuums in opponents and explodes. The explosion has high knockback, but at the cost of its reflection property. | |
| Side special | Default | Din's Fire | 7%-14% (sweetspot), 3.5%-7% (sourspot) | Shoots a magical fireball when the special button is held. It can be aimed up or down. Releasing the button causes it to explode. The longer the button is held down, the farther the blast will travel, automatically detonating when it reaches its maximum distance. It will renders Zelda helpless if used in midair. |
| Custom 1 | Din's Flare | 14% (sweetspot), 7% (sourspot) | The fireball moves faster and has increased range and deals the same damage regardless of how long it is held. However, it can barely be adjusted vertically. | |
| Custom 2 | Din's Blaze | 7.6%-18% (sweetspot), 3.8%-9% (sourspot) | The fireball has much more vertical movement and an increased explosion size, but it is slower to detonate and travels much slower. | |
| Up special | Default | Farore's Wind | 6% (hit 1), 10% (ground hit 2 near), 7% (ground hit 2 far), 12% (ground hit 2 near), 8% (ground hit 2 far) | Teleports in a given direction, dealing damage at both ends. When combined with a jump, its range is greatly increased. The first hit launches opponents upward, possibly leading in to the second hit if it is aimed up. The second hit possesses very high knockback, being able to KO as low as 50% near the upper blast line depending on weight and DI, making it one of Zelda's most reliable KOing options and a powerful out of shield option. Has high ending lag in the air if missed, and Zelda cannot move around for more than a second. |
| Custom 1 | Farore's Squall | — | A defensive teleport rather than an offensive one. Instead of dealing damage, it pushes opponents away with a large windbox at the beginning. This wind comes out extremely quickly, making it useful for escaping pressure from an opponent. It also travels slightly farther, even more so if extended with a jump, and its slower speed allowing for better maneuverability. The first hit has set knockback, but deals no damage. It also takes much longer to start up, and telegraphs where Zelda is going due to it emitting magical particles. | |
| Custom 2 | Farore's Windfall | 4% (hit 1), 7% (hit 2) | The teleport can only go straight upward, but it meteor smashes opponents when Zelda reappears. Unlike the other versions, it gains no benefits when combined with a jump, though there is some horizontal control over Zelda. It also has considerably less KOing power, as it does not start KOing until the 400% range. | |
| Down special | Default | Phantom Slash | 6% (uncharged), 14% (charged), 24% (fully charged), 11% (fully charged hit 1), 13% (fully charged hit 2) | Conjures a Phantom and propels it forward, slashing opponents and blocking attacks. A chargeable projectile, charging longer increases the distance covered and the slashing attack is altered. When fully charged, it becomes a two-hit attack. However, since the Phantom is considered a projectile, it can be reflected and Pocketed. The Phantom is also considered a physical entity and provides a few benefits as a result; it can slow down players that try to move through it (except for the Zelda that conjured it) and block some non-penetrating hits due to the Phantom having set health on all charges (and customs). Unlike Din's Fire, it will not render Zelda helpless if used in midair. |
| Custom 1 | Phantom Breaker | 5% (uncharged), 12% (charged) 20% (fully charged), 9% (fully charged hit 1), 11% (fully charged hit 2) | Propels a Phantom at a set distance, which is approximately the distance of a Phantom Slash at its second charge. This results in a minimally charged Phantom traveling farther, and a fully charged Phantom traveling less distance when compared to Phantom Slash. It deals less regular damage, but as its name implies, it deals more shield damage. | |
| Custom 2 | Phantom Strike | 8% (uncharged), 20% (charged), 28%-30% (fully charged) 14% (fully charged hit 1), 14%-16% (fully charged hit 2) | Materializes a Phantom directly in front of herself instead of propelling it forward at varying ranges, but deals more damage and reaches its full charge in half the time. | |
| Final Smash | Light Arrow | 1% (hit 1), 39% (first opponent), 29% (second opponent), 21% (third opponent) | Wields her bow and then fires a single Light Arrow that deals significant damage and knockback and launches opponents at 45°. However, the damage and knockback decrease for each consecutive opponent hit. | |
On-screen appearance
- Teleports onto the stage with magic glowing between her hands and sparkles rising up from the floor around her.

|
|---|
Taunts
- Up taunt: Holds one arm straight up, with her hand glowing with magic. Her pose is more elegant than in Brawl.
- Side taunt: Turns toward the screen and puts her hands together in front of her torso, conjuring Din's Fire between them.
- Down taunt: Smiles, waving to the side while leaning forward slightly.
| Up taunt | Side taunt | Down taunt |
|---|---|---|

|

|

|
Idle poses
- Brushes the back of her hair.
- Loosely holds one arm and then looks in multiple directions.
- With one hand on her elbow, she puts one hand on her neck, puts it back down and then taps her arm with one finger.
 |
 |

|
|---|
Crowd cheer
| English | Japanese | |
|---|---|---|
| Cheer | ||
| Description | Zel-da! | Zel-da! |
| Pitch | Group chant | Group chant |
Victory poses
- Clasps her hands together, which glow with magic, as if praying. She then turns her head and looks up toward the sky.
- Turns her head to the left and loosely holds one arm with the other to pose in an elegant stance that is identical to her Melee artwork. At the end of the animation, she will either
 look into the distance or
  look at the camera.
 - Puts her hands together in front of her torso, conjures Din's Fire between them and stares at it. Appears almost identical to her side taunt.
 |
 |

|
|---|
In competitive play
Official Custom Moveset Project
| Character | Custom sets available | ||||
|---|---|---|---|---|---|
| 1213 | 1313 | 1212 | 1312 | 1223 | |
| 1323 | 3212 | 3312 | 2213 | 2312 | |
Notable players
Active
Inactive
Trophies
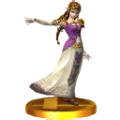
- Zelda
 This is the namesake of the Legend of Zelda games. Her appearance may change, but she always plays an important role. In Smash Bros., she's quick on the draw when it comes to magic, though a bit slow when moving. She has a new move that summons a Phantom to her aid.
 This is the Zelda they're talking about in the titles of all the Legend of Zelda games. Though her appearance can change from game to game, her importance in the story usually doesn't. In this game, she's a bit slow, but her impressive magic skills make up for it. Power up her brand new special, Phantom Slash, by holding down the button.
 : The Legend of Zelda (08/1987)
 : The Legend of Zelda: Twilight Princess (11/2006)
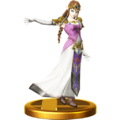
- Zelda (Alt.)
- Zelda's forward air attack, Lightning Kick, is a valiant kick with a magically charged tip. Striking with just the glowing spot will deal heavy damage and launch your opponent. Din's Fire, her explosive side special, can be guided up and down and has a greater blast if the button is held.
- Zelda's forward air attack, Lightning Kick, is a single-footed, electrically charged strike. Hit your opponent with just the glowing spot to deal heavy damage and launch them. Her Din's Fire side special can be guided up and down, and makes a bigger blast the longer you hold the button. It'll explode as soon as you let go.
- : The Legend of Zelda (08/1987)
- : The Legend of Zelda: Twilight Princess (11/2006)
- Light Arrow (Zelda)
- In many of the Legend of Zelda games, the sacred Light Arrows are required to defeat the final boss. In this game, Zelda fires one straight across the screen for her Final Smash. If it passes through multiple foes, the ones hit first will take the most damage. The Light Arrow has a lot of launching power, making it great for getting KOs!
Classic (3DS)
- ZeldaAllStarTrophy3DS.png
Alt. (3DS)
Classic (Wii U)

Alt. (Wii U)


In Event Matches
Solo Events
- All-Star Battle: Melee: Zelda is one of the opponents fought in this event. All opponents debuted in Melee.
- Identity Crisis: As Sheik, the player must defeat Samus. After defeating her, the player must defeat Zero Suit Samus. Zelda can appear if Sheik is KO'd.
- Princess Punch-Up!: As Zelda with Link as an ally, the player must defeat a team of Peach and Mario.
- The Demon King and the Goddess: As Ganondorf, the player must defeat a team of Link and Zelda. After the two are defeated or some time has passed, a giant Palutena appears and the player must defeat her.
- Unwavering Chivalry: As Meta Knight, the player must defeat Marth without defeating Peach or Zelda. Defeating either of the princesses results in a failure.
Co-op Events
- Peach in Peril: Zelda is one of the opponents Bowser and Bowser Jr. must defeat without KOing Peach.
- The Ultimate Battle: Two players choose a character and must defeat everyone on the roster.
Alternate costumes
.png)
| |||||||

|

|

|

|

|

|

|

|
Gallery

Zelda in the Nintendo Direct from April 8th, 2014.
Zelda's amiibo.
The Pic of the Day revealing Zelda.
A head shot of Zelda in Super Smash Bros. for Wii U.

Zelda and Link in Super Smash Bros. for Nintendo 3DS.
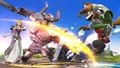
Using Phantom Slash, her new down special, against Fox.

Zelda alongside Link as he uses his side taunt.
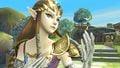
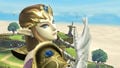
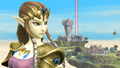
Zelda on Skyloft.
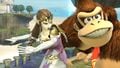
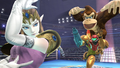
Zelda alongside Donkey Kong.
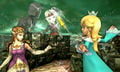
Zelda teetering as Rosalina & Luma look on.
Charging Phantom Slash.
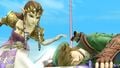
Zelda looking at a prone Link.

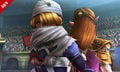
Zelda looking at Link and Peach from a distance.
Using her forward tilt.
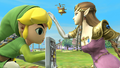
Zelda facing Toon Link.

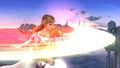
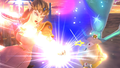
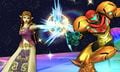
Using Farore's Wind alongside Samus, who is in her Morph Ball form.

Using her side taunt.

Using her neutral aerial.
Zelda hanging on the edge of Battlefield while Link and Peach are in the distance.
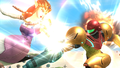
Using her neutral aerial against Samus.

Using her down taunt as Toon Link is launched.
Using her neutral aerial against Rosalina.
Using her neutral attack.
Posing while Samus and Donkey Kong are in the background.

Using hr forward tilt against Link.
Fighting Marth on Boxing Ring.
One of Zelda's idle poses.
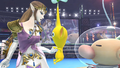
Zelda alongside Olimar and a Yellow Pikmin.
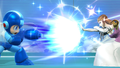
Using her forward smash against Mega Man's forward smash.

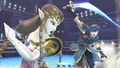
Zelda alongside Peach and Rosalina on Mario Galaxy.
Zelda jumping away from Mario.

Zelda's idle stance.

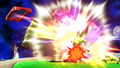
Zelda's pose when using Din's Fire.

Zelda being prone alongside a Purple Pikmin.

Another one of Zelda's idle poses.

Zelda in Super Smash Bros. for Nintendo 3DS.
Another Super Smash Bros. for Nintendo 3DS screenshot.
Posing in Super Smash Bros. for Nintendo 3DS.
Using her neutral attack on Samus.
Using her forward smash.
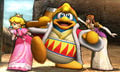
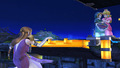
Taunting alongside King Dedede and Peach.

"Curiouser and curiouser ..."
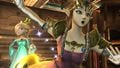
!["Ah--soft and squishy." [1]](https://ssb.wiki.gallery/images/thumb/f/f6/Smash.4_-_The_Elf_Princess_and_The_Cute_Penguin_King_02.jpg/120px-Smash.4_-_The_Elf_Princess_and_The_Cute_Penguin_King_02.jpg)
"Ah--soft and squishy." [1]
Fighting Rosalina on Reset Bomb Forest as Viridi appears in the background.
Using Din's Fire against Toon Link.
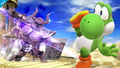
Using Phantom Slash against Yoshi's forward tilt.
Back-to-back with Sheik.
Zelda being attacked by a Polar Bear in Smash Run.


!["Ah--soft and squishy." [1]](/File:Smash.4_-_The_Elf_Princess_and_The_Cute_Penguin_King_02.jpg)


Trivia
- Zelda's dress behaves differently in both versions of SSB4. In Super Smash Bros. for Nintendo 3DS, her dress flows less freely via having set forms in accordance to the attacks she performs. Conversely, her dress flows more freely in Super Smash Bros. for Wii U. This results in her legs clipping through her dress in different ways.
- Zelda and Sheik are the only two The Legend of Zelda characters whose side specials are projectiles that render them helpless when used in midair.
| Fighters in Super Smash Bros. 4 | |
|---|---|
| Veterans | Bowser · Captain Falcon · Charizard · Diddy Kong · Donkey Kong · Dr. Mario · Falco · Fox · Ganondorf · Ike · Jigglypuff · King Dedede · Kirby · Link · Lucario · Lucas · Luigi · Mario · Marth · Meta Knight · Mewtwo · Mr. Game & Watch · Ness · Olimar · Peach · Pikachu · Pit · R.O.B. · Roy · Samus · Sheik · Sonic · Toon Link · Wario · Yoshi · Zelda · Zero Suit Samus |
| Newcomers | Bayonetta · Bowser Jr. · Cloud · Corrin · Dark Pit · Duck Hunt · Greninja · Little Mac · Lucina · Mega Man · Mii Fighter (Mii Brawler · Mii Gunner · Mii Swordfighter) · Pac-Man · Palutena · Robin · Rosalina & Luma · Ryu · Shulk · Villager · Wii Fit Trainer |