The Light Realm: Difference between revisions
Tag: Mobile edit |
m (Implemented t:SpiritType) |
||
| Line 5: | Line 5: | ||
|caption=Map of The Light Realm, featuring all fighters that can be unlocked.}} | |caption=Map of The Light Realm, featuring all fighters that can be unlocked.}} | ||
'''The Light Realm''' is the starting area in [[ | '''The Light Realm''' is the starting area in [[World of Light]]. After Galeem vaporized everyone who opposed him (aside from {{SSBU|Kirby}}), Kirby crash lands into The Light Realm with the task of rescuing all captured fighters and defeating Galeem. | ||
==Bosses== | ==Bosses== | ||
| Line 19: | Line 19: | ||
|[[File:Spirits_giga_bowser.png|center|108x108px]] | |[[File:Spirits_giga_bowser.png|center|108x108px]] | ||
|[[Giga Bowser]] | |[[Giga Bowser]] | ||
| | |{{SpiritType|Neutral}} <center>{{color|#796581|Neutral}}</center> | ||
|??? | |??? | ||
|''{{SSBUMusicLink|Super Smash Bros.|Giga Bowser}}'' | |''{{SSBUMusicLink|Super Smash Bros.|Giga Bowser}}'' | ||
| Line 25: | Line 25: | ||
|[[File:Spirits_galleom.png|center|108x108px]] | |[[File:Spirits_galleom.png|center|108x108px]] | ||
|[[Galleom]] | |[[Galleom]] | ||
| | |{{SpiritType|Neutral}} <center>{{color|#796581|Neutral}}</center> | ||
|??? | |??? | ||
|''{{SSBUMusicLink|Super Smash Bros.|Boss Battle - Super Smash Bros. Brawl}}'' | |''{{SSBUMusicLink|Super Smash Bros.|Boss Battle - Super Smash Bros. Brawl}}'' | ||
| Line 31: | Line 31: | ||
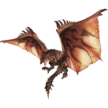
|[[File:Rathalos SSBU.png|center|108x108px]] | |[[File:Rathalos SSBU.png|center|108x108px]] | ||
|[[Rathalos]] | |[[Rathalos]] | ||
| | |{{SpiritType|Neutral}} <center>{{color|#796581|Neutral}}</center> | ||
|??? | |??? | ||
|''{{SSBUMusicLink|Other|Roar/Rathalos}}'' | |''{{SSBUMusicLink|Other|Roar/Rathalos}}'' | ||
| Line 37: | Line 37: | ||
|[[File:Master Hand SSBU.png|108x108px]] | |[[File:Master Hand SSBU.png|108x108px]] | ||
|{{SSBU|Master Hand}} | |{{SSBU|Master Hand}} | ||
| | |{{SpiritType|Neutral}} <center>{{color|#796581|Neutral}}</center> | ||
|??? | |??? | ||
|''{{SSBUMusicLink|Super Smash Bros.|Master Hand}}'' | |''{{SSBUMusicLink|Super Smash Bros.|Master Hand}}'' | ||
| Line 43: | Line 43: | ||
|[[File:Galeem SSBU.png|108x108px]] | |[[File:Galeem SSBU.png|108x108px]] | ||
|[[Galeem]] | |[[Galeem]] | ||
| | |{{SpiritType|Neutral}} <center>{{color|#796581|Neutral}}</center> | ||
|??? | |??? | ||
|''{{SSBUMusicLink|Super Smash Bros.|Galeem}}'' | |''{{SSBUMusicLink|Super Smash Bros.|Galeem}}'' | ||
| Line 65: | Line 65: | ||
|[[File:Mario SSBU.png|center|64x64px]] | |[[File:Mario SSBU.png|center|64x64px]] | ||
|{{SSBU|Mario}} | |{{SSBU|Mario}} | ||
| | |{{SpiritType|Neutral}} <center>{{color|#796581|Neutral}}</center> | ||
|2,500 | |2,500 | ||
|[[Final Destination]] | |[[Final Destination]] | ||
| Line 74: | Line 74: | ||
|[[File:Sheik SSBU.png|center|64x64px]] | |[[File:Sheik SSBU.png|center|64x64px]] | ||
|{{SSBU|Sheik}} | |{{SSBU|Sheik}} | ||
| | |{{SpiritType|Shield}} <center>{{color|#18aef5|Shield}}</center> | ||
|2,500 | |2,500 | ||
|[[Final Destination]] | |[[Final Destination]] | ||
| Line 83: | Line 83: | ||
|[[File:Marth SSBU.png|center|64x64px]] | |[[File:Marth SSBU.png|center|64x64px]] | ||
|{{SSBU|Marth}} | |{{SSBU|Marth}} | ||
| | |{{SpiritType|Attack}} <center>{{color|#dc1029|Attack}}</center> | ||
|2,500 | |2,500 | ||
|[[Final Destination]] | |[[Final Destination]] | ||
| Line 92: | Line 92: | ||
|[[File:Villager SSBU.png|center|64x64px]] | |[[File:Villager SSBU.png|center|64x64px]] | ||
|{{SSBU|Villager}} | |{{SSBU|Villager}} | ||
| | |{{SpiritType|Grab}} <center>{{color|#17ba17|Grab}}</center> | ||
|2,500 | |2,500 | ||
|[[Final Destination]] | |[[Final Destination]] | ||
| Line 101: | Line 101: | ||
|[[File:Jigglypuff SSBU.png|center|64x64px]] | |[[File:Jigglypuff SSBU.png|center|64x64px]] | ||
|{{SSBU|Jigglypuff}} | |{{SSBU|Jigglypuff}} | ||
| | |{{SpiritType|Shield}} <center>{{color|#18aef5|Shield}}</center> | ||
|3,300 | |3,300 | ||
|{{OmegaStage|Mushroom Kingdom U}} | |{{OmegaStage|Mushroom Kingdom U}} | ||
| Line 110: | Line 110: | ||
|[[File:Mii Swordfighter SSBU.png|center|64x64px]] | |[[File:Mii Swordfighter SSBU.png|center|64x64px]] | ||
|{{SSBU|Mii Swordfighter}} | |{{SSBU|Mii Swordfighter}} | ||
| | |{{SpiritType|Shield}} <center>{{color|#18aef5|Shield}}</center> | ||
|3,300 | |3,300 | ||
|[[Final Destination]] | |[[Final Destination]] | ||
| Line 119: | Line 119: | ||
|[[File:Lucario SSBU.png|center|64x64px]] | |[[File:Lucario SSBU.png|center|64x64px]] | ||
|{{SSBU|Lucario}} | |{{SSBU|Lucario}} | ||
| | |{{SpiritType|Attack}} <center>{{color|#dc1029|Attack}}</center> | ||
|3,300 | |3,300 | ||
|{{OmegaStage|Spear Pillar}} | |{{OmegaStage|Spear Pillar}} | ||
| Line 128: | Line 128: | ||
|[[File:Pikachu SSBU.png|center|64x64px]] | |[[File:Pikachu SSBU.png|center|64x64px]] | ||
|{{SSBU|Pikachu}} | |{{SSBU|Pikachu}} | ||
| | |{{SpiritType|Attack}} <center>{{color|#dc1029|Attack}}</center> | ||
|3,300 | |3,300 | ||
|{{OmegaStage|Pokémon Stadium}} | |{{OmegaStage|Pokémon Stadium}} | ||
| Line 137: | Line 137: | ||
|[[File:Yoshi SSBU.png|center|64x64px]] | |[[File:Yoshi SSBU.png|center|64x64px]] | ||
|{{SSBU|Yoshi}} | |{{SSBU|Yoshi}} | ||
| | |{{SpiritType|Grab}} <center>{{color|#17ba17|Grab}}</center> | ||
|3,600 | |3,600 | ||
|{{OmegaStage|Super Happy Tree}} | |{{OmegaStage|Super Happy Tree}} | ||
| Line 146: | Line 146: | ||
|[[File:Wii Fit Trainer SSBU.png|center|64x64px]] | |[[File:Wii Fit Trainer SSBU.png|center|64x64px]] | ||
|{{SSBU|Wii Fit Trainer}} | |{{SSBU|Wii Fit Trainer}} | ||
| | |{{SpiritType|Shield}} <center>{{color|#18aef5|Shield}}</center> | ||
|3,300 | |3,300 | ||
|{{OmegaStage|Wii Fit Studio}} | |{{OmegaStage|Wii Fit Studio}} | ||
| Line 155: | Line 155: | ||
|[[File:Inkling SSBU.png|center|64x64px]] | |[[File:Inkling SSBU.png|center|64x64px]] | ||
|{{SSBU|Inkling}} | |{{SSBU|Inkling}} | ||
| | |{{SpiritType|Attack}} <center>{{color|#dc1029|Attack}}</center> | ||
|3,300 | |3,300 | ||
|{{OmegaStage|Moray Towers}} | |{{OmegaStage|Moray Towers}} | ||
| Line 164: | Line 164: | ||
|[[File:Dr. Mario SSBU.png|center|64x64px]] | |[[File:Dr. Mario SSBU.png|center|64x64px]] | ||
|{{SSBU|Dr. Mario}} | |{{SSBU|Dr. Mario}} | ||
| | |{{SpiritType|Shield}} <center>{{color|#18aef5|Shield}}</center> | ||
|3,400 | |3,400 | ||
|{{OmegaStage|Mario Bros.}} | |{{OmegaStage|Mario Bros.}} | ||
| Line 173: | Line 173: | ||
|[[File:Fox SSBU.png|center|64x64px]] | |[[File:Fox SSBU.png|center|64x64px]] | ||
|{{SSBU|Fox}} | |{{SSBU|Fox}} | ||
| | |{{SpiritType|Shield}} <center>{{color|#18aef5|Shield}}</center> | ||
|3,700 | |3,700 | ||
|{{OmegaStage|Corneria}} | |{{OmegaStage|Corneria}} | ||
| Line 182: | Line 182: | ||
|[[File:Duck Hunt SSBU.png|center|64x64px]] | |[[File:Duck Hunt SSBU.png|center|64x64px]] | ||
|{{SSBU|Duck Hunt}} | |{{SSBU|Duck Hunt}} | ||
| | |{{SpiritType|Grab}} <center>{{color|#17ba17|Grab}}</center> | ||
|3,300 | |3,300 | ||
|{{OmegaStage|Duck Hunt}} | |{{OmegaStage|Duck Hunt}} | ||
| Line 191: | Line 191: | ||
|[[File:Little Mac SSBU.png|center|64x64px]] | |[[File:Little Mac SSBU.png|center|64x64px]] | ||
|{{SSBU|Little Mac}} | |{{SSBU|Little Mac}} | ||
| | |{{SpiritType|Attack}} <center>{{color|#dc1029|Attack}}</center> | ||
|3,300 | |3,300 | ||
|{{OmegaStage|Boxing Ring}} | |{{OmegaStage|Boxing Ring}} | ||
| Line 200: | Line 200: | ||
|[[File:Lucas SSBU.png|center|64x64px]] | |[[File:Lucas SSBU.png|center|64x64px]] | ||
|{{SSBU|Lucas}} | |{{SSBU|Lucas}} | ||
| | |{{SpiritType|Shield}} <center>{{color|#18aef5|Shield}}</center> | ||
|6,600 | |6,600 | ||
|{{OmegaStage|New Pork City}} | |{{OmegaStage|New Pork City}} | ||
| Line 209: | Line 209: | ||
|[[File:Isabelle SSBU.png|center|64x64px]] | |[[File:Isabelle SSBU.png|center|64x64px]] | ||
|{{SSBU|Isabelle}} | |{{SSBU|Isabelle}} | ||
| | |{{SpiritType|Grab}} <center>{{color|#17ba17|Grab}}</center> | ||
|3,900 | |3,900 | ||
|{{OmegaStage|Town and City}} | |{{OmegaStage|Town and City}} | ||
| Line 218: | Line 218: | ||
|[[File:Ice Climbers SSBU.png|center|64x64px]] | |[[File:Ice Climbers SSBU.png|center|64x64px]] | ||
|{{SSBU|Ice Climbers}} | |{{SSBU|Ice Climbers}} | ||
| | |{{SpiritType|Grab}} <center>{{color|#17ba17|Grab}}</center> | ||
|7,500 | |7,500 | ||
|{{OmegaStage|Summit}} | |{{OmegaStage|Summit}} | ||
| Line 227: | Line 227: | ||
|[[File:Falco SSBU.png|center|64x64px]] | |[[File:Falco SSBU.png|center|64x64px]] | ||
|{{SSBU|Falco}} | |{{SSBU|Falco}} | ||
| | |{{SpiritType|Attack}} <center>{{color|#dc1029|Attack}}</center> | ||
|7,500 | |7,500 | ||
|{{OmegaStage|Lylat Cruise}} | |{{OmegaStage|Lylat Cruise}} | ||
| Line 236: | Line 236: | ||
|[[File:Donkey Kong SSBU.png|center|64x64px]] | |[[File:Donkey Kong SSBU.png|center|64x64px]] | ||
|{{SSBU|Donkey Kong}} | |{{SSBU|Donkey Kong}} | ||
| | |{{SpiritType|Grab}} <center>{{color|#17ba17|Grab}}</center> | ||
|3,300 | |3,300 | ||
|{{OmegaStage|Kongo Jungle}} | |{{OmegaStage|Kongo Jungle}} | ||
| Line 245: | Line 245: | ||
|[[File:Pac-Man SSBU.png|center|64x64px]] | |[[File:Pac-Man SSBU.png|center|64x64px]] | ||
|{{SSBU|Pac-Man}} | |{{SSBU|Pac-Man}} | ||
| | |{{SpiritType|Grab}} <center>{{color|#17ba17|Grab}}</center> | ||
|3,300 | |3,300 | ||
|{{OmegaStage|Pac-Land}} | |{{OmegaStage|Pac-Land}} | ||
| Line 254: | Line 254: | ||
|[[File:Olimar SSBU.png|center|64x64px]] | |[[File:Olimar SSBU.png|center|64x64px]] | ||
|{{SSBU|Olimar}} | |{{SSBU|Olimar}} | ||
| | |{{SpiritType|Grab}} <center>{{color|#17ba17|Grab}}</center> | ||
|3,300 | |3,300 | ||
|{{OmegaStage|Distant Planet}} | |{{OmegaStage|Distant Planet}} | ||
| Line 263: | Line 263: | ||
|[[File:Link SSBU.png|center|64x64px]] | |[[File:Link SSBU.png|center|64x64px]] | ||
|{{SSBU|Link}} | |{{SSBU|Link}} | ||
| | |{{SpiritType|Shield}} <center>{{color|#18aef5|Shield}}</center> | ||
|3,600 | |3,600 | ||
|{{OmegaStage|Great Plateau Tower}} | |{{OmegaStage|Great Plateau Tower}} | ||
| Line 272: | Line 272: | ||
|[[File:Captain Falcon SSBU.png|center|64x64px]] | |[[File:Captain Falcon SSBU.png|center|64x64px]] | ||
|{{SSBU|Captain Falcon}} | |{{SSBU|Captain Falcon}} | ||
| | |{{SpiritType|Attack}} <center>{{color|#dc1029|Attack}}</center> | ||
|3,300 | |3,300 | ||
|{{OmegaStage|Port Town Aero Dive}} | |{{OmegaStage|Port Town Aero Dive}} | ||
| Line 281: | Line 281: | ||
|[[File:Samus SSBU.png|center|64x64px]] | |[[File:Samus SSBU.png|center|64x64px]] | ||
|{{SSBU|Samus}} | |{{SSBU|Samus}} | ||
| | |{{SpiritType|Shield}} <center>{{color|#18aef5|Shield}}</center> | ||
|7,500 | |7,500 | ||
|{{OmegaStage|Brinstar}} | |{{OmegaStage|Brinstar}} | ||
| Line 290: | Line 290: | ||
|[[File:Mr. Game & Watch SSBU.png|center|64x64px]] | |[[File:Mr. Game & Watch SSBU.png|center|64x64px]] | ||
|{{SSBU|Mr. Game & Watch}} | |{{SSBU|Mr. Game & Watch}} | ||
| | |{{SpiritType|Shield}} <center>{{color|#18aef5|Shield}}</center> | ||
|7,500 | |7,500 | ||
|{{OmegaStage|Flat Zone X}} | |{{OmegaStage|Flat Zone X}} | ||
| Line 299: | Line 299: | ||
|[[File:Pokemon Trainer SSBU.png|center|64x64px]] | |[[File:Pokemon Trainer SSBU.png|center|64x64px]] | ||
|{{SSBU|Pokémon Trainer}} ({{SSBU|Squirtle}}, {{SSBU|Ivysaur}}, and {{SSBU|Charizard}}) | |{{SSBU|Pokémon Trainer}} ({{SSBU|Squirtle}}, {{SSBU|Ivysaur}}, and {{SSBU|Charizard}}) | ||
| | |{{SpiritType|Attack}} <center>{{color|#dc1029|Attack}}</center> | ||
|7,500 | |7,500 | ||
|{{OmegaStage|Battlefield}} | |{{OmegaStage|Battlefield}} | ||
| Line 308: | Line 308: | ||
|[[File:Shulk SSBU.png|center|64x64px]] | |[[File:Shulk SSBU.png|center|64x64px]] | ||
|{{SSBU|Shulk}} | |{{SSBU|Shulk}} | ||
| | |{{SpiritType|Attack}} <center>{{color|#dc1029|Attack}}</center> | ||
|8,200 | |8,200 | ||
|{{OmegaStage|Gaur Plain}} | |{{OmegaStage|Gaur Plain}} | ||
| Line 317: | Line 317: | ||
|[[File:Zero Suit Samus SSBU.png|center|64x64px]] | |[[File:Zero Suit Samus SSBU.png|center|64x64px]] | ||
|{{SSBU|Zero Suit Samus}} | |{{SSBU|Zero Suit Samus}} | ||
| | |{{SpiritType|Grab}} <center>{{color|#17ba17|Grab}}</center> | ||
|7,500 | |7,500 | ||
|{{OmegaStage|Brinstar Depths}} | |{{OmegaStage|Brinstar Depths}} | ||
| Line 326: | Line 326: | ||
|[[File:Ness SSBU.png|center|64x64px]] | |[[File:Ness SSBU.png|center|64x64px]] | ||
|{{SSBU|Ness}} | |{{SSBU|Ness}} | ||
| | |{{SpiritType|Attack}} <center>{{color|#dc1029|Attack}}</center> | ||
|7,500 | |7,500 | ||
|{{OmegaStage|Magicant}} | |{{OmegaStage|Magicant}} | ||
| Line 335: | Line 335: | ||
|[[File:Mega Man SSBU.png|center|64x64px]] | |[[File:Mega Man SSBU.png|center|64x64px]] | ||
|{{SSBU|Mega Man}} | |{{SSBU|Mega Man}} | ||
| | |{{SpiritType|Shield}} <center>{{color|#18aef5|Shield}}</center> | ||
|7,500 | |7,500 | ||
|{{OmegaStage|Wily Castle}} | |{{OmegaStage|Wily Castle}} | ||
| Line 344: | Line 344: | ||
|[[File:Mii Gunner SSBU.png|center|64x64px]] | |[[File:Mii Gunner SSBU.png|center|64x64px]] | ||
|{{SSBU|Mii Gunner}} | |{{SSBU|Mii Gunner}} | ||
| | |{{SpiritType|Grab}} <center>{{color|#17ba17|Grab}}</center> | ||
|7,500 | |7,500 | ||
|[[Tortimer Island]] | |[[Tortimer Island]] | ||
| Line 365: | Line 365: | ||
| [[File:Peach SSBU.png|center|108x108px]] | | [[File:Peach SSBU.png|center|108x108px]] | ||
| {{SSBU|Peach}} | | {{SSBU|Peach}} | ||
| | | {{SpiritType|Grab}} <center>{{color|#17ba17|Grab}}</center> | ||
| 7,500 | | 7,500 | ||
| [[Mushroom Kingdom U]] | | [[Mushroom Kingdom U]] | ||
| Line 389: | Line 389: | ||
| [[File:Pichu SSBU.png|center|108x108px]] | | [[File:Pichu SSBU.png|center|108x108px]] | ||
| {{SSBU|Pichu}} | | {{SSBU|Pichu}} | ||
| | | {{SpiritType|Attack}} <center>{{color|#dc1029|Attack}}</center> | ||
| 7,500 | | 7,500 | ||
| [[Prism Tower]] [[Ω form|Ω]] | | [[Prism Tower]] [[Ω form|Ω]] | ||
| Line 408: | Line 408: | ||
| [[File:Simon SSBU.png|center|108x108px]] | | [[File:Simon SSBU.png|center|108x108px]] | ||
| {{SSBU|Simon}} | | {{SSBU|Simon}} | ||
| | | {{SpiritType|Grab}} <center>{{color|#17ba17|Grab}}</center> | ||
| 7,500 | | 7,500 | ||
| [[Dracula's Castle]] [[Ω form|Ω]] | | [[Dracula's Castle]] [[Ω form|Ω]] | ||
| Line 416: | Line 416: | ||
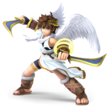
| [[File:Pit SSBU.png|center|108x108px]] | | [[File:Pit SSBU.png|center|108x108px]] | ||
| {{SSBU|Pit}} | | {{SSBU|Pit}} | ||
| | | {{SpiritType|Shield}} <center>{{color|#18aef5|Shield}}</center> | ||
| 3,300 | | 3,300 | ||
| [[Skyworld]] [[Ω form|Ω]] | | [[Skyworld]] [[Ω form|Ω]] | ||
| Line 435: | Line 435: | ||
| [[File:Snake SSBU.png|center|108x108px]] | | [[File:Snake SSBU.png|center|108x108px]] | ||
| {{SSBU|Snake}} | | {{SSBU|Snake}} | ||
| | | {{SpiritType|Grab}} <center>{{color|#17ba17|Grab}}</center> | ||
| 9,000 | | 9,000 | ||
| [[Final Destination]] | | [[Final Destination]] | ||
| Line 454: | Line 454: | ||
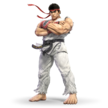
| [[File:Ryu SSBU.png|center|108x108px]] | | [[File:Ryu SSBU.png|center|108x108px]] | ||
| {{SSBU|Ryu}} | | {{SSBU|Ryu}} | ||
| | | {{SpiritType|Attack}} <center>{{color|#dc1029|Attack}}</center> | ||
| 9,000 | | 9,000 | ||
| [[Suzaku Castle]] [[Ω form|Ω]] | | [[Suzaku Castle]] [[Ω form|Ω]] | ||
| Line 473: | Line 473: | ||
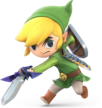
| [[File:Toon Link SSBU.png|center|108x108px]] | | [[File:Toon Link SSBU.png|center|108x108px]] | ||
| {{SSBU|Toon Link}} | | {{SSBU|Toon Link}} | ||
| | | {{SpiritType|Attack}} <center>{{color|#dc1029|Attack}}</center> | ||
| 7,500 | | 7,500 | ||
| [[Wuhu Island]] | | [[Wuhu Island]] | ||
| Line 492: | Line 492: | ||
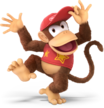
| [[File:Diddy Kong SSBU.png|center|108x108px]] | | [[File:Diddy Kong SSBU.png|center|108x108px]] | ||
| {{SSBU|Diddy Kong}} | | {{SSBU|Diddy Kong}} | ||
| | | {{SpiritType|Grab}} <center>{{color|#17ba17|Grab}}</center> | ||
| 9,000 | | 9,000 | ||
| [[Kongo Jungle]] [[Ω form|Ω]] | | [[Kongo Jungle]] [[Ω form|Ω]] | ||
| Line 511: | Line 511: | ||
| [[File:King Dedede SSBU.png|center|108x108px]] | | [[File:King Dedede SSBU.png|center|108x108px]] | ||
| {{SSBU|King Dedede}} | | {{SSBU|King Dedede}} | ||
| | | {{SpiritType|Attack}} <center>{{color|#dc1029|Attack}}</center> | ||
| 9,000 | | 9,000 | ||
| [[Fountain of Dreams]] [[Ω form|Ω]] | | [[Fountain of Dreams]] [[Ω form|Ω]] | ||
Revision as of 09:27, October 28, 2020
| The Light Realm | |
|---|---|
 Map of The Light Realm, featuring all fighters that can be unlocked. |
The Light Realm is the starting area in World of Light. After Galeem vaporized everyone who opposed him (aside from Kirby), Kirby crash lands into The Light Realm with the task of rescuing all captured fighters and defeating Galeem.
Bosses
There are five bosses present in the Light Realm, with three of them fought in sub-worlds. Giga Bowser is found in the Molten Fortress, Galleom is found in the Base, and Rathalos is found in the Forest Hill.
| Image | Name | Type | Power | Music |
|---|---|---|---|---|
| Giga Bowser | ??? | Giga Bowser | ||
| Galleom | ??? | Boss Battle - Super Smash Bros. Brawl | ||
| Rathalos | ??? | Roar/Rathalos | ||
|
Master Hand | ??? | Master Hand | |
|
Galeem | ??? | Galeem |
Captured Fighters
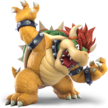
Since Kirby escaped from Galeem’s attack, he is the only fighter the player has available from the start. The other 73 base roster fighters have been captured and must be awakened for the player to unlock. Downloadable fighters are simply unlocked after the player has awakened a total of 10 fighters. 42 of the 73 captured fighters are unlocked in the Light Realm. 10 of them reside in sub-worlds. Aside from Bowser, all captured fighters must be unlocked through a fighter battle. Mario is always awakened first, with the second awakening being a choice between Sheik, Marth, or Villager. The lists of fighters are organized roughly by order of appearance.
Overworld
| No. | Image | Name | Type | Power | Stage | Music | Location |
|---|---|---|---|---|---|---|---|
| 01 | Mario | 2,500 | Final Destination | Final Destination | Right at the beginning | ||
| 16 | Sheik | 2,500 | Final Destination | Final Destination | North route | ||
| 21 | Marth | 2,500 | Final Destination | Final Destination | West route | ||
| 45 | Villager | 2,500 | Final Destination | Final Destination | East route | ||
| 12 | Jigglypuff | 3,300 | Mushroom Kingdom U Ω | Road to Viridian City - Pokémon Red / Pokémon Blue | Forest north of the starting area | ||
| 52 | Mii Swordfighter | 3,300 | Final Destination | Final Destination - Super Smash Bros. for 3DS / Wii U | North of the eastern town | ||
| 41 | Lucario | 3,300 | Spear Pillar Ω | Battle! (Team Galactic) | Along the wall, near the light breach | ||
| 08 | Pikachu | 3,300 | Pokémon Stadium Ω | Main Theme - Pokémon Red & Pokémon Blue (Melee) | The rapids above the wall | ||
| 05 | Yoshi | 3,600 | Super Happy Tree Ω | Obstacle Course - Yoshi's Island | In the ribbon hills | ||
| 47 | Wii Fit Trainer | 3,300 | Wii Fit Studio Ω | Yoga | Northern part of the city | ||
| 64 | Inkling | 3,300 | Moray Towers Ω | Splattack! | Southern part of the city | ||
| 18 | Dr. Mario | 3,400 | Mario Bros. Ω | Fever | North of the city towards the ribbon hills | ||
| 07 | Fox | 3,700 | Corneria Ω | Star Fox Medley | Before the pink button in the heart pond | ||
| 59 | Duck Hunt | 3,300 | Duck Hunt Ω | Duck Hunt Medley | In the shrouded forest | ||
| 49 | Little Mac | 3,300 | Boxing Ring Ω | Jogging / Countdown | In the city's stadium after clearing Power Plant | ||
| 37 | Lucas | 6,600 | New Pork City Ω | Unfounded Revenge / Smashing Song of Praise | In the western village | ||
| 68 | Isabelle | 3,900 | Town and City Ω | Plaza / Title Theme - Animal Crossing: City Folk / Animal Crossing: Wild World | East of the town by taking the bus from the western village | ||
| 15 | Ice Climbers | 7,500 | Summit Ω | Ice Climber (Brawl) | Bottom of the icy mountain | ||
| 20 | Falco | 7,500 | Lylat Cruise Ω | Space Armada | In the space area | ||
| 02 | Donkey Kong | 3,300 | Kongo Jungle Ω | Jungle Level (64) | Middle of the western jungle | ||
| 55 | Pac-Man | 3,300 | Pac-Land Ω | PAC-MAN | Between the mushroom forest and Base | ||
| 40 | Olimar | 3,300 | Distant Planet Ω | Main Theme - Pikmin | In the mushroom forest | ||
| 03 | Link | 3,600 | Great Plateau Tower Ω | Main Theme - The Legend of Zelda: Breath of the Wild | The Sheikah Tower in the south | ||
| 11 | Captain Falcon | 3,300 | Port Town Aero Dive Ω | F-ZERO Medley | Race track east of the starting area | ||
| 04 | Samus | 7,500 | Brinstar Ω | Title Theme - Metroid | Just beyond the light breach | ||
| 26 | Mr. Game & Watch | 7,500 | Flat Zone X Ω | Flat Zone 2 | Beyond the light breach, in the maze | ||
| 33-35 | Pokémon Trainer (Squirtle, Ivysaur, and Charizard) | 7,500 | Battlefield Ω | Main Theme - Pokémon Red & Pokémon Blue (Brawl) | Beyond the light breach, east of the coastal town | ||
| 57 | Shulk | 8,200 | Gaur Plain Ω | Xenoblade Chronicles Medley | Beyond the light breach, atop the waterfall | ||
| 29 | Zero Suit Samus | 7,500 | Brinstar Depths Ω | Theme of Samus Aran, Space Warrior | Beyond the light breach, on the volcano | ||
| 10 | Ness | 7,500 | Magicant Ω | Magicant (for 3DS / Wii U) | Beyond the light breach, in the pink clouds | ||
| 46 | Mega Man | 7,500 | Wily Castle Ω | Mega Man 2 Medley | Near the Base entrance | ||
| 53 | Mii Gunner | 7,500 | Tortimer Island | Final Destination - Super Smash Bros. for 3DS / Wii U | Beyond the light breach, on the southern island |
Molten Fortress
| No. | Image | Name | Type | Power | Stage | Music | |
|---|---|---|---|---|---|---|---|
| 13 | Peach | 7,500 | Mushroom Kingdom U | Fortress Boss - Super Mario World | |||
| 14 | Bowser | There is no fighter battle for Bowser. This fighter is obtained after defeating Giga Bowser. | |||||
Power Plant
| No. | Image | Name | Type | Power | Stage | Music |
|---|---|---|---|---|---|---|
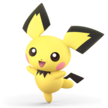
| 19 | Pichu | 7,500 | Prism Tower Ω | Pokémon Red / Pokémon Blue Medley |
Temple of Light
| No. | Image | Name | Type | Power | Stage | Music |
|---|---|---|---|---|---|---|
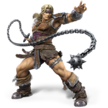
| 66 | Simon | 7,500 | Dracula's Castle Ω | Vampire Killer | ||
| 28 | Pit | 3,300 | Skyworld Ω | Underworld |
Base
| No. | Image | Name | Type | Power | Stage | Music |
|---|---|---|---|---|---|---|
| 31 | Snake | 9,000 | Final Destination | Encounter |
World Tour
| No. | Image | Name | Type | Power | Stage | Music |
|---|---|---|---|---|---|---|
| 60 | Ryu | 9,000 | Suzaku Castle Ω | Ryu Stage |
Forest Hill
| No. | Image | Name | Type | Power | Stage | Music |
|---|---|---|---|---|---|---|
| 43 | Toon Link | 7,500 | Wuhu Island | Main Theme - The Legend of Zelda: Tri Force Heroes |
DK Island
| No. | Image | Name | Type | Power | Stage | Music |
|---|---|---|---|---|---|---|
| 36 | Diddy Kong | 9,000 | Kongo Jungle Ω | Stickerbush Symphony |
Gourmet Race
| No. | Image | Name | Type | Power | Stage | Music |
|---|---|---|---|---|---|---|
| 39 | King Dedede | 9,000 | Fountain of Dreams Ω | King Dedede's Theme (Brawl) |


