Template:SSBU stage table: Difference between revisions
From SmashWiki, the Super Smash Bros. wiki
Jump to navigationJump to search
mNo edit summary |
No edit summary Tag: Mobile edit |
||
| (41 intermediate revisions by 16 users not shown) | |||
| Line 1: | Line 1: | ||
{|class="wikitable" style="text-align:center;margin:1em auto 1em auto" | {|class="wikitable" style="text-align:center;margin:1em auto 1em auto" | ||
!width= | !width=77px style="padding:0;"| | ||
!width= | !width=77px style="padding:0;"| | ||
!width= | !width=77px style="padding:0;"| | ||
!width= | !width=77px style="padding:0;"| | ||
!width= | !width=77px style="padding:0;"| | ||
!width= | !width=77px style="padding:0;"| | ||
!width= | !width=77px style="padding:0;"| | ||
!width= | !width=77px style="padding:0;"| | ||
!width= | !width=77px style="padding:0;"| | ||
!width= | !width=77px style="padding:0;"| | ||
!width= | !width=77px style="padding:0;"| | ||
!width= | !width=77px style="padding:0;"| | ||
|- | |- | ||
!colspan=12|New stages ( | !colspan=12|New stages (19) | ||
|- | |- | ||
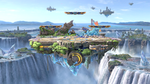
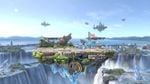
|colspan=2|[[File:SSBU-Battlefield.png|150x90px|link=Battlefield (SSBU)]]<br>{{SSBU|Battlefield}}<br>{{symbol| | |colspan=2|[[File:SSBU-Battlefield.png|150x90px|link=Battlefield (SSBU)]]<br>{{SSBU|Battlefield}}<br>{{symbol|ssb|20px}} | ||
|colspan=2|[[File:SSBU- | |colspan=2|[[File:SSBU-Final Destination.jpg|150x90px|link=Final Destination (SSBU)]]<br>{{SSBU|Final Destination}}<br>{{symbol|ssb|20px}} | ||
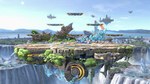
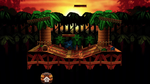
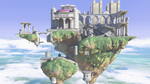
|colspan=2|[[File:SSBU-Big-Battlefield.png|150x90px|link=Big Battlefield (SSBU)]]<br>{{SSBU|Big Battlefield}}<br>{{symbol| | |colspan=2|[[File:SSBU-Big-Battlefield.png|150x90px|link=Big Battlefield (SSBU)]]<br>{{SSBU|Big Battlefield}}<br>{{symbol|ssb|20px}} | ||
|colspan=2|[[File:SSBU- | |colspan=2|[[File:SSBU-Small-Battlefield.jpg|150x90px|link=Small Battlefield]]<br>[[Small Battlefield]] <small><small>(8.1.0)</small></small><br>{{symbol|ssb|20px}} | ||
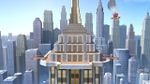
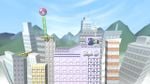
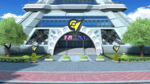
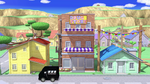
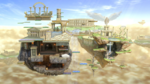
|colspan=2|[[File:SSBU-New Donk City Hall.jpg|150x90px|link=New Donk City Hall]]<br>[[New Donk City Hall]]<br>{{symbol| | |colspan=2|[[File:SSBU-New Donk City Hall.jpg|150x90px|link=New Donk City Hall]]<br>[[New Donk City Hall]]<br>{{symbol|smb|20px}} | ||
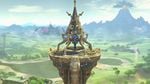
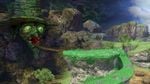
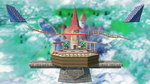
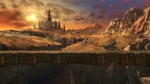
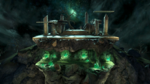
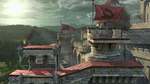
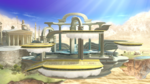
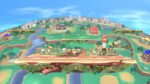
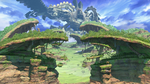
|colspan=2|[[File:SSBU-Great Plateau Tower.jpg|150x90px|link=Great Plateau Tower]]<br>[[Great Plateau Tower]]<br>{{symbol|zelda|20px}} | |colspan=2|[[File:SSBU-Great Plateau Tower.jpg|150x90px|link=Great Plateau Tower]]<br>[[Great Plateau Tower]]<br>{{symbol|zelda|20px}} | ||
|- | |- | ||
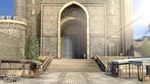
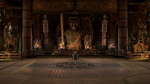
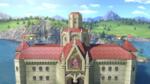
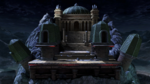
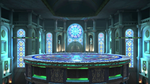
|colspan=2|[[File:SSBU-Garreg Mach Monastery.jpg|150x90px|link=Garreg Mach Monastery]]<br><small>[[Garreg Mach Monastery]] <small>(DLC)</small></small><br>{{symbol| | |colspan=2|[[File:SSBU-Garreg Mach Monastery.jpg|150x90px|link=Garreg Mach Monastery]]<br><small>[[Garreg Mach Monastery]] <small>(DLC)</small></small><br>{{symbol|fe|20px}} | ||
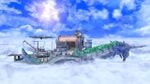
|colspan=2|[[File:SSBU-Cloud Sea of Alrest.jpg|150x90px|link=Cloud Sea of Alrest]]<br>[[Cloud Sea of Alrest]] <small><small>(DLC)</small></small><br>{{symbol|xb|20px}} | |||
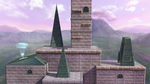
|colspan=2|[[File:SSBU-Moray Towers.png|150x90px|link=Moray Towers]]<br>[[Moray Towers]]<br>{{symbol|splatoon|20px}} | |colspan=2|[[File:SSBU-Moray Towers.png|150x90px|link=Moray Towers]]<br>[[Moray Towers]]<br>{{symbol|splatoon|20px}} | ||
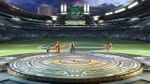
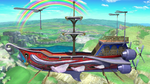
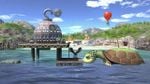
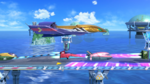
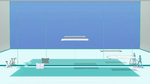
|colspan=2|[[File:SSBU-Spring Stadium.jpg|150x90px|link=Spring Stadium]]<br>[[Spring Stadium]] <small><small>(DLC)</small></small><br>{{symbol|arms|20px}} | |colspan=2|[[File:SSBU-Spring Stadium.jpg|150x90px|link=Spring Stadium]]<br>[[Spring Stadium]] <small><small>(DLC)</small></small><br>{{symbol|arms|20px}} | ||
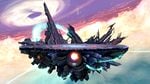
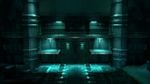
|colspan=2|[[File:SSBU Northern Cave.png|150x90px|link=Northern Cave]]<br>[[Northern Cave]] <small><small>(DLC)</small></small><br>{{symbol|ff|20px}} | |||
|colspan=2|[[File:SSBU-Dracula's Castle.png|150x90px|link=Dracula's Castle]]<br>[[Dracula's Castle]]<br>{{symbol|castlevania|20px}} | |colspan=2|[[File:SSBU-Dracula's Castle.png|150x90px|link=Dracula's Castle]]<br>[[Dracula's Castle]]<br>{{symbol|castlevania|20px}} | ||
|- | |||
|colspan=2| | |||
|colspan=2|[[File:SSBU-Mementos.jpg|150x90px|link=Mementos]]<br>[[Mementos]] <small><small>(DLC)</small></small><br>{{symbol|persona|20px}} | |colspan=2|[[File:SSBU-Mementos.jpg|150x90px|link=Mementos]]<br>[[Mementos]] <small><small>(DLC)</small></small><br>{{symbol|persona|20px}} | ||
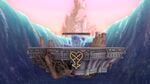
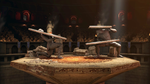
|colspan=2|[[File:SSBU-Yggdrasil'sAltar.jpg|150x90px|link=Yggdrasil's Altar]]<br>[[Yggdrasil's Altar]] <small><small>(DLC)</small></small><br>{{symbol|dq|20px}} | |colspan=2|[[File:SSBU-Yggdrasil'sAltar.jpg|150x90px|link=Yggdrasil's Altar]]<br>[[Yggdrasil's Altar]] <small><small>(DLC)</small></small><br>{{symbol|dq|20px}} | ||
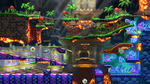
|colspan=2|[[File:SSBU-Spiral Mountain.jpg|150x90px|link=Spiral Mountain]]<br>[[Spiral Mountain]] <small><small>(DLC)</small></small><br>{{symbol|bk|20px}} | |||
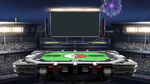
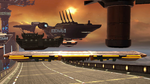
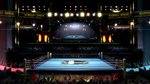
|colspan=2|[[File:SSBU-King of Fighters Stadium.jpg|150x90px|link=King of Fighters Stadium]]<br><small>[[King of Fighters Stadium]] <small>(DLC)</small></small><br>{{symbol|fatalfury|20px}} | |||
|colspan=2| | |||
|- | |- | ||
|colspan=3| | |colspan=3| | ||
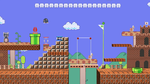
|colspan=2|[[File:SSBU- | |colspan=2|[[File:SSBU-Minecraft World.jpg|150x90px|link=Minecraft World]]<br>[[Minecraft World]] <small><small>(DLC)</small></small><br>{{symbol|mc|20px}} | ||
|colspan=2|[[File:SSBU- | |colspan=2|[[File:SSBU-Mishima Dojo.png|150x90px|link=Mishima Dojo]]<br>[[Mishima Dojo]] <small><small>(DLC)</small></small><br>{{symbol|tekken|20px}} | ||
|colspan=2|[[File:SSBU- | |colspan=2|[[File:SSBU-Hollow Bastion.jpg|150x90px|link=Hollow Bastion]]<br>[[Hollow Bastion]] <small><small>(DLC)</small></small><br>{{symbol|kh|20px}} | ||
|colspan=3| | |colspan=3| | ||
|- | |- | ||
!colspan=12|Returning stages (96) | !colspan=12|Returning stages (96) | ||
|- | |- | ||
|colspan=2|[[File:SSBU-Peach's Castle.png|150x90px|link=Peach's Castle]]<br>{{gameIcon|SSB}} [[Peach's Castle]]<br>{{symbol| | |colspan=2|[[File:SSBU-Peach's Castle.png|150x90px|link=Peach's Castle]]<br>{{gameIcon|SSB}} [[Peach's Castle]]<br>{{symbol|smb|20px}} | ||
|colspan=2|[[File:SSBU-Mushroom Kingdom (SSB).png|150x90px|link=Mushroom Kingdom (SSB)]]<br>{{gameIcon|SSB}} | |colspan=2|[[File:SSBU-Mushroom Kingdom (SSB).png|150x90px|link=Mushroom Kingdom (SSB)]]<br>{{gameIcon|SSB}} {{SSB|Mushroom Kingdom}}<br>{{symbol|smb|20px}} | ||
|colspan=2|[[File:SSBU-Princess_Peach's_Castle.png|150x90px|link=Princess Peach's Castle]]<br>{{gameIcon|SSBM}} <span style="font-size:90%">[[Princess Peach's Castle]]</span><br>{{symbol| | |colspan=2|[[File:SSBU-Princess_Peach's_Castle.png|150x90px|link=Princess Peach's Castle]]<br>{{gameIcon|SSBM}} <span style="font-size:90%">[[Princess Peach's Castle]]</span><br>{{symbol|smb|20px}} | ||
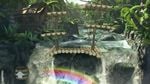
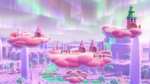
|colspan=2|[[File:SSBU-Rainbow Cruise.png|150x90px|link=Rainbow Cruise]]<br>{{gameIcon|SSBM}} [[Rainbow Cruise]]<br>{{symbol| | |colspan=2|[[File:SSBU-Rainbow Cruise.png|150x90px|link=Rainbow Cruise]]<br>{{gameIcon|SSBM}} [[Rainbow Cruise]]<br>{{symbol|smb|20px}} | ||
|colspan=2|[[File:SSBU-Mushroom Kingdom II.png|150x90px|link=Mushroom Kingdom II]]<br>{{gameIcon|SSBM}} [[Mushroom Kingdom II]]<br>{{symbol| | |colspan=2|[[File:SSBU-Mushroom Kingdom II.png|150x90px|link=Mushroom Kingdom II]]<br>{{gameIcon|SSBM}} [[Mushroom Kingdom II]]<br>{{symbol|smb|20px}} | ||
|colspan=2|[[File:SSBU-Delfino Plaza.jpg|150x90px|link=Delfino Plaza]]<br>{{gameIcon|SSBB}} [[Delfino Plaza]]<br>{{symbol| | |colspan=2|[[File:SSBU-Delfino Plaza.jpg|150x90px|link=Delfino Plaza]]<br>{{gameIcon|SSBB}} [[Delfino Plaza]]<br>{{symbol|smb|20px}} | ||
|- | |- | ||
|colspan=2|[[File:SSBU- | |colspan=2|[[File:SSBU-Mushroomy Kingdom.png|150x90px|link=Mushroomy Kingdom]]<br>{{gameIcon|SSBB}} [[Mushroomy Kingdom]]<br>{{symbol|smb|20px}} | ||
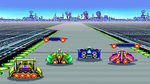
|colspan=2|[[File:SSBU- | |colspan=2|[[File:SSBU-Mario Circuit (SSBB).png|150x90px|link=Figure-8 Circuit]]<br>{{gameIcon|SSBB}} [[Figure-8 Circuit]]<br>{{symbol|smb|20px}} | ||
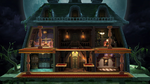
|colspan=2|[[File:SSBU- | |colspan=2|[[File:SSBU-Luigi's Mansion.png|150x90px|link=Luigi's Mansion]]<br>{{gameIcon|SSBB}} [[Luigi's Mansion]]<br>{{symbol|smb|20px}} | ||
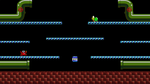
|colspan=2|[[File:SSBU-Mario Bros.png|150x90px|link=Mario Bros.]]<br>{{gameIcon|SSBB}} [[Mario Bros.]]<br>{{symbol| | |colspan=2|[[File:SSBU-Mario Bros.png|150x90px|link=Mario Bros.]]<br>{{gameIcon|SSBB}} [[Mario Bros.]]<br>{{symbol|smb|20px}} | ||
|colspan=2|[[File:SSBU-3D Land.png|150x90px|link=3D Land]]<br>{{gameIcon|SSB4-3DS}} [[3D Land]]<br>{{symbol| | |colspan=2|[[File:SSBU-3D Land.png|150x90px|link=3D Land]]<br>{{gameIcon|SSB4-3DS}} [[3D Land]]<br>{{symbol|smb|20px}} | ||
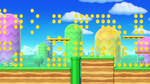
|colspan=2|[[File:SSBU-Golden Plains.png|150x90px|link=Golden Plains]]<br>{{gameIcon|SSB4-3DS}} [[Golden Plains]]<br>{{symbol| | |colspan=2|[[File:SSBU-Golden Plains.png|150x90px|link=Golden Plains]]<br>{{gameIcon|SSB4-3DS}} [[Golden Plains]]<br>{{symbol|smb|20px}} | ||
|- | |- | ||
|colspan=2|[[File:SSBU-Paper Mario.png|150x90px|link=Paper Mario]]<br>{{gameIcon|SSB4-3DS}} [[Paper Mario]]<br>{{symbol| | |colspan=2|[[File:SSBU-Paper Mario.png|150x90px|link=Paper Mario]]<br>{{gameIcon|SSB4-3DS}} [[Paper Mario]]<br>{{symbol|smb|20px}} | ||
|colspan=2|[[File:SSBU-Mushroom Kingdom U.png|150x90px|link=Mushroom Kingdom U]]<br>{{gameIcon|SSB4-U}} [[Mushroom Kingdom U]]<br>{{symbol| | |colspan=2|[[File:SSBU-Mushroom Kingdom U.png|150x90px|link=Mushroom Kingdom U]]<br>{{gameIcon|SSB4-U}} [[Mushroom Kingdom U]]<br>{{symbol|smb|20px}} | ||
|colspan=2|[[File:SSBU-Mario Galaxy.jpg|150x90px|link=Mario Galaxy]]<br>{{gameIcon|SSB4-U}} [[Mario Galaxy]]<br>{{symbol| | |colspan=2|[[File:SSBU-Mario Galaxy.jpg|150x90px|link=Mario Galaxy]]<br>{{gameIcon|SSB4-U}} [[Mario Galaxy]]<br>{{symbol|smb|20px}} | ||
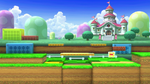
|colspan=2|[[File:SSBU-Mario Circuit (SSB4).png|150x90px|link=Mario Circuit (SSB4)]]<br>{{gameIcon|SSB4-U}} {{SSB4|Mario Circuit}}<br>{{symbol| | |colspan=2|[[File:SSBU-Mario Circuit (SSB4).png|150x90px|link=Mario Circuit (SSB4)]]<br>{{gameIcon|SSB4-U}} {{SSB4|Mario Circuit}}<br>{{symbol|smb|20px}} | ||
|colspan=2|[[File:SSBU-Super Mario Maker.png|150x90px|link=Super Mario Maker]]<br>{{gameIcon|SSB4}} [[Super Mario Maker]]<br>{{symbol| | |colspan=2|[[File:SSBU-Super Mario Maker.png|150x90px|link=Super Mario Maker]]<br>{{gameIcon|SSB4}} [[Super Mario Maker]]<br>{{symbol|smb|20px}} | ||
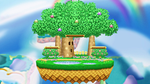
|colspan=2|[[File:SSBU- | |colspan=2|[[File:SSBU-Yoshi's Island (SSB).png|150x90px|link=Super Happy Tree]]<br>{{gameIcon|SSB}} [[Super Happy Tree]]<br>{{symbol|yoshi|20px}} | ||
|- | |- | ||
|colspan=2|[[File:SSBU-Kongo Falls.jpg|150x90px|link=Kongo Falls]]<br>{{gameIcon|SSBM}} [[ | |colspan=2|[[File:SSBU-Yoshi's Story.png|150x90px|link=Yoshi's Story]]<br>{{gameIcon|SSBM}} [[Yoshi's Story]]<br>{{symbol|yoshi|20px}} | ||
|colspan=2|[[File:SSBU-Yoshi's Island (SSBM).png|150x90px|link=Yoshi's Island (SSBM)]]<br>{{gameIcon|SSBM}} [[Yoshi's Island (SSBM)|Yoshi's Island (Melee)]]<br>{{symbol|yoshi|20px}} | |||
|colspan=2|[[File:SSBU-Yoshi's Island (SSBB).png|150x90px|link=Yoshi's Island (SSBB)]]<br>{{gameIcon|SSBB}} {{SSBB|Yoshi's Island}}<br>{{symbol|yoshi|20px}} | |||
|colspan=2|[[File:SSBU-Kongo Jungle.png|150x90px|link=Kongo Jungle (SSB)]]<br>{{gameIcon|SSB}} {{SSB|Kongo Jungle}}<br>{{symbol|dk|20px}} | |||
|colspan=2|[[File:SSBU-Kongo Falls.jpg|150x90px|link=Kongo Falls]]<br>{{gameIcon|SSBM}} [[Kongo Falls]]<br>{{symbol|dk|20px}} | |||
|colspan=2|[[File:SSBU-Jungle Japes.png|150x90px|link=Jungle Japes]]<br>{{gameIcon|SSBM}} [[Jungle Japes]]<br>{{symbol|dk|20px}} | |colspan=2|[[File:SSBU-Jungle Japes.png|150x90px|link=Jungle Japes]]<br>{{gameIcon|SSBM}} [[Jungle Japes]]<br>{{symbol|dk|20px}} | ||
|- | |||
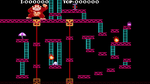
|colspan=2|[[File:SSBU-75m.png|150x90px|link=75m]]<br>{{gameIcon|SSBB}} [[75m]]<br>{{symbol|dk|20px}} | |colspan=2|[[File:SSBU-75m.png|150x90px|link=75m]]<br>{{gameIcon|SSBB}} [[75m]]<br>{{symbol|dk|20px}} | ||
|colspan=2|[[File:SSBU-Hyrule Castle.png|150x90px|link=Hyrule Castle]]<br>{{gameIcon|SSB}} [[Hyrule Castle]]<br>{{symbol|zelda|20px}} | |colspan=2|[[File:SSBU-Hyrule Castle.png|150x90px|link=Hyrule Castle]]<br>{{gameIcon|SSB}} [[Hyrule Castle]]<br>{{symbol|zelda|20px}} | ||
|colspan=2|[[File:SSBU-Great Bay.jpg|150x90px|link=Great Bay]]<br>{{gameIcon|SSBM}} [[Great Bay]]<br>{{symbol|zelda|20px}} | |colspan=2|[[File:SSBU-Great Bay.jpg|150x90px|link=Great Bay]]<br>{{gameIcon|SSBM}} [[Great Bay]]<br>{{symbol|zelda|20px}} | ||
| Line 84: | Line 91: | ||
|colspan=2|[[File:SSBU-Green Greens.png|150x90px|link=Green Greens]]<br>{{gameIcon|SSBM}} [[Green Greens]]<br>{{symbol|kirby|20px}} | |colspan=2|[[File:SSBU-Green Greens.png|150x90px|link=Green Greens]]<br>{{gameIcon|SSBM}} [[Green Greens]]<br>{{symbol|kirby|20px}} | ||
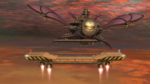
|colspan=2|[[File:SSBU-Halberd.png|150x90px|link=Halberd]]<br>{{gameIcon|SSBB}} [[Halberd]]<br>{{symbol|kirby|20px}} | |colspan=2|[[File:SSBU-Halberd.png|150x90px|link=Halberd]]<br>{{gameIcon|SSBB}} [[Halberd]]<br>{{symbol|kirby|20px}} | ||
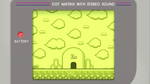
|colspan=2|[[File:SSBU-Dream Land (3DS).png|150x90px|link=Dream Land | |colspan=2|[[File:SSBU-Dream Land (3DS).png|150x90px|link=Dream Land GB]]<br>{{gameIcon|SSB4-3DS}} [[Dream Land GB]]<br>{{symbol|kirby|20px}} | ||
|- | |- | ||
|colspan=2|[[File:SSBU-The Great Cave Offensive.png|150x90px|link=The Great Cave Offensive]]<br>{{gameIcon|SSB4-U}} <span style="font-size:88%">[[The Great Cave Offensive]]</span><br>{{symbol|kirby|20px}} | |colspan=2|[[File:SSBU-The Great Cave Offensive.png|150x90px|link=The Great Cave Offensive]]<br>{{gameIcon|SSB4-U}} <span style="font-size:88%">[[The Great Cave Offensive]]</span><br>{{symbol|kirby|20px}} | ||
|colspan=2|[[File:SSBU-Corneria.png|150x90px|link=Corneria]]<br>{{gameIcon|SSBM}} [[Corneria]]<br>{{symbol| | |colspan=2|[[File:SSBU-Corneria.png|150x90px|link=Corneria]]<br>{{gameIcon|SSBM}} [[Corneria]]<br>{{symbol|fox|20px}} | ||
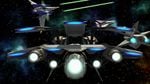
|colspan=2|[[File:SSBU-Venom.png|150x90px|link=Venom]]<br>{{gameIcon|SSBM}} [[Venom]]<br>{{symbol| | |colspan=2|[[File:SSBU-Venom.png|150x90px|link=Venom]]<br>{{gameIcon|SSBM}} [[Venom]]<br>{{symbol|fox|20px}} | ||
|colspan=2|[[File:SSBU-Lylat Cruise.jpg|150x90px|link=Lylat Cruise]]<br>{{gameIcon|SSBB}} [[Lylat Cruise]]<br>{{symbol| | |colspan=2|[[File:SSBU-Lylat Cruise.jpg|150x90px|link=Lylat Cruise]]<br>{{gameIcon|SSBB}} [[Lylat Cruise]]<br>{{symbol|fox|20px}} | ||
|colspan=2|[[File:SSBU-Saffron City.jpg|150x90px|link=Saffron City]]<br>{{gameIcon|SSB}} [[Saffron City]]<br>{{symbol| | |colspan=2|[[File:SSBU-Saffron City.jpg|150x90px|link=Saffron City]]<br>{{gameIcon|SSB}} [[Saffron City]]<br>{{symbol|pkmn|20px}} | ||
|colspan=2|[[File:SSBU-Pokémon Stadium.png|150x90px|link=Pokémon Stadium]]<br>{{gameIcon|SSBM}} [[Pokémon Stadium]]<br>{{symbol| | |colspan=2|[[File:SSBU-Pokémon Stadium.png|150x90px|link=Pokémon Stadium]]<br>{{gameIcon|SSBM}} [[Pokémon Stadium]]<br>{{symbol|pkmn|20px}} | ||
|- | |- | ||
|colspan=2|[[File:SSBU-Pokémon Stadium 2.png|150x90px|link=Pokémon Stadium 2]]<br>{{gameIcon|SSBB}} [[Pokémon Stadium 2]]<br>{{symbol| | |colspan=2|[[File:SSBU-Pokémon Stadium 2.png|150x90px|link=Pokémon Stadium 2]]<br>{{gameIcon|SSBB}} [[Pokémon Stadium 2]]<br>{{symbol|pkmn|20px}} | ||
|colspan=2|[[File:SSBU-Spear Pillar.png|150x90px|link=Spear Pillar]]<br>{{gameIcon|SSBB}} [[Spear Pillar]]<br>{{symbol| | |colspan=2|[[File:SSBU-Spear Pillar.png|150x90px|link=Spear Pillar]]<br>{{gameIcon|SSBB}} [[Spear Pillar]]<br>{{symbol|pkmn|20px}} | ||
|colspan=2|[[File:SSBU-Unova Pokémon League.png|150x90px|link=Unova Pokémon League]]<br>{{gameIcon|SSB4-3DS}} <span style="font-size:90%">[[Unova Pokémon League]]</span><br>{{symbol| | |colspan=2|[[File:SSBU-Unova Pokémon League.png|150x90px|link=Unova Pokémon League]]<br>{{gameIcon|SSB4-3DS}} <span style="font-size:90%">[[Unova Pokémon League]]</span><br>{{symbol|pkmn|20px}} | ||
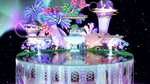
|colspan=2|[[File:SSBU-Prism Tower.png|150x90px|link=Prism Tower]]<br>{{gameIcon|SSB4-3DS}} [[Prism Tower]]<br>{{symbol| | |colspan=2|[[File:SSBU-Prism Tower.png|150x90px|link=Prism Tower]]<br>{{gameIcon|SSB4-3DS}} [[Prism Tower]]<br>{{symbol|pkmn|20px}} | ||
|colspan=2|[[File:SSBU-Kalos Pokémon League.png|150x90px|link=Kalos Pokémon League]]<br>{{gameIcon|SSB4-U}} <span style="font-size:90%">[[Kalos Pokémon League]]</span><br>{{symbol| | |colspan=2|[[File:SSBU-Kalos Pokémon League.png|150x90px|link=Kalos Pokémon League]]<br>{{gameIcon|SSB4-U}} <span style="font-size:90%">[[Kalos Pokémon League]]</span><br>{{symbol|pkmn|20px}} | ||
|colspan=2|[[File:SSBU-Big Blue.png|150x90px|link=Big Blue]]<br>{{gameIcon|SSBM}} [[Big Blue]]<br>{{symbol| | |colspan=2|[[File:SSBU-Big Blue.png|150x90px|link=Big Blue]]<br>{{gameIcon|SSBM}} [[Big Blue]]<br>{{symbol|fz|20px}} | ||
|- | |- | ||
|colspan=2|[[File:SSBU-Port Town Aero Dive.png|150x90px|link=Port Town Aero Dive]]<br>{{gameIcon|SSBB}} [[Port Town Aero Dive]]<br>{{symbol| | |colspan=2|[[File:SSBU-Port Town Aero Dive.png|150x90px|link=Port Town Aero Dive]]<br>{{gameIcon|SSBB}} [[Port Town Aero Dive]]<br>{{symbol|fz|20px}} | ||
|colspan=2|[[File:SSBU-Mute City (3DS).png|150x90px|link=Mute City | |colspan=2|[[File:SSBU-Mute City (3DS).png|150x90px|link=Mute City SNES]]<br>{{gameIcon|SSB4-3DS}} [[Mute City SNES]]<br>{{symbol|fz|20px}} | ||
|colspan=2|[[File:SSBU-Onett.png|150x90px|link=Onett]]<br>{{gameIcon|SSBM}} [[Onett]]<br>{{symbol| | |colspan=2|[[File:SSBU-Onett.png|150x90px|link=Onett]]<br>{{gameIcon|SSBM}} [[Onett]]<br>{{symbol|eb|20px}} | ||
|colspan=2|[[File:SSBU-Fourside.jpg|150x90px|link=Fourside]]<br>{{gameIcon|SSBM}} [[Fourside]]<br>{{symbol| | |colspan=2|[[File:SSBU-Fourside.jpg|150x90px|link=Fourside]]<br>{{gameIcon|SSBM}} [[Fourside]]<br>{{symbol|eb|20px}} | ||
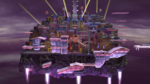
|colspan=2|[[File:SSBU-New Pork City.png|150x90px|link=New Pork City]]<br>{{gameIcon|SSBB}} [[New Pork City]]<br>{{symbol| | |colspan=2|[[File:SSBU-New Pork City.png|150x90px|link=New Pork City]]<br>{{gameIcon|SSBB}} [[New Pork City]]<br>{{symbol|eb|20px}} | ||
|colspan=2|[[File:SSBU-Magicant.png|150x90px|link=Magicant]]<br>{{gameIcon|SSB4-3DS}} [[Magicant]]<br>{{symbol| | |colspan=2|[[File:SSBU-Magicant.png|150x90px|link=Magicant]]<br>{{gameIcon|SSB4-3DS}} [[Magicant]]<br>{{symbol|eb|20px}} | ||
|- | |- | ||
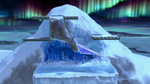
|colspan=2|[[File:SSBU-Summit.png|150x90px|link=Summit]]<br>{{gameIcon|SSBB}} [[Summit]]<br>{{symbol|ic|20px}} | |colspan=2|[[File:SSBU-Summit.png|150x90px|link=Summit]]<br>{{gameIcon|SSBB}} [[Summit]]<br>{{symbol|ic|20px}} | ||
| Line 111: | Line 118: | ||
|colspan=2|[[File:SSBU-Arena Ferox.png|150x90px|link=Arena Ferox]]<br>{{gameIcon|SSB4-3DS}} [[Arena Ferox]]<br>{{symbol|fe|20px}} | |colspan=2|[[File:SSBU-Arena Ferox.png|150x90px|link=Arena Ferox]]<br>{{gameIcon|SSB4-3DS}} [[Arena Ferox]]<br>{{symbol|fe|20px}} | ||
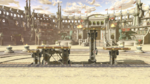
|colspan=2|[[File:SSBU-Coliseum.png|150x90px|link=Coliseum]]<br>{{gameIcon|SSB4-U}} [[Coliseum]]<br>{{symbol|fe|20px}} | |colspan=2|[[File:SSBU-Coliseum.png|150x90px|link=Coliseum]]<br>{{gameIcon|SSB4-U}} [[Coliseum]]<br>{{symbol|fe|20px}} | ||
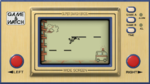
|colspan=2|[[File:SSBU-Flat Zone X.png|150x90px|link=Flat Zone X]]<br>{{gameIcon|SSB4-U}} [[Flat Zone X]]<br>{{symbol| | |colspan=2|[[File:SSBU-Flat Zone X.png|150x90px|link=Flat Zone X]]<br>{{gameIcon|SSB4-U}} [[Flat Zone X]]<br>{{symbol|gw|20px}} | ||
|colspan=2|[[File:SSBU-Skyworld.png|150x90px|link=Skyworld]]<br>{{gameIcon|SSBB}} [[Skyworld]]<br>{{symbol|ki|20px}} | |colspan=2|[[File:SSBU-Skyworld.png|150x90px|link=Skyworld]]<br>{{gameIcon|SSBB}} [[Skyworld]]<br>{{symbol|ki|20px}} | ||
|- | |- | ||
| Line 126: | Line 133: | ||
|colspan=2|[[File:SSBU-Wii Fit Studio.png|150x90px|link=Wii Fit Studio]]<br>{{gameIcon|SSB4-U}} [[Wii Fit Studio]]<br>{{symbol|wf|20px}} | |colspan=2|[[File:SSBU-Wii Fit Studio.png|150x90px|link=Wii Fit Studio]]<br>{{gameIcon|SSB4-U}} [[Wii Fit Studio]]<br>{{symbol|wf|20px}} | ||
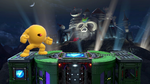
|colspan=2|[[File:SSBU-Boxing Ring.png|150x90px|link=Boxing Ring]]<br>{{gameIcon|SSB4}} [[Boxing Ring]]<br>{{symbol|po|20px}} | |colspan=2|[[File:SSBU-Boxing Ring.png|150x90px|link=Boxing Ring]]<br>{{gameIcon|SSB4}} [[Boxing Ring]]<br>{{symbol|po|20px}} | ||
|colspan=2|[[File:SSBU-Gaur Plain.png|150x90px|link=Gaur Plain]]<br>{{gameIcon|SSB4}} [[Gaur Plain]]<br>{{symbol| | |colspan=2|[[File:SSBU-Gaur Plain.png|150x90px|link=Gaur Plain]]<br>{{gameIcon|SSB4}} [[Gaur Plain]]<br>{{symbol|xb|20px}} | ||
|- | |- | ||
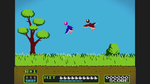
|colspan=2|[[File:SSBU-Duck Hunt.png|150x90px|link=Duck Hunt (stage)]]<br>{{gameIcon|SSB4}} | |colspan=2|[[File:SSBU-Duck Hunt.png|150x90px|link=Duck Hunt (stage)]]<br>{{gameIcon|SSB4}} {{b|Duck Hunt|stage}}<br>{{symbol|dh|20px}} | ||
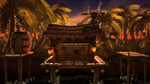
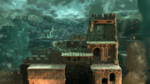
|colspan=2|[[File:SSBU-Shadow Moses Island 2.jpg|150x90px|link=Shadow Moses Island]]<br>{{gameIcon|SSBB}} [[Shadow Moses Island]]<br>{{symbol|mg|20px}} | |colspan=2|[[File:SSBU-Shadow Moses Island 2.jpg|150x90px|link=Shadow Moses Island]]<br>{{gameIcon|SSBB}} [[Shadow Moses Island]]<br>{{symbol|mg|20px}} | ||
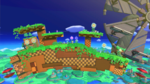
|colspan=2|[[File:SSBU-Green Hill Zone.png|150x90px|link=Green Hill Zone]]<br>{{gameIcon|SSBB}} [[Green Hill Zone]]<br>{{symbol|sonic|20px}} | |colspan=2|[[File:SSBU-Green Hill Zone.png|150x90px|link=Green Hill Zone]]<br>{{gameIcon|SSBB}} [[Green Hill Zone]]<br>{{symbol|sonic|20px}} | ||
| Line 135: | Line 142: | ||
|colspan=2|[[File:SSBU-Pac-Land.png|150x90px|link=Pac-Land]]<br>{{gameIcon|SSB4-U}} [[Pac-Land]]<br>{{symbol|pm|20px}} | |colspan=2|[[File:SSBU-Pac-Land.png|150x90px|link=Pac-Land]]<br>{{gameIcon|SSB4-U}} [[Pac-Land]]<br>{{symbol|pm|20px}} | ||
|- | |- | ||
|colspan=2|[[File:SSBU-Suzaku Castle.png|150x90px|link=Suzaku Castle]]<br>{{gameIcon|SSB4}} [[Suzaku Castle]]<br>{{symbol| | |colspan=2|[[File:SSBU-Suzaku Castle.png|150x90px|link=Suzaku Castle]]<br>{{gameIcon|SSB4}} [[Suzaku Castle]]<br>{{symbol|sf|20px}} | ||
|colspan=2|[[File:SSBU-Midgar.jpg|150x90px|link=Midgar]]<br>{{gameIcon|SSB4}} [[Midgar]]<br>{{symbol|ff|20px}} | |colspan=2|[[File:SSBU-Midgar.jpg|150x90px|link=Midgar]]<br>{{gameIcon|SSB4}} [[Midgar]]<br>{{symbol|ff|20px}} | ||
|colspan=2|[[File:SSBU-Umbra Clock Tower.png|150x90px|link=Umbra Clock Tower]]<br>{{gameIcon|SSB4}} [[Umbra Clock Tower]]<br>{{symbol|bayonetta|20px}} | |colspan=2|[[File:SSBU-Umbra Clock Tower.png|150x90px|link=Umbra Clock Tower]]<br>{{gameIcon|SSB4}} [[Umbra Clock Tower]]<br>{{symbol|bayonetta|20px}} | ||
|colspan=2|[[File:SSBU-Hanenbow.png|150x90px|link=Hanenbow]]<br>{{gameIcon|SSBB}} [[Hanenbow]]<br>{{symbol| | |colspan=2|[[File:SSBU-Hanenbow.png|150x90px|link=Hanenbow]]<br>{{gameIcon|SSBB}} [[Hanenbow]]<br>{{symbol|ep|20px}} | ||
|colspan=2|[[File:SSBU-PictoChat 2.png|150x90px|link=PictoChat 2]]<br>{{gameIcon|SSB4-3DS}}[[PictoChat 2]]<br>{{symbol|ds|20px}} | |colspan=2|[[File:SSBU-PictoChat 2.png|150x90px|link=PictoChat 2]]<br>{{gameIcon|SSB4-3DS}} [[PictoChat 2]]<br>{{symbol|ds|20px}} | ||
|colspan=2|[[File:SSBU-Balloon Fight.png|150x90px|link=Balloon Fight]]<br>{{gameIcon|SSB4-3DS}} [[Balloon Fight]]<br>{{symbol|bf|20px}} | |colspan=2|[[File:SSBU-Balloon Fight.png|150x90px|link=Balloon Fight]]<br>{{gameIcon|SSB4-3DS}} [[Balloon Fight]]<br>{{symbol|bf|20px}} | ||
|- | |- | ||
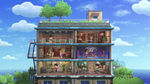
|colspan=2|[[File:SSBU-Living Room.png|150x90px|link=Living Room]]<br>{{gameIcon|SSB4-3DS}} [[Living Room]]<br>{{symbol| | |colspan=2|[[File:SSBU-Living Room.png|150x90px|link=Living Room]]<br>{{gameIcon|SSB4-3DS}} [[Living Room]]<br>{{symbol|nd|20px}} | ||
|colspan=2|[[File:SSBU-Find Mii.png|150x90px|link=Find Mii]]<br>{{gameIcon|SSB4-3DS}} [[Find Mii]]<br>{{symbol|streetpass|20px}} | |colspan=2|[[File:SSBU-Find Mii.png|150x90px|link=Find Mii]]<br>{{gameIcon|SSB4-3DS}} [[Find Mii]]<br>{{symbol|streetpass|20px}} | ||
|colspan=2|[[File:SSBU-Tomodachi Life.png|150x90px|link=Tomodachi Life]]<br>{{gameIcon|SSB4-3DS}} [[Tomodachi Life]]<br>{{symbol|tomodachi|20px}} | |colspan=2|[[File:SSBU-Tomodachi Life.png|150x90px|link=Tomodachi Life]]<br>{{gameIcon|SSB4-3DS}} [[Tomodachi Life]]<br>{{symbol|tomodachi|20px}} | ||
|colspan=2|[[File:SSBU-Wrecking Crew.png|150x90px|link=Wrecking Crew]]<br>{{gameIcon|SSB4-U}} [[Wrecking Crew]]<br>{{symbol|wreckingcrew|20px}} | |colspan=2|[[File:SSBU-Wrecking Crew.png|150x90px|link=Wrecking Crew]]<br>{{gameIcon|SSB4-U}} [[Wrecking Crew]]<br>{{symbol|wreckingcrew|20px}} | ||
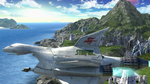
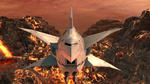
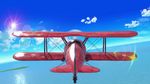
|colspan=2|[[File:SSBU-Pilotwings.png|150x90px|link=Pilotwings]]<br>{{gameIcon|SSB4-U}} [[Pilotwings]]<br>{{symbol|pw|20px}} | |colspan=2|[[File:SSBU-Pilotwings.png|150x90px|link=Pilotwings]]<br>{{gameIcon|SSB4-U}} [[Pilotwings]]<br>{{symbol|pw|20px}} | ||
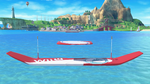
|colspan=2|[[File:SSBU-Wuhu Island.png|150x90px|link=Wuhu Island]]<br>{{gameIcon|SSB4-U}} [[Wuhu Island]]<br>{{symbol| | |colspan=2|[[File:SSBU-Wuhu Island.png|150x90px|link=Wuhu Island]]<br>{{gameIcon|SSB4-U}} [[Wuhu Island]]<br>{{symbol|wuhu|20px}} | ||
|} | |} | ||