Link (SSB4): Difference between revisions
No edit summary |
|||
| Line 158: | Line 158: | ||
|ftiltname= | |ftiltname= | ||
|ftiltdmg=13% | |ftiltdmg=13% | ||
|ftiltdesc=A downward slash that resembles the standard Z-Target slash It has moderate start-up, but | |ftiltdesc=A downward slash that resembles the standard Z-Target slash. It has moderate start-up, but has good range and above-average knockback for a tilt. | ||
|utiltname= | |utiltname= | ||
|utiltdmg=9% | |utiltdmg=9% | ||
| Line 167: | Line 167: | ||
|dashname={{s|zeldawiki|Jump Attack}} | |dashname={{s|zeldawiki|Jump Attack}} | ||
|dashdmg=14% (tip), 13% (non-tip) | |dashdmg=14% (tip), 13% (non-tip) | ||
|dashdesc=A leaping downward slash used by the Link from ''The Legend of Zelda: Ocarina of Time''. Deals horizontal knockback when tipped and vertical knockback when hit close, and will KO at early percentages. | |dashdesc=A leaping downward slash used by the Link from ''The Legend of Zelda: Ocarina of Time''. Deals horizontal knockback when tipped and vertical knockback when hit close, and will KO at early percentages. Has moderate startup and ending lag, making it very punishable if whiffed or used recklessly. | ||
|fsmashcount=2 | |fsmashcount=2 | ||
|fsmashname= | |fsmashname= | ||
| Line 181: | Line 181: | ||
|nairname= | |nairname= | ||
|nairdmg=11%/9% (clean), 6% (late) | |nairdmg=11%/9% (clean), 6% (late) | ||
|nairdesc=A flying kick. It is a [[sex kick]] with relatively fast start-up and little landing lag. Deals more damage | |nairdesc=A flying kick. It is a [[sex kick]] with relatively fast start-up and little [[landing lag]]. Deals more damage and knockback in the first few active frames, especially at Link's foot, while the late hitbox has minimal knockback. Overall, this is one of Link's most useful moves, allowing him to break opponents' combos and/or start his own. | ||
|fairname= | |fairname= | ||
|fairdmg=11% (hit 1), 13% (hit 2) | |fairdmg=11% (hit 1), 13% (hit 2) | ||
| Line 187: | Line 187: | ||
|bairname= | |bairname= | ||
|bairdmg=3% (hit 1), 5% (hit 2) | |bairdmg=3% (hit 1), 5% (hit 2) | ||
|bairdesc=A back kick followed by a mid-level roundhouse kick. | |bairdesc=A back kick followed by a mid-level roundhouse kick. This is Link's fastest aerial and has very little landing lag, but deals low damage. | ||
|uairname={{s|zeldawiki|Up Thrust}} | |uairname={{s|zeldawiki|Up Thrust}} | ||
|uairdmg=15% (clean), 13% (late) | |uairdmg=15% (clean), 13% (late) | ||
| Line 193: | Line 193: | ||
|dairname={{s|zeldawiki|Down Thrust}} | |dairname={{s|zeldawiki|Down Thrust}} | ||
|dairdmg=15% (early), 18% (clean), 15% (late), 11% (bounce) | |dairdmg=15% (early), 18% (clean), 15% (late), 11% (bounce) | ||
|dairdesc=A leaping downward thrust used by the Links in ''Zelda II: The Adventure of Link'', ''{{s|zeldawiki|The Legend of Zelda: Four Swords}}'', ''{{s|zeldawiki|The Legend of Zelda: Four Swords Adventures}}'' and ''{{s|zeldawiki|The Legend of Zelda: The Minish Cap}}''. It is possible for Link to "bounce" on opponents into a second hit. The early hit is a powerful [[meteor smash]]. | |dairdesc=A leaping downward thrust used by the Links in ''Zelda II: The Adventure of Link'', ''{{s|zeldawiki|The Legend of Zelda: Four Swords}}'', ''{{s|zeldawiki|The Legend of Zelda: Four Swords Adventures}}'' and ''{{s|zeldawiki|The Legend of Zelda: The Minish Cap}}''. It is possible for Link to "bounce" on opponents into a second hit, provided he isn't [[fast fall]]ing. The early hit is a powerful [[meteor smash]]. Has a strong non-meteor hitbox afterwards, capable of KOing under 130%. However, it is more difficult to land a strong non-meteor hitbox than the meteor hitbox, as it requires Link to hit with the rising hilt on start-up, or immediately after the initial meteor hit, but before the weak hit. | ||
|zairname=[[Clawshot]] | |zairname=[[Clawshot]] | ||
|zairdmg=2.5% (hit 1), 4% (hit 2) | |zairdmg=2.5% (hit 1), 4% (hit 2) | ||
| Line 201: | Line 201: | ||
|pummelname= | |pummelname= | ||
|pummeldmg=2.1% | |pummeldmg=2.1% | ||
|pummeldesc=Hits the opponent with the Master Sword's hilt. A fairly fast pummel. | |pummeldesc=Hits the opponent with the Master Sword's hilt. A fairly fast pummel with good damage output for its speed. | ||
|fthrowname= | |fthrowname= | ||
|fthrowdmg=3% (hit 1), 4% (throw) | |fthrowdmg=3% (hit 1), 4% (throw) | ||
|fthrowdesc=A front kick. | |fthrowdesc=A front kick. Mainly used to send opponents offstage, but has little utility beyond that. | ||
|bthrowname= | |bthrowname= | ||
|bthrowdmg=3% (hit 1), 4% (hit 2) | |bthrowdmg=3% (hit 1), 4% (hit 2) | ||
|bthrowdesc=Shoves the opponent behind himself and back kicks them away. | |bthrowdesc=Shoves the opponent behind himself and back kicks them away. Similar utility to his forward throw. | ||
|uthrowname= | |uthrowname= | ||
|uthrowdmg=5%/4% (hit 1), 2% (throw) | |uthrowdmg=5%/4% (hit 1), 2% (throw) | ||
|uthrowdesc=Raises the opponent above himself and slashes them upward. | |uthrowdesc=Raises the opponent above himself and slashes them upward. KOs opponents at around 170% before rage is factored in. | ||
|dthrowname= | |dthrowname= | ||
|dthrowdmg=3% (hit 1), 4% (throw) | |dthrowdmg=3% (hit 1), 4% (throw) | ||
| Line 228: | Line 228: | ||
|nsdefname=Hero's Bow | |nsdefname=Hero's Bow | ||
|nsdefdmg=4% (uncharged), 12% (fully charged) | |nsdefdmg=4% (uncharged), 12% (fully charged) | ||
|nsdefdesc=Equips his {{s|zeldawiki|Hero's Bow}} and fires an {{s|zeldawiki|arrow}} forward. Charging increases the speed, distance and damage dealt by an arrow. | |nsdefdesc=Equips his {{s|zeldawiki|Hero's Bow}} and fires an {{s|zeldawiki|arrow}} forward. Charging increases the speed, distance and damage dealt by an arrow. At full charge, the arrow flies almost completely straight and covers a very long distance. | ||
|nsc1name=Power Bow | |nsc1name=Power Bow | ||
|nsc1dmg=4% (uncharged), 20% (fully charged) | |nsc1dmg=4% (uncharged), 20% (fully charged) | ||
| Line 237: | Line 237: | ||
|ssdefname=Gale Boomerang | |ssdefname=Gale Boomerang | ||
|ssdefdmg=7% (near), 5% (middle), — (far/return) | |ssdefdmg=7% (near), 5% (middle), — (far/return) | ||
|ssdefdesc=Throws the {{s|zeldawiki|Gale Boomerang}} that flies forward and returns to him. It damages opponents as it flies away and drags opponents toward Link during its return. It can be angled up or down, while a "smash throw" (similar to when performing the input for a smash attack) increases the distance it can travel. | |ssdefdesc=Throws the {{s|zeldawiki|Gale Boomerang}} that flies forward and returns to him. It damages opponents as it flies away and drags opponents toward Link during its return. It can be angled up or down, while a "smash throw" (similar to when performing the input for a smash attack) increases the distance it can travel. It cannot be properly [[reflection|reflected]]; doing so only sends it flying past Link with its non-damaging pushbox. | ||
|ssc1name=Boomerang | |ssc1name=Boomerang | ||
|ssc1dmg=9% (near), 7% (middle), 5% (far), 3% (return) | |ssc1dmg=9% (near), 7% (middle), 5% (far), 3% (return) | ||
| Line 243: | Line 243: | ||
|ssc2name=Ripping Boomerang | |ssc2name=Ripping Boomerang | ||
|ssc2dmg=4% (near), 2% (middle), 1.5% (far), 0.7% (return) | |ssc2dmg=4% (near), 2% (middle), 1.5% (far), 0.7% (return) | ||
|ssc2desc=Travels across a much shorter range, but also hits multiple times | |ssc2desc=Travels across a much shorter range and deals low damage, but also hits multiple times and adds a stunning effect to the opponents, which makes it ideal for setting up combos. | ||
|usdefname=Spin Attack | |usdefname=Spin Attack | ||
|usdefdmg=12%/9%/7%/5% (grounded), 4% (aerial hit 1), 2% (aerial hits 2-8), 4% (aerial hit 9) | |usdefdmg=12%/9%/7%/5% (grounded), 4% (aerial hit 1), 2% (aerial hits 2-8), 4% (aerial hit 9) | ||
| Line 252: | Line 252: | ||
|usc2name=Whirling Leap | |usc2name=Whirling Leap | ||
|usc2dmg=— | |usc2dmg=— | ||
|usc2desc=Deals no damage, but travels much higher and much farther, to the point that | |usc2desc=Deals no damage, but travels much higher and much farther, to the point that Link can perform multiple left and right movements without relying on momentum. It also makes Link leap into the air if used from the ground. | ||
|dsdefname=Bomb | |dsdefname=Bomb | ||
|dspage=Bomb (Link) | |dspage=Bomb (Link) | ||
|dsdefdmg=5% (upper body), 8% (feet), 9% (down smash aerial, feet) | |dsdefdmg=5% (upper body), 8% (feet), 9% (down smash aerial, feet) | ||
|dsdefdesc=Pulls out a {{s|zeldawiki|Bomb}}. | |dsdefdesc=Pulls out a {{s|zeldawiki|Bomb}}. It explodes on contact with a surface, an attack, or on its own roughly four seconds after being pulled out, dealing damage to opponents. The explosion can hurt Link as well, but it won't if it hits an opponent first. Used skillfully, the explosion can snap him out of helplessness and grant him an extra Spin Attack, improving his recovery. Oddly, it will deal more damage when it hits the opponent's feet. | ||
|dsc1name=Giant Bomb | |dsc1name=Giant Bomb | ||
|dsc1dmg=8%-10% | |dsc1dmg=8%-10% | ||
|dsc1desc=The Bomb is massive | |dsc1desc=The Bomb is massive and has a huge explosion hitbox, which deals more damage and knockback. However, it cannot explode when thrown at the opponent, and explodes based on time or an attack. Deals damage based on range. | ||
|dsc2name=Meteor Bomb | |dsc2name=Meteor Bomb | ||
|dsc2dmg=5% | |dsc2dmg=5% | ||
| Line 270: | Line 270: | ||
===[[On-screen appearance]]=== | ===[[On-screen appearance]]=== | ||
{{appearance | {{appearance | ||
|desc= | |desc=Link appears from within a whirlwind, similarly to how he did in the original Zelda when the Recorder was used. Upon appearing, he equips the Master Sword and Hylian Shield. | ||
|char=Link | |char=Link | ||
|game=SSB4}} | |game=SSB4}} | ||
| Line 277: | Line 277: | ||
{{Taunt/SSB4 | {{Taunt/SSB4 | ||
|char=Link | |char=Link | ||
|desc-up=Swings the Master Sword twice and twirls | |desc-up=Swings the Master Sword twice and twirls it behind him before sheathing it. This is similar to his victory pose in ''The Legend of Zelda: Twilight Princess'', which he performs after defeating a boss, learning a hidden sword technique, or sheathing his sword upon the defeat of harder-to-defeat enemies. | ||
|desc-side=Link takes out a fairy that appears similar to {{s|zeldawiki|Navi}} from ''The Legend of Zelda: Ocarina of Time''. The fairy then proceeds to fly around as Link watches it until it returns to his pocket. While Navi does not appear in ''The Legend of Zelda: Twilight Princess'', the fairy is likely based on the blue fairy Wii Remote cursor in the Wii version of ''Twilight Princess''. | |desc-side=Link takes out a fairy that appears similar to {{s|zeldawiki|Navi}} from ''The Legend of Zelda: Ocarina of Time''. The fairy then proceeds to fly around as Link watches it until it returns to his pocket. While Navi does not appear in ''The Legend of Zelda: Twilight Princess'', the fairy is likely based on the blue fairy Wii Remote cursor in the Wii version of ''Twilight Princess''. | ||
|desc-down=Link assumes a {{s|wikipedia|Fujian White Crane}}-like stance while rearing the Master Sword behind his head. It originates from ''SSB'' and may be loosely based on the attacking pose used by the Link from ''Zelda II: The Adventure of Link''.}} | |desc-down=Link assumes a {{s|wikipedia|Fujian White Crane}}-like stance while rearing the Master Sword behind his head. It originates from ''SSB'' and may be loosely based on the attacking pose used by the Link from ''Zelda II: The Adventure of Link''.}} | ||
| Line 303: | Line 303: | ||
|desc-1=Link thrusts the Master Sword forward, holds it up to his face, then thrusts it to the sky while letting out a [[wikipedia:Kiai|kiai]]. | |desc-1=Link thrusts the Master Sword forward, holds it up to his face, then thrusts it to the sky while letting out a [[wikipedia:Kiai|kiai]]. | ||
|desc-2=Swings the Master Sword three times and then looks to the right. It is his "character chosen" animation in ''SSB'', albeit ending with him facing a different direction. | |desc-2=Swings the Master Sword three times and then looks to the right. It is his "character chosen" animation in ''SSB'', albeit ending with him facing a different direction. | ||
|desc-3=Swipes the Master Sword once, twirls it behind his head, then | |desc-3=Swipes the Master Sword once, twirls it behind his head, then sheathes it. This is based on his special sheathing animation in ''The Legend of Zelda: Twilight Princess'', which occurs if he puts away his sword immediately after defeating an enemy. Link does a similar animation during his up taunt. | ||
|char=Link}} | |char=Link}} | ||
Revision as of 05:38, September 11, 2016
| Link in Super Smash Bros. 4 | |
|---|---|
 
| |
| Universe | The Legend of Zelda |
| Other playable appearances | in SSB in Melee in Brawl |
| Availability | Starter |
| Final Smash | Triforce Slash |
| Tier | F (43) |
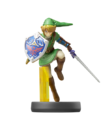
Link (リンク, Link) is a playable character in Super Smash Bros. 4. His return to the series was confirmed on June 11th, 2013 during the E3 2013 Nintendo Direct.[1] Additionally, he was also among the first wave of amiibo that are compatible with SSB4. Like in Super Smash Bros. Brawl, Akira Sasanuma reprises his role as Link's voice actor, albeit via voice clips recycled from The Legend of Zelda: Twilight Princess.
Link is ranked 43rd out of 58 on the tier list, placing him at the bottom of the F tier. This is a noticeable improvement from his placement in Brawl, where he was ranked 35th out of 38. Link's assets are his multiple projectiles in Hero's Bow, Gale Boomerang, and Bomb, which serve as great tools for combos, camping, gimping, and disrupting approaches. Aside from his projectiles, Link's Master Sword grants him a disjointed reach and is quite powerful. His recovery has been greatly buffed from Brawl and is quite versatile, thanks to his Clawshot's ability to function as a tether grab and his Bomb's ability to remove him from helplessness. As a heavyweight, his respectable durability allows him to take advantage of the rage mechanic introduced in SSB4, which further bolsters his already powerful attacks.
However, Link remains held back by his relatively sluggish frame data. He has moves that are quite easily punishable if they are whiffed, while his heavy weight and slow mobility without super glide tossing render him vulnerable to combos, especially from the fast, rushdown-oriented characters that are prevalent in the metagame. Despite Link's new assets, several of his fellow veterans gained more significant buffs, which downplays the effects that his own buffs grant him in competitive play.
Although he has a number of dedicated mains to his credit, such as Scizor, T and Izaw, Link's early tournament results have been mediocre at best. However, his results have recently improved, as he has achieved top 8 and 16 placements more frequently, bringing up some debate between players if Link truly deserves to be in the low tier.
Attributes
Link is a heavyweight and the majority of his attributes are largely reflective of his weight class. His only attribute that is atypical of a heavyweight is his walking speed, which is above average. Like his alternate timeline counterpart, Link possesses two shields instead of just one. In Link's case, he wields the Hylian Shield, which blocks opposing projectiles if he is standing still or walking. Like Toon Link, Link also wields his respective version of the Master Sword, which grants him good range, a disjointed hitbox and above average strength. Alongside his smash attacks and Spin Attack, Link's forward tilt and dash attack boast impressive power. His forward, up and down aerials are also strong while possessing certain traits: forward and down aerial can hit twice, up aerial has a long-lasting hitbox, and down aerial can meteor smash. Although situational, his up tilt and up throw have KO potential at higher percentages.
Link is one of the handful of characters in SSB4 with a tether grab, with his Clawshot being a useful supplement to his zoning, combo and recovery potentials. Although its damage output has been lowered since Brawl, Clawshot still boasts impressive range, has no landing lag and comes out even faster than before. It also assists his combo game, due to his down throw's impressive combo potential. Lastly and most importantly, Clawshot is a pivotal part of Link's recovery, especially due to his status as a heavyweight.
Link's special moves all have their uses. Hero's Bow is a strong option against characters who struggle at approaching and is good for providing long-ranged pressure. Gale Boomerang is a decent spacing option and has follow-up potential upon contact or via its wind-based drag effect. Gale Boomerang's drag effect also grants it gimping potential in the form of Gale Guarding. Spin Attack's overall recovery distance has been noticeably improved since Brawl, while its already impressive power has been further increased, which in turn improves it as a KOing option or as a way to punish rolls. However, Link's Bomb is perhaps the most versatile weapon within his arsenal due to its utility. Throwing a Bomb at a foe can cause enough hitstun to help Link's approach and/or set up combos. Conversely, if the opponent shields it, the Bomb simply bounces off, allowing it to be used for spacing. Even holding a Bomb long enough for it to explode can be useful; while doing so damages Link, it gives him a small vertical boost and removes him from being helpless, aiding his recovery and/or allowing him to break out of combos. Bomb can also be super glide tossed, which notably increases his mobility; Link also holds the distinction (along with R.O.B.) of being the only character who can super glide toss forward, as well as being able to generate an item to utilize it. When combined with the overall fastest item throw animations in the game, Link's Bomb allows him to pressure opponents at a deceptively fast speed.
Despite his benefits, Link retains some of his flaws from his previous appearances. Even though his recovery has been noticeably improved after formerly being one of his most significant flaws in SSB and Brawl, Link is susceptible to combos from faster characters, such as Sheik. As a result, he must make good use of reads, spacing and camping to avoid giving the advantage to such characters. To this end, his neutral aerial is a sex kick that allows him to break out of many combos, and is therefore one of his most useful moves. In addition, Link's KO potential is hindered by lag, particularly in regard to his forward tilt, dash attack, forward aerial and down aerial.
Overall, Link is a capable zoner and spacing-oriented character and a popular choice among beginners, who must also take note of some difficult techniques that are associated with him. However, unlike his fellow beginner-friendly characters Mario and Cloud, Link is a generally defensive character who relies on appropriate use of both camping and his combo game to be successful, which is often dependent on the matchup. Additionally, his playstyle can be difficult to utilize at higher levels of play, mainly due to the speedy and combo-oriented characters that are prevalent in the metagame.
Changes from Brawl
Link has been significantly buffed in his transition from Brawl to SSB4. As he received many faster and stronger attacks in exchange for slightly lowered damage outputs, these buffs overall outweigh the nerfs. Both his ground and aerial games have been improved, and his combo game has strengthened as a whole. His grab game has also considerably improved, with some grabs having better angle placements or knockback altogether. He also is a potent edgeguarder, with his down aerial now capable of meteor smashing, as well as more offensive options against opponents on the ledge. Additionally, significant buffs to Spin Attack and Clawshot improve his recovery, which in turn further improves his excellent survivability. Lastly, his camping game has also been improved due to his projectiles, most notably his Bomb, having been buffed.
Link also benefits from the general physics changes brought about by SSB4. The edge trump mechanic further improves his recovery, while the rage mechanic further boosts his power and can be utilized well due to his excellent survivability. Lastly, Link is one of the only characters to not be noticeably affected by the general nerf to camping. Ultimately, Link is significantly better than how he was in Brawl and is virtually as good as was in Melee, although his current viability is somewhat debatable due to the majority of the returning cast having also been buffed to varying degrees.
Aesthetics
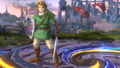
 Link once again appears as his The Legend of Zelda: Twilight Princess incarnation. However, instead of retaining the subdued color scheme used in Twilight Princess that was also carried over to Brawl, his overall color scheme is now noticeably brighter to appear in line with the more vibrant aesthetics used within SSB4. This is coincidentally similar to Link's appearances in other games within The Legend of Zelda series that use a more vibrant aesthetic than Twilight Princess.
- The Master Sword's trail is now blue with white accents that produces afterimages, rather than a fully blue blur like in Brawl.
- Idle stance animation's has changed.
Attributes
 Link walks slower (1.2 → 1.188).
 Link dashes faster (1.328 → 1.3944).
- Link's air speed is faster (0.8084 → 0.88).
- Link's gravity is higher (0.089 → 0.096).
- Backward roll's animation has changed. It is now based on the ones used by the Link from The Legend of Zelda: Ocarina of Time.
- Dash item throw's animation has been sped up to 18 frames, making it the fastest in the game. This improves his item projectile game.
- The Hylian Shield can now block projectiles even while walking. Additionally, Link now flinches when a projectile or Bomb explosion hits his Hylian Shield, making it more reliable when attempting to block multiple projectiles. It normally blocks any projectile in front of him, even while crouching or during idle poses. As well, the change to the idle stance animation will always have Hylian Shield in front of Link when standing, like in Melee.
Ground attacks
- Neutral attack deals 2% less damage (12% → 10%).
- Forward tilt has decreased ending lag.
- Up tilt has significantly increased knockback, granting it KO potential.
- Down tilt deals 1% less damage (12% → 11%) and has significantly decreased knockback. However, it comes out faster and has improved combo potential.
- Link has a new dash attack, the Jump Attack from The Legend of Zelda: Ocarina of Time. Compared to the previous dash attack, it is significantly stronger to the point of having KO potential, as it is capable of KOing under 150% and lower if the Master Sword's tip lands. It also has a much larger hitbox and launches opponents horizontally, vertically, diagonally and even backward depending on which hitbox connects, which allows for follow-ups.
- Dash attack has considerably increased start-up lag (8 frames → 20) compared to the previous dash attack.
- Forward smash deals less damage (15%/20% → 14%/13%) and the second hit has increased ending lag.
- Forward smash is stronger, with its first hit being able to KO if it hits near or at the Master Sword's tip. Additionally, its second hit is stronger and can follow up from the first hit like Toon Link's.
- Forward smash's sourspot's position has been altered and portions of it are now irreversible.
- The window of time that the attack button can be pressed after the first hit of forward smash in able to activate the second hit has been significantly tightened, leading to less accidental activation of the second hit, but making it so that one cannot use the delay as much in order to hit with the second hit.
- Up smash's last hit deals 1% more damage (10%/9%/8% → 11%/10%/9%), its hits connect together better and it deals significantly increased knockback, improving its KO potential.
- Down smash's first hit deals more knockback while its second hit is now a powerful semi-spike, improving its KO potential.
- Down smash's first hit's angle has been slightly altered.
Aerial attacks
- Clean neutral aerial no longer has a consistent damage output (10% → 11%/9%) due to consisting of two hits instead of one.
- Late neutral aerial has decreased knockback overall and decreased ending lag, granting it combo potential.
- Forward aerial deals more damage (9% → 11% (hit 1), 12% → 13% (hit 2)), is much faster and has decreased ending and landing lag.
- Back aerial deals 3% less damage (11% → 8%).
- Back aerial has decreased start-up lag.
- Up aerial's hitbox is more disjointed and briefly makes Link's hurtbox shorter, which improves its juggling and KO potentials, accuracy and safety. It also has decreased ending and landing lag.
- Clean and late down aerial deals less damage (22% → 18% (clean), 18% → 15% (late)).
- Down aerial's bouncing hit deals 3% more damage (8% → 11%). It can now meteor smash during its start, similarly to Toon Link's in Brawl. However, it does not meteor smash grounded opponents, allowing it to connect into a second hit. It also has increased range and significantly decreased ending and landing lag, improving its safety when bouncing off opponents and allowing Link to recover if falling off the stage.
- Clean down aerial deals 4% less damage (22% → 18%) and it now KOs around 110%-130% instead of under 75%, hindering its KO potential. It is also more difficult to land.
- Grab aerial deals 4% less damage (10% → 6%).
- Grab aerial has significantly increased range as a tether recovery and comes out significantly faster as an attack.
Throws/other attacks
- All grabs have decreased start-up and ending lag.
- Edge attack's animation has been changed. It is now a crouching thrust that resembles the Crouch Stab used by the Link from The Legend of Zelda: Ocarina of Time and The Legend of Zelda: Majora's Mask.
- Forward throw has decreased ending lag (39 frames → 34).
- Down throw's angle altered (110° → 83°), improving its follow-up and juggling potentials.
- Down throw's second hit deals 1% less damage (4% → 3%). However, this results in it dealing lower knockback, which improves its follow-up and juggling potentials.
Special moves
- Hero's Bow charges faster.
- Gale Boomerang has increased knockback and launches opponents vertically, improving its follow-up potential.
- Uncharged Spin Attack deals 2% more damage (12% → 14%). Both the grounded and aerial versions come out faster, end sooner and KO earlier.
- Spin Attack's back half KOs 19% later.
- Aerial Spin Attack covers significantly more vertical and horizontal distance.
- Bomb deals 3% more damage (5% → 8%) if it hits the opponent's feet. Bomb's fuse is shorter and Link can attack and detonate it in midair after throwing it, improving his Bomb-aided recovery potential. If a Bomb explodes due to colliding with an opponent, the explosion no longer hurts Link.
- Bomb now blocks large projectiles, such as a fully charged Charge Shot and a fully charged Aura Sphere, granting them defensive potential.
- Triforce Slash deals 23% less damage (83% → 60%).
Version exclusives
-
 Bomb is bigger. However, this is merely aesthetic.
 - Prior to update 1.0.8, grounded Clawshot came out shorter and dropped, but also ended faster. However, this was merely aesthetic.
-
 Grounded Clawshot's animation has changed. It no longer falls to the ground as it retracts, much like the Hookshot in SSB.
Update history
Link has been heavily buffed via game updates. In update 1.0.4, the knockback of the first hit of his forward smash was lowered, allowing it to connect better into the second hit. In update 1.0.6 though, he received a mix of buffs and nerfs, which hindered his KO and damage racking potentials, but improved his range and combo game. However, update 1.0.8 brought Link significant buffs in the form of a much more effective grab game and better KOing options, the latter of which helped mitigate the nerfs to his KOing potential that update 1.0.6 brought. In update 1.1.0, his grab game was slightly buffed, as his dash and pivot grabs each became 1 frame faster. Updates 1.1.3 and 1.1.5 also brought several buffs, which further increased his already high KO potential. Finally, he was indirectly buffed due to the changes on the shield mechanics in updates 1.1.0 and 1.1.1, as the increased shieldstun and the fact that hitlag modifiers now apply on shielding opponents improve Link's close-range game by making his moves safer on shield. This has resulted in him being viewed as a better character than how he was during the initial release of SSB4.
- Non-tipped forward smash's first hit's has lower base knockback (60 → 47), allowing it to more reliably lead into the second hit.
 Link can no longer throw a bomb with down special to cancel landing lag (outside of special moves which already could not be canceled).
- This hinders the safety of his aerials and air dodge, hinders the combo potential of his aerials and it prevents Link from canceling hitstun if he lands while in non-tumble hitstun.
- Link can no longer throw a bomb with down special to cancel tumble hitstun.
- This not only makes Link considerably more susceptible to combos, since he can no longer throw a bomb to cancel the hitstun and act sooner but this also considerably hinders his endurance, since he can no longer throw a bomb and then utilise momentum canceling to survive longer.
![]() 1.0.5
1.0.5
- Quickfire Bow and Power Bow now behave like they do in the version. The Quickfire Bow charges faster, comes out earlier and ends sooner, while the Power Bow functions oppositely.
- Hylian Shield now blocks Blaster's lasers.
- Uncharged Spin Attack deals 2% more damage: 12% → 14% and KOs 17% earlier, improving its KO potential.
- Spin Attack's back half KOs 19% later.
- Spin Attack comes out 3 frames faster and ends 4 frames sooner.
- Spin Attack and Shocking Spin Attack's second hitboxes' Z-offsets increased: 6.6 → 7.
- Neutral attack's first hit ends sooner: 27 frames → 19. It also no longer has any interruptibility frames, removing Link's "jab cancel death combo".[1]
- Non-tippered dash attack deals 1% less damage: 13% → 12% and its knockback growth decreased: 78 → 72.
- Dash attack's hitbox comes out 1 frame faster: frame 21 → 20.
- Down tilt's knockback growths decreased. This hinders its KO potential, but improves its combo potential.
- Forward smash's sourspot's position has been altered.
- Parts of forward smash have been made irreversible.
- Down aerial's reach increased by 50%.
- Down tilt deals 1% less damage: 12% → 11%, its knockback decreased and it comes out faster. This hinders its KO potential, but improves its combo potential.
- Up smash's hits connect together better, with all three hits now connecting when the move lands and the first two hits now dragging the opponent toward Link instead of stunning them.
- Clawshot now behaves like it does in the version. Clawshot's range has been doubled in terms of length and grab distance, it grabs just before it droops back down to the ground and Link's standing grab has been sped up by 2 frames.
- All grabs' ending lag decreased: 66 frames/77 frames/79 frames → 61/65/66.
- Forward throw's ending lag decreased: 39 frames → 34.
- Down throw's launching angle altered: 110° → 83°, improving its follow-up and juggling potentials.
- Down throw's second hit deals 1% less damage: 4% → 3%. However, this results in lower knockback, improves its follow-up and juggling potentials.
- Spin Attack's knockback growth increased: 84 (stage 1)/80 (stage 2)/80 (stage 3) → /85/85/82, improving its KO potential.
- Stage 2 Shocking Spin Attack's knockback growth increased: 80 → 82.
- Spin Attack's hitbox placements adjusted.
- Dash and pivot grabs come out 1 frame faster.
- Shocking Spin received a hitbox that deals 14% and its original hitboxes deal more damage: 14%/9%/7%/5% → 16%/11%/12%/8%/6%.
- Forward smash second hit knockback growth: 85 → 89.
- Down smash first hit angle: 75° → 78°.
- Down smash's first hit's knockback altered: 26 (base)/90 (growth) → 40/88. This allows it to KO slightly earlier.
- Forward aerial first hit damage: 8% → 11%.
- Forward aerial first hit base knockback: 10 → 20.
- Forward aerial first hit knockback growth: 132 → 130.
- Forward aerial second damage: 10% → 13%.
- Forward aerial second hit knockback growth: 105 → 100.
- Down aerial no longer meteor smashes grounded opponents.
- Down aerial has a new early hitbox designed to hit only grounded opponents; it deals less knockback (25 base/40 growth) and launches at an angle of 55° instead of meteor smashing. This allows Link to hit foes a second time with the attack right after bouncing off them, dealing a massive amount of damage (26% if both hits connect), which works until they reach about 60% damage.
- Down aerial's second bounce deals more damage: 8% → 11%.
- Spin Attack and Shocking Spin are slightly faster.
- Down smash hit 2 KBG: 57 → 63
- Dash attack KBG: 78/72 → 85/77
- Dash attack angles: 45/60/70° → 45/50/55°
Moveset
| Name | Damage | Description | ||
|---|---|---|---|---|
| Neutral attack | 2.5% | A diagonal slash and a horizontal slash followed by a thrust. It appears to be loosely based on the final blow that the Link from The Legend of Zelda: Ocarina of Time dealt to Ganon. It is a natural combo with fast start-up and little knockback. | ||
| 2.5% | ||||
| 5% | ||||
| Forward tilt | 13% | A downward slash that resembles the standard Z-Target slash. It has moderate start-up, but has good range and above-average knockback for a tilt. | ||
| Up tilt | 9% | An overhead arcing slice. Has good juggling capabilities at low percentages, great combo potential at medium percentages and decent KOing potential at somewhat higher percentages. | ||
| Down tilt | 11% | A low-angled swipe across the ground with vertical knockback. Meteor smashes opponents (except those hanging on the ledges as of update 1.0.6) in contact with the base of the sword to Link's arm. Has great combo potential and is sometimes safe on block due to its fast start-up and ending lag. | ||
| Dash attack | Jump Attack | 14% (tip), 13% (non-tip) | A leaping downward slash used by the Link from The Legend of Zelda: Ocarina of Time. Deals horizontal knockback when tipped and vertical knockback when hit close, and will KO at early percentages. Has moderate startup and ending lag, making it very punishable if whiffed or used recklessly. | |
| Forward smash | 14% (tip), 7% (non-tip) | Lunges forward with a wide swing forward, dealing good damage and knockback when tipped. The Master Sword's base has extremely minimal knockback, which enables it to naturally combo into an optional second hit, an outward slash with greater KO power. | ||
| 13% (tip), 12% (non-tip) | ||||
| Up smash | 4% (hit 1), 3% (hit 2), 11%/10%/9% (hit 3) | Three overhead arcing slashes. The first two slashes combo naturally into each other, while the third finishes the combo. Can KO before 100%. | ||
| Down smash | 17%/16%/14% (hit 1), 12%/11%/10% (hit 2) | A low slash in front and then behind Link. First hit sends opponents at a vertical trajectory while having slightly increased damage and knockback the closer one is to Link. Second hit is a powerful semi-spike with slightly increased damage and knockback on his blade. | ||
| Neutral aerial | 11%/9% (clean), 6% (late) | A flying kick. It is a sex kick with relatively fast start-up and little landing lag. Deals more damage and knockback in the first few active frames, especially at Link's foot, while the late hitbox has minimal knockback. Overall, this is one of Link's most useful moves, allowing him to break opponents' combos and/or start his own. | ||
| Forward aerial | 11% (hit 1), 13% (hit 2) | Two alternating outward slashes while spinning 360˚. The first hit has more knockback, while the second hit can only connect if the first hit does not or if the opponent is at a low percentage. Has decent KOing potential. | ||
| Back aerial | 3% (hit 1), 5% (hit 2) | A back kick followed by a mid-level roundhouse kick. This is Link's fastest aerial and has very little landing lag, but deals low damage. | ||
| Up aerial | Up Thrust | 15% (clean), 13% (late) | A leaping upward thrust used by the Link from Zelda II: The Adventure of Link. It has moderate landing lag unless used alongside a full hop. It is quite powerful and has a long-lasting hitbox that is difficult to dodge, making it a good KOing and juggling option. | |
| Down aerial | Down Thrust | 15% (early), 18% (clean), 15% (late), 11% (bounce) | A leaping downward thrust used by the Links in Zelda II: The Adventure of Link, The Legend of Zelda: Four Swords, The Legend of Zelda: Four Swords Adventures and The Legend of Zelda: The Minish Cap. It is possible for Link to "bounce" on opponents into a second hit, provided he isn't fast falling. The early hit is a powerful meteor smash. Has a strong non-meteor hitbox afterwards, capable of KOing under 130%. However, it is more difficult to land a strong non-meteor hitbox than the meteor hitbox, as it requires Link to hit with the rising hilt on start-up, or immediately after the initial meteor hit, but before the weak hit. | |
| Grab aerial | Clawshot | 2.5% (hit 1), 4% (hit 2) | Fires his Clawshot forward in the air. Has great range and no landing lag. Link can cancel his air dodge at any point via his tether, however it will not cancel the landing lag suffered from the dodge. The Clawshot also serves as a tether recovery that auto-snaps the edge, covering great horizontal distance. | |
| Grab | Clawshot | — | Fires his Clawshot forward. In Super Smash Bros. for Nintendo 3DS, the chain snaps straight back once fully extended, like the Hookshot from SSB. In Super Smash Bros. for Wii U, the chain drags on the ground as it does in Melee and Brawl. | |
| Pummel | 2.1% | Hits the opponent with the Master Sword's hilt. A fairly fast pummel with good damage output for its speed. | ||
| Forward throw | 3% (hit 1), 4% (throw) | A front kick. Mainly used to send opponents offstage, but has little utility beyond that. | ||
| Back throw | 3% (hit 1), 4% (hit 2) | Shoves the opponent behind himself and back kicks them away. Similar utility to his forward throw. | ||
| Up throw | 5%/4% (hit 1), 2% (throw) | Raises the opponent above himself and slashes them upward. KOs opponents at around 170% before rage is factored in. | ||
| Down throw | 3% (hit 1), 4% (throw) | Pins the opponent to the ground and elbow drops them. It can combo reliably into his up tilt, up smash and aerial attacks. | ||
| Forward roll Back roll Spot dodge Air dodge |
— | — | ||
| Techs | — | — | ||
| Floor attack (front) Floor getups (front) |
7% | Slashes in front of himself and then behind himself. | ||
| Floor attack (back) Floor getups (back) |
7% | Slashes in front of himself and then behind himself. | ||
| Floor attack (trip) Floor getups (trip) |
5% | Slashes in front of himself and then behind himself. | ||
| Edge attack Edge getups |
7% | Performs a thrust while climbing up. | ||
| Neutral special | Default | Hero's Bow | 4% (uncharged), 12% (fully charged) | Equips his Hero's Bow and fires an arrow forward. Charging increases the speed, distance and damage dealt by an arrow. At full charge, the arrow flies almost completely straight and covers a very long distance. |
| Custom 1 | Power Bow | 4% (uncharged), 20% (fully charged) | At the cost of heavily increasing the charge time of the move, the arrows deal very heavy knockback when fully charged, enough to KO at medium to high percentages. Uncharged or half-charged arrows have extremely limited range and power, dropping near Link's feet with no charging. | |
| Custom 2 | Quickfire Bow | 4% (uncharged), 8% (fully charged) | Shoots magical arrows that charge quickly and travel in a straight line. Decently spammable, but with low range and a lowered maximum damage output. | |
| Side special | Default | Gale Boomerang | 7% (near), 5% (middle), — (far/return) | Throws the Gale Boomerang that flies forward and returns to him. It damages opponents as it flies away and drags opponents toward Link during its return. It can be angled up or down, while a "smash throw" (similar to when performing the input for a smash attack) increases the distance it can travel. It cannot be properly reflected; doing so only sends it flying past Link with its non-damaging pushbox. |
| Custom 1 | Boomerang | 9% (near), 7% (middle), 5% (far), 3% (return) | Throws a Boomerang that functions like it did in SSB and Melee, which deals damage both when the Boomerang is thrown and when it returns. It deals more damage, damages opponents upon returning and be aimed easier, but deals less knockback. | |
| Custom 2 | Ripping Boomerang | 4% (near), 2% (middle), 1.5% (far), 0.7% (return) | Travels across a much shorter range and deals low damage, but also hits multiple times and adds a stunning effect to the opponents, which makes it ideal for setting up combos. | |
| Up special | Default | Spin Attack | 12%/9%/7%/5% (grounded), 4% (aerial hit 1), 2% (aerial hits 2-8), 4% (aerial hit 9) | Performs the Spin Attack. This move functions differently when grounded and airborne; an aerial Spin Attack is used as recovery which grants Link great vertical distance and can hit a maximum of eight times. A grounded Spin Attack is akin to most The Legend of Zelda games, and functions similarly to a smash attack with great knockback. |
| Custom 1 | Shocking Spin | 16%/11%/12%/8%/6% (grounded), 4% (aerial hit 1), 1% (aerial hits 2-4), 6% (aerial hit 5), 14% (additional hitbox) | A much more powerful electric version that has great KO power. However, the aerial version grants much less distance and has poor horizontal momentum, making it function very similarly to how Spin Attack did in SSB. The aerial version can semi-spike, but cannot hit backward. | |
| Custom 2 | Whirling Leap | — | Deals no damage, but travels much higher and much farther, to the point that Link can perform multiple left and right movements without relying on momentum. It also makes Link leap into the air if used from the ground. | |
| Down special | Default | Bomb | 5% (upper body), 8% (feet), 9% (down smash aerial, feet) | Pulls out a Bomb. It explodes on contact with a surface, an attack, or on its own roughly four seconds after being pulled out, dealing damage to opponents. The explosion can hurt Link as well, but it won't if it hits an opponent first. Used skillfully, the explosion can snap him out of helplessness and grant him an extra Spin Attack, improving his recovery. Oddly, it will deal more damage when it hits the opponent's feet. |
| Custom 1 | Giant Bomb | 8%-10% | The Bomb is massive and has a huge explosion hitbox, which deals more damage and knockback. However, it cannot explode when thrown at the opponent, and explodes based on time or an attack. Deals damage based on range. | |
| Custom 2 | Meteor Bomb | 5% | The Bomb is weaker and has a noticeably shorter fuse. However, it meteor smashes anyone hit with moderate knockback. As a result, it is not practical for recoveries in any way, as the Bombs simply meteor smash Link, though it allows him to survive vertical KOs longer with luck. On the ground, it will halt opponents in their tracks due to its considerable stun. | |
| Final Smash | Triforce Slash | 1% (hit 1), 3% (hits 2-15), 2% (hit 16), 15% (hit 17) | Emits a beam of light from the Triforce of Courage symbol on the back of his hand to stun an opponent in front of him. If the beam comes in contact with an opponent, Link dashes forward and slashes them repeatedly while they are trapped in a Triforce-shaped energy field, with the last hit being a powerful slash and launching the trapped opponent away. Can hit multiple opponents, but all non-trapped opponents are launched out the energy field after the penultimate hit. | |
On-screen appearance
- Link appears from within a whirlwind, similarly to how he did in the original Zelda when the Recorder was used. Upon appearing, he equips the Master Sword and Hylian Shield.

|
|---|
Taunts
- Up taunt: Swings the Master Sword twice and twirls it behind him before sheathing it. This is similar to his victory pose in The Legend of Zelda: Twilight Princess, which he performs after defeating a boss, learning a hidden sword technique, or sheathing his sword upon the defeat of harder-to-defeat enemies.
- Side taunt: Link takes out a fairy that appears similar to Navi from The Legend of Zelda: Ocarina of Time. The fairy then proceeds to fly around as Link watches it until it returns to his pocket. While Navi does not appear in The Legend of Zelda: Twilight Princess, the fairy is likely based on the blue fairy Wii Remote cursor in the Wii version of Twilight Princess.
- Down taunt: Link assumes a Fujian White Crane-like stance while rearing the Master Sword behind his head. It originates from SSB and may be loosely based on the attacking pose used by the Link from Zelda II: The Adventure of Link.
| Up taunt | Side taunt | Down taunt |
|---|---|---|

|

|

|
Idle poses
- Assumes a battle ready stance.
- Looks behind himself.
 |

|
|---|
Crowd cheer
| English | Japanese | |
|---|---|---|
| Cheer | ||
| Description | Link! Link! Link! | Rin-ku! |
| Pitch | Group chant | Group chant |
Victory poses
- Link thrusts the Master Sword forward, holds it up to his face, then thrusts it to the sky while letting out a kiai.
- Swings the Master Sword three times and then looks to the right. It is his "character chosen" animation in SSB, albeit ending with him facing a different direction.
- Swipes the Master Sword once, twirls it behind his head, then sheathes it. This is based on his special sheathing animation in The Legend of Zelda: Twilight Princess, which occurs if he puts away his sword immediately after defeating an enemy. Link does a similar animation during his up taunt.
 |
 |

|
|---|
In competitive play
Official Custom Moveset Project
| Character | Custom sets available | ||||
|---|---|---|---|---|---|
| 1211 | 1213 | 2211 | 2213 | 1311 | |
| 1313 | 2311 | 2313 | 1231 | 3211 | |
Notable players
 7
7 BlueLink
 Cat
Cat Drigo Toes
 Izaw
Izaw- LinkEa
- LordXav1er
- Rooky
- Scizor
 Sillintor
- SOVA Unknown
 T
T- Tsage
 MuthaDrum
Trophies
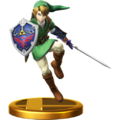
- Link
 Green tunic? Pointy hat? Yep, it's Link, all right! In this game, his sword and shield make for effective attacking and blocking, and his bow, bombs, and boomerang will spice up any battle. He's even brought his Clawshot for grabbing enemies and edges. Jeez, just how much stuff can Link carry?
 Green clothes? Pointy hat? Yep, it's Link, all right! In this game, his sword and shield make for effective attacking and blocking, and his bow, bombs, and boomerang will spice up any battle. He's even brought his Clawshot for grabbing enemies and edges. The hero of Hyrule is really kitted out for a brawl!
 : The Legend of Zelda (08/1987)
 : The Legend of Zelda: A Link to the Past (04/1992)
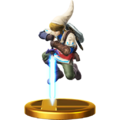
- Link (Alt.)
- If Link was on a desert island and could only pick one item, it'd be his powerful sword. This weapon is key to his down-air attack, a move with great launching potential and the ability to strike twice. He can also strike twice with his side smash—the second blow deals more damage and launches harder.
- Of all of his weapons, Link's sword may be the most lethal. His down air attack has incredible launching power. What's more, he'll bounce up afterwards, allowing for a follow-up strike. His side smash can also be followed up with a more powerful second blow that sends foes flying - just press the button again straight away.
- : The Legend of Zelda (08/1987)
- : The Legend of Zelda: A Link to the Past (04/1992)
- Triforce Slash (Link)
- Link makes use of the Triforce of Courage to trap foes, and then he launches a 16-blow combo. The final mighty blow has the power to launch opponents off the stage. When Link prepares the attack, the ray of light he emits must strike a rival, or the attack will fail. Shielding will do nothing to stop this powerful attack.
- Link traps a foe in mid-air with the power of the Triforce of Courage, then he delivers a 16-strike sword combo. The final strike has formidable launching power. If the ray of light at the start of the attack doesn't hit, the whole thing ends there. Helpfully, though, the ray of light's range and speed are incredible, and shields won't block it.
- LinkTrophy3DS1.png
Classic (3DS)
- LinkTrophy3DS2.png
Alt. (3DS)
Classic (Wii U)
Alt. (Wii U)


In Event Matches
Solo Events
- A Fated Battle: Link must defeat Ganondorf in a two stock battle. If the battle lasts through the third transition phase on Castle Siege, two Dark Links will appear.
- All-Star Battle: Regulars: Link is one of the opponents fought in this event. All of the opponents are the eight starter characters of the "perfect-attendance crew" from Super Smash Bros.
- Princess Punch-Up!: As Zelda, the player is allied with Link and must defeat against Peach and Mario in a one stock battle.
- The Demon King and the Goddess: As Ganondorf, the player must initially defeat a team of Link and Zelda. After the two are defeated or some time has passed, a giant Palutena appears and the player must defeat her as well.
- The Ultimate Swordsman: As Ike, the player must defeat Link, Marth, Meta Knight, Toon Link, male Robin, female Robin and Shulk. All of the opponents wield swords.
Co-op Events
- A Fairy Nice Trip: Link and Pac-Man must survive on Pac-Land until the stage reaches Fairy Land as four Kirbies try to hinder the players' progress.
- Final Battle Team-Up: Link, using his Dark Link alternate costume, is one of the opponents two players must defeat.
- The Ultimate Battle: Two players choose a character and must defeat the entire roster.
Alternate costumes
.png)
| |||||||

|

|

|

|

|

|

|

|
Gallery

Link in the Nintendo Direct from April 8th, 2014.
Link's amiibo.
Link's appearance in Super Smash Bros. for Wii U.
Link's appearance in Super Smash Bros. for Nintendo 3DS.
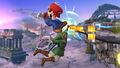
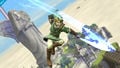
Using Spin Attack on Mario in Super Smash Bros. for Wii U.

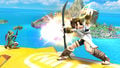
Using Hero's Bow alongside Pit's Palutena Bow.
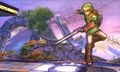
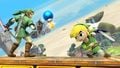
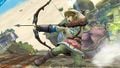
Using his forward tilt with Kirby in the background.
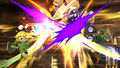
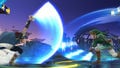
Link's Spin Attack colliding with Toon Link's Spin Attack against Donkey Kong.
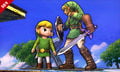
Toon Link throwing a Bomb at Link.
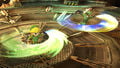
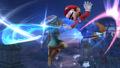
Toon Link and Link using their Spin Attacks on the ground.

Using down aerial and displaying its new meteor smash effect on Samus.
Neutral attack's first hit against Marth's forward tilt.

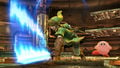
Using his Clawshot.
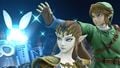
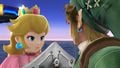
Using his side taunt alongside Zelda.
Link and Peach on Battlefield.
His appearance in Super Smash Bros. for Nintendo 3DS alongside Toon Link.
Link edge trumping Mario.
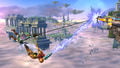
Hero's Bow and Palutena Bow colliding in the air.
Using his forward aerial.
Using Gale Boomerang.
Link and Samus simultaneously grabbing an edge with their tether recoveries.
Link's new alternate costume based on the civilian clothes worn by the Link in The Legend of Zelda: Skyward Sword.
Link's appearance on the cover of Super Smash Bros. for Nintendo 3DS.


Trivia

- On Link's first victory animation, his eyebrows appear lighter than usual, only to revert to their original shade of color once the victory animation ends.
- In Super Smash Bros. for Wii U, a glitch prior to update 1.1.0 enabled the player to see characters' bind poses. In Link's case, it could be seen that his bind pose was modeled in an unusual way, without forming a "T" shape like other bind poses.
References
| Fighters in Super Smash Bros. 4 | |
|---|---|
| Veterans | Bowser · Captain Falcon · Charizard · Diddy Kong · Donkey Kong · Dr. Mario · Falco · Fox · Ganondorf · Ike · Jigglypuff · King Dedede · Kirby · Link · Lucario · Lucas · Luigi · Mario · Marth · Meta Knight · Mewtwo · Mr. Game & Watch · Ness · Olimar · Peach · Pikachu · Pit · R.O.B. · Roy · Samus · Sheik · Sonic · Toon Link · Wario · Yoshi · Zelda · Zero Suit Samus |
| Newcomers | Bayonetta · Bowser Jr. · Cloud · Corrin · Dark Pit · Duck Hunt · Greninja · Little Mac · Lucina · Mega Man · Mii Fighter (Mii Brawler · Mii Gunner · Mii Swordfighter) · Pac-Man · Palutena · Robin · Rosalina & Luma · Ryu · Shulk · Villager · Wii Fit Trainer |