Template:SSBU stage table: Difference between revisions
From SmashWiki, the Super Smash Bros. wiki
Jump to navigationJump to search
(Yoshi moved next to Mario. Luigi's Mansion was unlockable in Brawl, and is placed after Figure-8 Circuit on Ultimate's Stage Selection Screen.) |
No edit summary Tag: Mobile edit |
||
| (26 intermediate revisions by 7 users not shown) | |||
| Line 1: | Line 1: | ||
{|class="wikitable" style="text-align:center;margin:1em auto 1em auto" | {|class="wikitable" style="text-align:center;margin:1em auto 1em auto" | ||
!width= | !width=77px style="padding:0;"| | ||
!width= | !width=77px style="padding:0;"| | ||
!width= | !width=77px style="padding:0;"| | ||
!width= | !width=77px style="padding:0;"| | ||
!width= | !width=77px style="padding:0;"| | ||
!width= | !width=77px style="padding:0;"| | ||
!width= | !width=77px style="padding:0;"| | ||
!width= | !width=77px style="padding:0;"| | ||
!width= | !width=77px style="padding:0;"| | ||
!width= | !width=77px style="padding:0;"| | ||
!width= | !width=77px style="padding:0;"| | ||
!width= | !width=77px style="padding:0;"| | ||
|- | |- | ||
!colspan=12|New stages (19) | !colspan=12|New stages (19) | ||
|- | |- | ||
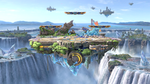
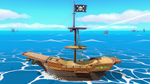
|colspan=2|[[File:SSBU-Battlefield.png|150x90px|link=Battlefield (SSBU)]]<br>{{SSBU|Battlefield}}<br>{{symbol| | |colspan=2|[[File:SSBU-Battlefield.png|150x90px|link=Battlefield (SSBU)]]<br>{{SSBU|Battlefield}}<br>{{symbol|ssb|20px}} | ||
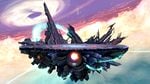
|colspan=2|[[File:SSBU- | |colspan=2|[[File:SSBU-Final Destination.jpg|150x90px|link=Final Destination (SSBU)]]<br>{{SSBU|Final Destination}}<br>{{symbol|ssb|20px}} | ||
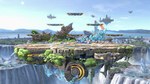
|colspan=2|[[File:SSBU-Big-Battlefield.png|150x90px|link=Big Battlefield (SSBU)]]<br>{{SSBU|Big Battlefield}}<br>{{symbol| | |colspan=2|[[File:SSBU-Big-Battlefield.png|150x90px|link=Big Battlefield (SSBU)]]<br>{{SSBU|Big Battlefield}}<br>{{symbol|ssb|20px}} | ||
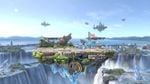
|colspan=2|[[File:SSBU- | |colspan=2|[[File:SSBU-Small-Battlefield.jpg|150x90px|link=Small Battlefield]]<br>[[Small Battlefield]] <small><small>(8.1.0)</small></small><br>{{symbol|ssb|20px}} | ||
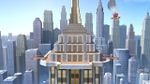
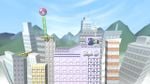
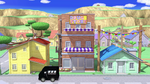
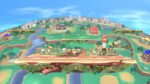
|colspan=2|[[File:SSBU-New Donk City Hall.jpg|150x90px|link=New Donk City Hall]]<br>[[New Donk City Hall]]<br>{{symbol| | |colspan=2|[[File:SSBU-New Donk City Hall.jpg|150x90px|link=New Donk City Hall]]<br>[[New Donk City Hall]]<br>{{symbol|smb|20px}} | ||
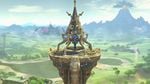
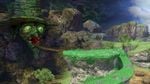
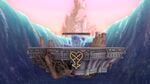
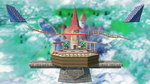
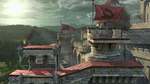
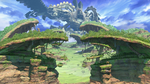
|colspan=2|[[File:SSBU-Great Plateau Tower.jpg|150x90px|link=Great Plateau Tower]]<br>[[Great Plateau Tower]]<br>{{symbol|zelda|20px}} | |colspan=2|[[File:SSBU-Great Plateau Tower.jpg|150x90px|link=Great Plateau Tower]]<br>[[Great Plateau Tower]]<br>{{symbol|zelda|20px}} | ||
|- | |- | ||
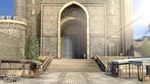
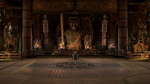
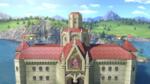
|colspan=2|[[File:SSBU-Garreg Mach Monastery.jpg|150x90px|link=Garreg Mach Monastery]]<br><small>[[Garreg Mach Monastery]] <small>(DLC)</small></small><br>{{symbol| | |colspan=2|[[File:SSBU-Garreg Mach Monastery.jpg|150x90px|link=Garreg Mach Monastery]]<br><small>[[Garreg Mach Monastery]] <small>(DLC)</small></small><br>{{symbol|fe|20px}} | ||
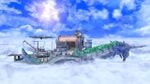
|colspan=2|[[File:SSBU-Cloud Sea of Alrest.jpg|150x90px|link=Cloud Sea of Alrest]]<br>[[Cloud Sea of Alrest]] <small><small>(DLC)</small></small><br>{{symbol| | |colspan=2|[[File:SSBU-Cloud Sea of Alrest.jpg|150x90px|link=Cloud Sea of Alrest]]<br>[[Cloud Sea of Alrest]] <small><small>(DLC)</small></small><br>{{symbol|xb|20px}} | ||
|colspan=2|[[File:SSBU-Moray Towers.png|150x90px|link=Moray Towers]]<br>[[Moray Towers]]<br>{{symbol|splatoon|20px}} | |colspan=2|[[File:SSBU-Moray Towers.png|150x90px|link=Moray Towers]]<br>[[Moray Towers]]<br>{{symbol|splatoon|20px}} | ||
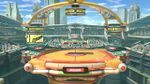
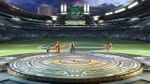
|colspan=2|[[File:SSBU-Spring Stadium.jpg|150x90px|link=Spring Stadium]]<br>[[Spring Stadium]] <small><small>(DLC)</small></small><br>{{symbol|arms|20px}} | |colspan=2|[[File:SSBU-Spring Stadium.jpg|150x90px|link=Spring Stadium]]<br>[[Spring Stadium]] <small><small>(DLC)</small></small><br>{{symbol|arms|20px}} | ||
| Line 29: | Line 29: | ||
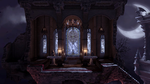
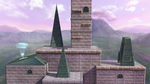
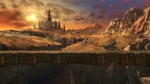
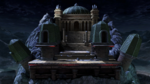
|colspan=2|[[File:SSBU-Dracula's Castle.png|150x90px|link=Dracula's Castle]]<br>[[Dracula's Castle]]<br>{{symbol|castlevania|20px}} | |colspan=2|[[File:SSBU-Dracula's Castle.png|150x90px|link=Dracula's Castle]]<br>[[Dracula's Castle]]<br>{{symbol|castlevania|20px}} | ||
|- | |- | ||
| | |colspan=2| | ||
|colspan=2|[[File:SSBU-Mementos.jpg|150x90px|link=Mementos]]<br>[[Mementos]] <small><small>(DLC)</small></small><br>{{symbol|persona|20px}} | |colspan=2|[[File:SSBU-Mementos.jpg|150x90px|link=Mementos]]<br>[[Mementos]] <small><small>(DLC)</small></small><br>{{symbol|persona|20px}} | ||
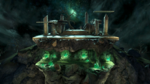
|colspan=2|[[File:SSBU-Yggdrasil'sAltar.jpg|150x90px|link=Yggdrasil's Altar]]<br>[[Yggdrasil's Altar]] <small><small>(DLC)</small></small><br>{{symbol|dq|20px}} | |colspan=2|[[File:SSBU-Yggdrasil'sAltar.jpg|150x90px|link=Yggdrasil's Altar]]<br>[[Yggdrasil's Altar]] <small><small>(DLC)</small></small><br>{{symbol|dq|20px}} | ||
|colspan=2|[[File:SSBU-Spiral Mountain.jpg|150x90px|link=Spiral Mountain]]<br>[[Spiral Mountain]] <small><small>(DLC)</small></small><br>{{symbol|bk|20px}} | |colspan=2|[[File:SSBU-Spiral Mountain.jpg|150x90px|link=Spiral Mountain]]<br>[[Spiral Mountain]] <small><small>(DLC)</small></small><br>{{symbol|bk|20px}} | ||
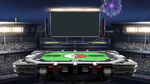
|colspan=2|[[File:SSBU- | |colspan=2|[[File:SSBU-King of Fighters Stadium.jpg|150x90px|link=King of Fighters Stadium]]<br><small>[[King of Fighters Stadium]] <small>(DLC)</small></small><br>{{symbol|fatalfury|20px}} | ||
|colspan=2|[[File:SSBU-Minecraft World.jpg|150x90px|link=Minecraft World]]<br>[[Minecraft World]] <small><small>(DLC)</small></small><br>{{symbol| | |colspan=2| | ||
| | |- | ||
|colspan=3| | |||
|colspan=2|[[File:SSBU-Minecraft World.jpg|150x90px|link=Minecraft World]]<br>[[Minecraft World]] <small><small>(DLC)</small></small><br>{{symbol|mc|20px}} | |||
|colspan=2|[[File:SSBU-Mishima Dojo.png|150x90px|link=Mishima Dojo]]<br>[[Mishima Dojo]] <small><small>(DLC)</small></small><br>{{symbol|tekken|20px}} | |||
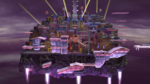
|colspan=2|[[File:SSBU-Hollow Bastion.jpg|150x90px|link=Hollow Bastion]]<br>[[Hollow Bastion]] <small><small>(DLC)</small></small><br>{{symbol|kh|20px}} | |||
|colspan=3| | |||
|- | |- | ||
!colspan=12|Returning stages (96) | !colspan=12|Returning stages (96) | ||
|- | |- | ||
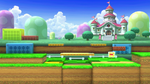
|colspan=2|[[File:SSBU-Peach's Castle.png|150x90px|link=Peach's Castle]]<br>{{gameIcon|SSB}} [[Peach's Castle]]<br>{{symbol| | |colspan=2|[[File:SSBU-Peach's Castle.png|150x90px|link=Peach's Castle]]<br>{{gameIcon|SSB}} [[Peach's Castle]]<br>{{symbol|smb|20px}} | ||
|colspan=2|[[File:SSBU-Mushroom Kingdom (SSB).png|150x90px|link=Mushroom Kingdom (SSB)]]<br>{{gameIcon|SSB}} | |colspan=2|[[File:SSBU-Mushroom Kingdom (SSB).png|150x90px|link=Mushroom Kingdom (SSB)]]<br>{{gameIcon|SSB}} {{SSB|Mushroom Kingdom}}<br>{{symbol|smb|20px}} | ||
|colspan=2|[[File:SSBU-Princess_Peach's_Castle.png|150x90px|link=Princess Peach's Castle]]<br>{{gameIcon|SSBM}} <span style="font-size:90%">[[Princess Peach's Castle]]</span><br>{{symbol| | |colspan=2|[[File:SSBU-Princess_Peach's_Castle.png|150x90px|link=Princess Peach's Castle]]<br>{{gameIcon|SSBM}} <span style="font-size:90%">[[Princess Peach's Castle]]</span><br>{{symbol|smb|20px}} | ||
|colspan=2|[[File:SSBU-Rainbow Cruise.png|150x90px|link=Rainbow Cruise]]<br>{{gameIcon|SSBM}} [[Rainbow Cruise]]<br>{{symbol| | |colspan=2|[[File:SSBU-Rainbow Cruise.png|150x90px|link=Rainbow Cruise]]<br>{{gameIcon|SSBM}} [[Rainbow Cruise]]<br>{{symbol|smb|20px}} | ||
|colspan=2|[[File:SSBU-Mushroom Kingdom II.png|150x90px|link=Mushroom Kingdom II]]<br>{{gameIcon|SSBM}} [[Mushroom Kingdom II]]<br>{{symbol| | |colspan=2|[[File:SSBU-Mushroom Kingdom II.png|150x90px|link=Mushroom Kingdom II]]<br>{{gameIcon|SSBM}} [[Mushroom Kingdom II]]<br>{{symbol|smb|20px}} | ||
|colspan=2|[[File:SSBU-Delfino Plaza.jpg|150x90px|link=Delfino Plaza]]<br>{{gameIcon|SSBB}} [[Delfino Plaza]]<br>{{symbol| | |colspan=2|[[File:SSBU-Delfino Plaza.jpg|150x90px|link=Delfino Plaza]]<br>{{gameIcon|SSBB}} [[Delfino Plaza]]<br>{{symbol|smb|20px}} | ||
|- | |- | ||
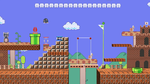
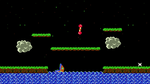
|colspan=2|[[File:SSBU-Mushroomy Kingdom.png|150x90px|link=Mushroomy Kingdom]]<br>{{gameIcon|SSBB}} [[Mushroomy Kingdom]]<br>{{symbol| | |colspan=2|[[File:SSBU-Mushroomy Kingdom.png|150x90px|link=Mushroomy Kingdom]]<br>{{gameIcon|SSBB}} [[Mushroomy Kingdom]]<br>{{symbol|smb|20px}} | ||
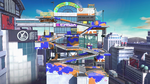
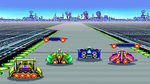
|colspan=2|[[File:SSBU-Mario Circuit (SSBB).png|150x90px|link=Figure-8 Circuit]]<br>{{gameIcon|SSBB}} [[Figure-8 Circuit]]<br>{{symbol| | |colspan=2|[[File:SSBU-Mario Circuit (SSBB).png|150x90px|link=Figure-8 Circuit]]<br>{{gameIcon|SSBB}} [[Figure-8 Circuit]]<br>{{symbol|smb|20px}} | ||
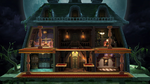
|colspan=2|[[File:SSBU-Luigi's Mansion.png|150x90px|link=Luigi's Mansion]]<br>{{gameIcon|SSBB}} [[Luigi's Mansion]]<br>{{symbol| | |colspan=2|[[File:SSBU-Luigi's Mansion.png|150x90px|link=Luigi's Mansion]]<br>{{gameIcon|SSBB}} [[Luigi's Mansion]]<br>{{symbol|smb|20px}} | ||
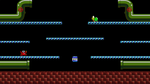
|colspan=2|[[File:SSBU-Mario Bros.png|150x90px|link=Mario Bros.]]<br>{{gameIcon|SSBB}} [[Mario Bros.]]<br>{{symbol| | |colspan=2|[[File:SSBU-Mario Bros.png|150x90px|link=Mario Bros.]]<br>{{gameIcon|SSBB}} [[Mario Bros.]]<br>{{symbol|smb|20px}} | ||
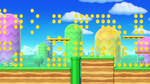
|colspan=2|[[File:SSBU-3D Land.png|150x90px|link=3D Land]]<br>{{gameIcon|SSB4-3DS}} [[3D Land]]<br>{{symbol| | |colspan=2|[[File:SSBU-3D Land.png|150x90px|link=3D Land]]<br>{{gameIcon|SSB4-3DS}} [[3D Land]]<br>{{symbol|smb|20px}} | ||
|colspan=2|[[File:SSBU-Golden Plains.png|150x90px|link=Golden Plains]]<br>{{gameIcon|SSB4-3DS}} [[Golden Plains]]<br>{{symbol| | |colspan=2|[[File:SSBU-Golden Plains.png|150x90px|link=Golden Plains]]<br>{{gameIcon|SSB4-3DS}} [[Golden Plains]]<br>{{symbol|smb|20px}} | ||
|- | |- | ||
|colspan=2|[[File:SSBU-Paper Mario.png|150x90px|link=Paper Mario]]<br>{{gameIcon|SSB4-3DS}} [[Paper Mario]]<br>{{symbol| | |colspan=2|[[File:SSBU-Paper Mario.png|150x90px|link=Paper Mario]]<br>{{gameIcon|SSB4-3DS}} [[Paper Mario]]<br>{{symbol|smb|20px}} | ||
|colspan=2|[[File:SSBU-Mushroom Kingdom U.png|150x90px|link=Mushroom Kingdom U]]<br>{{gameIcon|SSB4-U}} [[Mushroom Kingdom U]]<br>{{symbol| | |colspan=2|[[File:SSBU-Mushroom Kingdom U.png|150x90px|link=Mushroom Kingdom U]]<br>{{gameIcon|SSB4-U}} [[Mushroom Kingdom U]]<br>{{symbol|smb|20px}} | ||
|colspan=2|[[File:SSBU-Mario Galaxy.jpg|150x90px|link=Mario Galaxy]]<br>{{gameIcon|SSB4-U}} [[Mario Galaxy]]<br>{{symbol| | |colspan=2|[[File:SSBU-Mario Galaxy.jpg|150x90px|link=Mario Galaxy]]<br>{{gameIcon|SSB4-U}} [[Mario Galaxy]]<br>{{symbol|smb|20px}} | ||
|colspan=2|[[File:SSBU-Mario Circuit (SSB4).png|150x90px|link=Mario Circuit (SSB4)]]<br>{{gameIcon|SSB4-U}} {{SSB4|Mario Circuit}}<br>{{symbol| | |colspan=2|[[File:SSBU-Mario Circuit (SSB4).png|150x90px|link=Mario Circuit (SSB4)]]<br>{{gameIcon|SSB4-U}} {{SSB4|Mario Circuit}}<br>{{symbol|smb|20px}} | ||
|colspan=2|[[File:SSBU-Super Mario Maker.png|150x90px|link=Super Mario Maker]]<br>{{gameIcon|SSB4}} [[Super Mario Maker]]<br>{{symbol| | |colspan=2|[[File:SSBU-Super Mario Maker.png|150x90px|link=Super Mario Maker]]<br>{{gameIcon|SSB4}} [[Super Mario Maker]]<br>{{symbol|smb|20px}} | ||
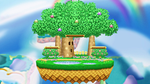
|colspan=2|[[File:SSBU-Yoshi's Island (SSB).png|150x90px|link= | |colspan=2|[[File:SSBU-Yoshi's Island (SSB).png|150x90px|link=Super Happy Tree]]<br>{{gameIcon|SSB}} [[Super Happy Tree]]<br>{{symbol|yoshi|20px}} | ||
|- | |- | ||
|colspan=2|[[File:SSBU-Yoshi's Story.png|150x90px|link=Yoshi's Story]]<br>{{gameIcon|SSBM}} [[Yoshi's Story]]<br>{{symbol|yoshi|20px}} | |||
|colspan=2|[[File:SSBU-Yoshi's Island (SSBM).png|150x90px|link=Yoshi's Island (SSBM)]]<br>{{gameIcon|SSBM}} [[Yoshi's Island (SSBM)|Yoshi's Island (Melee)]]<br>{{symbol|yoshi|20px}} | |colspan=2|[[File:SSBU-Yoshi's Island (SSBM).png|150x90px|link=Yoshi's Island (SSBM)]]<br>{{gameIcon|SSBM}} [[Yoshi's Island (SSBM)|Yoshi's Island (Melee)]]<br>{{symbol|yoshi|20px}} | ||
|colspan=2|[[File:SSBU-Yoshi's Island (SSBB).png|150x90px|link=Yoshi's Island (SSBB)]]<br>{{gameIcon|SSBB}} {{SSBB|Yoshi's Island}}<br>{{symbol|yoshi|20px}} | |||
|colspan=2|[[File:SSBU-Yoshi's Island (SSBB).png|150x90px|link=Yoshi's Island (SSBB)]]<br>{{gameIcon|SSBB}} | |colspan=2|[[File:SSBU-Kongo Jungle.png|150x90px|link=Kongo Jungle (SSB)]]<br>{{gameIcon|SSB}} {{SSB|Kongo Jungle}}<br>{{symbol|dk|20px}} | ||
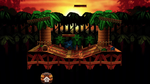
|colspan=2|[[File:SSBU-Kongo Jungle.png|150x90px|link=Kongo Jungle (SSB)]]<br>{{gameIcon|SSB}} | |colspan=2|[[File:SSBU-Kongo Falls.jpg|150x90px|link=Kongo Falls]]<br>{{gameIcon|SSBM}} [[Kongo Falls]]<br>{{symbol|dk|20px}} | ||
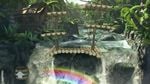
|colspan=2|[[File:SSBU-Kongo Falls.jpg|150x90px|link=Kongo Falls]]<br>{{gameIcon|SSBM}} [[ | |||
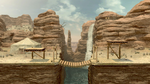
|colspan=2|[[File:SSBU-Jungle Japes.png|150x90px|link=Jungle Japes]]<br>{{gameIcon|SSBM}} [[Jungle Japes]]<br>{{symbol|dk|20px}} | |colspan=2|[[File:SSBU-Jungle Japes.png|150x90px|link=Jungle Japes]]<br>{{gameIcon|SSBM}} [[Jungle Japes]]<br>{{symbol|dk|20px}} | ||
|- | |- | ||
| Line 86: | Line 91: | ||
|colspan=2|[[File:SSBU-Green Greens.png|150x90px|link=Green Greens]]<br>{{gameIcon|SSBM}} [[Green Greens]]<br>{{symbol|kirby|20px}} | |colspan=2|[[File:SSBU-Green Greens.png|150x90px|link=Green Greens]]<br>{{gameIcon|SSBM}} [[Green Greens]]<br>{{symbol|kirby|20px}} | ||
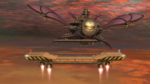
|colspan=2|[[File:SSBU-Halberd.png|150x90px|link=Halberd]]<br>{{gameIcon|SSBB}} [[Halberd]]<br>{{symbol|kirby|20px}} | |colspan=2|[[File:SSBU-Halberd.png|150x90px|link=Halberd]]<br>{{gameIcon|SSBB}} [[Halberd]]<br>{{symbol|kirby|20px}} | ||
|colspan=2|[[File:SSBU-Dream Land (3DS).png|150x90px|link=Dream Land | |colspan=2|[[File:SSBU-Dream Land (3DS).png|150x90px|link=Dream Land GB]]<br>{{gameIcon|SSB4-3DS}} [[Dream Land GB]]<br>{{symbol|kirby|20px}} | ||
|- | |- | ||
|colspan=2|[[File:SSBU-The Great Cave Offensive.png|150x90px|link=The Great Cave Offensive]]<br>{{gameIcon|SSB4-U}} <span style="font-size:88%">[[The Great Cave Offensive]]</span><br>{{symbol|kirby|20px}} | |colspan=2|[[File:SSBU-The Great Cave Offensive.png|150x90px|link=The Great Cave Offensive]]<br>{{gameIcon|SSB4-U}} <span style="font-size:88%">[[The Great Cave Offensive]]</span><br>{{symbol|kirby|20px}} | ||
|colspan=2|[[File:SSBU-Corneria.png|150x90px|link=Corneria]]<br>{{gameIcon|SSBM}} [[Corneria]]<br>{{symbol| | |colspan=2|[[File:SSBU-Corneria.png|150x90px|link=Corneria]]<br>{{gameIcon|SSBM}} [[Corneria]]<br>{{symbol|fox|20px}} | ||
|colspan=2|[[File:SSBU-Venom.png|150x90px|link=Venom]]<br>{{gameIcon|SSBM}} [[Venom]]<br>{{symbol| | |colspan=2|[[File:SSBU-Venom.png|150x90px|link=Venom]]<br>{{gameIcon|SSBM}} [[Venom]]<br>{{symbol|fox|20px}} | ||
|colspan=2|[[File:SSBU-Lylat Cruise.jpg|150x90px|link=Lylat Cruise]]<br>{{gameIcon|SSBB}} [[Lylat Cruise]]<br>{{symbol| | |colspan=2|[[File:SSBU-Lylat Cruise.jpg|150x90px|link=Lylat Cruise]]<br>{{gameIcon|SSBB}} [[Lylat Cruise]]<br>{{symbol|fox|20px}} | ||
|colspan=2|[[File:SSBU-Saffron City.jpg|150x90px|link=Saffron City]]<br>{{gameIcon|SSB}} [[Saffron City]]<br>{{symbol| | |colspan=2|[[File:SSBU-Saffron City.jpg|150x90px|link=Saffron City]]<br>{{gameIcon|SSB}} [[Saffron City]]<br>{{symbol|pkmn|20px}} | ||
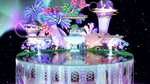
|colspan=2|[[File:SSBU-Pokémon Stadium.png|150x90px|link=Pokémon Stadium]]<br>{{gameIcon|SSBM}} [[Pokémon Stadium]]<br>{{symbol| | |colspan=2|[[File:SSBU-Pokémon Stadium.png|150x90px|link=Pokémon Stadium]]<br>{{gameIcon|SSBM}} [[Pokémon Stadium]]<br>{{symbol|pkmn|20px}} | ||
|- | |- | ||
|colspan=2|[[File:SSBU-Pokémon Stadium 2.png|150x90px|link=Pokémon Stadium 2]]<br>{{gameIcon|SSBB}} [[Pokémon Stadium 2]]<br>{{symbol| | |colspan=2|[[File:SSBU-Pokémon Stadium 2.png|150x90px|link=Pokémon Stadium 2]]<br>{{gameIcon|SSBB}} [[Pokémon Stadium 2]]<br>{{symbol|pkmn|20px}} | ||
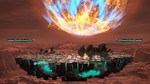
|colspan=2|[[File:SSBU-Spear Pillar.png|150x90px|link=Spear Pillar]]<br>{{gameIcon|SSBB}} [[Spear Pillar]]<br>{{symbol| | |colspan=2|[[File:SSBU-Spear Pillar.png|150x90px|link=Spear Pillar]]<br>{{gameIcon|SSBB}} [[Spear Pillar]]<br>{{symbol|pkmn|20px}} | ||
|colspan=2|[[File:SSBU-Unova Pokémon League.png|150x90px|link=Unova Pokémon League]]<br>{{gameIcon|SSB4-3DS}} <span style="font-size:90%">[[Unova Pokémon League]]</span><br>{{symbol| | |colspan=2|[[File:SSBU-Unova Pokémon League.png|150x90px|link=Unova Pokémon League]]<br>{{gameIcon|SSB4-3DS}} <span style="font-size:90%">[[Unova Pokémon League]]</span><br>{{symbol|pkmn|20px}} | ||
|colspan=2|[[File:SSBU-Prism Tower.png|150x90px|link=Prism Tower]]<br>{{gameIcon|SSB4-3DS}} [[Prism Tower]]<br>{{symbol| | |colspan=2|[[File:SSBU-Prism Tower.png|150x90px|link=Prism Tower]]<br>{{gameIcon|SSB4-3DS}} [[Prism Tower]]<br>{{symbol|pkmn|20px}} | ||
|colspan=2|[[File:SSBU-Kalos Pokémon League.png|150x90px|link=Kalos Pokémon League]]<br>{{gameIcon|SSB4-U}} <span style="font-size:90%">[[Kalos Pokémon League]]</span><br>{{symbol| | |colspan=2|[[File:SSBU-Kalos Pokémon League.png|150x90px|link=Kalos Pokémon League]]<br>{{gameIcon|SSB4-U}} <span style="font-size:90%">[[Kalos Pokémon League]]</span><br>{{symbol|pkmn|20px}} | ||
|colspan=2|[[File:SSBU-Big Blue.png|150x90px|link=Big Blue]]<br>{{gameIcon|SSBM}} [[Big Blue]]<br>{{symbol| | |colspan=2|[[File:SSBU-Big Blue.png|150x90px|link=Big Blue]]<br>{{gameIcon|SSBM}} [[Big Blue]]<br>{{symbol|fz|20px}} | ||
|- | |- | ||
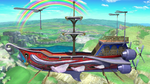
|colspan=2|[[File:SSBU-Port Town Aero Dive.png|150x90px|link=Port Town Aero Dive]]<br>{{gameIcon|SSBB}} [[Port Town Aero Dive]]<br>{{symbol| | |colspan=2|[[File:SSBU-Port Town Aero Dive.png|150x90px|link=Port Town Aero Dive]]<br>{{gameIcon|SSBB}} [[Port Town Aero Dive]]<br>{{symbol|fz|20px}} | ||
|colspan=2|[[File:SSBU-Mute City (3DS).png|150x90px|link=Mute City | |colspan=2|[[File:SSBU-Mute City (3DS).png|150x90px|link=Mute City SNES]]<br>{{gameIcon|SSB4-3DS}} [[Mute City SNES]]<br>{{symbol|fz|20px}} | ||
|colspan=2|[[File:SSBU-Onett.png|150x90px|link=Onett]]<br>{{gameIcon|SSBM}} [[Onett]]<br>{{symbol| | |colspan=2|[[File:SSBU-Onett.png|150x90px|link=Onett]]<br>{{gameIcon|SSBM}} [[Onett]]<br>{{symbol|eb|20px}} | ||
|colspan=2|[[File:SSBU-Fourside.jpg|150x90px|link=Fourside]]<br>{{gameIcon|SSBM}} [[Fourside]]<br>{{symbol| | |colspan=2|[[File:SSBU-Fourside.jpg|150x90px|link=Fourside]]<br>{{gameIcon|SSBM}} [[Fourside]]<br>{{symbol|eb|20px}} | ||
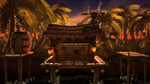
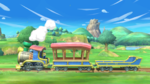
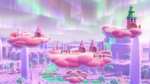
|colspan=2|[[File:SSBU-New Pork City.png|150x90px|link=New Pork City]]<br>{{gameIcon|SSBB}} [[New Pork City]]<br>{{symbol| | |colspan=2|[[File:SSBU-New Pork City.png|150x90px|link=New Pork City]]<br>{{gameIcon|SSBB}} [[New Pork City]]<br>{{symbol|eb|20px}} | ||
|colspan=2|[[File:SSBU-Magicant.png|150x90px|link=Magicant]]<br>{{gameIcon|SSB4-3DS}} [[Magicant]]<br>{{symbol| | |colspan=2|[[File:SSBU-Magicant.png|150x90px|link=Magicant]]<br>{{gameIcon|SSB4-3DS}} [[Magicant]]<br>{{symbol|eb|20px}} | ||
|- | |- | ||
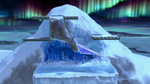
|colspan=2|[[File:SSBU-Summit.png|150x90px|link=Summit]]<br>{{gameIcon|SSBB}} [[Summit]]<br>{{symbol|ic|20px}} | |colspan=2|[[File:SSBU-Summit.png|150x90px|link=Summit]]<br>{{gameIcon|SSBB}} [[Summit]]<br>{{symbol|ic|20px}} | ||
| Line 113: | Line 118: | ||
|colspan=2|[[File:SSBU-Arena Ferox.png|150x90px|link=Arena Ferox]]<br>{{gameIcon|SSB4-3DS}} [[Arena Ferox]]<br>{{symbol|fe|20px}} | |colspan=2|[[File:SSBU-Arena Ferox.png|150x90px|link=Arena Ferox]]<br>{{gameIcon|SSB4-3DS}} [[Arena Ferox]]<br>{{symbol|fe|20px}} | ||
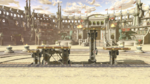
|colspan=2|[[File:SSBU-Coliseum.png|150x90px|link=Coliseum]]<br>{{gameIcon|SSB4-U}} [[Coliseum]]<br>{{symbol|fe|20px}} | |colspan=2|[[File:SSBU-Coliseum.png|150x90px|link=Coliseum]]<br>{{gameIcon|SSB4-U}} [[Coliseum]]<br>{{symbol|fe|20px}} | ||
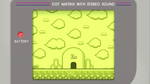
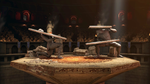
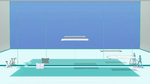
|colspan=2|[[File:SSBU-Flat Zone X.png|150x90px|link=Flat Zone X]]<br>{{gameIcon|SSB4-U}} [[Flat Zone X]]<br>{{symbol| | |colspan=2|[[File:SSBU-Flat Zone X.png|150x90px|link=Flat Zone X]]<br>{{gameIcon|SSB4-U}} [[Flat Zone X]]<br>{{symbol|gw|20px}} | ||
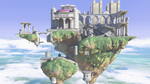
|colspan=2|[[File:SSBU-Skyworld.png|150x90px|link=Skyworld]]<br>{{gameIcon|SSBB}} [[Skyworld]]<br>{{symbol|ki|20px}} | |colspan=2|[[File:SSBU-Skyworld.png|150x90px|link=Skyworld]]<br>{{gameIcon|SSBB}} [[Skyworld]]<br>{{symbol|ki|20px}} | ||
|- | |- | ||
| Line 126: | Line 131: | ||
|colspan=2|[[File:SSBU-Tortimer Island.png|150x90px|link=Tortimer Island]]<br>{{gameIcon|SSB4-3DS}} [[Tortimer Island]]<br>{{symbol|ac|20px}} | |colspan=2|[[File:SSBU-Tortimer Island.png|150x90px|link=Tortimer Island]]<br>{{gameIcon|SSB4-3DS}} [[Tortimer Island]]<br>{{symbol|ac|20px}} | ||
|colspan=2|[[File:SSBU-Town and City.png|150x90px|link=Town and City]]<br>{{gameIcon|SSB4-U}} [[Town and City]]<br>{{symbol|ac|20px}} | |colspan=2|[[File:SSBU-Town and City.png|150x90px|link=Town and City]]<br>{{gameIcon|SSB4-U}} [[Town and City]]<br>{{symbol|ac|20px}} | ||
|colspan=2|[[File:SSBU-Wii Fit Studio.png|150x90px|link=Wii Fit Studio]]<br>{{gameIcon|SSB4-U}} [[Wii Fit Studio]]<br>{{symbol|wf|20px}} | |||
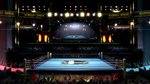
|colspan=2|[[File:SSBU-Boxing Ring.png|150x90px|link=Boxing Ring]]<br>{{gameIcon|SSB4}} [[Boxing Ring]]<br>{{symbol|po|20px}} | |colspan=2|[[File:SSBU-Boxing Ring.png|150x90px|link=Boxing Ring]]<br>{{gameIcon|SSB4}} [[Boxing Ring]]<br>{{symbol|po|20px}} | ||
|colspan=2|[[File:SSBU-Gaur Plain.png|150x90px|link=Gaur Plain]]<br>{{gameIcon|SSB4}} [[Gaur Plain]]<br>{{symbol|xb|20px}} | |||
|colspan=2|[[File:SSBU-Gaur Plain.png|150x90px|link=Gaur Plain]]<br>{{gameIcon|SSB4}} [[Gaur Plain]]<br>{{symbol| | |||
|- | |- | ||
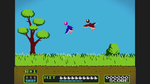
|colspan=2|[[File:SSBU-Duck Hunt.png|150x90px|link=Duck Hunt (stage)]]<br>{{gameIcon|SSB4}} | |colspan=2|[[File:SSBU-Duck Hunt.png|150x90px|link=Duck Hunt (stage)]]<br>{{gameIcon|SSB4}} {{b|Duck Hunt|stage}}<br>{{symbol|dh|20px}} | ||
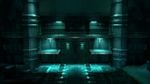
|colspan=2|[[File:SSBU-Shadow Moses Island 2.jpg|150x90px|link=Shadow Moses Island]]<br>{{gameIcon|SSBB}} [[Shadow Moses Island]]<br>{{symbol|mg|20px}} | |colspan=2|[[File:SSBU-Shadow Moses Island 2.jpg|150x90px|link=Shadow Moses Island]]<br>{{gameIcon|SSBB}} [[Shadow Moses Island]]<br>{{symbol|mg|20px}} | ||
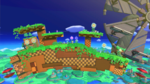
|colspan=2|[[File:SSBU-Green Hill Zone.png|150x90px|link=Green Hill Zone]]<br>{{gameIcon|SSBB}} [[Green Hill Zone]]<br>{{symbol|sonic|20px}} | |colspan=2|[[File:SSBU-Green Hill Zone.png|150x90px|link=Green Hill Zone]]<br>{{gameIcon|SSBB}} [[Green Hill Zone]]<br>{{symbol|sonic|20px}} | ||
| Line 137: | Line 142: | ||
|colspan=2|[[File:SSBU-Pac-Land.png|150x90px|link=Pac-Land]]<br>{{gameIcon|SSB4-U}} [[Pac-Land]]<br>{{symbol|pm|20px}} | |colspan=2|[[File:SSBU-Pac-Land.png|150x90px|link=Pac-Land]]<br>{{gameIcon|SSB4-U}} [[Pac-Land]]<br>{{symbol|pm|20px}} | ||
|- | |- | ||
|colspan=2|[[File:SSBU-Suzaku Castle.png|150x90px|link=Suzaku Castle]]<br>{{gameIcon|SSB4}} [[Suzaku Castle]]<br>{{symbol| | |colspan=2|[[File:SSBU-Suzaku Castle.png|150x90px|link=Suzaku Castle]]<br>{{gameIcon|SSB4}} [[Suzaku Castle]]<br>{{symbol|sf|20px}} | ||
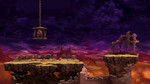
|colspan=2|[[File:SSBU-Midgar.jpg|150x90px|link=Midgar]]<br>{{gameIcon|SSB4}} [[Midgar]]<br>{{symbol|ff|20px}} | |colspan=2|[[File:SSBU-Midgar.jpg|150x90px|link=Midgar]]<br>{{gameIcon|SSB4}} [[Midgar]]<br>{{symbol|ff|20px}} | ||
|colspan=2|[[File:SSBU-Umbra Clock Tower.png|150x90px|link=Umbra Clock Tower]]<br>{{gameIcon|SSB4}} [[Umbra Clock Tower]]<br>{{symbol|bayonetta|20px}} | |colspan=2|[[File:SSBU-Umbra Clock Tower.png|150x90px|link=Umbra Clock Tower]]<br>{{gameIcon|SSB4}} [[Umbra Clock Tower]]<br>{{symbol|bayonetta|20px}} | ||
|colspan=2|[[File:SSBU-Hanenbow.png|150x90px|link=Hanenbow]]<br>{{gameIcon|SSBB}} [[Hanenbow]]<br>{{symbol| | |colspan=2|[[File:SSBU-Hanenbow.png|150x90px|link=Hanenbow]]<br>{{gameIcon|SSBB}} [[Hanenbow]]<br>{{symbol|ep|20px}} | ||
|colspan=2|[[File:SSBU-PictoChat 2.png|150x90px|link=PictoChat 2]]<br>{{gameIcon|SSB4-3DS}}[[PictoChat 2]]<br>{{symbol|ds|20px}} | |colspan=2|[[File:SSBU-PictoChat 2.png|150x90px|link=PictoChat 2]]<br>{{gameIcon|SSB4-3DS}} [[PictoChat 2]]<br>{{symbol|ds|20px}} | ||
|colspan=2|[[File:SSBU-Balloon Fight.png|150x90px|link=Balloon Fight]]<br>{{gameIcon|SSB4-3DS}} [[Balloon Fight]]<br>{{symbol|bf|20px}} | |colspan=2|[[File:SSBU-Balloon Fight.png|150x90px|link=Balloon Fight]]<br>{{gameIcon|SSB4-3DS}} [[Balloon Fight]]<br>{{symbol|bf|20px}} | ||
|- | |- | ||
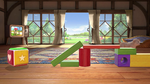
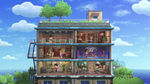
|colspan=2|[[File:SSBU-Living Room.png|150x90px|link=Living Room]]<br>{{gameIcon|SSB4-3DS}} [[Living Room]]<br>{{symbol| | |colspan=2|[[File:SSBU-Living Room.png|150x90px|link=Living Room]]<br>{{gameIcon|SSB4-3DS}} [[Living Room]]<br>{{symbol|nd|20px}} | ||
|colspan=2|[[File:SSBU-Find Mii.png|150x90px|link=Find Mii]]<br>{{gameIcon|SSB4-3DS}} [[Find Mii]]<br>{{symbol|streetpass|20px}} | |colspan=2|[[File:SSBU-Find Mii.png|150x90px|link=Find Mii]]<br>{{gameIcon|SSB4-3DS}} [[Find Mii]]<br>{{symbol|streetpass|20px}} | ||
|colspan=2|[[File:SSBU-Tomodachi Life.png|150x90px|link=Tomodachi Life]]<br>{{gameIcon|SSB4-3DS}} [[Tomodachi Life]]<br>{{symbol|tomodachi|20px}} | |colspan=2|[[File:SSBU-Tomodachi Life.png|150x90px|link=Tomodachi Life]]<br>{{gameIcon|SSB4-3DS}} [[Tomodachi Life]]<br>{{symbol|tomodachi|20px}} | ||
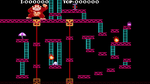
|colspan=2|[[File:SSBU-Wrecking Crew.png|150x90px|link=Wrecking Crew]]<br>{{gameIcon|SSB4-U}} [[Wrecking Crew]]<br>{{symbol|wreckingcrew|20px}} | |colspan=2|[[File:SSBU-Wrecking Crew.png|150x90px|link=Wrecking Crew]]<br>{{gameIcon|SSB4-U}} [[Wrecking Crew]]<br>{{symbol|wreckingcrew|20px}} | ||
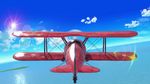
|colspan=2|[[File:SSBU-Pilotwings.png|150x90px|link=Pilotwings]]<br>{{gameIcon|SSB4-U}} [[Pilotwings]]<br>{{symbol|pw|20px}} | |colspan=2|[[File:SSBU-Pilotwings.png|150x90px|link=Pilotwings]]<br>{{gameIcon|SSB4-U}} [[Pilotwings]]<br>{{symbol|pw|20px}} | ||
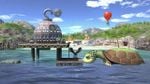
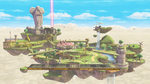
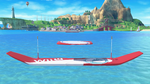
|colspan=2|[[File:SSBU-Wuhu Island.png|150x90px|link=Wuhu Island]]<br>{{gameIcon|SSB4-U}} [[Wuhu Island]]<br>{{symbol| | |colspan=2|[[File:SSBU-Wuhu Island.png|150x90px|link=Wuhu Island]]<br>{{gameIcon|SSB4-U}} [[Wuhu Island]]<br>{{symbol|wuhu|20px}} | ||
|} | |} | ||