Template:SSBU stage table: Difference between revisions
From SmashWiki, the Super Smash Bros. wiki
Jump to navigationJump to search
(I'll revert it back to the order it was before like in Ultimate with the third-party stages being last.) |
No edit summary Tag: Mobile edit |
||
| (9 intermediate revisions by 5 users not shown) | |||
| Line 1: | Line 1: | ||
{|class="wikitable" style="text-align:center;margin:1em auto 1em auto" | {|class="wikitable" style="text-align:center;margin:1em auto 1em auto" | ||
!width= | !width=77px style="padding:0;"| | ||
!width= | !width=77px style="padding:0;"| | ||
!width= | !width=77px style="padding:0;"| | ||
!width= | !width=77px style="padding:0;"| | ||
!width= | !width=77px style="padding:0;"| | ||
!width= | !width=77px style="padding:0;"| | ||
!width= | !width=77px style="padding:0;"| | ||
!width= | !width=77px style="padding:0;"| | ||
!width= | !width=77px style="padding:0;"| | ||
!width= | !width=77px style="padding:0;"| | ||
!width= | !width=77px style="padding:0;"| | ||
!width= | !width=77px style="padding:0;"| | ||
|- | |- | ||
!colspan=12|New | !colspan=12|New stages (19) | ||
|- | |- | ||
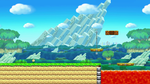
|colspan=2|[[File:SSBU-Battlefield.png|150x90px|link=Battlefield (SSBU)]]<br>{{SSBU|Battlefield}}<br>{{symbol|ssb|20px}} | |colspan=2|[[File:SSBU-Battlefield.png|150x90px|link=Battlefield (SSBU)]]<br>{{SSBU|Battlefield}}<br>{{symbol|ssb|20px}} | ||
|colspan=2|[[File:SSBU-Final Destination.jpg|150x90px|link=Final Destination (SSBU)]]<br>{{SSBU|Final Destination}}<br>{{symbol|ssb|20px}} | |||
|colspan=2|[[File:SSBU-Big-Battlefield.png|150x90px|link=Big Battlefield (SSBU)]]<br>{{SSBU|Big Battlefield}}<br>{{symbol|ssb|20px}} | |||
|colspan=2|[[File:SSBU-Small-Battlefield.jpg|150x90px|link=Small Battlefield]]<br>[[Small Battlefield]] <small><small>(8.1.0)</small></small><br>{{symbol|ssb|20px}} | |colspan=2|[[File:SSBU-Small-Battlefield.jpg|150x90px|link=Small Battlefield]]<br>[[Small Battlefield]] <small><small>(8.1.0)</small></small><br>{{symbol|ssb|20px}} | ||
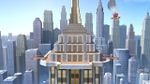
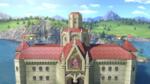
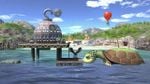
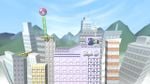
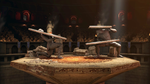
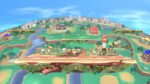
|colspan=2|[[File:SSBU-New Donk City Hall.jpg|150x90px|link=New Donk City Hall]]<br>[[New Donk City Hall]]<br>{{symbol|smb|20px}} | |colspan=2|[[File:SSBU-New Donk City Hall.jpg|150x90px|link=New Donk City Hall]]<br>[[New Donk City Hall]]<br>{{symbol|smb|20px}} | ||
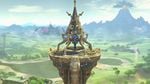
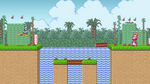
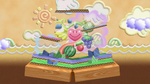
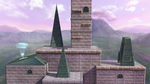
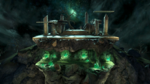
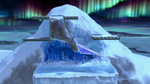
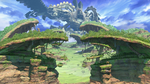
|colspan=2|[[File:SSBU-Great Plateau Tower.jpg|150x90px|link=Great Plateau Tower]]<br>[[Great Plateau Tower]]<br>{{symbol|zelda|20px}} | |colspan=2|[[File:SSBU-Great Plateau Tower.jpg|150x90px|link=Great Plateau Tower]]<br>[[Great Plateau Tower]]<br>{{symbol|zelda|20px}} | ||
| Line 42: | Line 42: | ||
|colspan=3| | |colspan=3| | ||
|- | |- | ||
!colspan=12|Returning | !colspan=12|Returning stages (96) | ||
|- | |- | ||
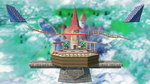
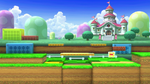
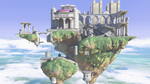
|colspan=2|[[File:SSBU-Peach's Castle.png|150x90px|link=Peach's Castle]]<br>{{gameIcon|SSB}} [[Peach's Castle]]<br>{{symbol|smb|20px}} | |colspan=2|[[File:SSBU-Peach's Castle.png|150x90px|link=Peach's Castle]]<br>{{gameIcon|SSB}} [[Peach's Castle]]<br>{{symbol|smb|20px}} | ||
| Line 136: | Line 136: | ||
|- | |- | ||
|colspan=2|[[File:SSBU-Duck Hunt.png|150x90px|link=Duck Hunt (stage)]]<br>{{gameIcon|SSB4}} {{b|Duck Hunt|stage}}<br>{{symbol|dh|20px}} | |colspan=2|[[File:SSBU-Duck Hunt.png|150x90px|link=Duck Hunt (stage)]]<br>{{gameIcon|SSB4}} {{b|Duck Hunt|stage}}<br>{{symbol|dh|20px}} | ||
|colspan=2|[[File:SSBU-Shadow Moses Island 2.jpg|150x90px|link=Shadow Moses Island]]<br>{{gameIcon|SSBB}} [[Shadow Moses Island]]<br>{{symbol|mg|20px}} | |||
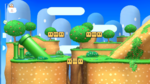
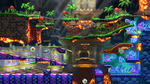
|colspan=2|[[File:SSBU-Green Hill Zone.png|150x90px|link=Green Hill Zone]]<br>{{gameIcon|SSBB}} [[Green Hill Zone]]<br>{{symbol|sonic|20px}} | |||
|colspan=2|[[File:SSBU-Windy Hill Zone.png|150x90px|link=Windy Hill Zone]]<br>{{gameIcon|SSB4-U}} [[Windy Hill Zone]]<br>{{symbol|sonic|20px}} | |||
|colspan=2|[[File:SSBU-Wily Castle.png|150x90px|link=Wily Castle]]<br>{{gameIcon|SSB4}} [[Wily Castle]]<br>{{symbol|mm|20px}} | |||
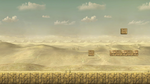
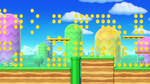
|colspan=2|[[File:SSBU-Pac-Land.png|150x90px|link=Pac-Land]]<br>{{gameIcon|SSB4-U}} [[Pac-Land]]<br>{{symbol|pm|20px}} | |||
|- | |||
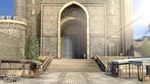
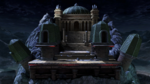
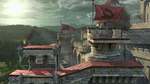
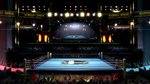
|colspan=2|[[File:SSBU-Suzaku Castle.png|150x90px|link=Suzaku Castle]]<br>{{gameIcon|SSB4}} [[Suzaku Castle]]<br>{{symbol|sf|20px}} | |||
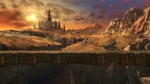
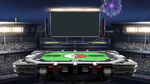
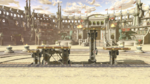
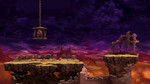
|colspan=2|[[File:SSBU-Midgar.jpg|150x90px|link=Midgar]]<br>{{gameIcon|SSB4}} [[Midgar]]<br>{{symbol|ff|20px}} | |||
|colspan=2|[[File:SSBU-Umbra Clock Tower.png|150x90px|link=Umbra Clock Tower]]<br>{{gameIcon|SSB4}} [[Umbra Clock Tower]]<br>{{symbol|bayonetta|20px}} | |||
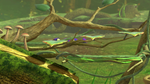
|colspan=2|[[File:SSBU-Hanenbow.png|150x90px|link=Hanenbow]]<br>{{gameIcon|SSBB}} [[Hanenbow]]<br>{{symbol|ep|20px}} | |colspan=2|[[File:SSBU-Hanenbow.png|150x90px|link=Hanenbow]]<br>{{gameIcon|SSBB}} [[Hanenbow]]<br>{{symbol|ep|20px}} | ||
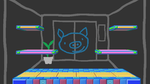
|colspan=2|[[File:SSBU-PictoChat 2.png|150x90px|link=PictoChat 2]]<br>{{gameIcon|SSB4-3DS}} [[PictoChat 2]]<br>{{symbol|ds|20px}} | |colspan=2|[[File:SSBU-PictoChat 2.png|150x90px|link=PictoChat 2]]<br>{{gameIcon|SSB4-3DS}} [[PictoChat 2]]<br>{{symbol|ds|20px}} | ||
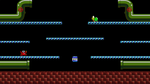
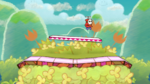
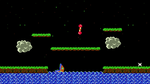
|colspan=2|[[File:SSBU-Balloon Fight.png|150x90px|link=Balloon Fight]]<br>{{gameIcon|SSB4-3DS}} [[Balloon Fight]]<br>{{symbol|bf|20px}} | |colspan=2|[[File:SSBU-Balloon Fight.png|150x90px|link=Balloon Fight]]<br>{{gameIcon|SSB4-3DS}} [[Balloon Fight]]<br>{{symbol|bf|20px}} | ||
|- | |||
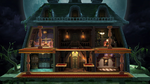
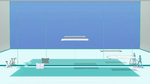
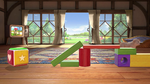
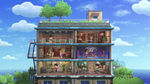
|colspan=2|[[File:SSBU-Living Room.png|150x90px|link=Living Room]]<br>{{gameIcon|SSB4-3DS}} [[Living Room]]<br>{{symbol|nd|20px}} | |colspan=2|[[File:SSBU-Living Room.png|150x90px|link=Living Room]]<br>{{gameIcon|SSB4-3DS}} [[Living Room]]<br>{{symbol|nd|20px}} | ||
|colspan=2|[[File:SSBU-Find Mii.png|150x90px|link=Find Mii]]<br>{{gameIcon|SSB4-3DS}} [[Find Mii]]<br>{{symbol|streetpass|20px}} | |colspan=2|[[File:SSBU-Find Mii.png|150x90px|link=Find Mii]]<br>{{gameIcon|SSB4-3DS}} [[Find Mii]]<br>{{symbol|streetpass|20px}} | ||
|colspan=2|[[File:SSBU-Tomodachi Life.png|150x90px|link=Tomodachi Life]]<br>{{gameIcon|SSB4-3DS}} [[Tomodachi Life]]<br>{{symbol|tomodachi|20px}} | |colspan=2|[[File:SSBU-Tomodachi Life.png|150x90px|link=Tomodachi Life]]<br>{{gameIcon|SSB4-3DS}} [[Tomodachi Life]]<br>{{symbol|tomodachi|20px}} | ||
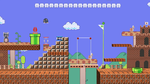
|colspan=2|[[File:SSBU-Wrecking Crew.png|150x90px|link=Wrecking Crew]]<br>{{gameIcon|SSB4-U}} [[Wrecking Crew]]<br>{{symbol|wreckingcrew|20px}} | |colspan=2|[[File:SSBU-Wrecking Crew.png|150x90px|link=Wrecking Crew]]<br>{{gameIcon|SSB4-U}} [[Wrecking Crew]]<br>{{symbol|wreckingcrew|20px}} | ||
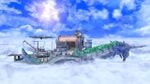
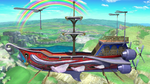
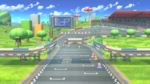
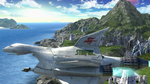
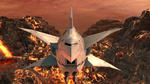
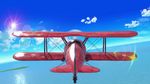
|colspan=2|[[File:SSBU-Pilotwings.png|150x90px|link=Pilotwings]]<br>{{gameIcon|SSB4-U}} [[Pilotwings]]<br>{{symbol|pw|20px}} | |colspan=2|[[File:SSBU-Pilotwings.png|150x90px|link=Pilotwings]]<br>{{gameIcon|SSB4-U}} [[Pilotwings]]<br>{{symbol|pw|20px}} | ||
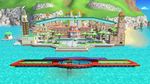
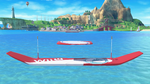
|colspan=2|[[File:SSBU-Wuhu Island.png|150x90px|link=Wuhu Island]]<br>{{gameIcon|SSB4-U}} [[Wuhu Island]]<br>{{symbol|wuhu|20px}} | |colspan=2|[[File:SSBU-Wuhu Island.png|150x90px|link=Wuhu Island]]<br>{{gameIcon|SSB4-U}} [[Wuhu Island]]<br>{{symbol|wuhu|20px}} | ||
|} | |} | ||