Zelda (SSBM): Difference between revisions
MikeSmash9 (talk | contribs) |
(→Most historically significant players: unless there’s a lot of good results to back up the claim with UmbreonMow, I’m going to remove them. I don’t really take “best in early meta” seriously anymore unless it’s actually well-documented. The most I can find are random games on YouTube.) |
||
| (439 intermediate revisions by more than 100 users not shown) | |||
| Line 1: | Line 1: | ||
{{ArticleIcons|melee=y}} | |||
{{disambig2|Zelda's appearance in ''[[Super Smash Bros. Melee]]''|the character in other contexts|Princess Zelda}}{{for|information about Zelda's alter-ego|Sheik (SSBM)}} | |||
{{Infobox Character | {{Infobox Character | ||
|name | |name = Zelda | ||
|image | |image = [[File:Zelda SSBM.jpg]] | ||
| | |shareslot = {{SSBM|Sheik}} | ||
| | |game = SSBM | ||
| | |ssbgame1 = SSBB | ||
| | |ssbgame2 = SSB4 | ||
|ssbgame3 = SSBU | |||
|availability = [[Starter character|Starter]] | |availability = [[Starter character|Starter]] | ||
|tier | |tier = D | ||
|ranking | |tierPAL = G | ||
|ranking = 24 | |||
|rankingPAL = 20 | |||
}} | }} | ||
'''Zelda''' ({{ja|ゼルダ|Zeruda}}, ''Zelda'') is one of the more unique characters in the lineup for ''[[Super Smash Bros. Melee]]''. Zelda's most notable traits are her array of powerful magical attacks and her unique ability to transform herself into her alter ego, {{SSBM|Sheik}}. This alternate form is very different from Zelda, and each was intended to help balance the other's weaknesses, so that ideally one would change between the two based on the flow of battle. | |||
Jun Mizusawa reprises her role as Zelda from ''Ocarina of Time'' in the game. | |||
Zelda is | Currently, Zelda is 24th on the tier list, the lowest-ranked character in D-tier. Zelda's positive attributes include several powerful attacks, with the most notable being her [[Lightning Kick]]. Zelda's primary weakness, however, is her poor mobility; she possesses (along with Jigglypuff) the slowest dash speed in the game, and falls slowly. These attributes, combined with her very high [[traction]], result in her possessing the shortest [[wavedash]] in the game (alongside Peach). Additionally, despite Zelda's long range on her recovery move, [[Farore's Wind]], which can also be angled, it is fairly predictable and easily edgeguarded and/or edgehogged due to its awkward endlag, and it also lacks a hitbox when she reappears, leaving her vulnerable to punishes when he tries to land. All of these factors contribute to Zelda having terrible matchups against most of the cast. | ||
==Attributes== | ==Attributes== | ||
[[ | Zelda does not fall under any specific archetype of characters, due to her unusual properties as a fighter; she has a slew of powerful finishers, such as her [[Lightning Kick]], but possesses average weight. Additionally, Zelda has a slow falling speed and high traction, leading to a very short, albeit fast, wavedash. | ||
Zelda has powerful, high | |||
One of Zelda's strengths is her great overall KO power. Within the air, her forward and back aerials of the Lightning Kick can KO at as low as 50%, and her up air has a large hitbox that can also KO opponents. On the ground, Zelda's up tilt is surprisingly powerful, with its long duration and large radius allowing it to be a versatile move under most circumstances. Zelda's up and forward smash attacks are also powerful and they have high damage output thanks to their multiple hits. | |||
In addition, Zelda has some fast attacks, such as her down smash (which is the fastest in the game) and her forward and back aerials, which requires opponents to tread more carefully when used. [[Nayru's Love]] has invincibility at frame 4, which makes it a good move to counterattack fast approaches. Up smash possesses quick startup and can be used as a great out of shield option, as it can lead to a grab if the opponent SDIs out of it. Forward smash has very low ending lag, a good disjointed hitbox, and a quick animation. The very last hitbox is significantly larger than the previous, being able to sometimes reach someone who SDI's in the front of the move. It can be also be thrown out in neutral to read fast approaches without putting herself in a bad spot. As an added bonus, many of Zelda's attacks have [[Priority#Transcendent priority|transcendent priority]]; combined with average reach for most of her attacks, Zelda has potential to stop others' attacks with her own. | |||
Despite most of her moves dealing high knockback, she has an acceptable combo game. Her dash attack is her primary combo starter on the ground, all of her tilts are great comboing moves, her forward tilt can send her opponents backwards, allowing for potential combo starters, her up tilt can juggle at low percentages and follow up with an up aerial when it stops comboing and her down tilt can combo into itself until around 95% and can also combo into her down smash. Up smash can also be used a few times in a row at low percentages if the opponent gets caught right above her. In addition to this, Zelda possesses a good grab game. Her up throw can be a kill confirm around 80% as it leads to a guaranteed bair/fair on certain matchups. It also has the potential to chain throw at low percentages, and her down throw has several potential follow-ups, such as a dash attack, Lightning Kick, or even a forward tilt and can set up stage spikes and early edge-guards. Her forward and back throws are quite powerful and can set up edge-guards or even K.O. at high percentages. Neutral air can also be used to guarantee these aerials (on certain matchups) if landed without the last hitbox, which will make the opponent pop up with a set knockback. | |||
However, Zelda is strongly held back by having one of the worst approach games in the game. On the ground, Zelda possesses the slowest dashing speed, a short wavedash, and a slow dash dance; combined with decidedly average range in her attacks, Zelda cannot effectively attack on the ground. Zelda doesn't fare much better in the air; despite her above average air speed, Zelda suffers from a low falling speed and a high short hop, leading to a very poor SHFFL. Zelda's lack of an effective projectile also prevents her from attacking from afar; [[Din's Fire]] is far too laggy, weak, and predictable to be an effective projectile, being too situational under most circumstances, even with the help of platforms and wavelanding. | |||
Despite her array of powerful moves and decent platform movement, she suffers numerous other flaws. In addition to a poor approach on the ground, most of Zelda's moveset consists of unreliable finishers. Her forward and up smash suffer from SDI problems, as opponents can easily SDI out of it before the last hit. Zelda's up aerial, while powerful, is impossible to land on a grounded opponent, as it has some start-up lag and the hitbox is above her. Her Lightning Kicks need to be sweetspotted to KO effectively. Her forward and back throws can only KO at very high percentages when used near the edge, limiting their utility. As such, Zelda's up tilt and down smash are possibly her only reliable KO moves and even those have their flaws; the former is rather slow for a tilt attack and the latter is rather weak for a smash attack. Lastly, some of her toolkit suffers from a lack of applicable uses, which includes her down aerial, her aforementioned Din's Fire and jab. | |||
Zelda also suffers from having generally situational specials (save [[Transform]]). Nayru's Love can only harm attackers in short ranges, and it has high ending lag and it doesn't protect her from attacks above her. Din's Fire, as mentioned earlier, doesn't aid her approach at all and suffers from too much ending lag. [[Farore's Wind]], generally considered her best special move, requires precise timing and angles to reach the ledge, else Zelda might land onstage and could potentially get punished, or worse, self-destruct. Farore's Wind's hitbox is also not generally viable for offensive use barring ledge stalls, and even then it lacks follow-ups on many characters. | |||
Overall, Zelda emphasizes a defensive gameplan by trying to find openings for grabs, dash attacks, or lightning kicks. Players must be precise on landing her finishing moves, as their fast startup and strong power can be offset by a difficulty and landing them. She must also try and use wavedashing as well as platforms as much as possible, as her low mobility can prove to be a burden when trying to fight in neutral or against disadvantageous situations. To find success, she has to bait out options and wait for an opponent to make a mistake, else she be overwhelmed by other foes. | |||
==Moveset== | |||
''For a gallery of Zelda's hitboxes, see [[Zelda (SSBM)/Hitboxes|here]].'' | |||
[[File:ZeldaAerialAttacksSSBM.png|thumb|Zelda's aerial attacks]] | |||
{{MovesetTable | |||
|game=SSBM | |||
|neutralcount=1 | |||
|neutralname=Short Flash ({{ja|ショートフラッシュ|Shōto Furasshu}}) | |||
|neutral1dmg=2% (hits 1-3) | |||
|neutraldesc=Zaps magic quickly from her palm, in a similar fashion to {{SSBM|Ganondorf}}'s neutral attack. Has [[transcendent priority]]. Slowest neutral attack in ''Melee'', hitting on frame 11. | |||
|ftiltname=Mystic Swipe ({{ja|ミスティックスワイプ|Misutikku Suwaipu}}) | |||
|ftiltdmg=13% (hand), 12% (arm), 11% (shoulder) | |||
|ftiltdesc=Swipes her hand forward with sparks. Has transcendent priority. Can be angled up or down. Second strongest forward tilt in ''Melee'', only beaten by {{SSBM|Bowser}}'s sweetspotted [[forward tilt]]. The hitbox on Zelda's hand sends the opponent behind her. | |||
|utiltname=Protective Sweep ({{ja|プロテクティブスイープ|Purotekutibu Suīpu}}) | |||
|utiltdmg=11% | |||
|utiltdesc=Waves her hand, filled with sparks, in an arc above her head. Surprisingly powerful and the hitbox lasts for a long time, so it is an excellent anti-air. Has transcendent priority. | |||
|dtiltname=Trip ({{ja|トリップ|Torippu}}) | |||
|dtiltdmg=8% (leg), 7% (foot) | |||
|dtiltdesc=Thrusts her foot out quickly from under her dress. Can [[meteor smash]] opponents who hit her leg and grounded opponents who hit the tip of her foot. Airborne opponents who hit her foot will be launched upwards. | |||
|dashname=Magical Push ({{ja|マジカルプッシュ|Majikaru Pusshu}}) | |||
|dashdmg=13% (clean body), 9% (clean hands), 8% (late body), 7% (late hands) | |||
|dashdesc=Shoves her hands in front, with magic sparks coming out them. Has transcendent priority. | |||
|fsmashname=Shining Palm ({{ja|シャイニングパーム|Shainingu Pōmu}}) | |||
|fsmashdmg={{ChargedSmashDmgSSBM|1}} (hits 1-4), {{ChargedSmashDmgSSBM|14}} (hit 5) | |||
|fsmashdesc=Sends out a fierce jab of magic in front of her in a similar fashion to Mario's. Hits multiple times, with the final hit having launching opponents away. This attack is powerful, but can be SDI'd out of, which is somewhat difficult to land all 5 hits. Has transcendent priority. | |||
|usmashname=Power Sweep ({{ja|パワースイープ|Pawā Suīpu}}) | |||
|usmashdmg={{ChargedSmashDmgSSBM|1}} (hits 1-11), {{ChargedSmashDmgSSBM|5}} (hits 12) | |||
|usmashdesc=Waves her hand in an arch similar to her up tilt three times. A powerful move if all hits manage to connect. It comes out on frame 5, making it the fastest up smash in the game. This subsequently means that it can good out-of-shield option, but it can be SDI'd out of, similarly to her forward smash, in addition to possessing incredibly short horizontal range. | |||
|dsmashname=Compass Spin ({{ja|コンパススピン|Konpasu Supin}}) | |||
|dsmashdmg={{ChargedSmashDmgSSBM|11}} | |||
|dsmashdesc=Quickly kicks both sides of herself. Short range with a slightly disjointed hitbox and poor power, but is the fastest down-smash in the game, coming out at frame 4 and only having 31 total frames. Has transcendent priority. Zelda's leg is intangible when she delivers both kicks. | |||
|nairname=Magic Spin ({{ja|マジックスピン|Majikku Supin}}) | |||
|nairdmg=2-3% (hits 1-5), 5% (hit 6) | |||
|nairdesc=Spins in place while emitting magic sparks from her hands. Many hitboxes, good for spacing. Has transcendent priority. It may be DI'd out of. | |||
|fairname=[[Lightning Kick]] ({{ja|稲妻キック|Inazuma Kikku}}) | |||
|fairdmg=20% (sweet), 10% (sour) | |||
|fairdesc=Kicks forward. If the opponent is hit with the glowing spark at the tip of Zelda's foot, it zaps them ''very'' powerfully, in a way similar to Captain Falcon's [[Knee Smash]]. Has transcendent priority. | |||
|bairname=Reverse Lightning Kick ({{ja|逆稲妻キック|Gyaku Inazuma Kikku}}) | |||
|bairdmg=20% (sweet), 10% (sour) | |||
|bairdesc=Virtually identical to her forward aerial but in a different direction and with slightly less startup lag. Has transcendent priority. A bit faster than her forward Lightning Kick, so it can be used twice in a short hop. | |||
|uairname=Condensed Blast ({{ja|コンデンスブラスト|Kondensu Burasuto}}) | |||
|uairdmg=13% | |||
|uairdesc=Releases a giant fireball that causes an explosion above Zelda. Can be used to [[shark]] opponents on the stage when Zelda is recovering. Has very high power, being the fifth strongest up aerial in ''Melee''. Has transcendent priority. | |||
|dairname=Meteor Heel ({{ja|マイルドメテオヒール|Mairudo Meteo Hīru}}, ''Mild Meteor Heel'') | |||
|dairdmg=7% (foot), 8% (leg) | |||
|dairdesc=Thrusts her foot downwards. A very weak [[meteor smash]]. | |||
|grabname=Magical Hold ({{ja|マジカルホールド|Majikaru Hōrudo}}) | |||
|grabdesc= | |||
|pummelname=Hex ({{ja|ヘックス|Hekkusu}}) | |||
|pummeldmg=3% | |||
|pummeldesc=Zaps her foe. | |||
|fthrowname=Levitation ({{ja|浮上|Fujō}}) | |||
|fthrowdmg=12% | |||
|fthrowdesc=Launches her foe forward, above average power. | |||
|bthrowname=Reverse Levitation ({{ja|逆浮上|Gyaku Fujō}}) | |||
|bthrowdmg=11% | |||
|bthrowdesc=Similar to her forward throw, only directly behind her. | |||
|uthrowname=Levitation Launch ({{ja|浮上打ち上げ|Fujō Uchiage}}) | |||
|uthrowdmg=11% | |||
|uthrowdesc=Thrusts foe to the sky. Has the ability to chain throw fast-falling opponents at low percents. | |||
|dthrowname=Plasma Beat ({{ja|プラズマビート|Purazuma Bīto}}) | |||
|dthrowdmg=2% (hits 1-4), 2% (throw) | |||
|dthrowdesc=Drops foe and zaps them, sending the foe behind her with weak knockback. | |||
|floorfname= | |||
|floorfdmg=6% (front hit), 8%/6% (back hit legs/body) | |||
|floorfdesc=Swirls her dress around with foot extended and gets up. | |||
|floorbname= | |||
|floorbdmg=6% | |||
|floorbdesc=Swirls her dress around with foot extended and gets up. | |||
|edgefname= | |||
|edgefdmg=6% | |||
|edgefdesc=Climbs up and swings her legs in a circular motion, while pulling herself up. | |||
|edgesname= | |||
|edgesdmg=10% (arm), 8% (body) | |||
|edgesdesc=Slowly gets up and slaps forward. | |||
|nsname=Nayru's Love | |||
|nsdmg=1-2% (hits 1-5), 4-5% (hit 6) | |||
|nsdesc=Twirls around with magical hitboxes on both sides. A decent "get off me" move. The attack also reflect projectiles. | |||
|ssname=Din's Fire | |||
|ssdmg=7-13% | |||
|ssdesc=Launches a controllable fireball that charges as it travels until it explodes. The fireball can be directed up or down with the [[control stick]]. Knockback angle depends on which side of the enemy is hit, so it can be used to knock opponents toward or away from Zelda. This move puts Zelda in a [[helpless]] state when used in the air. | |||
|usname=Farore's Wind | |||
|usdmg=4% | |||
|usdesc=A yellow ribbon of magic spins around Zelda, causing her to disappear. After that, she will reappear in the direction held on the [[control stick]] (or directly above her original location if the control stick is not moved). It does not have a hitbox upon reappearing and Zelda is locked out of moving for some time if she reappears in the air, leading to the move being somewhat punishable. | |||
|dsname=Transform | |||
|dsdmg=0% | |||
|dsdesc=Transforms into {{SSBM|Sheik}}. | |||
}} | |||
===Stats=== | |||
'''NTSC''' | |||
{{Attributes | |||
|cast = 26 | |||
|weight = 90 | |||
|rweight = 12-14 | |||
|dash = 1.1 | |||
|rdash = 25 | |||
|run = 1.1 | |||
|rrun = 25-26 | |||
|walk = 0.7 | |||
|rwalk = 25-26 | |||
|trac = 0.1 | |||
|rtrac = 1-4 | |||
|airfric = 0.005 | |||
|rairfric = 21-26 | |||
|air = 0.95 | |||
|rair = 10 | |||
|baseaccel = 0.01 | |||
|rbaseaccel = 25-26 | |||
|addaccel = 0.038 | |||
|raddaccel = 12 | |||
|gravity = 0.066 | |||
|rgravity = 25 | |||
|fall = 1.4 | |||
|rfall = 24-25 | |||
|ff = 1.85 | |||
|rff = 25 | |||
|jumpsquat = 6 | |||
|rjumpsquat = 23-25 | |||
|jumpheight = 31.262 | |||
|rjumpheight = 18 | |||
|shorthop = 18.337 | |||
|rshorthop = 3 | |||
|djump = 21.444 | |||
|rdjump = 19 | |||
}} | |||
=== | '''PAL''' | ||
==== | {{Attributes | ||
= | |cast = 26 | ||
|weight = 90 | |||
|rweight = 12-14 | |||
|dash = 1.1 | |||
|rdash = 25 | |||
|run = 1.1 | |||
==== | |rrun = 25-26 | ||
|walk = 0.7 | |||
|rwalk = 25-26 | |||
|trac = 0.1 | |||
=== | |rtrac = 1-4 | ||
|airfric = 0.005 | |||
|rairfric = 21-26 | |||
|air = 0.95 | |||
|rair = 9 | |||
|baseaccel = 0.01 | |||
= | |rbaseaccel = 25-26 | ||
|addaccel = 0.038 | |||
|raddaccel = 12 | |||
|gravity = 0.066 | |||
|rgravity = 25 | |||
|fall = 1.4 | |||
|rfall = 24-25 | |||
|ff = 1.85 | |||
|rff = 25 | |||
|jumpsquat = 6 | |||
|rjumpsquat = 23-25 | |||
|jumpheight = 31.262 | |||
|rjumpheight = 18 | |||
|shorthop = 18.337 | |||
|rshorthop = 3 | |||
|djump = 21.444 | |||
|rdjump = 19 | |||
}} | |||
==== | ===[[Announcer]] call=== | ||
[[File: Zelda Announcer SSBM.wav]] | |||
=== | ===[[Taunt]]=== | ||
{{ | {{Taunt/SSBM|char=Zelda|desc=Holds her hands together, as if in a prayer.}} | ||
==[[ | ===[[Idle pose]]s=== | ||
{{ | {{Idle | ||
|desc-1=Flips her hair back. | |||
|desc-2=Makes a thinking gesture. | |||
|desc-3=Turns her body away, while putting her right arm on her left. This pose is similar to the one she makes in her artwork, and near the end of ''Ocarina of Time''. | |||
|image-1=Zelda Idle Pose Melee 1.gif | |||
|image-2=Zelda Idle Pose Melee 2.gif | |||
|image-3=Zelda Idle Pose Melee 3.gif}} | |||
==[[ | ===[[Crowd cheer]]=== | ||
{{Crowd | |||
|char=Zelda | |||
|game=Melee | |||
|desc-us=Zel-da Zel-da Hu! | |||
|desc-jp=Zel-da! Zel-da! | |||
|pitch-us=Group chant | |||
|pitch-jp=Male}} | |||
=== | ===[[Victory pose]]s=== | ||
{{Victory/SSBM | |||
|victory-theme=ZeldaThemeMelee.ogg | |||
|victory-desc=An orchestrated portion of the main theme from ''The Legend of Zelda'' series. | |||
|desc-1=Praying, she then turns her head upward. | |||
|desc-2=Looks to her left, holding her left arm proudly. | |||
|desc-3=Focuses, then conjures a flame between her hands. | |||
|char=Zelda}} | |||
=== | ==In [[competitive play]]== | ||
===Most historically significant players=== | |||
<!--This character has a ten player limit for this section. Before adding and/or removing a player, read these guidelines: https://www.ssbwiki.com/SmashWiki:Notability#%22Most_historically_significant_players%22_guidelines --> | |||
:''See also: ''[[:Category:Zelda players (SSBM)]]'' | |||
# | |||
*{{Sm|Kalne|Japan}} - [[Sheilda|Co-mains Zelda and Sheik]]. Has multiple top 8 at Japanese locals such as [[MasterHand]] and was ranked 37th on the [[Japan SSBM Rank 2019]], becoming one of the few times a Zelda player has ranked on a country ranking. | |||
* | *{{Sm|Narcissa|USA}} - A Zelda player who was considered one of the best in North America and peaked at 2nd on the [[Chicago Power Rankings]]. Won [http://challonge.com/sgdq2013melee SGDQ 2013], placed 65th at {{Trn|EVO 2015}}, and placed high at many [[Show Me Your Moves]] locals. She later switched to Roy before becoming inactive from competition. | ||
* | *{{Sm|Rienne|USA}} - Created [https://www.profaneto.me/2017/07/the-profane-tome-index.html The Profane Tome], which is considered a "bible" for Zelda players. Is generally considered to be the best Zelda in the world at the moment, having wins over top players such as {{Sm|Aura}}, {{Sm|Nicki}}, and {{Sm|Mekk}}. | ||
* | *{{Sm|The Lake|USA}} - The best Zelda player of all-time. He became a respected player in Pittsburgh, ranking as high as 4th on the [[Pittsburgh Power Rankings]] and has one of the most famous Zelda clips with his 4-stock over {{Sm|Nintendude}} in a tournament match.<ref>{{cite web|url=https://youtu.be/8RM-J9V8iP4|title=Nintendude Vs. The Lake}}</ref> Outside of this, he holds the best Zelda results at notable regionals and majors, placing 25th at {{Trn|The Big House}} and 33rd at {{Trn|Revival of Melee 3}}. He passed away in October of 2022. | ||
* | |||
== | ===Tier placement and history=== | ||
Zelda was ranked extremely high on the first [[tier list]], tying for 6th place with {{SSBM|Samus}} and {{SSBM|Luigi}}; however, discussion in [http://www.smashboards.com/showthread.php?t=22623 the MBR average tiers topic] suggests this is an artifact of some tier list contributors grouping her with her top-tier counterpart {{SSBM|Sheik}}, and her placement was not fully based on her prowess as an independent character. The second tier list rectified this and had Zelda tie with Link and Ness for 14th to 16th place. Following this, Zelda fell again to 20th on the third tier list, and has since frequently appeared on the 19th and 20th spots on the tier list. Zelda's position is attributed to a combination of undesirable traits, being floaty, a middleweight yet tall (making her easy to juggle and KO from the upper blast line), having sluggish mobility, a poor [[wavedash]], and poor hitbox placements on most of her moves. However, the most important factor of Zelda’s lack of viability is Sheik’s existence as a top tier, which has deterred many smashers from using her in serious play. | |||
Zelda is currently ranked 24th on the thirteenth tier list, in what is her lowest standing on the list thus far. Prior to the ranking, she was ranked 22nd, with some smashers disputing whether this was an accurate assessment; {{Sm|Mew2King}} notably believed that Zelda [http://www.eventhubs.com/news/2014/may/02/kirby-and-zelda-are-two-worst-characters-melee-pichu-highly-underrated-mew2king-discusses-his-super-smash-bros-tier-list-pt-1/ was one of the two worst characters in the game], citing her poor frame data and awful approach in his assessment. | |||
Zelda | |||
Zelda has made little impact in tournaments from the start of the metagame, with relatively few dedicated mains. Her only modern players are semi-active at best, and usually do not place high enough to earn money in large tournaments without also using a better character. Additionally, many of the historically best Zeldas, most notably {{Sm|Narcissa}} stopped playing the game entirely, and {{Sm|The Lake}} has since passed away. Usually, the only time when Zelda shows up in top level play is when Sheik players transform into her off-stage to take advantage of her longer [[recovery]] where they would otherwise not be able to recover; if the opponent is aggressive enough, they may be forced to fight as her until an opportunity to transform back is available. | |||
==In 1-P Mode== | |||
===In {{SSBM|Classic Mode}}=== | |||
In Classic Mode, Zelda can appear in ordinary one-on-one battles, on a team with either {{SSBM|Link}}, {{SSBM|Marth}}, {{SSBM|Young Link}}, {{SSBM|Peach}} or {{SSBM|Bowser}}, or in the game's metal battle. In her appearances, Zelda usually appears on [[Temple]], though she also appears on Great Bay when with Young Link, and on Battlefield when with Bowser and in the metal battle. Unusually, however, Zelda will never appear as an ally in team and giant fights. | |||
==In | ===In [[Adventure Mode]]=== | ||
Zelda's sole appearance in the [[Adventure Mode]] is in the second portion of Stage 3, the Underground Maze. The player has to fight against her on the Temple stage to progress in the mode. | |||
Zelda | ===In [[All-Star Mode]]=== | ||
In All-Star Mode, Zelda and her allies are fought on the [[Temple]] stage. | |||
*'''[[Event 9: Hide 'n' Sheik]]''': The player | ===In [[Event Matches]]=== | ||
*'''[[Event 15: Girl Power]]''': the player is tiny and | Zelda is featured in the following event matches: | ||
*'''[[Event 20: All-Star Match 2]]''': Zelda is the third opponent | *'''[[Event 9: Hide 'n' Sheik]]''': The player is pitted against two Zeldas on Great Bay; to win, however, players have to wait for Zelda to transform into Sheik and then KO them. Upon getting KO'd as Sheik, the CPU will be removed from the game; KOs against Zelda, however, merely cause her to respawn as normal. | ||
*'''[[Event 29: Triforce Gathering]]''': The player | *'''[[Event 15: Girl Power]]''': The player, with two stocks, has to fight against {{SSBM|Samus}}, Peach and Zelda, all of whom also have two stocks; the player, however, is tiny, and must KO all three, who are on the same team. Friendly fire is turned on in the match, easing it slightly for the player. | ||
*'''[[Event 44: Mewtwo Strikes!]]''': | *'''[[Event 20: All-Star Match 2]]''': Zelda is the third opponent the player must fight in this series of staged battles. Their character battles her on the [[Temple]] stage, and the player's character has 2 stock while Zelda has 1. With a timer of four minutes, the player must defeat her and the other four characters with the overall time and life they have: {{SSBM|Samus}}, {{SSBM|Link}}, {{SSBM|Captain Falcon}}, and {{SSBM|Fox}}. | ||
*'''[[Event 29: Triforce Gathering]]''': The player plays as Link with Zelda as their partner, both of whom have one stock. They face {{SSBM|Ganondorf}} on the [[Temple]] stage, who has two stocks. Clearing the event allows the player to unlock Ganondorf. | |||
*'''[[Event 44: Mewtwo Strikes!]]''': In this event, the player is initially placed on Battlefield, against Zelda. After fifteen seconds, however, {{SSBM|Mewtwo}} appears on stage and will fight the player. The player's goal is to KO Mewtwo; while Zelda can be attacked, KOing her will result in failure. | |||
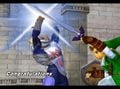
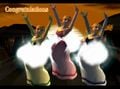
== | ===Ending images=== | ||
Zelda and Sheik share ending images for the one-player modes, as well as the same cinematic; clearing the mode with one also gives the player both of their trophies. | |||
<gallery> | |||
ZeldaSheikClassicMode.jpg|Classic Mode. | |||
ZeldaSheikAdventureMode.jpg|Adventure Mode. | |||
ZeldaSheikAllStarMode.jpg|All-Star mode. | |||
</gallery> | |||
==[[Trophies]]== | |||
In addition to the normal trophy about Zelda as a character, there are two trophies about her as a fighter, unlocked by completing the [[Adventure]] and [[All-Star]] modes respectively with Zelda or Sheik on any difficulty: | |||
{{Trophy/Fighter | |||
|name=Zelda | |||
|image=Princess Zelda Trophy Melee.png | |||
|mode=Classic | |||
|desc=The crown princess of Hyrule. Zelda entrusted Link with the future of Hyrule after a revelation came to her in the world of dreams. She knows much about the Triforce; in fact, the only person who likely knows more about Triforce lore is Ganondorf himself, whom Zelda evaded in Ocarina of Time by transforming into her alter ego, Sheik. | |||
|gamelist={{Trophy games|game1=The Legend of Zelda|release1=7/87}} | |||
|game=Melee | |||
}} | |||
{{clrl}} | |||
{{Trophy/Fighter | |||
|name=Zelda | |||
|image=Princess Zelda Trophy (Smash).png | |||
|mode=Adventure | |||
|desc=Zelda is a bit slow and, because of her light frame, easy to send flying. On the other hand, her magical skills lend her reliable and explosive attack power. Zelda's easier to use if you focus on waiting and countering rather than pressing attacks. She can use Nayru's Love to reflect projectile attacks or as an offensive weapon. | |||
|gamelist=:B: Nayru's Love | |||
:Smash B: Din's Fire | |||
|game=Melee | |||
}} | |||
{{clrl}} | |||
{{Trophy/Fighter | |||
|name=Zelda | |||
|image=Princess Zelda Trophy 2 (Smash).png | |||
|mode=All Star | |||
|desc=Zelda's midair Lightning Kick centers immense magical power in the ball of her foot. If she strikes perfectly, the attack is as strong as can be. If her aim is slightly off, it'll be exceedingly weak. Farore's Wind again utilizes Zelda's magical prowess, this time by transporting her great distances. It's vital to know the lay of the land before using this move. | |||
|gamelist=:Up & B: Farore's Wind | |||
:Down & B: Transform | |||
|game=Melee | |||
}} | |||
{{clrl}} | |||
==[[Alternate costume (SSBM)#Zelda|Alternate costumes]]== | |||
{|style="margin:1em auto 1em auto;text-align:center" | |||
|- | |||
|colspan=5|[[File:Zelda Palette (SSBM).png]] | |||
|- | |||
|{{Head|Zelda|g=SSBM|s=25px}} | |||
|{{Head|Zelda|g=SSBM|s=25px|cl=Red}} | |||
|{{Head|Zelda|g=SSBM|s=25px|cl=Blue}} | |||
|{{Head|Zelda|g=SSBM|s=25px|cl=Green}} | |||
|{{Head|Zelda|g=SSBM|s=25px|cl=White}} | |||
|} | |||
==Gallery== | |||
<center> | |||
<gallery> | <gallery> | ||
Zelda | Zelda SSBM Artwork.png|Official artwork of Zelda. | ||
SSBMWebsiteZelda1.jpg|Using her [[neutral aerial]] on [[Fountain of Dreams]]. | |||
SSBMWebsiteZelda2.jpg|Using [[Din's Fire]] on {{SSBM|Bowser}} on [[Yoshi's Story]]. | |||
FaroresWindMelee.png|Using [[Farore's Wind]]. | |||
SSBMWebsiteZelda4.jpg|Using her [[up smash]] on [[Pokémon Stadium]]. | |||
NLoveMelee.jpg|Using [[Nayru's Love]] on {{SSBM|Samus}} and {{SSBM|Captain Falcon}} on [[Jungle Japes]]. | |||
ZTransMelee.jpg|Using [[Transform]] on [[Temple]]. | |||
</gallery> | </gallery> | ||
</center> | |||
==Trivia== | ==Trivia== | ||
*Zelda is the only character with the ability to transform into another character in ''Melee'', and the first to do so in the ''Smash Bros.'' series, | *Zelda is the only starter character in ''Melee'' who was not revealed at [[E3]] 2001. Instead, she was revealed when her page was added to [[Smabura-Ken]] on November 6. | ||
**In [[Media:Betameleescreen.jpg|a screenshot]] of the character select screen in ''Melee'', from Smabura-Ken, Zelda's portrait is missing from the character select screen. This seems to have been done to hide the surprise of Zelda being playable, as Sheik was revealed first. | |||
*Zelda and Sheik are the [[fighter ability|only characters with the ability]] to transform into another character (each other) in ''Melee'', and the first to do so in the ''Smash Bros.'' series. | |||
*Zelda is the only character in ''Melee'', along with {{SSBM|Peach}}, to have 3 [[idle poses]]. The majority of the cast only have either one or two. | |||
**Additionally, her official artwork and character select portrait is based on one of her idle poses. | |||
*Zelda has the largest amount of moves with transcendent priority in ''Melee'', with 13. | |||
*Despite her design being based on her ''Ocarina of Time'' incarnation, her brodice is pink instead of purple, and if one looks closely, Zelda wears high-heels instead of brown boots as seen in her ''Smash'' trophies (which are retained in her later designs/appearances). | |||
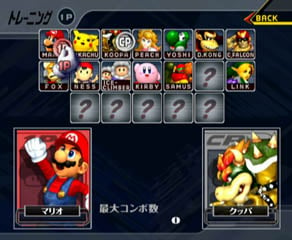
*Oddly, a CPU Zelda in Training mode set to the "Stand" CPU mode will still occasionally transform into Sheik. | |||
*Although not considered a clone, several of Zelda's non-attack animations are taken directly from Peach, such as her idle, crouching, walking, shielding, rolling, and jumping animations. | |||
==References== | |||
{{reflist}} | |||
==External links== | |||
*[https://www.nintendo.co.jp/n01/n64/software/nus_p_nalj/smash/flash/1106/index.html Zelda's page at Smabura-Ken] | |||
*[[smashwiki:26TP/Zelda|Translation]] | |||
{{SSBMCharacters}} | {{SSBMCharacters}} | ||
{{EnemiesAdvSSBM}} | {{EnemiesAdvSSBM}} | ||
{{Zelda universe}} | {{Zelda universe}} | ||
[[Category: | [[Category:Zelda (SSBM)| ]] | ||
[[Category: | [[Category:Trophies (SSBM)]] | ||
[[es:Zelda (SSBM)]] | |||
Revision as of 14:27, March 15, 2024
| Zelda in Super Smash Bros. Melee | |
|---|---|
 
| |
| Universe | The Legend of Zelda |
| Shares character slot with | Sheik |
| Other playable appearances | in Brawl in SSB4 in Ultimate |
| Availability | Starter |
| Tier | D (24) (North America) G (20) (Europe) |
Zelda (ゼルダ, Zelda) is one of the more unique characters in the lineup for Super Smash Bros. Melee. Zelda's most notable traits are her array of powerful magical attacks and her unique ability to transform herself into her alter ego, Sheik. This alternate form is very different from Zelda, and each was intended to help balance the other's weaknesses, so that ideally one would change between the two based on the flow of battle.
Jun Mizusawa reprises her role as Zelda from Ocarina of Time in the game.
Currently, Zelda is 24th on the tier list, the lowest-ranked character in D-tier. Zelda's positive attributes include several powerful attacks, with the most notable being her Lightning Kick. Zelda's primary weakness, however, is her poor mobility; she possesses (along with Jigglypuff) the slowest dash speed in the game, and falls slowly. These attributes, combined with her very high traction, result in her possessing the shortest wavedash in the game (alongside Peach). Additionally, despite Zelda's long range on her recovery move, Farore's Wind, which can also be angled, it is fairly predictable and easily edgeguarded and/or edgehogged due to its awkward endlag, and it also lacks a hitbox when she reappears, leaving her vulnerable to punishes when he tries to land. All of these factors contribute to Zelda having terrible matchups against most of the cast.
Attributes
Zelda does not fall under any specific archetype of characters, due to her unusual properties as a fighter; she has a slew of powerful finishers, such as her Lightning Kick, but possesses average weight. Additionally, Zelda has a slow falling speed and high traction, leading to a very short, albeit fast, wavedash.
One of Zelda's strengths is her great overall KO power. Within the air, her forward and back aerials of the Lightning Kick can KO at as low as 50%, and her up air has a large hitbox that can also KO opponents. On the ground, Zelda's up tilt is surprisingly powerful, with its long duration and large radius allowing it to be a versatile move under most circumstances. Zelda's up and forward smash attacks are also powerful and they have high damage output thanks to their multiple hits.
In addition, Zelda has some fast attacks, such as her down smash (which is the fastest in the game) and her forward and back aerials, which requires opponents to tread more carefully when used. Nayru's Love has invincibility at frame 4, which makes it a good move to counterattack fast approaches. Up smash possesses quick startup and can be used as a great out of shield option, as it can lead to a grab if the opponent SDIs out of it. Forward smash has very low ending lag, a good disjointed hitbox, and a quick animation. The very last hitbox is significantly larger than the previous, being able to sometimes reach someone who SDI's in the front of the move. It can be also be thrown out in neutral to read fast approaches without putting herself in a bad spot. As an added bonus, many of Zelda's attacks have transcendent priority; combined with average reach for most of her attacks, Zelda has potential to stop others' attacks with her own.
Despite most of her moves dealing high knockback, she has an acceptable combo game. Her dash attack is her primary combo starter on the ground, all of her tilts are great comboing moves, her forward tilt can send her opponents backwards, allowing for potential combo starters, her up tilt can juggle at low percentages and follow up with an up aerial when it stops comboing and her down tilt can combo into itself until around 95% and can also combo into her down smash. Up smash can also be used a few times in a row at low percentages if the opponent gets caught right above her. In addition to this, Zelda possesses a good grab game. Her up throw can be a kill confirm around 80% as it leads to a guaranteed bair/fair on certain matchups. It also has the potential to chain throw at low percentages, and her down throw has several potential follow-ups, such as a dash attack, Lightning Kick, or even a forward tilt and can set up stage spikes and early edge-guards. Her forward and back throws are quite powerful and can set up edge-guards or even K.O. at high percentages. Neutral air can also be used to guarantee these aerials (on certain matchups) if landed without the last hitbox, which will make the opponent pop up with a set knockback.
However, Zelda is strongly held back by having one of the worst approach games in the game. On the ground, Zelda possesses the slowest dashing speed, a short wavedash, and a slow dash dance; combined with decidedly average range in her attacks, Zelda cannot effectively attack on the ground. Zelda doesn't fare much better in the air; despite her above average air speed, Zelda suffers from a low falling speed and a high short hop, leading to a very poor SHFFL. Zelda's lack of an effective projectile also prevents her from attacking from afar; Din's Fire is far too laggy, weak, and predictable to be an effective projectile, being too situational under most circumstances, even with the help of platforms and wavelanding.
Despite her array of powerful moves and decent platform movement, she suffers numerous other flaws. In addition to a poor approach on the ground, most of Zelda's moveset consists of unreliable finishers. Her forward and up smash suffer from SDI problems, as opponents can easily SDI out of it before the last hit. Zelda's up aerial, while powerful, is impossible to land on a grounded opponent, as it has some start-up lag and the hitbox is above her. Her Lightning Kicks need to be sweetspotted to KO effectively. Her forward and back throws can only KO at very high percentages when used near the edge, limiting their utility. As such, Zelda's up tilt and down smash are possibly her only reliable KO moves and even those have their flaws; the former is rather slow for a tilt attack and the latter is rather weak for a smash attack. Lastly, some of her toolkit suffers from a lack of applicable uses, which includes her down aerial, her aforementioned Din's Fire and jab.
Zelda also suffers from having generally situational specials (save Transform). Nayru's Love can only harm attackers in short ranges, and it has high ending lag and it doesn't protect her from attacks above her. Din's Fire, as mentioned earlier, doesn't aid her approach at all and suffers from too much ending lag. Farore's Wind, generally considered her best special move, requires precise timing and angles to reach the ledge, else Zelda might land onstage and could potentially get punished, or worse, self-destruct. Farore's Wind's hitbox is also not generally viable for offensive use barring ledge stalls, and even then it lacks follow-ups on many characters.
Overall, Zelda emphasizes a defensive gameplan by trying to find openings for grabs, dash attacks, or lightning kicks. Players must be precise on landing her finishing moves, as their fast startup and strong power can be offset by a difficulty and landing them. She must also try and use wavedashing as well as platforms as much as possible, as her low mobility can prove to be a burden when trying to fight in neutral or against disadvantageous situations. To find success, she has to bait out options and wait for an opponent to make a mistake, else she be overwhelmed by other foes.
Moveset
For a gallery of Zelda's hitboxes, see here.

| Name | Damage | Description | ||
|---|---|---|---|---|
| Neutral attack | Short Flash (ショートフラッシュ) | 2% (hits 1-3) | Zaps magic quickly from her palm, in a similar fashion to Ganondorf's neutral attack. Has transcendent priority. Slowest neutral attack in Melee, hitting on frame 11. | |
| Forward tilt | Mystic Swipe (ミスティックスワイプ) | 13% (hand), 12% (arm), 11% (shoulder) | Swipes her hand forward with sparks. Has transcendent priority. Can be angled up or down. Second strongest forward tilt in Melee, only beaten by Bowser's sweetspotted forward tilt. The hitbox on Zelda's hand sends the opponent behind her. | |
| Up tilt | Protective Sweep (プロテクティブスイープ) | 11% | Waves her hand, filled with sparks, in an arc above her head. Surprisingly powerful and the hitbox lasts for a long time, so it is an excellent anti-air. Has transcendent priority. | |
| Down tilt | Trip (トリップ) | 8% (leg), 7% (foot) | Thrusts her foot out quickly from under her dress. Can meteor smash opponents who hit her leg and grounded opponents who hit the tip of her foot. Airborne opponents who hit her foot will be launched upwards. | |
| Dash attack | Magical Push (マジカルプッシュ) | 13% (clean body), 9% (clean hands), 8% (late body), 7% (late hands) | Shoves her hands in front, with magic sparks coming out them. Has transcendent priority. | |
| Forward smash | Shining Palm (シャイニングパーム) | 1% (hits 1-4), 14% (hit 5) | Sends out a fierce jab of magic in front of her in a similar fashion to Mario's. Hits multiple times, with the final hit having launching opponents away. This attack is powerful, but can be SDI'd out of, which is somewhat difficult to land all 5 hits. Has transcendent priority. | |
| Up smash | Power Sweep (パワースイープ) | 1% (hits 1-11), 5% (hits 12) | Waves her hand in an arch similar to her up tilt three times. A powerful move if all hits manage to connect. It comes out on frame 5, making it the fastest up smash in the game. This subsequently means that it can good out-of-shield option, but it can be SDI'd out of, similarly to her forward smash, in addition to possessing incredibly short horizontal range. | |
| Down smash | Compass Spin (コンパススピン) | 11% | Quickly kicks both sides of herself. Short range with a slightly disjointed hitbox and poor power, but is the fastest down-smash in the game, coming out at frame 4 and only having 31 total frames. Has transcendent priority. Zelda's leg is intangible when she delivers both kicks. | |
| Neutral aerial | Magic Spin (マジックスピン) | 2-3% (hits 1-5), 5% (hit 6) | Spins in place while emitting magic sparks from her hands. Many hitboxes, good for spacing. Has transcendent priority. It may be DI'd out of. | |
| Forward aerial | Lightning Kick (稲妻キック) | 20% (sweet), 10% (sour) | Kicks forward. If the opponent is hit with the glowing spark at the tip of Zelda's foot, it zaps them very powerfully, in a way similar to Captain Falcon's Knee Smash. Has transcendent priority. | |
| Back aerial | Reverse Lightning Kick (逆稲妻キック) | 20% (sweet), 10% (sour) | Virtually identical to her forward aerial but in a different direction and with slightly less startup lag. Has transcendent priority. A bit faster than her forward Lightning Kick, so it can be used twice in a short hop. | |
| Up aerial | Condensed Blast (コンデンスブラスト) | 13% | Releases a giant fireball that causes an explosion above Zelda. Can be used to shark opponents on the stage when Zelda is recovering. Has very high power, being the fifth strongest up aerial in Melee. Has transcendent priority. | |
| Down aerial | Meteor Heel (マイルドメテオヒール, Mild Meteor Heel) | 7% (foot), 8% (leg) | Thrusts her foot downwards. A very weak meteor smash. | |
| Grab | Magical Hold (マジカルホールド) | — | ||
| Pummel | Hex (ヘックス) | 3% | Zaps her foe. | |
| Forward throw | Levitation (浮上) | 12% | Launches her foe forward, above average power. | |
| Back throw | Reverse Levitation (逆浮上) | 11% | Similar to her forward throw, only directly behind her. | |
| Up throw | Levitation Launch (浮上打ち上げ) | 11% | Thrusts foe to the sky. Has the ability to chain throw fast-falling opponents at low percents. | |
| Down throw | Plasma Beat (プラズマビート) | 2% (hits 1-4), 2% (throw) | Drops foe and zaps them, sending the foe behind her with weak knockback. | |
| Forward roll Back roll Spot dodge Air dodge |
— | — | ||
| Techs | — | — | ||
| Floor attack (front) Floor getups (front) |
6% (front hit), 8%/6% (back hit legs/body) | Swirls her dress around with foot extended and gets up. | ||
| Floor attack (back) Floor getups (back) |
6% | Swirls her dress around with foot extended and gets up. | ||
| Edge attack (fast) Edge getups (fast) |
6% | Climbs up and swings her legs in a circular motion, while pulling herself up. | ||
| Edge attack (slow) Edge getups (slow) |
10% (arm), 8% (body) | Slowly gets up and slaps forward. | ||
| Neutral special | Nayru's Love | 1-2% (hits 1-5), 4-5% (hit 6) | Twirls around with magical hitboxes on both sides. A decent "get off me" move. The attack also reflect projectiles. | |
| Side special | Din's Fire | 7-13% | Launches a controllable fireball that charges as it travels until it explodes. The fireball can be directed up or down with the control stick. Knockback angle depends on which side of the enemy is hit, so it can be used to knock opponents toward or away from Zelda. This move puts Zelda in a helpless state when used in the air. | |
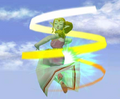
| Up special | Farore's Wind | 4% | A yellow ribbon of magic spins around Zelda, causing her to disappear. After that, she will reappear in the direction held on the control stick (or directly above her original location if the control stick is not moved). It does not have a hitbox upon reappearing and Zelda is locked out of moving for some time if she reappears in the air, leading to the move being somewhat punishable. | |
| Down special | Transform | 0% | Transforms into Sheik. | |
Stats
NTSC
| Stats | Weight | Dash speed | Walk speed | Traction | Air friction | Air speed | Air acceleration | Gravity | Falling speed | Jumpsquat | Jump Height | Double jump Height |
|---|---|---|---|---|---|---|---|---|---|---|---|---|
| Value | 90 | 1.1 – Initial dash 1.1 – Run |
0.7 | 0.1 | 0.005 | 0.95 | 0.01 – Base 0.038 – Additional |
0.066 | 1.4 – Base 1.85 – Fast-fall |
6 | 31.262 - Base 18.337 - Short hop |
21.444 |
PAL
| Stats | Weight | Dash speed | Walk speed | Traction | Air friction | Air speed | Air acceleration | Gravity | Falling speed | Jumpsquat | Jump Height | Double jump Height |
|---|---|---|---|---|---|---|---|---|---|---|---|---|
| Value | 90 | 1.1 – Initial dash 1.1 – Run |
0.7 | 0.1 | 0.005 | 0.95 | 0.01 – Base 0.038 – Additional |
0.066 | 1.4 – Base 1.85 – Fast-fall |
6 | 31.262 - Base 18.337 - Short hop |
21.444 |
Announcer call
Taunt
- Holds her hands together, as if in a prayer.

|
Idle poses
- Flips her hair back.
- Makes a thinking gesture.
- Turns her body away, while putting her right arm on her left. This pose is similar to the one she makes in her artwork, and near the end of Ocarina of Time.
 |
 |

|
|---|
Crowd cheer
| English | Japanese | |
|---|---|---|
| Cheer | ||
| Description | Zel-da Zel-da Hu! | Zel-da! Zel-da! |
| Pitch | Group chant | Male |
Victory poses
- Praying, she then turns her head upward.
- Looks to her left, holding her left arm proudly.
- Focuses, then conjures a flame between her hands.
 |
 |

|
|---|
In competitive play
Most historically significant players
- See also: Category:Zelda players (SSBM)
 Kalne - Co-mains Zelda and Sheik. Has multiple top 8 at Japanese locals such as MasterHand and was ranked 37th on the Japan SSBM Rank 2019, becoming one of the few times a Zelda player has ranked on a country ranking.
 Narcissa - A Zelda player who was considered one of the best in North America and peaked at 2nd on the Chicago Power Rankings. Won SGDQ 2013, placed 65th at EVO 2015, and placed high at many Show Me Your Moves locals. She later switched to Roy before becoming inactive from competition.
- Rienne - Created The Profane Tome, which is considered a "bible" for Zelda players. Is generally considered to be the best Zelda in the world at the moment, having wins over top players such as Aura, Nicki, and Mekk.
- The Lake - The best Zelda player of all-time. He became a respected player in Pittsburgh, ranking as high as 4th on the Pittsburgh Power Rankings and has one of the most famous Zelda clips with his 4-stock over Nintendude in a tournament match.[1] Outside of this, he holds the best Zelda results at notable regionals and majors, placing 25th at The Big House and 33rd at Revival of Melee 3. He passed away in October of 2022.
Tier placement and history
Zelda was ranked extremely high on the first tier list, tying for 6th place with Samus and Luigi; however, discussion in the MBR average tiers topic suggests this is an artifact of some tier list contributors grouping her with her top-tier counterpart Sheik, and her placement was not fully based on her prowess as an independent character. The second tier list rectified this and had Zelda tie with Link and Ness for 14th to 16th place. Following this, Zelda fell again to 20th on the third tier list, and has since frequently appeared on the 19th and 20th spots on the tier list. Zelda's position is attributed to a combination of undesirable traits, being floaty, a middleweight yet tall (making her easy to juggle and KO from the upper blast line), having sluggish mobility, a poor wavedash, and poor hitbox placements on most of her moves. However, the most important factor of Zelda’s lack of viability is Sheik’s existence as a top tier, which has deterred many smashers from using her in serious play.
Zelda is currently ranked 24th on the thirteenth tier list, in what is her lowest standing on the list thus far. Prior to the ranking, she was ranked 22nd, with some smashers disputing whether this was an accurate assessment; Mew2King notably believed that Zelda was one of the two worst characters in the game, citing her poor frame data and awful approach in his assessment.
Zelda has made little impact in tournaments from the start of the metagame, with relatively few dedicated mains. Her only modern players are semi-active at best, and usually do not place high enough to earn money in large tournaments without also using a better character. Additionally, many of the historically best Zeldas, most notably Narcissa stopped playing the game entirely, and The Lake has since passed away. Usually, the only time when Zelda shows up in top level play is when Sheik players transform into her off-stage to take advantage of her longer recovery where they would otherwise not be able to recover; if the opponent is aggressive enough, they may be forced to fight as her until an opportunity to transform back is available.
In 1-P Mode
In Classic Mode
In Classic Mode, Zelda can appear in ordinary one-on-one battles, on a team with either Link, Marth, Young Link, Peach or Bowser, or in the game's metal battle. In her appearances, Zelda usually appears on Temple, though she also appears on Great Bay when with Young Link, and on Battlefield when with Bowser and in the metal battle. Unusually, however, Zelda will never appear as an ally in team and giant fights.
In Adventure Mode
Zelda's sole appearance in the Adventure Mode is in the second portion of Stage 3, the Underground Maze. The player has to fight against her on the Temple stage to progress in the mode.
In All-Star Mode
In All-Star Mode, Zelda and her allies are fought on the Temple stage.
In Event Matches
Zelda is featured in the following event matches:
- Event 9: Hide 'n' Sheik: The player is pitted against two Zeldas on Great Bay; to win, however, players have to wait for Zelda to transform into Sheik and then KO them. Upon getting KO'd as Sheik, the CPU will be removed from the game; KOs against Zelda, however, merely cause her to respawn as normal.
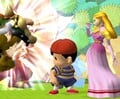
- Event 15: Girl Power: The player, with two stocks, has to fight against Samus, Peach and Zelda, all of whom also have two stocks; the player, however, is tiny, and must KO all three, who are on the same team. Friendly fire is turned on in the match, easing it slightly for the player.
- Event 20: All-Star Match 2: Zelda is the third opponent the player must fight in this series of staged battles. Their character battles her on the Temple stage, and the player's character has 2 stock while Zelda has 1. With a timer of four minutes, the player must defeat her and the other four characters with the overall time and life they have: Samus, Link, Captain Falcon, and Fox.
- Event 29: Triforce Gathering: The player plays as Link with Zelda as their partner, both of whom have one stock. They face Ganondorf on the Temple stage, who has two stocks. Clearing the event allows the player to unlock Ganondorf.
- Event 44: Mewtwo Strikes!: In this event, the player is initially placed on Battlefield, against Zelda. After fifteen seconds, however, Mewtwo appears on stage and will fight the player. The player's goal is to KO Mewtwo; while Zelda can be attacked, KOing her will result in failure.
Ending images
Zelda and Sheik share ending images for the one-player modes, as well as the same cinematic; clearing the mode with one also gives the player both of their trophies.

Classic Mode.
Adventure Mode.
All-Star mode.


Trophies
In addition to the normal trophy about Zelda as a character, there are two trophies about her as a fighter, unlocked by completing the Adventure and All-Star modes respectively with Zelda or Sheik on any difficulty:

- Zelda
- The crown princess of Hyrule. Zelda entrusted Link with the future of Hyrule after a revelation came to her in the world of dreams. She knows much about the Triforce; in fact, the only person who likely knows more about Triforce lore is Ganondorf himself, whom Zelda evaded in Ocarina of Time by transforming into her alter ego, Sheik.
- The Legend of Zelda (7/87)
.png)
- Zelda [Smash]
- Zelda is a bit slow and, because of her light frame, easy to send flying. On the other hand, her magical skills lend her reliable and explosive attack power. Zelda's easier to use if you focus on waiting and countering rather than pressing attacks. She can use Nayru's Love to reflect projectile attacks or as an offensive weapon.
- B: Nayru's Love
- Smash B: Din's Fire
.png)
- Zelda [Smash]
- Zelda's midair Lightning Kick centers immense magical power in the ball of her foot. If she strikes perfectly, the attack is as strong as can be. If her aim is slightly off, it'll be exceedingly weak. Farore's Wind again utilizes Zelda's magical prowess, this time by transporting her great distances. It's vital to know the lay of the land before using this move.
- Up & B: Farore's Wind
- Down & B: Transform
Alternate costumes
.png)
| ||||
Gallery
Official artwork of Zelda.
Using her neutral aerial on Fountain of Dreams.
Using Din's Fire on Bowser on Yoshi's Story.
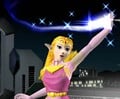
Using Farore's Wind.
Using her up smash on Pokémon Stadium.
Using Nayru's Love on Samus and Captain Falcon on Jungle Japes.


Trivia
- Zelda is the only starter character in Melee who was not revealed at E3 2001. Instead, she was revealed when her page was added to Smabura-Ken on November 6.
- In a screenshot of the character select screen in Melee, from Smabura-Ken, Zelda's portrait is missing from the character select screen. This seems to have been done to hide the surprise of Zelda being playable, as Sheik was revealed first.
- Zelda and Sheik are the only characters with the ability to transform into another character (each other) in Melee, and the first to do so in the Smash Bros. series.
- Zelda is the only character in Melee, along with Peach, to have 3 idle poses. The majority of the cast only have either one or two.
- Additionally, her official artwork and character select portrait is based on one of her idle poses.
- Zelda has the largest amount of moves with transcendent priority in Melee, with 13.
- Despite her design being based on her Ocarina of Time incarnation, her brodice is pink instead of purple, and if one looks closely, Zelda wears high-heels instead of brown boots as seen in her Smash trophies (which are retained in her later designs/appearances).
- Oddly, a CPU Zelda in Training mode set to the "Stand" CPU mode will still occasionally transform into Sheik.
- Although not considered a clone, several of Zelda's non-attack animations are taken directly from Peach, such as her idle, crouching, walking, shielding, rolling, and jumping animations.
References
External links
| Fighters in Super Smash Bros. Melee | |
|---|---|
| Veterans | Captain Falcon · Donkey Kong · Fox · Jigglypuff · Kirby · Link · Luigi · Mario · Ness · Pikachu · Samus · Yoshi |
| Newcomers | Bowser · Dr. Mario · Falco · Ganondorf · Ice Climbers · Marth · Mewtwo · Mr. Game & Watch · Peach · Pichu · Roy · Young Link · Zelda (Sheik) |