Roy (SSB4): Difference between revisions
Dovahchief (talk | contribs) No edit summary |
No edit summary Tag: Mobile edit |
||
| Line 1: | Line 1: | ||
{{ArticleIcons|ssb4=y}} | {{ArticleIcons|ssb4=y}} | ||
{{ | {{Disambig2|Roy's appearance in ''[[Super Smash Bros. 4]]''|the character in other contexts|Roy}} | ||
:''For information on the playable [[Koopaling]], | :''For information on the playable [[Koopaling]], see [[Bowser Jr. (SSB4)]]. | ||
{{Infobox Character | {{Infobox Character | ||
|name = Roy | |name = Roy | ||
| Line 7: | Line 7: | ||
|game = SSB4 | |game = SSB4 | ||
|ssbgame1 = SSBM | |ssbgame1 = SSBM | ||
|availability = [[ | |ssbgame2 = SSBU | ||
|availability = [[Downloadable content (SSB4)|Downloadable]] | |||
|tier = E | |||
|ranking = 41 | |||
}} | }} | ||
:{{ | :{{Cquote|''Roy Seals the Deal!''|cite=Introduction tagline}} | ||
'''Roy''' ({{ja|ロイ|Roi}}, ''Roy'') is a playable character in ''[[Super Smash Bros. 4]]'' | '''Roy''' ({{ja|ロイ|Roi}}, ''Roy'') is a playable character in ''[[Super Smash Bros. 4]]''. Initially [[Leak#Roy and Ryu data|leaked]] via data mining of update [[1.0.6]],<ref>[http://www.ign.com/articles/2015/06/13/ryu-and-roy-for-smash-bros-leaked Ryu and Roy for Smash Bros. Wii U, 3DS Leaked]</ref> Roy was formally announced alongside {{SSB4|Ryu}} during a [[Nintendo Direct]] on June 14th, 2015, and was made available that same day as [[Downloadable content (SSB4)|downloadable content]] alongside {{SSB4|Lucas}} and Ryu.<ref>[https://www.youtube.com/watch?v=WWM-SCjIuNg Super Smash Bros. for Nintendo 3DS / Wii U - New Content Approaching 6.14.15]</ref> {{s|wikipedia|Jun Fukuyama}} reprises his role as Roy's voice actor from ''[[Super Smash Bros. Melee]]'', providing new voice clips that mimic the ones he recorded in the game.<ref>[https://www.sourcegaming.info/2015/06/25/ryu-roy-and-lucas-join-the-battle-sakurai-famitsu-column-vol-481/ Ryu, Roy, and Lucas join the battle!]</ref> | ||
Roy is | Roy is ranked 41st out of 54 on the [[tier list]], placing him in the E tier. This is a slight improvement to Roy's low-tier placement in ''Melee'', where he was ranked 21st out of 26. However, due to ''SSB4''{{'}}s tier structure, Roy is actually rendered as a mid-tier character. | ||
Roy boasts good overall mobility and attack speed, owing to very fast [[dash]]ing and [[air speed]]s, alongside fast-starting attacks that allow him to quickly react to openings. When coupled with the [[fireemblemwiki:Binding Blade (weapon)|Binding Blade]]'s highly damaging sweetspots, which are close to its hilt, he boasts impressive power and a number of strong KOing options at close range. | |||
He also benefits from gameplay changes brought about by ''SSB4'': the [[rage]] mechanic supplements his strong sweetspotted attacks, the changes to hitstun and shieldstun make his sweetspots significantly safer on hit, while the updated edge mechanics improve his recovery. Roy also has a varied combo game that is difficult to predict and grants him above average damage racking potential, with reliable combo starters from low to medium percents including forward and down throw, neutral attack, neutral and up aerial, and [[Double-Edge Dance]]. | |||
Roy, however, is strongly held back by a poor approach, owing to his slow [[air acceleration]] and unsafe aerials that cannot [[autocancel]] in a [[short hop]]. On a related note, Roy is ineffective at spacing: despite having disjointed range, the Binding Blade's inconvenient sourspots force him to space his sweetspotted attacks dangerously close to opponents. | |||
Roy's combo game is also flawed: his sweetspotted moves are ineffective at performing lengthy combos past medium percents, while his forward, back and down throws are heavily reliant on reads because of their very low hitstun. Finally, Roy suffers from a poor recovery: [[Blazer]] is predictable and covers very minimal vertical distance, while his very fast [[falling speed]] not only hinders his recovery, but also makes him susceptible to combos. | |||
Due to the above factors, Roy has attained below-average tournament representation. Despite this, he has achieved some degree of competitive success, thanks to the likes of players such as {{Sm|Hyper Kirby}}, {{Sm|Flow}}, and {{Sm|Cloudy}}. | |||
==Attributes== | ==Attributes== | ||
Roy's | [[File:RoyMarthComparison.jpeg|400px|thumb|Roy and {{SSB4|Marth}} performing their forward smash attacks. Note that the sweetspot is highlighted by the trail left by their swords: Roy's [[fireemblemwiki:Binding Blade (weapon)|Binding Blade]] is strongest near its hilt, whereas Marth's {{s|fireemblemwiki|Falchion}} is strongest at its blade's tip.]] | ||
Unlike in ''Melee'', Roy is a [[semi-clone]] of {{SSB4|Marth}}, although he retains the attributes that differentiate the two. Compared to Marth, Roy sports the eleventh fastest [[dash]]ing speed, the fourth fastest [[air speed]], and the fifth fastest [[falling speed]] (7, 23, and 30 spots higher, respectively), alongside being 5 units [[Weight|heavier]] than Marth. Conversely, Roy [[walk]]s significantly slower, being only above-average compared to Marth, while his [[air acceleration]] is among the bottom five. Finally, Roy's long [[dash-dance|extended dash-dance]] allows him to read and punish opponents accordingly. However, his laggy initial dash (17 frames) and turnaround animations give him a poor shield buffer out of his dash and turn. Overall, this places Roy's archetype as a speedy fast-faller with polarized, linear movement. Roy's mobility is considerably faster than Marth's in regard to movement speed and air-to-ground transitioning, but his aerial fluidity is significantly limited, preventing him from easily using retreating aerials like Marth, and makes his aerial approaches committal. | |||
Apart from differences in attributes, many of Roy's attacks differ from Marth's by having separate animations, which in turn give his attacks completely altered hitbox sizes, frame values and mechanical differences. This grants him a individualized playstyle compared to Marth, made most notable by his inverse [[tipper]]: the [[fireemblemwiki:Binding Blade (weapon)|Binding Blade]] deals more damage and knockback near its hilt, and much less at its blade's tip, which has very little KO potential compared to Marth's untippered [[fireemblemwiki:Falchion|Falchion]]. However, its inverse tipper is much larger than Falchion's tipper, and most of its attacks are less polarizing due to their possession of a "mediumspot" that is between both its sweetspot and sourspot. Roy's sword, along with his attributes, encourage a highly rewarding close-and-personal game with heavy emphasis on landing hits with his sword's larger sweetspot, and has little focus on distant spacing due to its ineffective sourspots. | |||
Much like his overall mobility, almost all of Roy's attacks have quick start-up, and his aforementioned speed allows him to easily close the gap between himself and his opponent to make effective use of his inverse tipper. Coupled with his sweetspot's high damage, Roy has an above-average damage racking game once he finds an opening. His most versatile combo initiators are his neutral aerial (which has quick start-up, low landing lag, and a long-lasting hitbox) and his neutral attack (which starts at frame 5 and launches at a favorable angle), both of which can start combos into his throws and tilts. His up aerial starts on frame 5 and has a deceptively long-lasting hitbox that lasts until the sword trail ends, allowing a reverse sweetspotted up aerial to start medium percent combos into neutral aerial, back aerial, or [[Blazer]], or a sourspot into [[Double-Edge Dance]] depending on the enemy's reaction. Finally, forward aerial has very early [[interruptibility]], allowing it to be used as a retreating aerial while jumping backwards, can chain into itself up to two times if Roy moves at full speed and uses his second jump, and can be used for frame-trapping against air dodges if followed up with an up aerial. His down tilt is also a good spacing option, and is useful for [[shield stab]]bing and [[edgeguard]]ing due to its semi-spike trajectory. | |||
Tying in with his damage racking game are his throws, which launch at favorable angles for low-percent combos. Down and forward throws can chain into his neutral attack, dash attack, forward tilt, neutral aerial, Blazer and [[Double-Edge Dance]]. As Roy's combo-initiating moves can often lead straight into a grab, it is common for Roy to deal high amounts of damage through precise [[read]]s at low percents, either from an attack into a grab, or through chaining a throw into an attack, then re-grabbing. While the low [[hitstun]] of his throws prevent true follow-ups at higher percents, they also force opponents into [[tech-chase]] and air dodge scenarios, allowing Roy to condition opponents into reacting. Up throw is also able to KO outright at very high percents. | |||
The power of Roy's sweetspotted moves also grant him an array of KOing options that are capable of KOing impressively early. While on-stage, his best KOing options are his forward and up tilts, forward and up smashes, and [[Blazer]], due to their quick start-up and high power. His smash attacks, in particular, are immensely powerful; forward smash is one of the strongest of its kind and can be used for hard punishes at as low as 40%, up smash is capable of KOing as low as 100%, and the sweetspotted first hit of down smash can KO at around 120%. Although Roy's offense thrives while he is on-stage, his fast air speed and disjointed range grant him an effective off-stage presence. His forward, back and down aerials each have distinct perks apart from their power: the former two are quick and have wide arcs, while the latter is a powerful [[meteor smash]] when sweetspotted. Although he is a middleweight, Roy is also one of the better users of [[rage]], as his very quick falling speed grants him impressive on-stage endurance and allows him to further enhance the knockback of his already powerful moves. | |||
Finally, each of Roy's special moves possess respectable utility. [[Flare Blade]] is a deadly edgeguarding option, especially while on-stage, thanks to its fearsome power even when uncharged, large hitbox, and deceptively low ending lag. The latter allows it to be used as a mindgame to punish edge getups, while its speed can amplify Roy's sub-par aerial mobility by granting him an aerial [[B-reverse]]. Double-Edge Dance is effective for damage racking, catching dodges, and pressuring shields; its final upward and forward hits can also KO outright. Blazer is an excellent [[out of shield]] option, grants both brief super [[armor]] on start-up and high power when grounded, can [[stage spike]] careless opponents who attempt to edgeguard Roy, and can be a [[true combo]] from his down throw at 0%, or a neutral attack at specific percents as a KO combo. Lastly, his [[Counter]] is one of the strongest [[counterattack]]s in the game, as its 1.35× damage multiplier makes it devastating when used against a powerful attack. | |||
However, Roy is hindered by a slew of flaws. Although he is granted a powerful offense, making use of it is difficult in the first place despite his remarkable mobility, mainly due to several reasons. His very fast air speed is offset by his very slow air acceleration, making his aerial approach highly committal in general, much like {{SSB4|Ryu}}'s. In addition, while his inverse tipper is one of his greatest strengths, it also forces him to fight at close range to be utilized at its fullest: only his sweetspots cause enough [[shield stun]] to prevent [[punishment]], and when coupled with his attacks having overall high ending lag (or in the case of his aerials, the inability to [[autocancel]] with a short hop), this results in him having to space attacks dangerously close against shields and negating the benefits of his disjointed sword. Finally, his [[range]] is below average for a swordsman, and when coupled with the Sword of Seal's low-utility sourspots, Roy's approach and spacing game is poor despite his good mobility, since his only quick, low-risk options that can be used to close in and pressure the opponent are his neutral aerial and falling up aerial. | |||
Roy's combo game, while powerful at low percents, become inconsistent from medium percents and onward. Although possible, Roy's sourspots are very unreliable for creating combos unlike Marth's, as they require extreme precision and only work at specific percents. His sweetspots are similar, due to them sending opponents too far for actual combos and only being effective for outright KOing at high percents. His throws also lack any true followups due to their very low hitstun: his forward throw can be easily teched, while his down throw can be air dodged out of. Overall, this makes Roy potent at damage racking, but his lack of KO setups puts him at a significant disadvantage when trying to end stocks, as it leaves him only with hard punishes. | |||
Lastly, Roy's offstage endurance is notoriously poor. His very quick falling speed makes him extremely susceptible to [[combo]]s, and as none of his moves are generally reliable enough to consistently break combos, many characters with reliable combo moves can rack up large amounts of damage and easily force him off-stage. To add to this issue, Roy's only [[recovery]] move, Blazer, is notoriously ineffective despite his impressive mobility: although it offers excellent protection, can be angled, and covers a decent amount of horizontal distance, it covers little vertical distance and is predictable. When coupled by his very quick falling speed, he is highly susceptible to meteor smashes, and even a sufficiently strong [[semi-spike]] can launch him too far away to recover. Additionally, players unaccustomed to his falling speed will quickly find that any misused aerial off-stage will send him too far to recover. | |||
Although tournaments do not currently allow [[Character customization|custom moves]], it should be noted that Roy does not have any due to being a DLC character. As such, he must not only utilize his own special moves properly, but also adapt as best as possible against characters that possess their own custom moves. | |||
Roy's | Overall, Roy's strengths are on par with his weaknesses. While his character archetype is commonly viewed as being in the rushdown and/or glass cannon categories, he cannot effectively function in either role due to his poor recovery, unimpressive range for a swordsman, and vulnerability to combos. Instead, his optimal playstyle consists of limited aggression: capitalizing on enemy openings with his excellent mobility, and pressuring them with both his powerful sweetspots and effective combo game, but approaching cautiously and spacing his sweetspots safely enough to circumvent his flaws. As a result of these traits, Roy has sparse tournament representation and results at high-level play, although he has nevertheless achieved some competitive success, thanks to players such as {{Sm|Hyper Kirby}} and {{Sm|Cloudy}}. | ||
==Changes from ''[[Super Smash Bros. Melee]]''== | |||
Roy is frequently placed within a group of characters ({{SSB4|Bowser}}, {{SSB4|Dr. Mario}}, {{SSB4|Charizard}}, {{SSB4|King Dedede}} and {{SSB4|Pit}}) that are the most noticeably reworked [[veteran]]s in ''SSB4''. In Roy's case, several of his moves were de-cloned from {{SSB4|Marth}} in a similar vein to {{SSBB|Falco}} and {{SSBB|Ganondorf}} in ''[[Brawl]]'', to the point that he is now a semi-clone. Although Roy received a mix of buffs and nerfs in the transition from ''Melee'' to ''SSB4'', he has overall been buffed. | |||
Roy | Among Roy's buffs are his greatly improved mobility, now having a much faster dashing speed and one of the fastest air speeds in the game, as well as his moveset being notably more rewarding than in ''Melee'': most of his moves are different from Marth, such as his new neutral attack, forward and up tilts, dash attack and down aerial, most of which have reduced lag, improved hitbox placements, and increased power, improving his close-ranged offense and combo game, and giving him more reliable KO moves. His damage output is much higher, and his sweetspotted attacks are considerably more powerful, giving him a bevy of new KOing options, which generally alleviates his main weakness from ''Melee''. His attack speed is faster overall, with his aerials in particular having significantly reduced ending and landing lag, [[L-canceling]] notwithstanding. The addition of [[rage]] boosts his KO power even further, while his heavier weight allows him to use it quite effectively. He also has much better endurance thanks to a his much higher weight. Lastly, Roy's recovery is generally better, thanks to [[Blazer]]'s improved horizontal distance, his faster air speed, and the removal of [[edge hogging]]. | ||
However, Roy has also received several nerfs. Roy now stands at Marth's height, which enlarges his hurtbox, though his attacks have much shorter ranges and hitbox durations in spite of this, forcing him to fight at a much closer range, exacerbating one of his key weaknesses in ''Melee''. For the most part, Roy is also harmed by the post-''Melee'' gameplay changes: the loss of [[wavedash]]ing and L-canceling, as well as the weakening of [[dash-dancing]], noticeably worsen his approach. The general increase in range for other characters since ''Melee'', such as with {{SSB4|Donkey Kong}} and {{SSB4|Bowser}}, also indirectly hurts him. [[Double-Edge Dance]]'s first hit has almost completely lost its ability to stall his descent due to his faster falling speed, which hurts his recovery despite its improvements. Lastly, Roy's heavier weight makes him easy to combo despite falling speeds being slower in ''SSB4'' than they were in ''Melee''. | |||
Roy has | |||
Roy | Overall, Roy's strengths are much more pronounced than in ''Melee'', though he retains most of the same weaknesses as well. While his sweetspotted attacks are considerably more rewarding, he still has to fight up close in order to rack up damage, while his sub-par endurance makes his playstyle risky. Despite Roy having been overall buffed, other veterans were also buffed to varying degrees, which downplays his strengths in ''SSB4''{{'}}s metagame. | ||
===Aesthetics=== | ===Aesthetics=== | ||
*{{change|Roy's design is a combination of his | *{{change|Roy's design is now a combination of his appearances in ''{{s|fireemblemwiki|Fire Emblem: The Binding Blade}}'' and ''{{s|fireemblemwiki|Fire Emblem Awakening}}''. His taller height, more muscular physique, slightly smaller eyes, and Turkey red hair are from ''Awakening'', whereas his facial structure and hairstyle are from ''The Binding Blade''. Roy's {{s|wikipedia|cuirass}}, {{s|wikipedia|pauldron}}s, and boots are also from his attire in ''The Binding Blade'', whereas his {{s|wikipedia|vambrace}}s, {{s|wikipedia|poleyn}}s, greaves, and gloves are from his attire as an [[fireemblemwiki:Downloadable content in Fire Emblem Awakening#Characters|Einherjar]] in ''Awakening''.}} | ||
*{{change|Roy has | *{{change|Roy's shirt, pants, headband, and cape are now amalgamations of his respective articles of clothing in ''The Binding Blade'' and ''Awakening'', whereas his poleyns are amalgamated with the design of his pauldrons. Additionally, Roy's boots are now coyote brown with gray toe boxes, carnelian bootstraps, and metallic gold soles. Lastly, his gloves are now carnelian, instead of blue. These changes are unique to ''SSB4''.}} | ||
*{{change|Roy has an on-screen appearance.}} | *{{change|Roy now has eight costumes much like the rest of the cast. He has received six new alternate costumes, each of which is based on {{s|fireemblemwiki|Alen}}, [[fireemblemwiki:Lance_(character)|Lance]], {{s|fireemblemwiki|Marcus}}, {{s|fireemblemwiki|Zephiel}}, {{s|fireemblemwiki|Cecilia}}, and his father, {{s|fireemblemwiki|Eliwood}}.}} | ||
*{{change|Roy | *{{change|Roy has been updated with universal features introduced in ''Brawl''.}} | ||
*{{change| | **{{change|Roy uses various voice clips for any move between any [[tilt attack]], his [[dash attack]], and all [[aerial attack]]s except for his down aerial.}} | ||
*{{change| | **{{change|Roy has an [[on-screen appearance]] and two new [[taunt]]s. His taunt from ''Melee'' has been moved to his down taunt.}} | ||
*{{change|Roy is more expressive. He smiles during his fist pumping idle pose, and either scowls or sternly clenches his teeth during some attacks.}} | |||
*{{change|The [[fireemblemwiki:Binding Blade (weapon)|Binding Blade]]'s trail now clearly indicates its sweetspot's location, similarly to {{s|fireemblemwiki|Falchion}}.}} | |||
*{{change|Aside from retaining some of Marth's animations, Roy now swings the Binding Blade in a reverse grip or with both hands. This has translated to his moveset, be it through a tweaked animation or a completely new move.}} | |||
*{{change|Roy now has unique idle animation, instead of variations of Marth's, and has two new [[idle pose]]s. However, his stance while holding a light [[item]] is identical to {{SSB4|Marth}}'s.}} | |||
*{{change|Roy has a new [[victory pose]]. He now spins the Binding Blade one and a half times and then sheaths it rather than planting it on the ground.}} | |||
*{{change|[[Jump]], [[sidestep]], and [[shield]] break's animations have changed.}} | |||
===Attributes=== | ===Attributes=== | ||
*{{ | *{{nerf|Roy is taller, making his hurtbox slightly larger. While this would also improve his overall [[range]], this is largely mitigated by the majority of his moveset having smaller hitboxes and/or altered hitbox placements because of the aforementioned alterations to most of his sword-based attacks' animations.}} | ||
*{{ | *{{change|Roy is significantly [[weight|heavier]] (85 → 95), going from a heavier lightweight to an average middleweight (tied with {{SSB4|Robin}} and {{SSB4|Pac-Man}}). This improves his endurance, but makes him more susceptible to combos.}} | ||
*{{buff|Roy [[dash]]es much faster (1.61 → 1. | *{{nerf|Roy [[walk]]s slower (1.2 → 1.15).}} | ||
*{{ | *{{buff|Roy [[dash]]es much faster (1.61 → 1.95).}} | ||
*{{buff|Roy's [[air speed]] | *{{buff|Roy [[jump]]s higher (28.36337281 → 30.969999).}} | ||
*{{change|Roy [[falling speed | **{{change|Roy's [[short hop]] height is also higher (9.132671053 → 13). Compared to the returning veterans, however, Roy's short hop height is lower, going from the fifth lowest out of 26 characters to the sixth lowest out of 58.}} | ||
*{{ | *{{buff|Roy's [[air speed]] is drastically faster (0.9 → 1.24), going from the 12th fastest in ''Melee'' to the fourth fastest.}} | ||
*{{nerf|The | *{{change|As with the returning veterans, Roy's [[falling speed]] was decreased (2.4 → 1.8). Compared to the returning veterans, however, Roy falls faster. Improving his vertical endurance, but also making him more susceptible to combos.}} | ||
*{{change|The removal of [[chain grab]]bing both helps and hinders Roy. It results in him no longer being susceptible to chain grabs, while his faster falling speed results in him no longer being susceptible to pseudo-chain grabs. However, it hinders his damage racking potential.}} | |||
*{{nerf|The weakening of [[Dash-dance|dash-dancing]] and the removal of [[wavedash]]ing significantly hinder Roy's approach.}} | |||
===Ground attacks=== | ===Ground attacks=== | ||
*{{buff| | *[[Neutral attack]]: | ||
*{{nerf|Neutral attack has more start-up (frame 4 → 5) | **{{buff|Roy has a new neutral attack, a reverse gripped upward slash. Compared to the previous neutral attack, it deals more damage (3%/5%/6% → 4.8%/7.5%/7.5%) and base knockback (30/5 → 40/32), has less ending lag (FAF 26 → 23) and has a different angle ([[Sakurai angle|361°]] → 62°/32°). Altogether, these traits make it significantly better for combos.}} | ||
*{{ | **{{nerf|Neutral attack has more start-up lag and its duration is shorter (frame 4-7 → 5-7) compared to the previous neutral attack.}} | ||
*[[Forward tilt]]: | |||
*{{nerf|Forward tilt's | **{{buff|Roy has a new forward tilt, a reverse gripped downward slash. Compared to the previous forward tilt, it deals more damage (12%/10%/7% → 12.5%/9%/8%) and knockback (60/30 (base)/70 (scaling) → 30/40 (base)/100/80 (scaling)) and has less start-up (frame 9 → 8) and ending lag (FAF 40 → 32). Altogether, these traits making it better for KOing.}} | ||
*{{ | **{{nerf|Forward tilt's duration is shorter (5 frames → 3) than the previous forward tilt's.}} | ||
*[[Up tilt]]: | |||
*{{nerf|Up tilt's | **{{buff|Roy has a new up tilt, a reverse gripped overhead arcing slash. Compared to the previous up tilt, it deals more damage (6%/8%/9%/10% → 7%/12%) and the sweetspot has more knockback scaling, making it much stronger, while the sourspots deal consistent damage and less knockback scaling (120/118/116/100 → 103). It also has less start-up (frame 7 → 6) and ending lag (FAF 40 → 39) and its sourspot has more base knockback (20 → 30). Altogether, these traits make it better both for KOing and combos.}} | ||
*{{ | **{{nerf|Up tilt's duration is shorter (7 frames → 5) than the previous up tilt's.}} | ||
*{{buff|Down tilt has | *[[Down tilt]]: | ||
*{{nerf|Down tilt has increased | **{{nerf|Sweetspotted down tilt deals less damage (12% → 11%).}} | ||
*{{buff| | **{{buff|Sourspotted down tilt deals more damage (6% → 6.5%).}} | ||
*{{nerf|Dash attack | **{{buff|Down tilt has decreased start-up lag (frame 8 → 7).}} | ||
*{{ | **{{change|Down tilt has decreased base knockback (90/70 → 50/40). Due to its angle being altered (80° → 30°), it is also now a [[semi-spike]]. These changes improve its edgeguarding and [[tech-chasing]] potential, but significantly hinder its combo potential.}} | ||
**{{nerf|Down tilt has increased ending lag (FAF 20 → 22) and a shorter duration (3 frames → 2).}} | |||
*[[Dash attack]]: | |||
*{{ | **{{buff|Roy has a new dash attack, an inward horizontal slash. Compared to the previous dash attack, it deals more damage (12%/6% → 13%/9%), knockback (70/35 (base)/55/60 (scaling) → 65/60 (base)/82/60 (scaling)) and its sweetspot has a different angle (110° → 52°). It also does not suffer from the infamously poor hitbox issues at close range from Melee due to it being a different attack. Altogether, these traits make it better for KOing.}} | ||
*{{ | **{{nerf|Dash attack has more start-up (frame 12 → 13) and ending lag (FAF 40 → 50) compared to the previous dash attack.}} | ||
*{{buff| | *[[Forward smash]]: | ||
**{{nerf|Roy has a new forward smash, a rotating two-handed downward slash based on his regular attack as a Great Lord in ''Fire Emblem: The Binding Blade''. Compared to the previous forward smash, its sweetspot is smaller because of it having a "medium-spot" that deals 3% less damage (20% → 17%). It also has more start-up (frame 12 → 14) and ending lag (FAF 54 → 55), less vertical range, and a shorter duration (3 frames → 2).}} | |||
**{{change|Sweetspotted forward smash has different knockback compared to the previous forward smash's sweetspot (80 (base)/65 (scaling) → 70/70).}} | |||
*{{ | **{{buff|Due to the damage multiplier for fully charged smash attacks being increased from ''Melee'' to ''SSB4'' (1.3671× → 1.4×), fully charged forward smash deals more damage (27.324%/16.4052% → 28%/16.8%).}} | ||
*{{ | **{{buff|The 19% damage increase to [[shield]]s and the increase to [[shieldstun]] make sweetspotted forward smash significantly better at pressuring shields compared to the previous forward smash's sweetspot.}} | ||
*{{change| | *[[Up smash]]: | ||
**{{buff|Due to the damage multiplier for fully charged smash attacks being increased from ''Melee'' to ''SSB4'' (1.3671× → 1.4×), fully charged up smash deals more damage (22.639176% → 23.8%).}} | |||
**{{buff|Due to the changes to [[stale move negation]], up smash deals 0.44% more damage (16.56% → 17%), although its base knockback was compensated (73 → 70). It also has decreased start-up lag and a longer duration (10 frames → 12). Additionally, its [[spike]] hitbox now properly keeps opponents in place for the other hits. Lastly, it now grants intangibility to Roy's arm throughout its duration.}} | |||
**{{nerf|Up smash has significantly increased ending lag (FAF 46 → 59).}} | |||
*[[Down smash]]: | |||
**{{nerf|Down smash's front hit deals less damage (21%/14% → 15%/10%), hindering its KO potential.}} | |||
**{{buff|Down smash's back hit deals more damage (16%/8% → 17%/11%) and its angles have been altered (75°/361° → 50°/47°/361°), improving its KO potential. It also has decreased ending lag (FAF 72 → 63).}} | |||
**{{change|Down smash's knockback properties have been reversed, making the back hit stronger than the front hit.}} | |||
**{{nerf|Down smash has a shorter duration (6 frames → 4).}} | |||
**{{buff|The 19% damage increase to shields and the increase to shieldstun significantly improve sweetspotted down smash's shield pressuring potential.}} | |||
===Aerial attacks=== | ===Aerial attacks=== | ||
*{{buff|Neutral | *{{buff|All aerials have decreased ending lag (FAF 50 → 46 (neutral), FAF 35 → 30 (forward), FAF 43 → 36 (back), FAF 49 → 42 (up), FAF 64 → 52 (down)).}} | ||
*{{buff| | *{{nerf|Neutral, forward, and up aerials autocancel later (frame 32 → 47 (neutral), frame 30 → 33 (forward), frame 30 → 38 (up)). Forward aerial in particular no longer has an autocancel window, losing its ability to autocancel.}} | ||
*{{buff| | *{{change|All aerials have decreased landing lag (20/10 frames (normal/L-canceled) → 11 (neutral), 20/10 frames → 13 (forward), 24/12 frames → 16 (back), 18/9 frames → 14 (up), 32/16 frames → 23 (down)). Due to the removal of [[L-canceling]], however, they are not fully compensated.}} | ||
*{{buff|Forward aerial deals more damage (8%/5% → 11%/7%) | *[[Neutral aerial]]: | ||
**{{buff|Due to consisting of a sweetspot and a sourspot instead of a consistent hitbox, neutral aerial's first hit no longer deals consistent damage (4% → 6%/4%).}} | |||
*{{ | **{{buff|Neutral aerial's sweetspotted second hit deals 0.5% more damage (8% → 8.5%).}} | ||
* | **{{buff|Neutral aerial has decreased start-up lag (frame 7 → frame 6 (hit 1), frame 17 → frame 15 (hit 2)). Its second hit also has increased knockback scaling (80 → 100) and its angle has been altered (361° → 50°). Altogether, these changes improve its combo and KO potential.}} | ||
*{{buff|Back aerial deals 3% more damage (9%/6% → 12%/9%).}} | *[[Forward aerial]]: | ||
*{{buff|Up aerial | **{{buff|Forward aerial deals more damage (8%/5% → 11%/7%) and has increased knockback (30/10 (base)/70 (scaling) → 50/80), significantly improving its KO potential.}} | ||
* | **{{nerf|Forward aerial's animation has slightly changed. Roy now swings the Binding Blade while lunging farther inward. This new animation doubles its start-up lag (frame 5 → 10).}} | ||
*{{buff|Roy has a new down aerial, a two-handed slash | *[[Back aerial]]: | ||
*{{nerf|Down aerial has less | **{{buff|Back aerial deals 3% more damage (9%/6% → 12%/9%) and has increased knockback scaling (70 → 100), significantly improving its KO potential. It also autocancels earlier (frame 34 → 32).}} | ||
*[[Up aerial]]: | |||
**{{buff|Up aerial's duration is longer (5 frames → 7) and its sweetspot has increased knockback (20 (base)/70 (scaling) → 40/80), improving its juggling potential.}} | |||
*[[Down aerial]]: | |||
**{{buff|Roy has a new down aerial, a two-handed downward slash between his legs, similar to {{SSB4|Ike}}'s down aerial. Compared to the previous down aerial, it deals much more damage (6%/9% → 10%/15%), has more vertical range, its sweetspot is easier to land, and its sourspot has KO potential against grounded opponents. It also has higher knockback (40 (base)/70 (scaling) → 20/30 (base)/90 (scaling)) compared to the previous down aerial, improving its KO potential.}} | |||
**{{nerf|Down aerial has less horizontal range, more start-up lag, and a shorter duration (frames 7-10 → 16-17) compared to the previous down aerial.}} | |||
**{{buff|The removal of [[Meteor smash#Meteor canceling|meteor canceling]] makes down aerial significantly better at meteor smashing compared to the previous down aerial.}} | |||
===Throws/ | ===Throws/other attacks=== | ||
*{{nerf|All grabs have significantly decreased ranges.}} | |||
*{{nerf|All | *{{buff|Dash grab has decreased start-up lag (frame 10 → 8).}} | ||
*{{buff| | *[[Pummel]]: | ||
*{{buff| | **{{nerf|Pummel deals 1% less damage (3% → 2%).}} | ||
*{{buff|Up throw deals | **{{buff|Pummel is faster (24 frames → 15).}} | ||
*{{nerf| | *[[Up throw]]: | ||
*{{buff|Front and back floor attacks deal | **{{buff|Up throw deals more damage (5% → 6%).}} | ||
**{{nerf|It has reduced knockback scaling (130 → 100), hindering its KO potential in spite of its higher damage output.}} | |||
*[[Down throw]]: | |||
**{{nerf|Down throw deals less damage (6% → 5%).}} | |||
**{{buff|It launches at a higher angle (361° → 80°), which coupled with its lower damage output significantly improves its combo potential.}} | |||
*[[Floor attack]]: | |||
**{{buff|Front and back floor attacks deal more damage (6% → 7%).}} | |||
**{{change|Due to the introduction of [[tripping]] in ''Brawl'', Roy has received a floor attack after tripping.}} | |||
===Special moves=== | ===Special moves=== | ||
*{{buff| | *[[Flare Blade]]: | ||
*{{nerf|Flare Blade has | **{{buff|Flare Blade can be charged up to deal more damage before the full charge without receiving recoil damage (41% → 45%). It also has increased interruptibility for a few frames upon its hitbox being active in spite of its ending lag.}} | ||
*{{change|Flare Blade has | **{{nerf|Flare Blade has increased start-up lag, its duration is shorter (6 frames → 4), a smaller hitbox, and it takes slightly more time to fully charge. It has also received a sourspot at the edges of the attack that deals 15% less damage (50% → 35%) and has less knockback scaling (83 → 70).}} | ||
*{{ | **{{change|Flare Blade has updated visual effects. All of its stages now unleash a minor explosion, with most of the higher stages unleashing the large explosions from ''Melee''. It also has updated sound effects, as it now stops emitting sound when fully charged and before its explosion.}} | ||
*{{nerf|Double-Edge Dance | **{{change|Flare Blade's animation has slightly changed. Roy now briefly lifts the Binding Blade with both hands to his side when returning to his neutral stance.}} | ||
*{{change| | **{{change|Roy has gained a new voice clip for releasing a fully charged Flare Blade. In ''Melee'', it used his blast KO voice clip.}} | ||
*{{change|Double-Edge Dance | *[[Double-Edge Dance]]: | ||
*{{buff| | **{{buff|Aside from its first and fourth downward hits, [[Double-Edge Dance]]'s other have decreased start-up lag. Its third downward hit also no longer consists of multiple hits and launches at a lower trajectory. These changes make its hits connect together better.}} | ||
* | **{{nerf|Double-Edge Dance deals less damage and has decreased knockback, vertical range, and increased ending lag. Additionally, Roy's faster falling speed significantly hinders its first hit's recovery potential. Lastly, its third upward hit is no longer a meteor smash, removing its KO potential.}} | ||
*{{nerf|Blazer | **{{change|All variations of Double-Edge Dance's third hit connect together better with its fourth hit. This improves their combo potentials, but removes their KO potentials.}} | ||
*{{change|Blazer's first hit has | **{{buff|Double-Edge Dance now has [[Priority#Transcendent priority|transcendent priority]], improving its reliability.}} | ||
*{{change|Blazer | **{{buff|The 19% damage increase to shields and the increase to shieldstun significantly improve Double-Edge Dance's last downward hits' shield pressuring potential.}} | ||
* | **{{change|Double-Edge Dance's animation has changed. The slashes are now identical to [[Dancing Blade]] from ''Brawl''.}} | ||
*{{ | *[[Blazer]]: | ||
*{{ | **{{buff|Blazer deals more damage (13.18% → 16.8%) and its last hit has increased knockback (10 (base)/100 (scaling) → 40/130), improving its KO potential. It also has lingering hitboxes at its end, and can be reversed before start-up. It also travels more horizontal distance and the grounded version received more intangibility frames on start-up.}} | ||
*{{change|Roy has a | **{{nerf|Blazer travels less vertical distance.}} | ||
**{{change|Blazer's first hit has significantly decreased set knockback (200 → 160/120). This makes its hits connect together better, but removes its one-hit KO potential against the lightest characters.}} | |||
**{{change|Blazer's animation has slightly changed. Roy now performs the jumping slash while holding the Binding Blade in a reverse grip.}} | |||
*[[Counter]]: | |||
**{{nerf|Counter's damage multiplier has decreased (1.5× → 1.35×), although its knockback was somewhat compensated (30 (base)/90/70 (scaling) → 35 (base)/100/70 (scaling)), hindering its KO potential. Additionally, the damage cap can only reach a maximum of 50%, now matching the rest of the [[Counterattack|multiplier based counterattacks]] in ''Smash 4''.}} | |||
***{{bugfix|Due to its change, Counter-stacking no longer crashes the game.}} | |||
**{{buff|Counter's duration is longer (frames 8-20 → 8-27).}} | |||
**{{buff|Counter's animation has changed. Its counterattack now resembles Roy's long-ranged basic attack with the Binding Blade in ''Fire Emblem: The Binding Blade''. This new animation increases its horizontal range.}} | |||
*[[Critical Hit]]: | |||
**{{change|Roy now has a Final Smash, Critical Hit. Unlike Marth and Lucina's Critical Hit, Roy's version is stationary and has him swing the Binding Blade around himself before performing a slash in front of himself that emits a short-ranged explosion.}} | |||
==Update history== | ==Update history== | ||
Roy has been slightly buffed via game updates. Update [[1.1.0]] gave [[Blazer]] additional hitboxes, making it easier to land. However, the same update reduced the damage outputs of its first and last hits, which slightly weakened its KO potential. The changes to shield mechanics brought about by updates 1.1.0 and [[1.1.1]] have made Roy's sweetspotted attacks much safer at the cost of his sourspotted attacks being unsafer, to the point where his [[semi-clone]], {{SSB4|Lucina}}, has safer attacks than both him and Marth. Lastly, update [[1.1.4]] decreased the landing lag on all of Roy's aerials, which improved his neutral and up aerials' combo potentials when they are [[Short hop fast fall L-cancel#Short hop fast fall|SHFF]]'d, and decreased Double-Edge Dance's start-up and ending lag. | |||
'''{{GameIcon|ssb4}} [[1.1.0]]''' | |||
*{{change|Blazer's first and last hits deal 1% less damage|6.5% (hit 1 sweetspot)/5% (hit 1 sourspot), 9% (hit 5 sweetspot)/8% (hit 5 sourspot)|5.5%/4%, 8%/7%. This makes its first hit connect together better, but hinders its KO potential.}} | |||
*{{buff|[[Blazer]] has received additional hitboxes.}} | |||
*{{change|{{GameIcon|ssb4-3ds}}Roy performs his down [[taunt]] instead of his fist pump [[idle pose]] after a player chooses a path in [[Classic Mode]].}} | |||
'''{{GameIcon|ssb4}} 1.1. | '''{{GameIcon|ssb4}} [[1.1.4]]''' | ||
{{UpdateList/1.1.4|char=Roy}} | |||
==Moveset== | ==Moveset== | ||
*For simplicity if, for example, Roy's blade does 6% damage while the tip does 4%, and the attack has no other hitboxes, it is written as 6%/4%. | |||
''For a gallery of Roy's hitboxes, see [[/Hitboxes|here]].'' | |||
{{MovesetTable | {{MovesetTable | ||
|game=SSB4 | |game=SSB4 | ||
|neutralname= | |nocustoms=y | ||
|neutralname=Slash ({{ja|リフトスラッシュ|Rifuto Surasshu}}, ''Lift Slash'') | |||
|neutralcount=1 | |neutralcount=1 | ||
|neutral1dmg=7.5% | |neutral1dmg=7.5%/4.8% | ||
|neutraldesc= | |neutraldesc=A reversed gripped upward slash. Easily chains into itself, forward tilt and a grab at low percents, and his forward and up aerials at high percents. Starts at frame 5, making it a great tool for spacing, combos, and stopping approaches. | ||
|ftiltname= | |ftiltname=Sharp Edge ({{ja|オーバーバッシュ|ōbābasshu}}, ''Over Bash'') | ||
|ftiltdmg=12.5% (sweetspot), 9% (near), 8% (far) | |ftiltdmg=12.5% (sweetspot), 9% (near), 8% (far) | ||
|ftiltdesc= | |ftiltdesc=A reverse gripped downward slash. Very strong for a tilt attack, it usually KOs around 120% from center-stage when sweetspotted, making it a viable KO option. However, it has noticeable ending lag, making it punishable. The sweetspot is safe on shield if Roy does not directly touch the opponent's shield. | ||
|utiltname= | |utiltname= | ||
|utiltdmg=12% | |utiltdmg=12%/7% | ||
|utiltdesc= | |utiltdesc=A reverse gripped overhead arcing slash. Very strong like his forward tilt, it usually KOs around 110% when sweetspotted. However, it has rather low horizontal range and high ending lag, which make it very punishable on shield. | ||
|dtiltname= | |dtiltname=Low Stab ({{ja|ロースラスト|Rō Surasuto}}), ''Low Thrust'') | ||
|dtiltdmg=11% | |dtiltdmg=11%/6.5% | ||
|dtiltdesc= | |dtiltdesc=A kneeling thrust, identical to {{SSB4|Marth}} and {{SSB4|Lucina}}'s down tilts, but with lower range. Has the lowest amount of ending lag out of his tilt attacks, and is useful for [[shield stab]]bing, edgeguarding or starting [[Tech-chasing|tech-chases]] thanks to it being a [[semi-spike]]. However, it has much less knockback growth than his other tilts. | ||
|dashname= | |dashname= | ||
|dashdmg=13% | |dashdmg=13%/9% | ||
|dashdesc= | |dashdesc=An inward horizontal slash across the ground. It has good KO potential for a dash attack, KOing when sweetspotted around 130%, however it has moderate start-up and high ending lag, making it very unsafe on shield. | ||
|fsmashname= | |fsmashname= | ||
|fsmashdmg={{ChargedSmashDmgSSB4|20}} (close), {{ChargedSmashDmgSSB4|17}} (mid), {{ChargedSmashDmgSSB4|12}} (far) | |fsmashdmg={{ChargedSmashDmgSSB4|20}} (close), {{ChargedSmashDmgSSB4|17}} (mid), {{ChargedSmashDmgSSB4|12}} (far) | ||
|fsmashdesc= | |fsmashdesc=Rotates his body to perform a lunging, two-handed downward slash. It is one of the strongest forward smashes in the game when sweetspotted, as it can KO as low as 40% with [[rage]]. It also has very long disjointed range due to Roy lunging while performing it, and it comes out on frame 14, which is rather fast for a smash attack of its power. However, it has high ending lag and its hitbox does not last long, which make it very punishable when whiffed. It is based on his regular attack as a Great Lord in ''Fire Emblem: The Binding Blade''. | ||
|usmashname=Flame Sword | |usmashname=Flame Sword ({{ja|フレイムソード|Fureimu Sōdo}}) | ||
|usmashdmg={{ChargedSmashDmgSSB4|1}} (hit 1), {{ChargedSmashDmgSSB4|2}} (hits 2-4), {{ChargedSmashDmgSSB4|10}} (hit 5) | |usmashdmg={{ChargedSmashDmgSSB4|1}} (hit 1), {{ChargedSmashDmgSSB4|2}} (hits 2-4), {{ChargedSmashDmgSSB4|10}} (hit 5) | ||
|usmashdesc= | |usmashdesc=An upward thrust, which ignites the Binding Blade's tip and concludes with a small explosion. Powerful enough to KO middleweights around 100% while uncharged. Good for juggling opponents in the air, as it grants intangibility to Roy's arm throughout its duration. The attack's multiple hits transition faster if the initial portion of the thrust connects. The move also deals 1% more damage on an aerial opponent (for a total of 18% if all hits connect). High ending lag like his other smash attacks. | ||
|dsmashname= | |dsmashname= | ||
|dsmashdmg={{ChargedSmashDmgSSB4|15}} | |dsmashdmg={{ChargedSmashDmgSSB4|15}}/{{ChargedSmashDmgSSB4|10}} (front hit) {{ChargedSmashDmgSSB4|17}}/{{ChargedSmashDmgSSB4|11}} (back hit) | ||
|dsmashdesc= | |dsmashdesc=A kneeling outward slash in front of himself and then behind himself. Weaker than his other smash attacks, but it has the fastest start-up, and is useful for punishing rolls. Can KO uncharged around the 120% range if sweetspotted with the front hit, and around 100% sweetspotted with the back hit. While it has very quick start-up, it has the longest ending lag of all his smash attacks, which makes it very punishable when whiffed. | ||
|nairname= | |nairname=Double Slash ({{ja|ダブルスラッシュ|Daburu Surasshu}}) | ||
|nairdmg=6%/4% ( | |nairdmg=6%/4% (hit 1), 8.5%/5% (hit 2) | ||
|nairdesc= | |nairdesc=An inward slash followed by a spinning, outward slash. One of Roy's most useful spacing and combo options thanks to its quick start-up, long-lasting duration, and low landing lag. The second hit is capable of attacking behind him, and the sourspot can catch opponents before he lands. The first hit is risky due to its short range, but it is a surprisingly effective combo starter. Very useful for KO set-ups at high percents, as landing the first hit can lead into an up tilt, up smash, or [[Blazer]]. | ||
|fairname= | |fairname= | ||
|fairdmg=11%/7% | |fairdmg=11%/7% | ||
|fairdesc= | |fairdesc=A downward slash. It is fairly strong when sweetspotted, as it can KO opponents reliably while on-stage and especially off-stage. Good for air-to-air combat because of its low ending lag. It is possible to jump out of one from a short hop, and it can be used twice before landing from a jump. If performed fast enough, it can combo into itself when using his double jump. | ||
|bairname= | |bairname=About Face ({{ja|アッパースイング|Appā Suingu}}, ''Upper Swing'') | ||
|bairdmg=12%/9% | |bairdmg=12%/9% | ||
|bairdesc= | |bairdesc=Rotates his body to perform an upward slash. It is stronger than forward aerial, and can KO opponents reliably while on-stage and especially off-stage. Covers good vertical and horizontal range, but has rather high ending lag. Like with Marth and Lucina's back aerials, it turns Roy around when used. Unlike their back aerials, however, its sourspot can [[lock]] opponents at medium percents if they miss a tech. | ||
|uairname= | |uairname= | ||
|uairdmg=9%/6% | |uairdmg=9%/6% | ||
|uairdesc= | |uairdesc=A backflipping, upward arcing slash. The weakest of Roy's aerials in terms of damage and knockback, but it is his fastest one, due to it coming out on frame 5 (the same as his neutral attack). Its large arc and speed also make it suitable for juggling and/or combos, as it is able to follow up with most of his grounded attacks at low percents while he is falling, and into his aerials at high percents. Its sourspot also has a long duration, which allows it to function as a KO set-up, such as into back aerial or Blazer. | ||
|dairname= | |dairname=Half Moon ({{ja|メテオドロップ|meteodoroppu}}, ''Meteor Drop'') | ||
|dairdmg=15%/10% | |dairdmg=15%/10% | ||
|dairdesc= | |dairdesc=A two-handed, downward slash between his legs, similar to {{SSB4|Ike}}'s down aerial. It has a powerful [[meteor smash]] hitbox near the Binding Blade's hilt, while the rest of its blade launches opponents upward. KOs around 130% when sweetspotted on-stage. However, it has considerable ending and landing lag, which makes it risky to use off-stage, especially due to Roy's very high falling speed. | ||
|grabname= | |grabname= | ||
|grabdesc= | |grabdesc=Reaches out with his free hand. | ||
|pummelname= | |pummelname= | ||
|pummeldmg=2% | |pummeldmg=2% | ||
|pummeldesc= | |pummeldesc=A knee strike. A fairly fast pummel. | ||
|fthrowname= | |fthrowname= | ||
|fthrowdmg=5% | |fthrowdmg=5% | ||
|fthrowdesc= | |fthrowdesc=Spins and flings the opponent forward. While the throw only causes very low hitstun, its low ending lag and low knockback allow it to combo into a neutral attack or forward tilt at low percents, and a dash attack at medium percents. It can also potentially combo into a dashing up smash if the opponent does not react in time, and works very well as a set-up for a neutral aerial, which, when hit, can chain into even more combos. At high percents, it is also able to set up a tech-chase. | ||
|bthrowname= | |bthrowname= | ||
|bthrowdmg=5% | |bthrowdmg=5% | ||
|bthrowdesc= | |bthrowdesc=Tosses the opponent behind himself. Has weak diagonal knockback that causes the throw to have a somewhat fixed trajectory even at high percents. Low hitstun like his other throws, but its angle allows Roy to read the opponent's reaction and capitalize on it. If the opponent does not expect it, this can lead into down aerial at low percents or a back aerial for a KO at high percents near the edge, although the latter requires precise timing. | ||
|uthrowname= | |uthrowname= | ||
|uthrowdmg=6% | |uthrowdmg=6% | ||
|uthrowdesc= | |uthrowdesc=Heaves the opponent upward with his free hand. Like Marth and Lucina's up throws, it is Roy's only throw with KO potential, although it starts KOing slightly later in comparison (at around 170%). | ||
|dthrowname= | |dthrowname=Slam ({{ja|グラブドロップ|Gurabo Doroppu}}, ''Grab Drop'') | ||
|dthrowdmg=5% | |dthrowdmg=5% | ||
|dthrowdesc= | |dthrowdesc=A one-armed body slam. Aesthetically, it appears almost identical to forward throw, with its only difference being a shockwave effect to indicate the opponent hitting the ground. Mechanically, it functions much differently, as it launches the opponent directly above Roy and is a [[true combo]] into Blazer on most characters up to medium percents. Like Roy's forward throw, this throw causes very low hitstun, but its low base knockback and low knockback growth allow it to combo into neutral attack, up tilt and forward tilt at low percents, with the neutral attack combo allowing for the possibility of chaining into another grab if the opponent does not react in time. It can also combo into a neutral aerial, forward aerial and up aerial at medium percents. | ||
|floorfname= | |floorfname= | ||
|floorfdmg=7% | |floorfdmg=7% | ||
|floorfdesc= | |floorfdesc=Gets up while slashing to the left and then to the right. | ||
|floorbname= | |floorbname= | ||
|floorbdmg=7% | |floorbdmg=7% | ||
|floorbdesc=Gets into a kneeling position | |floorbdesc=Gets into a kneeling position and then slices around himself as he gets up. | ||
|floortname= | |floortname= | ||
|floortdmg=5% | |floortdmg=5% | ||
|floortdesc=Hops briskly to his feet | |floortdesc=Hops briskly to his feet to perform a thrust to the left and a slash to the right. | ||
|edgename= | |edgename= | ||
|edgedmg=8% | |edgedmg=8% | ||
|edgedesc= | |edgedesc=Performs an outward slash while climbing up. | ||
| | |nsname=Flare Blade | ||
| | |nsdmg=6%-45%, 50% (fully charged sweetspot), 36% (fully charged sourspot) | ||
| | |nsdesc=Rears back and ignites the Binding Blade's blade before performing a lunging, two-handed downward slash that generates an explosion. Functions similarly to [[Eruption]], as it can be charged before unleashing the explosion, with the explosion's size growing as it charges. It has very high knockback growth even while uncharged, and the ability to quickly increase its damage output via charging. When fully charged, it is capable of [[one-hit KO]]ing all but {{SSB4|Shulk}} with the [[Monado Arts|Shield Art]] active and {{SSB4|Bowser}} from center-stage. To further supplement its power, it has surprisingly minimal ending lag, as Roy is able to act out of it almost immediately. However, a fully charged explosion deals 10% [[recoil damage]]. The fully charged explosion also has a sourspot at its edges that deals much less damage and knockback and is not a OHKO, though it is still powerful enough to KO at 41%. It is possibly Roy's best option to use to punish a [[stun]]ned opponent because of its OHKO potential when fully charged, especially considering Roy's good shield pressuring potential. | ||
| | |ssname=Double-Edge Dance | ||
|ssdmg=Varies | |||
|ssdesc=A combination of sword swings, which can be influenced by directional inputs. Its animations are identical to [[Dancing Blade]] and its first hit stalls Roy's descent, although it is largely ineffective for recovery because of his falling speed being much faster than Marth and Lucina's. However, its overall knockback is slightly stronger than Dancing Blade, and the last hit of each variation deals [[flame]] damage unlike Dancing Blade because of the Binding Blade's blade igniting. | |||
|usname=Blazer | |||
|usdmg=5.5% (grounded hit 1), 4.5% (aerial hit 1), 1.1% (grounded hits 2-4), 1% (aerial hits 2-4), 8% (grounded hit 5), 6% (aerial hit 5) | |||
|usdesc=A jumping reverse gripped slash, which ignites the Binding Blade's blade. Hits multiple times and can be angled diagonally, though this causes the slash to cover less vertical distance. A viable [[out of shield]] and KOing option, its grounded version is more powerful, as it KOs around 110% if all hits connect. Its grounded version also grants brief super armor at its beginning. However, it is a sub-par recovery option, due to it covering decent horizontal distance, but very minimal vertical distance. | |||
|dsname=Counter | |||
| | |dsdmg=1.35× (minimum 9%) | ||
| | |dsdesc=[[fireemblemwiki:Counter|Parries]] and then [[counterattack]]s against any incoming attacks with an outward slash that ignites the Binding Blade's blade. It has the highest damage multiplier of any counterattack in the game by default, with only [[Vision]] surpassing it while the [[Monado Arts|Buster Art]] is active. However, its counter window is relatively short, and it is tied with [[Double Team]] for having the third highest amount of start-up lag out of every counterattack in the game. Roy may also say "{{ja|いまだ!|Imada!}}" (''"Now!"'') or "{{ja|そこ!|Soko!}}" (''"There!"'') if successful. Its counterattack is based on his long-ranged basic attack with the Binding Blade. | ||
| | |||
| | |||
| | |||
| | |||
| | |||
| | |||
|fsname=Critical Hit | |fsname=Critical Hit | ||
|fsdmg=1% (1-10 | |fsdmg=1% (hits 1-10), 35% (hit 11) | ||
|fsdesc= | |fsdesc=Swings the Binding Blade in a circular motion, which ignites its blade, before performing a two-handed, downward slash that generates a powerful explosion. Unlike Marth and Lucina's Critical Hit, Roy's is not a one-hit KO. The circular swing can hit up to four times from the front, though it can hit up to ten times if performed on an opponent behind Roy. It is based on the Binding Blade's {{s|fireemblemwiki|range}}d attack in ''The Binding Blade''. | ||
}} | |||
{| class="wikitable sortable" | |||
|+Double-Edge Dance | |||
! Hit | |||
! Damage | |||
! Description | |||
|- | |||
| First Hit (Neutral) || 3%/2% || A downwards slash towards the left while stepping forwards. | |||
|- | |||
| Second Hit (Up) || 3%/2% || Does an upwards lifting slash. | |||
|- | |||
| Second Hit (Neutral) || 3%/2% || Does a right-to-left swiping stab angled slightly downwards. | |||
|- | |||
| Third Hit (Up) || 4%/3% || Turns his body and swings upwards. | |||
|- | |||
| Third Hit (Neutral) || 4%/3% || Does an upwards swing while stepping forward. | |||
|- | |||
| Third Hit (Down) || 4%/3% || Steps forward and does a backhanded stab towards the ground before twirling. | |||
|- | |||
| Fourth Hit (Up) || 7%/5% || Performs a twirling overhead half-moon slash. | |||
|- | |||
| Fourth Hit (Neutral) || 6%/4% || Twirls counterclockwise and produces a strong downward. | |||
|- | |||
| Fourth Hit (Down) || 2% (hit 1-4), 5%/3% (hit 5) || Steps forward, bends close to the ground, and does a flurry of five stabs. The last hit launches opponents away. | |||
|} | |||
===Stats=== | |||
{{Attributes | |||
|cast = 58 | |||
|weight = 95 | |||
|rweight = 30-32 | |||
|dash = 1.4 | |||
|rdash = 42-46 | |||
|run = 1.95 | |||
|rrun = 11 | |||
|walk = 1.15 | |||
|rwalk = 24-27 | |||
|trac = 0.06 | |||
|rtrac = 14-24 | |||
|airfric = 0.005 | |||
|rairfric = 52-54 | |||
|air = 1.24 | |||
|rair = 4 | |||
|baseaccel = 0.02 | |||
|rbaseaccel = 8-9 | |||
|addaccel = 0.03 | |||
|raddaccel = 54-56 | |||
|gravity = 0.114 | |||
|rgravity = 9 | |||
|fall = 1.8 | |||
|rfall = 5-8 | |||
|ff = 2.9 | |||
|rff = 6 | |||
|jumpsquat = 5 | |||
|rjumpsquat = 14-41 | |||
|jumpheight = 30.969999 | |||
|rjumpheight = 45 | |||
|shorthop = 13 | |||
|rshorthop = 52-53 | |||
|djump = 28 | |||
|rdjump = 48-49 | |||
}} | }} | ||
=== | |||
===[[Announcer]] call=== | |||
{{audio|Needs announcer calls from other languages.}} | |||
<gallery> | <gallery> | ||
Roy English Announcer SSB4-SSBU.wav|English/Japanese/Chinese | |||
</gallery> | </gallery> | ||
===On- | ===[[On-screen appearance]]=== | ||
{{appearance | |||
|desc=Warps onto the stage using [[fireemblemwiki:Warp (staff)|warp magic]] while crouching, with the Binding Blade stuck in the ground when he appears. He then pulls it out with a flourish before assuming his idle stance. | |||
|char=Roy | |||
|game=SSB4}} | |||
===[[Taunt]]s=== | |||
{{Taunt/SSB4 | |||
|char=Roy | |||
|desc-up=Triumphantly holds the Binding Blade overhead. | |||
|desc-side=Winds back before striking a pose while holding the Binding Blade in a reverse grip while saying "{{ja|僕は負けない!|Boku wa makenai!}}" (''"I won't lose!"'') This line was one of his victory quotes in ''Melee''. | |||
|desc-down=Kneels and twirls the Binding Blade behind himself while yelling "Heee-ya!" This taunt returns from ''Melee''.}} | |||
===[[Idle pose]]s=== | |||
{{Idle | |||
|desc-1=Pumps his fist while smiling. | |||
|desc-2=Rubs the edge of the Binding Blade. | |||
|image-1=RoyIdlePose1WiiU.jpg | |||
|image-2=RoyIdlePose2WiiU.jpg}} | |||
===[[Crowd cheer]]=== | |||
{{Crowd | |||
|game=SSB4 | |||
|char=Roy | |||
|desc-us=Roy's our boy! | |||
|desc-jp=Roy! Roy! Roy! | |||
|pitch-us=Female | |||
|pitch-jp=Female}} | |||
===[[Victory pose]]s=== | |||
{{Victory/SSB4 | |||
|victory-theme=FireEmblemTheme.ogg | |||
|victory-desc=An orchestral excerpt of the title theme from ''{{s|fireemblemwiki|Fire Emblem: Shadow Dragon and the Blade of Light}}'', which has since become the main theme of the ''Fire Emblem'' series. | |||
|desc-1=Swings the Binding Blade once over his shoulder, then swings it down and behind him while facing left with his free hand clenched, saying {{ja|真の戦いは、これからだ|Shin no tatakai wa, korekara da}} (''"The real battle is yet to come."'') | |||
|desc-2=Spins the Binding Blade one and a half times and then sheaths it, saying "{{ja|苦しい戦いだった|Kurushī tatakai datta}}" (''"That was a difficult battle."'') This replaces his victory animation from ''Melee'', where he plunged the Binding Blade into the ground. | |||
|desc-3=Flourishes the Binding Blade in a circle before posing with it by his side, saying "{{ja|守るべきもののために、負けられない!|Mamoru beki mono no tame ni, makerarenai!}}" (''"For the sake of those I must protect, I will not lose!"'') | |||
|char=Roy}} | |||
==In [[competitive play]]== | |||
===Tier placement and history=== | |||
Roy's initial perception among the community was very positive; players almost immediately recognized his powerful offense due to the prominent strengths of his sweetspotted attacks, heavily damaging throw set-ups, and significantly improved mobility. These views were especially noted because his semi-clone, {{SSB4|Marth}}, and by extension {{SSB4|Lucina}}, were considered poor characters at the time. Despite his extremely low representation, which was unseen of a perceived high-tier character, most of the community believed that Roy was a viable character, with some claiming him to be the premier swordfighter in the game. Even so, his viability was also disputed due to his sparse tournament placements and difficulty in initiating combo setups. Furthermore, characters considered worse than him received a variety of buffs in later updates, with a corresponding increase in tournament results and representation than Roy, while his weaknesses were made much more apparent to the community. As such, opinions on Roy quickly started to change for the worse due to his vulnerability to combos, weak recovery, and an ineffective close-ranged playstyle due to his poor approach and unimpressive range. In spite of his flaws and lacking tournament presence, Roy was ranked 32nd on the first ''4BR'' [[tier list]], placing him at the top of the low-tier. | |||
Unfortunately for Roy, update [[1.1.4]] granted Marth and Lucina major buffs that significantly increased their effectiveness, while Roy only gained minor landing lag decreases to his aerials. This resulted in them, especially Marth, achieving improved results from professionals and saw their opinions reassessed as those of a high-tier and a mid-tier character, respectively. Conversely, Roy remained a low-tier character due to the minimal effectiveness of his buffs from update 1.1.4. The lack of significant breakthroughs to his lackluster approaches and middling combo game only served to further damage Roy's negative perception, which saw Roy being ranked 50th on the second tier list, placing him at the bottom of the low-tier. | |||
However, Roy players began more success afterwards, most notably with Ryo's placement at {{Trn|Super Smash Con 2016}} and {{Trn|CEO 2017}}, where he used Roy to place top 32 at both events. This helped improve opinions on Roy, who rose to 44th on the third tier list, placing him in the upper portion of the low-tier. Roy's results would improve even further after Cloudy's high placing of 9th at [[Smash Factor 6]] while upsetting {{Sm|Kameme}}, 33rd at [[2GGC: Fire Emblem Saga]] as well, {{Sm|Serge}} reaching 7th with Roy as a secondary, and {{Sm|komorikiri}} placing 16th at [[2GG Championship]] while defeating {{Sm|CaptainZack}}. Despite this, Roy remains ranked at 41st on the fourth and final tier list, though due to the expansion of the tiers, he is now ranked as a mid-tier character. Throughout the game’s competitive lifespan, Roy's standing relative to the cast was among divisive compared to most of the cast. While a number of top players consider his placement to be accurate due to his polarized toolkit causing him to struggle against numerous characters, many players agreed that Roy could potentially rise slightly higher thanks to his good power and mobility. | |||
=== | ===Most historically significant players=== | ||
<!--This character has a ten player limit for this section. Before adding and/or removing a player, read these guidelines: https://www.ssbwiki.com/SmashWiki:Notability#%22Most_historically_significant_players%22_guidelines --> | |||
''Any number following the Smasher name indicates placement on the [[PGR 100]], which recognizes the official top 100 players in [[Super Smash Bros. 4]] of all time.'' | |||
''See also: [[:Category:Roy players (SSB4)]]'' | |||
*{{Sm|Cloudy|Mexico}} - The best Roy player in the world. Placed 9th at {{Trn|Smash Factor 6}} and 33rd at both {{Trn|2GGC: Fire Emblem Saga}} and {{Trn|Smash Factor 7}} with wins over players such as {{Sm|Kameme}} and {{Sm|Mr.R}}. | |||
*{{Sm|komorikiri|Japan}} (#12) - Used Roy as a secondary. Placed 5th at {{Trn|Sumabato 20}} and 9th at {{Trn|Sumabato 21}} with a win over {{Sm|CaptainZack}}. | |||
*{{Sm|TheFlow|France}} - The best Roy player in Europe. Placed 7th at {{Trn|Albion 3}}, 9th at {{Trn|talent.io}}, and 25th at {{Trn|SALT}} with wins over players such as {{Sm|Lima}} and {{Sm|Glutonny}}. Ranked 30th on the [[European Smash 4 Power Rankings]]. | |||
*{{Sm|Hyper Kirby|USA}} - The best Roy player in the United States. Placed 17th at {{Trn|MomoCon 2017}} and 25th at both {{Trn|DreamHack Atlanta 2017}} and {{Trn|MomoCon 2018}} with wins over players such as {{Sm|Kameme}}, {{Sm|Fatality}}, and {{Sm|ScAtt}}. | |||
*{{Sm|Ryo|USA}} (#77) - Used Roy as a secondary to his Ike. Placed 9th at {{Trn|Super Smash Con 2016}}, 25th at {{Trn|CEO 2017}}, and 33rd at {{Trn|2GGT: ZeRo Saga}}. He is also known for advancing Roy's metagame. | |||
== | ==[[Trophies]]== | ||
{{Trophy/Fighter | |||
|name=Roy | |||
|image-3ds=RoyTrophy3DS.png | |||
|image-wiiu=RoyTrophyWiiU.png | |||
|mode=Classic | |||
|desc=Roy, the main character of Fire Emblem: The Binding Blade, returns for the first time since Melee! In The Binding Blade, Roy led the troops of Pherae into battle in his ailing father's stead, and now he brings his speed and talent for short-range combat into this game. His sword, the Sword of Seals, is uniquely powerful at the base of the blade. | |||
|gamelist={{Trophy games|console1=GBA|game1=Fire Emblem: The Binding Blade|release1=2002 (JP)}} | |||
}} | |||
{{clrl}} | |||
== | {{Trophy/Fighter | ||
|name=Roy (Alt.) | |||
|image-3ds=RoyAltTrophy3DS.png | |||
|image-wiiu=RoyAltTrophyWiiU.png | |||
|mode=Alt | |||
|desc=Flare Blade creates an explosion in front of Roy that can be charged by holding down the button. Take care, though, because at the highest levels of charge, Roy himself will catch fire and take damage! His side special, Double-Edge Dance, changes for each strike after the first depending on whether you hold up or down while attacking. | |||
|gamelist={{Trophy games|console1=GBA|game1=Fire Emblem: The Binding Blade|release1=2002 (JP)}} | |||
}} | |||
{{clrl}} | |||
{{Trophy/Fighter | |||
|name=Critical Hit (Roy) | |||
|image=CriticalHitRoyTrophyWiiU.png | |||
|desc-ntsc=For Roy's Final Smash, he traps enemies in a circular swing of the blade, brings it up behind him, and then, in a blast of fire, brings the blade down for a powerful finisher! The downward attack is powerful on its own but doesn't have much range, so make sure you're close enough to hit your enemies with the full combo and really seal their fate! | |||
|desc-pal=For Roy's Final Smash, he traps enemies in a circular swing of the blade, brings it up behind him and then, in a blast of fire, brings the blade down for a powerful finisher! The downward attack is powerful on its own, but doesn't have much range, so make sure you're close enough to hit your enemies with the full combo and really seal their fate! | |||
|game=ssb4-wiiu | |||
}} | |||
{{clrl}} | |||
==[[Alternate costume (SSB4)#Roy|Alternate costumes]]== | ==[[Alternate costume (SSB4)#Roy|Alternate costumes]]== | ||
{|style="margin:1em auto 1em auto;text-align:center" | {|style="margin:1em auto 1em auto;text-align:center" | ||
|- | |- | ||
|colspan=8|[[ | |colspan=8|[[File:Roy Palette (SSB4).png]] | ||
|- | |- | ||
|{{Head|Roy|g=SSB4|s=50px}} | |{{Head|Roy|g=SSB4|s=50px}} | ||
| Line 292: | Line 460: | ||
|} | |} | ||
== | ==[[List of Super Smash Bros. 4 character trailers#Roy|Reveal trailer]]== | ||
{{#widget:YouTube|id=w8XIj05irtU}} | |||
: | |||
==Gallery== | ==Gallery== | ||
<gallery> | <gallery> | ||
SSB4 Roy SplashArt.png| | SSB4 Roy SplashArt.png|Roy's splash art. | ||
Roy_amiibo.png|Roy's [[amiibo]]. | |||
Roy unlock notice SSB4-Wii U.png|Roy's unlock notice in {{forwiiu}} after downloading him from the [[Nintendo eShop]]. | |||
Roy Screen-1.jpg|Using his down taunt. | |||
Roy Screen-2.jpg|Using his new neutral attack on {{SSB4|Captain Falcon}}. | |||
Roy Screen-3.jpg|Using [[Double-Edge Dance]]'s third upward hit on {{SSB4|Lucario}}. | |||
Roy Screen-4.jpg|Using [[Critical Hit]], his [[Final Smash]], on Lucario and {{SSB4|Charizard}}. | |||
Roy Screen-5.jpg|Alongside [[Koopalings|Roy Koopa]]. | |||
Roy Screen-6.jpg|Alongside {{SSB4|Zero Suit Samus}} and {{SSB4|Wii Fit Trainer}}. | |||
Roy Screen-7.jpg|Using [[Flare Blade]] on {{SSB4|Link}}. | |||
Roy Screen-8.jpg|All of Roy's [[alternate costume]]s. | |||
Roy Screen-9.jpg|Using Double-Edge Dance's last forward hit on [[Rosalina & Luma (SSB4)|Rosalina]] and {{SSB4|Yoshi}}. | |||
Roy Screen-10.jpg|Using his up taunt alongside male and female {{SSB4|Robin}}. | |||
</gallery> | </gallery> | ||
==Trivia== | ==Trivia== | ||
* | *Roy and {{SSB4|Ryu}} are the only DLC characters to be released on the same day as their announcement. | ||
*Roy | *Roy's pose in his official art is nearly identical to his pose in his official art for ''Melee''. | ||
*Roy is the only one of the DLC veterans to not have had a trophy depicting him in the base game. | |||
*Roy's | *Aspects of Roy's sound design have been carried over from ''Melee'': | ||
**All of his sourspotted attacks emit a punch/kick sound effect, instead of a slash sound effect. | |||
*All of | **He uses different voice clips when using battering [[item]]s. | ||
** | **When he is [[dizzy]], his corresponding voice clip loops constantly, instead of playing only once. | ||
* | **He uses more than one voice clip for his smash attacks. | ||
** | **He only has one voice clip for taking light knockback (shared with {{SSB4|Mario}}, {{SSB4|Kirby}}, {{SSB4|Dr. Mario}}, {{SSB4|Ness}} and {{SSB4|Mewtwo}}). | ||
* | **He only has one voice clip upon being blast KO'd (also shared with Mewtwo, as well as {{SSB4|Jigglypuff}} and {{SSB4|Bayonetta}}). | ||
*Like | *Roy's up smash, Flame Sword, shares the same name as {{SSB4|Mega Man}}'s forward aerial. | ||
* | *Roy, {{SSB4|Marth}}, and {{SSB4|Cloud}} are the only characters to speak Japanese in every regional version of ''SSB4''. | ||
*Roy | *Like Marth in his transition from ''Melee'' to ''Brawl'', Roy's first and third [[victory pose]]s have swapped quotes. | ||
*If Roy's [[on-screen appearance]] occurs on one of [[Distant Planet]]'s leaf [[platform]]s, he will descend with the leaf, but the Binding Blade will remain stationary in the air until it returns to Roy once the battle actually starts. | |||
*Roy, Ryu, Cloud, {{SSB4|Corrin}}, and {{SSB4|Bayonetta}}'s voice clips are in much lower quality than the rest of the cast in {{for3ds}}. | |||
* | <!--If you're gonna write something about the Roy/Roy Koopa or Superspicy Curry references in the trailer, don't, because they are already on the SSB4 trailers page--> | ||
*Roy is the only DLC | *Roy's new [[Final Smash]] is less powerful than his fully-charged Flare Blade. | ||
*Roy is one of two DLC characters to be made available for purchase the day of their reveal, with the other being Ryu. | |||
*Roy is one of only two characters in the ''Super Smash Bros.'' series to have the same name as another playable fighter, his counterpart being the [[Koopaling]] named [[Bowser Jr.|Roy Koopa]]. This is referenced in an official image on the ''Super Smash Bros. 4'' website. | |||
**Additionally, despite having the same name, the [[Announcer]] has two different voice clips for announcing Roy and Roy Koopa's names. | |||
*Roy is the only DLC fighter in the series to not have a projectile of any sort. | |||
==References== | ==References== | ||
| Line 362: | Line 508: | ||
{{SSB4Characters}} | {{SSB4Characters}} | ||
{{Fire Emblem universe}} | {{Fire Emblem universe}} | ||
[[Category:Roy (SSB4)| ]] | [[Category:Roy (SSB4)| ]] | ||
[[Category:Downloadable content]] | [[Category:Downloadable content]] | ||
[[Category:Trophies (SSB4-3DS)]] | |||
[[Category:Trophies (SSB4-Wii U)]] | |||
[[es:Roy (SSB4)]] | |||
Latest revision as of 09:11, March 23, 2024
| Roy in Super Smash Bros. 4 | |
|---|---|
 
| |
| Universe | Fire Emblem |
| Other playable appearances | in Melee in Ultimate |
| Availability | Downloadable |
| Final Smash | Critical Hit |
| Tier | E (41) |
| “ | Roy Seals the Deal! | ” |
| —Introduction tagline | ||
Roy (ロイ, Roy) is a playable character in Super Smash Bros. 4. Initially leaked via data mining of update 1.0.6,[1] Roy was formally announced alongside Ryu during a Nintendo Direct on June 14th, 2015, and was made available that same day as downloadable content alongside Lucas and Ryu.[2] Jun Fukuyama reprises his role as Roy's voice actor from Super Smash Bros. Melee, providing new voice clips that mimic the ones he recorded in the game.[3]
Roy is ranked 41st out of 54 on the tier list, placing him in the E tier. This is a slight improvement to Roy's low-tier placement in Melee, where he was ranked 21st out of 26. However, due to SSB4's tier structure, Roy is actually rendered as a mid-tier character.
Roy boasts good overall mobility and attack speed, owing to very fast dashing and air speeds, alongside fast-starting attacks that allow him to quickly react to openings. When coupled with the Binding Blade's highly damaging sweetspots, which are close to its hilt, he boasts impressive power and a number of strong KOing options at close range.
He also benefits from gameplay changes brought about by SSB4: the rage mechanic supplements his strong sweetspotted attacks, the changes to hitstun and shieldstun make his sweetspots significantly safer on hit, while the updated edge mechanics improve his recovery. Roy also has a varied combo game that is difficult to predict and grants him above average damage racking potential, with reliable combo starters from low to medium percents including forward and down throw, neutral attack, neutral and up aerial, and Double-Edge Dance.
Roy, however, is strongly held back by a poor approach, owing to his slow air acceleration and unsafe aerials that cannot autocancel in a short hop. On a related note, Roy is ineffective at spacing: despite having disjointed range, the Binding Blade's inconvenient sourspots force him to space his sweetspotted attacks dangerously close to opponents.
Roy's combo game is also flawed: his sweetspotted moves are ineffective at performing lengthy combos past medium percents, while his forward, back and down throws are heavily reliant on reads because of their very low hitstun. Finally, Roy suffers from a poor recovery: Blazer is predictable and covers very minimal vertical distance, while his very fast falling speed not only hinders his recovery, but also makes him susceptible to combos.
Due to the above factors, Roy has attained below-average tournament representation. Despite this, he has achieved some degree of competitive success, thanks to the likes of players such as Hyper Kirby, Flow, and Cloudy.
Attributes[edit]

Unlike in Melee, Roy is a semi-clone of Marth, although he retains the attributes that differentiate the two. Compared to Marth, Roy sports the eleventh fastest dashing speed, the fourth fastest air speed, and the fifth fastest falling speed (7, 23, and 30 spots higher, respectively), alongside being 5 units heavier than Marth. Conversely, Roy walks significantly slower, being only above-average compared to Marth, while his air acceleration is among the bottom five. Finally, Roy's long extended dash-dance allows him to read and punish opponents accordingly. However, his laggy initial dash (17 frames) and turnaround animations give him a poor shield buffer out of his dash and turn. Overall, this places Roy's archetype as a speedy fast-faller with polarized, linear movement. Roy's mobility is considerably faster than Marth's in regard to movement speed and air-to-ground transitioning, but his aerial fluidity is significantly limited, preventing him from easily using retreating aerials like Marth, and makes his aerial approaches committal.
Apart from differences in attributes, many of Roy's attacks differ from Marth's by having separate animations, which in turn give his attacks completely altered hitbox sizes, frame values and mechanical differences. This grants him a individualized playstyle compared to Marth, made most notable by his inverse tipper: the Binding Blade deals more damage and knockback near its hilt, and much less at its blade's tip, which has very little KO potential compared to Marth's untippered Falchion. However, its inverse tipper is much larger than Falchion's tipper, and most of its attacks are less polarizing due to their possession of a "mediumspot" that is between both its sweetspot and sourspot. Roy's sword, along with his attributes, encourage a highly rewarding close-and-personal game with heavy emphasis on landing hits with his sword's larger sweetspot, and has little focus on distant spacing due to its ineffective sourspots.
Much like his overall mobility, almost all of Roy's attacks have quick start-up, and his aforementioned speed allows him to easily close the gap between himself and his opponent to make effective use of his inverse tipper. Coupled with his sweetspot's high damage, Roy has an above-average damage racking game once he finds an opening. His most versatile combo initiators are his neutral aerial (which has quick start-up, low landing lag, and a long-lasting hitbox) and his neutral attack (which starts at frame 5 and launches at a favorable angle), both of which can start combos into his throws and tilts. His up aerial starts on frame 5 and has a deceptively long-lasting hitbox that lasts until the sword trail ends, allowing a reverse sweetspotted up aerial to start medium percent combos into neutral aerial, back aerial, or Blazer, or a sourspot into Double-Edge Dance depending on the enemy's reaction. Finally, forward aerial has very early interruptibility, allowing it to be used as a retreating aerial while jumping backwards, can chain into itself up to two times if Roy moves at full speed and uses his second jump, and can be used for frame-trapping against air dodges if followed up with an up aerial. His down tilt is also a good spacing option, and is useful for shield stabbing and edgeguarding due to its semi-spike trajectory.
Tying in with his damage racking game are his throws, which launch at favorable angles for low-percent combos. Down and forward throws can chain into his neutral attack, dash attack, forward tilt, neutral aerial, Blazer and Double-Edge Dance. As Roy's combo-initiating moves can often lead straight into a grab, it is common for Roy to deal high amounts of damage through precise reads at low percents, either from an attack into a grab, or through chaining a throw into an attack, then re-grabbing. While the low hitstun of his throws prevent true follow-ups at higher percents, they also force opponents into tech-chase and air dodge scenarios, allowing Roy to condition opponents into reacting. Up throw is also able to KO outright at very high percents.
The power of Roy's sweetspotted moves also grant him an array of KOing options that are capable of KOing impressively early. While on-stage, his best KOing options are his forward and up tilts, forward and up smashes, and Blazer, due to their quick start-up and high power. His smash attacks, in particular, are immensely powerful; forward smash is one of the strongest of its kind and can be used for hard punishes at as low as 40%, up smash is capable of KOing as low as 100%, and the sweetspotted first hit of down smash can KO at around 120%. Although Roy's offense thrives while he is on-stage, his fast air speed and disjointed range grant him an effective off-stage presence. His forward, back and down aerials each have distinct perks apart from their power: the former two are quick and have wide arcs, while the latter is a powerful meteor smash when sweetspotted. Although he is a middleweight, Roy is also one of the better users of rage, as his very quick falling speed grants him impressive on-stage endurance and allows him to further enhance the knockback of his already powerful moves.
Finally, each of Roy's special moves possess respectable utility. Flare Blade is a deadly edgeguarding option, especially while on-stage, thanks to its fearsome power even when uncharged, large hitbox, and deceptively low ending lag. The latter allows it to be used as a mindgame to punish edge getups, while its speed can amplify Roy's sub-par aerial mobility by granting him an aerial B-reverse. Double-Edge Dance is effective for damage racking, catching dodges, and pressuring shields; its final upward and forward hits can also KO outright. Blazer is an excellent out of shield option, grants both brief super armor on start-up and high power when grounded, can stage spike careless opponents who attempt to edgeguard Roy, and can be a true combo from his down throw at 0%, or a neutral attack at specific percents as a KO combo. Lastly, his Counter is one of the strongest counterattacks in the game, as its 1.35× damage multiplier makes it devastating when used against a powerful attack.
However, Roy is hindered by a slew of flaws. Although he is granted a powerful offense, making use of it is difficult in the first place despite his remarkable mobility, mainly due to several reasons. His very fast air speed is offset by his very slow air acceleration, making his aerial approach highly committal in general, much like Ryu's. In addition, while his inverse tipper is one of his greatest strengths, it also forces him to fight at close range to be utilized at its fullest: only his sweetspots cause enough shield stun to prevent punishment, and when coupled with his attacks having overall high ending lag (or in the case of his aerials, the inability to autocancel with a short hop), this results in him having to space attacks dangerously close against shields and negating the benefits of his disjointed sword. Finally, his range is below average for a swordsman, and when coupled with the Sword of Seal's low-utility sourspots, Roy's approach and spacing game is poor despite his good mobility, since his only quick, low-risk options that can be used to close in and pressure the opponent are his neutral aerial and falling up aerial.
Roy's combo game, while powerful at low percents, become inconsistent from medium percents and onward. Although possible, Roy's sourspots are very unreliable for creating combos unlike Marth's, as they require extreme precision and only work at specific percents. His sweetspots are similar, due to them sending opponents too far for actual combos and only being effective for outright KOing at high percents. His throws also lack any true followups due to their very low hitstun: his forward throw can be easily teched, while his down throw can be air dodged out of. Overall, this makes Roy potent at damage racking, but his lack of KO setups puts him at a significant disadvantage when trying to end stocks, as it leaves him only with hard punishes.
Lastly, Roy's offstage endurance is notoriously poor. His very quick falling speed makes him extremely susceptible to combos, and as none of his moves are generally reliable enough to consistently break combos, many characters with reliable combo moves can rack up large amounts of damage and easily force him off-stage. To add to this issue, Roy's only recovery move, Blazer, is notoriously ineffective despite his impressive mobility: although it offers excellent protection, can be angled, and covers a decent amount of horizontal distance, it covers little vertical distance and is predictable. When coupled by his very quick falling speed, he is highly susceptible to meteor smashes, and even a sufficiently strong semi-spike can launch him too far away to recover. Additionally, players unaccustomed to his falling speed will quickly find that any misused aerial off-stage will send him too far to recover.
Although tournaments do not currently allow custom moves, it should be noted that Roy does not have any due to being a DLC character. As such, he must not only utilize his own special moves properly, but also adapt as best as possible against characters that possess their own custom moves.
Overall, Roy's strengths are on par with his weaknesses. While his character archetype is commonly viewed as being in the rushdown and/or glass cannon categories, he cannot effectively function in either role due to his poor recovery, unimpressive range for a swordsman, and vulnerability to combos. Instead, his optimal playstyle consists of limited aggression: capitalizing on enemy openings with his excellent mobility, and pressuring them with both his powerful sweetspots and effective combo game, but approaching cautiously and spacing his sweetspots safely enough to circumvent his flaws. As a result of these traits, Roy has sparse tournament representation and results at high-level play, although he has nevertheless achieved some competitive success, thanks to players such as Hyper Kirby and Cloudy.
Changes from Super Smash Bros. Melee[edit]
Roy is frequently placed within a group of characters (Bowser, Dr. Mario, Charizard, King Dedede and Pit) that are the most noticeably reworked veterans in SSB4. In Roy's case, several of his moves were de-cloned from Marth in a similar vein to Falco and Ganondorf in Brawl, to the point that he is now a semi-clone. Although Roy received a mix of buffs and nerfs in the transition from Melee to SSB4, he has overall been buffed.
Among Roy's buffs are his greatly improved mobility, now having a much faster dashing speed and one of the fastest air speeds in the game, as well as his moveset being notably more rewarding than in Melee: most of his moves are different from Marth, such as his new neutral attack, forward and up tilts, dash attack and down aerial, most of which have reduced lag, improved hitbox placements, and increased power, improving his close-ranged offense and combo game, and giving him more reliable KO moves. His damage output is much higher, and his sweetspotted attacks are considerably more powerful, giving him a bevy of new KOing options, which generally alleviates his main weakness from Melee. His attack speed is faster overall, with his aerials in particular having significantly reduced ending and landing lag, L-canceling notwithstanding. The addition of rage boosts his KO power even further, while his heavier weight allows him to use it quite effectively. He also has much better endurance thanks to a his much higher weight. Lastly, Roy's recovery is generally better, thanks to Blazer's improved horizontal distance, his faster air speed, and the removal of edge hogging.
However, Roy has also received several nerfs. Roy now stands at Marth's height, which enlarges his hurtbox, though his attacks have much shorter ranges and hitbox durations in spite of this, forcing him to fight at a much closer range, exacerbating one of his key weaknesses in Melee. For the most part, Roy is also harmed by the post-Melee gameplay changes: the loss of wavedashing and L-canceling, as well as the weakening of dash-dancing, noticeably worsen his approach. The general increase in range for other characters since Melee, such as with Donkey Kong and Bowser, also indirectly hurts him. Double-Edge Dance's first hit has almost completely lost its ability to stall his descent due to his faster falling speed, which hurts his recovery despite its improvements. Lastly, Roy's heavier weight makes him easy to combo despite falling speeds being slower in SSB4 than they were in Melee.
Overall, Roy's strengths are much more pronounced than in Melee, though he retains most of the same weaknesses as well. While his sweetspotted attacks are considerably more rewarding, he still has to fight up close in order to rack up damage, while his sub-par endurance makes his playstyle risky. Despite Roy having been overall buffed, other veterans were also buffed to varying degrees, which downplays his strengths in SSB4's metagame.
Aesthetics[edit]
 Roy's design is now a combination of his appearances in Fire Emblem: The Binding Blade and Fire Emblem Awakening. His taller height, more muscular physique, slightly smaller eyes, and Turkey red hair are from Awakening, whereas his facial structure and hairstyle are from The Binding Blade. Roy's cuirass, pauldrons, and boots are also from his attire in The Binding Blade, whereas his vambraces, poleyns, greaves, and gloves are from his attire as an Einherjar in Awakening.
- Roy's shirt, pants, headband, and cape are now amalgamations of his respective articles of clothing in The Binding Blade and Awakening, whereas his poleyns are amalgamated with the design of his pauldrons. Additionally, Roy's boots are now coyote brown with gray toe boxes, carnelian bootstraps, and metallic gold soles. Lastly, his gloves are now carnelian, instead of blue. These changes are unique to SSB4.
- Roy now has eight costumes much like the rest of the cast. He has received six new alternate costumes, each of which is based on Alen, Lance, Marcus, Zephiel, Cecilia, and his father, Eliwood.
- Roy has been updated with universal features introduced in Brawl.
- Roy uses various voice clips for any move between any tilt attack, his dash attack, and all aerial attacks except for his down aerial.
- Roy has an on-screen appearance and two new taunts. His taunt from Melee has been moved to his down taunt.
- Roy is more expressive. He smiles during his fist pumping idle pose, and either scowls or sternly clenches his teeth during some attacks.
- The Binding Blade's trail now clearly indicates its sweetspot's location, similarly to Falchion.
- Aside from retaining some of Marth's animations, Roy now swings the Binding Blade in a reverse grip or with both hands. This has translated to his moveset, be it through a tweaked animation or a completely new move.
- Roy now has unique idle animation, instead of variations of Marth's, and has two new idle poses. However, his stance while holding a light item is identical to Marth's.
- Roy has a new victory pose. He now spins the Binding Blade one and a half times and then sheaths it rather than planting it on the ground.
- Jump, sidestep, and shield break's animations have changed.
Attributes[edit]
 Roy is taller, making his hurtbox slightly larger. While this would also improve his overall range, this is largely mitigated by the majority of his moveset having smaller hitboxes and/or altered hitbox placements because of the aforementioned alterations to most of his sword-based attacks' animations.
- Roy is significantly heavier (85 → 95), going from a heavier lightweight to an average middleweight (tied with Robin and Pac-Man). This improves his endurance, but makes him more susceptible to combos.
- Roy walks slower (1.2 → 1.15).
 Roy dashes much faster (1.61 → 1.95).
- Roy jumps higher (28.36337281 → 30.969999).
- Roy's short hop height is also higher (9.132671053 → 13). Compared to the returning veterans, however, Roy's short hop height is lower, going from the fifth lowest out of 26 characters to the sixth lowest out of 58.
- Roy's air speed is drastically faster (0.9 → 1.24), going from the 12th fastest in Melee to the fourth fastest.
- As with the returning veterans, Roy's falling speed was decreased (2.4 → 1.8). Compared to the returning veterans, however, Roy falls faster. Improving his vertical endurance, but also making him more susceptible to combos.
- The removal of chain grabbing both helps and hinders Roy. It results in him no longer being susceptible to chain grabs, while his faster falling speed results in him no longer being susceptible to pseudo-chain grabs. However, it hinders his damage racking potential.
- The weakening of dash-dancing and the removal of wavedashing significantly hinder Roy's approach.
Ground attacks[edit]
- Neutral attack:
- Roy has a new neutral attack, a reverse gripped upward slash. Compared to the previous neutral attack, it deals more damage (3%/5%/6% → 4.8%/7.5%/7.5%) and base knockback (30/5 → 40/32), has less ending lag (FAF 26 → 23) and has a different angle (361° → 62°/32°). Altogether, these traits make it significantly better for combos.
- Neutral attack has more start-up lag and its duration is shorter (frame 4-7 → 5-7) compared to the previous neutral attack.
- Forward tilt:
- Roy has a new forward tilt, a reverse gripped downward slash. Compared to the previous forward tilt, it deals more damage (12%/10%/7% → 12.5%/9%/8%) and knockback (60/30 (base)/70 (scaling) → 30/40 (base)/100/80 (scaling)) and has less start-up (frame 9 → 8) and ending lag (FAF 40 → 32). Altogether, these traits making it better for KOing.
- Forward tilt's duration is shorter (5 frames → 3) than the previous forward tilt's.
- Up tilt:
- Roy has a new up tilt, a reverse gripped overhead arcing slash. Compared to the previous up tilt, it deals more damage (6%/8%/9%/10% → 7%/12%) and the sweetspot has more knockback scaling, making it much stronger, while the sourspots deal consistent damage and less knockback scaling (120/118/116/100 → 103). It also has less start-up (frame 7 → 6) and ending lag (FAF 40 → 39) and its sourspot has more base knockback (20 → 30). Altogether, these traits make it better both for KOing and combos.
- Up tilt's duration is shorter (7 frames → 5) than the previous up tilt's.
- Down tilt:
- Sweetspotted down tilt deals less damage (12% → 11%).
- Sourspotted down tilt deals more damage (6% → 6.5%).
- Down tilt has decreased start-up lag (frame 8 → 7).
- Down tilt has decreased base knockback (90/70 → 50/40). Due to its angle being altered (80° → 30°), it is also now a semi-spike. These changes improve its edgeguarding and tech-chasing potential, but significantly hinder its combo potential.
- Down tilt has increased ending lag (FAF 20 → 22) and a shorter duration (3 frames → 2).
- Dash attack:
- Roy has a new dash attack, an inward horizontal slash. Compared to the previous dash attack, it deals more damage (12%/6% → 13%/9%), knockback (70/35 (base)/55/60 (scaling) → 65/60 (base)/82/60 (scaling)) and its sweetspot has a different angle (110° → 52°). It also does not suffer from the infamously poor hitbox issues at close range from Melee due to it being a different attack. Altogether, these traits make it better for KOing.
- Dash attack has more start-up (frame 12 → 13) and ending lag (FAF 40 → 50) compared to the previous dash attack.
- Forward smash:
- Roy has a new forward smash, a rotating two-handed downward slash based on his regular attack as a Great Lord in Fire Emblem: The Binding Blade. Compared to the previous forward smash, its sweetspot is smaller because of it having a "medium-spot" that deals 3% less damage (20% → 17%). It also has more start-up (frame 12 → 14) and ending lag (FAF 54 → 55), less vertical range, and a shorter duration (3 frames → 2).
- Sweetspotted forward smash has different knockback compared to the previous forward smash's sweetspot (80 (base)/65 (scaling) → 70/70).
- Due to the damage multiplier for fully charged smash attacks being increased from Melee to SSB4 (1.3671× → 1.4×), fully charged forward smash deals more damage (27.324%/16.4052% → 28%/16.8%).
- The 19% damage increase to shields and the increase to shieldstun make sweetspotted forward smash significantly better at pressuring shields compared to the previous forward smash's sweetspot.
- Up smash:
- Due to the damage multiplier for fully charged smash attacks being increased from Melee to SSB4 (1.3671× → 1.4×), fully charged up smash deals more damage (22.639176% → 23.8%).
- Due to the changes to stale move negation, up smash deals 0.44% more damage (16.56% → 17%), although its base knockback was compensated (73 → 70). It also has decreased start-up lag and a longer duration (10 frames → 12). Additionally, its spike hitbox now properly keeps opponents in place for the other hits. Lastly, it now grants intangibility to Roy's arm throughout its duration.
- Up smash has significantly increased ending lag (FAF 46 → 59).
- Down smash:
- Down smash's front hit deals less damage (21%/14% → 15%/10%), hindering its KO potential.
- Down smash's back hit deals more damage (16%/8% → 17%/11%) and its angles have been altered (75°/361° → 50°/47°/361°), improving its KO potential. It also has decreased ending lag (FAF 72 → 63).
- Down smash's knockback properties have been reversed, making the back hit stronger than the front hit.
- Down smash has a shorter duration (6 frames → 4).
- The 19% damage increase to shields and the increase to shieldstun significantly improve sweetspotted down smash's shield pressuring potential.
Aerial attacks[edit]
- All aerials have decreased ending lag (FAF 50 → 46 (neutral), FAF 35 → 30 (forward), FAF 43 → 36 (back), FAF 49 → 42 (up), FAF 64 → 52 (down)).
- Neutral, forward, and up aerials autocancel later (frame 32 → 47 (neutral), frame 30 → 33 (forward), frame 30 → 38 (up)). Forward aerial in particular no longer has an autocancel window, losing its ability to autocancel.
- All aerials have decreased landing lag (20/10 frames (normal/L-canceled) → 11 (neutral), 20/10 frames → 13 (forward), 24/12 frames → 16 (back), 18/9 frames → 14 (up), 32/16 frames → 23 (down)). Due to the removal of L-canceling, however, they are not fully compensated.
- Neutral aerial:
- Due to consisting of a sweetspot and a sourspot instead of a consistent hitbox, neutral aerial's first hit no longer deals consistent damage (4% → 6%/4%).
- Neutral aerial's sweetspotted second hit deals 0.5% more damage (8% → 8.5%).
- Neutral aerial has decreased start-up lag (frame 7 → frame 6 (hit 1), frame 17 → frame 15 (hit 2)). Its second hit also has increased knockback scaling (80 → 100) and its angle has been altered (361° → 50°). Altogether, these changes improve its combo and KO potential.
- Forward aerial:
- Forward aerial deals more damage (8%/5% → 11%/7%) and has increased knockback (30/10 (base)/70 (scaling) → 50/80), significantly improving its KO potential.
- Forward aerial's animation has slightly changed. Roy now swings the Binding Blade while lunging farther inward. This new animation doubles its start-up lag (frame 5 → 10).
- Back aerial:
- Back aerial deals 3% more damage (9%/6% → 12%/9%) and has increased knockback scaling (70 → 100), significantly improving its KO potential. It also autocancels earlier (frame 34 → 32).
- Up aerial:
- Up aerial's duration is longer (5 frames → 7) and its sweetspot has increased knockback (20 (base)/70 (scaling) → 40/80), improving its juggling potential.
- Down aerial:
- Roy has a new down aerial, a two-handed downward slash between his legs, similar to Ike's down aerial. Compared to the previous down aerial, it deals much more damage (6%/9% → 10%/15%), has more vertical range, its sweetspot is easier to land, and its sourspot has KO potential against grounded opponents. It also has higher knockback (40 (base)/70 (scaling) → 20/30 (base)/90 (scaling)) compared to the previous down aerial, improving its KO potential.
- Down aerial has less horizontal range, more start-up lag, and a shorter duration (frames 7-10 → 16-17) compared to the previous down aerial.
- The removal of meteor canceling makes down aerial significantly better at meteor smashing compared to the previous down aerial.
Throws/other attacks[edit]
- All grabs have significantly decreased ranges.
- Dash grab has decreased start-up lag (frame 10 → 8).
- Pummel:
- Pummel deals 1% less damage (3% → 2%).
- Pummel is faster (24 frames → 15).
- Up throw:
- Up throw deals more damage (5% → 6%).
- It has reduced knockback scaling (130 → 100), hindering its KO potential in spite of its higher damage output.
- Down throw:
- Down throw deals less damage (6% → 5%).
- It launches at a higher angle (361° → 80°), which coupled with its lower damage output significantly improves its combo potential.
- Floor attack:
- Front and back floor attacks deal more damage (6% → 7%).
- Due to the introduction of tripping in Brawl, Roy has received a floor attack after tripping.
Special moves[edit]
- Flare Blade:
- Flare Blade can be charged up to deal more damage before the full charge without receiving recoil damage (41% → 45%). It also has increased interruptibility for a few frames upon its hitbox being active in spite of its ending lag.
- Flare Blade has increased start-up lag, its duration is shorter (6 frames → 4), a smaller hitbox, and it takes slightly more time to fully charge. It has also received a sourspot at the edges of the attack that deals 15% less damage (50% → 35%) and has less knockback scaling (83 → 70).
- Flare Blade has updated visual effects. All of its stages now unleash a minor explosion, with most of the higher stages unleashing the large explosions from Melee. It also has updated sound effects, as it now stops emitting sound when fully charged and before its explosion.
- Flare Blade's animation has slightly changed. Roy now briefly lifts the Binding Blade with both hands to his side when returning to his neutral stance.
- Roy has gained a new voice clip for releasing a fully charged Flare Blade. In Melee, it used his blast KO voice clip.
- Double-Edge Dance:
- Aside from its first and fourth downward hits, Double-Edge Dance's other have decreased start-up lag. Its third downward hit also no longer consists of multiple hits and launches at a lower trajectory. These changes make its hits connect together better.
- Double-Edge Dance deals less damage and has decreased knockback, vertical range, and increased ending lag. Additionally, Roy's faster falling speed significantly hinders its first hit's recovery potential. Lastly, its third upward hit is no longer a meteor smash, removing its KO potential.
- All variations of Double-Edge Dance's third hit connect together better with its fourth hit. This improves their combo potentials, but removes their KO potentials.
- Double-Edge Dance now has transcendent priority, improving its reliability.
- The 19% damage increase to shields and the increase to shieldstun significantly improve Double-Edge Dance's last downward hits' shield pressuring potential.
- Double-Edge Dance's animation has changed. The slashes are now identical to Dancing Blade from Brawl.
- Blazer:
- Blazer deals more damage (13.18% → 16.8%) and its last hit has increased knockback (10 (base)/100 (scaling) → 40/130), improving its KO potential. It also has lingering hitboxes at its end, and can be reversed before start-up. It also travels more horizontal distance and the grounded version received more intangibility frames on start-up.
- Blazer travels less vertical distance.
- Blazer's first hit has significantly decreased set knockback (200 → 160/120). This makes its hits connect together better, but removes its one-hit KO potential against the lightest characters.
- Blazer's animation has slightly changed. Roy now performs the jumping slash while holding the Binding Blade in a reverse grip.
- Counter:
- Counter's damage multiplier has decreased (1.5× → 1.35×), although its knockback was somewhat compensated (30 (base)/90/70 (scaling) → 35 (base)/100/70 (scaling)), hindering its KO potential. Additionally, the damage cap can only reach a maximum of 50%, now matching the rest of the multiplier based counterattacks in Smash 4.
 Due to its change, Counter-stacking no longer crashes the game.
- Counter's duration is longer (frames 8-20 → 8-27).
- Counter's animation has changed. Its counterattack now resembles Roy's long-ranged basic attack with the Binding Blade in Fire Emblem: The Binding Blade. This new animation increases its horizontal range.
- Critical Hit:
- Roy now has a Final Smash, Critical Hit. Unlike Marth and Lucina's Critical Hit, Roy's version is stationary and has him swing the Binding Blade around himself before performing a slash in front of himself that emits a short-ranged explosion.
Update history[edit]
Roy has been slightly buffed via game updates. Update 1.1.0 gave Blazer additional hitboxes, making it easier to land. However, the same update reduced the damage outputs of its first and last hits, which slightly weakened its KO potential. The changes to shield mechanics brought about by updates 1.1.0 and 1.1.1 have made Roy's sweetspotted attacks much safer at the cost of his sourspotted attacks being unsafer, to the point where his semi-clone, Lucina, has safer attacks than both him and Marth. Lastly, update 1.1.4 decreased the landing lag on all of Roy's aerials, which improved his neutral and up aerials' combo potentials when they are SHFF'd, and decreased Double-Edge Dance's start-up and ending lag.
- Blazer's first and last hits deal 1% less damage: 6.5% (hit 1 sweetspot)/5% (hit 1 sourspot), 9% (hit 5 sweetspot)/8% (hit 5 sourspot) → 5.5%/4%, 8%/7%. This makes its first hit connect together better, but hinders its KO potential.
- Blazer has received additional hitboxes.
-
 Roy performs his down taunt instead of his fist pump idle pose after a player chooses a path in Classic Mode.
- Neutral aerial landing lag: 13 → 11
- Forward aerial landing lag: 15 → 13
- Up aerial landing lag: 16 → 14
- Back aerial landing lag: 19 → 16
- Down aerial landing lag: 28 → 23
- Double Edge Dance improved. The first hit hits one frame earlier (7 → 6), has one frame less of endlag both grounded and in the air (IASA: 42/32→ 41/31).
Moveset[edit]
- For simplicity if, for example, Roy's blade does 6% damage while the tip does 4%, and the attack has no other hitboxes, it is written as 6%/4%.
For a gallery of Roy's hitboxes, see here.
| Name | Damage | Description | ||
|---|---|---|---|---|
| Neutral attack | Slash (リフトスラッシュ, Lift Slash) | 7.5%/4.8% | A reversed gripped upward slash. Easily chains into itself, forward tilt and a grab at low percents, and his forward and up aerials at high percents. Starts at frame 5, making it a great tool for spacing, combos, and stopping approaches. | |
| Forward tilt | Sharp Edge (オーバーバッシュ, Over Bash) | 12.5% (sweetspot), 9% (near), 8% (far) | A reverse gripped downward slash. Very strong for a tilt attack, it usually KOs around 120% from center-stage when sweetspotted, making it a viable KO option. However, it has noticeable ending lag, making it punishable. The sweetspot is safe on shield if Roy does not directly touch the opponent's shield. | |
| Up tilt | 12%/7% | A reverse gripped overhead arcing slash. Very strong like his forward tilt, it usually KOs around 110% when sweetspotted. However, it has rather low horizontal range and high ending lag, which make it very punishable on shield. | ||
| Down tilt | Low Stab (ロースラスト), Low Thrust) | 11%/6.5% | A kneeling thrust, identical to Marth and Lucina's down tilts, but with lower range. Has the lowest amount of ending lag out of his tilt attacks, and is useful for shield stabbing, edgeguarding or starting tech-chases thanks to it being a semi-spike. However, it has much less knockback growth than his other tilts. | |
| Dash attack | 13%/9% | An inward horizontal slash across the ground. It has good KO potential for a dash attack, KOing when sweetspotted around 130%, however it has moderate start-up and high ending lag, making it very unsafe on shield. | ||
| Forward smash | 20% (close), 17% (mid), 12% (far) | Rotates his body to perform a lunging, two-handed downward slash. It is one of the strongest forward smashes in the game when sweetspotted, as it can KO as low as 40% with rage. It also has very long disjointed range due to Roy lunging while performing it, and it comes out on frame 14, which is rather fast for a smash attack of its power. However, it has high ending lag and its hitbox does not last long, which make it very punishable when whiffed. It is based on his regular attack as a Great Lord in Fire Emblem: The Binding Blade. | ||
| Up smash | Flame Sword (フレイムソード) | 1% (hit 1), 2% (hits 2-4), 10% (hit 5) | An upward thrust, which ignites the Binding Blade's tip and concludes with a small explosion. Powerful enough to KO middleweights around 100% while uncharged. Good for juggling opponents in the air, as it grants intangibility to Roy's arm throughout its duration. The attack's multiple hits transition faster if the initial portion of the thrust connects. The move also deals 1% more damage on an aerial opponent (for a total of 18% if all hits connect). High ending lag like his other smash attacks. | |
| Down smash | 15%/10% (front hit) 17%/11% (back hit) | A kneeling outward slash in front of himself and then behind himself. Weaker than his other smash attacks, but it has the fastest start-up, and is useful for punishing rolls. Can KO uncharged around the 120% range if sweetspotted with the front hit, and around 100% sweetspotted with the back hit. While it has very quick start-up, it has the longest ending lag of all his smash attacks, which makes it very punishable when whiffed. | ||
| Neutral aerial | Double Slash (ダブルスラッシュ) | 6%/4% (hit 1), 8.5%/5% (hit 2) | An inward slash followed by a spinning, outward slash. One of Roy's most useful spacing and combo options thanks to its quick start-up, long-lasting duration, and low landing lag. The second hit is capable of attacking behind him, and the sourspot can catch opponents before he lands. The first hit is risky due to its short range, but it is a surprisingly effective combo starter. Very useful for KO set-ups at high percents, as landing the first hit can lead into an up tilt, up smash, or Blazer. | |
| Forward aerial | 11%/7% | A downward slash. It is fairly strong when sweetspotted, as it can KO opponents reliably while on-stage and especially off-stage. Good for air-to-air combat because of its low ending lag. It is possible to jump out of one from a short hop, and it can be used twice before landing from a jump. If performed fast enough, it can combo into itself when using his double jump. | ||
| Back aerial | About Face (アッパースイング, Upper Swing) | 12%/9% | Rotates his body to perform an upward slash. It is stronger than forward aerial, and can KO opponents reliably while on-stage and especially off-stage. Covers good vertical and horizontal range, but has rather high ending lag. Like with Marth and Lucina's back aerials, it turns Roy around when used. Unlike their back aerials, however, its sourspot can lock opponents at medium percents if they miss a tech. | |
| Up aerial | 9%/6% | A backflipping, upward arcing slash. The weakest of Roy's aerials in terms of damage and knockback, but it is his fastest one, due to it coming out on frame 5 (the same as his neutral attack). Its large arc and speed also make it suitable for juggling and/or combos, as it is able to follow up with most of his grounded attacks at low percents while he is falling, and into his aerials at high percents. Its sourspot also has a long duration, which allows it to function as a KO set-up, such as into back aerial or Blazer. | ||
| Down aerial | Half Moon (メテオドロップ, Meteor Drop) | 15%/10% | A two-handed, downward slash between his legs, similar to Ike's down aerial. It has a powerful meteor smash hitbox near the Binding Blade's hilt, while the rest of its blade launches opponents upward. KOs around 130% when sweetspotted on-stage. However, it has considerable ending and landing lag, which makes it risky to use off-stage, especially due to Roy's very high falling speed. | |
| Grab | — | Reaches out with his free hand. | ||
| Pummel | 2% | A knee strike. A fairly fast pummel. | ||
| Forward throw | 5% | Spins and flings the opponent forward. While the throw only causes very low hitstun, its low ending lag and low knockback allow it to combo into a neutral attack or forward tilt at low percents, and a dash attack at medium percents. It can also potentially combo into a dashing up smash if the opponent does not react in time, and works very well as a set-up for a neutral aerial, which, when hit, can chain into even more combos. At high percents, it is also able to set up a tech-chase. | ||
| Back throw | 5% | Tosses the opponent behind himself. Has weak diagonal knockback that causes the throw to have a somewhat fixed trajectory even at high percents. Low hitstun like his other throws, but its angle allows Roy to read the opponent's reaction and capitalize on it. If the opponent does not expect it, this can lead into down aerial at low percents or a back aerial for a KO at high percents near the edge, although the latter requires precise timing. | ||
| Up throw | 6% | Heaves the opponent upward with his free hand. Like Marth and Lucina's up throws, it is Roy's only throw with KO potential, although it starts KOing slightly later in comparison (at around 170%). | ||
| Down throw | Slam (グラブドロップ, Grab Drop) | 5% | A one-armed body slam. Aesthetically, it appears almost identical to forward throw, with its only difference being a shockwave effect to indicate the opponent hitting the ground. Mechanically, it functions much differently, as it launches the opponent directly above Roy and is a true combo into Blazer on most characters up to medium percents. Like Roy's forward throw, this throw causes very low hitstun, but its low base knockback and low knockback growth allow it to combo into neutral attack, up tilt and forward tilt at low percents, with the neutral attack combo allowing for the possibility of chaining into another grab if the opponent does not react in time. It can also combo into a neutral aerial, forward aerial and up aerial at medium percents. | |
| Floor attack (front) | 7% | Gets up while slashing to the left and then to the right. | ||
| Floor attack (back) | 7% | Gets into a kneeling position and then slices around himself as he gets up. | ||
| Floor attack (trip) | 5% | Hops briskly to his feet to perform a thrust to the left and a slash to the right. | ||
| Edge attack | 8% | Performs an outward slash while climbing up. | ||
| Neutral special | Flare Blade | 6%-45%, 50% (fully charged sweetspot), 36% (fully charged sourspot) | Rears back and ignites the Binding Blade's blade before performing a lunging, two-handed downward slash that generates an explosion. Functions similarly to Eruption, as it can be charged before unleashing the explosion, with the explosion's size growing as it charges. It has very high knockback growth even while uncharged, and the ability to quickly increase its damage output via charging. When fully charged, it is capable of one-hit KOing all but Shulk with the Shield Art active and Bowser from center-stage. To further supplement its power, it has surprisingly minimal ending lag, as Roy is able to act out of it almost immediately. However, a fully charged explosion deals 10% recoil damage. The fully charged explosion also has a sourspot at its edges that deals much less damage and knockback and is not a OHKO, though it is still powerful enough to KO at 41%. It is possibly Roy's best option to use to punish a stunned opponent because of its OHKO potential when fully charged, especially considering Roy's good shield pressuring potential. | |
| Side special | Double-Edge Dance | Varies | A combination of sword swings, which can be influenced by directional inputs. Its animations are identical to Dancing Blade and its first hit stalls Roy's descent, although it is largely ineffective for recovery because of his falling speed being much faster than Marth and Lucina's. However, its overall knockback is slightly stronger than Dancing Blade, and the last hit of each variation deals flame damage unlike Dancing Blade because of the Binding Blade's blade igniting. | |
| Up special | Blazer | 5.5% (grounded hit 1), 4.5% (aerial hit 1), 1.1% (grounded hits 2-4), 1% (aerial hits 2-4), 8% (grounded hit 5), 6% (aerial hit 5) | A jumping reverse gripped slash, which ignites the Binding Blade's blade. Hits multiple times and can be angled diagonally, though this causes the slash to cover less vertical distance. A viable out of shield and KOing option, its grounded version is more powerful, as it KOs around 110% if all hits connect. Its grounded version also grants brief super armor at its beginning. However, it is a sub-par recovery option, due to it covering decent horizontal distance, but very minimal vertical distance. | |
| Down special | Counter | 1.35× (minimum 9%) | Parries and then counterattacks against any incoming attacks with an outward slash that ignites the Binding Blade's blade. It has the highest damage multiplier of any counterattack in the game by default, with only Vision surpassing it while the Buster Art is active. However, its counter window is relatively short, and it is tied with Double Team for having the third highest amount of start-up lag out of every counterattack in the game. Roy may also say "いまだ!" ("Now!") or "そこ!" ("There!") if successful. Its counterattack is based on his long-ranged basic attack with the Binding Blade. | |
| Final Smash | Critical Hit | 1% (hits 1-10), 35% (hit 11) | Swings the Binding Blade in a circular motion, which ignites its blade, before performing a two-handed, downward slash that generates a powerful explosion. Unlike Marth and Lucina's Critical Hit, Roy's is not a one-hit KO. The circular swing can hit up to four times from the front, though it can hit up to ten times if performed on an opponent behind Roy. It is based on the Binding Blade's ranged attack in The Binding Blade. | |
| Hit | Damage | Description |
|---|---|---|
| First Hit (Neutral) | 3%/2% | A downwards slash towards the left while stepping forwards. |
| Second Hit (Up) | 3%/2% | Does an upwards lifting slash. |
| Second Hit (Neutral) | 3%/2% | Does a right-to-left swiping stab angled slightly downwards. |
| Third Hit (Up) | 4%/3% | Turns his body and swings upwards. |
| Third Hit (Neutral) | 4%/3% | Does an upwards swing while stepping forward. |
| Third Hit (Down) | 4%/3% | Steps forward and does a backhanded stab towards the ground before twirling. |
| Fourth Hit (Up) | 7%/5% | Performs a twirling overhead half-moon slash. |
| Fourth Hit (Neutral) | 6%/4% | Twirls counterclockwise and produces a strong downward. |
| Fourth Hit (Down) | 2% (hit 1-4), 5%/3% (hit 5) | Steps forward, bends close to the ground, and does a flurry of five stabs. The last hit launches opponents away. |
Stats[edit]
| Stats | Weight | Dash speed | Walk speed | Traction | Air friction | Air speed | Air acceleration | Gravity | Falling speed | Jumpsquat | Jump Height | Double jump Height |
|---|---|---|---|---|---|---|---|---|---|---|---|---|
| Value | 95 | 1.4 – Initial dash 1.95 – Run |
1.15 | 0.06 | 0.005 | 1.24 | 0.02 – Base 0.03 – Additional |
0.114 | 1.8 – Base 2.9 – Fast-fall |
5 | 30.969999 - Base 13 - Short hop |
28 |
Announcer call[edit]

English/Japanese/Chinese
On-screen appearance[edit]
- Warps onto the stage using warp magic while crouching, with the Binding Blade stuck in the ground when he appears. He then pulls it out with a flourish before assuming his idle stance.

|
|---|
Taunts[edit]
- Up taunt: Triumphantly holds the Binding Blade overhead.
- Side taunt: Winds back before striking a pose while holding the Binding Blade in a reverse grip while saying "僕は負けない!" ("I won't lose!") This line was one of his victory quotes in Melee.
- Down taunt: Kneels and twirls the Binding Blade behind himself while yelling "Heee-ya!" This taunt returns from Melee.
| Up taunt | Side taunt | Down taunt |
|---|---|---|

|

|

|
Idle poses[edit]
- Pumps his fist while smiling.
- Rubs the edge of the Binding Blade.
 |

|
|---|
Crowd cheer[edit]
| English | Japanese | |
|---|---|---|
| Cheer | ||
| Description | Roy's our boy! | Roy! Roy! Roy! |
| Pitch | Female | Female |
Victory poses[edit]
- Swings the Binding Blade once over his shoulder, then swings it down and behind him while facing left with his free hand clenched, saying 真の戦いは、これからだ ("The real battle is yet to come.")
- Spins the Binding Blade one and a half times and then sheaths it, saying "苦しい戦いだった" ("That was a difficult battle.") This replaces his victory animation from Melee, where he plunged the Binding Blade into the ground.
- Flourishes the Binding Blade in a circle before posing with it by his side, saying "守るべきもののために、負けられない!" ("For the sake of those I must protect, I will not lose!")
 |
 |

|
|---|
In competitive play[edit]
Tier placement and history[edit]
Roy's initial perception among the community was very positive; players almost immediately recognized his powerful offense due to the prominent strengths of his sweetspotted attacks, heavily damaging throw set-ups, and significantly improved mobility. These views were especially noted because his semi-clone, Marth, and by extension Lucina, were considered poor characters at the time. Despite his extremely low representation, which was unseen of a perceived high-tier character, most of the community believed that Roy was a viable character, with some claiming him to be the premier swordfighter in the game. Even so, his viability was also disputed due to his sparse tournament placements and difficulty in initiating combo setups. Furthermore, characters considered worse than him received a variety of buffs in later updates, with a corresponding increase in tournament results and representation than Roy, while his weaknesses were made much more apparent to the community. As such, opinions on Roy quickly started to change for the worse due to his vulnerability to combos, weak recovery, and an ineffective close-ranged playstyle due to his poor approach and unimpressive range. In spite of his flaws and lacking tournament presence, Roy was ranked 32nd on the first 4BR tier list, placing him at the top of the low-tier.
Unfortunately for Roy, update 1.1.4 granted Marth and Lucina major buffs that significantly increased their effectiveness, while Roy only gained minor landing lag decreases to his aerials. This resulted in them, especially Marth, achieving improved results from professionals and saw their opinions reassessed as those of a high-tier and a mid-tier character, respectively. Conversely, Roy remained a low-tier character due to the minimal effectiveness of his buffs from update 1.1.4. The lack of significant breakthroughs to his lackluster approaches and middling combo game only served to further damage Roy's negative perception, which saw Roy being ranked 50th on the second tier list, placing him at the bottom of the low-tier.
However, Roy players began more success afterwards, most notably with Ryo's placement at Super Smash Con 2016 and CEO 2017, where he used Roy to place top 32 at both events. This helped improve opinions on Roy, who rose to 44th on the third tier list, placing him in the upper portion of the low-tier. Roy's results would improve even further after Cloudy's high placing of 9th at Smash Factor 6 while upsetting Kameme, 33rd at 2GGC: Fire Emblem Saga as well, Serge reaching 7th with Roy as a secondary, and komorikiri placing 16th at 2GG Championship while defeating CaptainZack. Despite this, Roy remains ranked at 41st on the fourth and final tier list, though due to the expansion of the tiers, he is now ranked as a mid-tier character. Throughout the game’s competitive lifespan, Roy's standing relative to the cast was among divisive compared to most of the cast. While a number of top players consider his placement to be accurate due to his polarized toolkit causing him to struggle against numerous characters, many players agreed that Roy could potentially rise slightly higher thanks to his good power and mobility.
Most historically significant players[edit]
Any number following the Smasher name indicates placement on the PGR 100, which recognizes the official top 100 players in Super Smash Bros. 4 of all time.
See also: Category:Roy players (SSB4)
 Cloudy - The best Roy player in the world. Placed 9th at Smash Factor 6 and 33rd at both 2GGC: Fire Emblem Saga and Smash Factor 7 with wins over players such as Kameme and Mr.R.
 komorikiri (#12) - Used Roy as a secondary. Placed 5th at Sumabato 20 and 9th at Sumabato 21 with a win over CaptainZack.
 TheFlow - The best Roy player in Europe. Placed 7th at Albion 3, 9th at talent.io, and 25th at SALT with wins over players such as Lima and Glutonny. Ranked 30th on the European Smash 4 Power Rankings.
 Hyper Kirby - The best Roy player in the United States. Placed 17th at MomoCon 2017 and 25th at both DreamHack Atlanta 2017 and MomoCon 2018 with wins over players such as Kameme, Fatality, and ScAtt.
- Ryo (#77) - Used Roy as a secondary to his Ike. Placed 9th at Super Smash Con 2016, 25th at CEO 2017, and 33rd at 2GGT: ZeRo Saga. He is also known for advancing Roy's metagame.
Trophies[edit]

![[1]](/File:RoyTrophyWiiU.png)
- Roy
- Roy, the main character of Fire Emblem: The Binding Blade, returns for the first time since Melee! In The Binding Blade, Roy led the troops of Pherae into battle in his ailing father's stead, and now he brings his speed and talent for short-range combat into this game. His sword, the Sword of Seals, is uniquely powerful at the base of the blade.
 : Fire Emblem: The Binding Blade (2002 (JP))

![[1]](/File:RoyAltTrophyWiiU.png)
- Roy (Alt.)
- Flare Blade creates an explosion in front of Roy that can be charged by holding down the button. Take care, though, because at the highest levels of charge, Roy himself will catch fire and take damage! His side special, Double-Edge Dance, changes for each strike after the first depending on whether you hold up or down while attacking.
- : Fire Emblem: The Binding Blade (2002 (JP))
![[1]](/File:CriticalHitRoyTrophyWiiU.png)
- Critical Hit (Roy)
 For Roy's Final Smash, he traps enemies in a circular swing of the blade, brings it up behind him, and then, in a blast of fire, brings the blade down for a powerful finisher! The downward attack is powerful on its own but doesn't have much range, so make sure you're close enough to hit your enemies with the full combo and really seal their fate!
 For Roy's Final Smash, he traps enemies in a circular swing of the blade, brings it up behind him and then, in a blast of fire, brings the blade down for a powerful finisher! The downward attack is powerful on its own, but doesn't have much range, so make sure you're close enough to hit your enemies with the full combo and really seal their fate!
Alternate costumes[edit]
.png)
| |||||||

|

|

|

|

|

|

|

|
Reveal trailer[edit]
Gallery[edit]
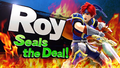
Roy's splash art.
Roy's amiibo.
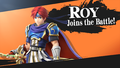
Roy's unlock notice in Super Smash Bros. for Wii U after downloading him from the Nintendo eShop.
Using his down taunt.
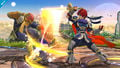
Using his new neutral attack on Captain Falcon.
Using Double-Edge Dance's third upward hit on Lucario.
Using Critical Hit, his Final Smash, on Lucario and Charizard.
Alongside Roy Koopa.
Alongside Zero Suit Samus and Wii Fit Trainer.
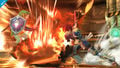
Using Flare Blade on Link.

All of Roy's alternate costumes.

Using his up taunt alongside male and female Robin.


Trivia[edit]
- Roy and Ryu are the only DLC characters to be released on the same day as their announcement.
- Roy's pose in his official art is nearly identical to his pose in his official art for Melee.
- Roy is the only one of the DLC veterans to not have had a trophy depicting him in the base game.
- Aspects of Roy's sound design have been carried over from Melee:
- All of his sourspotted attacks emit a punch/kick sound effect, instead of a slash sound effect.
- He uses different voice clips when using battering items.
- When he is dizzy, his corresponding voice clip loops constantly, instead of playing only once.
- He uses more than one voice clip for his smash attacks.
- He only has one voice clip for taking light knockback (shared with Mario, Kirby, Dr. Mario, Ness and Mewtwo).
- He only has one voice clip upon being blast KO'd (also shared with Mewtwo, as well as Jigglypuff and Bayonetta).
- Roy's up smash, Flame Sword, shares the same name as Mega Man's forward aerial.
- Roy, Marth, and Cloud are the only characters to speak Japanese in every regional version of SSB4.
- Like Marth in his transition from Melee to Brawl, Roy's first and third victory poses have swapped quotes.
- If Roy's on-screen appearance occurs on one of Distant Planet's leaf platforms, he will descend with the leaf, but the Binding Blade will remain stationary in the air until it returns to Roy once the battle actually starts.
- Roy, Ryu, Cloud, Corrin, and Bayonetta's voice clips are in much lower quality than the rest of the cast in Super Smash Bros. for Nintendo 3DS.
- Roy's new Final Smash is less powerful than his fully-charged Flare Blade.
- Roy is one of two DLC characters to be made available for purchase the day of their reveal, with the other being Ryu.
- Roy is one of only two characters in the Super Smash Bros. series to have the same name as another playable fighter, his counterpart being the Koopaling named Roy Koopa. This is referenced in an official image on the Super Smash Bros. 4 website.
- Additionally, despite having the same name, the Announcer has two different voice clips for announcing Roy and Roy Koopa's names.
- Roy is the only DLC fighter in the series to not have a projectile of any sort.
References[edit]
| Fighters in Super Smash Bros. 4 | |
|---|---|
| Veterans | Bowser · Captain Falcon · Charizard · Diddy Kong · Donkey Kong · Dr. Mario · Falco · Fox · Ganondorf · Ike · Jigglypuff · King Dedede · Kirby · Link · Lucario · Lucas · Luigi · Mario · Marth · Meta Knight · Mewtwo · Mr. Game & Watch · Ness · Olimar · Peach · Pikachu · Pit · R.O.B. · Roy · Samus · Sheik · Sonic · Toon Link · Wario · Yoshi · Zelda · Zero Suit Samus |
| Newcomers | Bayonetta · Bowser Jr. · Cloud · Corrin · Dark Pit · Duck Hunt · Greninja · Little Mac · Lucina · Mega Man · Mii Fighter (Mii Brawler · Mii Gunner · Mii Swordfighter) · Pac-Man · Palutena · Robin · Rosalina & Luma · Ryu · Shulk · Villager · Wii Fit Trainer |
|
| |
|---|---|
| Fighters | Marth (SSBM · SSBB · SSB4 · SSBU) · Roy (SSBM · SSB4 · SSBU) · Ike (SSBB · SSB4 · SSBU) · Lucina (SSB4 · SSBU) · Robin (SSB4 · SSBU) · Corrin (SSB4 · SSBU) · Chrom (SSBU) · Byleth (SSBU) |
| Assist Trophies | Lyn · Black Knight · Tiki |
| Stages | Castle Siege · Arena Ferox · Coliseum · Garreg Mach Monastery |
| Item | Killing Edge |
| Other | Sothis |
| Trophies, Stickers and Spirits | Trophies (SSBM · SSBB · SSB4) · Stickers · Spirits |
| Music | Brawl · SSB4 · Ultimate |
| Masterpieces | Fire Emblem: Shadow Dragon and the Blade of Light · Fire Emblem: Mystery of the Emblem |