Roy (SSBM): Difference between revisions
No edit summary |
|||
| (112 intermediate revisions by 51 users not shown) | |||
| Line 1: | Line 1: | ||
{{ArticleIcons|melee=y}} | {{ArticleIcons|melee=y}} | ||
{{ | {{Disambig2|Roy's appearance in ''Super Smash Bros. Melee''|the character in other contexts|Roy}} | ||
{{Infobox Character | {{Infobox Character | ||
|name = Roy | |name = Roy | ||
| Line 8: | Line 8: | ||
|ssbgame2 = SSBU | |ssbgame2 = SSBU | ||
|availability = [[Unlockable character|Unlockable]] | |availability = [[Unlockable character|Unlockable]] | ||
|tier = | |tier = D | ||
|tierPAL = G | |tierPAL = G | ||
|ranking = | |ranking = 21 | ||
|rankingPAL = 22 | |rankingPAL = 22 | ||
}} | }} | ||
'''Roy''' ({{ja|ロイ|Roi}}, ''Roy'') is a [[unlockable character]] in ''[[Super Smash Bros. Melee]]''. He is a [[clone]] of {{SSBM|Marth}}, differentiated primarily by his [[sweetspot]]s being located near the center of his blade rather than the tip. He is voiced by {{s|wikipedia|Jun Fukuyama}}. | '''Roy''' ({{ja|ロイ|Roi}}, ''Roy'') is a [[unlockable character]] in ''[[Super Smash Bros. Melee]]''. He is a [[clone]] of {{SSBM|Marth}}, differentiated primarily by his [[sweetspot]]s being located near the center of his blade rather than the tip. He is voiced by {{s|wikipedia|Jun Fukuyama}}. | ||
Roy currently ranks | Roy currently ranks 21st on the ''Melee'' [[tier list]], in the D tier, which is his worst placement in the series. Roy's advantages include an above average approach due to having one of the best [[SHFFL]]s in the game, as well as a good grab game, and among the best [[reach]]es in the game thanks to his sword. However, Roy's flaws are significant, which include having poor flexibility in his combo game, attacks that are difficult to properly land, generally possessing significantly [[lag]]gy attacks, having few moves that can KO reliably and only one of which (forward smash) that is an adequate finisher. He also possesses one of the worst recoveries in the game as [[Blazer]] travels a very short distance vertically, and being a light character that is heavily susceptible to combos; as a result, Roy has significant KOing problems while being easy to KO himself. These flaws overpower Roy's strengths, leading to numerous matchups hard countering him, especially against those who are higher ranked than him on the tier list. | ||
==How to unlock== | ==How to unlock== | ||
Roy must be defeated in battle before he can be unlocked. There are two ways the player can encounter Roy: | |||
*One way is to complete Classic Mode, Adventure Mode, or All-Star Mode as Marth without using any continues. If the player fails to defeat Roy, they can re-fight him by doing this same method again. | |||
*Another way is to play 900 VS. matches to completion. If the player fails to defeat Roy, they can re-fight him by playing another VS. match to completion. If this method is used, fighters with lower VS. match quotas must be unlocked before Roy can be fought. This prevents Roy from being unlocked before Marth. | |||
Roy is fought on the [[Temple]] stage, with the track "Fire Emblem" playing. | Roy is fought on the [[Temple]] stage, with the track "Fire Emblem" playing. | ||
==Attributes== | ==Attributes== | ||
Overall, Roy does not fall into any specific fighter archetype; while having a slew of powerful attacks, Roy himself is rather nimble, | [[File:Roy's Melee Dash Attack.gif|thumb|Roy's [[dash attack]] infamously [https://www.youtube.com/watch?v=Kht7deE4Zyw doesn't work properly] because the hitboxes are active for the same amount of frames as Marth while being much slower.]] | ||
Overall, Roy does not fall into any specific fighter archetype; while having a slew of powerful attacks, Roy himself is rather nimble, boasting a relatively fast dash and a long [[dash dance]], combined with very high falling speed. However, Roy has a relatively below-average air speed, similar to {{SSBM|Marth}}. A combination of a fast falling speed and low traction gives Roy a somewhat long wavedash (sixth longest in the game). | |||
Being a clone of a top-tiered character in ''Melee'' (The character in question being {{SSBM|Marth}}), Roy inherits some positive properties emblematic of Marth's game plan. Due to his movement properties and long wavedash, Roy has excellent ground-based movement. His down tilt also serves as a respectable poke and combo starter, as it will send opponents straight up when hit, allowing for a follow-up. Combined with an effective grab game, with the second-largest non-disjointed grab range (behind only Marth), Roy can somewhat emulate one portion of Marth's effective [[neutral game]] play: threatening grabs and down tilt out of his dash dance. With his ability to [[chaingrab]] some fastfallers such as {{SSBM|Fox}} and {{SSBM|Falco}} with his up throw, [[tech chase]] opponents and set up [[edgeguard]]s with his down and forward throws, as well as perform a handful of other combo setups that stem from his grab, Roy can force his opponents to respect him in the neutral while creating tangible threats as well. Roy also has a very fast [[SHFFL]] due to his fast falling speed and low-startup aerials, allowing him to further protect his space as needed. | |||
Roy also boasts high power in most of his ground-based attacks. Roy's forward smash, like Marth's, has quick startup and covers a large range; this is his primary KO move, and most of Roy's combos will end with a sweetspotted forward smash to send opponents off-stage. Its greater power up close can also punish overzealous opponents who carelessly step into Roy's threat zone, allowing for reversal situations. His other two smash attacks are more situational, but both his down and up smashes are strong when landed; the latter even has multi-hit properties and can [[spike]] when struck at the tip, although this is very situational. Roy's specials are also quite strong as well; [[Flare Blade]] is a decent edgeguarding tactic and has huge knockback nearing [[one-hit KO]] thresholds when fully charged, [[Double-Edge Dance]] can serve as a backup neutral poke with strong third and fourth hits, and [[Counter]] can be used as a devastating surprise option, turning the tables against single, strong hits when the opponent least expects it. Counter can also intercept linear recoveries, and because it scales based on move power, it will almost assuredly KO most recovering opponents if landed, unlike Marth's Counter, which often simply resets the situation. | |||
However, Roy's primary flaw is the [[sweetspot]] placement of his moves. While it may seem that Roy has great reach on paper due to his disjointed hitbox offered by the [[Binding Blade]], this is all merely an illusion in practice. Unlike Marth, who can safely attack opponents from a distance, Roy must still go into close proximity with the opponent to deliver strong damage and knockback, as the sweetspot on his sword is closer to the hilt rather than at the tip. While attacks can become incredibly powerful at this close of a range, this causes Roy to become very vulnerable, especially against characters with powerful close-range threats. This would not be as much of a problem if Roy's sourspots had utility in setting up KOs or extending combos, but many of them do not, greatly exacerbating this weakness. While Marth's weakest sourspots actually complement his game plan, using his weaker hitboxes to precisely set up for his stronger ones, Roy's sourspots do almost nothing to the opponent in terms of knockback or damage. | |||
Roy | As a result of this very close sweetspot, Roy himself lacks a particularly reliable KO move. With the exception of his forward smash, his down smash, and the later hits of his Double Edge Dance, Roy has few options to quickly KO, and even these attacks need to connect in close ranges in order for them to have any reasonable KOing power. Further compounding Roy's problems with KOing are his aerials; even when sweetspotted, none of these aerials can reliably KO under 200%, they require good setups in order to properly connect, and none of them can easily inflict damage in the first place. Roy also lacks any quick KO options. While he may have two meteor smashes (the third hit of his upward Double-Edge Dance and his down air) and one spike (tippered up smash), all three are highly situational, requiring particularly lucky or skilled setups in order to properly connect. Coupled with poor offstage options as a result of high-lag aerials that are all of high risk off the edge and a poor recovery, Roy is almost completely dependent on attempting to rack up damage with brief combo strings, culminating in a reliance on hard reads and unforced errors by the opponent to garner KOs. | ||
Roy's | Roy also has limited combo ability, in stark contrast with Marth. Roy has slightly below-average air speed like Marth, but Roy's sweetspot once again hurts him. Roy cannot move fast enough in the air to hit with the hilt of his blade, causing primarily sourspotted attacks, resulting in low hitstun and hitlag attacks, impairing Roy's combo and aerial games, and even giving him a poor edgeguarding game, unlike Marth. Roy's moveset is only suitable for aggravating fastfallers, since he at least has chaingrabs and tech chases against them, and can juggle them on stages with few or no platforms such as [[Pokémon Stadium]] or {{SSBM|Final Destination}}. However, that is the extent of Roy's high-level punish game against the cast, and he has no reliable method of achieving any combos or KO setups on [[floaty]] characters such as {{SSBM|Jigglypuff}} or {{SSBM|Peach}}. Roy's combo potential is thus below-average at best, being both stage- and character-dependent unlike Marth, and has led to completely lopsided losing matchups against those aforementioned floaty characters, with almost no hope of winning in a competitive setting. | ||
Roy himself, however, is easy to combo and edgeguard; like other fastfalling characters, his high falling speed harms him by making him extremely vulnerable to juggling. Even with fast falling speed, Roy's vertical survivability from the upper blast line is merely average due to a combination of his lighter weight than characters such as {{SSBM|Captain Falcon}} and much slower falling speed than characters like {{SSBM|Falco}}, despite him being slightly lighter than Roy. Like Marth, Roy also has a non-stellar recovery, though his faster falling speed and higher gravity only exacerbate it to make it far worse than Marth's and among the worst in the game; adding to this, his high falling speed makes him extremely vulnerable to edgeguarding, as well as being easy to [[gimp]]. While Roy's [[Blazer]] is slightly more effective than Marth's [[Dolphin Slash]], due to its greater horizontal distance, multi-hit properties that can aggravate edgeguarders, and its ability to be controlled to an extent, it still has high ending lag, leaving him open to punishes as he lands. Additionally, while Roy can still use Double-Edge Dance to recover horizontally, it is not as effective as Marth's Dancing Blade due to his higher falling speed. | |||
Roy | While Roy may appear like he has enough tools as a character to function, in reality, he struggles with nearly every aspect of ''Melee''. His excellent movement is not only outclassed by Marth, but simply does not compensate for his many weaknesses in both the advantage and disadvantage states. Roy's moveset is full of low-impact hitboxes that struggle to push any sort of advantage against non-fastfalling opponents, while he is almost trivial to combo, edgeguard, and KO himself. While Roy's raw power up close can punish careless opponents, hoping that opponents make unforced errors is not a reliable strategy. As such, unlike Marth, Roy is a poor character at higher levels of play with sparse representation. | ||
==Version history== | |||
'''NTSC 1.01''' | |||
*{{bugfix|Fixed the [[Whispy blink glitch]].}} | |||
==Differences from Marth== | ==Differences from {{SSBM|Marth}}== | ||
Roy is overall a considerably less effective character than Marth. All of his sweetspots are placed at the hilt or center of his blade, making it hard for him to space, and his down aerial's spike is a meteor smash hitbox that is difficult to hit with. Almost all of Roy's moves have hitboxes that come out slower, remain active for fewer frames, or stay out for the same period as Marth's, but with slower animation speed (leading to unfortunate hitbox timing on moves like his dash attack, the upper part of his neutral attack, three of his aerials and Blazer). Roy's sourspot does far less knockback and damage than Marth's, and his sweetspots do somewhere in between the knockback and damage of Marth's sour- and sweetspots, making his KO potential much worse than Marth's. Additionally, his wavedash and moonwalk are both shorter than Marth's, resulting in him being less mobile. | Roy is overall a considerably less effective character than Marth. All of his sweetspots are placed at the hilt or center of his blade, making it hard for him to space, and his down aerial's spike is a meteor smash hitbox that is difficult to hit with. Almost all of Roy's moves have hitboxes that come out slower, remain active for fewer frames, or stay out for the same period as Marth's, but with slower animation speed (leading to unfortunate hitbox timing on moves like his dash attack, the upper part of his neutral attack, three of his aerials and Blazer). Roy's sourspot does far less knockback and damage than Marth's, and his sweetspots do somewhere in between the knockback and damage of Marth's sour- and sweetspots, making his KO potential much worse than Marth's. Additionally, his wavedash and moonwalk are both shorter than Marth's, resulting in him being less mobile. | ||
However, Roy does have some advantages. As he is slightly shorter than Marth, he is slightly harder to hit (although this makes his range shorter as a result); his up smash hits multiple times and can spike, making it more reliable than Marth's, and Flare Blade is much stronger than [[Shield Breaker]], being a one-hit KO when fully charged. Additionally, unlike [[Dolphin Slash]], Blazer has multi-hit properties and can OHKO most lightweight fighters, like Mewtwo and Jigglypuff. | However, Roy does have some advantages. As he is slightly shorter than Marth, he is slightly harder to hit (although this makes his range shorter as a result); his up smash hits multiple times and can spike, making it more reliable than Marth's, and Flare Blade is much stronger than [[Shield Breaker]], being a one-hit KO when fully charged. Additionally, unlike [[Dolphin Slash]], Blazer has multi-hit properties and can OHKO most lightweight fighters, like Mewtwo and Jigglypuff. | ||
Overall, Roy's advantages are not enough to alleviate his significant weaknesses, and it results in him having far less successful tournament results and a much smaller playerbase in comparison to Marth. | |||
===Aesthetics=== | ===Aesthetics=== | ||
| Line 51: | Line 58: | ||
===Attributes=== | ===Attributes=== | ||
*{{change|Roy's sweetspot is placed at the hilt of his blade, meaning he fights at close range in order to be most efficient. Roy's sweetspot is larger than Marth's, but Marth can [[space]] the tipper sweetspot of his sword for maximum safety and damage.}} | *{{change|Roy's sweetspot is placed at the hilt of his blade, meaning he fights at close range in order to be most efficient. Roy's sweetspot is larger than Marth's, but Marth can [[space]] the tipper sweetspot of his sword for maximum safety and damage.}} | ||
*{{change|Some of Roy's attacks use the [[flame]] effect.}} | |||
*{{change|Roy is lighter than Marth (NTSC 87 → 85). It hinders his survivability slightly but makes him less susceptible to [[waveshine]] followups from {{SSBM|Fox}} as he is knocked down by the shine.}} | *{{change|Roy is lighter than Marth (NTSC 87 → 85). It hinders his survivability slightly but makes him less susceptible to [[waveshine]] followups from {{SSBM|Fox}} as he is knocked down by the shine.}} | ||
*{{change|Roy is shorter than Marth. This shortens his hurtbox, making him harder to hit, but also slightly reduces the range in his attacks.}} | *{{change|Roy is shorter than Marth. This shortens his hurtbox, making him harder to hit, but also slightly reduces the range in his attacks.}} | ||
| Line 58: | Line 66: | ||
*{{nerf|Roy's [[wavedash]] is shorter than Marth's.}} | *{{nerf|Roy's [[wavedash]] is shorter than Marth's.}} | ||
*{{nerf|Roy [[walk]]s (1.6 → 1.2) and [[dash]]es (1.8 → 1.61) noticeably slower than Marth, and his [[dash-dance]] window is smaller as a result of his slower dash speed.}} | *{{nerf|Roy [[walk]]s (1.6 → 1.2) and [[dash]]es (1.8 → 1.61) noticeably slower than Marth, and his [[dash-dance]] window is smaller as a result of his slower dash speed.}} | ||
*{{change|Roy's [[falling speed]] is higher (2.2 → 2.4), causing him to have less vertical knockback than Marth, despite Marth remaining heavier than Roy, and makes his SHFFL faster than Marth's. However, his increased falling speed makes him much easier to combo, worsens his recovery, and means that he is usually unable to go off-stage for edgeguards or gimps, hindering his ability to close out stocks at low percentages.}} | *{{change|Roy's [[falling speed]] is higher (2.2 → 2.4), causing him to have less vertical knockback than Marth, despite Marth remaining heavier than Roy, and makes his SHFFL faster than Marth's. However, his increased falling speed makes him much easier to combo, worsens his recovery, and means that he is usually unable to go off-stage for edgeguards or gimps, hindering his ability to close out stocks at low percentages.}} | ||
*{{change|Roy's [[gravity]] is higher (0.085 → 0.114).}} | |||
**{{nerf|As a result, Roy's jumps are lower than Marth's.}} | |||
===Ground attacks=== | ===Ground attacks=== | ||
*[[Neutral attack]]: | *[[Neutral attack]]: | ||
**{{nerf|Neutral attack only has a single hit | **{{nerf|Neutral attack only has a single hit, as such it can't be [[buffer]]ed into a second hit.}} | ||
**{{change|Sourspot damage was changed and mids do different damage, sourspot (4% → 3%), mid (4% → 5%).}} | |||
**{{ | ***{{change|Due to the fact that mid has priority on both characters, the overall damage output is generally higher per hit however since it is only one hit the rate of attack is slower.}} | ||
**{{ | **{{change|The sourspot has much less base knockback with slightly more growth (20 base/50 growth → 5/60), the mid and sweetspot however, have a higher base knockback (20 → 30).}} | ||
**{{nerf| | **{{nerf|The move's animation is slower, although the hitbox timings are unchanged. This makes it take a frame longer for Roy's arm to be outstretched, and also reduces the vertical range of the slash, due to the unchanged hitbox timing.}} | ||
**{{nerf|The hitboxes are smaller.}} | |||
*[[Forward tilt]]: | *[[Forward tilt]]: | ||
**{{buff|Forward tilt has a longer duration (4 frames → 5).}} | **{{buff|Forward tilt has a longer duration (4 frames → 5).}} | ||
**{{nerf|It has more startup (frame 7 → 9), with more ending lag.}} | **{{nerf|It has more startup (frame 7 → 9), with more ending lag.}} | ||
**{{ | **{{change| The sweetspot and sourspot deal less damage sourspot (9% → 7%), sweetspot (13%→12%), However his mids do higher damage(9% → 10%).}} | ||
**{{buff|Base knockback was buffed on mid (30 → 60).}} | |||
***{{buff|Due to the fact that mid has priority on both characters, the damage and knockback buff to the mid hitbox, generally improves KO potential.}} | |||
*[[Up tilt]]: | *[[Up tilt]]: | ||
**{{nerf|Up tilt has more startup (frame 6 → 7) and much more ending lag (frame 32 → 40).}} | **{{nerf|Up tilt has more startup (frame 6 → 7) and much more ending lag (frame 32 → 40).}} | ||
| Line 79: | Line 91: | ||
*[[Down tilt]]: | *[[Down tilt]]: | ||
**{{change|Instead of having horizontal knockback, Roy's down tilt has vertical knockback (30° → 80°), which allows it to leads into many combo setups, especially on fast fallers. In exchange, this makes Roy's down tilt much less useful for neutral resets and edgeguards against the rest of the cast.}} | **{{change|Instead of having horizontal knockback, Roy's down tilt has vertical knockback (30° → 80°), which allows it to leads into many combo setups, especially on fast fallers. In exchange, this makes Roy's down tilt much less useful for neutral resets and edgeguards against the rest of the cast.}} | ||
**{{buff|The | **{{buff|The sweetspot deals more damage (10% → 12%) and has more base knockback (50 → 90), while the mid also deals more damage (9% → 10%) and has more base knockback (40 → 90)}} | ||
***{{buff|Hitbox priority is on the hilt and mids on both characters since Roy has sweetspot on hilt and stronger mids his does more damage and knockback on average however as this move has a different launch angle/utility these changes aren't felt as strongly as they would be otherwise}} | |||
**{{nerf|It has more startup (frame 7 → 8).}} | **{{nerf|It has more startup (frame 7 → 8).}} | ||
**{{ | **{{change|The sourspot deals less damage (8% → 6%) but has higher base knockback (25/20 → 40).}} | ||
**{{nerf|The tipper hitbox is smaller and has lowest priority reducing range slightly with no benefit.}} | |||
*[[Dash attack]]: | *[[Dash attack]]: | ||
**{{ | **{{change|The sourspot of Roy's dash attack deals less damage (9% → 6%), the mids however deal more damage (11% → 12%)}} | ||
**{{nerf|The move's animation is much slower, but with no change in hitbox timings, leading to an infamously terrible hitbox placement.}}[https://www.youtube.com/watch?v=Kht7deE4Zyw] | **{{nerf|The move's animation is much slower, but with no change in hitbox timings, leading to an infamously terrible hitbox placement.}}[https://www.youtube.com/watch?v=Kht7deE4Zyw] | ||
*[[Forward smash]]: | *[[Forward smash]]: | ||
**{{buff|Forward smash's sweetspot is | **{{buff|Forward smash's sweetspot hitbox is larger and his mids are identical to the sweetspot essentially giving the effect of everything but the tip being the sweetspot.}} | ||
***{{buff|Hitbox priority is on the hilt and mids making hitting the sweetspot extremely consistent while on Marth the sweetspot has lowest priority and mids are the same as the sour spot.}} | |||
**{{nerf|Forward smash's tipper hitbox is smaller than Marth's tipper hitbox which while giving it slightly less range and doesn't benefit Roy as his tipper while his sourspot is lowest priority anyway.}} | |||
**{{nerf|It has more startup with a shorter duration (frame 10-13 → 12-14) and more ending lag (frame 48 → 54).}} | **{{nerf|It has more startup with a shorter duration (frame 10-13 → 12-14) and more ending lag (frame 48 → 54).}} | ||
**{{nerf|All of its hitboxes also deal less knockback, with his sourspot in particular dealing significantly less knockback (60 base/70 growth → 30/65) and his sweetspot having slightly less knockback growth (70 → 65).}} | **{{nerf|All of its hitboxes also deal less knockback, with his sourspot in particular dealing significantly less knockback (60 base/70 growth → 30/65) and his sweetspot having slightly less knockback growth (70 → 65).}} | ||
**{{nerf|The sourspot deals 2% less damage (14% → 12%).}} | **{{nerf|The sourspot deals 2% less damage (14% → 12%).}} | ||
*[[Up smash]]: | *[[Up smash]]: | ||
**{{change|Up smash uses the [[flame | **{{change|Up smash uses the [[flame]] effect.}} | ||
**{{buff|Up smash has a longer duration (4 frames → 10).}} | **{{buff|Up smash has a longer duration (4 frames → 10).}} | ||
**{{buff|It can serve as an unconventional [[spike]] if hit with the tip of Roy's sword on the second, third, and fourth hits.}} | **{{buff|It can serve as an unconventional [[spike]] if hit with the tip of Roy's sword on the second, third, and fourth hits.}} | ||
**{{change|It deals more damage than Marth's sourspots, but less than his sweetspots (8%/15%/18% → 16.56%).}} | **{{change|It deals more damage than Marth's sourspots, but less than his sweetspots (8%/15%/18% → 16.56%).}} | ||
***{{buff|Overall, it does more damage consistently.}} | ***{{buff|Overall, it does more damage consistently.}} | ||
**{{buff|It deals more knockback without sourspots (196 set knockback/30/80 base/100/80 growth → 73 base/90 growth).}} | **{{buff|It deals more knockback without sourspots (196 set knockback/30/80 base/100/80 growth → 73 base/90 growth).}} | ||
**{{nerf|It has more startup (frame 13 → 15).}} | **{{nerf|It has more startup (frame 13 → 15).}} | ||
**{{nerf|As it is a multi-hit move, it has the possibility of being [[SDI]]ed before connecting with the final hit.}} | **{{nerf|As it is a multi-hit move, it has the possibility of being [[SDI]]ed before connecting with the final hit.}} | ||
| Line 110: | Line 126: | ||
*{{nerf|Except for back aerial and down aerial, all aerials have more landing lag (15 frames → 20 (neutral aerial), 15 frames → 20 (forward aerial), 15 frames → 18 (up aerial)).}} | *{{nerf|Except for back aerial and down aerial, all aerials have more landing lag (15 frames → 20 (neutral aerial), 15 frames → 20 (forward aerial), 15 frames → 18 (up aerial)).}} | ||
*[[Neutral aerial]]: | *[[Neutral aerial]]: | ||
**{{nerf|It has more startup on both hits | **{{nerf|It has more startup on both hits (6-7 (hit 1) 15-21 (hit 2) → 7-8 (hit 1) 17-20 (hit 2) and slightly more ending lag (frame 49 → 50).}} | ||
**{{nerf|The second hit also deals less damage (10% → 8%/6%).}} | **{{nerf|The second hit also deals less damage (10% → 8%/6%).}} | ||
*[[Forward aerial]]: | *[[Forward aerial]]: | ||
**{{change|It consistently sends opponents at a [[Sakurai angle]] unlike Marth (67°/361° → 361°).}} | **{{change|It consistently sends opponents at a [[Sakurai angle]] unlike Marth (67°/361° → 361°).}} | ||
**{{nerf|It has more start-up with a shorter duration (frame 4-7 → 5-7) and more ending lag (FAF 30 → 35).}} | **{{nerf|It has more start-up with a shorter duration (frame 4-7 → 5-7) and more ending lag (FAF 30 → 35).}} | ||
**{{nerf|It deals considerably less damage (13%/10%9% → 8%/5%), and has significantly less base knockback (42/30/20 → 30/10).}} | **{{nerf|It deals considerably less damage (13%/10%9% → 8%/5%), and has significantly less base knockback (42/30/20 → 30/10).}} | ||
*[[Back aerial]]: | *[[Back aerial]]: | ||
**{{nerf|It has more startup with a shorter duration (frame 7-11 → 8-10) and much more ending lag (frame 32 → 43) with no difference in animation, leading to an unfortunate hitbox placement.}} | **{{nerf|It has more startup with a shorter duration (frame 7-11 → 8-10) and much more ending lag (frame 32 → 43) with no difference in animation, leading to an unfortunate hitbox placement.}} | ||
| Line 121: | Line 137: | ||
*[[Up aerial]]: | *[[Up aerial]]: | ||
**{{buff|It has a longer duration (frame 5-8 → 5-10).}} | **{{buff|It has a longer duration (frame 5-8 → 5-10).}} | ||
**{{change|All hitboxes send at 80°, where as Marth sweetspot sends at 90°, sweetspot (90° → 80°).}} | |||
**{{nerf|It deals moderately less damage (13%/10%/9% → 9%/6%).}} | **{{nerf|It deals moderately less damage (13%/10%/9% → 9%/6%).}} | ||
**{{nerf|It has much less base knockback (40/30/20/18 → 20/10).}} | **{{nerf|It has much less base knockback (40/30/20/18 → 20/10).}} | ||
*[[Down aerial]]: | *[[Down aerial]]: | ||
**{{buff|The sourspots have more base knockback (40/30 → 40).}} | **{{buff|The sourspots have more base knockback (40/30 → 40).}} | ||
**{{nerf|It is considerably more difficult to sweetspot with (the sweetspot is located around Roy's hand, rather than the tip of his sword as with Marth).}} | **{{nerf|It is considerably more difficult to sweetspot with (the sweetspot is located around Roy's hand, rather than the tip of his sword as with Marth).}} | ||
**{{nerf|It has more start-up (frame 6 → 7), and much more ending lag.}} | **{{nerf|It has more start-up (frame 6 → 7), and much more ending lag.}} | ||
**{{nerf|It deals less damage (13%/10%/9% → 9%/6%), and its sweetspot is a [[meteor smash]] instead of a [[spike]] (NTSC 290° → 270°), meaning it can be meteor canceled.}} | **{{nerf|It deals less damage (13%/10%/9% → 9%/6%), and its sweetspot is a [[meteor smash]] instead of a [[spike]] (NTSC 290° → 270°), meaning it can be meteor canceled.}} | ||
| Line 141: | Line 158: | ||
**{{change|Flare Blade has a [[flame]] effect, and near the end of charging it, Roy glows white and the screen shakes violently.}} | **{{change|Flare Blade has a [[flame]] effect, and near the end of charging it, Roy glows white and the screen shakes violently.}} | ||
**{{change|A fully charged Flare Blade has to be charged for a longer period.}} | **{{change|A fully charged Flare Blade has to be charged for a longer period.}} | ||
**{{buff|It deals considerably more knockback than Marth's [[Shield Breaker]] (30/34/40 base/100 growth → 40/110 (uncharged)/50/83 (fully charged).}} | **{{buff|It deals considerably more knockback than Marth's [[Shield Breaker]] (30/34/40 base/100 growth → 40/110 (uncharged)/50/83 (fully charged).}} | ||
**{{buff|When fully charged, Flare Blade also deals drastically more damage than Shield Breaker (28% → 50%), resulting in a [[OHKO]] on hit.}} | **{{buff|When fully charged, Flare Blade also deals drastically more damage than Shield Breaker (28% → 50%), resulting in a [[OHKO]] on hit.}} | ||
**{{nerf|Flare Blade deals 10% [[recoil damage]] to Roy when fully charged.}} | **{{nerf|Flare Blade deals 10% [[recoil damage]] to Roy when fully charged.}} | ||
**{{nerf|An uncharged Flare Blade also deals less damage than an uncharged Shield Breaker (7% → 6%).}} | **{{nerf|An uncharged Flare Blade also deals less damage than an uncharged Shield Breaker (7% → 6%).}} | ||
**{{nerf|The move deals drastically less [[shield damage]] (uncharged:30/38 → 1, fully charged: 60 → 30).}} | **{{nerf|The move deals drastically less [[shield damage]] (uncharged:30/38 → 1, fully charged: 60 → 30).}} | ||
| Line 150: | Line 167: | ||
**{{buff|Double-Edge Dance has normal priority as opposed to [[Priority#Transcendent priority|transcendent priority]] unlike Dancing Blade, allowing it to cancel projectiles. The first hit, all angles of the second hit, third hit inputted upwards, and fourth hit inputted upwards of Double-Edge Dance deal more damage than Dancing Blade's variations (first: 4% → 5%/4%, second (all angles): 5% → 6%/4%, third: 6% → 10%/8%, fourth: 10% → 13%/10%), and the fourth hit inputed forward deals much more knockback (15 base/120 growth → 35/135). The first hit also has less base knockback than Dancing Blade's (55 → 50/40), allowing it to connect better with the second hits.}} | **{{buff|Double-Edge Dance has normal priority as opposed to [[Priority#Transcendent priority|transcendent priority]] unlike Dancing Blade, allowing it to cancel projectiles. The first hit, all angles of the second hit, third hit inputted upwards, and fourth hit inputted upwards of Double-Edge Dance deal more damage than Dancing Blade's variations (first: 4% → 5%/4%, second (all angles): 5% → 6%/4%, third: 6% → 10%/8%, fourth: 10% → 13%/10%), and the fourth hit inputed forward deals much more knockback (15 base/120 growth → 35/135). The first hit also has less base knockback than Dancing Blade's (55 → 50/40), allowing it to connect better with the second hits.}} | ||
**{{nerf|Double-Edge Dance's third hit inputted forwards has more base knockback, but less knockback growth (0 base/160 growth → 50/110) than that of Dancing Blade's variation. This makes it overall weaker than Dancing Blade's variation at higher percentages, while also making it more difficult to combo into the fourth hits at lower percentages. The third hit inputted downward also has more startup (frame 13 → 14), more ending lag, and is a multi-hitting move, making it weaker overall despite the final hit having more base knockback (50 → 70), and meaning it can be SDI'd before it connects with the final hit due to it being a multi-hit. The third hit inputted forward and downward and the fourth hit inputted forward also deal less damage (third (forward): 10% → 10%/8%, third (downward): 12% → 11.51% (due to how [[stale-move negation]] works on multi-hit moves), fourth: 14% → 13%/10%) and the fourth hit inputted upwards has much less base knockback than Dancing Blade's variation (40 → 22). The third hit inputted upward's meteor smash is also overall weaker than Dancing Blade's third hit inputted downward's meteor smash (50 base/100 growth → 80/36 base/60/40 growth).}} | **{{nerf|Double-Edge Dance's third hit inputted forwards has more base knockback, but less knockback growth (0 base/160 growth → 50/110) than that of Dancing Blade's variation. This makes it overall weaker than Dancing Blade's variation at higher percentages, while also making it more difficult to combo into the fourth hits at lower percentages. The third hit inputted downward also has more startup (frame 13 → 14), more ending lag, and is a multi-hitting move, making it weaker overall despite the final hit having more base knockback (50 → 70), and meaning it can be SDI'd before it connects with the final hit due to it being a multi-hit. The third hit inputted forward and downward and the fourth hit inputted forward also deal less damage (third (forward): 10% → 10%/8%, third (downward): 12% → 11.51% (due to how [[stale-move negation]] works on multi-hit moves), fourth: 14% → 13%/10%) and the fourth hit inputted upwards has much less base knockback than Dancing Blade's variation (40 → 22). The third hit inputted upward's meteor smash is also overall weaker than Dancing Blade's third hit inputted downward's meteor smash (50 base/100 growth → 80/36 base/60/40 growth).}} | ||
**{{change|All three finishers use the flame effect.}} | **{{change|All three finishers use the flame effect, in addition to the downward-angled third hit.}} | ||
*[[Blazer]]: | *[[Blazer]]: | ||
**{{change|It uses the flame effect.}} | **{{change|It uses the flame effect.}} | ||
**{{buff|[[Blazer]] deals slightly more damage (13%/10%/7%/6% → 13.18%).}} | **{{buff|[[Blazer]] deals slightly more damage (13%/10%/7%/6% → 13.18%).}} | ||
**{{buff|It can be angled forward for better horizontal recovery.}} | **{{buff|It can be angled forward for better horizontal recovery.}} | ||
**{{buff|It has a longer duration (6 frames → 13).}} | **{{buff|It has a longer duration (6 frames → 13).}} | ||
**{{buff|It has slightly less landing lag than [[Dolphin Slash]] (34 frames → 30).}} | **{{buff|It has slightly less landing lag than [[Dolphin Slash]] (34 frames → 30).}} | ||
**{{buff|Its first hit has very strong set knockback (200 set knockback), allowing it to KO floaty characters like {{SSBM|Jigglypuff}} at 0% on certain stages.}} | **{{buff|Its first hit has very strong set knockback (200 set knockback), allowing it to KO floaty characters like {{SSBM|Jigglypuff}} at 0% on certain stages.}} | ||
**{{nerf|It has more startup (frame 5 → 9).}} | **{{nerf|It has more startup (frame 5 → 9).}} | ||
**{{nerf|It deals drastically less knockback (80/60/20 base/70/90 growth → 0/10 base/100 set knockback/100 growth).}} | **{{nerf|It deals drastically less knockback (80/60/20 base/70/90 growth → 0/10 base/100 set knockback/100 growth).}} | ||
**{{nerf|It covers less vertical distance.}} | **{{nerf|It covers less vertical distance.}} | ||
**{{nerf|It can be SDIed out of due to its multihit nature.}} | **{{nerf|It can be SDIed out of due to its multihit nature.}} | ||
| Line 178: | Line 195: | ||
|game=SSBM | |game=SSBM | ||
|neutralcount=1 | |neutralcount=1 | ||
|neutralname= | |neutralname=Slash ({{ja|スラッシュ|Surasshu}}) | ||
|neutral1dmg=5% (blade), 3% (tip), 6% (body) | |neutral1dmg=5% (blade), 3% (tip), 6% (body) | ||
|neutraldesc=Identical to Marth's; he slashes in front of himself. However, Roy only slashes once, and at a slower rate than Marth. Additionally, Roy's version is devoid of [[buffer]], meaning the player has to press the attack button one at a time instead of mashing it. | |neutraldesc=Identical to Marth's; he slashes in front of himself. However, Roy only slashes once, and at a slower rate than Marth. Additionally, Roy's version is devoid of [[buffer]], meaning the player has to press the attack button one at a time instead of mashing it. | ||
|ftiltname= | |ftiltname=Sharp Edge ({{ja|シャープエッジ|Shāpu Ejji}}) | ||
|ftiltdmg=10% (blade), 7% (tip), 12% (body) | |ftiltdmg=10% (blade), 7% (tip), 12% (body) | ||
|ftiltdesc=A fast upward swipe with the Binding Blade while leaning forward. Deals more damage if the opponent is closer to Roy. Can KO at high percentages or when the [[blast line]] is close by. | |ftiltdesc=A fast upward swipe with the Binding Blade while leaning forward. Deals more damage if the opponent is closer to Roy. Can KO at high percentages or when the [[blast line]] is close by. | ||
|utiltname= | |utiltname=Anti-Air Slash ({{ja|アンチエアスラッシュ|Anchi Ea Surasshu}}) | ||
|utiltdmg=Clean: 8% (blade & arm), 6% (tip), 10% (body)<br/>Late: 8% (blade & arm), 6% (tip), 10% (body) | |utiltdmg=Clean: 8% (blade & arm), 6% (tip), 10% (body)<br/>Late: 8% (blade & arm), 6% (tip), 10% (body) | ||
|utiltdesc=Swings his sword in a large arc above his head. Despite generally covering Roy's hurtboxes, it is less powerful and has less combo potential than Marth's. | |utiltdesc=Swings his sword in a large arc above his head. Despite generally covering Roy's hurtboxes, it is less powerful and has less combo potential than Marth's. | ||
|dtiltname= | |dtiltname=Low Stab ({{ja|ロースラスト|Rō Surasuto}}), ''Low Thrust'') | ||
|dtiltdmg=10% (blade), 6% (tip), 12% (body) | |dtiltdmg=10% (blade), 6% (tip), 12% (body) | ||
|dtiltdesc=A sword poke to the ground. Has longer hitstun than most of Roy's other attacks, and also sends opponents upward, making it a good combo starter overall. Its range and speed makes it a very favorable move to use in the neutral game and spacing, as well as [[edgeguarding]]. | |dtiltdesc=A sword poke to the ground. Has longer hitstun than most of Roy's other attacks, and also sends opponents upward, making it a good combo starter overall. Its range and speed makes it a very favorable move to use in the neutral game and spacing, as well as [[edgeguarding]]. | ||
|dashname= | |dashname=Raid Chop ({{ja|レイドチョップ|Reido Choppu}}) | ||
|dashdmg=12% (blade), 6% (tip) | |dashdmg=12% (blade), 6% (tip) | ||
|dashdesc=A quick upward sweeping diagonal slash. Like Marth's, can either send opponents in front of him, behind him, or above him. Because this move has a slower animation overall than Marth's but the hitboxes are active for the same frames, the move starts before he even swings the sword and ends before it reaches halfway through his swing in front of him. | |dashdesc=A quick upward sweeping diagonal slash. Like Marth's, can either send opponents in front of him, behind him, or above him. Because this move has a slower animation overall than Marth's but the hitboxes are active for the same frames, the move starts before he even swings the sword and ends before it reaches halfway through his swing in front of him. | ||
|fsmashname= | |fsmashname=Dragon Killer ({{ja|ドラゴンキラー|Doragon Kirā}}) | ||
|fsmashdmg={{ChargedSmashDmgSSBM|20}} (blade), {{ChargedSmashDmgSSBM|12}} (tip) | |fsmashdmg={{ChargedSmashDmgSSBM|20}} (blade), {{ChargedSmashDmgSSBM|12}} (tip) | ||
|fsmashdesc=Rotates body counter-clockwise with a strong arc-like swing from his head to the ground, similar to the animation of his neutral special. It is rather fast, and is Roy's primary KO move. | |fsmashdesc=Rotates body counter-clockwise with a strong arc-like swing from his head to the ground, similar to the animation of his neutral special. It is rather fast, and is Roy's primary KO move. | ||
|usmashname=Flame Sword | |usmashname=Flame Sword ({{ja|フレイムソード|Fureimu Sōdo}}) | ||
|usmashdmg={{ChargedSmashDmgSSBM|2}} (hits 1-4), {{ChargedSmashDmgSSBM|10}} (hit 5) | |usmashdmg={{ChargedSmashDmgSSBM|2}} (hits 1-4), {{ChargedSmashDmgSSBM|10}} (hit 5) | ||
|usmashdesc=A relatively quick sword thrust upwards with fire effects. Can act as an unorthodox spike if the enemy is hit on the sword's tip during the start of the attack, though this is highly situational. This attack is a multi-hit attack and the last hit has decent vertical knockback, if enemy is hit at the base. All hits can approximately deal up to {{ChargedSmashDmgSSBM|16.56}} damage due to [[stale move negation]]. | |usmashdesc=A relatively quick sword thrust upwards with fire effects. Can act as an unorthodox spike if the enemy is hit on the sword's tip during the start of the attack, though this is highly situational. This attack is a multi-hit attack and the last hit has decent vertical knockback, if enemy is hit at the base. All hits can approximately deal up to {{ChargedSmashDmgSSBM|16.56}} damage due to [[stale move negation]]. | ||
|dsmashname= | |dsmashname=Whirlwind Blade ({{ja|旋風のブレード|Senpū no Burēdo}}) | ||
|dsmashdmg={{ChargedSmashDmgSSBM|21}}/{{ChargedSmashDmgSSBM|14}} (front), {{ChargedSmashDmgSSBM|16}}/{{ChargedSmashDmgSSBM|8}} (back) | |dsmashdmg={{ChargedSmashDmgSSBM|21}}/{{ChargedSmashDmgSSBM|14}} (front), {{ChargedSmashDmgSSBM|16}}/{{ChargedSmashDmgSSBM|8}} (back) | ||
|dsmashdesc=Sweeps his sword on the ground towards the front, then towards the back. A decent finisher, useful for vertical KOs, though there is rather high ending lag. Deals less damage if the opponent hits the tip of Roy's sword. | |dsmashdesc=Sweeps his sword on the ground towards the front, then towards the back. A decent finisher, useful for vertical KOs, though there is rather high ending lag. Deals less damage if the opponent hits the tip of Roy's sword. | ||
|nairname= | |nairname=Double Slash ({{ja|ダブルスラッシュ|Daburu Surasshu}}) | ||
|nairdmg=4% (hit 1), 8% (hit 2 base), 5% (hit 2 tip) | |nairdmg=4% (hit 1), 8% (hit 2 base), 5% (hit 2 tip) | ||
|nairdesc=Two swipes around him via an inward slash then a full outward spin, with decent knockback and damage if sweetspotted. | |nairdesc=Two swipes around him via an inward slash then a full outward spin, with decent knockback and damage if sweetspotted. | ||
|fairname= | |fairname=Aerial Swipe ({{ja|エアリアル スワイプ|Eariaru Suwaipu}}) | ||
|fairdmg=8% (base), 5% (tip) | |fairdmg=8% (base), 5% (tip) | ||
|fairdesc=Swipes sword in front of him with surprising range and tends to be a primary combo tool due to its speed and recovery. | |fairdesc=Swipes sword in front of him with surprising range and tends to be a primary combo tool due to its speed and recovery. | ||
|bairname= | |bairname=About Face ({{ja|アッパースイング|Appā Suingu}}, ''Upper Swing'') | ||
|bairdmg=9% (base), 6% (tip) | |bairdmg=9% (base), 6% (tip) | ||
|bairdesc=Turns around and swipes inward with his sword, similar to his forward aerial in terms of usage and knockback. Like Marth's back aerial, this move turns Roy around. | |bairdesc=Turns around and swipes inward with his sword, similar to his forward aerial in terms of usage and knockback. Like Marth's back aerial, this move turns Roy around. | ||
|uairname= | |uairname=Luna Slash ({{ja|ルナスラッシュ|Runa Surasshu}}) | ||
|uairdmg=9% (base), 6% (tip) | |uairdmg=9% (base), 6% (tip) | ||
|uairdesc=Swipes above outward while doing a delayed backflip. Meant to be a [[juggle]] tool, but is often subpar due to its low early knockback. | |uairdesc=Swipes above outward while doing a delayed backflip. Meant to be a [[juggle]] tool, but is often subpar due to its low early knockback. | ||
|dairname= | |dairname=Half Moon ({{ja|ハーフムーン|Hāfu Mūn}}) | ||
|dairdmg=9% (base), 6% (tip) | |dairdmg=9% (base), 6% (tip) | ||
|dairdesc=Swipes below via an outward wide slash. [[Meteor smash]]es opponents who come in contact with Roy's body, but is rather weak and has nearly unrecoverable ending lag. The move's sweetspot is extremely tiny; which is located at Roy's right arm and left shoulder (meaning that Roy has to overlap the opponent significantly), making it more difficult to hit with than {{SSBM|Jigglypuff}}'s [[Rest]]. | |dairdesc=Swipes below via an outward wide slash. [[Meteor smash]]es opponents who come in contact with Roy's body, but is rather weak and has nearly unrecoverable ending lag. The move's sweetspot is extremely tiny; which is located at Roy's right arm and left shoulder (meaning that Roy has to overlap the opponent significantly), making it more difficult to hit with than {{SSBM|Jigglypuff}}'s [[Rest]]. | ||
|grabname= | |grabname=Grab ({{ja|つかみ|Tsukami}}) | ||
|grabdesc=Roy reaches out with his free hand. Due to Roy being shorter than Marth, his grab range is slightly shorter, making it the 5th longest grab range overall and the second longest non-tether grab. | |grabdesc=Roy reaches out with his free hand. Due to Roy being shorter than Marth, his grab range is slightly shorter, making it the 5th longest grab range overall and the second longest non-tether grab. | ||
|pummelname= | |pummelname=Knee ({{ja|膝|Hiza}}) | ||
|pummeldmg=3% | |pummeldmg=3% | ||
|pummeldesc=Knees the opponent. | |pummeldesc=Knees the opponent. | ||
|fthrowname= | |fthrowname=Bounce ({{ja|バウンス|Baunsu}}) | ||
|fthrowdmg=5% | |fthrowdmg=5% | ||
|fthrowdesc=Grabs and pushes forward, tripping them with his leg. | |fthrowdesc=Grabs and pushes forward, tripping them with his leg. | ||
|bthrowname= | |bthrowname=Throw Away ({{ja|捨てる|Suteru}}) | ||
|bthrowdmg=5% | |bthrowdmg=5% | ||
|bthrowdesc=Pulls the opponent behind him and extends his leg simultaneously. | |bthrowdesc=Pulls the opponent behind him and extends his leg simultaneously. | ||
|uthrowname= | |uthrowname=Emblem Toss ({{ja|エンブレムトス|Enburemu Tosu}}) | ||
|uthrowdmg=5% | |uthrowdmg=5% | ||
|uthrowdesc=Thrusts opponent upwards. Can chain grab [[fast- | |uthrowdesc=Thrusts opponent upwards. Can chain grab [[fast-faller]]s at lower percentages. It is the second strongest up throw in the game. | ||
|dthrowname= | |dthrowname=Slam ({{ja|スラム|Suramu}}) | ||
|dthrowdmg=6% | |dthrowdmg=6% | ||
|dthrowdesc=Tosses the foe to the ground. Has chain grab and frame-trap potential. | |dthrowdesc=Tosses the foe to the ground. Has chain grab and frame-trap potential. | ||
| Line 242: | Line 259: | ||
|edgefname= | |edgefname= | ||
|edgefdmg=8% (sword), 6% (hilt) | |edgefdmg=8% (sword), 6% (hilt) | ||
|edgefdesc=Flips onto ledge with a quick downward diagonal slash downwards. Hitbox only exists on Roy's right | |edgefdesc=Flips onto ledge with a quick downward diagonal slash downwards. Hitbox only exists on Roy's right arm and his sword, meaning that foes close to the ledge Roy is hanging on can avoid the attack. | ||
|edgesname= | |edgesname= | ||
|edgesdmg=8% (sword), 6% (hilt) | |edgesdmg=8% (sword), 6% (hilt) | ||
| Line 272: | Line 289: | ||
| Second Hit (Neutral) || 6% (base), 4% (tip) || Does a stab, has a little more knockback then the first slash, but still not much. | | Second Hit (Neutral) || 6% (base), 4% (tip) || Does a stab, has a little more knockback then the first slash, but still not much. | ||
|- | |- | ||
| Third Hit (Up) || Clean: 10% (base), 8% (tip)<br/>Late: 7% (base), 5% (tip) || Does a downwards vertical slash. Can [[meteor smash]] at the beginning of the move. | | Third Hit (Up) || Clean: 10% (base), 8% (tip)<br/>Late: 7% (base), 5% (tip) || Does a downwards vertical slash. Can [[meteor smash]] at the beginning of the move, but only when used on the ground. | ||
|- | |- | ||
| Third Hit (Neutral) || 10% (base), 8% (tip) || Does a fairly powerful horizontal slash. | | Third Hit (Neutral) || 10% (base), 8% (tip) || Does a fairly powerful horizontal slash. | ||
| Line 280: | Line 297: | ||
| Fourth Hit (Up) || 13% (base), 10% (tip) || Does a jumping slash. Deals [[flame]] damage. | | Fourth Hit (Up) || 13% (base), 10% (tip) || Does a jumping slash. Deals [[flame]] damage. | ||
|- | |- | ||
| Fourth Hit (Neutral) || 13% (base), 10% (tip) || Does a powerful vertical slash. Deals [[flame]] damage. | | Fourth Hit (Neutral) || 13% (base), 10% (tip) || Does a powerful vertical slash. Deals [[flame]] damage. Slightly slower but more powerful than fourth hit (up). | ||
|- | |- | ||
| Fourth Hit (Down) || 3% (hit 1-4), 5% (hit 5) || Does a flurry of lower stabs, each stab dealing [[flame]] damage. | | Fourth Hit (Down) || 3% (hit 1-4), 5% (hit 5) || Does a flurry of lower stabs, each stab dealing [[flame]] damage. | ||
|} | |} | ||
===Stats=== | |||
'''NTSC''' | |||
{{Attributes | |||
|cast = 26 | |||
|weight = 85 | |||
|rweight = 17-19 | |||
|dash = 1.4 | |||
|rdash = 14-18 | |||
|run = 1.61 | |||
|rrun = 7 | |||
|walk = 1.2 | |||
|rwalk = 6-10 | |||
|trac = 0.06 | |||
|rtrac = 15-23 | |||
|airfric = 0.005 | |||
|rairfric = 21-26 | |||
|air = 0.9 | |||
|rair = 12-14 | |||
|baseaccel = 0.02 | |||
|rbaseaccel = 2-23 | |||
|addaccel = 0.03 | |||
|raddaccel = 13-19 | |||
|gravity = 0.114 | |||
|rgravity = 7 | |||
|fall = 2.4 | |||
|rfall = 4-5 | |||
|ff = 2.9 | |||
|rff = 8 | |||
|jumpsquat = 5 | |||
|rjumpsquat = 16-22 | |||
|jumpheight = 30.958 | |||
|rjumpheight = 19 | |||
|shorthop = 10.626 | |||
|rshorthop = 24 | |||
|djump = 21.82 | |||
|rdjump = 18 | |||
}} | |||
'''PAL''' | |||
{{Attributes | |||
|cast = 26 | |||
|weight = 85 | |||
|rweight = 16-19 | |||
|dash = 1.4 | |||
|rdash = 14-18 | |||
|run = 1.61 | |||
|rrun = 7 | |||
|walk = 1.2 | |||
|rwalk = 6-10 | |||
|trac = 0.06 | |||
|rtrac = 15-23 | |||
|airfric = 0.005 | |||
|rairfric = 21-26 | |||
|air = 0.9 | |||
|rair = 11-13 | |||
|baseaccel = 0.02 | |||
|rbaseaccel = 2-23 | |||
|addaccel = 0.03 | |||
|raddaccel = 13-19 | |||
|gravity = 0.114 | |||
|rgravity = 7 | |||
|fall = 2.4 | |||
|rfall = 4-5 | |||
|ff = 2.9 | |||
|rff = 8 | |||
|jumpsquat = 5 | |||
|rjumpsquat = 16-22 | |||
|jumpheight = 30.958 | |||
|rjumpheight = 19 | |||
|shorthop = 10.626 | |||
|rshorthop = 24 | |||
|djump = 21.82 | |||
|rdjump = 18 | |||
}} | |||
===[[Announcer]] call=== | |||
[[File: Roy Announcer SSBM.wav]] | |||
===[[Taunt]]=== | ===[[Taunt]]=== | ||
| Line 310: | Line 405: | ||
==In [[competitive play]]== | ==In [[competitive play]]== | ||
=== | ===Most historically significant players=== | ||
<!--This character has a ten player limit for this section. Before adding and/or removing a player, read these guidelines: https://www.ssbwiki.com/SmashWiki:Notability#%22Most_historically_significant_players%22_guidelines --> | |||
:''See also: [[:Category:Roy players (SSBM)]]'' | |||
*{{Sm|LAG|Mexico}} - Currently considered one of the best active Roy players in the world. Mainly places in online tournaments, although has been ranked in offline rankings, such 50th on the [[Mexican Power Rankings]]. | |||
*{{Sm|Leon|France}} - Although better known for his {{SSBB|Marth}} in ''[[Brawl]]'', he placed well in many French tournaments with Roy. He won a smaller French tournament in {{Trn|Bushido Nibaï Impact II}} and still used the character at some of the more populated regionals in the country, placing 13th at {{Trn|Avalon I}}. | |||
*{{Sm|NEO|USA}} - Considered to be the best Roy player of all time with many results other Roy players still have yet to match. He was the closest a Roy player has gotten to winning a North American regional with his 2nd place at {{Trn|Pound}} and made other peaks with Roy such as 4th at {{Trn|MLG DC 2005}}. | |||
*{{Sm|Sethlon|USA}} - Was considered to be the current best Roy player in the world after NEO's retirement, due to his popularity and widely acclaimed combo video ''Ashes to Ashes.'' While his results were not at the same caliber as NEO, he made some respectable placements such as 49th at {{Trn|GENESIS}}. | |||
*{{Sm|Zain|USA}} - Uses Roy under the moniker "DontTestMe"; started using Roy in the Slippy era to moderate success, defeating {{Sm|2saint}}, {{Sm|Ginger}}, and {{Sm|bobby big ballz}} in online tournaments. His 7th place finish at {{Trn|Wavedash 2023}} marked Roy's most notable offline tournament placing since NEO's results in the Golden Age. Has wins over {{Sm|Nickemwit}} and {{Sm|Kürv}} offline. | |||
:''See also: [[:Category:Roy | |||
*{{Sm| | |||
*{{Sm|Leon|France}} - Although better known for his {{SSBB|Marth}} in ''[[Brawl]]'', he placed well in many French tournaments with Roy. | |||
*{{Sm|NEO|USA}} - Considered to be the best Roy player of all time with many results other Roy players still have yet to match. | |||
*{{Sm|Sethlon|USA}} - Was considered to be the current best Roy player in the world after | |||
*{{Sm| | |||
===Tier placement and history=== | ===Tier placement and history=== | ||
On the current tier list, Roy ranks | On the current tier list, Roy ranks 21st, in the D tier. Roy has consistently ranked very low on most revisions of the [[tier list]], with his highest being only 15th on two separate occasions. His severe weaknesses, such as his poor effective threat range, fast-falling physics coupled with very poor recovery, and nearly nonexistent combo game on floaty characters, have resulted in terrible matchups against many top- and high-tiered characters (particularly the non-fastfallers) that completely stop his mains from progressing far into tournaments. This holds him back far too much in competitive play to place consistently in high-level tournaments without the use of a secondary character. | ||
Roy's moveset also | Roy's moveset also does not boast the potential creativity of other characters, especially Marth, owing to his over-reliance on his very few good combo extenders and KO moves. This has resulted in much less nuance and optimization possible in Roy's [[metagame]], making the Roy matchup very easy to learn and catch up with. Additionally, because he is very similar to Marth, a top-tiered character that any competitive player knows how to fight against, Roy players cannot rely on matchup inexperience to win sets, unlike mains of other uncommon characters. While {{Sm|NEO}}, arguably the greatest Roy player of all time, managed to place top 8 consistently in the early ''Melee'' metagame, even he had to use Marth and Sheik secondaries to succeed at higher-stakes tournaments such as MLG. NEO, and many of Roy's best representatives, have either become inactive in the tournament scene or have dropped him for other characters (or other ''Smash'' games altogether), further hurting Roy's results in tournaments. | ||
Roy's only notable results in the current ''Melee'' metagame have been through Marth players, such as {{Sm|Zain}} and {{Sm|Mew2King}}, [[sandbagging]] with him in lower-stakes tournaments or matches. | Roy's only notable results in the current ''Melee'' metagame have been through Marth players, such as {{Sm|Zain}} and {{Sm|Mew2King}}, [[sandbagging]] with him in lower-stakes tournaments or matches. Zain has seen a notable amount of success with Roy in online tournaments and at the regional level; notably, he placed 7th at {{Trn|Wavedash 2023}}, the character's best performance since NEO's placements in the Golden Age. However, the majority of Zain's best wins have been against fastfallers, outside of a handful of fringe sets where he barely scraped out wins against {{SSBM|Jigglypuff}} players, some of them not even ranked in the top 100. Thus, his tournament runs with Roy only reinforce what has been known about him for years already, both in terms of strengths and limitations, and it is clear that Zain's success with Roy is entirely due to his phenomenal abilities as a player rather than Roy offering any unique positive qualities as a character to fuel that success. Despite Zain's attempts to push the character, Roy's metagame still remains rather stagnant, with players' opinions of him only marginally improving overall. | ||
===The "Tier Wars" and comparison to Marth=== | ===The "Tier Wars" and comparison to Marth=== | ||
{{SSBM|Marth}} and Roy's differences became the center of controversy and discussion on [[GameFAQs]]' [[tier list]] debates, specifically in 2003 and 2004, when the competitive scene was | {{SSBM|Marth}}'s and Roy's differences became the center of controversy and discussion on [[GameFAQs]]' [[tier list]] debates, specifically in 2003 and 2004, when the competitive scene was still new. Marth players who generally supported the tier list claimed Marth had overall better attributes, in terms of speed, weight, and recovery capabilities. They also cited tournament results as proof of his superiority, with a multitude of professional Marth users such as {{Sm|Ken}} placing extremely high in major tournaments, while Roy lacked any such representation to back up the anti-tiers' arguments. Roy players who generally opposed the tier list, however, claimed that Roy's different attributes, such as his larger sweetspot in the center of his blade and general "superiority" in power, were enough to allow him to be as efficient of a character as Marth was; they also argued that professionals needed to learn how to use Roy as a different character from Marth in an attempt to disprove the tournament results. | ||
Owing to the fact that these debates took place before extensive testing of ''Melee's'' engine, the debates were plagued by numerous inaccuracies that have since been disproven with time. The point about Marth's extra weight, for instance, is now considered moot; his extra weight is decidedly negligible, and can even be interpreted as a disadvantage, considering his extra weight makes him susceptible to {{SSBM|Fox}}'s [[shine]] combos, while Roy's lighter weight makes him immune to such combos. More importantly, pro-tiers made a common assumption that Marth is faster than Roy. While Marth indeed has a faster dashing speed, this claim is questionable, considering that Roy's [[SHFFL]] is faster than Marth's due to his falling speed and lower short hop. Similarly, some points brought up about Roy's viability are also now considered inaccurate. For instance, Roy's "superiority" in power has been disproven, as many of Marth's attacks, tippered and non-tippered, deal more knockback and damage than Roy's respective centered and non-sweetspotted strikes. The sweetspot in the hilt of the blade is now considered a disadvantage and one of the main reasons for Roy's poor tier placement; while Marth can attack from afar and still deal respectable damage, Roy cannot do so, lest his attacks hit with extremely low knockback; Roy's sourspot on the entire length of the Binding Blade, besides the hilt, is also much weaker than Marth's sourspot on the hilt of the Falchion. | Owing to the fact that these debates took place before extensive testing of ''Melee's'' engine, the debates were plagued by numerous inaccuracies that have since been disproven with time. The point about Marth's extra weight, for instance, is now considered moot; his extra weight is decidedly negligible, and can even be interpreted as a disadvantage, considering his extra weight makes him susceptible to {{SSBM|Fox}}'s [[shine]] combos, while Roy's lighter weight makes him immune to such combos. More importantly, pro-tiers made a common assumption that Marth is faster than Roy. While Marth indeed has a faster dashing speed, this claim is questionable, considering that Roy's [[SHFFL]] is faster than Marth's due to his falling speed and lower short hop. Similarly, some points brought up about Roy's viability are also now considered inaccurate. For instance, Roy's "superiority" in power has been disproven, as many of Marth's attacks, tippered and non-tippered, deal more knockback and damage than Roy's respective centered and non-sweetspotted strikes. The sweetspot in the hilt of the blade is now considered a disadvantage and one of the main reasons for Roy's poor tier placement; while Marth can attack from afar and still deal respectable damage, Roy cannot do so, lest his attacks hit with extremely low knockback; Roy's sourspot on the entire length of the Binding Blade, besides the hilt, is also much weaker than Marth's sourspot on the hilt of the Falchion. | ||
Overall, the primary reason for Roy's named inferiority is precisely the one that anti-tiers attempted to refute: Roy has too much trouble trying to KO his opponents. Marth has far more creative and flexible ways to string together moves, deal damage, KO, and edgeguard (especially due to his {{mvsub|Marth|SSBM|down aerial}} [[spike]]). Roy, however, lacks the same flexibility in his comboing and KOing games, and is instead heavily reliant on predictable and repetitive chain grab and down tilt setups, with almost all of his viable combos ending in a forward smash. Roy's edgeguarding game is also considerably worse than Marth's; while Roy's down tilt is more useful for combos, it is not at all useful for intercepting the majority of recoveries (unlike Marth's). Additionally, Roy has a notoriously poor | Overall, the primary reason for Roy's named inferiority is precisely the one that anti-tiers attempted to refute: Roy has too much trouble trying to KO his opponents. Marth has far more creative and flexible ways to string together moves, deal damage, KO, and edgeguard (especially due to his {{mvsub|Marth|SSBM|down aerial}} [[spike]]). Roy, however, lacks the same flexibility in his comboing and KOing games, and is instead heavily reliant on predictable and repetitive chain grab and down tilt setups, with almost all of his viable combos ending in a forward smash. Roy's edgeguarding game is also considerably worse than Marth's; while Roy's down tilt is more useful for combos, it is not at all useful for intercepting the majority of recoveries (unlike Marth's). Additionally, Roy has a notoriously poor offstage game due to his falling speed and terrible aerials, that are both incredibly weak even when sweetspotted and have a high amount of ending lag, which severely hinders his ability to effectively edge-guard offstage without self-destructing. The current metagame for ''Melee'' reflects these differences and conclusions: Marth ranks in the S tier at 2nd place and features numerous dedicated mains, while Roy ranks in the D tier at 21st, and has very few dedicated mains of his own. | ||
==In 1-P Mode== | |||
==In | |||
===In {{SSBM|Classic Mode}}=== | ===In {{SSBM|Classic Mode}}=== | ||
[[File:BetaAllStarIntro.png|thumb | [[File:BetaAllStarIntro.png|thumb|Roy's unused intro image.]] | ||
Unusually, Roy does not appear in Classic Mode when unlocked, neither as an ally, nor as an opponent, making him the only fighter who never appears at all; the reason for this is unknown. Despite this, Roy does have an introduction image for the "Now Loading..." screen between matches | Unusually, Roy does not appear in Classic Mode when unlocked, neither as an ally, nor as an opponent, making him the only fighter who never appears at all; the reason for this is unknown. Despite this, Roy does have an introduction image for the "Now Loading..." screen between matches in the game files. | ||
===In [[Adventure Mode]]=== | ===In [[Adventure Mode]]=== | ||
| Line 374: | Line 452: | ||
</gallery></center> | </gallery></center> | ||
==Trophies== | ==[[Trophies]]== | ||
In addition to the normal trophy about Roy as a character, there are two trophies about him as a fighter, unlocked by completing the Adventure and All-Star modes respectively with Roy on any difficulty: | In addition to the normal trophy about Roy as a character, there are two trophies about him as a fighter, unlocked by completing the [[Adventure]] and [[All-Star]] modes respectively with Roy on any difficulty: | ||
{{Trophy/Fighter | |||
|name=Roy | |||
|image=Roy Trophy Melee.png | |||
|mode=Classic | |||
: | |desc=The son of the lord of Pharae Principality, Roy was studying in Ostia when the Kingdom of Bern invaded League of Lycia. [[fireemblemwiki:Eliwood|His father]] fell ill at this time, so Roy assumed leadership of Pharae's armies. After his fateful meeting with the Princess Guinevere, his destiny became inextricably linked with the fate of the entire continent. | ||
|gamelist-ntsc={{Trophy games|game1=Fire Emblem|release1=Japan Only}} | |||
|gamelist-pal=:Future Release | |||
|game=Melee | |||
}} | |||
{{clrl}} | |||
{{Trophy/Fighter | |||
|name=Roy | |||
: | |image=Roy Trophy (Smash).png | ||
: | |mode=Adventure | ||
|desc=While Roy's moves are well balanced, he's a little on the slow side, and doesn't excel at midair combat. His blade, the Sword of Seals, gives him excellent reach, and makes his Double-Edge Dance slightly different than Marth's Dancing Blade. When it's fully charged, Roy's destructive Flare Blade delivers an instant KO. | |||
|gamelist=:B: Flare Blade | |||
:Smash B: Double-Edge Dance | |||
|game=Melee | |||
}} | |||
{{clrl}} | |||
{{Trophy/Fighter | |||
|name=Roy | |||
|image=Roy Trophy (Smash 2).png | |||
Roy Trophy (Smash).png| | |mode=All Star | ||
Roy | |desc=Roy's blade is different than Marth's; he does the most damage hitting with the center of his sword. So, a fearless advance into the arms of his foe is Roy's best bet. Blazer is a bit slower than Marth's Dolphin Slash, but it's still a mighty attack that sets anyone it strikes aflame. Roy's attack after using Counter differs slightly from Marth's. | ||
|gamelist=:Up & B: Blazer | |||
:Down & B: Counter | |||
|game=Melee | |||
}} | |||
{{clrl}} | |||
==[[Alternate costume (SSBM)#Roy|Alternate costumes]]== | ==[[Alternate costume (SSBM)#Roy|Alternate costumes]]== | ||
| Line 415: | Line 504: | ||
<gallery> | <gallery> | ||
Roy SSBM Artwork.png|Official artwork of Roy. | Roy SSBM Artwork.png|Official artwork of Roy. | ||
SSBMWebsiteRoy1.jpg|[[Idle|Idling]] on [[Fourside]]. | |||
SSBMWebsiteRoy2.jpg|Using his [[forward smash]] on {{SSBM|Jigglypuff}} on [[Mute City]]. | |||
Blazer.jpg|Using [[Blazer]] on {{SSBM|Bowser}} on [[Brinstar]]. | |||
Roy's Counter Move.jpg|[[Counter]]ing {{SSBM|Marth}}'s [[neutral aerial]] on [[Temple]]. | |||
Roy's B move.jpg|Using his fully-[[charge]]d [[Flare Blade]] on Bowser and {{SSBM|Donkey Kong}} on Fourside. | |||
Roy's Double Edge Dance Move.jpg|Using [[Double-Edge Dance]]'s 4th slash inputted forward on [[Yoshi's Story]]. | |||
</gallery> | </gallery> | ||
</center> | </center> | ||
| Line 420: | Line 515: | ||
==Trivia== | ==Trivia== | ||
[[File:Royhal.png|thumb|Closeup of Roy's sword, showing the text "©HAL LABRATORY.INC"]] | [[File:Royhal.png|thumb|Closeup of Roy's sword, showing the text "©HAL LABRATORY.INC"]] | ||
*Close examination of textures for the Binding Blade shows | *Close examination of textures for the Binding Blade shows the incorrectly spelt text "©HAL LABRATORY.INC" included in the file. It is not known why the signature is there. | ||
*Roy is referred | *Roy is the only character in ''Melee'': | ||
*Roy does not feature a sheath during gameplay and his "Challenger Approaching" screen like Marth does; this is considered unusual, as Roy has a sheath in his victory poses, official art, character select portrait and all three of his trophies, as well as his unused Classic Mode introduction. | **That is a clone of a [[newcomer]], as well as the only clone of an unlockable character. | ||
*Roy and {{SSBM|Marth}} are the only two characters in ''Melee'' that speak Japanese even in the international | **Whose icon on the [[character selection screen]] has a different background color on his name (the background color is almost pure black on his name while other characters have a red and black color mix for their background color for their names). | ||
*Roy and Marth are the only playable characters in ''Melee'' that do not have a stage representing their universe, though hacked data shows that [[AKANEIA|one was | **Who makes no appearance as a CPU whatsoever in {{b|Classic Mode|SSBM}}. | ||
**In ''Melee''{{'}}s [[All-Star Mode]], Roy is fought on {{SSBM|Final Destination}}. In his two Event Match appearances and his unlock battle, he appears on [[Temple]]. | *Roy's files and debug menu listings do not reference him specifically: he is instead referred to internally as "EMBLEM", most prominently in the [[debug menu]]<ref>{{Cite web|url=https://tcrf.net/Super_Smash_Bros._Melee/Master_Debug_Menu#CHAR_SELECT|title=Super Smash Bros. Melee/Master Debug Menu|site=The Cutting Room Floor|published=2015-03-09|retrieved=2015-03-16}}</ref> and his texture files refer to him with the codename "Fe", an abbreviation of "Fire Emblem".<ref>{{Cite web|url=http://smashboards.com/threads/melee-hacks-and-you-updated-1-7-11.247119/page-2#post-8291198|author=Steelia|title=Guide - Melee, Hacks, and You -- *UPDATED 1/7/11*|site=Smashboards|published=September 3, 2009|retrieved=March 16, 2015}}</ref> | ||
*Roy and {{SSBM|Young Link}} are the only fighters to use their KO cry for other uses. Roy's is used when fully charging [[Flare Blade]] and Young Link's is used during his Star KO animation. | **This suggests that Roy was chosen as the Marth clone relatively late in development. | ||
*Roy does not feature a sheath during gameplay and his "Challenger Approaching" screen like Marth does; this is considered unusual, as Roy has a sheath in his victory poses, official art, character select portrait and all three of his trophies, as well as his unused Classic Mode introduction. | |||
**This also happens in ''Smash 4'' and ''Ultimate'', but the sheath appears when he uses his [[Critical Hit|Final Smash]]. | |||
*Roy and {{SSBM|Marth}} are the only two characters in ''Melee'' that speak Japanese even in the international versions. | |||
*Roy and Marth are the only playable characters in ''Melee'' that do not have a stage representing their universe, though hacked data shows that [[AKANEIA|one was planned]]. | |||
**In ''Melee''{{'}}s [[All-Star Mode]], Roy is fought on {{SSBM|Final Destination}}. In his two Event Match appearances and his unlock battle, he appears on [[Temple]]. | |||
*Roy and {{SSBM|Young Link}} are the only fighters to use their KO cry for other uses. Roy's is used when fully charging [[Flare Blade]] and Young Link's is used during his Star KO animation. {{SSBM|Kirby}} also mimics this unique property when he copies Roy and releases a fully-charged Flare Blade. | |||
*Roy with his Flare Blade, {{SSBM|Mr. Game & Watch}} with his [[Judge]], and {{SSBM|Pichu}} with most of its electric attacks are the only characters in ''Melee'' to have attacks that directly inflict recoil damage. {{SSBM|Kirby}} can also harm himself if he copies either Roy or Pichu. | *Roy with his Flare Blade, {{SSBM|Mr. Game & Watch}} with his [[Judge]], and {{SSBM|Pichu}} with most of its electric attacks are the only characters in ''Melee'' to have attacks that directly inflict recoil damage. {{SSBM|Kirby}} can also harm himself if he copies either Roy or Pichu. | ||
* | *Due to ''Fire Emblem'' games being Japan-exclusive at the time, Sakurai discussed Roy's exclusion from the American version of ''Melee'' with Nintendo of America. In the end, Roy was kept in every non-Japanese version alongside Marth.<ref>[http://www.sourcegaming.info/2015/12/13/sakurai-fe25/ Sakurai Interview: Fire Emblem 25th Anniversary - Source Gaming]</ref> | ||
*All of Roy's sourspotted attacks make a punch/kick sound effect instead of a slashing sound effect. | *All of Roy's sourspotted attacks make a punch/kick sound effect instead of a slashing sound effect. | ||
*Ironically, Roy's sword trails indicate that the sweetspot is at the tip of the sword. | *Ironically, Roy's sword trails indicate that the sweetspot is at the tip of the sword. | ||
*Because [[fireemblemwiki:Fire Emblem: The Binding Blade|Roy's intended debut game]]'s release was delayed into March 2002, Roy is one of two characters who can claim a ''Smash'' game as their first appearance. The other one is {{SSBM|Mr. Game & Watch}}, a composite of older Game & Watch characters with some original elements. | |||
*Roy's design in ''Melee'' is taken from the version of ''Fire Emblem: The Binding Blade'' shown at Nintendo Space World 2001. There are some differences, though, like the lack of sleeves and the lack of a jewel on Roy's armor. | |||
*Possibly as a result for his somewhat high learning curve and being a popular low-tier substitute for high-level smashers such as {{Sm|Mew2King}} and {{Sm|Ken}}, the term "skilled Roy" is a common gag inside the ''Melee'' community for being an unbeatable character, with the phrase "A skilled Roy can beat any {{SSBM|Fox}}. This is why I main Roy." being a good example of it. | *Possibly as a result for his somewhat high learning curve and being a popular low-tier substitute for high-level smashers such as {{Sm|Mew2King}} and {{Sm|Ken}}, the term "skilled Roy" is a common gag inside the ''Melee'' community for being an unbeatable character, with the phrase "A skilled Roy can beat any {{SSBM|Fox}}. This is why I main Roy." being a good example of it. | ||
*Roy | *Roy and Marth are the only characters that can perform the [[Whispy blink glitch]]. | ||
==References== | |||
{{reflist}} | |||
==External links== | |||
*[https://www.nintendo.co.jp/n01/n64/software/nus_p_nalj/smash/flash/0115/index.html Roy's page at Smabura-Ken] ([[smashwiki:26TP/Roy|Translation]]) | |||
{{SSBMCharacters}} | {{SSBMCharacters}} | ||
Latest revision as of 04:17, March 7, 2024
| Roy in Super Smash Bros. Melee | |
|---|---|
 
| |
| Universe | Fire Emblem |
| Other playable appearances | in SSB4 in Ultimate |
| Availability | Unlockable |
| Tier | D (21) (North America) G (22) (Europe) |
Roy (ロイ, Roy) is a unlockable character in Super Smash Bros. Melee. He is a clone of Marth, differentiated primarily by his sweetspots being located near the center of his blade rather than the tip. He is voiced by Jun Fukuyama.
Roy currently ranks 21st on the Melee tier list, in the D tier, which is his worst placement in the series. Roy's advantages include an above average approach due to having one of the best SHFFLs in the game, as well as a good grab game, and among the best reaches in the game thanks to his sword. However, Roy's flaws are significant, which include having poor flexibility in his combo game, attacks that are difficult to properly land, generally possessing significantly laggy attacks, having few moves that can KO reliably and only one of which (forward smash) that is an adequate finisher. He also possesses one of the worst recoveries in the game as Blazer travels a very short distance vertically, and being a light character that is heavily susceptible to combos; as a result, Roy has significant KOing problems while being easy to KO himself. These flaws overpower Roy's strengths, leading to numerous matchups hard countering him, especially against those who are higher ranked than him on the tier list.
How to unlock[edit]
Roy must be defeated in battle before he can be unlocked. There are two ways the player can encounter Roy:
- One way is to complete Classic Mode, Adventure Mode, or All-Star Mode as Marth without using any continues. If the player fails to defeat Roy, they can re-fight him by doing this same method again.
- Another way is to play 900 VS. matches to completion. If the player fails to defeat Roy, they can re-fight him by playing another VS. match to completion. If this method is used, fighters with lower VS. match quotas must be unlocked before Roy can be fought. This prevents Roy from being unlocked before Marth.
Roy is fought on the Temple stage, with the track "Fire Emblem" playing.
Attributes[edit]

Overall, Roy does not fall into any specific fighter archetype; while having a slew of powerful attacks, Roy himself is rather nimble, boasting a relatively fast dash and a long dash dance, combined with very high falling speed. However, Roy has a relatively below-average air speed, similar to Marth. A combination of a fast falling speed and low traction gives Roy a somewhat long wavedash (sixth longest in the game).
Being a clone of a top-tiered character in Melee (The character in question being Marth), Roy inherits some positive properties emblematic of Marth's game plan. Due to his movement properties and long wavedash, Roy has excellent ground-based movement. His down tilt also serves as a respectable poke and combo starter, as it will send opponents straight up when hit, allowing for a follow-up. Combined with an effective grab game, with the second-largest non-disjointed grab range (behind only Marth), Roy can somewhat emulate one portion of Marth's effective neutral game play: threatening grabs and down tilt out of his dash dance. With his ability to chaingrab some fastfallers such as Fox and Falco with his up throw, tech chase opponents and set up edgeguards with his down and forward throws, as well as perform a handful of other combo setups that stem from his grab, Roy can force his opponents to respect him in the neutral while creating tangible threats as well. Roy also has a very fast SHFFL due to his fast falling speed and low-startup aerials, allowing him to further protect his space as needed.
Roy also boasts high power in most of his ground-based attacks. Roy's forward smash, like Marth's, has quick startup and covers a large range; this is his primary KO move, and most of Roy's combos will end with a sweetspotted forward smash to send opponents off-stage. Its greater power up close can also punish overzealous opponents who carelessly step into Roy's threat zone, allowing for reversal situations. His other two smash attacks are more situational, but both his down and up smashes are strong when landed; the latter even has multi-hit properties and can spike when struck at the tip, although this is very situational. Roy's specials are also quite strong as well; Flare Blade is a decent edgeguarding tactic and has huge knockback nearing one-hit KO thresholds when fully charged, Double-Edge Dance can serve as a backup neutral poke with strong third and fourth hits, and Counter can be used as a devastating surprise option, turning the tables against single, strong hits when the opponent least expects it. Counter can also intercept linear recoveries, and because it scales based on move power, it will almost assuredly KO most recovering opponents if landed, unlike Marth's Counter, which often simply resets the situation.
However, Roy's primary flaw is the sweetspot placement of his moves. While it may seem that Roy has great reach on paper due to his disjointed hitbox offered by the Binding Blade, this is all merely an illusion in practice. Unlike Marth, who can safely attack opponents from a distance, Roy must still go into close proximity with the opponent to deliver strong damage and knockback, as the sweetspot on his sword is closer to the hilt rather than at the tip. While attacks can become incredibly powerful at this close of a range, this causes Roy to become very vulnerable, especially against characters with powerful close-range threats. This would not be as much of a problem if Roy's sourspots had utility in setting up KOs or extending combos, but many of them do not, greatly exacerbating this weakness. While Marth's weakest sourspots actually complement his game plan, using his weaker hitboxes to precisely set up for his stronger ones, Roy's sourspots do almost nothing to the opponent in terms of knockback or damage.
As a result of this very close sweetspot, Roy himself lacks a particularly reliable KO move. With the exception of his forward smash, his down smash, and the later hits of his Double Edge Dance, Roy has few options to quickly KO, and even these attacks need to connect in close ranges in order for them to have any reasonable KOing power. Further compounding Roy's problems with KOing are his aerials; even when sweetspotted, none of these aerials can reliably KO under 200%, they require good setups in order to properly connect, and none of them can easily inflict damage in the first place. Roy also lacks any quick KO options. While he may have two meteor smashes (the third hit of his upward Double-Edge Dance and his down air) and one spike (tippered up smash), all three are highly situational, requiring particularly lucky or skilled setups in order to properly connect. Coupled with poor offstage options as a result of high-lag aerials that are all of high risk off the edge and a poor recovery, Roy is almost completely dependent on attempting to rack up damage with brief combo strings, culminating in a reliance on hard reads and unforced errors by the opponent to garner KOs.
Roy also has limited combo ability, in stark contrast with Marth. Roy has slightly below-average air speed like Marth, but Roy's sweetspot once again hurts him. Roy cannot move fast enough in the air to hit with the hilt of his blade, causing primarily sourspotted attacks, resulting in low hitstun and hitlag attacks, impairing Roy's combo and aerial games, and even giving him a poor edgeguarding game, unlike Marth. Roy's moveset is only suitable for aggravating fastfallers, since he at least has chaingrabs and tech chases against them, and can juggle them on stages with few or no platforms such as Pokémon Stadium or Final Destination. However, that is the extent of Roy's high-level punish game against the cast, and he has no reliable method of achieving any combos or KO setups on floaty characters such as Jigglypuff or Peach. Roy's combo potential is thus below-average at best, being both stage- and character-dependent unlike Marth, and has led to completely lopsided losing matchups against those aforementioned floaty characters, with almost no hope of winning in a competitive setting.
Roy himself, however, is easy to combo and edgeguard; like other fastfalling characters, his high falling speed harms him by making him extremely vulnerable to juggling. Even with fast falling speed, Roy's vertical survivability from the upper blast line is merely average due to a combination of his lighter weight than characters such as Captain Falcon and much slower falling speed than characters like Falco, despite him being slightly lighter than Roy. Like Marth, Roy also has a non-stellar recovery, though his faster falling speed and higher gravity only exacerbate it to make it far worse than Marth's and among the worst in the game; adding to this, his high falling speed makes him extremely vulnerable to edgeguarding, as well as being easy to gimp. While Roy's Blazer is slightly more effective than Marth's Dolphin Slash, due to its greater horizontal distance, multi-hit properties that can aggravate edgeguarders, and its ability to be controlled to an extent, it still has high ending lag, leaving him open to punishes as he lands. Additionally, while Roy can still use Double-Edge Dance to recover horizontally, it is not as effective as Marth's Dancing Blade due to his higher falling speed.
While Roy may appear like he has enough tools as a character to function, in reality, he struggles with nearly every aspect of Melee. His excellent movement is not only outclassed by Marth, but simply does not compensate for his many weaknesses in both the advantage and disadvantage states. Roy's moveset is full of low-impact hitboxes that struggle to push any sort of advantage against non-fastfalling opponents, while he is almost trivial to combo, edgeguard, and KO himself. While Roy's raw power up close can punish careless opponents, hoping that opponents make unforced errors is not a reliable strategy. As such, unlike Marth, Roy is a poor character at higher levels of play with sparse representation.
Version history[edit]
NTSC 1.01
 Fixed the Whispy blink glitch.
Differences from Marth[edit]
Roy is overall a considerably less effective character than Marth. All of his sweetspots are placed at the hilt or center of his blade, making it hard for him to space, and his down aerial's spike is a meteor smash hitbox that is difficult to hit with. Almost all of Roy's moves have hitboxes that come out slower, remain active for fewer frames, or stay out for the same period as Marth's, but with slower animation speed (leading to unfortunate hitbox timing on moves like his dash attack, the upper part of his neutral attack, three of his aerials and Blazer). Roy's sourspot does far less knockback and damage than Marth's, and his sweetspots do somewhere in between the knockback and damage of Marth's sour- and sweetspots, making his KO potential much worse than Marth's. Additionally, his wavedash and moonwalk are both shorter than Marth's, resulting in him being less mobile.
However, Roy does have some advantages. As he is slightly shorter than Marth, he is slightly harder to hit (although this makes his range shorter as a result); his up smash hits multiple times and can spike, making it more reliable than Marth's, and Flare Blade is much stronger than Shield Breaker, being a one-hit KO when fully charged. Additionally, unlike Dolphin Slash, Blazer has multi-hit properties and can OHKO most lightweight fighters, like Mewtwo and Jigglypuff.
Overall, Roy's advantages are not enough to alleviate his significant weaknesses, and it results in him having far less successful tournament results and a much smaller playerbase in comparison to Marth.
Aesthetics[edit]
 Roy's idle animation, taunt and victory animations are different from Marth's.
Attributes[edit]
- Roy's sweetspot is placed at the hilt of his blade, meaning he fights at close range in order to be most efficient. Roy's sweetspot is larger than Marth's, but Marth can space the tipper sweetspot of his sword for maximum safety and damage.
- Some of Roy's attacks use the flame effect.
- Roy is lighter than Marth (NTSC 87 → 85). It hinders his survivability slightly but makes him less susceptible to waveshine followups from Fox as he is knocked down by the shine.
- Roy is shorter than Marth. This shortens his hurtbox, making him harder to hit, but also slightly reduces the range in his attacks.
 Due to his shorter height, Roy can grab smaller characters such as Jigglypuff and Kirby while they are crouching with his standing grab, unlike Marth.
- Roy's air speed is slightly faster than Marth (PAL 0.85 → 0.9).
 Roy's jumpsquat is one frame later than Marth's (frame 4 → frame 5). Not only does this mean catching opponents by surprise with aerials is slightly harder for Roy, but it also makes his wavedash slightly less useful than that of Marth.
- Roy's wavedash is shorter than Marth's.
- Roy walks (1.6 → 1.2) and dashes (1.8 → 1.61) noticeably slower than Marth, and his dash-dance window is smaller as a result of his slower dash speed.
- Roy's falling speed is higher (2.2 → 2.4), causing him to have less vertical knockback than Marth, despite Marth remaining heavier than Roy, and makes his SHFFL faster than Marth's. However, his increased falling speed makes him much easier to combo, worsens his recovery, and means that he is usually unable to go off-stage for edgeguards or gimps, hindering his ability to close out stocks at low percentages.
- Roy's gravity is higher (0.085 → 0.114).
- As a result, Roy's jumps are lower than Marth's.
Ground attacks[edit]
- Neutral attack:
- Neutral attack only has a single hit, as such it can't be buffered into a second hit.
- Sourspot damage was changed and mids do different damage, sourspot (4% → 3%), mid (4% → 5%).
- Due to the fact that mid has priority on both characters, the overall damage output is generally higher per hit however since it is only one hit the rate of attack is slower.
- The sourspot has much less base knockback with slightly more growth (20 base/50 growth → 5/60), the mid and sweetspot however, have a higher base knockback (20 → 30).
- The move's animation is slower, although the hitbox timings are unchanged. This makes it take a frame longer for Roy's arm to be outstretched, and also reduces the vertical range of the slash, due to the unchanged hitbox timing.
- The hitboxes are smaller.
- Forward tilt:
- Forward tilt has a longer duration (4 frames → 5).
- It has more startup (frame 7 → 9), with more ending lag.
- The sweetspot and sourspot deal less damage sourspot (9% → 7%), sweetspot (13%→12%), However his mids do higher damage(9% → 10%).
- Base knockback was buffed on mid (30 → 60).
- Due to the fact that mid has priority on both characters, the damage and knockback buff to the mid hitbox, generally improves KO potential.
- Up tilt:
- Up tilt has more startup (frame 6 → 7) and much more ending lag (frame 32 → 40).
- It has a smaller hitbox.
- It deals less damage (8%/9%/12% (early)/9%/10%/13% (clean) → 6%/8%/9%/10%).
- It has much less base knockback (50/40/30 → 35/20), making it drastically inferior for combos and KOing.
- Down tilt:
- Instead of having horizontal knockback, Roy's down tilt has vertical knockback (30° → 80°), which allows it to leads into many combo setups, especially on fast fallers. In exchange, this makes Roy's down tilt much less useful for neutral resets and edgeguards against the rest of the cast.
- The sweetspot deals more damage (10% → 12%) and has more base knockback (50 → 90), while the mid also deals more damage (9% → 10%) and has more base knockback (40 → 90)
- Hitbox priority is on the hilt and mids on both characters since Roy has sweetspot on hilt and stronger mids his does more damage and knockback on average however as this move has a different launch angle/utility these changes aren't felt as strongly as they would be otherwise
- It has more startup (frame 7 → 8).
- The sourspot deals less damage (8% → 6%) but has higher base knockback (25/20 → 40).
- The tipper hitbox is smaller and has lowest priority reducing range slightly with no benefit.
- Dash attack:
- The sourspot of Roy's dash attack deals less damage (9% → 6%), the mids however deal more damage (11% → 12%)
- The move's animation is much slower, but with no change in hitbox timings, leading to an infamously terrible hitbox placement.[1]
- Forward smash:
- Forward smash's sweetspot hitbox is larger and his mids are identical to the sweetspot essentially giving the effect of everything but the tip being the sweetspot.
- Hitbox priority is on the hilt and mids making hitting the sweetspot extremely consistent while on Marth the sweetspot has lowest priority and mids are the same as the sour spot.
- Forward smash's tipper hitbox is smaller than Marth's tipper hitbox which while giving it slightly less range and doesn't benefit Roy as his tipper while his sourspot is lowest priority anyway.
- It has more startup with a shorter duration (frame 10-13 → 12-14) and more ending lag (frame 48 → 54).
- All of its hitboxes also deal less knockback, with his sourspot in particular dealing significantly less knockback (60 base/70 growth → 30/65) and his sweetspot having slightly less knockback growth (70 → 65).
- The sourspot deals 2% less damage (14% → 12%).
- Up smash:
- Up smash uses the flame effect.
- Up smash has a longer duration (4 frames → 10).
- It can serve as an unconventional spike if hit with the tip of Roy's sword on the second, third, and fourth hits.
- It deals more damage than Marth's sourspots, but less than his sweetspots (8%/15%/18% → 16.56%).
- Overall, it does more damage consistently.
- It deals more knockback without sourspots (196 set knockback/30/80 base/100/80 growth → 73 base/90 growth).
- It has more startup (frame 13 → 15).
- As it is a multi-hit move, it has the possibility of being SDIed before connecting with the final hit.
- It has smaller hitboxes.
- Down smash:
- The front hit of down smash deals more damage (16%/11% → 21%/14%).
- Both hits of down smash have higher startup (first hit: frame 5 → frame 6, second hit: frame 20 → 23).
- It has more ending lag (frame 62 → 72).
- The sourspot of the back hit also deals less damage (11% → 8%).
- Both hits of the move deal drastically less knockback (front hit: 16/20/70 base/72/100 growth → 15/42 base/100/70 growth, back hit: 15/30/70 base/72/100 growth → 15/42 base/68/100 growth) than Marth's.
Aerial attacks[edit]
- Except for back aerial and down aerial, all aerials have more landing lag (15 frames → 20 (neutral aerial), 15 frames → 20 (forward aerial), 15 frames → 18 (up aerial)).
- Neutral aerial:
- It has more startup on both hits (6-7 (hit 1) 15-21 (hit 2) → 7-8 (hit 1) 17-20 (hit 2) and slightly more ending lag (frame 49 → 50).
- The second hit also deals less damage (10% → 8%/6%).
- Forward aerial:
- It consistently sends opponents at a Sakurai angle unlike Marth (67°/361° → 361°).
- It has more start-up with a shorter duration (frame 4-7 → 5-7) and more ending lag (FAF 30 → 35).
- It deals considerably less damage (13%/10%9% → 8%/5%), and has significantly less base knockback (42/30/20 → 30/10).
- Back aerial:
- It has more startup with a shorter duration (frame 7-11 → 8-10) and much more ending lag (frame 32 → 43) with no difference in animation, leading to an unfortunate hitbox placement.
- It deals moderately less damage (13%/10%/9% → 9%/6%), and the sourspot has much less base knockback (30/25/10 → 10).
- Up aerial:
- It has a longer duration (frame 5-8 → 5-10).
- All hitboxes send at 80°, where as Marth sweetspot sends at 90°, sweetspot (90° → 80°).
- It deals moderately less damage (13%/10%/9% → 9%/6%).
- It has much less base knockback (40/30/20/18 → 20/10).
- Down aerial:
- The sourspots have more base knockback (40/30 → 40).
- It is considerably more difficult to sweetspot with (the sweetspot is located around Roy's hand, rather than the tip of his sword as with Marth).
- It has more start-up (frame 6 → 7), and much more ending lag.
- It deals less damage (13%/10%/9% → 9%/6%), and its sweetspot is a meteor smash instead of a spike (NTSC 290° → 270°), meaning it can be meteor canceled.
Grabs and throws[edit]
- Grab range is slightly shorter, but is still one of the farthest reaching non-tether grabs in the game.
- All of Roy's throws deal 1% more damage (forward/back/up throw: 4% → 5%, down throw: 5% → 6%).
- Roy's forward throw sends opponents at a slightly lower angle (50° → 45°).
- Roy's back throw has less knockback growth (60 → 45). This improves its follow-up potential, but hinders its ability to set-up edgeguards at higher percents.
- Roy's up throw sends opponents at a different angle (93° → 97°).
- Roy's down throw has more knockback growth (50 → 60) and sends opponents at a slightly higher angle than Marth's (135° → 120°), hindering its ability to follow-up and tech-chase.
Special moves[edit]
- Flare Blade:
- Flare Blade has a flame effect, and near the end of charging it, Roy glows white and the screen shakes violently.
- A fully charged Flare Blade has to be charged for a longer period.
- It deals considerably more knockback than Marth's Shield Breaker (30/34/40 base/100 growth → 40/110 (uncharged)/50/83 (fully charged).
- When fully charged, Flare Blade also deals drastically more damage than Shield Breaker (28% → 50%), resulting in a OHKO on hit.
- Flare Blade deals 10% recoil damage to Roy when fully charged.
- An uncharged Flare Blade also deals less damage than an uncharged Shield Breaker (7% → 6%).
- The move deals drastically less shield damage (uncharged:30/38 → 1, fully charged: 60 → 30).
- Double-Edge Dance:
- Double-Edge Dance has sourspots, unlike Dancing Blade. However, the sourspots range from dealing more or less damage than Dancing Blade's variations, depending on the angle. Most of Double-Edge Dance's hits also have different knockback (second (forward): 16 base/100 growth → 20/40 base/60/35 growth, second (upwards): 30/60/70/85 base/40 growth → 50/30, fourth (downward final hit): 20 base/130 growth → 30/110) and angle (first: 85°/96°/80°/76° → 96°/80°/60°/85°, second (forward): 105°/80°/70°/50° → 80°/56°/35°/105°, second (upwards): 90°/85°/70° → 96°, third (upwards): 80° → 280°/270°/60°, third (downward): 270° → 90°/75°/90° (multi-hits)/64° (final hit), fourth (upwards): 80° → 40°) properties compared to Dancing Blade's variations. The third hit upwards of Double-Edge Dance also meteor smashes instead of the third hit downwards like Dancing Blade.
- Double-Edge Dance has normal priority as opposed to transcendent priority unlike Dancing Blade, allowing it to cancel projectiles. The first hit, all angles of the second hit, third hit inputted upwards, and fourth hit inputted upwards of Double-Edge Dance deal more damage than Dancing Blade's variations (first: 4% → 5%/4%, second (all angles): 5% → 6%/4%, third: 6% → 10%/8%, fourth: 10% → 13%/10%), and the fourth hit inputed forward deals much more knockback (15 base/120 growth → 35/135). The first hit also has less base knockback than Dancing Blade's (55 → 50/40), allowing it to connect better with the second hits.
- Double-Edge Dance's third hit inputted forwards has more base knockback, but less knockback growth (0 base/160 growth → 50/110) than that of Dancing Blade's variation. This makes it overall weaker than Dancing Blade's variation at higher percentages, while also making it more difficult to combo into the fourth hits at lower percentages. The third hit inputted downward also has more startup (frame 13 → 14), more ending lag, and is a multi-hitting move, making it weaker overall despite the final hit having more base knockback (50 → 70), and meaning it can be SDI'd before it connects with the final hit due to it being a multi-hit. The third hit inputted forward and downward and the fourth hit inputted forward also deal less damage (third (forward): 10% → 10%/8%, third (downward): 12% → 11.51% (due to how stale-move negation works on multi-hit moves), fourth: 14% → 13%/10%) and the fourth hit inputted upwards has much less base knockback than Dancing Blade's variation (40 → 22). The third hit inputted upward's meteor smash is also overall weaker than Dancing Blade's third hit inputted downward's meteor smash (50 base/100 growth → 80/36 base/60/40 growth).
- All three finishers use the flame effect, in addition to the downward-angled third hit.
- Blazer:
- It uses the flame effect.
- Blazer deals slightly more damage (13%/10%/7%/6% → 13.18%).
- It can be angled forward for better horizontal recovery.
- It has a longer duration (6 frames → 13).
- It has slightly less landing lag than Dolphin Slash (34 frames → 30).
- Its first hit has very strong set knockback (200 set knockback), allowing it to KO floaty characters like Jigglypuff at 0% on certain stages.
- It has more startup (frame 5 → 9).
- It deals drastically less knockback (80/60/20 base/70/90 growth → 0/10 base/100 set knockback/100 growth).
- It covers less vertical distance.
- It can be SDIed out of due to its multihit nature.
- Counter:
- Roy's Counter pose is slightly different. A successful counter uses the flame effect.
- Roy's Counter does 1.5x the damage of the countered move, as opposed to Marth's dealing a flat 7%, making it a powerful KO move when used against strong attacks (such as Falcon Punch, Warlock Punch, or a charged smash attack).
- The counter has more startup with a much shorter duration (frame 5-29 → 8-20).
- It also deals less knockback with an added sourspot (90 base/35 growth → 30 base/90/70 growth), making it much weaker at low percents if it counters a move that deals 4.6% or less.
- Roy has two unique voice clips when he successfully uses Counter instead of three like Marth's. Roy may either say "今だ!" ("Now!") or "そこ!" ("There!").
Moveset[edit]
For a gallery of Roy's hitboxes, see here.


All of Roy's attacks are at their strongest when they hit with the center of the Binding Blade; if an attack hits with both the sourspot and sweetspot hitboxes, then the sweetspot usually takes priority but sometimes sourspots do occur.
| Name | Damage | Description | ||
|---|---|---|---|---|
| Neutral attack | Slash (スラッシュ) | 5% (blade), 3% (tip), 6% (body) | Identical to Marth's; he slashes in front of himself. However, Roy only slashes once, and at a slower rate than Marth. Additionally, Roy's version is devoid of buffer, meaning the player has to press the attack button one at a time instead of mashing it. | |
| Forward tilt | Sharp Edge (シャープエッジ) | 10% (blade), 7% (tip), 12% (body) | A fast upward swipe with the Binding Blade while leaning forward. Deals more damage if the opponent is closer to Roy. Can KO at high percentages or when the blast line is close by. | |
| Up tilt | Anti-Air Slash (アンチエアスラッシュ) | Clean: 8% (blade & arm), 6% (tip), 10% (body) Late: 8% (blade & arm), 6% (tip), 10% (body) |
Swings his sword in a large arc above his head. Despite generally covering Roy's hurtboxes, it is less powerful and has less combo potential than Marth's. | |
| Down tilt | Low Stab (ロースラスト), Low Thrust) | 10% (blade), 6% (tip), 12% (body) | A sword poke to the ground. Has longer hitstun than most of Roy's other attacks, and also sends opponents upward, making it a good combo starter overall. Its range and speed makes it a very favorable move to use in the neutral game and spacing, as well as edgeguarding. | |
| Dash attack | Raid Chop (レイドチョップ) | 12% (blade), 6% (tip) | A quick upward sweeping diagonal slash. Like Marth's, can either send opponents in front of him, behind him, or above him. Because this move has a slower animation overall than Marth's but the hitboxes are active for the same frames, the move starts before he even swings the sword and ends before it reaches halfway through his swing in front of him. | |
| Forward smash | Dragon Killer (ドラゴンキラー) | 20% (blade), 12% (tip) | Rotates body counter-clockwise with a strong arc-like swing from his head to the ground, similar to the animation of his neutral special. It is rather fast, and is Roy's primary KO move. | |
| Up smash | Flame Sword (フレイムソード) | 2% (hits 1-4), 10% (hit 5) | A relatively quick sword thrust upwards with fire effects. Can act as an unorthodox spike if the enemy is hit on the sword's tip during the start of the attack, though this is highly situational. This attack is a multi-hit attack and the last hit has decent vertical knockback, if enemy is hit at the base. All hits can approximately deal up to 16.56% damage due to stale move negation. | |
| Down smash | Whirlwind Blade (旋風のブレード) | 21%/14% (front), 16%/8% (back) | Sweeps his sword on the ground towards the front, then towards the back. A decent finisher, useful for vertical KOs, though there is rather high ending lag. Deals less damage if the opponent hits the tip of Roy's sword. | |
| Neutral aerial | Double Slash (ダブルスラッシュ) | 4% (hit 1), 8% (hit 2 base), 5% (hit 2 tip) | Two swipes around him via an inward slash then a full outward spin, with decent knockback and damage if sweetspotted. | |
| Forward aerial | Aerial Swipe (エアリアル スワイプ) | 8% (base), 5% (tip) | Swipes sword in front of him with surprising range and tends to be a primary combo tool due to its speed and recovery. | |
| Back aerial | About Face (アッパースイング, Upper Swing) | 9% (base), 6% (tip) | Turns around and swipes inward with his sword, similar to his forward aerial in terms of usage and knockback. Like Marth's back aerial, this move turns Roy around. | |
| Up aerial | Luna Slash (ルナスラッシュ) | 9% (base), 6% (tip) | Swipes above outward while doing a delayed backflip. Meant to be a juggle tool, but is often subpar due to its low early knockback. | |
| Down aerial | Half Moon (ハーフムーン) | 9% (base), 6% (tip) | Swipes below via an outward wide slash. Meteor smashes opponents who come in contact with Roy's body, but is rather weak and has nearly unrecoverable ending lag. The move's sweetspot is extremely tiny; which is located at Roy's right arm and left shoulder (meaning that Roy has to overlap the opponent significantly), making it more difficult to hit with than Jigglypuff's Rest. | |
| Grab | Grab (つかみ) | — | Roy reaches out with his free hand. Due to Roy being shorter than Marth, his grab range is slightly shorter, making it the 5th longest grab range overall and the second longest non-tether grab. | |
| Pummel | Knee (膝) | 3% | Knees the opponent. | |
| Forward throw | Bounce (バウンス) | 5% | Grabs and pushes forward, tripping them with his leg. | |
| Back throw | Throw Away (捨てる) | 5% | Pulls the opponent behind him and extends his leg simultaneously. | |
| Up throw | Emblem Toss (エンブレムトス) | 5% | Thrusts opponent upwards. Can chain grab fast-fallers at lower percentages. It is the second strongest up throw in the game. | |
| Down throw | Slam (スラム) | 6% | Tosses the foe to the ground. Has chain grab and frame-trap potential. | |
| Floor attack (front) | 6% | Sweeps his sword on the ground, front to back. | ||
| Floor attack (back) | 6% | A quick stab to the left followed by a horizontal slash to the right. | ||
| Edge attack (fast) | 8% (sword), 6% (hilt) | Flips onto ledge with a quick downward diagonal slash downwards. Hitbox only exists on Roy's right arm and his sword, meaning that foes close to the ledge Roy is hanging on can avoid the attack. | ||
| Edge attack (slow) | 8% (sword), 6% (hilt) | Slowly gets up and performs a quick horizontal slice upwards. Just like his quick edge attack, opponents can avoid the attack if they are close to the ledge Roy is currently hanging on. | ||
| Neutral special | Flare Blade | 6-41%, 50% (fully charged) | Roy holds the Binding Blade over his head before doing a powerful overhead slash in a similar fashion to his forward smash. When the move is fully charged, Roy slams his sword on the ground, creating a large explosion that can one-hit KO any character in the game, but he takes 10% recoil damage as a side effect. This attack has transcendent priority. | |
| Side special | Double-Edge Dance | Varies | A sequence of sword maneuvers with several variations based on the direction the control stick is held. All variations have transcendent priority. | |
| Up special | Blazer | 5%/3% (hit 1), 2%/1% (hits 2-4), 1% (hits 5-7) | Roy soars upwards with his sword, engulfed in flames. This move can be aimed by quickly pushing the control stick in a direction after the initial jump. It deals more hits on heavier characters such as Bowser. Can deal approximately up to 13.19% damage if all hits connect and not tippered. The first hit of this move deals great base knockback and is capable of sending floaty characters off the top on certain stages if this is the only hit that connects. (Capable of KOing Jigglypuff at 0% on Final Destination). This is most easily done with a reverse Blazer. | |
| Down special | Counter | 1.5x the damage of the countered move (min 1%) | Twirls his sword into reverse grip and holds it over his his left forearm, while bending down and performs a defensive stance. He will block incoming attacks by immediately raising his sword up in reverse grip and slash in a downwards arc. Damage and knockback dealt depends on the strength of the move that is countered. | |
| Hit | Damage | Description |
|---|---|---|
| First Hit (Neutral) | 5% (base), 4% (tip) | Does a vertical slash, has little knockback: incapable of KOing. |
| Second Hit (Up) | 6% (base), 4% (tip) | Does an upwards slash. |
| Second Hit (Neutral) | 6% (base), 4% (tip) | Does a stab, has a little more knockback then the first slash, but still not much. |
| Third Hit (Up) | Clean: 10% (base), 8% (tip) Late: 7% (base), 5% (tip) |
Does a downwards vertical slash. Can meteor smash at the beginning of the move, but only when used on the ground. |
| Third Hit (Neutral) | 10% (base), 8% (tip) | Does a fairly powerful horizontal slash. |
| Third Hit (Down) | 3% (hits 1-3), 5% (hit 4) | Stabs his sword at the ground, dealing multiple flame damage. |
| Fourth Hit (Up) | 13% (base), 10% (tip) | Does a jumping slash. Deals flame damage. |
| Fourth Hit (Neutral) | 13% (base), 10% (tip) | Does a powerful vertical slash. Deals flame damage. Slightly slower but more powerful than fourth hit (up). |
| Fourth Hit (Down) | 3% (hit 1-4), 5% (hit 5) | Does a flurry of lower stabs, each stab dealing flame damage. |
Stats[edit]
NTSC
| Stats | Weight | Dash speed | Walk speed | Traction | Air friction | Air speed | Air acceleration | Gravity | Falling speed | Jumpsquat | Jump Height | Double jump Height |
|---|---|---|---|---|---|---|---|---|---|---|---|---|
| Value | 85 | 1.4 – Initial dash 1.61 – Run |
1.2 | 0.06 | 0.005 | 0.9 | 0.02 – Base 0.03 – Additional |
0.114 | 2.4 – Base 2.9 – Fast-fall |
5 | 30.958 - Base 10.626 - Short hop |
21.82 |
PAL
| Stats | Weight | Dash speed | Walk speed | Traction | Air friction | Air speed | Air acceleration | Gravity | Falling speed | Jumpsquat | Jump Height | Double jump Height |
|---|---|---|---|---|---|---|---|---|---|---|---|---|
| Value | 85 | 1.4 – Initial dash 1.61 – Run |
1.2 | 0.06 | 0.005 | 0.9 | 0.02 – Base 0.03 – Additional |
0.114 | 2.4 – Base 2.9 – Fast-fall |
5 | 30.958 - Base 10.626 - Short hop |
21.82 |
Announcer call[edit]
Taunt[edit]
- Leans back and holds his sword behind him in an attack position, shouting "Heee-ya!"

|
Idle pose[edit]
- Gets in a ready pose.

|
|---|
Crowd cheer[edit]
| English | Japanese | |
|---|---|---|
| Cheer | ||
| Description | Roy's-Our-Boy! | Roy! Roy! Roy! |
| Pitch | Group chant | Male |
Victory poses[edit]
- Swipes his sword once over his shoulder, then swipes it down and behind him while facing left, saying "守るべきもののために、負けられない!", which is localized as: "For those whom I must protect, I cannot lose!".
- Spins the Binding Blade one and a half times and then thrusts it into the ground in front of him, looking to slightly to the left, and says either of the following lines: "苦しい戦いだった。", which translates to: "It was a painful fight", or "僕 は 負けない。", which translates to: "I won't lose".
- Flourishes his sword and poses with it by his side, saying "真の戦いは、これからだ。", which translates to: "The true battle, is soon to begin".
 |
 |

|
|---|
In competitive play[edit]
Most historically significant players[edit]
- See also: Category:Roy players (SSBM)
 LAG - Currently considered one of the best active Roy players in the world. Mainly places in online tournaments, although has been ranked in offline rankings, such 50th on the Mexican Power Rankings.
 Leon - Although better known for his Marth in Brawl, he placed well in many French tournaments with Roy. He won a smaller French tournament in Bushido Nibaï Impact II and still used the character at some of the more populated regionals in the country, placing 13th at Avalon I.
 NEO - Considered to be the best Roy player of all time with many results other Roy players still have yet to match. He was the closest a Roy player has gotten to winning a North American regional with his 2nd place at Pound and made other peaks with Roy such as 4th at MLG DC 2005.
- Sethlon - Was considered to be the current best Roy player in the world after NEO's retirement, due to his popularity and widely acclaimed combo video Ashes to Ashes. While his results were not at the same caliber as NEO, he made some respectable placements such as 49th at GENESIS.
- Zain - Uses Roy under the moniker "DontTestMe"; started using Roy in the Slippy era to moderate success, defeating 2saint, Ginger, and bobby big ballz in online tournaments. His 7th place finish at Wavedash 2023 marked Roy's most notable offline tournament placing since NEO's results in the Golden Age. Has wins over Nickemwit and Kürv offline.
Tier placement and history[edit]
On the current tier list, Roy ranks 21st, in the D tier. Roy has consistently ranked very low on most revisions of the tier list, with his highest being only 15th on two separate occasions. His severe weaknesses, such as his poor effective threat range, fast-falling physics coupled with very poor recovery, and nearly nonexistent combo game on floaty characters, have resulted in terrible matchups against many top- and high-tiered characters (particularly the non-fastfallers) that completely stop his mains from progressing far into tournaments. This holds him back far too much in competitive play to place consistently in high-level tournaments without the use of a secondary character.
Roy's moveset also does not boast the potential creativity of other characters, especially Marth, owing to his over-reliance on his very few good combo extenders and KO moves. This has resulted in much less nuance and optimization possible in Roy's metagame, making the Roy matchup very easy to learn and catch up with. Additionally, because he is very similar to Marth, a top-tiered character that any competitive player knows how to fight against, Roy players cannot rely on matchup inexperience to win sets, unlike mains of other uncommon characters. While NEO, arguably the greatest Roy player of all time, managed to place top 8 consistently in the early Melee metagame, even he had to use Marth and Sheik secondaries to succeed at higher-stakes tournaments such as MLG. NEO, and many of Roy's best representatives, have either become inactive in the tournament scene or have dropped him for other characters (or other Smash games altogether), further hurting Roy's results in tournaments.
Roy's only notable results in the current Melee metagame have been through Marth players, such as Zain and Mew2King, sandbagging with him in lower-stakes tournaments or matches. Zain has seen a notable amount of success with Roy in online tournaments and at the regional level; notably, he placed 7th at Wavedash 2023, the character's best performance since NEO's placements in the Golden Age. However, the majority of Zain's best wins have been against fastfallers, outside of a handful of fringe sets where he barely scraped out wins against Jigglypuff players, some of them not even ranked in the top 100. Thus, his tournament runs with Roy only reinforce what has been known about him for years already, both in terms of strengths and limitations, and it is clear that Zain's success with Roy is entirely due to his phenomenal abilities as a player rather than Roy offering any unique positive qualities as a character to fuel that success. Despite Zain's attempts to push the character, Roy's metagame still remains rather stagnant, with players' opinions of him only marginally improving overall.
The "Tier Wars" and comparison to Marth[edit]
Marth's and Roy's differences became the center of controversy and discussion on GameFAQs' tier list debates, specifically in 2003 and 2004, when the competitive scene was still new. Marth players who generally supported the tier list claimed Marth had overall better attributes, in terms of speed, weight, and recovery capabilities. They also cited tournament results as proof of his superiority, with a multitude of professional Marth users such as Ken placing extremely high in major tournaments, while Roy lacked any such representation to back up the anti-tiers' arguments. Roy players who generally opposed the tier list, however, claimed that Roy's different attributes, such as his larger sweetspot in the center of his blade and general "superiority" in power, were enough to allow him to be as efficient of a character as Marth was; they also argued that professionals needed to learn how to use Roy as a different character from Marth in an attempt to disprove the tournament results.
Owing to the fact that these debates took place before extensive testing of Melee's engine, the debates were plagued by numerous inaccuracies that have since been disproven with time. The point about Marth's extra weight, for instance, is now considered moot; his extra weight is decidedly negligible, and can even be interpreted as a disadvantage, considering his extra weight makes him susceptible to Fox's shine combos, while Roy's lighter weight makes him immune to such combos. More importantly, pro-tiers made a common assumption that Marth is faster than Roy. While Marth indeed has a faster dashing speed, this claim is questionable, considering that Roy's SHFFL is faster than Marth's due to his falling speed and lower short hop. Similarly, some points brought up about Roy's viability are also now considered inaccurate. For instance, Roy's "superiority" in power has been disproven, as many of Marth's attacks, tippered and non-tippered, deal more knockback and damage than Roy's respective centered and non-sweetspotted strikes. The sweetspot in the hilt of the blade is now considered a disadvantage and one of the main reasons for Roy's poor tier placement; while Marth can attack from afar and still deal respectable damage, Roy cannot do so, lest his attacks hit with extremely low knockback; Roy's sourspot on the entire length of the Binding Blade, besides the hilt, is also much weaker than Marth's sourspot on the hilt of the Falchion.
Overall, the primary reason for Roy's named inferiority is precisely the one that anti-tiers attempted to refute: Roy has too much trouble trying to KO his opponents. Marth has far more creative and flexible ways to string together moves, deal damage, KO, and edgeguard (especially due to his down aerial spike). Roy, however, lacks the same flexibility in his comboing and KOing games, and is instead heavily reliant on predictable and repetitive chain grab and down tilt setups, with almost all of his viable combos ending in a forward smash. Roy's edgeguarding game is also considerably worse than Marth's; while Roy's down tilt is more useful for combos, it is not at all useful for intercepting the majority of recoveries (unlike Marth's). Additionally, Roy has a notoriously poor offstage game due to his falling speed and terrible aerials, that are both incredibly weak even when sweetspotted and have a high amount of ending lag, which severely hinders his ability to effectively edge-guard offstage without self-destructing. The current metagame for Melee reflects these differences and conclusions: Marth ranks in the S tier at 2nd place and features numerous dedicated mains, while Roy ranks in the D tier at 21st, and has very few dedicated mains of his own.
In 1-P Mode[edit]
In Classic Mode[edit]

Unusually, Roy does not appear in Classic Mode when unlocked, neither as an ally, nor as an opponent, making him the only fighter who never appears at all; the reason for this is unknown. Despite this, Roy does have an introduction image for the "Now Loading..." screen between matches in the game files.
In Adventure Mode[edit]
The Adventure Mode makes no concessions to Roy when he is unlocked. Like Marth, however, music associated with him can play in the Underground Maze stage.
In All-Star Mode[edit]
In All-Star Mode, Roy and his allies are fought on Final Destination, as Roy was not designated an official home stage. Final Destination has the unusual property of playing the Fire Emblem music track when accessed this way.
In Event Matches[edit]
Roy appears in two Event Matches:
- Event 46: Fire Emblem Pride: The player battles and must defeat a team of Marth and Roy in an untimed match on Temple, with all three characters receiving 3 stock.
- Event 49: All-Star Match Deluxe: Roy is the fifth opponent fought in this series of staged battles. The selected character battles him on Temple with a stock of 2 while Roy has 1. With a timer of four minutes, the player must defeat him and the other five characters one-by-one with the overall time and damage: Dr. Mario, Falco, Pichu, Young Link and Ganondorf.
Ending images[edit]
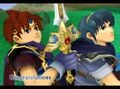
Classic Mode.
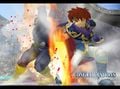
Adventure Mode.

All-Star Mode.


Trophies[edit]
In addition to the normal trophy about Roy as a character, there are two trophies about him as a fighter, unlocked by completing the Adventure and All-Star modes respectively with Roy on any difficulty:

- Roy
- The son of the lord of Pharae Principality, Roy was studying in Ostia when the Kingdom of Bern invaded League of Lycia. His father fell ill at this time, so Roy assumed leadership of Pharae's armies. After his fateful meeting with the Princess Guinevere, his destiny became inextricably linked with the fate of the entire continent.

- Fire Emblem (Japan Only)

- Future Release
.png)
- Roy [Smash]
- While Roy's moves are well balanced, he's a little on the slow side, and doesn't excel at midair combat. His blade, the Sword of Seals, gives him excellent reach, and makes his Double-Edge Dance slightly different than Marth's Dancing Blade. When it's fully charged, Roy's destructive Flare Blade delivers an instant KO.
- B: Flare Blade
- Smash B: Double-Edge Dance
.png)
- Roy [Smash]
- Roy's blade is different than Marth's; he does the most damage hitting with the center of his sword. So, a fearless advance into the arms of his foe is Roy's best bet. Blazer is a bit slower than Marth's Dolphin Slash, but it's still a mighty attack that sets anyone it strikes aflame. Roy's attack after using Counter differs slightly from Marth's.
- Up & B: Blazer
- Down & B: Counter
Alternate costumes[edit]
.png)
| ||||
Gallery[edit]

Official artwork of Roy.

Using his forward smash on Jigglypuff on Mute City.
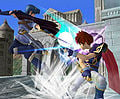
Countering Marth's neutral aerial on Temple.
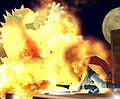
Using his fully-charged Flare Blade on Bowser and Donkey Kong on Fourside.
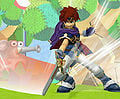
Using Double-Edge Dance's 4th slash inputted forward on Yoshi's Story.


Trivia[edit]

- Close examination of textures for the Binding Blade shows the incorrectly spelt text "©HAL LABRATORY.INC" included in the file. It is not known why the signature is there.
- Roy is the only character in Melee:
- That is a clone of a newcomer, as well as the only clone of an unlockable character.
- Whose icon on the character selection screen has a different background color on his name (the background color is almost pure black on his name while other characters have a red and black color mix for their background color for their names).
- Who makes no appearance as a CPU whatsoever in Classic Mode.
- Roy's files and debug menu listings do not reference him specifically: he is instead referred to internally as "EMBLEM", most prominently in the debug menu[1] and his texture files refer to him with the codename "Fe", an abbreviation of "Fire Emblem".[2]
- This suggests that Roy was chosen as the Marth clone relatively late in development.
- Roy does not feature a sheath during gameplay and his "Challenger Approaching" screen like Marth does; this is considered unusual, as Roy has a sheath in his victory poses, official art, character select portrait and all three of his trophies, as well as his unused Classic Mode introduction.
- This also happens in Smash 4 and Ultimate, but the sheath appears when he uses his Final Smash.
- Roy and Marth are the only two characters in Melee that speak Japanese even in the international versions.
- Roy and Marth are the only playable characters in Melee that do not have a stage representing their universe, though hacked data shows that one was planned.
- In Melee's All-Star Mode, Roy is fought on Final Destination. In his two Event Match appearances and his unlock battle, he appears on Temple.
- Roy and Young Link are the only fighters to use their KO cry for other uses. Roy's is used when fully charging Flare Blade and Young Link's is used during his Star KO animation. Kirby also mimics this unique property when he copies Roy and releases a fully-charged Flare Blade.
- Roy with his Flare Blade, Mr. Game & Watch with his Judge, and Pichu with most of its electric attacks are the only characters in Melee to have attacks that directly inflict recoil damage. Kirby can also harm himself if he copies either Roy or Pichu.
- Due to Fire Emblem games being Japan-exclusive at the time, Sakurai discussed Roy's exclusion from the American version of Melee with Nintendo of America. In the end, Roy was kept in every non-Japanese version alongside Marth.[3]
- All of Roy's sourspotted attacks make a punch/kick sound effect instead of a slashing sound effect.
- Ironically, Roy's sword trails indicate that the sweetspot is at the tip of the sword.
- Because Roy's intended debut game's release was delayed into March 2002, Roy is one of two characters who can claim a Smash game as their first appearance. The other one is Mr. Game & Watch, a composite of older Game & Watch characters with some original elements.
- Roy's design in Melee is taken from the version of Fire Emblem: The Binding Blade shown at Nintendo Space World 2001. There are some differences, though, like the lack of sleeves and the lack of a jewel on Roy's armor.
- Possibly as a result for his somewhat high learning curve and being a popular low-tier substitute for high-level smashers such as Mew2King and Ken, the term "skilled Roy" is a common gag inside the Melee community for being an unbeatable character, with the phrase "A skilled Roy can beat any Fox. This is why I main Roy." being a good example of it.
- Roy and Marth are the only characters that can perform the Whispy blink glitch.
References[edit]
External links[edit]
| Fighters in Super Smash Bros. Melee | |
|---|---|
| Veterans | Captain Falcon · Donkey Kong · Fox · Jigglypuff · Kirby · Link · Luigi · Mario · Ness · Pikachu · Samus · Yoshi |
| Newcomers | Bowser · Dr. Mario · Falco · Ganondorf · Ice Climbers · Marth · Mewtwo · Mr. Game & Watch · Peach · Pichu · Roy · Young Link · Zelda (Sheik) |
|
| |
|---|---|
| Fighters | Marth (SSBM · SSBB · SSB4 · SSBU) · Roy (SSBM · SSB4 · SSBU) · Ike (SSBB · SSB4 · SSBU) · Lucina (SSB4 · SSBU) · Robin (SSB4 · SSBU) · Corrin (SSB4 · SSBU) · Chrom (SSBU) · Byleth (SSBU) |
| Assist Trophies | Lyn · Black Knight · Tiki |
| Stages | Castle Siege · Arena Ferox · Coliseum · Garreg Mach Monastery |
| Item | Killing Edge |
| Other | Sothis |
| Trophies, Stickers and Spirits | Trophies (SSBM · SSBB · SSB4) · Stickers · Spirits |
| Music | Brawl · SSB4 · Ultimate |
| Masterpieces | Fire Emblem: Shadow Dragon and the Blade of Light · Fire Emblem: Mystery of the Emblem |