Ness (SSB4): Difference between revisions
| (322 intermediate revisions by 97 users not shown) | |||
| Line 1: | Line 1: | ||
{{ArticleIcons|ssb4=y}} | {{ArticleIcons|ssb4=y}} | ||
{{disambig2|Ness's appearance in '' | {{disambig2|Ness's appearance in ''Super Smash Bros. 4''|the character in other contexts|Ness}} | ||
{{Infobox Character | {{Infobox Character | ||
|name | |name = Ness | ||
|image | |image = [[File:Ness SSB4.png|250px]] | ||
|game | |game = SSB4 | ||
|ssbgame1 | |ssbgame1 = SSB | ||
|ssbgame2 | |ssbgame2 = SSBM | ||
|ssbgame3 | |ssbgame3 = SSBB | ||
|ssbgame4 = SSBU | |||
|availability = [[Unlockable character|Unlockable]] (3DS)<br>[[Starter character|Starter]] (Wii U) | |availability = [[Unlockable character|Unlockable]] (3DS)<br>[[Starter character|Starter]] (Wii U) | ||
|tier = C | |tier = C | ||
|ranking = | |ranking = 28-29 | ||
}} | }} | ||
'''Ness''' ({{ja|ネス|Nesu}}, ''Ness'') returns as a playable character in ''[[Super Smash Bros. 4]]''. Ness was officially confirmed on October 3rd, 2014, alongside {{SSB4|Falco}} and {{SSB4|Wario}}, coinciding with the Western release of | '''Ness''' ({{ja|ネス|Nesu}}, ''Ness'') returns as a playable character in ''[[Super Smash Bros. 4]]''. Ness was officially confirmed on October 3rd, 2014, alongside {{SSB4|Falco}} and {{SSB4|Wario}}, coinciding with the Western release of {{for3ds}}. As in every previous ''Smash Bros.'' installation, Ness is once again voiced by Makiko Ōmoto, who has now recorded new voice clips for both versions of the game. | ||
Ness | Ness is ranked 28th/29th out of 54 characters on the [[tier list]] (tied with {{SSB4|Lucas}}), placing both him and Lucas as the lowest C tier characters. This is a vast improvement from his 26th out of 38 in ''Brawl'' and is his best placement in the series. Ness no longer suffers from having 10 extra [[grab release]] frames, which was a huge detriment to his survival. Besides that, Ness possesses arguably the best grab game among the entire cast (competing with {{SSB4|Mewtwo}}'s and {{SSB4|Luigi}}'s), with his forward and up throws leaving opponents in very unfavorable positions, his down throw being a great combo starter at lower percentages and his back throw being the most powerful throw in the game, on top of being difficult to DI properly. Other notable strengths include an effective [[projectile]] game with [[PK Fire]] and [[PK Thunder]], a formidable air game courtesy of his powerful aerials, and a versatile combo game thanks to his throws and aerials. Despite being a middleweight, he also has high raw KO power and high damage output, a prime example being his aerials, forward smash, PK Flash and PK Thunder 2. Finally, due to the strengths above, Ness possesses very useful options to cover getups from a ledge or on the ground. | ||
However, Ness has rather sub-par mobility and range, which often forces him to be methodical with his approaches, or play defensively in order to gain the lead, which can leave him at a disadvantage against characters with greater range on their attacks such as Cloud | However, Ness has rather sub-par mobility and range, which often forces him to be methodical with his approaches, or play defensively in order to gain the lead, which can leave him at a disadvantage against characters with greater range on their attacks such as Cloud. Lastly and the most problematic is his recovery. Despite being greatly improved, PK Thunder remains quite gimpable as the lightning bolt can clang with other attacks, while opponents can forcibly push Ness out of the way or even take a hit from the lightning bolt, making his recovery fail. | ||
Ness | While Ness has poor matchups against several characters that were ranked higher than him, particularly {{SSB4|Rosalina & Luma}}, {{SSB4|Marth}}, and {{SSB4|Corrin}}, Ness has achieved good representation and above average results thanks to top players such as {{Sm|FOW}}, {{Sm|BestNess}}, {{Sm|S1}}, {{Sm|The Great Gonzales}}, {{Sm|Gackt}}, and {{Sm|NAKAT}}. | ||
==How to unlock== | ==How to unlock (3DS version only)== | ||
Complete one of the following: | Complete one of the following: | ||
* Play 10 VS Matches. | * Play 10 VS Matches. | ||
* Clear {{SSB4-3DS|Classic Mode}} on any difficulty. | * Clear {{SSB4-3DS|Classic Mode}} on any difficulty. | ||
After completing one of the two methods, Ness must then be defeated on [[Magicant]]. | After completing one of the two methods, Ness must then be defeated on [[Magicant]]. | ||
==Attributes== | ==Attributes== | ||
Ness is an unusual blend of character archetypes, being a short, projectile-heavy character with a lot of versatility with his moves. Ness's [[weight]] is average and his [[falling speed]] is rather slow, giving him no disadvantage with weight alone. His [[walking speed]] is slow while his [[dashing speed]] and [[air speed]] are both sub-par, but his [[air acceleration]] is very high. | Ness is an unusual blend of character archetypes, being a short, projectile-heavy character with a lot of versatility with his moves. Ness's [[weight]] is average and his [[falling speed]] is rather slow, giving him no disadvantage with weight alone. His [[walking speed]] is slow while his [[dashing speed]] and [[air speed]] are both sub-par, but his [[air acceleration]] is very high. | ||
Ness possesses three [[projectile]]s: [[PK Flash]], [[PK Fire]], and [[PK Thunder]]. PK Flash can be used as an extremely powerful punishing or edge-guarding option, dealing huge knockback which can | Ness possesses three [[projectile]]s: [[PK Flash]], [[PK Fire]], and [[PK Thunder]]. PK Flash can be used as an extremely powerful punishing or edge-guarding option, dealing huge knockback which can KO even Bowser, the heaviest character, under 70%. PK Fire possesses a good amount of range and holds opponents in it when it hits them (due to being impossible to SDI out of), granting Ness guaranteed follow-ups (such as grab, an additional PK Fire, or a forward smash to finish the opponent) as long as he acts quickly enough. Also, it can be used off-stage against characters with more linear recoveries to combo into down air. PK Thunder is one of the more unique projectiles in the game. When used, the player will lose control of Ness and instead take control of a large thunder ball for a few seconds. PK Thunder can essentially be used to knock opponents towards Ness for follow ups, to mindgame opponents into a PK Thunder 2 trap to finish them, to edgeguard, and to juggle opponents. The knockback it provides can also hit an opponent over the upper blast line (especially light and floaty characters), allowing it to be used as a situational [[KO]] move as well. His down special move, [[PSI Magnet]], provides a psychic shield that can heal him when hit with an energy based attack, making it extremely effective against characters with slower projectiles such as Samus or the Mii Gunner. PSI Magnet has fast start-up and end-lag, this allows Ness to cancel his double jump momentum and allows him to reverse himself mid-air more reliably, making it effective for avoiding vertical attacks such as Mario's up smash when Ness is on the air. | ||
Ness's biggest strength is found in his superb aerial game. | Ness's biggest strength is found in his superb aerial game. Most of Ness's aerial moves can be used to either space, combo, or KO. All aerials, excluding down aerial, are capable of [[auto-canceling]] out of a [[short hop]]. His neutral aerial possesses very little startup and ending lag, and hits on both sides of Ness, making it a useful [[out of shield]] option. His forward aerial has quick startup, a disjointed hitbox, and traps opponents, essentially allowing it to chain into either itself or another move. It is a powerful [[spacing]] tool and is helpful in [[approach]]ing opponents. His up aerial, one of the strongest in the game, can be used to combo at lower percents and KO reliably at higher percents. It possesses a large hitbox and little lag, making it low risk, high reward. His back aerial is another reliable KO move that possesses low lag. His down aerial can occasionally be useful in edgeguarding, although it has significant startup in comparison to his other aerials. Down aerial has a large autocancel window, giving Ness the ability to decrease the length of his shorthop, as Ness extends his hurtbox by using the move. Ness can use this property to Tomahawk much more effectively, buffer landing options, mix up his platform movement, and occasionally avoid techchase situations. Thanks to his floatiness, Ness can perform a neutral aerial or up aerial after a short hop air dodge, allowing him to jump through moves with invincibility and whiff punish. | ||
While Ness's | While Ness's aerials make him a formidable fighter at close quarters, he can struggle to pressure from afar. His dash attack has an exceptionally long range and is a decent approach, but leaves him vulnerable to landing aerials and is only safe if properly spaced. PK Fire covers a lot of ground and can be used to perform a [[PK Jump]], a technique that allows Ness to approach or retreat by inputting the move 1 frame after double jumping. If Ness buffers an airdodge after double jumping, he can increase the height of his double. If Ness uses PSI Magnet then PK Thunder by the ledge, he will snap immediately, rather than stalling as he would normally. By combining these two traits together, Ness can often recover without having to use PK Thunder to travel, alleviating one of his biggest weaknesses. | ||
Ness's grab game is also very | Ness's grab game is also very potent. His standing grab has slightly below average range and is fast. His pivot grab is surprisingly disjointed and his dash grab gives him a substantial speed boost. As mentioned earlier, Ness can trap opponents with PK Fire or PK Jump in order to set up for a grab. Ness possesses one of the fastest [[pummel]]s in the game, allowing him to deal a decent amount of damage before throwing. His down throw neatly sets up for aerial attacks, leading into a forward air chain at lower percents or an up air at higher percents. Ness's forward throw has very high base knockback and can set up edgeguards. Up throw can be used to play situational [[mindgames]] with PK Thunder. Ness's infamous back throw is the strongest throw in the game; while it has very low base knockback, it has extremely high knockback scaling and is often regarded as his most effective and commonly used KO option. | ||
Ness is | Ness is far from perfect, however. He possesses below average speed in both the ground and the air, making it hard for him to chase most opponents. His ground game is also generally weak as he possesses short-ranged tilt attacks. His up and down smashes are also somewhat situational. While his up smash can be used as an out of shield option and his down smash as a useful edgeguarding option to two-frame opponents, both KO considerably later than his other KO options in a neutral situation, and his forward smash, while extremely powerful, possesses both high startup and ending lag, making it easily punishable if it misses. Ness's biggest flaw, however, is his [[recovery]]. While there have been various buffs to his recovery that make it much more reliable and viable than in previous ''Smash'' games, it is still easy to gimp if Ness is not careful enough with his double jump offstage. Characters with multiple jumps, such as {{SSB4|Jigglypuff}}, {{SSB4|Kirby}} and {{SSB4|Meta Knight}}, with counters, such as most of the Fire Emblem characters, or with moves that [[reflect]] or [[absorb]], such as {{SSB4|Rosalina}}, | ||
{{SSB4|Villager}}, and {{SSB4|Pit}} can force Ness into disadvantage when offstage. | |||
Custom moves can give Ness great advantages and brand new options. [[PK Freeze]] can [[freeze]] opponents, allowing free follow-ups, especially with PK Fire. PK Fire Burst has more range and power and always goes straight, making it a spacing tool rather than a combo tool. Lasting PK Thunder goes right through opponents and moves slower, allowing for better control. Recovery with PK Thunder 2 is also longer, significantly improving Ness' offstage survivability. Rolling PK Thunder travels much slower but is much stronger. While the recovery with PK Thunder 2 is mediocre due to the drastically decreased distance of it, the move is also significantly stronger, which allows it to KO even earlier than normal PK Thunder 2. Forward PSI Magnet is the same, but has a [[semi-spike]] hitbox in front of Ness, functioning similar to {{SSB4|Fox}}'s [[Reflector]]. Finally, if the opponent has no energy projectiles, PSI Vacuum is the optimal choice, as it draws opponents in and is the strongest of Ness's down special moves damage-wise. | Custom moves can give Ness great advantages and brand new options. [[PK Freeze]] can [[freeze]] opponents, allowing free follow-ups, especially with PK Fire. PK Fire Burst has more range and power and always goes straight, making it a spacing tool rather than a combo tool. Lasting PK Thunder goes right through opponents and moves slower, allowing for better control. Recovery with PK Thunder 2 is also longer, significantly improving Ness' offstage survivability. Rolling PK Thunder travels much slower but is much stronger. While the recovery with PK Thunder 2 is mediocre due to the drastically decreased distance of it, the move is also significantly stronger, which allows it to KO even earlier than normal PK Thunder 2. Forward PSI Magnet is the same, but has a [[semi-spike]] hitbox in front of Ness, functioning similar to {{SSB4|Fox}}'s [[Reflector]]. Finally, if the opponent has no energy projectiles, PSI Vacuum is the optimal choice, as it draws opponents in and is the strongest of Ness's down special moves damage-wise. | ||
Overall, Ness is viewed as a | Overall, Ness is viewed as a viable character in tournament play, due to his good combo game and extremely potent kill options. Despite this, he is believed to have a somewhat volatile matchup spread; he is especially vulnerable to characters that can abuse his poor mobility and low range to zone him out. Characters such as Rosalina and Luma, Marth, and Corrin are seen as especially troublesome matchups for Ness. | ||
==Changes from ''Brawl''== | ==Changes from ''[[Super Smash Bros. Brawl]]''== | ||
Ness has been heavily buffed in the transition from ''Brawl'' to ''SSB4''. His | Ness has been heavily buffed in the transition from ''Brawl'' to ''SSB4''. His grab-release animation with 10 extra frames of ending lag, which was one of his most detrimental flaws, has been removed, and many of the other flaws he had (mainly his recovery) have been addressed. Ness also greatly benefits from the general changes of ''SSB4'', as the new edge-trumping mechanic makes his recovery much harder to gimp, and the changes to [[hitstun canceling]] allows him to combo with his moves much more efficiently while the weakening of [[SDI]] makes his multi hit moves more reliable. The introduction of [[rage]] also benefits him as it improves his KO potential when he's at higher percents. He also greatly benefits from the removal of [[chain grab]]bing which was one of the main reasons why his longer grounded grab release was so exploitable. | ||
As for direct changes outside of the length of his grounded grab release animation, he has seen a mix of buffs and nerfs. Ness overall has greater mobility, his smash attacks are stronger and his down smash can now be used as a powerful edgeguarding tool as Ness can now charge to close to a ledge and it now [[semi-spike]]s opponents. | |||
However, Ness has seen more direct nerfs overall. Ness' damage output is overall lower and a variety of his moves have smaller hitboxes. His aerial game has seen some downgrades as his forward aerial deals less damage, has more landing lag and has much smaller hitboxes making it a less effective spacing tool while his down aerial has less range, is considerably weaker and it has lost its extremely lenient [[auto-cancel]] window making it no longer auto-cancel in a short hop and making it a much worse move overall. His down throw also has considerably increased knockback hindering its setup potential at higher percents. | |||
Overall, Ness is significantly better than he ever was in previous ''Super Smash Bros.'' games due to the general changes to the mechanics greatly benefiting him overall and he has also seen solid tournament representation and greatly improved results due to his vast improvement. | |||
===Aesthetics=== | ===Aesthetics=== | ||
*{{change|Ness has a brighter color palette, and has lost the blushes on his cheeks and the purple hue in his eyes. He is also slightly taller and thinner, with a smaller and more proportionate head, and a smaller backpack. He also lacks the partial yellow stripe that he had at the bottom of his shirt.}} | *{{change|Ness has a brighter color palette, and has lost the blushes on his cheeks and the purple hue in his eyes. He is also slightly taller and thinner, with a smaller and more proportionate head, and a smaller backpack. He also lacks the partial yellow stripe that he had at the bottom of his shirt.}} | ||
*{{change|Ness has | *{{change|Ness' backpack now has more various color schemes depending on his alternate costume, such as a blue backpack for his yellow outfit, and a red backpack for his green outfit, whereas in previous titles, his backpack for those aforementioned costumes used the default color scheme instead.}} | ||
*{{change|Ness is more expressive.}} | |||
*{{change|All of Ness' PSI-based attacks now use a graphic effect similar to Lucas's attacks (forward aerial, up smash, etc.) instead of using the same graphic effect as his double jump.}} | |||
===Attributes=== | ===Attributes=== | ||
*{{buff|Ness [[walk]]s faster (0.86 → 0.8635).}} | |||
*{{buff|Ness [[dash]]es faster (1.39 → 1.46265).}} | *{{buff|Ness [[dash]]es faster (1.39 → 1.46265).}} | ||
*{{buff|Ness [[ | *{{buff|Ness' grounded [[grab release]] has much less ending lag (FAF 41 → 30), now matching the rest of the cast, and making him significantly less vulnerable to grab release follow-ups especially when combined with the removal of [[chain grab]]bing. The changes to air releases also benefits him as he is far less susceptible to air release followups.}} | ||
*{{buff|[[Air dodge]] has less startup lag (frame 4 → 3) and ending lag (FAF 49 → 34).}} | |||
*{{change|All of Ness's [[electric]] attacks except for his specials are now a | *{{change|All of Ness's [[electric]] attacks except for his specials are now a {{b|magic|effect}} effect.}} | ||
*{{change|Ness' gravity is higher (0.0711 → 0.077).}} | |||
*{{buff|[[Roll]]s have less ending lag (FAF 32 → 31).}} | |||
*{{nerf|Rolls have a shorter duration (frame 4-19 → 4-17).}} | |||
*{{nerf|[[Spot dodge]] has more startup lag, a shorter duration (frames 2-20 → 3-18) and more ending lag (FAF 26 → 28).}} | |||
*{{nerf|The changes in [[shieldstun]] makes some of his attacks slightly less safe on shield compared to the cast.}} | *{{nerf|The changes in [[shieldstun]] makes some of his attacks slightly less safe on shield compared to the cast.}} | ||
===Ground attacks=== | ===Ground attacks=== | ||
* | *[[Neutral attack]]: | ||
* | **{{nerf|The first hit of neutral attack deals 1% less damage (3% → 2%) and all three hits have smaller hitboxes (3u/3u/2.5u → 3u/2u (hits 1 & 2), 4.5u/4u/3.8u → 4u/2.4u (hit 3)).}} | ||
*{{ | *[[Forward tilt]]: | ||
**{{nerf|Forward tilt deals less damage (12%/11%/10% → 9% (unangled)/10% (angled)).}} | |||
*{{nerf| | *[[Up tilt]]: | ||
*{{buff|Up tilt now involves Ness releasing a | **{{buff|Up tilt now involves Ness releasing a PSI spark from his hands, increasing its vertical reach.}} | ||
*{{nerf|Up tilt | **{{nerf|Up tilt has slightly higher startup (frame 5 → 7) and its old hitbox is now a sourspot that deals 2% less damage. Its hitboxes are also smaller (7.2u/7.2u → 6.5u/4.0u) to compensate the increased vertical range.}} | ||
*{{change| | **{{change|Up tilt's animation is more similar to that of ''Smash 64'', and its sweetspot now has a magic sound effect instead of a punching sound effect.}} | ||
*{{nerf| | *[[Down tilt]]: | ||
*{{buff|[[Forward smash]] deals drastically more knockback (50 base | **{{nerf|Down tilt now has a sourspot at the end of Ness's foot that deals less damage (4% → 2%) with its base knockback only slightly increased (3 → 6). Down tilt also has smaller hitboxes (4.32u/2.88u/3.36u → 2.5u/2.5u).}} | ||
*{{nerf|Forward smash's tipper hitbox has been completely removed, so that its maximum damage potential when uncharged | *[[Dash attack]]: | ||
*{{buff| | **{{buff|Dash attack now launches in front of Ness instead of behind him (100° → 80°), making followups easier. The final hit also deals more knockback (70 (base), 100 (scaling) → 80/104) and has a bigger hitbox (5u → 6u).}} | ||
*{{nerf|Yo-yo smashes are charged while still in Ness's hand, removing their pre-charge hitboxes.}} | **{{change|The first hit of dash attack no longer deals consistent damage (5% → 4%/7%/3%). This makes it better against aerial opponents, but worse on grounded ones. Dash attack also has more intense lighting effects.}} | ||
*{{change|Yo-yo is colored green instead of yellow.}} | **{{nerf|The second hit of dash attack deals less damage (4% → 2%) and as the first hit no longer deals consistent damage, dash attack as a whole no longer deals consistent damage (13% → 9%/11%/13%).}} | ||
*{{buff|Up smash | *[[Forward smash]]: | ||
*{{ | **{{buff|Forward smash deals drastically more knockback (50 (base), 62 (scaling) → 70/67) (now having the same knockback values as its Japanese ''Smash 64'' counterpart), going from a forward smash of above-average power in ''Brawl'' to one of the most powerful forward smashes in ''Smash 4''. Its reflector now has a speed and power multiplier, drastically improving its punishing utility.}} | ||
**{{nerf|Forward smash's strongest tipper hitbox has been completely removed, so that its maximum damage potential when uncharged has been lowered (24% → 22%). Its other hitboxes are also smaller (2.9u/3.6u/3.8u/4.099983u → 2.3u/2.6u/3.0u) and its reflector now has a limit, where if he tries to reflect a projectile that is too strong to reflect, Ness will experience about 300 frames (5 seconds) of ending lag.}} | |||
*Yoyo: | |||
**{{buff|Both up smash and down smashes are now properly affected by smash charging making them deal more damage when charged.}} | |||
**{{nerf|Yo-yo smashes are charged while still in Ness's hand, removing their pre-charge hitboxes.}} | |||
**{{change|Yo-yo is colored green instead of yellow.}} | |||
*[[Up smash]]: | |||
**{{buff|Up smash has much less startup lag with a longer duration (frames 10-34 → 6-30).}} | |||
**{{nerf|Up smash has more ending lag (FAF 55 → 56).}} | |||
*[[Down smash]]: | |||
**{{buff|Down smash has less ending lag (FAF 62 → 46).}} | |||
**{{buff|Down smash is now a semi-spike (55° → 28° (front), 33° (back)), greatly improving its edgeguarding ability.}} | |||
**{{nerf|Down smash's main hit deals less damage (13% → 10%) and its knockback was not fully compensated (90 (base), 60 (scaling) → 60/80 (front), 50/80 (back)).}} | |||
**{{change|Down smash now has weak initial hits before its front and back hits which deal 1% damage and low knockback; linking into the main hit. It hits four times at the front and two times at the back.}} | |||
***{{buff|Because of this, the front hit deals more damage overall (13% → 14%).}} | |||
***{{nerf|However, the back hit deals less damage overall (13% → 12%).}} | |||
**{{nerf|Down smash is no longer constantly active (frames 10-33 → 10-15/17-18/23-25/26-29/31-32).}} | |||
===Aerial attacks=== | ===Aerial attacks=== | ||
*{{nerf| | *[[Neutral aerial]]: | ||
*{{ | **{{nerf|Neutral aerial has a shorter duration (frames 5-24 → 5-15).}} | ||
*{{nerf|Forward aerial deals | **{{nerf|The hand hitboxes have been positioned closer to Ness (x offset: 0.33 → 0), slightly decreased their range.}} | ||
*{{nerf|[[Back aerial]] has | *[[Forward aerial]]: | ||
*{{ | **{{buff|Forward aerial's looping hits have a decreased SDI multiplier (1.5x → 0.8x) which along with the weakening of SDI makes forward aerial significantly more difficult to escape from.}} | ||
*{{nerf| | **{{change|The looping hits' angle has been altered (361° → 366°).}} | ||
*{{buff| | ***{{buff|This allows them to connect more reliably (with the move now being able to reliably chain into itself) improving Ness's comboing and damage-racking capabilities.}} | ||
*{{nerf|Down aerial | ***{{nerf|However, this also removes their ability to [[lock]] opponents removing Ness' most reliable aerial locking tool at higher percents.}} | ||
*{{ | **{{change|The final hit has increased knockback (24 (base), 145 (scaling) → 32/150) improving forward aerial's edgeguarding potential but hindering its ability to chain into itself.}} | ||
**{{change|Forward aerial a higher [[hitlag]] multiplier (0.5x → 1x (loop), 1.5x (final)).}} | |||
**{{nerf|Forward aerial deals less damage (2% → 1% (loop), 11% → 7% (total)), has smaller hitboxes (8.1u → 5u/1.5u (loop hits), 9u → 8u (final)) and the final hit has a shorter duration (frames 20-21 → 20).}} | |||
**{{nerf|Forward aerial has increased landing lag (12 frames → 20) and [[auto-cancel]]s later (frame 30 → 33).}} | |||
*[[Back aerial]]: | |||
**{{nerf|Back aerial has increased landing lag (12 frames → 17).}} | |||
*[[Up aerial]]: | |||
**{{change|Up aerial has an altered animation where Ness swings his head more quickly.}} | |||
***{{buff|This new animation increases the move's horizontal range.}} | |||
***{{nerf|However, this also makes the move slightly harder to use as an anti-air.}} | |||
**{{change|Up aerial's hitbox has been marginally repositioned (y offset: 3.408 → x offset: 3.4).}} | |||
**{{nerf|Up aerial has increased landing lag (12 frames → 14).}} | |||
*[[Down aerial]]: | |||
**{{buff|Late down aerial deals more damage (9% → 10%).}} | |||
**{{change|Down aerial has a new animation, where Ness spins during its startup and he is facing at a different orientation as he kicks downward with his toes instead of the stamp of his foot. The kick additionally now produces a spark of energy below Ness' foot.}} | |||
**{{change|Down aerial's hitbox is now static, rather than being attached to Ness' foot. This means that the hitbox now stays in the same position relative to Ness, rather than moving with his foot.}} | |||
**{{change|Down aerial uses the strong magic sound effect on hit instead of a strong/medium punch sound.}} | |||
**{{nerf|Down aerial has a shorter duration (frames 20-23 (clean)/24-28 (late) → 20-21/22-24).}} | |||
**{{nerf|Down aerial [[auto-cancel]]s much later (frame 29 → 50), removing its ability to auto-cancel in a short hop, lead alone straight after the hitboxes are no longer active.}} | |||
**{{nerf|Down aerial has drastically decreased base knockback (90 → 20 (clean)/30 (late)), with both hits now being incapable of KOing at realistic percentages, even with the removal of [[meteor cancel]]ing and the late hit's increased damage.}} | |||
**{{nerf|Down aerial has smaller hitboxes (6.54u → 3.9u (clean)/6u (late)).}} | |||
**{{nerf|The late hit launches opponents at a slightly higher angle (361° → 45°).}} | |||
===Throws/other attacks=== | ===Throws/other attacks=== | ||
*{{buff|Pivot grab | *[[Grab]]s: | ||
*{{nerf| | **{{buff|All grabs are positioned further outwards (z offset: 6.8 (standing)/8 (dash)/-12 (pivot) → z stretch: 8/10/14), improving their range.}} | ||
*{{ | **{{nerf|Pivot grab has more startup lag (frame 6 → 10), no longer being the fastest in the game.}} | ||
*{{buff| | **{{nerf|Dash and pivot grab have more ending lag (FAF 36 (both) → 43 (dash), 41 (pivot)).}} | ||
*{{buff|The changes to hitstun canceling significantly benefits down throw, as | **{{nerf|Dash grab has a smaller grabbox (4u/3.5u/3.5u → 3.2u).}} | ||
*{{nerf|Down throw | *[[Pummel]]: | ||
*{{ | **{{buff|Pummel deals slightly more damage (1% → 1.2%).}} | ||
*[[Down throw]]: | |||
**{{buff|The changes to [[hitstun canceling]] and DI significantly benefits down throw, as Ness can now use it to set up into his aerials much more effectively at lower percents when combined with its lowered base knockback (90 → 70).}} | |||
**{{change|Down throw has less fire graphics.}} | |||
**{{nerf|Down throw's fire hits deal less damage (1% → 0.6%) reducing its total damage output (9% → 7%).}} | |||
**{{nerf|The throw has much more knockback scaling (30 → 80), hindering its combo potential at higher percents.}} | |||
===Special moves=== | ===Special moves=== | ||
*{{buff| | *[[PK Flash]]: | ||
*{{change|PK Flash is | **{{buff|PK Flash travels faster. It travels even faster and gains even more distance if directed behind Ness. Turning around before using this move might prove useful, depending on prediction.}} | ||
*{{buff| | **{{change|PK Flash is now a much darker green.}} | ||
*{{nerf| | *[[PK Fire]]: | ||
*{{change|PK Fire's effect after hitting an opponent produces darker colored flames and more smoke.}} | **{{buff|PK Fire travels slightly farther.}} | ||
*{{change|When interrupted whilst starting up PK Fire, Ness stops reciting the attack's name.}} | **{{nerf|PK Fire has slightly more ending lag. It now travels much farther back to Ness if [[reflected]] rather than petering out after traveling its set distance.}} | ||
*{{buff| | **{{change|PK Fire's effect after hitting an opponent produces darker colored flames and more smoke.}} | ||
* | **{{change|When interrupted whilst starting up PK Fire, Ness stops reciting the attack's name.}} | ||
*{{change|PK Thunder | *[[PK Thunder]]: | ||
*{{ | **{{buff|PK Thunder travels faster, has less ending lag, much larger hitboxes, deals much better knockback, travels in a drastically tighter arc and goes through opponents until the tail disconnects from Ness with 1% more damage, making him less susceptible to being [[gimp]]ed. [[PK Thunder 2]] is much faster and when Ness bounces off a wall while recovering with it, he can initiate PK Thunder again during the bounce.}} | ||
*{{nerf|PSI Magnet swirls projectiles around it, causing a slight delay until Ness can actually be healed. If Ness were to drop PSI Magnet and/or be launched, the absorbed projectiles may take even longer to reach him, but they will still heal him eventually.}} | **{{change|PK Thunder is now light blue like in ''Melee''.}} | ||
*{{change|The swirling of captured attacks by PSI Magnet utterly nullifies even projectiles that would continue past Ness, including [[Thoron]] and {{SSB4|Pikachu}}'s {{b|Thunder|Pokémon}}.}} | *[[PK Thunder 2]]: | ||
*{{change|[[PK Starstorm]] now fires a thin, aimable line of meteors from the top-center of the stage, similar to how [[Aura Storm]] functioned. This enables it to deal damage more reliably at the cost of having blind spots.}} | **{{nerf|[[PK Thunder 2]] has increased ending lag.}} | ||
*{{change|PK Starstorm now has a [[flame]] effect instead of an electric effect.}} | *[[PSI Magnet]]: | ||
**{{buff|PSI Magnet has significantly less ending lag, with Ness now being able to act out of it much quicker. The magnet is also larger, increasing its range.}} | |||
**{{nerf|PSI Magnet swirls projectiles around it, causing a slight delay until Ness can actually be healed. If Ness were to drop PSI Magnet and/or be launched, the absorbed projectiles may take even longer to reach him, but they will still heal him eventually.}} | |||
**{{change|The swirling of captured attacks by PSI Magnet utterly nullifies even projectiles that would continue past Ness, including [[Thoron]] and {{SSB4|Pikachu}}'s {{b|Thunder|Pokémon}}.}} | |||
**{{change|PSI Magnet is now light blue like in ''Melee''.}} | |||
*[[PK Starstorm]]: | |||
**{{change|PK Starstorm now fires a thin, aimable line of meteors from the top-center of the stage, similar to how [[Aura Storm]] functioned. This enables it to deal damage more reliably at the cost of having blind spots.}} | |||
**{{change|PK Starstorm now has a [[flame]] effect, instead of an electric effect.}} | |||
==Update history== | ==Update history== | ||
| Line 120: | Line 182: | ||
'''{{GameIcon|ssb4}} [[1.0.6]]''' | '''{{GameIcon|ssb4}} [[1.0.6]]''' | ||
*{{change|Forward smash | *{{change|Forward smash's has an updated sound effect when reflecting projectiles.}} | ||
*{{change| | *{{change|Down throw's screen shaking effect is more pronounced.}} | ||
'''{{GameIcon|ssb4}} [[1.0.8]]''' | '''{{GameIcon|ssb4}} [[1.0.8]]''' | ||
*{{buff| | *{{change|The PK Starstorm trophy adds "Ness" in parentheses once [[Lucas]] is downloaded, as Lucas's trophy is also named "PK Starstorm"}} | ||
*{{nerf|PK Thunder 2 has a greater deceleration rate (0.072 → 0.08), making it cover less distance.}} | |||
**{{buff|PK Thunder 2 has a lower deceleration rate after hitting an opponent (0.072 → 0.064), making it cover the same distance after hitting an opponent despite the previous change.}} | |||
*{{buff|[[PSI Magnet]] and its custom variants' minimum hold time has been decreased (30 frames → 18 (PSI Magnet), 26 frames → 16 (PSI Vacuum), 36 frames → 20 (forward PSI Magnet)).}} | |||
*{{buff|PSI Magnet absorbs projectiles faster (20 frames → 6).}} | |||
'''{{GameIcon|ssb4}} [[1.1.0]]''' | '''{{GameIcon|ssb4}} [[1.1.0]]''' | ||
*{{buff|Down aerial's meteor hitbox size increased | *{{buff|Down aerial's meteor smash hitbox size increased|3.5u|3.9u and duration increased.}} | ||
*{{nerf|[[PK Fire]] | *{{nerf|[[PK Fire]]'s ending lag increased.}} | ||
'''{{GameIcon|ssb4}} [[1.1.1]]''' | '''{{GameIcon|ssb4}} [[1.1.1]]''' | ||
*{{ | *{{buff|Rising PK Flash has less startup lag when it is detonated (frame 8 → 6).}} | ||
*{{ | *{{buff|Rising PK Flash deals more damage (2% → 4%) and knockback (80 (base)/30 (scaling) → 50/80), improving its KO potential.}} | ||
*{{nerf|Rising PK Flash's first hitbox duration decreased | *{{buff|Rising PK Flash's range increased (10 → 13).}} | ||
*{{nerf|Rising PK Flash's first hitbox's duration decreased (3 frames → 2).}} | |||
*{{nerf|Rising PK Flash has a smaller size multiplier (2.2x → 2x).}} | |||
*{{change|Rising PK Flash minimum charge increased.}} | *{{change|Rising PK Flash minimum charge increased.}} | ||
*{{buff| | *{{buff|[[PK Freeze]] range increased (10 → 11).}} | ||
*{{buff| | *{{buff|PK Freeze has less startup lag when it is detonated (frame 15 → 8).}} | ||
*{{buff|[[PK Fire Burst]] damage | *{{buff|PK Freeze deals more damage (8% → 10%) and has a larger damage multiplier (0.11x → 0.16x).}} | ||
*{{nerf|PK freeze has more landing lag (25 frames → 30).}} | |||
*{{buff|[[PK Fire Burst]] deals 1% more damage|1%/8%|2%/9% and hits earlier.}} | |||
'''{{GameIcon|ssb4}} [[1.1.3]]''' | '''{{GameIcon|ssb4}} [[1.1.3]]''' | ||
| Line 143: | Line 213: | ||
==Moveset== | ==Moveset== | ||
''For a gallery of Ness's hitboxes, see [[/Hitboxes|here]].'' | |||
{{MovesetTable | {{MovesetTable | ||
|game=SSB4 | |game=SSB4 | ||
| Line 150: | Line 221: | ||
|neutral2dmg=2% | |neutral2dmg=2% | ||
|neutral3dmg=4% | |neutral3dmg=4% | ||
|neutraldesc=Punches twice, then kicks. The first hit can [[lock]] at low | |neutraldesc=Punches twice, then kicks. The first hit can jab [[lock]] at low percentages. | ||
|ftiltangles=3 | |ftiltangles=3 | ||
|ftiltname= | |ftiltname= | ||
| Line 159: | Line 230: | ||
|utiltname= | |utiltname= | ||
|utiltdmg=7% (arms) 5% (hands) | |utiltdmg=7% (arms) 5% (hands) | ||
|utiltdesc=Pushes upward with both hands that produces a PSI spark. Has a | |utiltdesc=Pushes upward with both hands that produces a PSI spark. Has a sourspot located on his hands that deals 5%. | ||
|dtiltname= | |dtiltname= | ||
|dtiltdmg=4% (foot), 2% (toes) | |dtiltdmg=4% (foot), 2% (toes) | ||
|dtiltdesc=A swift shin kick. Extremely spammable and can be used to jab reset. Has a sourspot located on the tip of his foot. Has a chance of making the opponent trip. | |dtiltdesc=A swift shin kick. Extremely spammable and can be used to jab reset. Has a sourspot located on the tip of his foot. Has a chance of making the opponent trip. | ||
|dashname= | |dashname= | ||
|dashdmg=4%/3% (hit 1), 7% (hit 1 aerial), 2% (hit 2), 4% (hit 3) | |dashdmg=4%/3% (hit 1), 7% (hit 1 aerial), 2% (hit 2), 4% (hit 3) | ||
|dashdesc=Sends three PSI sparks out in front of him with the third spark knocking the opponent up into the air. The first spark deals more damage to aerial targets. Good to set up juggles and pressuring from afar. Difficult to punish on shield if only the last hit connects. | |dashdesc=Sends three PSI sparks out in front of him with the third spark knocking the opponent up into the air. The first spark deals more damage to aerial targets. Good to set up juggles and pressuring from afar. Difficult to punish on shield if only the last hit connects. | ||
|fsmashname= | |fsmashname= | ||
|fsmashdmg={{ChargedSmashDmgSSB4|18}} (low), {{ChargedSmashDmgSSB4|20}} (mid), {{ChargedSmashDmgSSB4|22}} (tip) | |fsmashdmg={{ChargedSmashDmgSSB4|18}} (low), {{ChargedSmashDmgSSB4|20}} (mid), {{ChargedSmashDmgSSB4|22}} (tip), 2× damage (reflected projectiles) | ||
|fsmashdesc=Swings his bat. It is the second strongest forward smash in the game when sweetspotted at the tip of the bat and still one of the strongest forward smashes when untippered, but it has some start-up and ending lag. The bat itself will [[reflect]] incoming projectiles when he swings it. However, reflecting a projectile that is too strong to reflect | |fsmashdesc=Swings his bat. It is the second strongest forward smash in the game when sweetspotted at the tip of the bat and still one of the strongest forward smashes when untippered, but it has some start-up and ending lag. The bat itself will [[reflect]] incoming projectiles when he swings it. However, reflecting a projectile that is too strong to reflect will result in Ness experiencing five full seconds of ending lag, although this is uncommon since it requires a strong projectile to be reflected multiple times. | ||
|usmashname= | |usmashname=Around The World ({{ja|シャトルループ|Shatoru Rūpu}}, ''Shuttle Loop'') | ||
|usmashdmg={{ChargedSmashDmgSSB4|9}}-{{ChargedSmashDmgSSB4|13}} | |usmashdmg={{ChargedSmashDmgSSB4|9}}-{{ChargedSmashDmgSSB4|13}} | ||
|usmashdesc=Sends his yo-yo forward and performs "around-the-world" over himself. A decent anti-air and a good out of shield option. It is more powerful if the opponent is behind Ness, but it's still the weakest up smash in the game, not KOing until roughly 137%. | |usmashdesc=Sends his yo-yo forward and performs "around-the-world" over himself. A decent anti-air and a good out of shield option. It is more powerful if the opponent is behind Ness, but it's still the weakest up smash in the game, not KOing until roughly 137%. | ||
|dsmashname= | |dsmashname= Walk the Dog ({{ja|ヨーヨーショット|Yōyō Shotto}}, ''Yo-Yo Shot'') | ||
|dsmashdmg={{ChargedSmashDmgSSB4|1}} (hit 1, front and back) {{ChargedSmashDmgSSB4|1}} (hit 2, front and back) {{ChargedSmashDmgSSB4|10}} (hit 3, front and back) | |dsmashdmg={{ChargedSmashDmgSSB4|1}} (hit 1, front and back) {{ChargedSmashDmgSSB4|1}} (hit 2, front and back) {{ChargedSmashDmgSSB4|10}} (hit 3, front and back) | ||
|dsmashdesc=Sends his yo-yo backwards and "walk-the- | |dsmashdesc=Sends his yo-yo backwards and "walk-the-dog" with it before pulling the yo-yo back. Covers get up options well, but cannot connect well if the opponent is at the longest range of the move. | ||
|nairname= | |nairname= | ||
|nairdmg=11% (clean), 7% (late) | |nairdmg=11% (clean), 7% (late) | ||
| Line 197: | Line 268: | ||
|fthrowname= | |fthrowname= | ||
|fthrowdmg=11% | |fthrowdmg=11% | ||
|fthrowdesc=Psychokinetically swings his opponent in a small circle in front of himself before sending them off forward. Very high base knockback, but incredibly low scaling, | |fthrowdesc=Psychokinetically swings his opponent in a small circle in front of himself before sending them off forward. Very high base knockback, but incredibly low knockback scaling, which gives it little to no KO potential even after Sudden Death percentages. It is useful for setting up an edgeguard, however. | ||
|bthrowname= | |bthrowname= | ||
|bthrowdmg=11% | |bthrowdmg=11% | ||
|bthrowdesc=Psychokinetically swings the opponent over his head before sending them off backwards, in a diagonally upwards motion. Possesses very low base knockback but incredibly high knockback scaling, making it the strongest throw in the entire game, KOing | |bthrowdesc=Psychokinetically swings the opponent over his head before sending them off backwards, in a diagonally upwards motion. Possesses very low base knockback but incredibly high knockback scaling, making it the strongest throw in the entire game, KOing even the heaviest characters with optimal DI at 122% near the ledge without rage. | ||
|uthrowname= | |uthrowname= | ||
|uthrowdmg=10% | |uthrowdmg=10% | ||
|uthrowdesc=Psychokinetically spins the opponent above his head before sending them up. Leaves the opponent in an unfavorable position where they can be juggled, most commonly by PK Thunder. | |uthrowdesc=Psychokinetically spins the opponent above his head before sending them up. Leaves the opponent in an unfavorable position where they can be juggled, most commonly by PK Thunder. | ||
|dthrowname= | |dthrowname= | ||
|dthrowdmg=0.6% (hits 1-5), 4% ( | |dthrowdmg=0.6% (hits 1-5), 4% (throw) | ||
|dthrowdesc=Throws the opponent onto the ground and scorches them with PK Fire. A strong combo starter, having guaranteed follow-ups into neutral aerial, forward aerial and up aerial. | |dthrowdesc=Throws the opponent onto the ground and scorches them with PK Fire. A strong combo starter, having guaranteed follow-ups into neutral aerial, forward aerial and up aerial. | ||
|floorfname= | |floorfname= | ||
| Line 221: | Line 292: | ||
|nsdefname=PK Flash | |nsdefname=PK Flash | ||
|nsdefdmg=9%-37% | |nsdefdmg=9%-37% | ||
|nsdefdesc=A green plasma-like energy projectile appears above Ness. As the special attack button is held, the sphere moves downwards and increases in power, until the attack button is released or until it is fully charged, it explodes. Can KO as low 37% fully charged. | |nsdefdesc=A green plasma-like energy projectile appears above Ness. As the special attack button is held, the sphere moves downwards and increases in power, until the attack button is released or until it is fully charged, it explodes. Can KO as low 37% when fully charged. | ||
|nsc1name=Rising PK Flash | |nsc1name=Rising PK Flash | ||
|nsc1dmg=8%-24% | |nsc1dmg=8%-24% | ||
| Line 242: | Line 313: | ||
|usc1name=Lasting PK Thunder | |usc1name=Lasting PK Thunder | ||
|usc1dmg=7% (PK Thunder), 1% (Thunder's tail), 1.5% (PK Thunder 2, each hit), 10% (PK Thunder 2, last hit) | |usc1dmg=7% (PK Thunder), 1% (Thunder's tail), 1.5% (PK Thunder 2, each hit), 10% (PK Thunder 2, last hit) | ||
|usc1desc=Functions identically to {{SSB4|Lucas}}'s counterpart, with tighter turning and both the projectile and Ness piercing enemies. Deals less damage, but launches Ness further | |usc1desc=Functions identically to {{SSB4|Lucas}}'s counterpart, with tighter turning and both the projectile and Ness piercing enemies. Deals less damage, but launches Ness further. | ||
|usc2name=Rolling PK Thunder | |usc2name=Rolling PK Thunder | ||
|usc2dmg=12% (PK Thunder), 1% (Thunder's tail), 30% (PK Thunder 2) | |usc2dmg=12% (PK Thunder), 1% (Thunder's tail), 30% (PK Thunder 2) | ||
|usc2desc=Creates a slower, yet larger | |usc2desc=Creates a slower, yet larger PK Thunder. Both the projectile and Ness do more damage and knockback. However, the distance Ness moves with PK Thunder 2 is significantly shorter, making this a high-risk, high-reward move. | ||
|dsdefname=PSI Magnet | |dsdefname=PSI Magnet | ||
|dsdefdmg=0% | |dsdefdmg=0% | ||
|dsdefdesc=A purple energy field around him which allows him to [[absorb]] any energy-based projectile (like Samus' [[Charge Shot]]). It can be held in order to use it repeatedly. Heals 1. | |dsdefdesc=A purple energy field around him which allows him to [[absorb]] any energy-based projectile (like Samus' [[Charge Shot]]). It can be held in order to use it repeatedly. Heals 1.6× the damage Ness would have taken, but only heals a maximum of 30% damage. | ||
|dsc1name=PSI Vacuum | |dsc1name=PSI Vacuum | ||
|dsc1dmg=10% | |dsc1dmg=10% | ||
|dsc1desc=Ness draws opponents in, releasing an explosion that damages nearby foes when the move is released. It cannot absorb projectiles. | |dsc1desc=Ness draws opponents in, releasing an explosion that damages nearby foes when the move is released. It cannot absorb projectiles. | ||
|dsc2name=Forward PSI Magnet | |dsc2name=Forward PSI Magnet | ||
|dsc2dmg=9% | |dsc2dmg=9% | ||
| Line 259: | Line 330: | ||
|fsdesc=Summons stars to fall from the sky to annihilate his enemies. The comets descend in a straight line over Ness and can sweep the screen with directional inputs to the left and right. | |fsdesc=Summons stars to fall from the sky to annihilate his enemies. The comets descend in a straight line over Ness and can sweep the screen with directional inputs to the left and right. | ||
}} | }} | ||
===Stats=== | |||
{{Attributes | |||
|cast = 58 | |||
|weight = 94 | |||
|rweight = 33-36 | |||
|dash = 1.3 | |||
|rdash = 49-55 | |||
|run = 1.46265 | |||
|rrun = 45 | |||
|walk = 0.8635 | |||
|rwalk = 51 | |||
|trac = 0.0546 | |||
|rtrac = 35 | |||
|airfric = 0.0225 | |||
|rairfric = 4 | |||
|air = 0.9588 | |||
|rair = 41 | |||
|baseaccel = 0.01 | |||
|rbaseaccel = 10-54 | |||
|addaccel = 0.09 | |||
|raddaccel = 5-7 | |||
|gravity = 0.077 | |||
|rgravity = 46-47 | |||
|fall = 1.31 | |||
|rfall = 48 | |||
|ff = 2.096 | |||
|rff = 48 | |||
|jumpsquat = 5 | |||
|rjumpsquat = 14-41 | |||
|jumpheight = 34.476265 | |||
|rjumpheight = 22 | |||
|shorthop = 16.652296 | |||
|rshorthop = 25 | |||
|djump = 34.476265 | |||
|rdjump = 25 | |||
}} | |||
===[[Announcer]] call=== | |||
<gallery> | |||
Ness English Announcer SSB4-SSBU.wav|English/Japanese/Chinese | |||
Ness French Announcer SSBU.wav|French | |||
Ness German Announcer SSBU.wav|German | |||
Ness Italian Announcer SSBU.wav|Italian | |||
Ness Russian Announcer SSBU.wav|Russian | |||
Ness Spanish Announcer SSBU.wav|Spanish | |||
</gallery> | |||
===[[On-screen appearance]]=== | ===[[On-screen appearance]]=== | ||
| Line 298: | Line 416: | ||
|char=Ness}} | |char=Ness}} | ||
==In competitive play== | ==In [[competitive play]]== | ||
===[[Official Custom Moveset Project]]=== | ===[[Official Custom Moveset Project]]=== | ||
{{OfficialCustomMoves | {{OfficialCustomMoves | ||
| Line 313: | Line 431: | ||
|set10=1113 | |set10=1113 | ||
}} | }} | ||
=== | ===Most historically significant players=== | ||
<!--This character has a ten player limit for this section. Before adding and/or removing a player, read these guidelines: https://www.ssbwiki.com/SmashWiki:Notability#%22Most_historically_significant_players%22_guidelines --> | |||
''See also: [[:Category:Ness players (SSB4)]]'' | |||
= | *{{Sm|BestNess|USA}} - A known Ness player for most of competitive ''Smash 4'', as well as the best Ness player in the world in 2018, with some of Ness's best regional performances, such as winning {{Trn|Super Smash Fight Club 4}} over {{Sm|Elegant}} and {{Sm|Ned}}, and placing 7th at {{Trn|SCR 2018}} defeating {{Sm|Zenyou}}. He also had some of Ness's best major performances since FOW, placing 13th at {{Trn|The Big House 8}} defeating {{Sm|Vinnie}}, placing 25th at {{Trn|GENESIS 5}}, and defeating {{Sm|Light|p=Connecticut}} at {{Trn|Super Smash Con 2018}}. | ||
*{{Sm| | *{{Sm|FOW|USA}} - Ness's most well-known representative, as well as the best solo-Ness player of all-time, ranking as high as 12th on the [[PGR v1]] thanks to strong major performances such as 5th at {{Trn|GENESIS 3}} and 7th at {{Trn|EVO 2015}}. His activity at national-level events dwindled in mid-2016; however, he remained a strong threat at events he did attend, including placing 13th at {{Trn|2GGC: Nairo Saga}}, and was ultimately ranked 57th on the [[PGR 100]], the highest-ranking solo-Ness player on the list. | ||
*{{Sm| | *{{Sm|Gackt|Japan}} - Japan's best Ness player in the game's later years and one of the best Ness players in the world in 2018, having become infamous for his offensive usage of PK Thunder 2. His breakout event was at {{Trn|The Big House 7}}, where he defeated {{Sm|ANTi}} and {{Sm|Locus}} to place 17th, and although he remained inconsistent, he nevertheless remained one of Ness's most notable representatives after FOW's inactivity, placing 5th at {{Trn|Rikabura 8}} defeating {{Sm|Abadango}}, as well as 9th at {{Trn|Umebura 32}}. | ||
*{{Sm| | *{{Sm|NAKAT|USA}} - One of the best Ness players of all-time, co-maining the character alongside {{SSB4|Fox}}. He primarily played Ness to place 7th at {{Trn|Super Smash Con 2015}} and 13th at {{Trn|Pound 2016}}, but played more Fox as time went on. However, he once again began focusing on Ness in 2017, most notably using primarily Ness to place 13th at {{Trn|EVO 2017}} and 17th at both {{Trn|GameTyrant Expo 2017}} and {{Trn|2GGC: Fire Emblem Saga}}. He was ultimately ranked 49th on the [[PGR 100]] with both Fox and Ness, the only Ness player in the top 50. | ||
*{{Sm| | *{{Sm|Shaky|USA}} - The second-best solo-Ness player after FOW in the early metagame, placing 5th at {{Trn|Paragon Los Angeles 2015}} and 7th at {{Trn|CEO 2015}} and ranking 16th on the [[PGR v1]]. Despite low activity for the rest of competitive ''Smash 4'', he was still recognized as one of the game's best Ness players, ranking 83rd on the [[PGR 100]]. | ||
*{{Sm|S1|Netherlands}} - The best Ness player in Europe, as well as one of Europe's best players overall, ranking 5th on the [[European Smash 4 Power Rankings]]. He regularly made top 8 appearances at European events, which includes some of Europe's largest events such as 7th at {{Trn|B.E.A.S.T 6}} and {{Trn|Syndicate 2017}}. Internationally, his best performance was placing 5th at {{Trn|Midwest Mayhem 11}}. | |||
*{{Sm|taranito|Japan}} - Japan's best Ness player in the game's earlier years, placing 5th at {{Trn|Umebura 25}} defeating {{Sm|Tsu}} and 13th at {{Trn|Sumabato for THE BIG HOUSE}} defeating {{Sm|9B}}. Although eventually surpassed by Gackt, taranito remained the second-best Ness player in Japan, with placements such as 17th at both {{Trn|EVO Japan 2018}} and {{Trn|Umebura 34}}. | |||
*{{Sm|The Great Gonzales|USA}} - Although already a known player in Tristate, having defeated {{Sm|ScAtt}} at {{Trn|KTAR XIX}} and placed 9th at {{Trn|Apex 2016}}, he became best known for his run to 5th at {{Trn|Royal Flush}} defeating {{Sm|Mr.E}}, {{Sm|Pink Fresh}}, and {{Sm|WaDi}}. He has since become one of North America's best Ness players, with performances such as 17th at {{Trn|Smash 'N' Splash 3}} and 25th at {{Trn|Frostbite 2018}}, defeating {{Sm|Lima}} in the latter event. | |||
===Tier placement and history=== | ===Tier placement and history=== | ||
During the early | Opinions on Ness' competitive viability have shifted throughout the game's lifespan. During the early metagame, smashers immediately noticed the vast buffs made to Ness, including the removal of the 10 extra frame grab-release animations, significant improvements to his combo game, and edge-trumping making his recovery less exploitable. These buffs, alongside Ness having one of the best throw games in ''SSB4'', a highly versatile aerial game, and excellent KO power and damage output, led many players to believe that Ness was at least a high tier, with a few going as far as to call him a top tier. These claims were backed up with above-average results in competitive play throughout the first two years of the game's lifespan, with {{Sm|FOW}} playing 5th at {{Trn|GENESIS 3}} and 7th at {{Trn|EVO 2015}} and {{Sm|Shaky}} placing 7th at {{Trn|CEO 2015}} and 9th at GENESIS 3. Ness's positive reception solidified him into the 13th position on the first official ''4BR'' [[tier list]]. This reception continued onto the second tier list, where Ness saw a small drop to 16th, mainly due to the additions of {{SSB4|Bayonetta}} and {{SSB4|Corrin}}. | ||
Over time, however, Ness' flaws came to be more apparent, with players noticing that his subpar mobility, mediocre ground game, and notably gimpable recovery made him struggle against several high and top tiers, most notably {{SSB4|Rosalina & Luma}} and {{SSB4|Corrin}}. As a result, opinions on Ness began to fall off drastically: his results stagnated as many of his best players became less active by the end of 2016. In addition, Ness's fellow ''EarthBound'' representative and pseudo-clone {{SSB4|Lucas}} saw a shift in perception: while Lucas was initially considered inferior to Ness, over time, opinions shifted the other way around due to Lucas' buffs received from patches and his commendable results thanks to {{Sm|Taiheita}}. At the same time, Ness gained new counters in the form of {{SSB4|Marth}} and {{SSB4|Lucina}}, whose buffs also helped create a large spike in popularity. Although Ness still saw strong results, such as FOW placing 17th at {{Trn|2GGT: ZeRo Saga}} and {{Sm|S1}} placing 5th at {{Trn|BEAST 7}}, it did not compensate the loss of his stagnant results he had already suffered. This resulted in a much larger decline to 24th on the third tier list, being tied with {{SSB4|Pac-Man}} for the largest tier drop between the second and third tier lists; this drop also had him reassessed as a mid-tier character. | |||
Throughout 2017, several mains began to return to the scene, with FOW briefly coming out of retirement to place 13th at {{Trn|2GGC: Nairo Saga}} and 25th at {{Trn|2GGC: Civil War}}. NAKAT, despite using Ness as a secondary in favor of Fox in 2016, began to co-main Ness. With Ness, NAKAT saw great results such as 3rd at {{Trn|Smash Factor 6}}, 13th at {{Trn|EVO 2017}}, and 17th at both {{Trn|GameTyrant Expo 2017}} and {{Trn|2GGC: Fire Emblem Saga}}. Other notable players include {{Sm|The Great Gonzales}}, who placed 5th at {{Trn|Royal Flush}} and 17th at {{Trn|Smash 'N' Splash 3}}, and {{Sm|Gackt}}, who had a breakout performance at {{Trn|The Big House 7}} by defeating {{Sm|ANTi}}, {{Sm|Locus}}, and {{Sm|Mistake}}, ultimately placing 17th. These improved results, however, failed to shift opinions on Ness, as many top players, including {{Sm|ZeRo}}, {{Sm|Dabuz}}, {{Sm|MkLeo}}, and {{Sm|Nairo}}, widely believed that Lucas was superior to Ness. Due to this, Ness dropped once again on the fourth and final tier list to 28th/29th, now sharing the spot with Lucas, though due to the expansion of the tiers, he was once again considered a high tier character. | |||
This placement, as well as his tie with Lucas, was challenged in 2018, as several dedicated players, including Gackt, S1, and {{Sm|BestNess}}, continued to see above-average placements at a national level, with Gackt placing 17th at {{Trn|EVO Japan 2018}}, S1 placing 5th at {{Trn|Midwest Mayhem 11}}, and BestNess placing 13th at {{Trn|The Big House 8}}, to name a few. Furthermore, Lucas's results dropped significantly as Taiheita entered retirement. With Ness's rise by the end of the game's active lifespan as well as improved results over characters such as {{SSB4|Greninja}}, {{SSB4|Villager}}, and {{SSB4|Bowser}}, players such as Dabuz once again believed that Ness was the superior ''EarthBound'' character and deserved to be higher on the tier list. | |||
Despite the ups and downs Ness had faced, he is unanimously considered superior to any of his previous incarnations, although several players use secondaries in order to complement the character on a national level. | |||
{{Trophy games|console1=SNES|game1= | ==[[Trophies]]== | ||
{{Trophy/Fighter | |||
|name=Ness | |||
|image-3ds=NessTrophy3DS.png | |||
|image-wiiu=NessTrophyWiiU.png | |||
|mode=Classic | |||
|desc-3ds-ntsc=Hailing from Onett, a small town in Eagleland, this young boy's ordinary looks hide his psychic powers. Ness fought against the evil Giygas in EarthBound, and in Smash Bros. he unleashes some of the same PSI moves. Watch out for PK Thunder, a guided attack that can also launch Ness like a rocket! | |||
|desc-wiiu-ntsc=Hailing from Onett, a small town in Eagleland, this young boy sports ordinary looks that hide his psychic powers. Ness fought against the evil Giygas in EarthBound, and in Smash Bros. he unleashes some of the same PSI moves. Watch out for PK Thunder, a guided attack that can also launch Ness like a rocket! | |||
|desc-pal=From Onett in Eagleland comes this young lad. He may not look like much, but he has powerful psychic abilities, and they really come in handy in EarthBound. They come in handy in this game, too. Did you know you can control his PK Thunder bolt? Aim it at Ness himself to send him flying, absolutely clobbering anyone in his path! | |||
|gamelist-ntsc={{Trophy games|console1=SNES|game1=EarthBound|release1=06/1995}} | |||
|gamelist-pal={{Trophy games|console1=SFC|game1=EarthBound|release1=1994 (JP)|console2=GBA|game2={{iw|wikibound|Mother 1+2}}|release2=2003 (JP)}} | |||
}} | |||
{{clrl}} | |||
{{Trophy/Fighter | |||
|name=Ness (Alt.) | |||
|image-3ds=NessAltTrophy3DS.png | |||
|image-wiiu=NessAltTrophyWiiU.png | |||
|mode=Alt | |||
|desc-3ds-ntsc=Ness may have psychic powers, but that doesn't mean he shies away from getting physical. His side smash packs a real punch if you hit enemies with the end of his bat, and it can even deflect projectiles! His up and down smashes also have a lot of range—Ness can land his strikes with ease! | |||
|desc-wiiu-ntsc=Ness may have psychic powers, but that doesn't mean he shies away from getting physical. His side smash packs a real punch if you hit enemies with the end of his bat, and it can even deflect projectiles! His up and down smashes also have a lot of range—try giving them a spin! | |||
|desc-pal=Ness may have psychic powers, but that doesn't mean he shies away from getting physical. His side smash packs a real punch if you hit enemies with the end of his bat, and it can even reflect projectiles! His up and down smashes also have a lot of range, meaning when you play as Ness, it's always easy to land hits on your foes! | |||
|gamelist-ntsc={{Trophy games|console1=SNES|game1=EarthBound|release1=06/1995}} | |||
|gamelist-pal={{Trophy games|console1=SFC|game1=EarthBound|release1=1994 (JP)|console2=GBA|game2=Mother 1+2|release2=2003 (JP)}} | |||
}} | |||
{{clrl}} | |||
{{Trophy/Fighter | |||
|name=PK Starstorm (Ness)<ref group="fs">Simply "PK Starstorm" if {{SSB4|Lucas}} has not been downloaded.</ref> | |||
{{ | |image=PKStarstormTrophyWiiU.png | ||
|desc=In EarthBound, this PSI ability belonged to Poo, the Crown Prince of Dalaam and one of Ness's friends. Ness must have learned it especially for Smash Bros.! The attack makes a shower of meteors fall onto the stage, damaging any foes it hits. While the attack's in progress, Ness is invincible and can adjust the meteors' trajectory. | |||
|game=ssb4-wiiu | |||
}} | |||
{{clrl}} | |||
< | <references group="fs"/> | ||
==In [[Event Match]]es== | ==In [[Event Match]]es== | ||
| Line 398: | Line 520: | ||
==Gallery== | ==Gallery== | ||
<gallery> | <gallery> | ||
Ness amiibo.png|Ness' | Ness amiibo.png|Ness' [[amiibo]]. | ||
Ness unlock notice SSB4-3DS.png|Ness' unlock notice in {{for3ds}}. | |||
SSB4 - Ness Screen-1.jpg|Posing with [[Jeff]]. | SSB4 - Ness Screen-1.jpg|Posing with [[Jeff]]. | ||
SSB4 - Ness Screen-2.jpg|Posing with {{SSB4|Pikachu}}. | SSB4 - Ness Screen-2.jpg|Posing with {{SSB4|Pikachu}}. | ||
| Line 425: | Line 548: | ||
{{SSB4Characters}} | {{SSB4Characters}} | ||
{{EarthBound universe}} | {{EarthBound universe}} | ||
[[Category:Ness (SSB4)| ]] | [[Category:Ness (SSB4)| ]] | ||
[[Category:Trophies (SSB4-3DS)]] | [[Category:Trophies (SSB4-3DS)]] | ||
[[Category:Trophies (SSB4-Wii U)]] | |||
[[es:Ness (SSB4)]] | |||
Latest revision as of 19:35, April 7, 2024
| Ness in Super Smash Bros. 4 | |
|---|---|
 
| |
| Universe | EarthBound |
| Other playable appearances | in SSB in Melee in Brawl in Ultimate |
| Availability | Unlockable (3DS) Starter (Wii U) |
| Final Smash | PK Starstorm |
| Tier | C (28-29) |
Ness (ネス, Ness) returns as a playable character in Super Smash Bros. 4. Ness was officially confirmed on October 3rd, 2014, alongside Falco and Wario, coinciding with the Western release of Super Smash Bros. for Nintendo 3DS. As in every previous Smash Bros. installation, Ness is once again voiced by Makiko Ōmoto, who has now recorded new voice clips for both versions of the game.
Ness is ranked 28th/29th out of 54 characters on the tier list (tied with Lucas), placing both him and Lucas as the lowest C tier characters. This is a vast improvement from his 26th out of 38 in Brawl and is his best placement in the series. Ness no longer suffers from having 10 extra grab release frames, which was a huge detriment to his survival. Besides that, Ness possesses arguably the best grab game among the entire cast (competing with Mewtwo's and Luigi's), with his forward and up throws leaving opponents in very unfavorable positions, his down throw being a great combo starter at lower percentages and his back throw being the most powerful throw in the game, on top of being difficult to DI properly. Other notable strengths include an effective projectile game with PK Fire and PK Thunder, a formidable air game courtesy of his powerful aerials, and a versatile combo game thanks to his throws and aerials. Despite being a middleweight, he also has high raw KO power and high damage output, a prime example being his aerials, forward smash, PK Flash and PK Thunder 2. Finally, due to the strengths above, Ness possesses very useful options to cover getups from a ledge or on the ground.
However, Ness has rather sub-par mobility and range, which often forces him to be methodical with his approaches, or play defensively in order to gain the lead, which can leave him at a disadvantage against characters with greater range on their attacks such as Cloud. Lastly and the most problematic is his recovery. Despite being greatly improved, PK Thunder remains quite gimpable as the lightning bolt can clang with other attacks, while opponents can forcibly push Ness out of the way or even take a hit from the lightning bolt, making his recovery fail.
While Ness has poor matchups against several characters that were ranked higher than him, particularly Rosalina & Luma, Marth, and Corrin, Ness has achieved good representation and above average results thanks to top players such as FOW, BestNess, S1, The Great Gonzales, Gackt, and NAKAT.
How to unlock (3DS version only)[edit]
Complete one of the following:
- Play 10 VS Matches.
- Clear Classic Mode on any difficulty.
After completing one of the two methods, Ness must then be defeated on Magicant.
Attributes[edit]
Ness is an unusual blend of character archetypes, being a short, projectile-heavy character with a lot of versatility with his moves. Ness's weight is average and his falling speed is rather slow, giving him no disadvantage with weight alone. His walking speed is slow while his dashing speed and air speed are both sub-par, but his air acceleration is very high.
Ness possesses three projectiles: PK Flash, PK Fire, and PK Thunder. PK Flash can be used as an extremely powerful punishing or edge-guarding option, dealing huge knockback which can KO even Bowser, the heaviest character, under 70%. PK Fire possesses a good amount of range and holds opponents in it when it hits them (due to being impossible to SDI out of), granting Ness guaranteed follow-ups (such as grab, an additional PK Fire, or a forward smash to finish the opponent) as long as he acts quickly enough. Also, it can be used off-stage against characters with more linear recoveries to combo into down air. PK Thunder is one of the more unique projectiles in the game. When used, the player will lose control of Ness and instead take control of a large thunder ball for a few seconds. PK Thunder can essentially be used to knock opponents towards Ness for follow ups, to mindgame opponents into a PK Thunder 2 trap to finish them, to edgeguard, and to juggle opponents. The knockback it provides can also hit an opponent over the upper blast line (especially light and floaty characters), allowing it to be used as a situational KO move as well. His down special move, PSI Magnet, provides a psychic shield that can heal him when hit with an energy based attack, making it extremely effective against characters with slower projectiles such as Samus or the Mii Gunner. PSI Magnet has fast start-up and end-lag, this allows Ness to cancel his double jump momentum and allows him to reverse himself mid-air more reliably, making it effective for avoiding vertical attacks such as Mario's up smash when Ness is on the air.
Ness's biggest strength is found in his superb aerial game. Most of Ness's aerial moves can be used to either space, combo, or KO. All aerials, excluding down aerial, are capable of auto-canceling out of a short hop. His neutral aerial possesses very little startup and ending lag, and hits on both sides of Ness, making it a useful out of shield option. His forward aerial has quick startup, a disjointed hitbox, and traps opponents, essentially allowing it to chain into either itself or another move. It is a powerful spacing tool and is helpful in approaching opponents. His up aerial, one of the strongest in the game, can be used to combo at lower percents and KO reliably at higher percents. It possesses a large hitbox and little lag, making it low risk, high reward. His back aerial is another reliable KO move that possesses low lag. His down aerial can occasionally be useful in edgeguarding, although it has significant startup in comparison to his other aerials. Down aerial has a large autocancel window, giving Ness the ability to decrease the length of his shorthop, as Ness extends his hurtbox by using the move. Ness can use this property to Tomahawk much more effectively, buffer landing options, mix up his platform movement, and occasionally avoid techchase situations. Thanks to his floatiness, Ness can perform a neutral aerial or up aerial after a short hop air dodge, allowing him to jump through moves with invincibility and whiff punish.
While Ness's aerials make him a formidable fighter at close quarters, he can struggle to pressure from afar. His dash attack has an exceptionally long range and is a decent approach, but leaves him vulnerable to landing aerials and is only safe if properly spaced. PK Fire covers a lot of ground and can be used to perform a PK Jump, a technique that allows Ness to approach or retreat by inputting the move 1 frame after double jumping. If Ness buffers an airdodge after double jumping, he can increase the height of his double. If Ness uses PSI Magnet then PK Thunder by the ledge, he will snap immediately, rather than stalling as he would normally. By combining these two traits together, Ness can often recover without having to use PK Thunder to travel, alleviating one of his biggest weaknesses.
Ness's grab game is also very potent. His standing grab has slightly below average range and is fast. His pivot grab is surprisingly disjointed and his dash grab gives him a substantial speed boost. As mentioned earlier, Ness can trap opponents with PK Fire or PK Jump in order to set up for a grab. Ness possesses one of the fastest pummels in the game, allowing him to deal a decent amount of damage before throwing. His down throw neatly sets up for aerial attacks, leading into a forward air chain at lower percents or an up air at higher percents. Ness's forward throw has very high base knockback and can set up edgeguards. Up throw can be used to play situational mindgames with PK Thunder. Ness's infamous back throw is the strongest throw in the game; while it has very low base knockback, it has extremely high knockback scaling and is often regarded as his most effective and commonly used KO option.
Ness is far from perfect, however. He possesses below average speed in both the ground and the air, making it hard for him to chase most opponents. His ground game is also generally weak as he possesses short-ranged tilt attacks. His up and down smashes are also somewhat situational. While his up smash can be used as an out of shield option and his down smash as a useful edgeguarding option to two-frame opponents, both KO considerably later than his other KO options in a neutral situation, and his forward smash, while extremely powerful, possesses both high startup and ending lag, making it easily punishable if it misses. Ness's biggest flaw, however, is his recovery. While there have been various buffs to his recovery that make it much more reliable and viable than in previous Smash games, it is still easy to gimp if Ness is not careful enough with his double jump offstage. Characters with multiple jumps, such as Jigglypuff, Kirby and Meta Knight, with counters, such as most of the Fire Emblem characters, or with moves that reflect or absorb, such as Rosalina, Villager, and Pit can force Ness into disadvantage when offstage.
Custom moves can give Ness great advantages and brand new options. PK Freeze can freeze opponents, allowing free follow-ups, especially with PK Fire. PK Fire Burst has more range and power and always goes straight, making it a spacing tool rather than a combo tool. Lasting PK Thunder goes right through opponents and moves slower, allowing for better control. Recovery with PK Thunder 2 is also longer, significantly improving Ness' offstage survivability. Rolling PK Thunder travels much slower but is much stronger. While the recovery with PK Thunder 2 is mediocre due to the drastically decreased distance of it, the move is also significantly stronger, which allows it to KO even earlier than normal PK Thunder 2. Forward PSI Magnet is the same, but has a semi-spike hitbox in front of Ness, functioning similar to Fox's Reflector. Finally, if the opponent has no energy projectiles, PSI Vacuum is the optimal choice, as it draws opponents in and is the strongest of Ness's down special moves damage-wise.
Overall, Ness is viewed as a viable character in tournament play, due to his good combo game and extremely potent kill options. Despite this, he is believed to have a somewhat volatile matchup spread; he is especially vulnerable to characters that can abuse his poor mobility and low range to zone him out. Characters such as Rosalina and Luma, Marth, and Corrin are seen as especially troublesome matchups for Ness.
Changes from Super Smash Bros. Brawl[edit]
Ness has been heavily buffed in the transition from Brawl to SSB4. His grab-release animation with 10 extra frames of ending lag, which was one of his most detrimental flaws, has been removed, and many of the other flaws he had (mainly his recovery) have been addressed. Ness also greatly benefits from the general changes of SSB4, as the new edge-trumping mechanic makes his recovery much harder to gimp, and the changes to hitstun canceling allows him to combo with his moves much more efficiently while the weakening of SDI makes his multi hit moves more reliable. The introduction of rage also benefits him as it improves his KO potential when he's at higher percents. He also greatly benefits from the removal of chain grabbing which was one of the main reasons why his longer grounded grab release was so exploitable.
As for direct changes outside of the length of his grounded grab release animation, he has seen a mix of buffs and nerfs. Ness overall has greater mobility, his smash attacks are stronger and his down smash can now be used as a powerful edgeguarding tool as Ness can now charge to close to a ledge and it now semi-spikes opponents.
However, Ness has seen more direct nerfs overall. Ness' damage output is overall lower and a variety of his moves have smaller hitboxes. His aerial game has seen some downgrades as his forward aerial deals less damage, has more landing lag and has much smaller hitboxes making it a less effective spacing tool while his down aerial has less range, is considerably weaker and it has lost its extremely lenient auto-cancel window making it no longer auto-cancel in a short hop and making it a much worse move overall. His down throw also has considerably increased knockback hindering its setup potential at higher percents.
Overall, Ness is significantly better than he ever was in previous Super Smash Bros. games due to the general changes to the mechanics greatly benefiting him overall and he has also seen solid tournament representation and greatly improved results due to his vast improvement.
Aesthetics[edit]
 Ness has a brighter color palette, and has lost the blushes on his cheeks and the purple hue in his eyes. He is also slightly taller and thinner, with a smaller and more proportionate head, and a smaller backpack. He also lacks the partial yellow stripe that he had at the bottom of his shirt.
- Ness' backpack now has more various color schemes depending on his alternate costume, such as a blue backpack for his yellow outfit, and a red backpack for his green outfit, whereas in previous titles, his backpack for those aforementioned costumes used the default color scheme instead.
- Ness is more expressive.
- All of Ness' PSI-based attacks now use a graphic effect similar to Lucas's attacks (forward aerial, up smash, etc.) instead of using the same graphic effect as his double jump.
Attributes[edit]
 Ness walks faster (0.86 → 0.8635).
- Ness dashes faster (1.39 → 1.46265).
- Ness' grounded grab release has much less ending lag (FAF 41 → 30), now matching the rest of the cast, and making him significantly less vulnerable to grab release follow-ups especially when combined with the removal of chain grabbing. The changes to air releases also benefits him as he is far less susceptible to air release followups.
- Air dodge has less startup lag (frame 4 → 3) and ending lag (FAF 49 → 34).
- All of Ness's electric attacks except for his specials are now a magic effect.
- Ness' gravity is higher (0.0711 → 0.077).
- Rolls have less ending lag (FAF 32 → 31).
 Rolls have a shorter duration (frame 4-19 → 4-17).
- Spot dodge has more startup lag, a shorter duration (frames 2-20 → 3-18) and more ending lag (FAF 26 → 28).
- The changes in shieldstun makes some of his attacks slightly less safe on shield compared to the cast.
Ground attacks[edit]
- Neutral attack:
- The first hit of neutral attack deals 1% less damage (3% → 2%) and all three hits have smaller hitboxes (3u/3u/2.5u → 3u/2u (hits 1 & 2), 4.5u/4u/3.8u → 4u/2.4u (hit 3)).
- Forward tilt:
- Forward tilt deals less damage (12%/11%/10% → 9% (unangled)/10% (angled)).
- Up tilt:
- Up tilt now involves Ness releasing a PSI spark from his hands, increasing its vertical reach.
- Up tilt has slightly higher startup (frame 5 → 7) and its old hitbox is now a sourspot that deals 2% less damage. Its hitboxes are also smaller (7.2u/7.2u → 6.5u/4.0u) to compensate the increased vertical range.
- Up tilt's animation is more similar to that of Smash 64, and its sweetspot now has a magic sound effect instead of a punching sound effect.
- Down tilt:
- Down tilt now has a sourspot at the end of Ness's foot that deals less damage (4% → 2%) with its base knockback only slightly increased (3 → 6). Down tilt also has smaller hitboxes (4.32u/2.88u/3.36u → 2.5u/2.5u).
- Dash attack:
- Dash attack now launches in front of Ness instead of behind him (100° → 80°), making followups easier. The final hit also deals more knockback (70 (base), 100 (scaling) → 80/104) and has a bigger hitbox (5u → 6u).
- The first hit of dash attack no longer deals consistent damage (5% → 4%/7%/3%). This makes it better against aerial opponents, but worse on grounded ones. Dash attack also has more intense lighting effects.
- The second hit of dash attack deals less damage (4% → 2%) and as the first hit no longer deals consistent damage, dash attack as a whole no longer deals consistent damage (13% → 9%/11%/13%).
- Forward smash:
- Forward smash deals drastically more knockback (50 (base), 62 (scaling) → 70/67) (now having the same knockback values as its Japanese Smash 64 counterpart), going from a forward smash of above-average power in Brawl to one of the most powerful forward smashes in Smash 4. Its reflector now has a speed and power multiplier, drastically improving its punishing utility.
- Forward smash's strongest tipper hitbox has been completely removed, so that its maximum damage potential when uncharged has been lowered (24% → 22%). Its other hitboxes are also smaller (2.9u/3.6u/3.8u/4.099983u → 2.3u/2.6u/3.0u) and its reflector now has a limit, where if he tries to reflect a projectile that is too strong to reflect, Ness will experience about 300 frames (5 seconds) of ending lag.
- Yoyo:
- Both up smash and down smashes are now properly affected by smash charging making them deal more damage when charged.
- Yo-yo smashes are charged while still in Ness's hand, removing their pre-charge hitboxes.
- Yo-yo is colored green instead of yellow.
- Up smash:
- Up smash has much less startup lag with a longer duration (frames 10-34 → 6-30).
- Up smash has more ending lag (FAF 55 → 56).
- Down smash:
- Down smash has less ending lag (FAF 62 → 46).
- Down smash is now a semi-spike (55° → 28° (front), 33° (back)), greatly improving its edgeguarding ability.
- Down smash's main hit deals less damage (13% → 10%) and its knockback was not fully compensated (90 (base), 60 (scaling) → 60/80 (front), 50/80 (back)).
- Down smash now has weak initial hits before its front and back hits which deal 1% damage and low knockback; linking into the main hit. It hits four times at the front and two times at the back.
- Because of this, the front hit deals more damage overall (13% → 14%).
- However, the back hit deals less damage overall (13% → 12%).
- Down smash is no longer constantly active (frames 10-33 → 10-15/17-18/23-25/26-29/31-32).
Aerial attacks[edit]
- Neutral aerial:
- Neutral aerial has a shorter duration (frames 5-24 → 5-15).
- The hand hitboxes have been positioned closer to Ness (x offset: 0.33 → 0), slightly decreased their range.
- Forward aerial:
- Forward aerial's looping hits have a decreased SDI multiplier (1.5x → 0.8x) which along with the weakening of SDI makes forward aerial significantly more difficult to escape from.
- The looping hits' angle has been altered (361° → 366°).
- This allows them to connect more reliably (with the move now being able to reliably chain into itself) improving Ness's comboing and damage-racking capabilities.
- However, this also removes their ability to lock opponents removing Ness' most reliable aerial locking tool at higher percents.
- The final hit has increased knockback (24 (base), 145 (scaling) → 32/150) improving forward aerial's edgeguarding potential but hindering its ability to chain into itself.
- Forward aerial a higher hitlag multiplier (0.5x → 1x (loop), 1.5x (final)).
- Forward aerial deals less damage (2% → 1% (loop), 11% → 7% (total)), has smaller hitboxes (8.1u → 5u/1.5u (loop hits), 9u → 8u (final)) and the final hit has a shorter duration (frames 20-21 → 20).
- Forward aerial has increased landing lag (12 frames → 20) and auto-cancels later (frame 30 → 33).
- Back aerial:
- Back aerial has increased landing lag (12 frames → 17).
- Up aerial:
- Up aerial has an altered animation where Ness swings his head more quickly.
- This new animation increases the move's horizontal range.
- However, this also makes the move slightly harder to use as an anti-air.
- Up aerial's hitbox has been marginally repositioned (y offset: 3.408 → x offset: 3.4).
- Up aerial has increased landing lag (12 frames → 14).
- Down aerial:
- Late down aerial deals more damage (9% → 10%).
- Down aerial has a new animation, where Ness spins during its startup and he is facing at a different orientation as he kicks downward with his toes instead of the stamp of his foot. The kick additionally now produces a spark of energy below Ness' foot.
- Down aerial's hitbox is now static, rather than being attached to Ness' foot. This means that the hitbox now stays in the same position relative to Ness, rather than moving with his foot.
- Down aerial uses the strong magic sound effect on hit instead of a strong/medium punch sound.
- Down aerial has a shorter duration (frames 20-23 (clean)/24-28 (late) → 20-21/22-24).
- Down aerial auto-cancels much later (frame 29 → 50), removing its ability to auto-cancel in a short hop, lead alone straight after the hitboxes are no longer active.
- Down aerial has drastically decreased base knockback (90 → 20 (clean)/30 (late)), with both hits now being incapable of KOing at realistic percentages, even with the removal of meteor canceling and the late hit's increased damage.
- Down aerial has smaller hitboxes (6.54u → 3.9u (clean)/6u (late)).
- The late hit launches opponents at a slightly higher angle (361° → 45°).
Throws/other attacks[edit]
- Grabs:
- All grabs are positioned further outwards (z offset: 6.8 (standing)/8 (dash)/-12 (pivot) → z stretch: 8/10/14), improving their range.
- Pivot grab has more startup lag (frame 6 → 10), no longer being the fastest in the game.
- Dash and pivot grab have more ending lag (FAF 36 (both) → 43 (dash), 41 (pivot)).
- Dash grab has a smaller grabbox (4u/3.5u/3.5u → 3.2u).
- Pummel:
- Pummel deals slightly more damage (1% → 1.2%).
- Down throw:
- The changes to hitstun canceling and DI significantly benefits down throw, as Ness can now use it to set up into his aerials much more effectively at lower percents when combined with its lowered base knockback (90 → 70).
- Down throw has less fire graphics.
- Down throw's fire hits deal less damage (1% → 0.6%) reducing its total damage output (9% → 7%).
- The throw has much more knockback scaling (30 → 80), hindering its combo potential at higher percents.
Special moves[edit]
- PK Flash:
- PK Flash travels faster. It travels even faster and gains even more distance if directed behind Ness. Turning around before using this move might prove useful, depending on prediction.
- PK Flash is now a much darker green.
- PK Fire:
- PK Fire travels slightly farther.
- PK Fire has slightly more ending lag. It now travels much farther back to Ness if reflected rather than petering out after traveling its set distance.
- PK Fire's effect after hitting an opponent produces darker colored flames and more smoke.
- When interrupted whilst starting up PK Fire, Ness stops reciting the attack's name.
- PK Thunder:
- PK Thunder travels faster, has less ending lag, much larger hitboxes, deals much better knockback, travels in a drastically tighter arc and goes through opponents until the tail disconnects from Ness with 1% more damage, making him less susceptible to being gimped. PK Thunder 2 is much faster and when Ness bounces off a wall while recovering with it, he can initiate PK Thunder again during the bounce.
- PK Thunder is now light blue like in Melee.
- PK Thunder 2:
- PK Thunder 2 has increased ending lag.
- PSI Magnet:
- PSI Magnet has significantly less ending lag, with Ness now being able to act out of it much quicker. The magnet is also larger, increasing its range.
- PSI Magnet swirls projectiles around it, causing a slight delay until Ness can actually be healed. If Ness were to drop PSI Magnet and/or be launched, the absorbed projectiles may take even longer to reach him, but they will still heal him eventually.
- The swirling of captured attacks by PSI Magnet utterly nullifies even projectiles that would continue past Ness, including Thoron and Pikachu's Thunder.
- PSI Magnet is now light blue like in Melee.
- PK Starstorm:
- PK Starstorm now fires a thin, aimable line of meteors from the top-center of the stage, similar to how Aura Storm functioned. This enables it to deal damage more reliably at the cost of having blind spots.
- PK Starstorm now has a flame effect, instead of an electric effect.
Update history[edit]
Ness has been slightly nerfed overall in game updates. His most notable nerfs are the reduced damage output to his down throw and PK Fire having slightly more endlag. The changes to shield mechanics also hamper him slightly due to the majority of his non PSI-based moves having a rather low damage output. Ness has also got some other useful buffs, however, such as a faster PSI Magnet and his down aerial having a bigger hitbox and lasts one more frame (though it's still his least useful aerial), and while the buffs do not truly compensate for his nerfs, he remains a strong character.
- The period Ness can be at his maximum fall speed before using hard landing lag has been lengthened: 4 → 5 frames.
- PK Thunder and all custom variations have 6 frames more ending lag.
- Down throw's five hits have gained additional hitboxes, allowing them to hit Mr. Game & Watch.
- Down throw's five hits before release deal less damage: 1% → 0.6%.
- Down throw's release has increased knockback: 90 base/30 growth → 70/80, hindering its combo ability at high percents.
- Forward smash's has an updated sound effect when reflecting projectiles.
- Down throw's screen shaking effect is more pronounced.
- The PK Starstorm trophy adds "Ness" in parentheses once Lucas is downloaded, as Lucas's trophy is also named "PK Starstorm"
- PK Thunder 2 has a greater deceleration rate (0.072 → 0.08), making it cover less distance.
- PK Thunder 2 has a lower deceleration rate after hitting an opponent (0.072 → 0.064), making it cover the same distance after hitting an opponent despite the previous change.
- PSI Magnet and its custom variants' minimum hold time has been decreased (30 frames → 18 (PSI Magnet), 26 frames → 16 (PSI Vacuum), 36 frames → 20 (forward PSI Magnet)).
- PSI Magnet absorbs projectiles faster (20 frames → 6).
- Down aerial's meteor smash hitbox size increased: 3.5u → 3.9u and duration increased.
- PK Fire's ending lag increased.
- Rising PK Flash has less startup lag when it is detonated (frame 8 → 6).
- Rising PK Flash deals more damage (2% → 4%) and knockback (80 (base)/30 (scaling) → 50/80), improving its KO potential.
- Rising PK Flash's range increased (10 → 13).
- Rising PK Flash's first hitbox's duration decreased (3 frames → 2).
- Rising PK Flash has a smaller size multiplier (2.2x → 2x).
- Rising PK Flash minimum charge increased.
- PK Freeze range increased (10 → 11).
- PK Freeze has less startup lag when it is detonated (frame 15 → 8).
- PK Freeze deals more damage (8% → 10%) and has a larger damage multiplier (0.11x → 0.16x).
- PK freeze has more landing lag (25 frames → 30).
- PK Fire Burst deals 1% more damage: 1%/8% → 2%/9% and hits earlier.
- PSI Magnet heals halved damage from absorbing teammates' projectiles.
Moveset[edit]
For a gallery of Ness's hitboxes, see here.
| Name | Damage | Description | ||
|---|---|---|---|---|
| Neutral attack | 2% | Punches twice, then kicks. The first hit can jab lock at low percentages. | ||
| 2% | ||||
| 4% | ||||
| Forward tilt | ↗ | 10% | A roundhouse kick. Can be angled, making it deal 1% more damage. It can also lock at low percents. | |
| → | 9% | |||
| ↘ | 10% | |||
| Up tilt | 7% (arms) 5% (hands) | Pushes upward with both hands that produces a PSI spark. Has a sourspot located on his hands that deals 5%. | ||
| Down tilt | 4% (foot), 2% (toes) | A swift shin kick. Extremely spammable and can be used to jab reset. Has a sourspot located on the tip of his foot. Has a chance of making the opponent trip. | ||
| Dash attack | 4%/3% (hit 1), 7% (hit 1 aerial), 2% (hit 2), 4% (hit 3) | Sends three PSI sparks out in front of him with the third spark knocking the opponent up into the air. The first spark deals more damage to aerial targets. Good to set up juggles and pressuring from afar. Difficult to punish on shield if only the last hit connects. | ||
| Forward smash | 18% (low), 20% (mid), 22% (tip), 2× damage (reflected projectiles) | Swings his bat. It is the second strongest forward smash in the game when sweetspotted at the tip of the bat and still one of the strongest forward smashes when untippered, but it has some start-up and ending lag. The bat itself will reflect incoming projectiles when he swings it. However, reflecting a projectile that is too strong to reflect will result in Ness experiencing five full seconds of ending lag, although this is uncommon since it requires a strong projectile to be reflected multiple times. | ||
| Up smash | Around The World (シャトルループ, Shuttle Loop) | 9%-13% | Sends his yo-yo forward and performs "around-the-world" over himself. A decent anti-air and a good out of shield option. It is more powerful if the opponent is behind Ness, but it's still the weakest up smash in the game, not KOing until roughly 137%. | |
| Down smash | Walk the Dog (ヨーヨーショット, Yo-Yo Shot) | 1% (hit 1, front and back) 1% (hit 2, front and back) 10% (hit 3, front and back) | Sends his yo-yo backwards and "walk-the-dog" with it before pulling the yo-yo back. Covers get up options well, but cannot connect well if the opponent is at the longest range of the move. | |
| Neutral aerial | 11% (clean), 7% (late) | Spins diagonally in the air with his arms outstretched. Quick, and acts like a sex kick. Can be followed-up after a down throw. Rather useful to break combos and as an out of shield option. Autocancels from a short hop. | ||
| Forward aerial | 1% (hit 1-3) 4% (hit 4) | Sticks his palms out, sending a stream of PSI sparks in front of him. Decently safe on shield if Ness retreats during the attack, useful to start and continue combos. Autocancels from a short hop. | ||
| Back aerial | 15% (clean), 8% (late) | Ness kicks out backwards with both feet. The initial hit is immensely strong, KOing at 125% onstage and even lower at the ledge. Autocancels from a short hop. | ||
| Up aerial | 13% | An upwards headbutt. It is considered one of Ness' best aerials, due to its rather quick startup, power that makes it effective for comboing at low percentages and KOing at high ones, starting at 115%. Autocancels from a short hop. | ||
| Down aerial | 12% (sweetspot), 10% (sourspot) | Pulls his legs to his body before stomping down into the air, producing a PSI spark. This attack can meteor smash on the first frame. It has slow start up, as it comes out on frame 20 and has lots of landing lag (28 frames). It only autocancels before the hitbox comes out, making it useful to cancel the tumble animation when Ness is near the ground. | ||
| Grab | — | Grabs with both hands. Fast, but below average range. | ||
| Pummel | 1.2% | Headbutts the opponent. A fast pummel. | ||
| Forward throw | 11% | Psychokinetically swings his opponent in a small circle in front of himself before sending them off forward. Very high base knockback, but incredibly low knockback scaling, which gives it little to no KO potential even after Sudden Death percentages. It is useful for setting up an edgeguard, however. | ||
| Back throw | 11% | Psychokinetically swings the opponent over his head before sending them off backwards, in a diagonally upwards motion. Possesses very low base knockback but incredibly high knockback scaling, making it the strongest throw in the entire game, KOing even the heaviest characters with optimal DI at 122% near the ledge without rage. | ||
| Up throw | 10% | Psychokinetically spins the opponent above his head before sending them up. Leaves the opponent in an unfavorable position where they can be juggled, most commonly by PK Thunder. | ||
| Down throw | 0.6% (hits 1-5), 4% (throw) | Throws the opponent onto the ground and scorches them with PK Fire. A strong combo starter, having guaranteed follow-ups into neutral aerial, forward aerial and up aerial. | ||
| Floor attack (front) | 7% | |||
| Floor attack (back) | 7% | |||
| Floor attack (trip) | 5% | |||
| Edge attack | 7% | Flips onto the stage and does a sweep kick. | ||
| Neutral special | Default | PK Flash | 9%-37% | A green plasma-like energy projectile appears above Ness. As the special attack button is held, the sphere moves downwards and increases in power, until the attack button is released or until it is fully charged, it explodes. Can KO as low 37% when fully charged. |
| Custom 1 | Rising PK Flash | 8%-24% | A magenta colored PK Flash that keeps rising, hence the name. Has minimal control and deals less damage, but has a larger hitbox. | |
| Custom 2 | PK Freeze | 10%-19% | Inflicts less damage, but freezes opponents. Works like Lucas's neutral special, except with the same movement as PK Flash. His voice clips also changes. | |
| Side special | Default | PK Fire | 4% (lightning), 2% (fire) | Fires a yellow, lightning-bolt shaped projectile, that travels in a straight line until it hits an enemy or destructible portion of a stage, at which point it explodes into a gradually-fading pillar of fire, making said enemy vulnerable. Fires at a downward 50 degree angle if used in the air. |
| Custom 1 | PK Bonfire | 2% (lightning), 3%-5% (fire) | The lightning-bolt doesn't travel as far, but the flame pillar is stronger and it sticks around longer. Has much less combo potential due to its increased ending lag and knockback. | |
| Custom 2 | PK Fire Burst | 2% (lightning), 9% (fire) | Releases a single flame when it hits and knocks opponents farther. It will always travel horizontally even when used in the air, similar to Lucas's variant of PK Fire. It also travels further distance. | |
| Up special | Default | PK Thunder | 8% (PK Thunder), 1% (Thunder's tail), 25% (PK Thunder 2 initial hitbox), 21% (PK Thunder 2 late hitbox) | Creates a stream of lightning that can be aimed into opponents to deal damage with the head and stun with the tail. Aiming the head into Ness himself will launch him in a trajectory opposite to the side he was hit on, which is referred to as PK Thunder 2. PK Thunder 2 has invincibility frames during the first half of the move. Ness' recovery move, but it can be easily gimped during startup. |
| Custom 1 | Lasting PK Thunder | 7% (PK Thunder), 1% (Thunder's tail), 1.5% (PK Thunder 2, each hit), 10% (PK Thunder 2, last hit) | Functions identically to Lucas's counterpart, with tighter turning and both the projectile and Ness piercing enemies. Deals less damage, but launches Ness further. | |
| Custom 2 | Rolling PK Thunder | 12% (PK Thunder), 1% (Thunder's tail), 30% (PK Thunder 2) | Creates a slower, yet larger PK Thunder. Both the projectile and Ness do more damage and knockback. However, the distance Ness moves with PK Thunder 2 is significantly shorter, making this a high-risk, high-reward move. | |
| Down special | Default | PSI Magnet | 0% | A purple energy field around him which allows him to absorb any energy-based projectile (like Samus' Charge Shot). It can be held in order to use it repeatedly. Heals 1.6× the damage Ness would have taken, but only heals a maximum of 30% damage. |
| Custom 1 | PSI Vacuum | 10% | Ness draws opponents in, releasing an explosion that damages nearby foes when the move is released. It cannot absorb projectiles. | |
| Custom 2 | Forward PSI Magnet | 9% | The magnet appears in front of him, just like Lucas's version. It damages an opponent inside the magnet when the move is released. | |
| Final Smash | PK Starstorm | 8% per hit | Summons stars to fall from the sky to annihilate his enemies. The comets descend in a straight line over Ness and can sweep the screen with directional inputs to the left and right. | |
Stats[edit]
| Stats | Weight | Dash speed | Walk speed | Traction | Air friction | Air speed | Air acceleration | Gravity | Falling speed | Jumpsquat | Jump Height | Double jump Height |
|---|---|---|---|---|---|---|---|---|---|---|---|---|
| Value | 94 | 1.3 – Initial dash 1.46265 – Run |
0.8635 | 0.0546 | 0.0225 | 0.9588 | 0.01 – Base 0.09 – Additional |
0.077 | 1.31 – Base 2.096 – Fast-fall |
5 | 34.476265 - Base 16.652296 - Short hop |
34.476265 |
Announcer call[edit]
English/Japanese/Chinese
French
German
Italian
Russian
Spanish
On-screen appearance[edit]
- Ness teleports on the screen using PSI Teleport. He then shakes the ash off of his body.

|
|---|
Taunts[edit]
- Up taunt: Turns to the screen and nods his head while saying "Okay".
- Side taunt: Takes his bat out and points it in front of him.
- Down taunt: Releases a wave of PSI from his finger.
| Up taunt | Side taunt | Down taunt |
|---|---|---|

|

|

|
Idle poses[edit]
- Looks around curiously.
- Closes his eyes and places his fingers on his forehead, concentrating his PSI, and then points it forward.
 |

|
|---|
Crowd cheer[edit]
| English | Japanese | |
|---|---|---|
| Cheer | ||
| Description | Su-per Ness! | Ness! Ness! Ness! |
| Pitch | Group chant | Group chant |
Victory poses[edit]
- Skips in place and then nods similar to his up taunt.
- Looks to his sides quickly before facing the screen, putting his hand on the back of his head.
- Swings his bat multiple times, then points it forward.
 |
 |

|
|---|
In competitive play[edit]
Official Custom Moveset Project[edit]
| Character | Custom sets available | ||||
|---|---|---|---|---|---|
| 1112 | 1121 | 1122 | 1311 | 1312 | |
| 1321 | 1322 | 1212 | 2111 | 1113 | |
Most historically significant players[edit]
See also: Category:Ness players (SSB4)
 BestNess - A known Ness player for most of competitive Smash 4, as well as the best Ness player in the world in 2018, with some of Ness's best regional performances, such as winning Super Smash Fight Club 4 over Elegant and Ned, and placing 7th at SCR 2018 defeating Zenyou. He also had some of Ness's best major performances since FOW, placing 13th at The Big House 8 defeating Vinnie, placing 25th at GENESIS 5, and defeating Light at Super Smash Con 2018.
- FOW - Ness's most well-known representative, as well as the best solo-Ness player of all-time, ranking as high as 12th on the PGR v1 thanks to strong major performances such as 5th at GENESIS 3 and 7th at EVO 2015. His activity at national-level events dwindled in mid-2016; however, he remained a strong threat at events he did attend, including placing 13th at 2GGC: Nairo Saga, and was ultimately ranked 57th on the PGR 100, the highest-ranking solo-Ness player on the list.
 Gackt - Japan's best Ness player in the game's later years and one of the best Ness players in the world in 2018, having become infamous for his offensive usage of PK Thunder 2. His breakout event was at The Big House 7, where he defeated ANTi and Locus to place 17th, and although he remained inconsistent, he nevertheless remained one of Ness's most notable representatives after FOW's inactivity, placing 5th at Rikabura 8 defeating Abadango, as well as 9th at Umebura 32.
- NAKAT - One of the best Ness players of all-time, co-maining the character alongside Fox. He primarily played Ness to place 7th at Super Smash Con 2015 and 13th at Pound 2016, but played more Fox as time went on. However, he once again began focusing on Ness in 2017, most notably using primarily Ness to place 13th at EVO 2017 and 17th at both GameTyrant Expo 2017 and 2GGC: Fire Emblem Saga. He was ultimately ranked 49th on the PGR 100 with both Fox and Ness, the only Ness player in the top 50.
- Shaky - The second-best solo-Ness player after FOW in the early metagame, placing 5th at Paragon Los Angeles 2015 and 7th at CEO 2015 and ranking 16th on the PGR v1. Despite low activity for the rest of competitive Smash 4, he was still recognized as one of the game's best Ness players, ranking 83rd on the PGR 100.
 S1 - The best Ness player in Europe, as well as one of Europe's best players overall, ranking 5th on the European Smash 4 Power Rankings. He regularly made top 8 appearances at European events, which includes some of Europe's largest events such as 7th at B.E.A.S.T 6 and Syndicate 2017. Internationally, his best performance was placing 5th at Midwest Mayhem 11.
- taranito - Japan's best Ness player in the game's earlier years, placing 5th at Umebura 25 defeating Tsu and 13th at Sumabato for THE BIG HOUSE defeating 9B. Although eventually surpassed by Gackt, taranito remained the second-best Ness player in Japan, with placements such as 17th at both EVO Japan 2018 and Umebura 34.
- The Great Gonzales - Although already a known player in Tristate, having defeated ScAtt at KTAR XIX and placed 9th at Apex 2016, he became best known for his run to 5th at Royal Flush defeating Mr.E, Pink Fresh, and WaDi. He has since become one of North America's best Ness players, with performances such as 17th at Smash 'N' Splash 3 and 25th at Frostbite 2018, defeating Lima in the latter event.
Tier placement and history[edit]
Opinions on Ness' competitive viability have shifted throughout the game's lifespan. During the early metagame, smashers immediately noticed the vast buffs made to Ness, including the removal of the 10 extra frame grab-release animations, significant improvements to his combo game, and edge-trumping making his recovery less exploitable. These buffs, alongside Ness having one of the best throw games in SSB4, a highly versatile aerial game, and excellent KO power and damage output, led many players to believe that Ness was at least a high tier, with a few going as far as to call him a top tier. These claims were backed up with above-average results in competitive play throughout the first two years of the game's lifespan, with FOW playing 5th at GENESIS 3 and 7th at EVO 2015 and Shaky placing 7th at CEO 2015 and 9th at GENESIS 3. Ness's positive reception solidified him into the 13th position on the first official 4BR tier list. This reception continued onto the second tier list, where Ness saw a small drop to 16th, mainly due to the additions of Bayonetta and Corrin.
Over time, however, Ness' flaws came to be more apparent, with players noticing that his subpar mobility, mediocre ground game, and notably gimpable recovery made him struggle against several high and top tiers, most notably Rosalina & Luma and Corrin. As a result, opinions on Ness began to fall off drastically: his results stagnated as many of his best players became less active by the end of 2016. In addition, Ness's fellow EarthBound representative and pseudo-clone Lucas saw a shift in perception: while Lucas was initially considered inferior to Ness, over time, opinions shifted the other way around due to Lucas' buffs received from patches and his commendable results thanks to Taiheita. At the same time, Ness gained new counters in the form of Marth and Lucina, whose buffs also helped create a large spike in popularity. Although Ness still saw strong results, such as FOW placing 17th at 2GGT: ZeRo Saga and S1 placing 5th at BEAST 7, it did not compensate the loss of his stagnant results he had already suffered. This resulted in a much larger decline to 24th on the third tier list, being tied with Pac-Man for the largest tier drop between the second and third tier lists; this drop also had him reassessed as a mid-tier character.
Throughout 2017, several mains began to return to the scene, with FOW briefly coming out of retirement to place 13th at 2GGC: Nairo Saga and 25th at 2GGC: Civil War. NAKAT, despite using Ness as a secondary in favor of Fox in 2016, began to co-main Ness. With Ness, NAKAT saw great results such as 3rd at Smash Factor 6, 13th at EVO 2017, and 17th at both GameTyrant Expo 2017 and 2GGC: Fire Emblem Saga. Other notable players include The Great Gonzales, who placed 5th at Royal Flush and 17th at Smash 'N' Splash 3, and Gackt, who had a breakout performance at The Big House 7 by defeating ANTi, Locus, and Mistake, ultimately placing 17th. These improved results, however, failed to shift opinions on Ness, as many top players, including ZeRo, Dabuz, MkLeo, and Nairo, widely believed that Lucas was superior to Ness. Due to this, Ness dropped once again on the fourth and final tier list to 28th/29th, now sharing the spot with Lucas, though due to the expansion of the tiers, he was once again considered a high tier character.
This placement, as well as his tie with Lucas, was challenged in 2018, as several dedicated players, including Gackt, S1, and BestNess, continued to see above-average placements at a national level, with Gackt placing 17th at EVO Japan 2018, S1 placing 5th at Midwest Mayhem 11, and BestNess placing 13th at The Big House 8, to name a few. Furthermore, Lucas's results dropped significantly as Taiheita entered retirement. With Ness's rise by the end of the game's active lifespan as well as improved results over characters such as Greninja, Villager, and Bowser, players such as Dabuz once again believed that Ness was the superior EarthBound character and deserved to be higher on the tier list.
Despite the ups and downs Ness had faced, he is unanimously considered superior to any of his previous incarnations, although several players use secondaries in order to complement the character on a national level.
Trophies[edit]


- Ness

 Hailing from Onett, a small town in Eagleland, this young boy's ordinary looks hide his psychic powers. Ness fought against the evil Giygas in EarthBound, and in Smash Bros. he unleashes some of the same PSI moves. Watch out for PK Thunder, a guided attack that can also launch Ness like a rocket!
 Hailing from Onett, a small town in Eagleland, this young boy sports ordinary looks that hide his psychic powers. Ness fought against the evil Giygas in EarthBound, and in Smash Bros. he unleashes some of the same PSI moves. Watch out for PK Thunder, a guided attack that can also launch Ness like a rocket!
 : EarthBound (06/1995)
 From Onett in Eagleland comes this young lad. He may not look like much, but he has powerful psychic abilities, and they really come in handy in EarthBound. They come in handy in this game, too. Did you know you can control his PK Thunder bolt? Aim it at Ness himself to send him flying, absolutely clobbering anyone in his path!
 : EarthBound (1994 (JP))
 : Mother 1+2 (2003 (JP))


- Ness (Alt.)
- Ness may have psychic powers, but that doesn't mean he shies away from getting physical. His side smash packs a real punch if you hit enemies with the end of his bat, and it can even deflect projectiles! His up and down smashes also have a lot of range—Ness can land his strikes with ease!
- Ness may have psychic powers, but that doesn't mean he shies away from getting physical. His side smash packs a real punch if you hit enemies with the end of his bat, and it can even deflect projectiles! His up and down smashes also have a lot of range—try giving them a spin!
- : EarthBound (06/1995)
- Ness may have psychic powers, but that doesn't mean he shies away from getting physical. His side smash packs a real punch if you hit enemies with the end of his bat, and it can even reflect projectiles! His up and down smashes also have a lot of range, meaning when you play as Ness, it's always easy to land hits on your foes!
- : EarthBound (1994 (JP))
- : Mother 1+2 (2003 (JP))

- PK Starstorm (Ness)[fs 1]
- In EarthBound, this PSI ability belonged to Poo, the Crown Prince of Dalaam and one of Ness's friends. Ness must have learned it especially for Smash Bros.! The attack makes a shower of meteors fall onto the stage, damaging any foes it hits. While the attack's in progress, Ness is invincible and can adjust the meteors' trajectory.
In Event Matches[edit]
Solo Events[edit]
- All-Star Battle: Secret: Ness is one of the opponents fought in this event. All opponents are characters that have been unlockable in previous Super Smash Bros. games.
- It's Past Your Bedtime!: As Jigglypuff, the player must make Ness, Bowser Jr. and Toon Link fall asleep at the same time by using Sing.
- Playing Tricks: Ness must bury two Villagers at the same time with Pitfalls.
Co-op Events[edit]
- The Ultimate Battle: Two players select a character and must defeat the entire roster.
- Visiting Onett: Ness and Villager must defeat Kirby, Meta Knight, Fox, Falco, Olimar, and Rosalina & Luma.
Alternate costumes[edit]

| |||||||

|

|

|

|

|

|

|

|
Gallery[edit]
Ness' amiibo.

Ness' unlock notice in Super Smash Bros. for Nintendo 3DS.
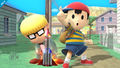
Posing with Jeff.
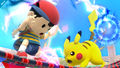
Posing with Pikachu.
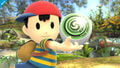
Showing off his yo-yo.
Posing with Toon Link.
Posing next to Mr. Saturn.
Attacking Sheik with PK Thunder.
Using PK Starstorm.
On Battlefield.
On Magicant.
Attacking Starmen.

Using PSI Magnet.
Using PK Fire.


Trivia[edit]
- Ness and Palutena are the only characters in SSB4 with different voice clips for custom moves; in Ness's case, he has a unique voice clip when using PK Freeze.
- Ness's amiibo description on the North American amiibo website is based on his trophy description from Melee.
- Ness's yo-yo in this game reads "SUPER NINTENDO 2014" and "MOTHER", in reference to his console of origin, SSB4's year of release, and his home series.
- Ness's custom special PK Freeze is one of only three custom specials in the game that have a preview image featuring a non-silhouetted character besides the user of the attack (alongside Mega Man's Ice Slasher and Lucas's PK Freeze). This is likely due to the characters being frozen.
- Ness and Jigglypuff are the only original 12 characters to be excluded from newcomer poster art.
- One set of Ness's custom moves reference Lucas's moveset in Brawl (and as later included in Smash 4).
- Super Smash Bros. for Nintendo 3DS is the only game where Ness and Captain Falcon do not have the same availability.
| Fighters in Super Smash Bros. 4 | |
|---|---|
| Veterans | Bowser · Captain Falcon · Charizard · Diddy Kong · Donkey Kong · Dr. Mario · Falco · Fox · Ganondorf · Ike · Jigglypuff · King Dedede · Kirby · Link · Lucario · Lucas · Luigi · Mario · Marth · Meta Knight · Mewtwo · Mr. Game & Watch · Ness · Olimar · Peach · Pikachu · Pit · R.O.B. · Roy · Samus · Sheik · Sonic · Toon Link · Wario · Yoshi · Zelda · Zero Suit Samus |
| Newcomers | Bayonetta · Bowser Jr. · Cloud · Corrin · Dark Pit · Duck Hunt · Greninja · Little Mac · Lucina · Mega Man · Mii Fighter (Mii Brawler · Mii Gunner · Mii Swordfighter) · Pac-Man · Palutena · Robin · Rosalina & Luma · Ryu · Shulk · Villager · Wii Fit Trainer |
|
| |
|---|---|
| Fighters | Ness (SSB · SSBM · SSBB · SSB4 · SSBU) · Lucas (SSBB · SSB4 · SSBU) |
| Assist Trophies | Jeff · Starman |
| Bosses | Porky Statue · Porky |
| Stages | Onett · Fourside · New Pork City · Magicant |
| Items | Mr. Saturn · Franklin Badge · Ramblin' Evil Mushroom |
| Enemies | Devil Car · Starman |
| Other | Boney · Flying Man · Kumatora · Paula · Poo · Rope Snake · Ultimate Chimera |
| Trophies, Stickers and Spirits | Trophies (SSBM · SSBB · SSB4) · Stickers · Spirits |
| Music | Brawl · SSB4 · Ultimate |
| Masterpiece | EarthBound |