Super Smash Bros. 4

Ness (SSB4)/Down tilt

From SmashWiki, the Super Smash Bros. wiki
Jump to navigationJump to search
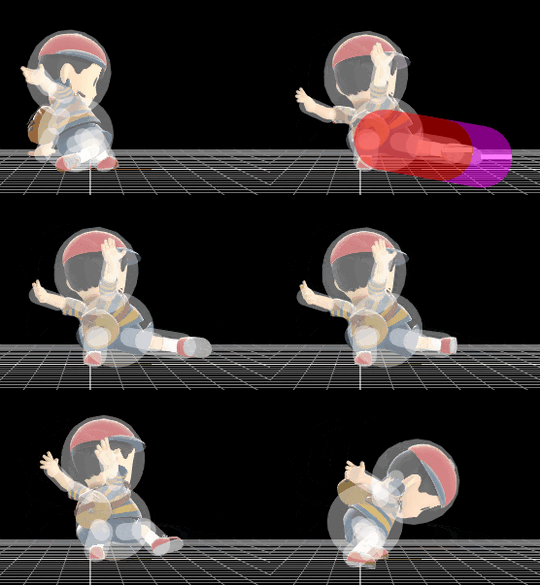
Hitbox visualization showing Ness's down tilt.
Competitive.png This article or section may require competitive expertise.
You can discuss this issue on the talk page or edit this page to improve it.
Data.png This article or section may require additional technical data.
You can discuss this issue on the talk page or edit this page to improve it.

Overview[edit]

The move is very fast, being one of the quickest down tilts in the game and having barely any ending lag. The move is unable to kill even at 999%, but it has a chance to make opponents trip.

Hitboxes[edit]

ID Part Damage SD Angle BK KS FKV Radius Bone Offset SDIx T% Clang Rebound Type Effect G A Sound Direct
0 0 4% 0 AngleIcon0.png 3 20 0 2.5 9 1.8 0.0 0.0 1.0x 0.5x 30% HitboxTableIcon(Clang).png HitboxTableIcon(Rebound).png Foot (type) Normal (effect) HitboxTableIcon(GroundedTrue).png HitboxTableIcon(AerialTrue).png S Kick SpecialsDirect.png
1 0 2% 0 AngleIcon0.png 6 20 0 2.5 9 5.0 0.0 0.0 1.0x 0.5x 30% HitboxTableIcon(Clang).png HitboxTableIcon(Rebound).png Foot (type) Normal (effect) HitboxTableIcon(GroundedTrue).png HitboxTableIcon(AerialTrue).png S Kick SpecialsDirect.png

Timing[edit]

Hitboxes 3-4
Earliest continuable frame 6 (only if another DTilt is inputed)
Animation length 13
FrameIcon(Lag).png FrameIcon(Lag).png FrameIcon(Hitbox).png FrameIcon(Hitbox).png FrameIcon(LagContinuableS).png FrameIcon(LagContinuableE).png FrameIcon(Lag).png FrameIcon(Lag).png FrameIcon(Lag).png FrameIcon(Lag).png FrameIcon(Lag).png FrameIcon(Lag).png FrameIcon(Lag).png
Legend (1 square = 1 frame)
Lag
Lag time
Hitbox
Hitbox
FrameIcon(BlankContinuableS).pngFrameIcon(BlankContinuableE).png
Earliest continuable point