List of spirits (Donkey Kong series): Difference between revisions
From SmashWiki, the Super Smash Bros. wiki
Jump to navigationJump to search
(reverting) |
Capstalker (talk | contribs) |
||
| Line 22: | Line 22: | ||
|★★★★ | |★★★★ | ||
|⬡⬡⬡ | |⬡⬡⬡ | ||
|Power | |[[File:Equipment Icon Power Badge.png|20px|Power]] 4,047—10,119<br>[[File:Equipment Icon Brawn Badge.png|20px|Brawn]] 2,386—5,967<br>[[File:Equipment Icon Protection Badge.png|20px|Protection]] 1,432—3,580 | ||
|Throw Power ↑ | |Throw Power ↑ | ||
|''Donkey Kong'' | |''Donkey Kong'' | ||
| Line 33: | Line 33: | ||
|★★★ | |★★★ | ||
|⬡ | |⬡ | ||
|Power | |[[File:Equipment Icon Power Badge.png|20px|Power]] 2,696—8,132<br>[[File:Equipment Icon Brawn Badge.png|20px|Brawn]] 1,374—4,143<br>[[File:Equipment Icon Protection Badge.png|20px|Protection]] 1,170—3,529 | ||
|Throw Power ↑ | |Throw Power ↑ | ||
|''Donkey Kong Jr.''<br>(Artwork: ''Donkey Kong Jr. Math'') | |''Donkey Kong Jr.''<br>(Artwork: ''Donkey Kong Jr. Math'') | ||
| Line 44: | Line 44: | ||
|★★ | |★★ | ||
|⬡⬡ | |⬡⬡ | ||
|Power | |[[File:Equipment Icon Power Badge.png|20px|Power]] 1,624—6,519<br>[[File:Equipment Icon Brawn Badge.png|20px|Brawn]] 763—3,064<br>[[File:Equipment Icon Protection Badge.png|20px|Protection]] 861—3,455 | ||
|No Effect | |No Effect | ||
|''Donkey Kong 3'' | |''Donkey Kong 3'' | ||
| Line 55: | Line 55: | ||
|★★★ | |★★★ | ||
|⬡⬡⬡ | |⬡⬡⬡ | ||
|Power | |[[File:Equipment Icon Power Badge.png|20px|Power]] 2,918—8,798<br>[[File:Equipment Icon Brawn Badge.png|20px|Brawn]] 1,378—4,155<br>[[File:Equipment Icon Protection Badge.png|20px|Protection]] 1,324—3,992 | ||
|Speed ↓ | |Speed ↓ | ||
|''Donkey Kong Country''<br>(Artwork: ''Donkey Kong Country Returns'') | |''Donkey Kong Country''<br>(Artwork: ''Donkey Kong Country Returns'') | ||
| Line 66: | Line 66: | ||
|★★★ | |★★★ | ||
|⬡⬡⬡ | |⬡⬡⬡ | ||
|Power | |[[File:Equipment Icon Power Badge.png|20px|Power]] 2,526—7,600<br>[[File:Equipment Icon Brawn Badge.png|20px|Brawn]] 1,288—3,876<br>[[File:Equipment Icon Protection Badge.png|20px|Protection]] 1,238—3,724 | ||
|Can Be Enhanced at Lv. 99 | |Can Be Enhanced at Lv. 99 | ||
|''Donkey Kong Country 2: Diddy's Kong Quest''<br/>(Artwork: ''Donkey Kong Country: Tropical Freeze'') | |''Donkey Kong Country 2: Diddy's Kong Quest''<br/>(Artwork: ''Donkey Kong Country: Tropical Freeze'') | ||
| Line 77: | Line 77: | ||
|★★★★ | |★★★★ | ||
|⬡⬡⬡ | |⬡⬡⬡ | ||
|Power | |[[File:Equipment Icon Power Badge.png|20px|Power]] 4,465—11,167<br>[[File:Equipment Icon Brawn Badge.png|20px|Brawn]] 2,212—5,531<br>[[File:Equipment Icon Protection Badge.png|20px|Protection]] 2,001—5,004 | ||
|Thrown Items ↑ | |Thrown Items ↑ | ||
|''Donkey Kong Country 3: Dixie Kong's Double Trouble!'' | |''Donkey Kong Country 3: Dixie Kong's Double Trouble!'' | ||
| Line 88: | Line 88: | ||
|★★ | |★★ | ||
|⬡⬡⬡ | |⬡⬡⬡ | ||
|Power | |[[File:Equipment Icon Power Badge.png|20px|Power]] 1,505—6,023<br>[[File:Equipment Icon Brawn Badge.png|20px|Brawn]] 775—3,102<br>[[File:Equipment Icon Protection Badge.png|20px|Protection]] 730—2,921 | ||
|No Effect | |No Effect | ||
|''Donkey Kong 64'' | |''Donkey Kong 64'' | ||
| Line 99: | Line 99: | ||
|★★ | |★★ | ||
|⬡⬡ | |⬡⬡ | ||
|Power | |[[File:Equipment Icon Power Badge.png|20px|Power]] 1,707—6,851<br>[[File:Equipment Icon Brawn Badge.png|20px|Brawn]] 939—3,768<br>[[File:Equipment Icon Protection Badge.png|20px|Protection]] 768—3,083 | ||
|No Effect | |No Effect | ||
|''Donkey Kong 64'' | |''Donkey Kong 64'' | ||
| Line 110: | Line 110: | ||
|★★★ | |★★★ | ||
|⬡ | |⬡ | ||
|Power | |[[File:Equipment Icon Power Badge.png|20px|Power]] 2,662—8,026<br>[[File:Equipment Icon Brawn Badge.png|20px|Brawn]] 1,024—3,087<br>[[File:Equipment Icon Protection Badge.png|20px|Protection]] 1,536—4,631 | ||
|Speed ↑ | |Speed ↑ | ||
|''Donkey Kong Country''<br>(Artwork: ''Donkey Kong Country Returns'') | |''Donkey Kong Country''<br>(Artwork: ''Donkey Kong Country Returns'') | ||
| Line 121: | Line 121: | ||
|★★ | |★★ | ||
|⬡ | |⬡ | ||
|Power | |[[File:Equipment Icon Power Badge.png|20px|Power]] 2,018—8,078<br>[[File:Equipment Icon Brawn Badge.png|20px|Brawn]] 1,076—4,306<br>[[File:Equipment Icon Protection Badge.png|20px|Protection]] 828—3,315 | ||
|Electric Weakness | |Electric Weakness | ||
|''Donkey Kong Country'' | |''Donkey Kong Country'' | ||
| Line 132: | Line 132: | ||
|★ | |★ | ||
|⬡ | |⬡ | ||
|Power | |[[File:Equipment Icon Power Badge.png|20px|Power]] 956—4,782<br>[[File:Equipment Icon Brawn Badge.png|20px|Brawn]] 631—3,156<br>[[File:Equipment Icon Protection Badge.png|20px|Protection]] 325—1,626 | ||
|No Effect | |No Effect | ||
|''Donkey Kong Country''<br>(Artwork: ''Donkey Kong Barrel Blast'') | |''Donkey Kong Country''<br>(Artwork: ''Donkey Kong Barrel Blast'') | ||
| Line 143: | Line 143: | ||
|★ | |★ | ||
| | | | ||
|Power | |[[File:Equipment Icon Power Badge.png|20px|Power]] 1,208—6,041<br>[[File:Equipment Icon Brawn Badge.png|20px|Brawn]] 767—3,836<br>[[File:Equipment Icon Protection Badge.png|20px|Protection]] 441—2,205 | ||
|No Effect | |No Effect | ||
|''Donkey Kong Country''<br>(Artwork: ''DK: Jungle Climber'') | |''Donkey Kong Country''<br>(Artwork: ''DK: Jungle Climber'') | ||
| Line 154: | Line 154: | ||
|★★ | |★★ | ||
| | | | ||
|Power | |[[File:Equipment Icon Power Badge.png|20px|Power]] 1,926—7,742<br>[[File:Equipment Icon Brawn Badge.png|20px|Brawn]] 1,176—4,728<br>[[File:Equipment Icon Protection Badge.png|20px|Protection]] 676—2,717 | ||
|Weight ↓ | |Weight ↓ | ||
|''Donkey Kong Country'' | |''Donkey Kong Country'' | ||
| Line 165: | Line 165: | ||
|★★★★ | |★★★★ | ||
|⬡⬡ | |⬡⬡ | ||
|Power | |[[File:Equipment Icon Power Badge.png|20px|Power]] 4,232—10,583<br>[[File:Equipment Icon Brawn Badge.png|20px|Brawn]] 2,243—5,609<br>[[File:Equipment Icon Protection Badge.png|20px|Protection]] 1,989—4,974 | ||
|No Effect | |No Effect | ||
|''Donkey Kong Country 2: Diddy's Kong Quest'' | |''Donkey Kong Country 2: Diddy's Kong Quest'' | ||
| Line 176: | Line 176: | ||
|★★★ | |★★★ | ||
|⬡⬡⬡ | |⬡⬡⬡ | ||
|Power | |[[File:Equipment Icon Power Badge.png|20px|Power]] 2,933—8,826<br>[[File:Equipment Icon Brawn Badge.png|20px|Brawn]] 1,584—4,766<br>[[File:Equipment Icon Protection Badge.png|20px|Protection]] 1,349—4,060 | ||
|No Effect | |No Effect | ||
|''Donkey Kong Country 3: Dixie Kong's Double Trouble!'' | |''Donkey Kong Country 3: Dixie Kong's Double Trouble!'' | ||
| Line 187: | Line 187: | ||
|★ | |★ | ||
|⬡⬡⬡ | |⬡⬡⬡ | ||
|Power | |[[File:Equipment Icon Power Badge.png|20px|Power]] 990—4,952<br>[[File:Equipment Icon Brawn Badge.png|20px|Brawn]] 314—1,571<br>[[File:Equipment Icon Protection Badge.png|20px|Protection]] 638—3,191 | ||
|Fire Weakness | |Fire Weakness | ||
|''Donkey Kong Country Returns'' | |''Donkey Kong Country Returns'' | ||
| Line 198: | Line 198: | ||
|★ | |★ | ||
|⬡ | |⬡ | ||
|Power | |[[File:Equipment Icon Power Badge.png|20px|Power]] 959—4,801<br>[[File:Equipment Icon Brawn Badge.png|20px|Brawn]] 516—2,582<br>[[File:Equipment Icon Protection Badge.png|20px|Protection]] 389—1,948 | ||
|Weight ↑ | |Weight ↑ | ||
|''Donkey Kong Country: Tropical Freeze'' | |''Donkey Kong Country: Tropical Freeze'' | ||
| Line 209: | Line 209: | ||
|★ | |★ | ||
|⬡ | |⬡ | ||
|Power | |[[File:Equipment Icon Power Badge.png|20px|Power]] 858—4,300<br>[[File:Equipment Icon Brawn Badge.png|20px|Brawn]] 409—2,049<br>[[File:Equipment Icon Protection Badge.png|20px|Protection]] 401—2,008 | ||
|Jump ↑ | |Jump ↑ | ||
|''Donkey Kong Barrel Blast'' | |''Donkey Kong Barrel Blast'' | ||
| Line 220: | Line 220: | ||
|★★★ | |★★★ | ||
|⬡ | |⬡ | ||
|Power | |[[File:Equipment Icon Power Badge.png|20px|Power]] 2,643—7,970<br>[[File:Equipment Icon Brawn Badge.png|20px|Brawn]] 1,385—4,177<br>[[File:Equipment Icon Protection Badge.png|20px|Protection]] 1,157—3,487 | ||
|Fist Attack ↑ | |Fist Attack ↑ | ||
|''Donkey Kong Jungle Beat'' | |''Donkey Kong Jungle Beat'' | ||
| Line 231: | Line 231: | ||
|★ | |★ | ||
|⬡ | |⬡ | ||
|Power | |[[File:Equipment Icon Power Badge.png|20px|Power]] 1,052—5,265<br>[[File:Equipment Icon Brawn Badge.png|20px|Brawn]] 631—3,159<br>[[File:Equipment Icon Protection Badge.png|20px|Protection]] 421—2,106 | ||
|No Effect | |No Effect | ||
|''Donkey Kong Jungle Beat'' | |''Donkey Kong Jungle Beat'' | ||
Revision as of 23:54, January 31, 2020
The following is the list of the Spirits from the Donkey Kong series in Super Smash Bros. Ultimate.
Primary Spirits
| No. | Image | Name | Type | Class | Slot | Stats | Ability | Origin Game | Acquisition |
|---|---|---|---|---|---|---|---|---|---|
| 137 | Donkey Kong & Lady | ★★★★ | ⬡⬡⬡ | Throw Power ↑ | Donkey Kong | •Battle via Spirit Board •Purchase from the Vault Shop for 15,000G | |||
| 138 | Donkey Kong Jr. | ★★★ | ⬡ | Throw Power ↑ | Donkey Kong Jr. (Artwork: Donkey Kong Jr. Math) |
•Battle via World of Light (The Light Realm) •Battle via Spirit Board •Purchase from the Vault Shop for 6000G | |||
| 139 | Stanley | ★★ | ⬡⬡ | No Effect | Donkey Kong 3 | •Battle via Spirit Board •Purchase from the Vault Shop for 1000G | |||
| 140 | Cranky Kong | ★★★ | ⬡⬡⬡ | Speed ↓ | Donkey Kong Country (Artwork: Donkey Kong Country Returns) |
•Summon with cores from Cyrus & Reese and Wrinkly Kong •Battle via World of Light (DK Island) •Purchase from the Vault Shop for 6000G (unlocked after obtaining spirit once) | |||
| 145 | Dixie Kong | ★★★ | ⬡⬡⬡ | Can Be Enhanced at Lv. 99 | Donkey Kong Country 2: Diddy's Kong Quest (Artwork: Donkey Kong Country: Tropical Freeze) |
•Summon with cores from Tiny Kong and Candy Kong •Battle via Spirit Board (unlocked after obtaining spirit once) •Purchase from the Vault Shop for 6000G (unlocked after obtaining spirit once) | |||
| 146 | Dixie Kong & Kiddy Kong | ★★★★ | ⬡⬡⬡ | Thrown Items ↑ | Donkey Kong Country 3: Dixie Kong's Double Trouble! | •Enhance the Dixie Kong spirit | |||
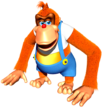
| 147 | Lanky Kong | ★★ | ⬡⬡⬡ | No Effect | Donkey Kong 64 | •Battle via Spirit Board •Purchase from the Vault Shop for 1000G | |||
| 149 | Chunky Kong | ★★ | ⬡⬡ | No Effect | Donkey Kong 64 | •Battle via Spirit Board •Purchase from the Vault Shop for 1000G | |||
| 150 | Rambi | ★★★ | ⬡ | Speed ↑ | Donkey Kong Country (Artwork: Donkey Kong Country Returns) |
•Battle via World of Light (Forest Hill) •Battle via Spirit Board •Purchase from the Vault Shop for 6000G | |||
| 151 | Enguarde | ★★ | ⬡ | Electric Weakness | Donkey Kong Country | •Battle via World of Light (DK Island) •Battle via Spirit Board •Purchase from the Vault Shop for 1000G | |||
| 159 | Kritter | ★ | ⬡ | No Effect | Donkey Kong Country (Artwork: Donkey Kong Barrel Blast) |
•Battle via World of Light (DK Island) •Battle via Spirit Board •Purchase from the Vault Shop for 500G | |||
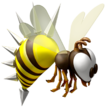
| 160 | Zinger | ★ | No Effect | Donkey Kong Country (Artwork: DK: Jungle Climber) |
•Battle via World of Light (DK Island) •Battle via Spirit Board •Purchase from the Vault Shop for 500G | ||||
| 161 | Klaptrap | ★★ | Weight ↓ | Donkey Kong Country | •Complete Challenge (Classic Mode): As King K. Rool, reach the goal in Bonus Game within 45 seconds. •Battle via Spirit Board (unlocked after obtaining spirit once) •Purchase from the Vault Shop for 1000G (unlocked after obtaining spirit once) | ||||
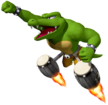
| 162 | Kaptain K. Rool | ★★★★ | ⬡⬡ | No Effect | Donkey Kong Country 2: Diddy's Kong Quest | •Battle via World of Light (The Final Battle - Dark) •Battle via Spirit Board •Purchase from the Vault Shop for 15,000G | |||
| 163 | Baron K. Roolenstein | ★★★ | ⬡⬡⬡ | No Effect | Donkey Kong Country 3: Dixie Kong's Double Trouble! | •Summon with cores from Dr. Crygor, Kritter, and The Creature & Flea Man | |||
| 165 | 
|
Tiki Tak Tribe | ★ | ⬡⬡⬡ | Fire Weakness | Donkey Kong Country Returns | •Battle via World of Light (The Light Realm) •Battle via Spirit Board •Purchase from the Vault Shop for 500G | ||
| 166 | Lord Fredrik | ★ | ⬡ | Weight ↑ | Donkey Kong Country: Tropical Freeze | •Battle via Spirit Board •Purchase from the Vault Shop for 500G | |||
| 167 | Kip | ★ | ⬡ | Jump ↑ | Donkey Kong Barrel Blast | •Purchase at Funky Kong's Shack for 500SP •Battle via Spirit Board | |||
| 170 | Karate Kong | ★★★ | ⬡ | Fist Attack ↑ | Donkey Kong Jungle Beat | •Purchase at Anna's Emporium for 4000SP •Battle via Spirit Board | |||
| 171 | Ninja Kong | ★ | ⬡ | No Effect | Donkey Kong Jungle Beat | •Battle via Spirit Board •Purchase from the Vault Shop for 500G |
Support Spirits
| No. | Image | Name | Class | Cost | Ability | Origin Game | Acquisition |
|---|---|---|---|---|---|---|---|
| 142 | Candy Kong | ★★ | ⬢ | Critical-Health Stats ↑ | Donkey Kong Country (Artwork: DK: Jungle Climber) |
•Battle via World of Light (DK Island) •Battle via Spirit Board (unlocked after obtaining spirit once) •Purchase from the Vault Shop for 1000G (unlocked after obtaining spirit once) | |
| 143 | Swanky Kong | ★ | ⬢ | Banana Gun Equipped | Donkey Kong Country 2: Diddy's Kong Quest | •Battle via Spirit Board •Purchase from the Vault Shop for 500G | |
| 144 | Wrinkly Kong | ★★ | ⬢ | Trade-Off Defense ↑ | Donkey Kong Country 2: Diddy's Kong Quest (Artwork: DK: Jungle Climber) |
•Treasure Chest in World of Light (The Light Realm) •Battle via Spirit Board (unlocked after obtaining spirit once) •Purchase from the Vault Shop for 1000G (unlocked after obtaining spirit once) | |
| 148 | Tiny Kong | ★★★ | ⬢ | Easier Dodging | Donkey Kong 64 | •Battle via World of Light (Sacred Land) •Battle via Spirit Board •Purchase from the Vault Shop for 6000G | |
| 152 | Squawks | ★★ | ⬢⬢ | Fog Immunity | Donkey Kong Country (Artwork: Donkey Kong Country Returns) |
•Battle via World of Light (The Light Realm) •Battle via Spirit Board •Purchase from the Vault Shop for 1000G | |
| 153 | Expresso | ★ | ⬢ | Trade-Off Speed ↑ | Donkey Kong Country | •Battle via World of Light (The Light Realm) •Battle via Spirit Board •Purchase from the Vault Shop for 500G | |
| 154 | Winky | ★ | ⬢ | Foot Attack ↑ | Donkey Kong Country | •Battle via Spirit Board •Purchase from the Vault Shop for 500G | |
| 155 | Squitter | ★★ | ⬢⬢ | Sticky-Floor Immunity | Donkey Kong Country 2: Diddy's Kong Quest | •Battle via World of Light (The Light Realm) •Battle via Spirit Board •Purchase from the Vault Shop for 1000G | |
| 156 | Rattly | ★★ | ⬢ | Jump ↑ | Donkey Kong Country 2: Diddy's Kong Quest | •Battle via Spirit Board •Purchase from the Vault Shop for 1000G | |
| 157 | Ellie | ★ | ⬢ | Water & Ice Attack ↑ | Donkey Kong Country 3: Dixie Kong's Double Trouble! | •Battle via World of Light (The Light Realm) •Battle via Spirit Board •Purchase from the Vault Shop for 500G | |
| 158 | Professor Chops | ★ | ⬢ | Stamina ↑ | Donkey Kong Country Returns | •Battle via World of Light (The Light Realm) •Battle via Spirit Board •Purchase from the Vault Shop for 500G | |
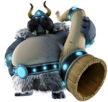
| 164 | Blast-o-Matic | ★★★★ | ⬢ | Giant Killer | Donkey Kong 64 (Artwork: Super Smash Bros. Ultimate) |
•Purchase at Sheldon's Place for 10,000SP | |
| 168 | Kalypso | ★ | ⬢ | Rocket Belt Equipped | Donkey Kong Barrel Blast | •Battle via World of Light (The Light Realm) •Battle via Spirit Board •Purchase from the Vault Shop for 500G | |
| 169 | Donkey Kong & Bongos | ★★ | ⬢ | Perfect-Shield Reflect | Donkey Konga | •Purchase at Timmy and Tommy's for 1000SP |
Master Spirit
| No. | Image | Name | Facility | Origin Game | Acquisition | Music |
|---|---|---|---|---|---|---|
| 141 | Funky Kong | Shopping (Funky Kong's Shack) | Donkey Kong Country (Artwork: Donkey Kong Country: Tropical Freeze) |
•Battle via World of Light (DK Island) | Funky's Fugue |
Fighter Spirits
| No. | Image | Alternate Artwork | Name | Origin Game | Acquisition |
|---|---|---|---|---|---|
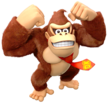
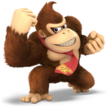
| 134 | Donkey Kong | Donkey Kong (Artwork: Donkey Kong Country: Tropical Freeze) |
•Complete Classic Mode with Donkey Kong •Purchase from the Vault Shop for 300G | ||
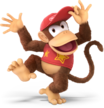
| 135 | Diddy Kong | Donkey Kong Country (Artwork: Donkey Kong Country: Tropical Freeze) |
•Complete Classic Mode with Diddy Kong •Purchase from the Vault Shop for 300G (after unlocking Diddy Kong) | ||
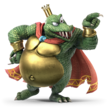
| 136 | King K. Rool | Donkey Kong Country (Artwork: DK: Jungle Climber) |
•Complete Classic Mode with King K. Rool •Purchase from the Vault Shop for 300G (after unlocking King K. Rool) |
Spirit Battles
| Spirit | Battle parameters | Inspiration | ||||||||
|---|---|---|---|---|---|---|---|---|---|---|
| No. | Image | Name | Enemy Fighter(s) | Type | Power | Stage | Rules | Conditions | Music | |
| 137 | Donkey Kong & Lady | •Giant Donkey Kong •Ally: Peach |
13,500 | 75m | •Item Tidal Wave | •You lose if your CPU ally is KO'd •The enemy has super armor and is hard to launch or make flinch •Timed Stamina battle |
Donkey Kong / Donkey Kong Jr. Medley |
| ||
| 138 | Donkey Kong Jr. | •Donkey Kong •Giant Donkey Kong |
9,000 | Kongo Jungle (hazards off) | N/A | •Defeat the main fighter to win •The enemy's throws have increased power •Reinforcements will appear during the battle |
Donkey Kong / Donkey Kong Jr. Medley |
| ||
| 139 | Stanley | •Villager |
3,700 | 75m | N/A | •The enemy starts the battle with a Gust Bellows | Donkey Kong / Donkey Kong Jr. Medley |
| ||
| 140 | Cranky Kong | •Donkey Kong |
9,700 | Jungle Japes | •Hazard: Slumber Floor | •The floor is sleep-inducing | Opening - Donkey Kong |
| ||
| 141 | Funky Kong | •Captain Falcon •Diddy Kong •Donkey Kong |
9,000 | Kongo Jungle | •Item: Bullet Bill | •The enemy is easily distracted by items | Funky's Fugue |
| ||
| 142 | Candy Kong | •Bayonetta |
3,800 | Kongo Falls | •Item: Bananas | •The enemy starts the battle with a Banana Gun •The enemy has increased move speed |
Mangrove Cove |
| ||
| 143 | Swanky Kong | •Donkey Kong |
1,700 | Kongo Jungle | •Item: Beastball | •The enemy is easily distracted by items | Funky's Fugue |
| ||
| 144 | Wrinkly Kong | •Clear Donkey Kong |
3,500 | Luigi's Mansion | •Hazard: High Gravity •Hazard: Low Gravity |
•Your jumping power decreases when the enemy's at high damage •The enemy is less affected by gravity •The enemy starts with damage but is more powerful |
The Map Page / Bonus Level (Remix) |
| ||
| 145 | Dixie Kong | •Isabelle •Diddy Kong |
9,100 | Jungle Japes | •Item: Banana Peel | •The enemy is easily distracted by items | Swinger Flinger |
| ||
| 147 | Lanky Kong | •Diddy Kong Team |
3,900 | Kongo Falls | •Item: Bananas | •The enemy is easily distracted by items •Defeat an army of fighters |
DK Rap |
| ||
| 148 | Tiny Kong | •Diddy Kong |
9,500 | Jungle Japes | •Tiny •Hazard: Low Gravity •Hazard: Heavy Wind |
•Dangerously high winds are in effect •Timed battle •Gravity is reduced |
DK Rap |
| ||
| 149 | Chunky Kong | •Donkey Kong |
3,800 | Jungle Japes | N/A | •The enemy's punches and elbow strikes have increased power | DK Rap |
| ||
| 150 | Rambi | •Donkey Kong |
9,100 | Kongo Falls (Ω form) | N/A | •The enemy can deal damage by dashing into you | Jungle Level (Brawl) |
| ||
| 151 | Enguarde | •Corrin |
3,600 | Great Bay | •Buoyancy Reduced | •You can't swim •The enemy's dash attacks have increased power •The enemy favors dash attacks |
Ice Cave Chant |
| ||
| 152 | Squawks | •Duck Hunt |
4,400 | The Great Cave Offensive | •Hazard: Fog | •The stage is covered in fog •Timed battle |
Ice Cave Chant |
| ||
| 153 | Expresso | •Falco |
1,800 | Green Hill Zone | •Slippery Stage | •The stage's platforms are very slippery •The enemy has increased move speed •The enemy falls slowly |
The Map Page / Bonus Level (Remix) |
| ||
| 154 | Winky | •Greninja |
1,700 | Mushroom Kingdom U | N/A | •The enemy deals damage when falling •The enemy has increased jump power |
Jungle Level (Brawl) |
| ||
| 155 | Squitter | •Diddy Kong |
3,600 | Jungle Japes | •Move Speed ↓ | •You have reduced move speed | Ice Cave Chant |
| ||
| 156 | Rattly | •Yoshi |
3,400 | Kongo Jungle | N/A | •The enemy loves to jump •The enemy has increased jump power |
Snakey Chantey |
| ||
| 157 | Ellie | •Squirtle Team |
2,100 | Jungle Japes | N/A | •The enemy favors neutral specials | Snakey Chantey |
| ||
| 158 | Professor Chops | •Donkey Kong |
1,700 | Kongo Falls | •Item: Banana Peel | •The enemy can instantly escape from movement-disabling moves | Jungle Hijinxs |
| ||
| 159 | Kritter | •King K. Rool |
1,700 | Kongo Jungle | •Defense ↑ | •The enemy has increased defense •The enemy starts the battle with a Rocket Belt |
Jungle Level (64) |
| ||
| 160 | Zinger | •Pikachu |
1,800 | The Great Cave Offensive (Ω form) | •Item: Unira | •The enemy's throwing-type items have increased power | Stickerbush Symphony |
| ||
| 161 | Klaptrap | •Tiny King K. Rool |
4,000 | Kongo Jungle | •Assist Trophy Enemies (Klaptrap) | •Hostile assist trophies will appear | Stickerbush Symphony |
| ||
| 162 | Kaptain K. Rool | •King K. Rool |
13,500 | Halberd | •Invisibility | •The enemy's neutral special has increased power •Stamina battle •The enemy is invisible after a little while |
Crocodile Cacophony |
| ||
| 165 | Tiki Tak Tribe | •Diddy Kong Team (x4) ( |
1,700 | Kongo Falls | N/A | •Take your strongest team into this no-frills battle | Jungle Hijinxs |
| ||
| 166 | Lord Fredrik | •King K. Rool |
2,300 | Summit (Battlefield form) | •Hazard: Ice Floor | •The floor is frozen | Swinger Flinger |
| ||
| 167 | Kip | •Tiny Yoshi Team |
1,800 | Yoshi's Story | N/A | •The enemy starts the battle with a Rocket Belt | Boss 2 - DK: Jungle Climber |
| ||
| 168 | Kalypso | •Wendy Team |
1,800 | Kongo Falls | N/A | •The enemy starts the battle with a Rocket Belt •The enemy has increased move speed |
Boss 2 - DK: Jungle Climber |
| ||
| 170 | Karate Kong | •Ryu |
9,500 | Kongo Falls (Ω form) | •Hard to Launch •Hazard: High Gravity |
•The enemy's physical attacks have increased power •Timed Stamina battle •All fighters have reduced jump ability |
Battle for Storm Hill |
| ||
| 171 | Ninja Kong | •Donkey Kong |
1,900 | Distant Planet (Battlefield form) | N/A | •The enemy's kicks and knee strikes have increased power •The enemy favors side specials |
Battle for Storm Hill |
| ||
Series Order
| Number | Name | Series |
|---|---|---|
| 134 | Donkey Kong | Donkey Kong Series |
| 135 | Diddy Kong | |
| 136 | King K. Rool | |
| 137 | Donkey Kong & Lady | |
| 138 | Donkey Kong Jr. | |
| 139 | Stanley | |
| 140 | Cranky Kong | |
| 141 | Funky Kong | |
| 142 | Candy Kong | |
| 143 | Swanky Kong | |
| 144 | Wrinkly Kong | |
| 145 | Dixie Kong | |
| 146 | Dixie Kong & Kiddy Kong | |
| 147 | Lanky Kong | |
| 148 | Tiny Kong | |
| 149 | Chunky Kong | |
| 150 | Rambi | |
| 151 | Enguarde | |
| 152 | Squawks | |
| 153 | Expresso | |
| 154 | Winky | |
| 155 | Squitter | |
| 156 | Rattly | |
| 157 | Ellie | |
| 158 | Professor Chops | |
| 159 | Kritter | |
| 160 | Zinger | |
| 161 | Klaptrap | |
| 162 | Kaptain K. Rool | |
| 163 | Baron K. Roolenstein | |
| 164 | Blast-o-Matic | |
| 165 | Tiki Tak Tribe | |
| 166 | Lord Fredrik | |
| 167 | Kip | Donkey Kong: Barrel Blast Donkey Kong: Jet Race |
| 168 | Kalypso | |
| 169 | Donkey Kong & Bongos | Donkey Kong Jungle Beat |
| 170 | Karate Kong | |
| 171 | Ninja Kong |
Trivia
- Prior to the 1.1.0 update, Dixie Kong (as well as the Dixie Kong and Kiddy Kong spirit) was ordered before Swanky Kong and Wrinkly Kong.
- Due to their appearances as spirits, Super Smash Bros. Ultimate is the first appearance of Kiddy Kong and Swanky Kong since the Game Boy Advance version of Donkey Kong Country 3, as well as Tiny Kong in her debut design.
- The Donkey Kong & Bongos' game of origin is listed as "Donkey Kong Jungle Beat", despite the artwork and specific pairing actually coming from the Donkey Konga series.
| Spirits | |
|---|---|
| by categories | Primary spirit (Enhanceable spirit) · Support spirit · Master spirit · Fighter spirit · (All spirits) · Summon · DLC Spirits (DLC changes) |
| by series | Super Mario · Donkey Kong · The Legend of Zelda · Metroid · Yoshi · Kirby · Star Fox · Pokémon · EarthBound · F-Zero · Ice Climber · Fire Emblem · Game & Watch · Kid Icarus · Wario · Metal Gear · Sonic the Hedgehog · Pikmin · R.O.B. · Animal Crossing · Mega Man · Wii Fit · Punch-Out!! · Pac-Man · Xenoblade Chronicles · Duck Hunt · Street Fighter · Final Fantasy · Bayonetta · Splatoon · Castlevania · Persona · Dragon Quest · Banjo-Kazooie · Fatal Fury · ARMS · Minecraft · Tekken · Kingdom Hearts · Mii · Super Smash Bros. · Others |
|
| |
|---|---|
| Fighters | Donkey Kong (SSB · SSBM · SSBB · SSB4 · SSBU) · Diddy Kong (SSBB · SSB4 · SSBU) · King K. Rool (SSBU) |
| Assist Trophy | Klaptrap |
| Boss | Giant Donkey Kong |
| Stages | Kongo Jungle · Kongo Falls · Jungle Japes · Rumble Falls · 75m · Jungle Hijinxs |
| Items | Hammer · Barrel Cannon · Peanut · Spring |
| Enemies | Kritter · Tiki Buzz |
| Other | Dixie Kong · DK Barrel · DK Island · Pauline · Zinger |
| Trophies, Stickers and Spirits | Trophies (SSBM · SSBB · SSB4) · Stickers · Spirits |
| Music | Brawl · SSB4 · Ultimate |
| Masterpiece | Donkey Kong |
| Related universe | Mario |

