Unused content (SSBU)/Spirit Battles: Difference between revisions
Splanthony (talk | contribs) (Added category) |
m (Why are these here? No data and they were added after the initial lists) |
||
| (10 intermediate revisions by 6 users not shown) | |||
| Line 1: | Line 1: | ||
There are 214 [[ | There are 214 [[Spirit]] Battles that exist in the files of ''Super Smash Bros. Ultimate'', but go unused. | ||
==Unavailable battles== | ==Unavailable battles== | ||
| Line 13: | Line 13: | ||
{|class="wikitable sortable" | {|class="wikitable sortable" | ||
|- | |- | ||
! # | |||
! Image | ! Image | ||
! Name | ! Name | ||
| Line 33: | Line 34: | ||
! CPU Lv. | ! CPU Lv. | ||
|- | |- | ||
| | |18 | ||
|Super Mushroom | |{{SpiritTableName|Super Mushroom}} | ||
|4000 | |4000 | ||
|Stock: 1 | |Stock: 1 | ||
| Line 48: | Line 49: | ||
|Giant | |Giant | ||
| | | | ||
| | |{{SpiritType|Attack}} | ||
|[[File:Equipment Icon Brawn Badge.png|20px]] 2000<br>[[File:Equipment Icon Protection Badge.png|20px]] 1300 | |[[File:Equipment Icon Brawn Badge.png|20px]] 2000<br>[[File:Equipment Icon Protection Badge.png|20px]] 1300 | ||
|Metal | |Metal | ||
|47 | |47 | ||
|- | |- | ||
| | |19 | ||
|Fire Flower | |{{SpiritTableName|Fire Flower}} | ||
|1900 | |1900 | ||
|Stock: 1 | |Stock: 1 | ||
| Line 68: | Line 69: | ||
| | | | ||
|•Fire Flower Equipped | |•Fire Flower Equipped | ||
| | |{{SpiritType|Attack}} | ||
|[[File:Equipment Icon Brawn Badge.png|20px]] 1500<br>[[File:Equipment Icon Protection Badge.png|20px]] 1000 | |[[File:Equipment Icon Brawn Badge.png|20px]] 1500<br>[[File:Equipment Icon Protection Badge.png|20px]] 1000 | ||
|Normal | |Normal | ||
|41 | |41 | ||
|- | |- | ||
| | |24 | ||
| | |{{SpiritTableName|Gold Mario}} | ||
| | |13700 | ||
|Stock: 1 | |Stock: 1 | ||
|{{SSBU|Battlefield}} | |{{SSBU|Battlefield}} | ||
|Normal | |Normal | ||
| | | | ||
|" | |"normal", Low | ||
| | | | ||
| | | | ||
| Line 88: | Line 89: | ||
| | | | ||
| | | | ||
|[[File: | |{{SpiritType|Attack}} | ||
|[[File:Equipment Icon Brawn Badge.png|20px]] 6500<br>[[File:Equipment Icon Protection Badge.png|20px]] 6000 | |||
|Normal | |||
|99 | |||
|- | |||
|28 | |||
|{{SpiritTableName|Cat Princess Peach}} | |||
|9400 | |||
|Stock: 1 | |||
|[[Golden Plains]] | |||
|Battlefield | |||
| | |||
|"normal", Low | |||
| | |||
|•Air Attack ↑ | |||
|{{SSBU|Peach}} | |||
|6 | |||
| | |||
|Tail | |||
|•Move Speed ↑<br>•Move Speed ↑<br>•Foot Attack ↑ | |||
|{{SpiritType|Shield}} | |||
|[[File:Equipment Icon Brawn Badge.png|20px]] 4000<br>[[File:Equipment Icon Protection Badge.png|20px]] 3500 | |[[File:Equipment Icon Brawn Badge.png|20px]] 4000<br>[[File:Equipment Icon Protection Badge.png|20px]] 3500 | ||
|Normal | |Normal | ||
|74 | |74 | ||
|- | |- | ||
| | |32 | ||
| | |{{SpiritTableName|Captain Toad}} | ||
| | |9500 | ||
|Stock: 1 | |Stock: 1 | ||
| | |{{SSBU|Battlefield}} | ||
|Normal | |Normal | ||
| | | | ||
|" | |"normal", Low | ||
| | |||
| | | | ||
|{{SSBU|Mario}} | |||
|{{SSBU| | |||
|1 | |1 | ||
| | | | ||
| | | | ||
| | | | ||
| | |{{SpiritType|Grab}} | ||
|[[File:Equipment Icon Brawn Badge.png|20px]] | |[[File:Equipment Icon Brawn Badge.png|20px]] 4000<br>[[File:Equipment Icon Protection Badge.png|20px]] 3500 | ||
|Normal | |Normal | ||
| | |74 | ||
|- | |- | ||
| | |42 | ||
|Banzai Bill | |{{SpiritTableName|Banzai Bill}} | ||
|3700 | |3700 | ||
|Stock: 1 | |Stock: 1 | ||
| Line 128: | Line 149: | ||
| | | | ||
| | | | ||
| | |{{SpiritType|Attack}} | ||
|[[File:Equipment Icon Brawn Badge.png|20px]] 2000<br>[[File:Equipment Icon Protection Badge.png|20px]] 1300 | |[[File:Equipment Icon Brawn Badge.png|20px]] 2000<br>[[File:Equipment Icon Protection Badge.png|20px]] 1300 | ||
|Normal | |Normal | ||
|47 | |47 | ||
|- | |- | ||
| | |45 | ||
|Birdo | |{{SpiritTableName|Birdo}} | ||
|9300 | |9300 | ||
|Stock: 1 | |Stock: 1 | ||
| Line 148: | Line 169: | ||
| | | | ||
| | | | ||
| | |{{SpiritType|Grab}} | ||
|[[File:Equipment Icon Brawn Badge.png|20px]] 4000<br>[[File:Equipment Icon Protection Badge.png|20px]] 3500 | |[[File:Equipment Icon Brawn Badge.png|20px]] 4000<br>[[File:Equipment Icon Protection Badge.png|20px]] 3500 | ||
|Normal | |Normal | ||
|74 | |74 | ||
|- | |- | ||
| | |49 | ||
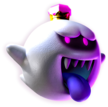
| | |{{SpiritTableName|King Boo}} | ||
| | |3800 | ||
|Stock: 1 | |Stock: 1 | ||
|{{SSBU|Battlefield}} | |{{SSBU|Battlefield}} | ||
|Normal | |Normal | ||
| | | | ||
|" | |"normal2", Low | ||
| | | | ||
| | | | ||
| Line 168: | Line 189: | ||
| | | | ||
| | | | ||
| | |{{SpiritType|Shield}} | ||
|[[File:Equipment Icon Brawn Badge.png|20px]] | |[[File:Equipment Icon Brawn Badge.png|20px]] 2000<br>[[File:Equipment Icon Protection Badge.png|20px]] 1300 | ||
|Normal | |Normal | ||
| | |47 | ||
|- | |- | ||
| | |52 | ||
| | |{{SpiritTableName|Thwomp}} | ||
| | |3500 | ||
|Stock: 1 | |Stock: 1 | ||
| | |[[Delfino Plaza]] | ||
|Normal | |Normal | ||
| | | | ||
|"normal3", Low | |"normal3", Low | ||
| | | | ||
| | |•Air Attack ↑ | ||
|{{SSBU| | |{{SSBU|Bowser}} | ||
|1 | |1 | ||
| | | | ||
| | | | ||
| | |•Instadrop<br>•Jump ↑<br>•Jump ↑ | ||
| | |{{SpiritType|Attack}} | ||
|[[File:Equipment Icon Brawn Badge.png|20px]] 2000<br>[[File:Equipment Icon Protection Badge.png|20px]] 1300 | |[[File:Equipment Icon Brawn Badge.png|20px]] 2000<br>[[File:Equipment Icon Protection Badge.png|20px]] 1300 | ||
|Normal | |Normal | ||
|47 | |47 | ||
|- | |- | ||
| | |54 | ||
| | |{{SpiritTableName|Petey Piranha}} | ||
| | |9300 | ||
|Stock: 1 | |Stock: 1 | ||
|{{SSBU|Battlefield}} | |{{SSBU|Battlefield}} | ||
| Line 208: | Line 229: | ||
| | | | ||
| | | | ||
| | |{{SpiritType|Attack}} | ||
|[[File:Equipment Icon Brawn Badge.png|20px]] | |[[File:Equipment Icon Brawn Badge.png|20px]] 4000<br>[[File:Equipment Icon Protection Badge.png|20px]] 3500 | ||
|Normal | |Normal | ||
| | |74 | ||
|- | |- | ||
| | |56 | ||
| | |{{SpiritTableName|Boom Boom & Pom Pom}} | ||
| | |9100 | ||
|Stock: 1 | |Stock: 1 | ||
|{{SSBU|Battlefield}} | |{{SSBU|Battlefield}} | ||
|Normal | |Normal | ||
| | | | ||
|" | |"normal2", Low | ||
| | | | ||
| | | | ||
| Line 228: | Line 249: | ||
| | | | ||
| | | | ||
| | |{{SpiritType|Attack}} | ||
|[[File:Equipment Icon Brawn Badge.png|20px]] 4000<br>[[File:Equipment Icon Protection Badge.png|20px]] 3500 | |[[File:Equipment Icon Brawn Badge.png|20px]] 4000<br>[[File:Equipment Icon Protection Badge.png|20px]] 3500 | ||
|Normal | |Normal | ||
|74 | |74 | ||
|- | |- | ||
| | |64 | ||
| | |{{SpiritTableName|Nabbit}} | ||
| | |3600 | ||
|Stock: 1 | |Stock: 1 | ||
| | |{{SSBU|Battlefield}} | ||
| | |Normal | ||
| | | | ||
|" | |"normal3", Low | ||
| | | | ||
| | | | ||
| | |{{SSBU|Mario}} | ||
| | |1 | ||
| | | | ||
|[[File:Equipment Icon Brawn Badge.png|20px]] | | | ||
| | |||
|{{SpiritType|Grab}} | |||
|[[File:Equipment Icon Brawn Badge.png|20px]] 2000<br>[[File:Equipment Icon Protection Badge.png|20px]] 1300 | |||
|Normal | |Normal | ||
| | |47 | ||
|- | |- | ||
| | |68 | ||
|{{SpiritTableName|F.L.U.D.D.}} | |||
|3800 | |3800 | ||
|Stock: 1 | |Stock: 1 | ||
| | |{{SSBU|Battlefield}} | ||
| | |Normal | ||
| | | | ||
|" | |"normal3", Low | ||
| | | | ||
| | | | ||
|{{SSBU| | |{{SSBU|Mario}} | ||
|1 | |1 | ||
| | | | ||
| | | | ||
| | | | ||
| | |{{SpiritType|Grab}} | ||
|[[File:Equipment Icon Brawn Badge.png|20px]] 2000<br>[[File:Equipment Icon Protection Badge.png|20px]] 1300 | |[[File:Equipment Icon Brawn Badge.png|20px]] 2000<br>[[File:Equipment Icon Protection Badge.png|20px]] 1300 | ||
|Normal | |Normal | ||
|47 | |47 | ||
|- | |- | ||
| | |76 | ||
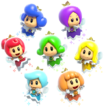
| | |{{SpiritTableName|Sprixie Princesses}} | ||
| | |3800 | ||
|Stock: 1 | |Stock: 1 | ||
|[[Delfino Plaza]] | |[[Delfino Plaza]] | ||
| Line 283: | Line 304: | ||
| | | | ||
| | | | ||
|{{SSBU| | |{{SSBU|Zelda}} | ||
|1 | |1 | ||
| | | | ||
| | | | ||
| | | | ||
| | |{{SpiritType|Shield}} | ||
|[[File:Equipment Icon Brawn Badge.png|20px]] | |[[File:Equipment Icon Brawn Badge.png|20px]] 2000<br>[[File:Equipment Icon Protection Badge.png|20px]] 1300 | ||
|Normal | |Normal | ||
| | |47 | ||
|- | |- | ||
| | |92 | ||
| | |{{SpiritTableName|City Tripper}} | ||
| | |9300 | ||
|Stock: 1 | |Stock: 1 | ||
|{{SSBU|Battlefield}} | |{{SSBU|Battlefield}} | ||
| Line 308: | Line 329: | ||
| | | | ||
| | | | ||
| | |{{SpiritType|Grab}} | ||
|[[File:Equipment Icon Brawn Badge.png|20px]] 4000<br>[[File:Equipment Icon Protection Badge.png|20px]] 3500 | |[[File:Equipment Icon Brawn Badge.png|20px]] 4000<br>[[File:Equipment Icon Protection Badge.png|20px]] 3500 | ||
|Normal | |Normal | ||
|74 | |74 | ||
|- | |- | ||
| | |93 | ||
| | |{{SpiritTableName|Master Cycle}} | ||
| | |13400 | ||
| | |Stock: 1 | ||
| | |{{SSBU|Battlefield}} | ||
| | |Normal | ||
| | | | ||
|"normal", Low | |"normal", Low | ||
| | | | ||
| | | | ||
|{{SSBU|Mario}} | |{{SSBU|Mario}} | ||
|1 | |1 | ||
| | | | ||
| | | | ||
| | | | ||
|{{SpiritType|Attack}} | |||
|[[File:Equipment Icon Brawn Badge.png|20px]] 6500<br>[[File:Equipment Icon Protection Badge.png|20px]] 6000 | |[[File:Equipment Icon Brawn Badge.png|20px]] 6500<br>[[File:Equipment Icon Protection Badge.png|20px]] 6000 | ||
|Normal | |Normal | ||
|99 | |99 | ||
|- | |- | ||
| | |94 | ||
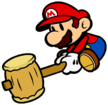
| | |{{SpiritTableName|Paper Mario}} | ||
| | |9400 | ||
|Stock: 1 | |Stock: 1 | ||
| | |[[Delfino Plaza]] | ||
| | |Battlefield | ||
| | |||
|"normal", Low | |||
| | | | ||
| | | | ||
|{{SSBU|Mario}} | |{{SSBU|Mario}} | ||
|1 | |1 | ||
| | | | ||
| | | | ||
| | | | ||
|[[File:Equipment Icon Brawn Badge.png|20px]] | |{{SpiritType|Neutral}} | ||
| | |[[File:Equipment Icon Brawn Badge.png|20px]] 4000<br>[[File:Equipment Icon Protection Badge.png|20px]] 3500 | ||
| | |Normal | ||
|74 | |||
|- | |- | ||
| | |96 | ||
|{{SpiritTableName|Paper Bowser (Paper Mario: Sticker Star)}} | |||
| | |13500 | ||
| | |HP: 120 | ||
| | |[[Paper Mario]] | ||
| | |Ω | ||
| | | | ||
|"normal", Low | |"normal", Low | ||
| | |•Enemy Attack ↑↑ after 30 seconds<br>•Enemy Defense ↑↑ after 45 seconds | ||
| | |•Stamina ↑<br>•Critical-Health Healing<br>•Autoheal<br>•Great Autoheal<br>•Death's Scythe Equipped | ||
|{{SSBU|Mario}} | |{{SSBU|Mario}} | ||
|1 | |1 | ||
|0 | |||
| | | | ||
| | | | ||
| | |{{SpiritType|Attack}} | ||
|[[File:Equipment Icon Brawn Badge.png|20px]] 6500<br>[[File:Equipment Icon Protection Badge.png|20px]] 6000 | |[[File:Equipment Icon Brawn Badge.png|20px]] 6500<br>[[File:Equipment Icon Protection Badge.png|20px]] 6000 | ||
|Normal | |Normal | ||
|99 | |99 | ||
|- | |- | ||
| | |99 | ||
| | |{{SpiritTableName|Shadow Queen}} | ||
| | |9500 | ||
|Stock: 1 | |Stock: 1 | ||
|{{SSBU|Battlefield}} | |{{SSBU|Battlefield}} | ||
| Line 388: | Line 409: | ||
| | | | ||
| | | | ||
| | |{{SpiritType|Attack}} | ||
|[[File:Equipment Icon Brawn Badge.png|20px]] 4000<br>[[File:Equipment Icon Protection Badge.png|20px]] 3500 | |[[File:Equipment Icon Brawn Badge.png|20px]] 4000<br>[[File:Equipment Icon Protection Badge.png|20px]] 3500 | ||
|Normal | |Normal | ||
|74 | |74 | ||
|- | |- | ||
| | |112 | ||
| | |{{SpiritTableName|Papercraft Mario}} | ||
| | |2300 | ||
|Stock: 1 | |Stock: 1 | ||
|{{ | |{{SSB|Mushroom Kingdom}} | ||
|Normal | |Normal | ||
| | | | ||
|" | |"normal3", Low | ||
| | | | ||
|•Giant Killer | |||
|{{SSBU|Mario}} | |{{SSBU|Mario}} | ||
|1 | |1 | ||
| | | | ||
|Giant | |||
| | | | ||
| | |{{SpiritType|Attack}} | ||
| | |[[File:Equipment Icon Brawn Badge.png|20px]] 1500<br>[[File:Equipment Icon Protection Badge.png|20px]] 1000 | ||
|[[File:Equipment Icon Brawn Badge.png|20px]] | |Metal | ||
| | |41 | ||
| | |||
|- | |- | ||
| | |120 | ||
|Professor Elvin Gadd | |{{SpiritTableName|Professor Elvin Gadd}} | ||
|3900 | |3900 | ||
|Stock: 1 | |Stock: 1 | ||
| Line 428: | Line 449: | ||
| | | | ||
| | | | ||
| | |{{SpiritType|Grab}} | ||
|[[File:Equipment Icon Brawn Badge.png|20px]] 2000<br>[[File:Equipment Icon Protection Badge.png|20px]] 1300 | |[[File:Equipment Icon Brawn Badge.png|20px]] 2000<br>[[File:Equipment Icon Protection Badge.png|20px]] 1300 | ||
|Normal | |Normal | ||
|47 | |47 | ||
|- | |- | ||
| | |126 | ||
|{{SpiritTableName|Mini Mario}} | |||
|{{ | |||
|3100 | |3100 | ||
|Stock: 1 | |Stock: 1 | ||
| Line 468: | Line 469: | ||
|Tiny | |Tiny | ||
|•Hammer Equipped | |•Hammer Equipped | ||
| | |{{SpiritType|Neutral}} | ||
|[[File:Equipment Icon Brawn Badge.png|20px]] 2000<br>[[File:Equipment Icon Protection Badge.png|20px]] 1300 | |[[File:Equipment Icon Brawn Badge.png|20px]] 2000<br>[[File:Equipment Icon Protection Badge.png|20px]] 1300 | ||
|Normal | |Normal | ||
|47 | |47 | ||
|- | |- | ||
| | |127 | ||
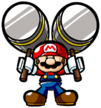
|Mini Mario & Hammers | |{{SpiritTableName|Mini Mario & Hammers}} | ||
|9300 | |9300 | ||
|Stock: 1 | |Stock: 1 | ||
| Line 488: | Line 489: | ||
| | | | ||
| | | | ||
| | |{{SpiritType|Attack}} | ||
|[[File:Equipment Icon Brawn Badge.png|20px]] 4000<br>[[File:Equipment Icon Protection Badge.png|20px]] 3500 | |[[File:Equipment Icon Brawn Badge.png|20px]] 4000<br>[[File:Equipment Icon Protection Badge.png|20px]] 3500 | ||
|Normal | |Normal | ||
|74 | |74 | ||
|- | |- | ||
| | |146 | ||
| | |{{SpiritTableName|Dixie Kong & Kiddy Kong}} | ||
| | |13300 | ||
|Stock: 1 | |Stock: 1 | ||
| | |[[Kongo Falls]] | ||
|Normal | |Normal | ||
| | | | ||
|"normal2", Low | |"normal2", Low | ||
| | |•Item Tidal Wave: Bananas every 5 seconds | ||
| | |•Falling Immunity<br>•Franklin Badge Equipped | ||
|{{SSBU|Mario}} | |{{SSBU|Mario}} | ||
|1 | |1 | ||
| Line 508: | Line 509: | ||
| | | | ||
| | | | ||
| | |{{SpiritType|Grab}} | ||
|[[File:Equipment Icon Brawn Badge.png|20px]] | |[[File:Equipment Icon Brawn Badge.png|20px]] 6500<br>[[File:Equipment Icon Protection Badge.png|20px]] 6000 | ||
|Normal | |Normal | ||
| | |99 | ||
|- | |- | ||
| | |163 | ||
|{{SpiritTableName|Baron K. Roolenstein}} | |||
|9500 | |||
|{{ | |||
| | |||
|9500 | |||
|Stock: 1 | |Stock: 1 | ||
|[[Great Bay]] | |[[Great Bay]] | ||
| Line 548: | Line 529: | ||
| | | | ||
| | | | ||
| | |{{SpiritType|Shield}} | ||
|[[File:Equipment Icon Brawn Badge.png|20px]] 4000<br>[[File:Equipment Icon Protection Badge.png|20px]] 3500 | |[[File:Equipment Icon Brawn Badge.png|20px]] 4000<br>[[File:Equipment Icon Protection Badge.png|20px]] 3500 | ||
|Normal | |Normal | ||
|74 | |74 | ||
|- | |- | ||
| | |164 | ||
|Blast-o-Matic | |{{SpiritTableName|Blast-o-Matic}} | ||
|13400 | |13400 | ||
|Stock: 1 | |Stock: 1 | ||
| Line 568: | Line 549: | ||
| | | | ||
| | | | ||
| | |{{SpiritType|Attack}} | ||
|[[File:Equipment Icon Brawn Badge.png|20px]] 6500<br>[[File:Equipment Icon Protection Badge.png|20px]] 6000 | |[[File:Equipment Icon Brawn Badge.png|20px]] 6500<br>[[File:Equipment Icon Protection Badge.png|20px]] 6000 | ||
|Normal | |Normal | ||
|99 | |99 | ||
|- | |- | ||
| | |169 | ||
|Donkey Kong & Bongos | |{{SpiritTableName|Donkey Kong & Bongos}} | ||
|3600 | |3600 | ||
|Stock: 1 | |Stock: 1 | ||
| Line 588: | Line 569: | ||
| | | | ||
| | | | ||
| | |{{SpiritType|Attack}} | ||
|[[File:Equipment Icon Brawn Badge.png|20px]] 2000<br>[[File:Equipment Icon Protection Badge.png|20px]] 1300 | |[[File:Equipment Icon Brawn Badge.png|20px]] 2000<br>[[File:Equipment Icon Protection Badge.png|20px]] 1300 | ||
|Normal | |Normal | ||
|47 | |47 | ||
|- | |- | ||
| | |190 | ||
|Zelda (Ocarina of Time) | |{{SpiritTableName|Zelda (Ocarina of Time)}} | ||
|13500 | |13500 | ||
|Stock: 1 | |Stock: 1 | ||
| Line 608: | Line 589: | ||
| | | | ||
| | | | ||
| | |{{SpiritType|Shield}} | ||
|[[File:Equipment Icon Brawn Badge.png|20px]] 6500<br>[[File:Equipment Icon Protection Badge.png|20px]] 6000 | |[[File:Equipment Icon Brawn Badge.png|20px]] 6500<br>[[File:Equipment Icon Protection Badge.png|20px]] 6000 | ||
|Normal | |Normal | ||
|99 | |99 | ||
|- | |- | ||
| | |196 | ||
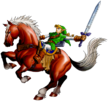
|Epona | |{{SpiritTableName|Epona}} | ||
|9400 | |9400 | ||
|Stock: 1 | |Stock: 1 | ||
| Line 628: | Line 609: | ||
| | | | ||
| | | | ||
| | |{{SpiritType|Attack}} | ||
|[[File:Equipment Icon Brawn Badge.png|20px]] 4000<br>[[File:Equipment Icon Protection Badge.png|20px]] 3500 | |[[File:Equipment Icon Brawn Badge.png|20px]] 4000<br>[[File:Equipment Icon Protection Badge.png|20px]] 3500 | ||
|Normal | |Normal | ||
|74 | |74 | ||
|- | |- | ||
| | |200 | ||
|Ruto | |{{SpiritTableName|Ruto}} | ||
|9400 | |9400 | ||
|Stock: 1 | |Stock: 1 | ||
| Line 648: | Line 629: | ||
| | | | ||
|•Water/Freezing Resist ↑<br>•Neutral Special ↑ | |•Water/Freezing Resist ↑<br>•Neutral Special ↑ | ||
| | |{{SpiritType|Shield}} | ||
|[[File:Equipment Icon Brawn Badge.png|20px]] 4000<br>[[File:Equipment Icon Protection Badge.png|20px]] 3500 | |[[File:Equipment Icon Brawn Badge.png|20px]] 4000<br>[[File:Equipment Icon Protection Badge.png|20px]] 3500 | ||
|Normal | |Normal | ||
|74 | |74 | ||
|- | |- | ||
| | |203 | ||
|Twinrova | |{{SpiritTableName|Twinrova}} | ||
|9300 | |9300 | ||
|Stock: 1 | |Stock: 1 | ||
| Line 668: | Line 649: | ||
| | | | ||
| | | | ||
| | |{{SpiritType|Attack}} | ||
|[[File:Equipment Icon Brawn Badge.png|20px]] 4000<br>[[File:Equipment Icon Protection Badge.png|20px]] 3500 | |[[File:Equipment Icon Brawn Badge.png|20px]] 4000<br>[[File:Equipment Icon Protection Badge.png|20px]] 3500 | ||
|Normal | |Normal | ||
|74 | |74 | ||
|- | |- | ||
| | |206 | ||
|Skull Kid & Majora's Mask | |{{SpiritTableName|Skull Kid & Majora's Mask}} | ||
|13400 | |13400 | ||
|Stock: 1 | |Stock: 1 | ||
| Line 688: | Line 669: | ||
| | | | ||
| | | | ||
| | |{{SpiritType|Attack}} | ||
|[[File:Equipment Icon Brawn Badge.png|20px]] 6500<br>[[File:Equipment Icon Protection Badge.png|20px]] 6000 | |[[File:Equipment Icon Brawn Badge.png|20px]] 6500<br>[[File:Equipment Icon Protection Badge.png|20px]] 6000 | ||
|Normal | |Normal | ||
|99 | |99 | ||
|- | |- | ||
| | |209 | ||
|Majora's Mask | |{{SpiritTableName|Majora's Mask}} | ||
|9500 | |9500 | ||
|Stock: 1 | |Stock: 1 | ||
| Line 708: | Line 689: | ||
| | | | ||
| | | | ||
| | |{{SpiritType|Attack}} | ||
|[[File:Equipment Icon Brawn Badge.png|20px]] 4000<br>[[File:Equipment Icon Protection Badge.png|20px]] 3500 | |[[File:Equipment Icon Brawn Badge.png|20px]] 4000<br>[[File:Equipment Icon Protection Badge.png|20px]] 3500 | ||
|Normal | |Normal | ||
|74 | |74 | ||
|- | |- | ||
| | |210 | ||
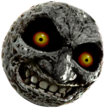
|Moon | |{{SpiritTableName|Moon}} | ||
|9300 | |9300 | ||
|Stock: 1 | |Stock: 1 | ||
| Line 728: | Line 709: | ||
| | | | ||
| | | | ||
| | |{{SpiritType|Attack}} | ||
|[[File:Equipment Icon Brawn Badge.png|20px]] 4000<br>[[File:Equipment Icon Protection Badge.png|20px]] 3500 | |[[File:Equipment Icon Brawn Badge.png|20px]] 4000<br>[[File:Equipment Icon Protection Badge.png|20px]] 3500 | ||
|Normal | |Normal | ||
|74 | |74 | ||
|- | |- | ||
| | |221 | ||
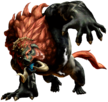
| | |{{SpiritTableName|Beast Ganon}} | ||
| | |13700 | ||
|Stock: 1 | |Stock: 1 | ||
|{{SSBU|Battlefield}} | |{{SSBU|Battlefield}} | ||
|Normal | |Normal | ||
| | | | ||
|" | |"normal3", Low | ||
| | | | ||
| | | | ||
| Line 748: | Line 729: | ||
| | | | ||
| | | | ||
| | |{{SpiritType|Attack}} | ||
|[[File:Equipment Icon Brawn Badge.png|20px]] 6500<br>[[File:Equipment Icon Protection Badge.png|20px]] 6000 | |[[File:Equipment Icon Brawn Badge.png|20px]] 6500<br>[[File:Equipment Icon Protection Badge.png|20px]] 6000 | ||
|Normal | |Normal | ||
|99 | |99 | ||
|- | |- | ||
| | |223 | ||
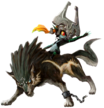
| | |{{SpiritTableName|Wolf Link & Midna}} | ||
| | |13500 | ||
|Stock: 1 | |Stock: 1 | ||
| | |{{SSBU|Battlefield}} | ||
|Normal | |Normal | ||
| | | | ||
|" | |"normal3", Low | ||
| | | | ||
| | | | ||
|{{SSBU| | |{{SSBU|Mario}} | ||
|1 | |1 | ||
| | | | ||
| | | | ||
| | | | ||
| | |{{SpiritType|Grab}} | ||
|[[File:Equipment Icon Brawn Badge.png|20px]] | |[[File:Equipment Icon Brawn Badge.png|20px]] 6500<br>[[File:Equipment Icon Protection Badge.png|20px]] 6000 | ||
|Normal | |Normal | ||
| | |99 | ||
|- | |- | ||
| | |230 | ||
| | |{{SpiritTableName|Demise}} | ||
| | |9500 | ||
|Stock: 1 | |Stock: 1 | ||
|{{SSBU|Battlefield}} | |{{SSBU|Battlefield}} | ||
| Line 788: | Line 769: | ||
| | | | ||
| | | | ||
| | |{{SpiritType|Shield}} | ||
|[[File:Equipment Icon Brawn Badge.png|20px]] 4000<br>[[File:Equipment Icon Protection Badge.png|20px]] 3500 | |[[File:Equipment Icon Brawn Badge.png|20px]] 4000<br>[[File:Equipment Icon Protection Badge.png|20px]] 3500 | ||
|Normal | |Normal | ||
|74 | |74 | ||
|- | |- | ||
| | |234 | ||
| | |{{SpiritTableName|Link (A Link Between Worlds)}} | ||
| | |9300 | ||
|Stock: 1 | |Stock: 1 | ||
|{{SSBU|Battlefield}} | |{{SSBU|Battlefield}} | ||
|Normal | |Normal | ||
| | | | ||
|" | |"normal", Low | ||
| | | | ||
| | | | ||
| Line 808: | Line 789: | ||
| | | | ||
| | | | ||
| | |{{SpiritType|Shield}} | ||
|[[File:Equipment Icon Brawn Badge.png|20px]] | |[[File:Equipment Icon Brawn Badge.png|20px]] 4000<br>[[File:Equipment Icon Protection Badge.png|20px]] 3500 | ||
|Normal | |Normal | ||
| | |74 | ||
|- | |- | ||
| | |247 | ||
| | |{{SpiritTableName|Zelda (The Wind Waker)}} | ||
| | |13400 | ||
|Stock: 1 | |Stock: 1 | ||
|{{SSBU|Battlefield}} | |{{SSBU|Battlefield}} | ||
|Normal | |Normal | ||
| | | | ||
|" | |"normal", Low | ||
| | | | ||
| | | | ||
| Line 828: | Line 809: | ||
| | | | ||
| | | | ||
| | |{{SpiritType|Shield}} | ||
|[[File:Equipment Icon Brawn Badge.png|20px]] 6500<br>[[File:Equipment Icon Protection Badge.png|20px]] 6000 | |[[File:Equipment Icon Brawn Badge.png|20px]] 6500<br>[[File:Equipment Icon Protection Badge.png|20px]] 6000 | ||
|Normal | |Normal | ||
|99 | |99 | ||
|- | |- | ||
| | |248 | ||
| | |{{SpiritTableName|King of Red Lions}} | ||
| | |3800 | ||
|Stock: 1 | |Stock: 1 | ||
| | |[[Pirate Ship]] | ||
|Normal | |Normal | ||
| | | | ||
| Line 843: | Line 824: | ||
| | | | ||
| | | | ||
|{{SSBU| | |{{SSBU|Toon Link}} | ||
|1 | |1 | ||
| | | | ||
| | | | ||
| | | | ||
| | |{{SpiritType|Shield}} | ||
|[[File:Equipment Icon Brawn Badge.png|20px]] | |[[File:Equipment Icon Brawn Badge.png|20px]] 2000<br>[[File:Equipment Icon Protection Badge.png|20px]] 1300 | ||
|Normal | |Normal | ||
| | |47 | ||
|- | |- | ||
| | |249 | ||
| | |{{SpiritTableName|King of Hyrule}} | ||
| | |9400 | ||
|Stock: 1 | |Stock: 1 | ||
|{{SSBU|Battlefield}} | |{{SSBU|Battlefield}} | ||
| Line 868: | Line 849: | ||
| | | | ||
| | | | ||
| | |{{SpiritType|Grab}} | ||
|[[File:Equipment Icon Brawn Badge.png|20px]] 4000<br>[[File:Equipment Icon Protection Badge.png|20px]] 3500 | |[[File:Equipment Icon Brawn Badge.png|20px]] 4000<br>[[File:Equipment Icon Protection Badge.png|20px]] 3500 | ||
|Normal | |Normal | ||
|74 | |74 | ||
|- | |- | ||
| | |259 | ||
| | |{{SpiritTableName|Zelda (Spirit Tracks)}} | ||
| | |9200 | ||
|Stock: 1 | |Stock: 1 | ||
|{{SSBU|Battlefield}} | |{{SSBU|Battlefield}} | ||
|Normal | |Normal | ||
| | | | ||
|" | |"normal2", Low | ||
| | | | ||
| | | | ||
| Line 888: | Line 869: | ||
| | | | ||
| | | | ||
| | |{{SpiritType|Neutral}} | ||
|[[File:Equipment Icon Brawn Badge.png|20px]] 4000<br>[[File:Equipment Icon Protection Badge.png|20px]] 3500 | |[[File:Equipment Icon Brawn Badge.png|20px]] 4000<br>[[File:Equipment Icon Protection Badge.png|20px]] 3500 | ||
|Normal | |Normal | ||
|74 | |74 | ||
|- | |- | ||
| | |270 | ||
| | |{{SpiritTableName|Fusion Suit}} | ||
| | |9300 | ||
|Stock: 1 | |Stock: 1 | ||
|{{SSBU|Battlefield}} | |{{SSBU|Battlefield}} | ||
| Line 908: | Line 889: | ||
| | | | ||
| | | | ||
| | |{{SpiritType|Neutral}} | ||
|[[File:Equipment Icon Brawn Badge.png|20px]] | |[[File:Equipment Icon Brawn Badge.png|20px]] 4000<br>[[File:Equipment Icon Protection Badge.png|20px]] 3500 | ||
|Normal | |Normal | ||
| | |74 | ||
|- | |- | ||
| | |271 | ||
| | |{{SpiritTableName|Phazon Suit}} | ||
| | |9700 | ||
|Stock: 1 | |Stock: 1 | ||
|{{ | |{{SSB|Kongo Jungle}} | ||
|Normal | |Normal | ||
|Lava Floor | |||
|"normal2", Low | |||
| | | | ||
| | |•Lava-Floor Immunity<br>•Lava-Floor Resist<br>•Rocket Belt Equipped<br>•Additional Midair Jump<br>•Slow Super Armor<br>•Armor Knight | ||
|{{SSBU|Samus}} | |||
|{{SSBU| | |||
|1 | |1 | ||
| | | | ||
| | | | ||
| | |•Lava-Floor Immunity | ||
| | |{{SpiritType|Shield}} | ||
|[[File:Equipment Icon Brawn Badge.png|20px]] | |[[File:Equipment Icon Brawn Badge.png|20px]] 4000<br>[[File:Equipment Icon Protection Badge.png|20px]] 3500 | ||
|Normal | |Normal | ||
| | |74 | ||
|- | |- | ||
| | |272 | ||
| | |{{SpiritTableName|Dark Suit}} | ||
| | |3800 | ||
|Stock: 1 | |Stock: 1 | ||
| | |[[Frigate Orpheon]] | ||
|Normal | |Normal | ||
| | | | ||
| | |"normal", Low | ||
| | |||
| | |||
|{{SSBU|Samus}} | |{{SSBU|Samus}} | ||
|1 | |1 | ||
| | | | ||
| | | | ||
| | | | ||
| | |{{SpiritType|Shield}} | ||
|[[File:Equipment Icon Brawn Badge.png|20px]] | |[[File:Equipment Icon Brawn Badge.png|20px]] 2000<br>[[File:Equipment Icon Protection Badge.png|20px]] 1300 | ||
|Normal | |Normal | ||
| | |47 | ||
|- | |- | ||
| | |273 | ||
| | |{{SpiritTableName|Light Suit}} | ||
| | |13500 | ||
|Stock: 1 | |Stock: 1 | ||
|{{SSBU|Battlefield}} | |{{SSBU|Battlefield}} | ||
| Line 968: | Line 949: | ||
| | | | ||
| | | | ||
| | |{{SpiritType|Shield}} | ||
|[[File:Equipment Icon Brawn Badge.png|20px]] | |[[File:Equipment Icon Brawn Badge.png|20px]] 6500<br>[[File:Equipment Icon Protection Badge.png|20px]] 6000 | ||
|Normal | |Normal | ||
| | |99 | ||
|- | |- | ||
| | |||
| | |279 | ||
| | |{{SpiritTableName|Mother Brain (2nd Form)}} | ||
|13400 | |||
|Stock: 1 | |Stock: 1 | ||
|{{SSBU|Battlefield}} | |{{SSBU|Battlefield}} | ||
| Line 981: | Line 963: | ||
| | | | ||
|"normal", Low | |"normal", Low | ||
| | |•Assist Trophy Enemy: Mother Brain after 1 second<br>•Energy Output ↑ after 5 seconds | ||
| | |•Assist Killer<br>•Energy Shot Attack/Resistance ↑<br>•Energy-Shot Attack ↑<br>•Energy-Shot Resist ↑ | ||
|{{SSBU|Mario}} | |{{SSBU|Mario}} | ||
|1 | |1 | ||
| Line 988: | Line 970: | ||
| | | | ||
| | | | ||
| | |{{SpiritType|Grab}} | ||
|[[File:Equipment Icon Brawn Badge.png|20px]] | |[[File:Equipment Icon Brawn Badge.png|20px]] 5950<br>[[File:Equipment Icon Protection Badge.png|20px]] 5450 | ||
|Normal | |Normal | ||
| | |75 | ||
|- | |- | ||
| | |280 | ||
| | |{{SpiritTableName|Gunship}} | ||
| | |3700 | ||
|Stock: 1 | |Stock: 1 | ||
|{{SSBU|Battlefield}} | |{{SSBU|Battlefield}} | ||
| Line 1,008: | Line 990: | ||
| | | | ||
| | | | ||
| | |{{SpiritType|Shield}} | ||
|[[File:Equipment Icon Brawn Badge.png|20px]] | |[[File:Equipment Icon Brawn Badge.png|20px]] 2000<br>[[File:Equipment Icon Protection Badge.png|20px]] 1300 | ||
|Normal | |Normal | ||
| | |47 | ||
|- | |- | ||
| | |286 | ||
| | |{{SpiritTableName|Nightmare}} | ||
| | |9300 | ||
|Stock: 1 | |Stock: 1 | ||
| | |{{SSBU|Battlefield}} | ||
|Normal | |Normal | ||
| | | | ||
| Line 1,023: | Line 1,005: | ||
| | | | ||
| | | | ||
|{{SSBU| | |{{SSBU|Mario}} | ||
|1 | |1 | ||
| | | | ||
| | | | ||
| | | | ||
| | |{{SpiritType|Grab}} | ||
|[[File:Equipment Icon Brawn Badge.png|20px]] | |[[File:Equipment Icon Brawn Badge.png|20px]] 4000<br>[[File:Equipment Icon Protection Badge.png|20px]] 3500 | ||
|Normal | |Normal | ||
| | |74 | ||
|- | |- | ||
| | |296 | ||
|Mech | |{{SpiritTableName|Mech}} | ||
|1800 | |1800 | ||
|Stock: 1 | |Stock: 1 | ||
| Line 1,048: | Line 1,030: | ||
| | | | ||
| | | | ||
| | |{{SpiritType|Neutral}} | ||
|[[File:Equipment Icon Brawn Badge.png|20px]] 1500<br>[[File:Equipment Icon Protection Badge.png|20px]] 1000 | |[[File:Equipment Icon Brawn Badge.png|20px]] 1500<br>[[File:Equipment Icon Protection Badge.png|20px]] 1000 | ||
|Normal | |Normal | ||
|41 | |41 | ||
|- | |- | ||
| | |300 | ||
|Baby Mario (Superstar Mario) | |{{SpiritTableName|Baby Mario (Superstar Mario)}} | ||
|13500 | |13500 | ||
|Stock: 1 | |Stock: 1 | ||
| Line 1,068: | Line 1,050: | ||
| | | | ||
| | | | ||
| | |{{SpiritType|Attack}} | ||
|[[File:Equipment Icon Brawn Badge.png|20px]] 6500<br>[[File:Equipment Icon Protection Badge.png|20px]] 6000 | |[[File:Equipment Icon Brawn Badge.png|20px]] 6500<br>[[File:Equipment Icon Protection Badge.png|20px]] 6000 | ||
|Normal | |Normal | ||
|99 | |99 | ||
|- | |- | ||
| | |302 | ||
|Stork | |{{SpiritTableName|Stork}} | ||
|9300 | |9300 | ||
|Stock: 1 | |Stock: 1 | ||
| Line 1,088: | Line 1,070: | ||
| | | | ||
| | | | ||
| | |{{SpiritType|Grab}} | ||
|[[File:Equipment Icon Brawn Badge.png|20px]] 4000<br>[[File:Equipment Icon Protection Badge.png|20px]] 3500 | |[[File:Equipment Icon Brawn Badge.png|20px]] 4000<br>[[File:Equipment Icon Protection Badge.png|20px]] 3500 | ||
|Normal | |Normal | ||
|74 | |74 | ||
|- | |- | ||
| | |313 | ||
|Super Happy Tree | |{{SpiritTableName|Super Happy Tree}} | ||
|13700 | |13700 | ||
|Stock: 1 | |Stock: 1 | ||
| Line 1,108: | Line 1,090: | ||
| | | | ||
|•Invincibility after Eating<br>•Stats ↑ after Eating | |•Invincibility after Eating<br>•Stats ↑ after Eating | ||
| | |{{SpiritType|Grab}} | ||
|[[File:Equipment Icon Brawn Badge.png|20px]] 6500<br>[[File:Equipment Icon Protection Badge.png|20px]] 6000 | |[[File:Equipment Icon Brawn Badge.png|20px]] 6500<br>[[File:Equipment Icon Protection Badge.png|20px]] 6000 | ||
|Normal | |Normal | ||
|99 | |99 | ||
|- | |- | ||
| | |319 | ||
|Mega Eggdozer | |{{SpiritTableName|Mega Eggdozer}} | ||
|3800 | |3800 | ||
|Stock: 1 | |Stock: 1 | ||
| Line 1,128: | Line 1,110: | ||
| | | | ||
| | | | ||
| | |{{SpiritType|Grab}} | ||
|[[File:Equipment Icon Brawn Badge.png|20px]] 2000<br>[[File:Equipment Icon Protection Badge.png|20px]] 1300 | |[[File:Equipment Icon Brawn Badge.png|20px]] 2000<br>[[File:Equipment Icon Protection Badge.png|20px]] 1300 | ||
|Normal | |Normal | ||
|47 | |47 | ||
|- | |- | ||
| | |326 | ||
|Warp Star | |{{SpiritTableName|Warp Star}} | ||
|3800 | |3800 | ||
|Stock: 1 | |Stock: 1 | ||
| Line 1,148: | Line 1,130: | ||
| | | | ||
| | | | ||
| | |{{SpiritType|Attack}} | ||
|[[File:Equipment Icon Brawn Badge.png|20px]] 2000<br>[[File:Equipment Icon Protection Badge.png|20px]] 1300 | |[[File:Equipment Icon Brawn Badge.png|20px]] 2000<br>[[File:Equipment Icon Protection Badge.png|20px]] 1300 | ||
|Normal | |Normal | ||
|47 | |47 | ||
|- | |- | ||
|[[File: | |328 | ||
| | |{{SpiritTableName|Ultra Sword}} | ||
| | |9400 | ||
|Stock: 1 | |||
|[[Coliseum]] | |||
|Normal | |||
| | |||
|"normal", Low | |||
|•Enemy Sudden Final Smash after 5 seconds | |||
|•Critical Immunity<br>•Critical-Health Healing<br>•Easier Dodging | |||
|{{SSBU|Kirby}} | |||
|2 | |||
| | |||
| | |||
|•Beam Sword Equipped | |||
|{{SpiritType|Attack}} | |||
|[[File:Equipment Icon Brawn Badge.png|20px]] 4000<br>[[File:Equipment Icon Protection Badge.png|20px]] 3500 | |||
|Normal | |||
|74 | |||
|- | |||
|330 | |||
|{{SpiritTableName|Halberd}} | |||
|13400 | |||
|Stock: 1 | |Stock: 1 | ||
|{{SSBU|Battlefield}} | |{{SSBU|Battlefield}} | ||
|Normal | |Normal | ||
| | | | ||
|" | |"normal2", Low | ||
| | | | ||
| | | | ||
| Line 1,168: | Line 1,170: | ||
| | | | ||
| | | | ||
| | |{{SpiritType|Attack}} | ||
|[[File:Equipment Icon Brawn Badge.png|20px]] | |[[File:Equipment Icon Brawn Badge.png|20px]] 6500<br>[[File:Equipment Icon Protection Badge.png|20px]] 6000 | ||
|Normal | |Normal | ||
| | |99 | ||
|- | |- | ||
| | |342 | ||
|Nightmare Wizard | |{{SpiritTableName|Nightmare Wizard}} | ||
|13600 | |13600 | ||
|Stock: 1 | |Stock: 1 | ||
| Line 1,188: | Line 1,190: | ||
| | | | ||
| | | | ||
| | |{{SpiritType|Neutral}} | ||
|[[File:Equipment Icon Brawn Badge.png|20px]] 6500<br>[[File:Equipment Icon Protection Badge.png|20px]] 6000 | |[[File:Equipment Icon Brawn Badge.png|20px]] 6500<br>[[File:Equipment Icon Protection Badge.png|20px]] 6000 | ||
|Normal | |Normal | ||
|99 | |99 | ||
|- | |- | ||
| | |345 | ||
| | |{{SpiritTableName|Dyna Blade}} | ||
| | |13500 | ||
|Stock: 1 | |Stock: 1 | ||
|[[ | |[[Green Greens]] | ||
|Normal | |Normal | ||
| | | | ||
|"normal", Low | |"normal", Low | ||
| | | | ||
| | |•Giant Killer | ||
|{{SSBU| | |{{SSBU|Falco}} | ||
|1 | |1 | ||
| | | | ||
|Giant | |||
| | | | ||
|{{SpiritType|Shield}} | |||
|[[File:Equipment Icon Brawn Badge.png|20px]] 6500<br>[[File:Equipment Icon Protection Badge.png|20px]] 6000 | |||
|Metal | |||
|99 | |||
|{{ | |||
|[[File:Equipment Icon Brawn Badge.png|20px]] | |||
| | |||
| | |||
|- | |- | ||
| | |348 | ||
|Marx (True Form) | |{{SpiritTableName|Marx (True Form)}} | ||
|13700 | |13700 | ||
|Stock: 1 | |Stock: 1 | ||
| Line 1,248: | Line 1,230: | ||
| | | | ||
| | | | ||
| | |{{SpiritType|Grab}} | ||
|[[File:Equipment Icon Brawn Badge.png|20px]] 6500<br>[[File:Equipment Icon Protection Badge.png|20px]] 6000 | |[[File:Equipment Icon Brawn Badge.png|20px]] 6500<br>[[File:Equipment Icon Protection Badge.png|20px]] 6000 | ||
|Normal | |Normal | ||
|99 | |99 | ||
|- | |- | ||
| | |351 | ||
| | |{{SpiritTableName|Daroach}} | ||
| | |9400 | ||
|Stock: 1 | |Stock: 1 | ||
|[[The Great Cave Offensive]] | |||
|[[The Great Cave Offensive]] | |||
|Normal | |Normal | ||
| | | | ||
| Line 1,308: | Line 1,250: | ||
| | | | ||
|•Move Speed ↑<br>•Thrown Items ↑<br>•Item Gravitation | |•Move Speed ↑<br>•Thrown Items ↑<br>•Item Gravitation | ||
| | |{{SpiritType|Neutral}} | ||
|[[File:Equipment Icon Brawn Badge.png|20px]] 4000<br>[[File:Equipment Icon Protection Badge.png|20px]] 3500 | |[[File:Equipment Icon Brawn Badge.png|20px]] 4000<br>[[File:Equipment Icon Protection Badge.png|20px]] 3500 | ||
|Normal | |Normal | ||
|74 | |74 | ||
|- | |- | ||
| | |352 | ||
|Dark Daroach | |{{SpiritTableName|Dark Daroach}} | ||
|13400 | |13400 | ||
|Stock: 1 | |Stock: 1 | ||
| Line 1,328: | Line 1,270: | ||
| | | | ||
| | | | ||
| | |{{SpiritType|Attack}} | ||
|[[File:Equipment Icon Brawn Badge.png|20px]] 6500<br>[[File:Equipment Icon Protection Badge.png|20px]] 6000 | |[[File:Equipment Icon Brawn Badge.png|20px]] 6500<br>[[File:Equipment Icon Protection Badge.png|20px]] 6000 | ||
|Normal | |Normal | ||
|99 | |99 | ||
|- | |- | ||
| | |353 | ||
|Masked Dedede | |{{SpiritTableName|Masked Dedede}} | ||
|9300 | |9300 | ||
|Stock: 1 | |Stock: 1 | ||
| Line 1,348: | Line 1,290: | ||
| | | | ||
|•Weapon Attack ↑<br>•Shield Damage ↑ | |•Weapon Attack ↑<br>•Shield Damage ↑ | ||
| | |{{SpiritType|Attack}} | ||
|[[File:Equipment Icon Brawn Badge.png|20px]] 4000<br>[[File:Equipment Icon Protection Badge.png|20px]] 3500 | |[[File:Equipment Icon Brawn Badge.png|20px]] 4000<br>[[File:Equipment Icon Protection Badge.png|20px]] 3500 | ||
|Normal | |Normal | ||
|74 | |74 | ||
|- | |- | ||
| | |354 | ||
|Galacta Knight | |{{SpiritTableName|Galacta Knight}} | ||
|13700 | |13700 | ||
|Stock: 1 | |Stock: 1 | ||
| Line 1,368: | Line 1,310: | ||
| | | | ||
|•Hyper Smash Attacks<br>•Critical Hit ↑<br>•Slash Attack ↑ | |•Hyper Smash Attacks<br>•Critical Hit ↑<br>•Slash Attack ↑ | ||
| | |{{SpiritType|Attack}} | ||
|[[File:Equipment Icon Brawn Badge.png|20px]] 6500<br>[[File:Equipment Icon Protection Badge.png|20px]] 6000 | |[[File:Equipment Icon Brawn Badge.png|20px]] 6500<br>[[File:Equipment Icon Protection Badge.png|20px]] 6000 | ||
|Normal | |Normal | ||
|99 | |99 | ||
|- | |- | ||
| | |357 | ||
| | |{{SpiritTableName|Queen Sectonia}} | ||
| | |9400 | ||
|Stock: 1 | |Stock: 1 | ||
|{{SSBU|Battlefield}} | |{{SSBU|Battlefield}} | ||
|Normal | |Normal | ||
| | | | ||
|" | |"normal2", Low | ||
| | | | ||
| | | | ||
| Line 1,388: | Line 1,330: | ||
| | | | ||
| | | | ||
| | |{{SpiritType|Grab}} | ||
|[[File:Equipment Icon Brawn Badge.png|20px]] 4000<br>[[File:Equipment Icon Protection Badge.png|20px]] 3500 | |[[File:Equipment Icon Brawn Badge.png|20px]] 4000<br>[[File:Equipment Icon Protection Badge.png|20px]] 3500 | ||
|Normal | |Normal | ||
|74 | |74 | ||
|- | |- | ||
| | |361 | ||
| | |{{SpiritTableName|Bandana Waddle Dee}} | ||
| | |9500 | ||
|Stock: 1 | |Stock: 1 | ||
| | |{{SSBU|Battlefield}} | ||
|Normal | |Normal | ||
| | | | ||
|" | |"normal3", Low | ||
| | | | ||
| | | | ||
|{{SSBU| | |{{SSBU|Mario}} | ||
| | |1 | ||
| | |||
| | | | ||
| | | | ||
| | |{{SpiritType|Neutral}} | ||
| | |||
|[[File:Equipment Icon Brawn Badge.png|20px]] 4000<br>[[File:Equipment Icon Protection Badge.png|20px]] 3500 | |[[File:Equipment Icon Brawn Badge.png|20px]] 4000<br>[[File:Equipment Icon Protection Badge.png|20px]] 3500 | ||
|Normal | |Normal | ||
|74 | |74 | ||
|- | |- | ||
| | |367 | ||
| | |{{SpiritTableName|Angry Scarfy}} | ||
| | |3700 | ||
|Stock: 1 | |Stock: 1 | ||
|{{SSBU|Battlefield}} | |{{SSBU|Battlefield}} | ||
|Normal | |Normal | ||
| | | | ||
|" | |"normal3", Low | ||
| | | | ||
| | | | ||
| Line 1,428: | Line 1,370: | ||
| | | | ||
| | | | ||
| | |{{SpiritType|Attack}} | ||
|[[File:Equipment Icon Brawn Badge.png|20px]] | |[[File:Equipment Icon Brawn Badge.png|20px]] 2000<br>[[File:Equipment Icon Protection Badge.png|20px]] 1300 | ||
|Normal | |Normal | ||
| | |47 | ||
|- | |- | ||
| | |369 | ||
| | |{{SpiritTableName|Wheelie}} | ||
| | |3600 | ||
|Stock: 1 | |Stock: 1 | ||
|[[ | |[[Figure-8 Circuit]] | ||
| | |Normal | ||
| | | | ||
|"normal", Low | |"normal", Low | ||
| | | | ||
| | | | ||
|{{SSBU| | |{{SSBU|Wario}} | ||
| | |1 | ||
| | | | ||
| | | | ||
| | |•Impact Run | ||
| | |{{SpiritType|Attack}} | ||
|[[File:Equipment Icon Brawn Badge.png|20px]] | |[[File:Equipment Icon Brawn Badge.png|20px]] 2000<br>[[File:Equipment Icon Protection Badge.png|20px]] 1300 | ||
|Normal | |Normal | ||
| | |47 | ||
|- | |- | ||
| | |375 | ||
|{{SpiritTableName|Mr. Shine & Mr. Bright}} | |||
| | |3700 | ||
|Stock: 1 | |Stock: 1 | ||
| | |{{SSBU|Battlefield}} | ||
|Normal | |Normal | ||
| | | | ||
| Line 1,463: | Line 1,405: | ||
| | | | ||
| | | | ||
|{{SSBU| | |{{SSBU|Mario}} | ||
| | |1 | ||
| | | | ||
| | | | ||
| | | | ||
| | |{{SpiritType|Neutral}} | ||
|[[File:Equipment Icon Brawn Badge.png|20px]] 2000<br>[[File:Equipment Icon Protection Badge.png|20px]] 1300 | |[[File:Equipment Icon Brawn Badge.png|20px]] 2000<br>[[File:Equipment Icon Protection Badge.png|20px]] 1300 | ||
|Normal | |Normal | ||
|47 | |47 | ||
|- | |- | ||
| | |390 | ||
| | |{{SpiritTableName|Arwing}} | ||
| | |9300 | ||
|Stock: 1 | |Stock: 1 | ||
| | |[[Venom]] | ||
|Battlefield | |||
| | | | ||
|" | |"normal", Low | ||
| | | | ||
| | | | ||
|{{SSBU| | |{{SSBU|Mega Man}} | ||
| | |5 | ||
| | | | ||
| | | | ||
| | | | ||
| | |{{SpiritType|Attack}} | ||
|[[File:Equipment Icon Brawn Badge.png|20px]] | |[[File:Equipment Icon Brawn Badge.png|20px]] 4000<br>[[File:Equipment Icon Protection Badge.png|20px]] 3500 | ||
|Normal | |Normal | ||
| | |74 | ||
|- | |- | ||
| | |391 | ||
|Great Fox | |{{SpiritTableName|Great Fox}} | ||
|13700 | |13700 | ||
|Stock: 1 | |Stock: 1 | ||
| Line 1,508: | Line 1,450: | ||
| | | | ||
| | | | ||
| | |{{SpiritType|Shield}} | ||
|[[File:Equipment Icon Brawn Badge.png|20px]] 6500<br>[[File:Equipment Icon Protection Badge.png|20px]] 6000 | |[[File:Equipment Icon Brawn Badge.png|20px]] 6500<br>[[File:Equipment Icon Protection Badge.png|20px]] 6000 | ||
|Normal | |Normal | ||
|99 | |99 | ||
|- | |- | ||
| | |393 | ||
|Walker | |{{SpiritTableName|Walker}} | ||
|3800 | |3800 | ||
|Stock: 1 | |Stock: 1 | ||
| Line 1,528: | Line 1,470: | ||
| | | | ||
| | | | ||
| | |{{SpiritType|Shield}} | ||
|[[File:Equipment Icon Brawn Badge.png|20px]] 2000<br>[[File:Equipment Icon Protection Badge.png|20px]] 1300 | |[[File:Equipment Icon Brawn Badge.png|20px]] 2000<br>[[File:Equipment Icon Protection Badge.png|20px]] 1300 | ||
|Normal | |Normal | ||
|47 | |47 | ||
|- | |- | ||
| | |400 | ||
| | |{{SpiritTableName|Andross}} | ||
| | |3900 | ||
|Stock: 1 | |Stock: 1 | ||
| | |[[Corneria]] | ||
|Normal | |Normal | ||
| | | | ||
|" | |"normal", Low | ||
| | | | ||
| | | | ||
|{{SSBU| | |{{SSBU|Falco}} | ||
| | |7 | ||
| | | | ||
| | | | ||
| | | | ||
| | |{{SpiritType|Grab}} | ||
|[[File:Equipment Icon Brawn Badge.png|20px]] | |[[File:Equipment Icon Brawn Badge.png|20px]] 2000<br>[[File:Equipment Icon Protection Badge.png|20px]] 1300 | ||
|Normal | |Normal | ||
| | |47 | ||
|- | |- | ||
| | |402 | ||
| | |{{SpiritTableName|Andross (True Form)}} | ||
| | |13600 | ||
|Stock: 1 | |Stock: 1 | ||
| | |{{SSBU|Battlefield}} | ||
|Normal | |Normal | ||
| | | | ||
| | |"normal2", Low | ||
| | |||
| | |||
|{{SSBU|Mario}} | |||
|1 | |||
| | | | ||
| | | | ||
| | | | ||
| | |{{SpiritType|Grab}} | ||
|[[File:Equipment Icon Brawn Badge.png|20px]] 6500<br>[[File:Equipment Icon Protection Badge.png|20px]] 6000 | |||
|[[File:Equipment Icon Brawn Badge.png|20px]] | |||
|Normal | |Normal | ||
| | |99 | ||
|- | |- | ||
| | |451 | ||
| | |{{SpiritTableName|Mega Kangaskhan}} | ||
|9300 | |9300 | ||
|Stock: 1 | |Stock: 1 | ||
| Line 1,588: | Line 1,530: | ||
| | | | ||
| | | | ||
| | |{{SpiritType|Grab}} | ||
|[[File:Equipment Icon Brawn Badge.png|20px]] 4000<br>[[File:Equipment Icon Protection Badge.png|20px]] 3500 | |[[File:Equipment Icon Brawn Badge.png|20px]] 4000<br>[[File:Equipment Icon Protection Badge.png|20px]] 3500 | ||
|Normal | |Normal | ||
|74 | |74 | ||
|- | |- | ||
| | |467 | ||
| | |{{SpiritTableName|Togepi}} | ||
| | |3600 | ||
|Stock: 1 | |Stock: 1 | ||
|{{SSBU|Battlefield}} | |{{SSBU|Battlefield}} | ||
|Normal | |Normal | ||
| | | | ||
|" | |"normal", Low | ||
| | | | ||
| | | | ||
| Line 1,608: | Line 1,550: | ||
| | | | ||
| | | | ||
| | |{{SpiritType|Shield}} | ||
|[[File:Equipment Icon Brawn Badge.png|20px]] | |[[File:Equipment Icon Brawn Badge.png|20px]] 2000<br>[[File:Equipment Icon Protection Badge.png|20px]] 1300 | ||
|Normal | |Normal | ||
| | |47 | ||
|- | |- | ||
| | |476 | ||
| | |{{SpiritTableName|Scizor}} | ||
| | |4400 | ||
|Stock: 1 | |Stock: 1 | ||
| | |[[Kalos Pokémon League]] | ||
|Normal | |Normal | ||
| | | | ||
|" | |"normal3", Low | ||
| | | | ||
| | |•Metal Killer | ||
|{{SSBU| | |{{SSBU|Lucario}} | ||
|1 | |1 | ||
| | | | ||
|Metal | |||
| | | | ||
| | |{{SpiritType|Attack}} | ||
| | |[[File:Equipment Icon Brawn Badge.png|20px]] 2000<br>[[File:Equipment Icon Protection Badge.png|20px]] 1300 | ||
|[[File:Equipment Icon Brawn Badge.png|20px]] | |Metal | ||
| | |47 | ||
| | |||
|- | |- | ||
| | |497 | ||
|{{SpiritTableName|Primal Kyogre}} | |||
| | |8700 | ||
|Stock: 1 | |Stock: 1 (enemy: 99) | ||
| | |[[Dracula's Castle]] | ||
|Normal | |Normal | ||
| | | | ||
|"normal", Low | |"normal", Low | ||
| | |•Giant Enemy for 10 seconds at 5 second intervals | ||
| | |•Giant Killer<br>•KOs Heal Damage<br>•Back Shield Equipped | ||
|{{SSBU| | |{{SSBU|King K. Rool}} | ||
|1 | |1 | ||
| | | | ||
| | | | ||
| | | | ||
| | |{{SpiritType|Shield}} | ||
|[[File:Equipment Icon Brawn Badge.png|20px]] | |[[File:Equipment Icon Brawn Badge.png|20px]] 2700<br>[[File:Equipment Icon Protection Badge.png|20px]] 2200 | ||
| | |Stay | ||
| | |4 | ||
|- | |- | ||
| | |499 | ||
| | |{{SpiritTableName|Primal Groudon}} | ||
|8700 | |||
|Stock: 1 | |Stock: 1 (enemy: 99) | ||
|{{SSBU|Battlefield}} | |{{SSBU|Battlefield}} | ||
|Normal | |Normal | ||
| | | | ||
|" | |"normal", Low | ||
| | |•Curry-Filled Everyone for 10 seconds at 5 second intervals | ||
| | |•Fire/Explosion Resist ↑<br>•Super Armor<br>•Healing Shield<br>•Shield Durability ↑<br>•Slow Super Armor<br>•KOs Heal Damage<br>•Back Shield Equipped | ||
|{{SSBU|Mario}} | |{{SSBU|Mario}} | ||
|1 | |1 | ||
| Line 1,668: | Line 1,610: | ||
| | | | ||
| | | | ||
| | |{{SpiritType|Attack}} | ||
|[[File:Equipment Icon Brawn Badge.png|20px]] | |[[File:Equipment Icon Brawn Badge.png|20px]] 2700<br>[[File:Equipment Icon Protection Badge.png|20px]] 2200 | ||
| | |Stay | ||
| | |4 | ||
|- | |- | ||
| | |501 | ||
|{{SpiritTableName|Jirachi}} | |||
| | |13700 | ||
|Stock: 1 | |Stock: 1<br>Time: 180 | ||
| | |[[Pokémon Stadium]] | ||
|Normal | |Normal | ||
| | | | ||
| Line 1,683: | Line 1,625: | ||
| | | | ||
| | | | ||
|{{SSBU| | |{{SSBU|Rosalina & Luma}} | ||
|1 | |1 | ||
| | | | ||
| | | | ||
| | |•Critical Immunity<br>•Critical Immunity<br>•Critical Immunity | ||
| | |{{SpiritType|Grab}} | ||
|[[File:Equipment Icon Brawn Badge.png|20px]] 6500<br>[[File:Equipment Icon Protection Badge.png|20px]] 6000 | |[[File:Equipment Icon Brawn Badge.png|20px]] 6500<br>[[File:Equipment Icon Protection Badge.png|20px]] 6000 | ||
|Normal | |Normal | ||
|99 | |99 | ||
|- | |- | ||
| | |513 | ||
| | |{{SpiritTableName|Giratina (Origin Forme)}} | ||
|12400 | |||
|Stock: | |Stock: 99 | ||
| | |[[Dracula's Castle]] | ||
|Normal | |Normal | ||
| | | | ||
|" | |"normal", Low | ||
| | |•Wind (Left) Lv. 1 at 5 second intervals | ||
| | |•Strong-Wind Immunity<br>•Strong-Wind Resist<br>•Move Speed ↑<br>•Trade-Off Speed ↑<br>•KOs Heal Damage<br>•Back Shield Equipped<br>•Rocket Belt Equipped<br>•Lightweight<br>•Jump ↑<br>•Bunny Hood Equipped | ||
|{{SSBU|Mario}} | |{{SSBU|Mario}} | ||
|1 | |1 | ||
| Line 1,708: | Line 1,650: | ||
| | | | ||
| | | | ||
| | |{{SpiritType|Neutral}} | ||
|[[File:Equipment Icon Brawn Badge.png|20px]] | |[[File:Equipment Icon Brawn Badge.png|20px]] 4900<br>[[File:Equipment Icon Protection Badge.png|20px]] 4400 | ||
| | |Stay | ||
| | |5 | ||
|- | |- | ||
| | |518 | ||
| | |{{SpiritTableName|Shaymin (Sky Forme)}} | ||
| | |12400 | ||
|Stock: | |Stock: 99 | ||
|{{SSBU|Battlefield}} | |{{SSBU|Battlefield}} | ||
|Normal | |Normal | ||
| | | | ||
|" | |"normal", Low | ||
| | |•Everyone Defense ↑↑↑ for 15 seconds at 5 second intervals | ||
| | |•KOs Heal Damage<br>•Back Shield Equipped | ||
|{{SSBU|Mario}} | |{{SSBU|Mario}} | ||
|1 | |1 | ||
| Line 1,728: | Line 1,670: | ||
| | | | ||
| | | | ||
| | |{{SpiritType|Grab}} | ||
|[[File:Equipment Icon Brawn Badge.png|20px]] | |[[File:Equipment Icon Brawn Badge.png|20px]] 4900<br>[[File:Equipment Icon Protection Badge.png|20px]] 4400 | ||
| | |Stay | ||
| | |5 | ||
|- | |- | ||
| | |532 | ||
| | |{{SpiritTableName|Kyurem (Black Kyurem)}} | ||
| | |8600 | ||
| | |Stock: 99 | ||
| | |{{SSBU|Battlefield}} | ||
|Normal | |Normal | ||
| | | | ||
|" | |"normal", Low | ||
|•Screen Flip for 10 seconds at 5 second intervals | |||
|•Screen-Flip Immunity<br>•KOs Heal Damage<br>•Back Shield Equipped | |||
|{{SSBU|Mario}} | |||
|1 | |||
| | | | ||
| | | | ||
| | | | ||
| | |{{SpiritType|Attack}} | ||
|[[File:Equipment Icon Brawn Badge.png|20px]] | |[[File:Equipment Icon Brawn Badge.png|20px]] 2700<br>[[File:Equipment Icon Protection Badge.png|20px]] 2200 | ||
| | |Stay | ||
| | |4 | ||
|- | |- | ||
| | |533 | ||
| | |{{SpiritTableName|Kyurem (White Kyurem)}} | ||
| | |8600 | ||
| | |Stock: 99 | ||
| | |{{SSBU|Battlefield}} | ||
|Normal | |Normal | ||
| | | | ||
|" | |"normal", Low | ||
|•Player Input Reverse for 10 seconds at 5 second intervals | |||
|•Irreversible Controls<br>•KOs Heal Damage<br>•Back Shield Equipped | |||
|{{SSBU|Mario}} | |||
|1 | |||
| | |||
| | | | ||
| | | | ||
| | |{{SpiritType|Shield}} | ||
| | |[[File:Equipment Icon Brawn Badge.png|20px]] 2700<br>[[File:Equipment Icon Protection Badge.png|20px]] 2200 | ||
|[[File:Equipment Icon Brawn Badge.png|20px]] | |Stay | ||
| | |4 | ||
| | |||
|- | |- | ||
| | |535 | ||
|{{SpiritTableName|Keldeo (Resolute Form)}} | |||
| | |12300 | ||
|Stock: | |Stock: 99 | ||
| | |{{SSBU|Battlefield}} | ||
|Normal | |Normal | ||
| | | | ||
|" | |"normal", Low | ||
| | |•Invisible Everyone for 10 seconds at 5 second intervals | ||
| | |•Lip's Stick Equipped<br>•Black Hole Equipped<br>•Beastball Equipped<br>•KOs Heal Damage<br>•Back Shield Equipped | ||
|{{SSBU| | |{{SSBU|Mario}} | ||
|1 | |1 | ||
| | | | ||
| | | | ||
| | | | ||
| | |{{SpiritType|Shield}} | ||
|[[File:Equipment Icon Brawn Badge.png|20px]] | |[[File:Equipment Icon Brawn Badge.png|20px]] 4900<br>[[File:Equipment Icon Protection Badge.png|20px]] 4400 | ||
|Stay | |||
|5 | |||
|- | |||
|545 | |||
|{{SpiritTableName|Zygarde (Complete Forme)}} | |||
|12500 | |||
|Stock: 99 | |||
|{{SSBU|Battlefield}} | |||
|Normal | |Normal | ||
| | | | ||
|"normal", Low | |"normal", Low | ||
| | |•Metal Everyone for 15 seconds at 5 second intervals | ||
| | |•Metal Killer<br>•KOs Heal Damage<br>•Back Shield Equipped | ||
|{{SSBU| | |{{SSBU|Mario}} | ||
|1 | |1 | ||
| | | | ||
| | | | ||
| | | | ||
| | |{{SpiritType|Grab}} | ||
|[[File:Equipment Icon Brawn Badge.png|20px]] | |[[File:Equipment Icon Brawn Badge.png|20px]] 4900<br>[[File:Equipment Icon Protection Badge.png|20px]] 4400 | ||
| | |Stay | ||
| | |5 | ||
|- | |- | ||
| | |547 | ||
| | |{{SpiritTableName|Mega Diancie}} | ||
| | |13500 | ||
|Stock: 1 | |Stock: 1 | ||
| | |{{SSBU|Battlefield}} | ||
|Normal | |Normal | ||
| | | | ||
|" | |"normal", Low | ||
| | | | ||
| | | | ||
| Line 1,828: | Line 1,770: | ||
| | | | ||
| | | | ||
| | |{{SpiritType|Shield}} | ||
|[[File:Equipment Icon Brawn Badge.png|20px]] | |[[File:Equipment Icon Brawn Badge.png|20px]] 6500<br>[[File:Equipment Icon Protection Badge.png|20px]] 6000 | ||
|Normal | |Normal | ||
| | |99 | ||
|- | |- | ||
| | |549 | ||
| | |{{SpiritTableName|Hoopa (Unbound)}} | ||
| | |9500 | ||
|Stock: 1 | |Stock: 1 | ||
| | |{{SSBU|Battlefield}} | ||
|Normal | |Normal | ||
| | | | ||
|" | |"normal", Low | ||
| | | | ||
| | | | ||
| Line 1,848: | Line 1,790: | ||
| | | | ||
| | | | ||
| | |{{SpiritType|Grab}} | ||
|[[File:Equipment Icon Brawn Badge.png|20px]] | |[[File:Equipment Icon Brawn Badge.png|20px]] 4000<br>[[File:Equipment Icon Protection Badge.png|20px]] 3500 | ||
|Normal | |Normal | ||
| | |74 | ||
|- | |- | ||
| | |577 | ||
|{{SpiritTableName|Mr. Saturn}} | |||
| | |9400 | ||
|Stock: 1 | |Stock: 1 | ||
|[[ | |[[Onett]] | ||
|Normal | |Normal | ||
| | | | ||
| | |Mr. Saturn, Max | ||
| | | | ||
| | |•Thrown Items ↑<br>•Shield Damage ↑<br>•Healing Shield<br>•Shield Durability ↑ | ||
|{{SSBU| | |{{SSBU|Ness}} | ||
| | |2 | ||
| | | | ||
| | | | ||
| | |•Thrown Items ↑<br>•Shield Damage ↑ | ||
| | |{{SpiritType|Neutral}} | ||
|[[File:Equipment Icon Brawn Badge.png|20px]] 4000<br>[[File:Equipment Icon Protection Badge.png|20px]] 3500 | |[[File:Equipment Icon Brawn Badge.png|20px]] 4000<br>[[File:Equipment Icon Protection Badge.png|20px]] 3500 | ||
|Normal | |Normal | ||
|74 | |74 | ||
|- | |- | ||
| | |594 | ||
|{{SpiritTableName|Samurai Goroh}} | |||
|13300 | |||
|{{ | |||
| | |||
|Stock: 1 | |Stock: 1 | ||
|{{SSBU|Battlefield}} | |{{SSBU|Battlefield}} | ||
|Normal | |Normal | ||
| | | | ||
|" | |"normal2", Low | ||
| | | | ||
| | | | ||
| Line 1,908: | Line 1,830: | ||
| | | | ||
| | | | ||
| | |{{SpiritType|Attack}} | ||
|[[File:Equipment Icon Brawn Badge.png|20px]] 6500<br>[[File:Equipment Icon Protection Badge.png|20px]] 6000 | |[[File:Equipment Icon Brawn Badge.png|20px]] 6500<br>[[File:Equipment Icon Protection Badge.png|20px]] 6000 | ||
|Normal | |Normal | ||
|99 | |99 | ||
|- | |- | ||
| | |631 | ||
| | |{{SpiritTableName|Tiki (Naga's Voice)}} | ||
| | |9300 | ||
|Stock: 1 | |Stock: 1 | ||
|{{SSBU|Battlefield}} | |{{SSBU|Battlefield}} | ||
| Line 1,928: | Line 1,850: | ||
| | | | ||
| | | | ||
| | |{{SpiritType|Neutral}} | ||
|[[File:Equipment Icon Brawn Badge.png|20px]] 4000<br>[[File:Equipment Icon Protection Badge.png|20px]] 3500 | |[[File:Equipment Icon Brawn Badge.png|20px]] 4000<br>[[File:Equipment Icon Protection Badge.png|20px]] 3500 | ||
|Normal | |Normal | ||
|74 | |74 | ||
|- | |- | ||
| | |634 | ||
| | |{{SpiritTableName|Sirius}} | ||
| | |13600 | ||
|Stock: 1 | |Stock: 1 | ||
|{{SSBU|Battlefield}} | |{{SSBU|Battlefield}} | ||
|Normal | |Normal | ||
| | | | ||
|" | |"normal3", Low | ||
| | | | ||
| | | | ||
| Line 1,948: | Line 1,870: | ||
| | | | ||
| | | | ||
| | |{{SpiritType|Grab}} | ||
|[[File:Equipment Icon Brawn Badge.png|20px]] 6500<br>[[File:Equipment Icon Protection Badge.png|20px]] 6000 | |[[File:Equipment Icon Brawn Badge.png|20px]] 6500<br>[[File:Equipment Icon Protection Badge.png|20px]] 6000 | ||
|Normal | |Normal | ||
|99 | |99 | ||
|- | |- | ||
| | |638 | ||
| | |{{SpiritTableName|Alm & Celica}} | ||
|9300 | |9300 | ||
|Stock: 1 | |Stock: 1 | ||
| Line 1,960: | Line 1,882: | ||
|Normal | |Normal | ||
| | | | ||
|" | |"normal2", Low | ||
| | | | ||
| | | | ||
|{{SSBU| | |{{SSBU|Marth}} | ||
|1 | |1 | ||
| | | | ||
| | | | ||
| | | | ||
| | |{{SpiritType|Shield}} | ||
|[[File:Equipment Icon Brawn Badge.png|20px]] 4000<br>[[File:Equipment Icon Protection Badge.png|20px]] 3500 | |[[File:Equipment Icon Brawn Badge.png|20px]] 4000<br>[[File:Equipment Icon Protection Badge.png|20px]] 3500 | ||
|Normal | |Normal | ||
|74 | |74 | ||
|- | |- | ||
| | |646 | ||
| | |{{SpiritTableName|Lyn (Blade Lord)}} | ||
| | |13500 | ||
|Stock: 1 | |Stock: 1 | ||
|{{SSBU|Battlefield}} | |{{SSBU|Battlefield}} | ||
| Line 1,988: | Line 1,910: | ||
| | | | ||
| | | | ||
| | |{{SpiritType|Attack}} | ||
|[[File:Equipment Icon Brawn Badge.png|20px]] | |[[File:Equipment Icon Brawn Badge.png|20px]] 6500<br>[[File:Equipment Icon Protection Badge.png|20px]] 6000 | ||
|Normal | |Normal | ||
| | |99 | ||
|- | |- | ||
| | |654 | ||
| | |{{SpiritTableName|Ephraim}} | ||
| | |9500 | ||
|Stock: 1 | |Stock: 1 | ||
| | |{{SSBU|Battlefield}} | ||
|Normal | |Normal | ||
| | | | ||
|" | |"normal3", Low | ||
| | | | ||
| | | | ||
| Line 2,028: | Line 1,930: | ||
| | | | ||
| | | | ||
| | |{{SpiritType|Attack}} | ||
|[[File:Equipment Icon Brawn Badge.png|20px]] 4000<br>[[File:Equipment Icon Protection Badge.png|20px]] 3500 | |[[File:Equipment Icon Brawn Badge.png|20px]] 4000<br>[[File:Equipment Icon Protection Badge.png|20px]] 3500 | ||
|Normal | |Normal | ||
|74 | |74 | ||
|- | |- | ||
| | |662 | ||
| | |{{SpiritTableName|Queen Elincia}} | ||
| | |13400 | ||
|Stock: 1 | |Stock: 1 | ||
|{{SSBU|Battlefield}} | |{{SSBU|Battlefield}} | ||
|Normal | |Normal | ||
| | | | ||
|" | |"normal2", Low | ||
| | | | ||
| | | | ||
| Line 2,048: | Line 1,950: | ||
| | | | ||
| | | | ||
| | |{{SpiritType|Shield}} | ||
|[[File:Equipment Icon Brawn Badge.png|20px]] | |[[File:Equipment Icon Brawn Badge.png|20px]] 6500<br>[[File:Equipment Icon Protection Badge.png|20px]] 6000 | ||
|Normal | |Normal | ||
| | |99 | ||
|- | |- | ||
| | |665 | ||
| | |{{SpiritTableName|Black Knight}} | ||
| | |13700 | ||
|Stock: 1 | |Stock: 1 | ||
|{{SSBU|Battlefield}} | |{{SSBU|Battlefield}} | ||
| Line 2,068: | Line 1,970: | ||
| | | | ||
| | | | ||
| | |{{SpiritType|Attack}} | ||
|[[File:Equipment Icon Brawn Badge.png|20px]] 6500<br>[[File:Equipment Icon Protection Badge.png|20px]] 6000 | |[[File:Equipment Icon Brawn Badge.png|20px]] 6500<br>[[File:Equipment Icon Protection Badge.png|20px]] 6000 | ||
|Normal | |Normal | ||
|99 | |99 | ||
|- | |- | ||
| | |666 | ||
| | |{{SpiritTableName|Micaiah}} | ||
| | |9300 | ||
|Stock: 1 | |Stock: 1 | ||
|{{SSBU|Battlefield}} | |{{SSBU|Battlefield}} | ||
|Normal | |Normal | ||
| | | | ||
|" | |"normal3", Low | ||
| | | | ||
| | | | ||
| Line 2,088: | Line 1,990: | ||
| | | | ||
| | | | ||
| | |{{SpiritType|Grab}} | ||
|[[File:Equipment Icon Brawn Badge.png|20px]] 4000<br>[[File:Equipment Icon Protection Badge.png|20px]] 3500 | |[[File:Equipment Icon Brawn Badge.png|20px]] 4000<br>[[File:Equipment Icon Protection Badge.png|20px]] 3500 | ||
|Normal | |Normal | ||
|74 | |74 | ||
|- | |- | ||
| | |669 | ||
| | |{{SpiritTableName|Cordelia}} | ||
| | |3700 | ||
|HP: 120 | |||
| | |[[Arena Ferox]] | ||
|Normal | |Normal | ||
| | | | ||
|" | |"normal3", Low | ||
| | | | ||
| | |•Stamina ↑<br>•Critical-Health Healing<br>•Autoheal<br>•Great Autoheal<br>•Death's Scythe Equipped | ||
|{{SSBU| | |{{SSBU|Chrom}} | ||
|1 | |1 | ||
|80 | |||
| | | | ||
| | | | ||
| | |{{SpiritType|Shield}} | ||
|[[File:Equipment Icon Brawn Badge.png|20px]] 2000<br>[[File:Equipment Icon Protection Badge.png|20px]] 1300 | |[[File:Equipment Icon Brawn Badge.png|20px]] 2000<br>[[File:Equipment Icon Protection Badge.png|20px]] 1300 | ||
|Normal | |Normal | ||
|47 | |47 | ||
|- | |- | ||
| | |682 | ||
| | |{{SpiritTableName|Xander}} | ||
| | |13800 | ||
|HP: 120 | |||
| | |[[Coliseum]] | ||
|Normal | |Normal | ||
| | | | ||
|" | |"normal2", Low | ||
| | | | ||
| | |•Stamina ↑<br>•Critical-Health Healing<br>•Autoheal<br>•Great Autoheal<br>•Lip's Stick Equipped<br>•Strong Throw<br>•Ray Gun Equipped<br>•Super Scope Equipped<br>•Staff Equipped<br>•Banana Gun Equipped<br>•Boomerang Equipped<br>•Death's Scythe Equipped | ||
|{{SSBU| | |{{SSBU|Corrin}} | ||
|1 | |1 | ||
|80 | |||
| | | | ||
| | |•Autoheal<br>•Slash Attack ↑<br>•Slow Super Armor | ||
| | |{{SpiritType|Attack}} | ||
| | |[[File:Equipment Icon Brawn Badge.png|20px]] 6500<br>[[File:Equipment Icon Protection Badge.png|20px]] 6000 | ||
|[[File:Equipment Icon Brawn Badge.png|20px]] | |||
|Normal | |Normal | ||
| | |99 | ||
|- | |- | ||
| | |688 | ||
| | |{{SpiritTableName|Tsubasa Oribe (Carnage Form)}} | ||
| | |9300 | ||
|Stock: 1 | |Stock: 1 | ||
| | |[[Moray Towers]] | ||
|Normal | |Normal | ||
| | | | ||
|" | |"normal2", Low | ||
| | |•Enemy Sudden Final Smash immediately | ||
| | |•Critical Immunity<br>•Critical-Health Healing<br>•Easier Dodging | ||
|{{SSBU| | |{{SSBU|Daisy}} | ||
|1 | |1 | ||
| | | | ||
| | | | ||
| | | | ||
| | |{{SpiritType|Shield}} | ||
|[[File:Equipment Icon Brawn Badge.png|20px]] 4000<br>[[File:Equipment Icon Protection Badge.png|20px]] 3500 | |[[File:Equipment Icon Brawn Badge.png|20px]] 4000<br>[[File:Equipment Icon Protection Badge.png|20px]] 3500 | ||
|Normal | |Normal | ||
|74 | |74 | ||
|- | |- | ||
| | |695 | ||
| | |{{SpiritTableName|Helmet}} | ||
| | |1700 | ||
|Stock: 1 | |Stock: 1 | ||
| | |[[Flat Zone X]] | ||
|Battlefield | |||
| | | | ||
|" | |"normal", Low | ||
| | | | ||
| | | | ||
|{{SSBU| | |{{SSBU|Pac-Man}} | ||
|1 | |1 | ||
| | | | ||
| | | | ||
| | | | ||
| | |{{SpiritType|Shield}} | ||
|[[File:Equipment Icon Brawn Badge.png|20px]] | |[[File:Equipment Icon Brawn Badge.png|20px]] 1500<br>[[File:Equipment Icon Protection Badge.png|20px]] 1000 | ||
|Normal | |Normal | ||
| | |41 | ||
|- | |- | ||
| | |697 | ||
| | |{{SpiritTableName|Parachute}} | ||
| | |3600 | ||
|Stock: 1 | |Stock: 1 | ||
|[[ | |[[Flat Zone X]] | ||
|Normal | |Normal | ||
| | | | ||
| | |"normal2", Low | ||
| | |||
| | | | ||
|{{SSBU|Mario}} | |||
|{{SSBU| | |||
|1 | |1 | ||
| | | | ||
| | | | ||
| | | | ||
| | |{{SpiritType|Grab}} | ||
|[[File:Equipment Icon Brawn Badge.png|20px]] | |[[File:Equipment Icon Brawn Badge.png|20px]] 2000<br>[[File:Equipment Icon Protection Badge.png|20px]] 1300 | ||
|Normal | |Normal | ||
| | |47 | ||
|- | |- | ||
| | |698 | ||
| | |{{SpiritTableName|Octopus}} | ||
| | |13700 | ||
|Stock: 1 | |Stock: 1 | ||
| | |[[Flat Zone X]] | ||
|Normal | |Normal | ||
| | | | ||
| Line 2,208: | Line 2,110: | ||
| | | | ||
| | | | ||
| | |{{SpiritType|Shield}} | ||
|[[File:Equipment Icon Brawn Badge.png|20px]] | |[[File:Equipment Icon Brawn Badge.png|20px]] 6500<br>[[File:Equipment Icon Protection Badge.png|20px]] 6000 | ||
|Normal | |Normal | ||
| | |99 | ||
|- | |- | ||
| | |699 | ||
| | |{{SpiritTableName|Chef (Game & Watch)}} | ||
|9300 | |9300 | ||
|Stock: 1 | |Stock: 1 | ||
|[[ | |[[Flat Zone X]] | ||
|Normal | |Normal | ||
| | | | ||
|" | |"normal3", Low | ||
| | | | ||
| | | | ||
|{{SSBU| | |{{SSBU|Mario}} | ||
|1 | |1 | ||
| | | | ||
| | | | ||
| | | | ||
| | |{{SpiritType|Shield}} | ||
|[[File:Equipment Icon Brawn Badge.png|20px]] 4000<br>[[File:Equipment Icon Protection Badge.png|20px]] 3500 | |[[File:Equipment Icon Brawn Badge.png|20px]] 4000<br>[[File:Equipment Icon Protection Badge.png|20px]] 3500 | ||
|Normal | |Normal | ||
|74 | |74 | ||
|- | |- | ||
| | |706 | ||
| | |{{SpiritTableName|Pit (Original)}} | ||
| | |9400 | ||
|Stock: 1 | |Stock: 1 | ||
|[[ | |[[Skyworld]] | ||
|Normal | |Normal | ||
| | | | ||
| Line 2,243: | Line 2,145: | ||
| | | | ||
| | | | ||
|{{SSBU| | |{{SSBU|Pit}} | ||
|1 | |1 | ||
| | | | ||
| | | | ||
| | | | ||
| | |{{SpiritType|Grab}} | ||
|[[File:Equipment Icon Brawn Badge.png|20px]] | |[[File:Equipment Icon Brawn Badge.png|20px]] 4000<br>[[File:Equipment Icon Protection Badge.png|20px]] 3500 | ||
|Normal | |Normal | ||
| | |74 | ||
|- | |- | ||
| | |711 | ||
|{{SpiritTableName|Medusa (Kid Icarus: Uprising)}} | |||
| | |13600 | ||
|Stock: 1 | |Stock: 1 | ||
| | |{{SSBU|Battlefield}} | ||
|Normal | |Normal | ||
| | | | ||
| Line 2,268: | Line 2,170: | ||
| | | | ||
| | | | ||
| | |{{SpiritType|Grab}} | ||
|[[File:Equipment Icon Brawn Badge.png|20px]] | |[[File:Equipment Icon Brawn Badge.png|20px]] 6500<br>[[File:Equipment Icon Protection Badge.png|20px]] 6000 | ||
|Normal | |Normal | ||
| | |99 | ||
|- | |- | ||
| | |711 | ||
| | |{{SpiritTableName|Amazon Pandora}} | ||
| | |9500 | ||
|Stock: 1 | |Stock: 1 | ||
| | |{{SSBU|Battlefield}} | ||
|Normal | |Normal | ||
| | | | ||
|" | |"normal", Low | ||
| | |||
| | | | ||
|{{SSBU|Mario}} | |||
|{{SSBU| | |||
|1 | |1 | ||
| | | | ||
| | | | ||
| | | | ||
| | |{{SpiritType|Grab}} | ||
|[[File:Equipment Icon Brawn Badge.png|20px]] | |[[File:Equipment Icon Brawn Badge.png|20px]] 4000<br>[[File:Equipment Icon Protection Badge.png|20px]] 3500 | ||
| | |Normal | ||
| | |74 | ||
|- | |- | ||
| | |718 | ||
| | |{{SpiritTableName|Hades (Final Form)}} | ||
|13700 | |13700 | ||
|Stock: 1 | |Stock: 1 | ||
| Line 2,308: | Line 2,210: | ||
| | | | ||
| | | | ||
| | |{{SpiritType|Attack}} | ||
|[[File:Equipment Icon Brawn Badge.png|20px]] 6500<br>[[File:Equipment Icon Protection Badge.png|20px]] 6000 | |[[File:Equipment Icon Brawn Badge.png|20px]] 6500<br>[[File:Equipment Icon Protection Badge.png|20px]] 6000 | ||
|Normal | |Normal | ||
|99 | |99 | ||
|- | |- | ||
| | |724 | ||
| | |{{SpiritTableName|Phosphora}} | ||
| | |9300 | ||
|Stock: 1 | |Stock: 1 | ||
|{{SSBU|Battlefield}} | |{{SSBU|Battlefield}} | ||
| Line 2,328: | Line 2,230: | ||
| | | | ||
| | | | ||
| | |{{SpiritType|Attack}} | ||
|[[File:Equipment Icon Brawn Badge.png|20px]] | |[[File:Equipment Icon Brawn Badge.png|20px]] 4000<br>[[File:Equipment Icon Protection Badge.png|20px]] 3500 | ||
|Normal | |Normal | ||
| | |74 | ||
|- | |- | ||
| | |731 | ||
|{{SpiritTableName|Jimmy T}}. | |||
| | |9200 | ||
|Stock: 1 | |Stock: 1 | ||
|{{SSBU|Battlefield}} | |{{SSBU|Battlefield}} | ||
|Normal | |Normal | ||
| | | | ||
|" | |"normal", Low | ||
| | | | ||
| | | | ||
| Line 2,348: | Line 2,250: | ||
| | | | ||
| | | | ||
| | |{{SpiritType|Shield}} | ||
|[[File:Equipment Icon Brawn Badge.png|20px]] | |[[File:Equipment Icon Brawn Badge.png|20px]] 4000<br>[[File:Equipment Icon Protection Badge.png|20px]] 3500 | ||
|Normal | |Normal | ||
| | |74 | ||
|- | |- | ||
| | |732 | ||
| | |{{SpiritTableName|Mona}} | ||
| | |9300 | ||
|Stock: 1 | |||
|[[ | |[[Mario Bros.]] | ||
|Normal | |Normal | ||
| | | | ||
|" | |"normal", Low | ||
| | |||
| | |||
|{{SSBU|Wario}} | |||
|4 | |||
| | | | ||
| | | | ||
| | |•Side Special ↑<br>•Side Special ↑<br>•Move Speed ↑ | ||
| | |{{SpiritType|Grab}} | ||
|[[File:Equipment Icon Brawn Badge.png|20px]] 4000<br>[[File:Equipment Icon Protection Badge.png|20px]] 3500 | |[[File:Equipment Icon Brawn Badge.png|20px]] 4000<br>[[File:Equipment Icon Protection Badge.png|20px]] 3500 | ||
|Normal | |Normal | ||
|74 | |74 | ||
|- | |- | ||
| | |742 | ||
| | |{{SpiritTableName|5-Volt (Angry)}} | ||
| | |9400 | ||
|Stock: 1 | |Stock: 1 | ||
|{{SSBU|Battlefield}} | |{{SSBU|Battlefield}} | ||
|Normal | |Normal | ||
| | | | ||
|" | |"normal2", Low | ||
| | | | ||
| | | | ||
|{{SSBU| | |{{SSBU|Mario}} | ||
|1 | |1 | ||
| | | | ||
| | | | ||
| | | | ||
| | |{{SpiritType|Attack}} | ||
|[[File:Equipment Icon Brawn Badge.png|20px]] | |[[File:Equipment Icon Brawn Badge.png|20px]] 4000<br>[[File:Equipment Icon Protection Badge.png|20px]] 3500 | ||
|Normal | |Normal | ||
| | |74 | ||
|- | |- | ||
| | |759 | ||
| | |{{SpiritTableName|Big Boss}} | ||
| | |13700 | ||
|Stock: 1 | |Stock: 1 | ||
|{{SSBU|Battlefield}} | |{{SSBU|Battlefield}} | ||
| Line 2,408: | Line 2,310: | ||
| | | | ||
| | | | ||
|[[File: | |{{SpiritType|Grab}} | ||
|[[File:Equipment Icon Brawn Badge.png|20px]] 6500<br>[[File:Equipment Icon Protection Badge.png|20px]] 6000 | |||
|Normal | |||
|99 | |||
|- | |||
|763 | |||
|{{SpiritTableName|Revolver Ocelot (Metal Gear Solid V)}} | |||
|9800 | |||
|Stock: 1 | |||
|[[Shadow Moses Island]] | |||
|Battlefield | |||
|Zap-Floor | |||
|Shooting, Max | |||
| | |||
|•Zap-Floor Immunity<br>•Rocket Belt Equipped<br>•Additional Midair Jump<br>•Super Leaf Equipped<br>•Screw Attack Equipped<br>•Shooting Items ↑<br>•Shooting Attack ↑<br>•Franklin Badge Equipped<br>•Easier Dodging<br>•Slow Super Armor<br>•Armor Knight | |||
|{{SSBU|Fox}} | |||
|5 | |||
| | |||
| | |||
|•Shooting Attack ↑<br>•Strong Throw<br>•Zap-Floor Immunity | |||
|{{SpiritType|Grab}} | |||
|[[File:Equipment Icon Brawn Badge.png|20px]] 4000<br>[[File:Equipment Icon Protection Badge.png|20px]] 3500 | |[[File:Equipment Icon Brawn Badge.png|20px]] 4000<br>[[File:Equipment Icon Protection Badge.png|20px]] 3500 | ||
| | |Item Shoot | ||
|74 | |74 | ||
|- | |- | ||
| | |765 | ||
| | |{{SpiritTableName|Raiden}} | ||
| | |13500 | ||
|Stock: 1 | |Stock: 1 | ||
|{{SSBU|Battlefield}} | |{{SSBU|Battlefield}} | ||
|Normal | |Normal | ||
| | | | ||
|" | |"normal", Low | ||
| | | | ||
| | | | ||
| Line 2,428: | Line 2,350: | ||
| | | | ||
| | | | ||
| | |{{SpiritType|Attack}} | ||
|[[File:Equipment Icon Brawn Badge.png|20px]] 6500<br>[[File:Equipment Icon Protection Badge.png|20px]] 6000 | |[[File:Equipment Icon Brawn Badge.png|20px]] 6500<br>[[File:Equipment Icon Protection Badge.png|20px]] 6000 | ||
|Normal | |Normal | ||
|99 | |99 | ||
|- | |- | ||
| | |773 | ||
| | |{{SpiritTableName|Sahelanthropus}} | ||
| | |9200 | ||
|Stock: 1 | |Stock: 1 | ||
|{{SSBU|Battlefield}} | |{{SSBU|Battlefield}} | ||
|Normal | |Normal | ||
| | | | ||
|" | |"normal", Low | ||
| | | | ||
| | | | ||
| Line 2,448: | Line 2,370: | ||
| | | | ||
| | | | ||
| | |{{SpiritType|Neutral}} | ||
|[[File:Equipment Icon Brawn Badge.png|20px]] | |[[File:Equipment Icon Brawn Badge.png|20px]] 4000<br>[[File:Equipment Icon Protection Badge.png|20px]] 3500 | ||
|Normal | |Normal | ||
| | |74 | ||
|- | |- | ||
| | |774 | ||
| | |{{SpiritTableName|Cardboard Box}} | ||
| | |2000 | ||
|Stock: 1 | |Stock: 1 | ||
| | |[[Shadow Moses Island]] | ||
|Battlefield | |||
| | | | ||
|" | |"normal", Low | ||
| | | | ||
| | | | ||
|{{SSBU| | |{{SSBU|Olimar}} | ||
|1 | |1 | ||
| | | | ||
| | | | ||
| | | | ||
| | |{{SpiritType|Grab}} | ||
|[[File:Equipment Icon Brawn Badge.png|20px]] 1500<br>[[File:Equipment Icon Protection Badge.png|20px]] 1000 | |[[File:Equipment Icon Brawn Badge.png|20px]] 1500<br>[[File:Equipment Icon Protection Badge.png|20px]] 1000 | ||
|Normal | |Normal | ||
|41 | |41 | ||
|- | |- | ||
| | |781 | ||
| | |{{SpiritTableName|Knuckles}} | ||
| | |9300 | ||
|Stock: 1 | |Stock: 1 | ||
|{{SSBU|Battlefield}} | |{{SSBU|Battlefield}} | ||
|Normal | |Normal | ||
| | | | ||
|" | |"normal", Low | ||
| | | | ||
| | | | ||
| Line 2,488: | Line 2,410: | ||
| | | | ||
| | | | ||
| | |{{SpiritType|Grab}} | ||
|[[File:Equipment Icon Brawn Badge.png|20px]] | |[[File:Equipment Icon Brawn Badge.png|20px]] 4000<br>[[File:Equipment Icon Protection Badge.png|20px]] 3500 | ||
|Normal | |Normal | ||
| | |74 | ||
|- | |- | ||
| | |787 | ||
| | |{{SpiritTableName|Hero Chao}} | ||
| | |9500 | ||
|Stock: 1 | |Stock: 1 | ||
|{{SSBU|Battlefield}} | |{{SSBU|Battlefield}} | ||
|Normal | |Normal | ||
| | | | ||
|" | |"normal", Low | ||
| | | | ||
| | | | ||
| Line 2,508: | Line 2,430: | ||
| | | | ||
| | | | ||
| | |{{SpiritType|Shield}} | ||
|[[File:Equipment Icon Brawn Badge.png|20px]] | |[[File:Equipment Icon Brawn Badge.png|20px]] 4000<br>[[File:Equipment Icon Protection Badge.png|20px]] 3500 | ||
|Normal | |Normal | ||
| | |74 | ||
|- | |- | ||
| | |789 | ||
| | |{{SpiritTableName|Super Shadow}} | ||
| | |13700 | ||
|Stock: 1 | |Stock: 1 | ||
|{{SSBU|Battlefield}} | |{{SSBU|Battlefield}} | ||
|Normal | |Normal | ||
| | | | ||
|" | |"normal", Low | ||
| | | | ||
| | | | ||
| Line 2,528: | Line 2,450: | ||
| | | | ||
| | | | ||
| | |{{SpiritType|Attack}} | ||
|[[File:Equipment Icon Brawn Badge.png|20px]] | |[[File:Equipment Icon Brawn Badge.png|20px]] 6500<br>[[File:Equipment Icon Protection Badge.png|20px]] 6000 | ||
|Normal | |Normal | ||
| | |99 | ||
|- | |- | ||
| | |794 | ||
| | |{{SpiritTableName|Jet the Hawk}} | ||
| | |3100 | ||
|Stock: | |Stock: 99 | ||
|{{SSBU|Battlefield}} | |{{SSBU|Battlefield}} | ||
|Normal | |Normal | ||
| | | | ||
|" | |"normal", Low | ||
| | |•Flower Everyone for 15 seconds at 5 second intervals | ||
| | |•Autoheal<br>•Great Autoheal<br>•Critical-Health Attack ↑<br>•Critical-Health Defense ↑<br>•Critical-Health Stats ↑<br>•Critical-Health Stats ↑↑<br>•Critical Immunity<br>•KOs Heal Damage<br>•Back Shield Equipped<br>•Undamaged Attack ↑<br>•Undamaged Speed ↑<br>•Undamaged Attack & Speed ↑ | ||
|{{SSBU|Mario}} | |{{SSBU|Mario}} | ||
|1 | |1 | ||
| Line 2,548: | Line 2,470: | ||
| | | | ||
| | | | ||
|[[File: | |{{SpiritType|Shield}} | ||
|[[File:Equipment Icon Brawn Badge.png|20px]] | |[[File:Equipment Icon Brawn Badge.png|20px]] 1050<br>[[File:Equipment Icon Protection Badge.png|20px]] 350 | ||
|Stay | |||
|3 | |||
|- | |||
|800 | |||
|{{SpiritTableName|Louie}} | |||
|9300 | |||
|Stock: 1 | |||
|{{SSBU|Battlefield}} | |||
|Normal | |||
| | |||
|"normal", Low | |||
| | |||
| | |||
|{{SSBU|Mario}} | |||
|1 | |||
| | |||
| | |||
| | |||
|{{SpiritType|Grab}} | |||
|[[File:Equipment Icon Brawn Badge.png|20px]] 4000<br>[[File:Equipment Icon Protection Badge.png|20px]] 3500 | |||
|Normal | |Normal | ||
| | |74 | ||
|- | |- | ||
| | |811 | ||
| | |{{SpiritTableName|Empress Bulblax}} | ||
|13300 | |13300 | ||
|Stock: 1 | |Stock: 1 | ||
| Line 2,560: | Line 2,502: | ||
|Normal | |Normal | ||
| | | | ||
|" | |"normal2", Low | ||
| | | | ||
| | | | ||
| Line 2,568: | Line 2,510: | ||
| | | | ||
| | | | ||
| | |{{SpiritType|Shield}} | ||
|[[File:Equipment Icon Brawn Badge.png|20px]] 6500<br>[[File:Equipment Icon Protection Badge.png|20px]] 6000 | |[[File:Equipment Icon Brawn Badge.png|20px]] 6500<br>[[File:Equipment Icon Protection Badge.png|20px]] 6000 | ||
|Normal | |Normal | ||
|99 | |99 | ||
|- | |- | ||
| | |814 | ||
| | |{{SpiritTableName|Plasm Wraith}} | ||
| | |9400 | ||
|Stock: 1 | |Stock: 1 | ||
|{{SSBU|Battlefield}} | |{{SSBU|Battlefield}} | ||
|Normal | |Normal | ||
| | | | ||
|" | |"normal2", Low | ||
| | | | ||
| | | | ||
| Line 2,588: | Line 2,530: | ||
| | | | ||
| | | | ||
| | |{{SpiritType|Neutral}} | ||
|[[File:Equipment Icon Brawn Badge.png|20px]] 4000<br>[[File:Equipment Icon Protection Badge.png|20px]] 3500 | |[[File:Equipment Icon Brawn Badge.png|20px]] 4000<br>[[File:Equipment Icon Protection Badge.png|20px]] 3500 | ||
|Normal | |Normal | ||
|74 | |74 | ||
|- | |- | ||
| | |823 | ||
| | |{{SpiritTableName|Stack-Up}} | ||
| | |3800 | ||
|Stock: 1 | |Stock: 1 | ||
| | |{{SSBU|Battlefield}} | ||
|Normal | |Normal | ||
| | | | ||
| Line 2,603: | Line 2,545: | ||
| | | | ||
| | | | ||
|{{SSBU| | |{{SSBU|Mario}} | ||
|1 | |1 | ||
| | | | ||
| | | | ||
| | | | ||
| | |{{SpiritType|Shield}} | ||
|[[File:Equipment Icon Brawn Badge.png|20px]] 2000<br>[[File:Equipment Icon Protection Badge.png|20px]] 1300 | |[[File:Equipment Icon Brawn Badge.png|20px]] 2000<br>[[File:Equipment Icon Protection Badge.png|20px]] 1300 | ||
|Normal | |Normal | ||
|47 | |47 | ||
|- | |- | ||
| | |829 | ||
| | |{{SpiritTableName|Tom Nook (Nookington's)}} | ||
| | |9100 | ||
|Stock: 1 | |Stock: 1 | ||
|{{SSBU|Battlefield}} | |{{SSBU|Battlefield}} | ||
| Line 2,628: | Line 2,570: | ||
| | | | ||
| | | | ||
| | |{{SpiritType|Neutral}} | ||
|[[File:Equipment Icon Brawn Badge.png|20px]] | |[[File:Equipment Icon Brawn Badge.png|20px]] 4000<br>[[File:Equipment Icon Protection Badge.png|20px]] 3500 | ||
|Normal | |Normal | ||
| | |74 | ||
|- | |- | ||
| | |832 | ||
|{{SpiritTableName|K.K. Slider}} | |||
| | |9500 | ||
|Stock: 1 | |Stock: 1 | ||
|{{SSBU|Battlefield}} | |{{SSBU|Battlefield}} | ||
|Normal | |Normal | ||
| | | | ||
|" | |"normal3", Low | ||
| | | | ||
| | | | ||
| Line 2,648: | Line 2,590: | ||
| | | | ||
| | | | ||
| | |{{SpiritType|Neutral}} | ||
|[[File:Equipment Icon Brawn Badge.png|20px]] 4000<br>[[File:Equipment Icon Protection Badge.png|20px]] 3500 | |[[File:Equipment Icon Brawn Badge.png|20px]] 4000<br>[[File:Equipment Icon Protection Badge.png|20px]] 3500 | ||
|Normal | |Normal | ||
|74 | |74 | ||
|- | |- | ||
| | |833 | ||
| | |{{SpiritTableName|Resetti}} | ||
| | |9700 | ||
|Stock: 1 | |Stock: 1 | ||
| | |[[Smashville]] | ||
|Normal | |Normal | ||
| | | | ||
| | |Hammer, Max | ||
| | | | ||
| | |•Jump ↑<br>•Additional Midair Jump<br>•Shield Durability ↑<br>•Move Speed ↑<br>•Rocket Belt Equipped | ||
|{{SSBU| | |{{SSBU|King Dedede}} | ||
|1 | |1 | ||
| | | | ||
| | | | ||
| | | | ||
| | |{{SpiritType|Attack}} | ||
|[[File:Equipment Icon Brawn Badge.png|20px]] 6500<br>[[File:Equipment Icon Protection Badge.png|20px]] 6000 | |[[File:Equipment Icon Brawn Badge.png|20px]] 6500<br>[[File:Equipment Icon Protection Badge.png|20px]] 6000 | ||
|Normal | |Normal | ||
|99 | |99 | ||
|- | |- | ||
| | |839 | ||
| | |{{SpiritTableName|Pete}} | ||
| | |9300 | ||
|Stock: 1 | |Stock: 1 | ||
|{{SSBU|Battlefield}} | |{{SSBU|Battlefield}} | ||
|Normal | |Normal | ||
| | | | ||
|" | |"normal2", Low | ||
| | | | ||
| | | | ||
| Line 2,688: | Line 2,630: | ||
| | | | ||
| | | | ||
| | |{{SpiritType|Shield}} | ||
|[[File:Equipment Icon Brawn Badge.png|20px]] 4000<br>[[File:Equipment Icon Protection Badge.png|20px]] 3500 | |[[File:Equipment Icon Brawn Badge.png|20px]] 4000<br>[[File:Equipment Icon Protection Badge.png|20px]] 3500 | ||
|Normal | |Normal | ||
|74 | |74 | ||
|- | |- | ||
| | |845 | ||
| | |{{SpiritTableName|Tortimer}} | ||
|9300 | |9300 | ||
|Stock: 1 | |Stock: 1 | ||
| Line 2,700: | Line 2,642: | ||
|Normal | |Normal | ||
| | | | ||
|" | |"normal3", Low | ||
| | | | ||
| | | | ||
| Line 2,708: | Line 2,650: | ||
| | | | ||
| | | | ||
| | |{{SpiritType|Shield}} | ||
|[[File:Equipment Icon Brawn Badge.png|20px]] 4000<br>[[File:Equipment Icon Protection Badge.png|20px]] 3500 | |[[File:Equipment Icon Brawn Badge.png|20px]] 4000<br>[[File:Equipment Icon Protection Badge.png|20px]] 3500 | ||
|Normal | |Normal | ||
|74 | |74 | ||
|- | |- | ||
| | |865 | ||
| | |{{SpiritTableName|Proto Man}} | ||
| | |13500 | ||
|Stock: 1 | |Stock: 1 | ||
|{{SSBU|Battlefield}} | |{{SSBU|Battlefield}} | ||
| Line 2,728: | Line 2,670: | ||
| | | | ||
| | | | ||
| | |{{SpiritType|Shield}} | ||
|[[File:Equipment Icon Brawn Badge.png|20px]] 6500<br>[[File:Equipment Icon Protection Badge.png|20px]] 6000 | |[[File:Equipment Icon Brawn Badge.png|20px]] 6500<br>[[File:Equipment Icon Protection Badge.png|20px]] 6000 | ||
|Normal | |Normal | ||
|99 | |99 | ||
|- | |- | ||
| | |869 | ||
| | |{{SpiritTableName|Rush}} | ||
| | |9200 | ||
|Stock: 1 | |Stock: 1 | ||
|{{SSBU|Battlefield}} | |{{SSBU|Battlefield}} | ||
| Line 2,748: | Line 2,690: | ||
| | | | ||
| | | | ||
| | |{{SpiritType|Attack}} | ||
|[[File:Equipment Icon Brawn Badge.png|20px]] 4000<br>[[File:Equipment Icon Protection Badge.png|20px]] 3500 | |[[File:Equipment Icon Brawn Badge.png|20px]] 4000<br>[[File:Equipment Icon Protection Badge.png|20px]] 3500 | ||
|Normal | |Normal | ||
|74 | |74 | ||
|- | |- | ||
| | |882 | ||
| | |{{SpiritTableName|Yellow Devil}} | ||
| | |9400 | ||
|Stock: 1 | |Stock: 1 | ||
| | |{{SSBU|Battlefield}} | ||
|Normal | |Normal | ||
| | | | ||
| | |"normal", Low | ||
| | |||
| | | | ||
|{{SSBU|Mario}} | |||
|{{SSBU| | |||
|1 | |1 | ||
| | | | ||
| | | | ||
| | | | ||
| | |{{SpiritType|Neutral}} | ||
|[[File:Equipment Icon Brawn Badge.png|20px]] | |[[File:Equipment Icon Brawn Badge.png|20px]] 4000<br>[[File:Equipment Icon Protection Badge.png|20px]] 3500 | ||
|Normal | |Normal | ||
| | |74 | ||
|- | |- | ||
| | |894 | ||
| | |{{SpiritTableName|Drill Man}} | ||
| | |1700 | ||
|Stock: 1 | |Stock: 1 | ||
|{{SSBU|Battlefield}} | |{{SSBU|Battlefield}} | ||
| Line 2,783: | Line 2,725: | ||
| | | | ||
| | | | ||
|{{SSBU| | |{{SSBU|Mario}} | ||
|1 | |1 | ||
| | | | ||
| | | | ||
| | | | ||
| | |{{SpiritType|Attack}} | ||
|[[File:Equipment Icon Brawn Badge.png|20px]] | |[[File:Equipment Icon Brawn Badge.png|20px]] 1500<br>[[File:Equipment Icon Protection Badge.png|20px]] 1000 | ||
|Normal | |Normal | ||
| | |41 | ||
|- | |- | ||
| | |906 | ||
| | |{{SpiritTableName|Full Armor X}} | ||
| | |13700 | ||
|Stock: 1 | |Stock: 1 | ||
|{{SSBU|Battlefield}} | |{{SSBU|Battlefield}} | ||
| Line 2,808: | Line 2,750: | ||
| | | | ||
| | | | ||
| | |{{SpiritType|Neutral}} | ||
|[[File:Equipment Icon Brawn Badge.png|20px]] | |[[File:Equipment Icon Brawn Badge.png|20px]] 6500<br>[[File:Equipment Icon Protection Badge.png|20px]] 6000 | ||
|Normal | |Normal | ||
| | |99 | ||
|- | |- | ||
| | |908 | ||
| | |{{SpiritTableName|Zero (Z-Saber)}} | ||
| | |13700 | ||
|Stock: 1 | |Stock: 1 | ||
|{{SSBU|Battlefield}} | |{{SSBU|Battlefield}} | ||
| Line 2,828: | Line 2,770: | ||
| | | | ||
| | | | ||
| | |{{SpiritType|Attack}} | ||
|[[File:Equipment Icon Brawn Badge.png|20px]] | |[[File:Equipment Icon Brawn Badge.png|20px]] 6500<br>[[File:Equipment Icon Protection Badge.png|20px]] 6000 | ||
|Normal | |Normal | ||
| | |99 | ||
|- | |- | ||
| | |917 | ||
| | |{{SpiritTableName|Star Force Mega Man}} | ||
| | |8600 | ||
|Stock: | |Stock: 99 | ||
|{{SSBU|Battlefield}} | |{{SSBU|Battlefield}} | ||
|Normal | |Normal | ||
| | | | ||
|"normal", Low | |"normal", Low | ||
| | |•Low Gravity for 15 seconds at 5 second intervals | ||
| | |•Gravity-Change Immunity<br>•Air Defense ↑<br>•Easier Dodging<br>•Instadrop<br>•Air Attack ↑<br>•KOs Heal Damage<br>•Back Shield Equipped | ||
|{{SSBU|Mario}} | |{{SSBU|Mario}} | ||
|1 | |1 | ||
| Line 2,848: | Line 2,790: | ||
| | | | ||
| | | | ||
| | |{{SpiritType|Grab}} | ||
|[[File:Equipment Icon Brawn Badge.png|20px]] | |[[File:Equipment Icon Brawn Badge.png|20px]] 270<br>[[File:Equipment Icon Protection Badge.png|20px]] 2200 | ||
| | |Stay | ||
| | |4 | ||
|- | |- | ||
| | |920 | ||
| | |{{SpiritTableName|Model ZX}} | ||
| | |3900 | ||
|Stock: 1 | |Stock: 1 | ||
| | |{{SSBU|Battlefield}} | ||
|Normal | |Normal | ||
| | | | ||
|" | |"normal", Low | ||
| | | | ||
| | | | ||
|{{SSBU|Mario}} | |||
|1 | |||
|300 | |||
| | | | ||
| | | | ||
| | |{{SpiritType|Attack}} | ||
|[[File:Equipment Icon Brawn Badge.png|20px]] | |[[File:Equipment Icon Brawn Badge.png|20px]] 2000<br>[[File:Equipment Icon Protection Badge.png|20px]] 1300 | ||
|Normal | |Normal | ||
| | |47 | ||
|- | |- | ||
| | |924 | ||
| | |{{SpiritTableName|Pet}} | ||
| | |1600 | ||
|Stock: 1 | |Stock: 1 | ||
|[[ | |[[Wii Fit Studio]] | ||
|Normal | |Normal | ||
| | | | ||
|" | |"normal", Low | ||
| | |||
| | | | ||
|{{SSBU|Mario}} | |||
|{{SSBU| | |||
|1 | |1 | ||
| | | | ||
| | | | ||
| | | | ||
| | |{{SpiritType|Neutral}} | ||
|[[File:Equipment Icon Brawn Badge.png|20px]] | |[[File:Equipment Icon Brawn Badge.png|20px]] 1500<br>[[File:Equipment Icon Protection Badge.png|20px]] 1000 | ||
|Normal | |Normal | ||
| | |41 | ||
|- | |- | ||
| | |928 | ||
| | |{{SpiritTableName|Tree}} | ||
| | |9300 | ||
|Stock: 1 | |Stock: 1 | ||
|[[ | |[[Duck Hunt]] | ||
|Normal | |Normal | ||
| | | | ||
|" | |"normal2", Low | ||
| | |||
| | | | ||
|{{SSBU|Wii Fit Trainer}} | |||
|{{SSBU| | |||
|1 | |1 | ||
| | | | ||
| | | | ||
| | | | ||
| | |{{SpiritType|Shield}} | ||
|[[File:Equipment Icon Brawn Badge.png|20px]] 4000<br>[[File:Equipment Icon Protection Badge.png|20px]] 3500 | |[[File:Equipment Icon Brawn Badge.png|20px]] 4000<br>[[File:Equipment Icon Protection Badge.png|20px]] 3500 | ||
|Normal | |Normal | ||
|74 | |74 | ||
|- | |- | ||
| | |930 | ||
| | |{{SpiritTableName|Warrior}} | ||
| | |3900 | ||
|Stock: 1 | |Stock: 1 | ||
|[[ | |[[Wii Fit Studio]] | ||
|Normal | |Normal | ||
| | | | ||
|" | |"normal3", Low | ||
| | | | ||
| | | | ||
| Line 2,948: | Line 2,870: | ||
| | | | ||
| | | | ||
| | |{{SpiritType|Attack}} | ||
|[[File:Equipment Icon Brawn Badge.png|20px]] 2000<br>[[File:Equipment Icon Protection Badge.png|20px]] 1300 | |[[File:Equipment Icon Brawn Badge.png|20px]] 2000<br>[[File:Equipment Icon Protection Badge.png|20px]] 1300 | ||
|Normal | |Normal | ||
|47 | |47 | ||
|- | |- | ||
| | |940 | ||
| | |{{SpiritTableName|Super Macho Man}} | ||
| | |13800 | ||
|Stock: 1 | |Stock: 1 | ||
| | |[[Boxing Ring]] (''Punch-Out!!'' version) | ||
|Normal | |Normal | ||
| | | | ||
|" | |"normal3", Low | ||
| | | | ||
| | |•Giant Killer | ||
|{{SSBU| | |{{SSBU|Incineroar}} | ||
|1 | |1 | ||
| | | | ||
|Giant | |||
|•Critical Hit ↑ | |||
|{{SpiritType|Attack}} | |||
|[[File:Equipment Icon Brawn Badge.png|20px]] 6500<br>[[File:Equipment Icon Protection Badge.png|20px]] 6000 | |||
|Metal | |||
|99 | |||
|- | |||
|947 | |||
|{{SpiritTableName|Mother Fairy}} | |||
|9500 | |||
|Stock: 1 | |||
|[[Pac-Land]] | |||
|Battlefield | |||
| | | | ||
|"normal2", Low | |||
| | | | ||
| | | | ||
|[[File:Equipment Icon Brawn Badge.png|20px]] | |{{SSBU|Rosalina & Luma}} | ||
|2 | |||
| | |||
| | |||
| | |||
|{{SpiritType|Grab}} | |||
|[[File:Equipment Icon Brawn Badge.png|20px]] 4000<br>[[File:Equipment Icon Protection Badge.png|20px]] 3500 | |||
|Normal | |Normal | ||
| | |74 | ||
|- | |- | ||
| | |960 | ||
| | |{{SpiritTableName|Metal Face}} | ||
| | |13700 | ||
|Stock: 1 | |Stock: 1 | ||
|{{SSBU|Battlefield}} | |{{SSBU|Battlefield}} | ||
|Normal | |Normal | ||
| | | | ||
|" | |"normal2", Low | ||
| | | | ||
| | | | ||
| Line 2,988: | Line 2,930: | ||
| | | | ||
| | | | ||
| | |{{SpiritType|Attack}} | ||
|[[File:Equipment Icon Brawn Badge.png|20px]] | |[[File:Equipment Icon Brawn Badge.png|20px]] 6500<br>[[File:Equipment Icon Protection Badge.png|20px]] 6000 | ||
|Normal | |Normal | ||
| | |99 | ||
|- | |- | ||
| | |965 | ||
| | |{{SpiritTableName|Formula}} | ||
| | |3900 | ||
|Stock: 1 | |Stock: 1 | ||
|{{SSBU|Battlefield}} | |{{SSBU|Battlefield}} | ||
| Line 3,008: | Line 2,950: | ||
| | | | ||
| | | | ||
| | |{{SpiritType|Attack}} | ||
|[[File:Equipment Icon Brawn Badge.png|20px]] 2000<br>[[File:Equipment Icon Protection Badge.png|20px]] 1300 | |[[File:Equipment Icon Brawn Badge.png|20px]] 2000<br>[[File:Equipment Icon Protection Badge.png|20px]] 1300 | ||
|Normal | |Normal | ||
|47 | |47 | ||
|- | |- | ||
| | |979 | ||
|{{SpiritTableName|E. Honda}} | |||
| | |3700 | ||
|Stock: 1 | |Stock: 1 | ||
| | |{{SSBU|Battlefield}} | ||
|Normal | |Normal | ||
| | | | ||
|" | |"normal", Low | ||
|•Everyone Jump Power ↓↓↓ after 1 second | |||
|•Jump ↑<br>•Additional Midair Jump<br>•Bunny Hood Equipped<br>•Rocket Belt Equipped<br>•Lightweight | |||
|{{SSBU|Mario}} | |||
|1 | |||
| | | | ||
| | | | ||
| | | | ||
| | |{{SpiritType|Attack}} | ||
|[[File:Equipment Icon Brawn Badge.png|20px]] 2000<br>[[File:Equipment Icon Protection Badge.png|20px]] 1300 | |[[File:Equipment Icon Brawn Badge.png|20px]] 2000<br>[[File:Equipment Icon Protection Badge.png|20px]] 1300 | ||
| | |Normal | ||
|47 | |47 | ||
|- | |- | ||
| | |981 | ||
| | |{{SpiritTableName|Chun-Li}} | ||
| | |9400 | ||
| | |HP: 120 | ||
| | |{{SSBU|Battlefield}} | ||
|Normal | |Normal | ||
| | | | ||
|"normal", Low | |"normal", Low | ||
| | |•Everyone Jump Power ↓↓↓ after 1 second | ||
| | |•Jump ↑<br>•Additional Midair Jump<br>•Bunny Hood Equipped<br>•Rocket Belt Equipped<br>•Lightweight<br>•Stamina ↑<br>•Critical-Health Healing<br>•Autoheal<br>•Great Autoheal<br>•Death's Scythe Equipped | ||
|{{SSBU| | |{{SSBU|Mario}} | ||
|1 | |1 | ||
|180 | |||
| | | | ||
| | | | ||
| | |{{SpiritType|Grab}} | ||
| | |[[File:Equipment Icon Brawn Badge.png|20px]] 4000<br>[[File:Equipment Icon Protection Badge.png|20px]] 3500 | ||
|[[File:Equipment Icon Brawn Badge.png|20px]] | |Normal | ||
| | |74 | ||
| | |||
|- | |- | ||
| | |985 | ||
| | |{{SpiritTableName|Dhalsim}} | ||
| | |9200 | ||
|HP: 120 | |||
|{{SSBU|Battlefield}} | |{{SSBU|Battlefield}} | ||
|Normal | |Normal | ||
| | | | ||
|"normal", Low | |"normal", Low | ||
| | |•Everyone Jump Power ↓↓↓ after 1 second | ||
| | |•Jump ↑<br>•Additional Midair Jump<br>•Bunny Hood Equipped<br>•Rocket Belt Equipped<br>•Lightweight<br>•Stamina ↑<br>•Critical-Health Healing<br>•Autoheal<br>•Great Autoheal<br>•Death's Scythe Equipped | ||
|{{SSBU|Mario}} | |{{SSBU|Mario}} | ||
|1 | |1 | ||
|160 | |||
| | | | ||
| | | | ||
| | |{{SpiritType|Grab}} | ||
| | |[[File:Equipment Icon Brawn Badge.png|20px]] 4000<br>[[File:Equipment Icon Protection Badge.png|20px]] 3500 | ||
|[[File:Equipment Icon Brawn Badge.png|20px]] | |Normal | ||
| | |74 | ||
| | |||
|- | |- | ||
| | |1001 | ||
| | |{{SpiritTableName|Ibuki}} | ||
| | |3800 | ||
| | |HP: 120 | ||
| | |{{SSBU|Battlefield}} | ||
|Normal | |Normal | ||
| | | | ||
|" | |"normal", Low | ||
| | |•Everyone Jump Power ↓↓↓ after 1 second | ||
| | |•Jump ↑<br>•Additional Midair Jump<br>•Bunny Hood Equipped<br>•Rocket Belt Equipped<br>•Lightweight<br>•Stamina ↑<br>•Critical-Health Healing<br>•Autoheal<br>•Great Autoheal<br>•Death's Scythe Equipped | ||
|{{SSBU| | |{{SSBU|Mario}} | ||
|1 | |1 | ||
|140 | |||
| | | | ||
| | | | ||
| | |{{SpiritType|Shield}} | ||
| | |[[File:Equipment Icon Brawn Badge.png|20px]] 2000<br>[[File:Equipment Icon Protection Badge.png|20px]] 1300 | ||
|[[File:Equipment Icon Brawn Badge.png|20px]] | |||
|Normal | |Normal | ||
| | |47 | ||
|- | |- | ||
| | |1002 | ||
| | |{{SpiritTableName|Yun & Yang}} | ||
| | |3800 | ||
| | |HP: 120 | ||
| | |{{SSBU|Battlefield}} | ||
|Normal | |Normal | ||
| | | | ||
|"normal", Low | |"normal", Low | ||
| | |•Everyone Jump Power ↓↓↓ after 1 second | ||
| | |•Jump ↑<br>•Additional Midair Jump<br>•Bunny Hood Equipped<br>•Rocket Belt Equipped<br>•Lightweight<br>•Stamina ↑<br>•Critical-Health Healing<br>•Autoheal<br>•Great Autoheal<br>•Death's Scythe Equipped | ||
|{{SSBU|Mario}} | |{{SSBU|Mario}} | ||
|1 | |1 | ||
|140 | |||
| | | | ||
| | | | ||
| | |{{SpiritType|Neutral}} | ||
|[[File:Equipment Icon Brawn Badge.png|20px]] 2000<br>[[File:Equipment Icon Protection Badge.png|20px]] 1300 | |||
|[[File:Equipment Icon Brawn Badge.png|20px]] | |Normal | ||
| | |47 | ||
| | |||
|- | |- | ||
| | |1011 | ||
| | |{{SpiritTableName|Cutie J}} | ||
| | |13700 | ||
|Stock: | |Stock: 1 | ||
|{{SSBU|Battlefield}} | |{{SSBU|Battlefield}} | ||
|Normal | |Normal | ||
| | | | ||
|"normal", Low | |"normal", Low | ||
| | | | ||
| | | | ||
|{{SSBU|Mario}} | |{{SSBU|Mario}} | ||
|1 | |1 | ||
| Line 3,128: | Line 3,070: | ||
| | | | ||
| | | | ||
| | |{{SpiritType|Attack}} | ||
|[[File:Equipment Icon Brawn Badge.png|20px]] | |[[File:Equipment Icon Brawn Badge.png|20px]] 6500<br>[[File:Equipment Icon Protection Badge.png|20px]] 6000 | ||
| | |Normal | ||
| | |99 | ||
|- | |- | ||
| | |1012 | ||
| | |{{SpiritTableName|Rodin}} | ||
| | |9300 | ||
|Stock: | |Stock: 1 | ||
|{{SSBU|Battlefield}} | |{{SSBU|Battlefield}} | ||
|Normal | |Normal | ||
| | | | ||
|"normal", Low | |"normal", Low | ||
| | | | ||
| | | | ||
|{{SSBU| | |{{SSBU|Ganondorf}} | ||
|1 | |1 | ||
| | | | ||
| | | | ||
| | | | ||
| | |{{SpiritType|Neutral}} | ||
|[[File:Equipment Icon Brawn Badge.png|20px]] | |[[File:Equipment Icon Brawn Badge.png|20px]] 4000<br>[[File:Equipment Icon Protection Badge.png|20px]] 3500 | ||
| | |Normal | ||
| | |74 | ||
|- | |- | ||
| | |1013 | ||
| | |{{SpiritTableName|Rodin, the Infinite One}} | ||
| | |13700 | ||
|Stock: | |Stock: 1 | ||
|{{SSBU|Battlefield}} | |{{SSBU|Battlefield}} | ||
|Normal | |Normal | ||
| | | | ||
|"normal", Low | |"normal", Low | ||
| | | | ||
| | | | ||
|{{SSBU|Mario}} | |{{SSBU|Mario}} | ||
|1 | |1 | ||
| Line 3,168: | Line 3,110: | ||
| | | | ||
| | | | ||
| | |{{SpiritType|Neutral}} | ||
|[[File:Equipment Icon Brawn Badge.png|20px]] | |[[File:Equipment Icon Brawn Badge.png|20px]] 6500<br>[[File:Equipment Icon Protection Badge.png|20px]] 6000 | ||
| | |Normal | ||
| | |99 | ||
|- | |- | ||
| | |1018 | ||
| | |{{SpiritTableName|Father Balder}} | ||
| | |9400 | ||
|Stock: | |Stock: 1 | ||
|{{SSBU|Battlefield}} | |{{SSBU|Battlefield}} | ||
|Normal | |Normal | ||
| | | | ||
|"normal", Low | |"normal", Low | ||
| | | | ||
| | | | ||
|{{SSBU|Mario}} | |{{SSBU|Mario}} | ||
|1 | |1 | ||
| Line 3,188: | Line 3,130: | ||
| | | | ||
| | | | ||
| | |{{SpiritType|Grab}} | ||
|[[File:Equipment Icon Brawn Badge.png|20px]] | |[[File:Equipment Icon Brawn Badge.png|20px]] 4000<br>[[File:Equipment Icon Protection Badge.png|20px]] 3500 | ||
| | |Normal | ||
| | |74 | ||
|- | |- | ||
| | |1027 | ||
| | |{{SpiritTableName|Inkling Squid}} | ||
| | |9600 | ||
|HP: 120<br>Time: 180 | |||
| | |[[Moray Towers]] | ||
|Normal | |Normal | ||
| | | | ||
|" | |"normal3", Low | ||
| | | | ||
| | |•Stamina ↑<br>•Critical-Health Healing<br>•Autoheal<br>•Great Autoheal<br>•Death's Scythe Equipped | ||
|{{SSBU| | |{{SSBU|Inkling}} | ||
|1 | |1 | ||
|160 | |||
| | | | ||
| | |•Easier Dodging | ||
| | |{{SpiritType|Grab}} | ||
|[[File:Equipment Icon Brawn Badge.png|20px]] 4000<br>[[File:Equipment Icon Protection Badge.png|20px]] 3500 | |||
|[[File:Equipment Icon Brawn Badge.png|20px]] | |Normal | ||
| | |74 | ||
| | |||
|- | |- | ||
| | |1028 | ||
| | |{{SpiritTableName|Judd}} | ||
| | |13600 | ||
|Stock: 1 | |Stock: 1 | ||
|{{SSBU|Battlefield}} | |{{SSBU|Battlefield}} | ||
|Normal | |Normal | ||
| | | | ||
|" | |"normal2", Low | ||
| | | | ||
| | | | ||
| Line 3,228: | Line 3,170: | ||
| | | | ||
| | | | ||
| | |{{SpiritType|Neutral}} | ||
|[[File:Equipment Icon Brawn Badge.png|20px]] 6500<br>[[File:Equipment Icon Protection Badge.png|20px]] 6000 | |[[File:Equipment Icon Brawn Badge.png|20px]] 6500<br>[[File:Equipment Icon Protection Badge.png|20px]] 6000 | ||
|Normal | |Normal | ||
|99 | |99 | ||
|- | |- | ||
| | |1036 | ||
| | |{{SpiritTableName|Spyke}} | ||
| | |3700 | ||
|Stock: 1 | |Stock: 1 | ||
|{{SSBU|Battlefield}} | |{{SSBU|Battlefield}} | ||
|Normal | |Normal | ||
| | | | ||
|" | |"normal3", Low | ||
| | | | ||
| | | | ||
| Line 3,248: | Line 3,190: | ||
| | | | ||
| | | | ||
| | |{{SpiritType|Shield}} | ||
|[[File:Equipment Icon Brawn Badge.png|20px]] | |[[File:Equipment Icon Brawn Badge.png|20px]] 2000<br>[[File:Equipment Icon Protection Badge.png|20px]] 1300 | ||
|Normal | |Normal | ||
| | |47 | ||
|- | |- | ||
| | |1037 | ||
| | |{{SpiritTableName|Flow}} | ||
| | |3700 | ||
|Stock: 1 | |Stock: 1 | ||
| | |{{SSBU|Battlefield}} | ||
| | |Normal | ||
| | | | ||
|" | |"normal3", Low | ||
| | | | ||
| | | | ||
|{{SSBU| | |{{SSBU|Mario}} | ||
|1 | |1 | ||
| | | | ||
| | | | ||
| | | | ||
| | |{{SpiritType|Shield}} | ||
|[[File:Equipment Icon Brawn Badge.png|20px]] | |[[File:Equipment Icon Brawn Badge.png|20px]] 2000<br>[[File:Equipment Icon Protection Badge.png|20px]] 1300 | ||
|Normal | |Normal | ||
| | |47 | ||
|- | |- | ||
| | |1043 | ||
|{{SpiritTableName|DJ Octavio}} | |||
|3700 | |||
|{{ | |||
| | |||
|Stock: 1 | |Stock: 1 | ||
|{{SSBU|Battlefield}} | |{{SSBU|Battlefield}} | ||
| Line 3,303: | Line 3,225: | ||
| | | | ||
| | | | ||
|{{SSBU| | |{{SSBU|Kirby}} | ||
|1 | |1 | ||
| | | | ||
| | | | ||
| | | | ||
| | |{{SpiritType|Neutral}} | ||
|[[File:Equipment Icon Brawn Badge.png|20px]] | |[[File:Equipment Icon Brawn Badge.png|20px]] 2000<br>[[File:Equipment Icon Protection Badge.png|20px]] 1300 | ||
|Normal | |Normal | ||
| | |47 | ||
|- | |- | ||
| | |1044 | ||
| | |{{SpiritTableName|Octobot King}} | ||
| | |9500 | ||
|Stock: 1 | |Stock: 1 | ||
|{{SSBU|Battlefield}} | |{{SSBU|Battlefield}} | ||
| Line 3,328: | Line 3,250: | ||
| | | | ||
| | | | ||
| | |{{SpiritType|Grab}} | ||
|[[File:Equipment Icon Brawn Badge.png|20px]] | |[[File:Equipment Icon Brawn Badge.png|20px]] 4000<br>[[File:Equipment Icon Protection Badge.png|20px]] 3500 | ||
|Normal | |Normal | ||
| | |74 | ||
|- | |- | ||
| | |1049 | ||
| | |{{SpiritTableName|Super Sea Snail}} | ||
| | |1600 | ||
|Stock: 1 | |Stock: 1 | ||
|{{SSBU|Battlefield}} | |{{SSBU|Battlefield}} | ||
|Normal | |Normal | ||
| | | | ||
|" | |"normal3", Low | ||
| | | | ||
| | | | ||
| Line 3,348: | Line 3,270: | ||
| | | | ||
| | | | ||
| | |{{SpiritType|Attack}} | ||
|[[File:Equipment Icon Brawn Badge.png|20px]] | |[[File:Equipment Icon Brawn Badge.png|20px]] 1500<br>[[File:Equipment Icon Protection Badge.png|20px]] 1000 | ||
|Normal | |Normal | ||
| | |41 | ||
|- | |- | ||
| | |1054 | ||
| | |{{SpiritTableName|Maria Renard (Symphony of the Night)}} | ||
| | |9500 | ||
|Stock: 1 | |Stock: 1 | ||
| | |[[Reset Bomb Forest]] | ||
|Normal | |Normal | ||
| | | | ||
| Line 3,368: | Line 3,290: | ||
| | | | ||
| | | | ||
| | |{{SpiritType|Neutral}} | ||
|[[File:Equipment Icon Brawn Badge.png|20px]] 4000<br>[[File:Equipment Icon Protection Badge.png|20px]] 3500 | |[[File:Equipment Icon Brawn Badge.png|20px]] 4000<br>[[File:Equipment Icon Protection Badge.png|20px]] 3500 | ||
|Normal | |Normal | ||
|74 | |74 | ||
|- | |- | ||
| | |1075 | ||
| | |{{SpiritTableName|Dracula}} | ||
|9500 | |9500 | ||
|Stock: 1 | |Stock: 1 | ||
| Line 3,383: | Line 3,305: | ||
| | | | ||
| | | | ||
|{{SSBU| | |{{SSBU|Ganondorf}} | ||
|1 | |1 | ||
| | | | ||
| | | | ||
| | | | ||
| | |{{SpiritType|Neutral}} | ||
|[[File:Equipment Icon Brawn Badge.png|20px]] 4000<br>[[File:Equipment Icon Protection Badge.png|20px]] 3500 | |[[File:Equipment Icon Brawn Badge.png|20px]] 4000<br>[[File:Equipment Icon Protection Badge.png|20px]] 3500 | ||
|Normal | |Normal | ||
|74 | |74 | ||
|- | |- | ||
| | |1076 | ||
| | |{{SpiritTableName|Soma Cruz}} | ||
|13700 | |13700 | ||
|Stock: 1 | |Stock: 1 | ||
| Line 3,408: | Line 3,330: | ||
| | | | ||
| | | | ||
| | |{{SpiritType|Neutral}} | ||
|[[File:Equipment Icon Brawn Badge.png|20px]] 6500<br>[[File:Equipment Icon Protection Badge.png|20px]] 6000 | |[[File:Equipment Icon Brawn Badge.png|20px]] 6500<br>[[File:Equipment Icon Protection Badge.png|20px]] 6000 | ||
|Normal | |Normal | ||
|99 | |99 | ||
|- | |- | ||
| | |1088 | ||
| | |{{SpiritTableName|Plane}} | ||
|3600 | |||
|Stock: | |Stock: 1 | ||
| | |[[Wuhu Island]] | ||
|Normal | |Normal | ||
| | | | ||
|" | |"normal2", Low | ||
| | | | ||
| | | | ||
|{{SSBU| | |{{SSBU|R.O.B.}} | ||
|1 | |1 | ||
| | | | ||
| | | | ||
| | | | ||
| | |{{SpiritType|Shield}} | ||
|[[File:Equipment Icon Brawn Badge.png|20px]] | |[[File:Equipment Icon Brawn Badge.png|20px]] 2000<br>[[File:Equipment Icon Protection Badge.png|20px]] 1300 | ||
| | |Normal | ||
| | |47 | ||
|- | |- | ||
| | |1104 | ||
| | |{{SpiritTableName|Master Core}} | ||
| | |13700 | ||
|Stock: 1 | |Stock: 1 | ||
|{{SSBU|Battlefield}} | |{{SSBU|Battlefield}} | ||
|Normal | |Normal | ||
| | | | ||
|" | |"normal2", Low | ||
| | | | ||
| | | | ||
| Line 3,448: | Line 3,370: | ||
| | | | ||
| | | | ||
| | |{{SpiritType|Neutral}} | ||
|[[File:Equipment Icon Brawn Badge.png|20px]] | |[[File:Equipment Icon Brawn Badge.png|20px]] 6500<br>[[File:Equipment Icon Protection Badge.png|20px]] 6000 | ||
|Normal | |Normal | ||
| | |99 | ||
|- | |- | ||
| | |1111 | ||
| | |{{SpiritTableName|Roturret}} | ||
| | |1700 | ||
|Stock: 1 | |Stock: 1 | ||
|{{SSBU|Battlefield}} | |{{SSBU|Battlefield}} | ||
|Normal | |Normal | ||
| | | | ||
|" | |"normal2", Low | ||
| | | | ||
| | | | ||
| Line 3,468: | Line 3,390: | ||
| | | | ||
| | | | ||
| | |{{SpiritType|Neutral}} | ||
|[[File:Equipment Icon Brawn Badge.png|20px]] | |[[File:Equipment Icon Brawn Badge.png|20px]] 1500<br>[[File:Equipment Icon Protection Badge.png|20px]] 1000 | ||
|Normal | |Normal | ||
| | |41 | ||
|- | |- | ||
| | |1113 | ||
| | |{{SpiritTableName|Subspace Bomb}} | ||
| | |3700 | ||
|Stock: 1 | |Stock: 1 | ||
|{{SSBU|Battlefield}} | |{{SSBU|Battlefield}} | ||
|Normal | |Normal | ||
| | | | ||
|" | |"normal2", Low | ||
| | | | ||
| | | | ||
| Line 3,488: | Line 3,410: | ||
| | | | ||
| | | | ||
| | |{{SpiritType|Attack}} | ||
|[[File:Equipment Icon Brawn Badge.png|20px]] | |[[File:Equipment Icon Brawn Badge.png|20px]] 2000<br>[[File:Equipment Icon Protection Badge.png|20px]] 1300 | ||
|Normal | |Normal | ||
| | |47 | ||
|- | |- | ||
| | |1115 | ||
| | |{{SpiritTableName|Sheriff}} | ||
| | |13300 | ||
|Stock: 1 | |Stock: 1 | ||
|{{SSBU|Battlefield}} | |{{SSBU|Battlefield}} | ||
|Normal | |Normal | ||
| | | | ||
|" | |"normal3", Low | ||
| | | | ||
| | | | ||
| Line 3,508: | Line 3,430: | ||
| | | | ||
| | | | ||
| | |{{SpiritType|Attack}} | ||
|[[File:Equipment Icon Brawn Badge.png|20px]] | |[[File:Equipment Icon Brawn Badge.png|20px]] 6500<br>[[File:Equipment Icon Protection Badge.png|20px]] 6000 | ||
|Normal | |Normal | ||
| | |99 | ||
|- | |- | ||
| | |1131 | ||
| | |{{SpiritTableName|Donbe & Hikari (Shin Onigashima Kouhen)}} | ||
| | |9500 | ||
|Stock: 1 | |Stock: 1 | ||
|{{SSBU|Battlefield}} | |{{SSBU|Battlefield}} | ||
| Line 3,528: | Line 3,450: | ||
| | | | ||
| | | | ||
| | |{{SpiritType|Shield}} | ||
|[[File:Equipment Icon Brawn Badge.png|20px]] | |[[File:Equipment Icon Brawn Badge.png|20px]] 4000<br>[[File:Equipment Icon Protection Badge.png|20px]] 3500 | ||
|Normal | |Normal | ||
| | |74 | ||
|- | |- | ||
| | |1144 | ||
| | |{{SpiritTableName|Prince of Sablé}} | ||
| | |13600 | ||
|Stock: 1 | |Stock: 1 | ||
|{{SSBU|Battlefield}} | |{{SSBU|Battlefield}} | ||
| Line 3,548: | Line 3,470: | ||
| | | | ||
| | | | ||
| | |{{SpiritType|Shield}} | ||
|[[File:Equipment Icon Brawn Badge.png|20px]] 6500<br>[[File:Equipment Icon Protection Badge.png|20px]] 6000 | |[[File:Equipment Icon Brawn Badge.png|20px]] 6500<br>[[File:Equipment Icon Protection Badge.png|20px]] 6000 | ||
|Normal | |Normal | ||
|99 | |99 | ||
|- | |- | ||
| | |1161 | ||
| | |{{SpiritTableName|Ray Mk III}} | ||
| | |9300 | ||
|Stock: | |Stock: 1 | ||
|{{SSBU|Battlefield}} | |{{SSBU|Battlefield}} | ||
|Normal | |Normal | ||
| | | | ||
|"normal", Low | |"normal", Low | ||
| | | | ||
| | | | ||
|{{SSBU|Mario}} | |{{SSBU|Mario}} | ||
|1 | |1 | ||
| Line 3,568: | Line 3,490: | ||
| | | | ||
| | | | ||
| | |{{SpiritType|Attack}} | ||
|[[File:Equipment Icon Brawn Badge.png|20px]] | |[[File:Equipment Icon Brawn Badge.png|20px]] 4000<br>[[File:Equipment Icon Protection Badge.png|20px]] 3500 | ||
| | |Normal | ||
| | |74 | ||
|- | |- | ||
| | |1169 | ||
| | |{{SpiritTableName|Isaac (Dark Dawn)}} | ||
| | |13600 | ||
|Stock: 1 | |Stock: 1 | ||
|{{SSBU|Battlefield}} | |{{SSBU|Battlefield}} | ||
| Line 3,585: | Line 3,507: | ||
|{{SSBU|Mario}} | |{{SSBU|Mario}} | ||
|1 | |1 | ||
| | | | ||
| | | | ||
| | | | ||
|[[File:Equipment Icon Brawn Badge.png|20px]] | |{{SpiritType|Grab}} | ||
|[[File:Equipment Icon Brawn Badge.png|20px]] 6500<br>[[File:Equipment Icon Protection Badge.png|20px]] 6000 | |||
|Normal | |Normal | ||
| | |99 | ||
|- | |- | ||
| | |1181 | ||
| | |{{SpiritTableName|Starfy}} | ||
| | |9400 | ||
|Stock: 1 | |Stock: 1 | ||
| | |{{SSBU|Battlefield}} | ||
| | |Normal | ||
| | | | ||
|" | |"normal", Low | ||
| | | | ||
| | | | ||
|{{SSBU| | |{{SSBU|Mario}} | ||
| | |1 | ||
| | | | ||
| | | | ||
| | | | ||
| | |{{SpiritType|Neutral}} | ||
|[[File:Equipment Icon Brawn Badge.png|20px]] 4000<br>[[File:Equipment Icon Protection Badge.png|20px]] 3500 | |[[File:Equipment Icon Brawn Badge.png|20px]] 4000<br>[[File:Equipment Icon Protection Badge.png|20px]] 3500 | ||
|Normal | |Normal | ||
|74 | |74 | ||
|- | |- | ||
| | |1190 | ||
| | |{{SpiritTableName|Jill & the Drill Dozer}} | ||
|3700 | |3700 | ||
|Stock: 1 | |Stock: 1 | ||
| | |[[Wrecking Crew]] | ||
|Normal | |Normal | ||
| | | | ||
| | |Drill, Max | ||
| | | | ||
| | |•Franklin Badge Equipped | ||
|{{SSBU| | |{{SSBU|Bowser Jr.}} | ||
|1 | |1 | ||
| | | | ||
| | | | ||
| | |•Drill Equipped<br>•Shooting Items ↑ | ||
| | |{{SpiritType|Attack}} | ||
|[[File:Equipment Icon Brawn Badge.png|20px]] 2000<br>[[File:Equipment Icon Protection Badge.png|20px]] 1300 | |[[File:Equipment Icon Brawn Badge.png|20px]] 2000<br>[[File:Equipment Icon Protection Badge.png|20px]] 1300 | ||
|Normal | |Normal | ||
|47 | |47 | ||
|- | |- | ||
| | |1193 | ||
| | |{{SpiritTableName|The Wandering Samurai}} | ||
| | |3600 | ||
| | |Stock: 1 | ||
|{{SSBU|Battlefield}} | |{{SSBU|Battlefield}} | ||
|Normal | |Normal | ||
| | | | ||
|"normal", Low | |"normal", Low | ||
| | | | ||
| | | | ||
|{{SSBU| | |{{SSBU|Ike}} | ||
|1 | |1 | ||
| | | | ||
| | | | ||
| | | | ||
|[[File:Equipment Icon Brawn Badge.png|20px]] | |{{SpiritType|Attack}} | ||
|[[File:Equipment Icon Brawn Badge.png|20px]] 2000<br>[[File:Equipment Icon Protection Badge.png|20px]] 1300 | |||
|Normal | |Normal | ||
| | |47 | ||
|- | |- | ||
| | |1194 | ||
| | |{{SpiritTableName|Wandering Samurai (Rhythm Heaven Fever)}} | ||
| | |9300 | ||
| | |Stock: 1 | ||
|{{SSBU|Battlefield}} | |{{SSBU|Battlefield}} | ||
|Normal | |Normal | ||
| | | | ||
|"normal", Low | |"normal", Low | ||
| | | | ||
| | | | ||
|{{SSBU|Mario}} | |{{SSBU|Mario}} | ||
|1 | |1 | ||
| | | | ||
| | | | ||
| | | | ||
|{{SpiritType|Attack}} | |||
|[[File:Equipment Icon Brawn Badge.png|20px]] 4000<br>[[File:Equipment Icon Protection Badge.png|20px]] 3500 | |[[File:Equipment Icon Brawn Badge.png|20px]] 4000<br>[[File:Equipment Icon Protection Badge.png|20px]] 3500 | ||
|Normal | |Normal | ||
|74 | |74 | ||
|- | |- | ||
| | |1207 | ||
| | |{{SpiritTableName|Super Chibi-Robo}} | ||
| | |9400 | ||
| | |Stock: 1 | ||
|{{SSBU|Battlefield}} | |{{SSBU|Battlefield}} | ||
|Normal | |Normal | ||
| | | | ||
|"normal", Low | |"normal", Low | ||
| | | | ||
| | | | ||
|{{SSBU|Mario}} | |{{SSBU|Mario}} | ||
|1 | |1 | ||
| | | | ||
| | | | ||
| | | | ||
|[[File:Equipment Icon Brawn Badge.png|20px]] | |{{SpiritType|Grab}} | ||
|[[File:Equipment Icon Brawn Badge.png|20px]] 4000<br>[[File:Equipment Icon Protection Badge.png|20px]] 3500 | |||
|Normal | |Normal | ||
| | |74 | ||
|- | |- | ||
| | |1211 | ||
| | |{{SpiritTableName|Barbara the Bat}} | ||
| | |9300 | ||
| | |Stock: 1 | ||
|{{SSBU|Battlefield}} | |{{SSBU|Battlefield}} | ||
|Normal | |Normal | ||
| | | | ||
|"normal", Low | |"normal", Low | ||
| | | | ||
| | | | ||
|{{SSBU|Mario}} | |{{SSBU|Mario}} | ||
|1 | |1 | ||
| | | | ||
| | | | ||
| | | | ||
|[[File:Equipment Icon Brawn Badge.png|20px]] | |{{SpiritType|Grab}} | ||
|[[File:Equipment Icon Brawn Badge.png|20px]] 4000<br>[[File:Equipment Icon Protection Badge.png|20px]] 3500 | |||
|Normal | |Normal | ||
| | |74 | ||
|- | |- | ||
| | |1215 | ||
|{{SpiritTableName|Dr. Kawashima (Concentration Training)}} | |||
| | |13300 | ||
|Stock: 1 | |Stock: 1 | ||
|{{SSBU|Battlefield}} | |{{SSBU|Battlefield}} | ||
| Line 3,728: | Line 3,650: | ||
| | | | ||
| | | | ||
| | |{{SpiritType|Neutral}} | ||
|[[File:Equipment Icon Brawn Badge.png|20px]] 6500<br>[[File:Equipment Icon Protection Badge.png|20px]] 6000 | |[[File:Equipment Icon Brawn Badge.png|20px]] 6500<br>[[File:Equipment Icon Protection Badge.png|20px]] 6000 | ||
|Normal | |Normal | ||
|99 | |99 | ||
|- | |- | ||
| | |1243 | ||
| | |{{SpiritTableName|Captain Rainbow}} | ||
| | |9100 | ||
|Stock: 1 | |Stock: 1 | ||
|{{SSBU|Battlefield}} | |{{SSBU|Battlefield}} | ||
| Line 3,743: | Line 3,665: | ||
| | | | ||
| | | | ||
|{{SSBU| | |{{SSBU|Mario}} | ||
|1 | |1 | ||
| | | | ||
| | | | ||
| | | | ||
| | |{{SpiritType|Grab}} | ||
|[[File:Equipment Icon Brawn Badge.png|20px]] 4000<br>[[File:Equipment Icon Protection Badge.png|20px]] 3500 | |[[File:Equipment Icon Brawn Badge.png|20px]] 4000<br>[[File:Equipment Icon Protection Badge.png|20px]] 3500 | ||
|Normal | |Normal | ||
|74 | |74 | ||
|- | |- | ||
| | |1245 | ||
| | |{{SpiritTableName|Beetle}} | ||
| | |1700 | ||
|Stock: 1 | |Stock: 1 | ||
|{{SSBU|Battlefield}} | |{{SSBU|Battlefield}} | ||
| Line 3,768: | Line 3,690: | ||
| | | | ||
| | | | ||
| | |{{SpiritType|Grab}} | ||
|[[File:Equipment Icon Brawn Badge.png|20px]] | |[[File:Equipment Icon Brawn Badge.png|20px]] 1500<br>[[File:Equipment Icon Protection Badge.png|20px]] 1000 | ||
|Normal | |Normal | ||
| | |41 | ||
|- | |- | ||
| | |1257 | ||
| | |{{SpiritTableName|BlueShark}} | ||
| | |1900 | ||
|Stock: 1 | |Stock: 1 | ||
| | |[[Pirate Ship]] | ||
|Normal | |Normal | ||
| | | | ||
|" | |"normal2", Low | ||
| | | | ||
| | |•Franklin Badge Equipped | ||
|{{SSBU| | |{{SSBU|Snake}} | ||
|1 | |1 | ||
| | | | ||
| | | | ||
| | |•Ray Gun Equipped<br>•Shooting Items ↑ | ||
| | |{{SpiritType|Shield}} | ||
|[[File:Equipment Icon Brawn Badge.png|20px]] | |[[File:Equipment Icon Brawn Badge.png|20px]] 1500<br>[[File:Equipment Icon Protection Badge.png|20px]] 1000 | ||
|Normal | |Normal | ||
| | |41 | ||
|- | |- | ||
| | |1264 | ||
| | |{{SpiritTableName|Shovel Knight}} | ||
| | |9400 | ||
|Stock: 1 | |Stock: 1 | ||
| | |[[Mario Bros.]] | ||
|Normal | |Normal | ||
| | | | ||
|" | |"normal3", Low | ||
| | | | ||
| | |•Weapon Resist ↑ | ||
|{{SSBU| | |{{SSBU|Meta Knight}} | ||
|1 | |1 | ||
| | | | ||
| | | | ||
| | |•Instadrop<br>•Weapon Attack ↑<br>•Shield Damage ↑ | ||
| | |{{SpiritType|Attack}} | ||
|[[File:Equipment Icon Brawn Badge.png|20px]] 4000<br>[[File:Equipment Icon Protection Badge.png|20px]] 3500 | |[[File:Equipment Icon Brawn Badge.png|20px]] 4000<br>[[File:Equipment Icon Protection Badge.png|20px]] 3500 | ||
|Normal | |Normal | ||
|74 | |74 | ||
|- | |- | ||
| | |1265 | ||
| | |{{SpiritTableName|Shield Knight}} | ||
| | |4000 | ||
|Stock: 1 | |Stock: 1 | ||
|[[ | |[[Mario Bros.]] | ||
|Normal | |Normal | ||
| | | | ||
|" | |"normal2", Low | ||
| | |•Enemy Defense ↑↑↑ after 3 seconds for 30 seconds | ||
| | |•Strong Throw<br>•Ray Gun Equipped<br>•Staff Equipped<br>•Super Scope Equipped<br>•Banana Gun Equipped<br>•Mouthful of Curry | ||
|{{SSBU| | |{{SSBU|Corrin}} | ||
|1 | |1 | ||
| | | | ||
| | |Reflect | ||
| | |•Back Shield Equipped<br>•Healing Shield | ||
|[[File: | |{{SpiritType|Shield}} | ||
|[[File:Equipment Icon Brawn Badge.png|20px]] | |[[File:Equipment Icon Brawn Badge.png|20px]] 2000<br>[[File:Equipment Icon Protection Badge.png|20px]] 1300 | ||
|Normal | |Normal | ||
| | |47 | ||
|- | |- | ||
|[[File: | |1283 | ||
| | |{{SpiritTableName|Wonder-Red}} | ||
| | |3700 | ||
|Stock: 1 | |Stock: 1 | ||
|{{SSBU|Battlefield}} | |[[New Donk City Hall]] | ||
|Normal | |Normal | ||
| | | | ||
|"normal", Low | |"normal3", Low | ||
| | | | ||
| | |•Fire/Explosion Resist ↑ | ||
|{{SSBU|Mario}} | |{{SSBU|Captain Falcon}} | ||
|1 | |1 | ||
| | | | ||
| | | | ||
| | |•Fist Attack ↑<br>•Fire & Explosion Attack ↑<br>•Unflinching Charged Smashes | ||
|[[File: | |{{SpiritType|Grab}} | ||
|[[File:Equipment Icon Brawn Badge.png|20px]] | |[[File:Equipment Icon Brawn Badge.png|20px]] 2000<br>[[File:Equipment Icon Protection Badge.png|20px]] 1300 | ||
|Normal | |Normal | ||
| | |47 | ||
|- | |} | ||
|[[File: | |||
|Pikachu Libre | ===Spirits updated after original release=== | ||
|0 | Only Poppi α, [[Ribbon Girl]] and [[Ninjara]] became Spirit Battles following {{SSBU|Pyra}}'s and {{SSBU|Min Min}}'s releases with some differences besides placeholder values is that Ninjara's spirit battle being a Shield types in development but became a Grab type in the final build while Poppi α's spirit battle was a Grab type in development but became a Shield type in the final build. Coincidentally, Ribbon Girl's is set on a [[Battlefield form]] of a stage, Poppi α's is set on [[Midgar]] with hazards off rendering it as a Battlefield-type stage, and all three spirits have the same battle power in the final build. | ||
|Stock: 1 | |||
|{{SSBU|Battlefield}} | {|class="wikitable sortable" | ||
|Normal | |- | ||
! # | |||
! Image | |||
! Name | |||
! Power | |||
! Rules | |||
! Stage | |||
! Stage form | |||
! Enviro. | |||
! Items | |||
! Events | |||
! Recommended abilities | |||
! Fighter | |||
! Color | |||
! Start HP / Dmg. | |||
! Status | |||
! Abilities | |||
! Type | |||
! Stats | |||
! CPU Mode | |||
! CPU Lv. | |||
|- | |||
|971 | |||
|{{SpiritTableName|Poppi α}} | |||
|3800 | |||
|Stock: 1 | |||
|{{SSBU|Battlefield}} | |||
|Normal | |||
| | |||
|"normal2", Low | |||
| | |||
| | |||
|{{SSBU|Mario}} | |||
|1 | |||
| | |||
| | |||
| | |||
|{{SpiritType|Grab}} | |||
|[[File:Equipment Icon Brawn Badge.png|20px]] 2000<br>[[File:Equipment Icon Protection Badge.png|20px]] 1300 | |||
|Normal | |||
|47 | |||
|- | |||
|1288 | |||
|{{SpiritTableName|Ribbon Girl}} | |||
|3600 | |||
|Stock: 1 | |||
|{{SSBU|Battlefield}} | |||
|Normal | |||
| | |||
|"normal", Low | |||
| | |||
| | |||
|{{SSBU|Mario}} | |||
|1 | |||
| | |||
| | |||
| | |||
|{{SpiritType|Grab}} | |||
|[[File:Equipment Icon Brawn Badge.png|20px]] 2000<br>[[File:Equipment Icon Protection Badge.png|20px]] 1300 | |||
|Normal | |||
|47 | |||
|- | |||
|1291 | |||
|{{SpiritTableName|Ninjara}} | |||
|3600 | |||
|Stock: 1 | |||
|{{SSBU|Battlefield}} | |||
|Normal | |||
| | |||
|"normal", Low | |||
| | |||
| | |||
|{{SSBU|Mario}} | |||
|1 | |||
| | |||
| | |||
| | |||
|{{SpiritType|Shield}} | |||
|[[File:Equipment Icon Brawn Badge.png|20px]] 2000<br>[[File:Equipment Icon Protection Badge.png|20px]] 1300 | |||
|Normal | |||
|47 | |||
|} | |||
===Fighter Spirits with Spirit Battles=== | |||
{|class="wikitable sortable" | |||
|- | |||
! # | |||
! Image | |||
! Name | |||
! Power | |||
! Rules | |||
! Stage | |||
! Stage form | |||
! Enviro. | |||
! Items | |||
! Events | |||
! Recommended abilities | |||
! Fighter | |||
! Color | |||
! Start HP / Dmg. | |||
! Status | |||
! Abilities | |||
! Type | |||
! Stats | |||
! CPU Mode | |||
! CPU Lv. | |||
|- | |||
| | |||
|{{SpiritTableName|Builder Mario}} | |||
|0 | |||
|Stock: 1 | |||
|{{SSBU|Battlefield}} | |||
|Normal | |||
| | |||
|"normal2", Low | |||
| | |||
| | |||
|{{SSBU|Mario}} | |||
|1 | |||
| | |||
| | |||
| | |||
|{{SpiritType|Shield}} | |||
|[[File:Equipment Icon Brawn Badge.png|20px]] 1<br>[[File:Equipment Icon Protection Badge.png|20px]] 1 | |||
|Normal | |||
|1 | |||
|- | |||
| | |||
|{{SpiritTableName|Yoshi (Yoshi's Crafted World)}} | |||
|0 | |||
|Stock: 1 | |||
|{{SSBU|Final Destination}} | |||
|Normal | |||
| | |||
|"normal", Low | |||
| | |||
| | |||
|{{SSBU|Mario}} | |||
|1 | |||
| | |||
| | |||
| | |||
|{{SpiritType|Neutral}} | |||
|[[File:Equipment Icon Brawn Badge.png|20px]] 1<br>[[File:Equipment Icon Protection Badge.png|20px]] 1 | |||
|Normal | |||
|1 | |||
|- | |||
| | |||
|{{SpiritTableName|Pikachu Libre}} | |||
|0 | |||
|Stock: 1 | |||
|{{SSBU|Battlefield}} | |||
|Normal | |||
| | | | ||
|"normal", Low | |"normal", Low | ||
| Line 3,868: | Line 3,942: | ||
| | | | ||
| | | | ||
|{{SpiritType|Neutral}} | |||
|{{ | |||
|[[File:Equipment Icon Brawn Badge.png|20px]] 1<br>[[File:Equipment Icon Protection Badge.png|20px]] 1 | |[[File:Equipment Icon Brawn Badge.png|20px]] 1<br>[[File:Equipment Icon Protection Badge.png|20px]] 1 | ||
|Normal | |Normal | ||
| Line 3,942: | Line 3,996: | ||
| | | | ||
| | | | ||
| | |{{SpiritType|Neutral}} | ||
|[[File:Equipment Icon Brawn Badge.png|20px]] 1<br>[[File:Equipment Icon Protection Badge.png|20px]] 1 | |[[File:Equipment Icon Brawn Badge.png|20px]] 1<br>[[File:Equipment Icon Protection Badge.png|20px]] 1 | ||
|Normal | |Normal | ||
| Line 3,961: | Line 4,015: | ||
| | | | ||
| | | | ||
| | |{{SpiritType|Attack}} | ||
|[[File:Equipment Icon Brawn Badge.png|20px]] 1<br>[[File:Equipment Icon Protection Badge.png|20px]] 1 | |[[File:Equipment Icon Brawn Badge.png|20px]] 1<br>[[File:Equipment Icon Protection Badge.png|20px]] 1 | ||
|Normal | |Normal | ||
| Line 3,980: | Line 4,034: | ||
| | | | ||
|•Lava-Floor Immunity | |•Lava-Floor Immunity | ||
| | |{{SpiritType|Neutral}} | ||
|[[File:Equipment Icon Brawn Badge.png|20px]] 1<br>[[File:Equipment Icon Protection Badge.png|20px]] 1 | |[[File:Equipment Icon Brawn Badge.png|20px]] 1<br>[[File:Equipment Icon Protection Badge.png|20px]] 1 | ||
|Normal | |Normal | ||
| Line 3,999: | Line 4,053: | ||
| | | | ||
| | | | ||
| | |{{SpiritType|Neutral}} | ||
|[[File:Equipment Icon Brawn Badge.png|20px]] 1<br>[[File:Equipment Icon Protection Badge.png|20px]] 1 | |[[File:Equipment Icon Brawn Badge.png|20px]] 1<br>[[File:Equipment Icon Protection Badge.png|20px]] 1 | ||
|Stay | |Stay | ||
| Line 4,018: | Line 4,072: | ||
| | | | ||
| | | | ||
| | |{{SpiritType|Neutral}} | ||
|[[File:Equipment Icon Brawn Badge.png|20px]] 1<br>[[File:Equipment Icon Protection Badge.png|20px]] 1 | |[[File:Equipment Icon Brawn Badge.png|20px]] 1<br>[[File:Equipment Icon Protection Badge.png|20px]] 1 | ||
|Stay | |Stay | ||
| Line 4,037: | Line 4,091: | ||
| | | | ||
| | | | ||
| | |{{SpiritType|Attack}} | ||
|[[File:Equipment Icon Brawn Badge.png|20px]] 1<br>[[File:Equipment Icon Protection Badge.png|20px]] 1 | |[[File:Equipment Icon Brawn Badge.png|20px]] 1<br>[[File:Equipment Icon Protection Badge.png|20px]] 1 | ||
|Normal | |Normal | ||
| Line 4,056: | Line 4,110: | ||
| | | | ||
| | | | ||
| | |{{SpiritType|Neutral}} | ||
|[[File:Equipment Icon Brawn Badge.png|20px]] 1<br>[[File:Equipment Icon Protection Badge.png|20px]] 1 | |[[File:Equipment Icon Brawn Badge.png|20px]] 1<br>[[File:Equipment Icon Protection Badge.png|20px]] 1 | ||
|Stay | |Stay | ||
| Line 4,075: | Line 4,129: | ||
| | | | ||
|•Strong-Wind Immunity | |•Strong-Wind Immunity | ||
| | |{{SpiritType|Neutral}} | ||
|[[File:Equipment Icon Brawn Badge.png|20px]] 1<br>[[File:Equipment Icon Protection Badge.png|20px]] 1 | |[[File:Equipment Icon Brawn Badge.png|20px]] 1<br>[[File:Equipment Icon Protection Badge.png|20px]] 1 | ||
|Stay | |Stay | ||
| Line 4,094: | Line 4,148: | ||
| | | | ||
| | | | ||
| | |{{SpiritType|Neutral}} | ||
|[[File:Equipment Icon Brawn Badge.png|20px]] 1<br>[[File:Equipment Icon Protection Badge.png|20px]] 1 | |[[File:Equipment Icon Brawn Badge.png|20px]] 1<br>[[File:Equipment Icon Protection Badge.png|20px]] 1 | ||
|Stay | |Stay | ||
| Line 4,113: | Line 4,167: | ||
| | | | ||
| | | | ||
| | |{{SpiritType|Neutral}} | ||
|[[File:Equipment Icon Brawn Badge.png|20px]] 1<br>[[File:Equipment Icon Protection Badge.png|20px]] 1 | |[[File:Equipment Icon Brawn Badge.png|20px]] 1<br>[[File:Equipment Icon Protection Badge.png|20px]] 1 | ||
|Stay | |Stay | ||
| Line 4,132: | Line 4,186: | ||
| | | | ||
| | | | ||
| | |{{SpiritType|Neutral}} | ||
|[[File:Equipment Icon Brawn Badge.png|20px]] 1<br>[[File:Equipment Icon Protection Badge.png|20px]] 1 | |[[File:Equipment Icon Brawn Badge.png|20px]] 1<br>[[File:Equipment Icon Protection Badge.png|20px]] 1 | ||
|Stay | |Stay | ||
| Line 4,151: | Line 4,205: | ||
| | | | ||
| | | | ||
| | |{{SpiritType|Neutral}} | ||
|[[File:Equipment Icon Brawn Badge.png|20px]] 1<br>[[File:Equipment Icon Protection Badge.png|20px]] 1 | |[[File:Equipment Icon Brawn Badge.png|20px]] 1<br>[[File:Equipment Icon Protection Badge.png|20px]] 1 | ||
|Normal | |Normal | ||
| Line 4,170: | Line 4,224: | ||
| | | | ||
| | | | ||
| | |{{SpiritType|Neutral}} | ||
|[[File:Equipment Icon Brawn Badge.png|20px]] 1<br>[[File:Equipment Icon Protection Badge.png|20px]] 1 | |[[File:Equipment Icon Brawn Badge.png|20px]] 1<br>[[File:Equipment Icon Protection Badge.png|20px]] 1 | ||
|Stay | |Stay | ||
| Line 4,189: | Line 4,243: | ||
| | | | ||
| | | | ||
| | |{{SpiritType|Neutral}} | ||
|[[File:Equipment Icon Brawn Badge.png|20px]] 1<br>[[File:Equipment Icon Protection Badge.png|20px]] 1 | |[[File:Equipment Icon Brawn Badge.png|20px]] 1<br>[[File:Equipment Icon Protection Badge.png|20px]] 1 | ||
|Stay | |Stay | ||
| Line 4,208: | Line 4,262: | ||
| | | | ||
| | | | ||
| | |{{SpiritType|Neutral}} | ||
|[[File:Equipment Icon Brawn Badge.png|20px]] 1<br>[[File:Equipment Icon Protection Badge.png|20px]] 1 | |[[File:Equipment Icon Brawn Badge.png|20px]] 1<br>[[File:Equipment Icon Protection Badge.png|20px]] 1 | ||
|Stay | |Stay | ||
| Line 4,227: | Line 4,281: | ||
| | | | ||
| | | | ||
| | |{{SpiritType|Neutral}} | ||
|[[File:Equipment Icon Brawn Badge.png|20px]] 1<br>[[File:Equipment Icon Protection Badge.png|20px]] 1 | |[[File:Equipment Icon Brawn Badge.png|20px]] 1<br>[[File:Equipment Icon Protection Badge.png|20px]] 1 | ||
|Stay | |Stay | ||
| Line 4,246: | Line 4,300: | ||
| | | | ||
| | | | ||
| | |{{SpiritType|Neutral}} | ||
|[[File:Equipment Icon Brawn Badge.png|20px]] 1<br>[[File:Equipment Icon Protection Badge.png|20px]] 1 | |[[File:Equipment Icon Brawn Badge.png|20px]] 1<br>[[File:Equipment Icon Protection Badge.png|20px]] 1 | ||
|Stay | |Stay | ||
| Line 4,265: | Line 4,319: | ||
| | | | ||
| | | | ||
| | |{{SpiritType|Neutral}} | ||
|[[File:Equipment Icon Brawn Badge.png|20px]] 1<br>[[File:Equipment Icon Protection Badge.png|20px]] 1 | |[[File:Equipment Icon Brawn Badge.png|20px]] 1<br>[[File:Equipment Icon Protection Badge.png|20px]] 1 | ||
|Stay | |Stay | ||
| Line 4,284: | Line 4,338: | ||
| | | | ||
| | | | ||
| | |{{SpiritType|Neutral}} | ||
|[[File:Equipment Icon Brawn Badge.png|20px]] 1<br>[[File:Equipment Icon Protection Badge.png|20px]] 1 | |[[File:Equipment Icon Brawn Badge.png|20px]] 1<br>[[File:Equipment Icon Protection Badge.png|20px]] 1 | ||
|Stay | |Stay | ||
| Line 4,303: | Line 4,357: | ||
| | | | ||
| | | | ||
| | |{{SpiritType|Neutral}} | ||
|[[File:Equipment Icon Brawn Badge.png|20px]] 1<br>[[File:Equipment Icon Protection Badge.png|20px]] 1 | |[[File:Equipment Icon Brawn Badge.png|20px]] 1<br>[[File:Equipment Icon Protection Badge.png|20px]] 1 | ||
|Stay | |Stay | ||
| Line 4,322: | Line 4,376: | ||
| | | | ||
| | | | ||
| | |{{SpiritType|Neutral}} | ||
|[[File:Equipment Icon Brawn Badge.png|20px]] 1<br>[[File:Equipment Icon Protection Badge.png|20px]] 1 | |[[File:Equipment Icon Brawn Badge.png|20px]] 1<br>[[File:Equipment Icon Protection Badge.png|20px]] 1 | ||
|Stay | |Stay | ||
|1 | |1 | ||
|} | |} | ||
[[Category:Hacking]] | [[Category:Hacking]] | ||
Latest revision as of 08:31, February 9, 2023
There are 214 Spirit Battles that exist in the files of Super Smash Bros. Ultimate, but go unused.
[edit]
At least 193 spirits have battles that cannot be accessed in the game. Most spirits that cannot be battled contain the default placeholder data for their battles, consisting of Mario on Battlefield with other data being similarly default values. However, all of these battles have data such as battle power specified based on the spirit's rank, and some of these battles were developed past their initial placeholder state, though not to completion.
All of these battles:
- Have only one opponent.
- Have stage hazards on.
- Do not use any special behavior for their stages (e.g. forcing a specific chamber on Kalos Pokémon League), except for Resetti, which uses the same setting that all battles on Smashville use (specifics unknown).
- Have the normal victory condition of defeating the enemy (within the time limit, if applicable).
- Do not specify a music track, simply using the default of "random".
| # | Image | Name | Power | Rules | Stage | Stage form | Enviro. | Items | Events | Recommended abilities | Fighter | Color | Start HP / Dmg. | Status | Abilities | Type | Stats | CPU Mode | CPU Lv. |
|---|---|---|---|---|---|---|---|---|---|---|---|---|---|---|---|---|---|---|---|
| 18 | Super Mushroom | 4000 | Stock: 1 | Super Mario Maker | Normal | "normal3", Low | •Giant Enemy after 3 seconds | •Giant Killer | Mario | 1 | Giant | Metal | 47 | ||||||
| 19 | Fire Flower | 1900 | Stock: 1 | Super Mario Maker | Battlefield | "normal", Low | •Franklin Badge Equipped •Fire/Explosion Resist ↑ |
Mario | 1 | •Fire Flower Equipped | Normal | 41 | |||||||
| 24 | Gold Mario | 13700 | Stock: 1 | Battlefield | Normal | "normal", Low | Mario | 1 | Normal | 99 | |||||||||
| 28 | Cat Princess Peach | 9400 | Stock: 1 | Golden Plains | Battlefield | "normal", Low | •Air Attack ↑ | Peach | 6 | Tail | •Move Speed ↑ •Move Speed ↑ •Foot Attack ↑ |
Normal | 74 | ||||||
| 32 | Captain Toad | 9500 | Stock: 1 | Battlefield | Normal | "normal", Low | Mario | 1 | Normal | 74 | |||||||||
| 42 | Banzai Bill | 3700 | Stock: 1 | Battlefield | Normal | "normal3", Low | Mario | 1 | Normal | 47 | |||||||||
| 45 | Birdo | 9300 | Stock: 1 | Battlefield | Normal | "normal2", Low | Mario | 1 | Normal | 74 | |||||||||
| 49 | King Boo | 3800 | Stock: 1 | Battlefield | Normal | "normal2", Low | Mario | 1 | Normal | 47 | |||||||||
| 52 | Thwomp | 3500 | Stock: 1 | Delfino Plaza | Normal | "normal3", Low | •Air Attack ↑ | Bowser | 1 | •Instadrop •Jump ↑ •Jump ↑ |
Normal | 47 | |||||||
| 54 | Petey Piranha | 9300 | Stock: 1 | Battlefield | Normal | "normal3", Low | Mario | 1 | Normal | 74 | |||||||||
| 56 | Boom Boom & Pom Pom | 9100 | Stock: 1 | Battlefield | Normal | "normal2", Low | Mario | 1 | Normal | 74 | |||||||||
| 64 | Nabbit | 3600 | Stock: 1 | Battlefield | Normal | "normal3", Low | Mario | 1 | Normal | 47 | |||||||||
| 68 | F.L.U.D.D. | 3800 | Stock: 1 | Battlefield | Normal | "normal3", Low | Mario | 1 | Normal | 47 | |||||||||
| 76 | Sprixie Princesses | 3800 | Stock: 1 | Delfino Plaza | Battlefield | "normal", Low | Zelda | 1 | Normal | 47 | |||||||||
| 92 | City Tripper | 9300 | Stock: 1 | Battlefield | Normal | "normal3", Low | Mario | 1 | Normal | 74 | |||||||||
| 93 | Master Cycle | 13400 | Stock: 1 | Battlefield | Normal | "normal", Low | Mario | 1 | Normal | 99 | |||||||||
| 94 | Paper Mario | 9400 | Stock: 1 | Delfino Plaza | Battlefield | "normal", Low | Mario | 1 | Normal | 74 | |||||||||
| 96 | Paper Bowser (Paper Mario: Sticker Star) | 13500 | HP: 120 | Paper Mario | Ω | "normal", Low | •Enemy Attack ↑↑ after 30 seconds •Enemy Defense ↑↑ after 45 seconds |
•Stamina ↑ •Critical-Health Healing •Autoheal •Great Autoheal •Death's Scythe Equipped |
Mario | 1 | 0 | Normal | 99 | ||||||
| 99 | Shadow Queen | 9500 | Stock: 1 | Battlefield | Normal | "normal3", Low | Mario | 1 | Normal | 74 | |||||||||
| 112 | Papercraft Mario | 2300 | Stock: 1 | Mushroom Kingdom | Normal | "normal3", Low | •Giant Killer | Mario | 1 | Giant | Metal | 41 | |||||||
| 120 | Professor Elvin Gadd | 3900 | Stock: 1 | Battlefield | Normal | "normal", Low | Mario | 1 | Normal | 47 | |||||||||
| 126 | Mini Mario | 3100 | Stock: 1 | Wrecking Crew | Normal | "normal2", Low | •Jump ↑ •Additional Midair Jump •Shield Durability ↑ •Move Speed ↑ •Rocket Belt Equipped |
Mario | 1 | Tiny | •Hammer Equipped | Normal | 47 | ||||||
| 127 | Mini Mario & Hammers | 9300 | Stock: 1 | Battlefield | Normal | "normal", Low | Mario | 1 | Normal | 74 | |||||||||
| 146 | Dixie Kong & Kiddy Kong | 13300 | Stock: 1 | Kongo Falls | Normal | "normal2", Low | •Item Tidal Wave: Bananas every 5 seconds | •Falling Immunity •Franklin Badge Equipped |
Mario | 1 | Normal | 99 | |||||||
| 163 | Baron K. Roolenstein | 9500 | Stock: 1 | Great Bay | Normal | "normal2", Low | Dr. Mario | 2 | Normal | 74 | |||||||||
| 164 | Blast-o-Matic | 13400 | Stock: 1 | Battlefield | Normal | "normal", Low | Mario | 1 | Normal | 99 | |||||||||
| 169 | Donkey Kong & Bongos | 3600 | Stock: 1 | Battlefield | Normal | "normal2", Low | Mario | 1 | Normal | 47 | |||||||||
| 190 | Zelda (Ocarina of Time) | 13500 | Stock: 1 | Battlefield | Normal | "normal2", Low | Mario | 1 | Normal | 99 | |||||||||
| 196 | Epona | 9400 | Stock: 1 | Battlefield | Normal | "normal3", Low | Mario | 1 | Normal | 74 | |||||||||
| 200 | Ruto | 9400 | Stock: 1 | Great Bay | Battlefield | "normal2", Low | •Freezie Equipped | Inkling | 1 | •Water/Freezing Resist ↑ •Neutral Special ↑ |
Normal | 74 | |||||||
| 203 | Twinrova | 9300 | Stock: 1 | Battlefield | Normal | "normal3", Low | Mario | 1 | Normal | 74 | |||||||||
| 206 | Skull Kid & Majora's Mask | 13400 | Stock: 1 | Battlefield | Normal | "normal2", Low | Mario | 1 | Normal | 99 | |||||||||
| 209 | Majora's Mask | 9500 | Stock: 1 | Great Bay | Normal | "normal2", Low | Young Link | 7 | Normal | 74 | |||||||||
| 210 | Moon | 9300 | Stock: 1 | Great Bay | Normal | "normal2", Low | •Tiny Enemy after 3 seconds for 10 seconds •Giant Enemy after 20 seconds for 120 seconds |
•Giant Killer | Jigglypuff | 1 | Normal | 74 | |||||||
| 221 | Beast Ganon | 13700 | Stock: 1 | Battlefield | Normal | "normal3", Low | Mario | 1 | Normal | 99 | |||||||||
| 223 | Wolf Link & Midna | 13500 | Stock: 1 | Battlefield | Normal | "normal3", Low | Mario | 1 | Normal | 99 | |||||||||
| 230 | Demise | 9500 | Stock: 1 | Battlefield | Normal | "normal", Low | Mario | 1 | Normal | 74 | |||||||||
| 234 | Link (A Link Between Worlds) | 9300 | Stock: 1 | Battlefield | Normal | "normal", Low | Mario | 1 | Normal | 74 | |||||||||
| 247 | Zelda (The Wind Waker) | 13400 | Stock: 1 | Battlefield | Normal | "normal", Low | Mario | 1 | Normal | 99 | |||||||||
| 248 | King of Red Lions | 3800 | Stock: 1 | Pirate Ship | Normal | "normal2", Low | Toon Link | 1 | Normal | 47 | |||||||||
| 249 | King of Hyrule | 9400 | Stock: 1 | Battlefield | Normal | "normal", Low | Mario | 1 | Normal | 74 | |||||||||
| 259 | Zelda (Spirit Tracks) | 9200 | Stock: 1 | Battlefield | Normal | "normal2", Low | Mario | 1 | Normal | 74 | |||||||||
| 270 | Fusion Suit | 9300 | Stock: 1 | Battlefield | Normal | "normal2", Low | Mario | 1 | Normal | 74 | |||||||||
| 271 | Phazon Suit | 9700 | Stock: 1 | Kongo Jungle | Normal | Lava Floor | "normal2", Low | •Lava-Floor Immunity •Lava-Floor Resist •Rocket Belt Equipped •Additional Midair Jump •Slow Super Armor •Armor Knight |
Samus | 1 | •Lava-Floor Immunity | Normal | 74 | ||||||
| 272 | Dark Suit | 3800 | Stock: 1 | Frigate Orpheon | Normal | "normal", Low | Samus | 1 | Normal | 47 | |||||||||
| 273 | Light Suit | 13500 | Stock: 1 | Battlefield | Normal | "normal2", Low | Mario | 1 | Normal | 99 | |||||||||
| 279 | Mother Brain (2nd Form) | 13400 | Stock: 1 | Battlefield | Normal | "normal", Low | •Assist Trophy Enemy: Mother Brain after 1 second •Energy Output ↑ after 5 seconds |
•Assist Killer •Energy Shot Attack/Resistance ↑ •Energy-Shot Attack ↑ •Energy-Shot Resist ↑ |
Mario | 1 | Normal | 75 | |||||||
| 280 | Gunship | 3700 | Stock: 1 | Battlefield | Normal | "normal2", Low | Mario | 1 | Normal | 47 | |||||||||
| 286 | Nightmare | 9300 | Stock: 1 | Battlefield | Normal | "normal", Low | Mario | 1 | Normal | 74 | |||||||||
| 296 | Mech | 1800 | Stock: 1 | Battlefield | Normal | "normal", Low | Mario | 1 | Normal | 41 | |||||||||
| 300 | Baby Mario (Superstar Mario) | 13500 | Stock: 1 | Battlefield | Normal | "normal2", Low | Mario | 1 | Normal | 99 | |||||||||
| 302 | Stork | 9300 | Stock: 1 | Yoshi's Story | Battlefield | "normal3", Low | Pit | 1 | Normal | 74 | |||||||||
| 313 | Super Happy Tree | 13700 | Stock: 1 | Super Happy Tree | Normal | Food, Max | •Stats ↑ after Eating •Stats ↑↑ after Eating •Invincibility after Eating •Item Gravitation |
Yoshi | 1 | •Invincibility after Eating •Stats ↑ after Eating |
Normal | 99 | |||||||
| 319 | Mega Eggdozer | 3800 | Stock: 1 | Battlefield | Normal | "normal", Low | Mario | 1 | Normal | 47 | |||||||||
| 326 | Warp Star | 3800 | Stock: 1 | Battlefield | Normal | "normal2", Low | Mario | 1 | Normal | 47 | |||||||||
| 328 | Ultra Sword | 9400 | Stock: 1 | Coliseum | Normal | "normal", Low | •Enemy Sudden Final Smash after 5 seconds | •Critical Immunity •Critical-Health Healing •Easier Dodging |
Kirby | 2 | •Beam Sword Equipped | Normal | 74 | ||||||
| 330 | Halberd | 13400 | Stock: 1 | Battlefield | Normal | "normal2", Low | Mario | 1 | Normal | 99 | |||||||||
| 342 | Nightmare Wizard | 13600 | Stock: 1 | Battlefield | Normal | "normal", Low | Mario | 1 | Normal | 99 | |||||||||
| 345 | Dyna Blade | 13500 | Stock: 1 | Green Greens | Normal | "normal", Low | •Giant Killer | Falco | 1 | Giant | Metal | 99 | |||||||
| 348 | Marx (True Form) | 13700 | Stock: 1 | Battlefield | Normal | "normal3", Low | Mario | 1 | Normal | 99 | |||||||||
| 351 | Daroach | 9400 | Stock: 1 | The Great Cave Offensive | Normal | "normal", Low | •Item Gravitation | Sonic | 5 | •Move Speed ↑ •Thrown Items ↑ •Item Gravitation |
Normal | 74 | |||||||
| 352 | Dark Daroach | 13400 | Stock: 1 | Battlefield | Normal | "normal", Low | Mario | 1 | Normal | 99 | |||||||||
| 353 | Masked Dedede | 9300 | Stock: 1 | Boxing Ring (Smash Bros. version) | Normal | "normal", None | •Weapon Resist ↑ | King Dedede | 6 | •Weapon Attack ↑ •Shield Damage ↑ |
Normal | 74 | |||||||
| 354 | Galacta Knight | 13700 | Stock: 1 | Halberd | Normal | "normal", Low | Meta Knight | 1 | •Hyper Smash Attacks •Critical Hit ↑ •Slash Attack ↑ |
Normal | 99 | ||||||||
| 357 | Queen Sectonia | 9400 | Stock: 1 | Battlefield | Normal | "normal2", Low | Mario | 1 | Normal | 74 | |||||||||
| 361 | Bandana Waddle Dee | 9500 | Stock: 1 | Battlefield | Normal | "normal3", Low | Mario | 1 | Normal | 74 | |||||||||
| 367 | Angry Scarfy | 3700 | Stock: 1 | Battlefield | Normal | "normal3", Low | Mario | 1 | Normal | 47 | |||||||||
| 369 | Wheelie | 3600 | Stock: 1 | Figure-8 Circuit | Normal | "normal", Low | Wario | 1 | •Impact Run | Normal | 47 | ||||||||
| 375 | Mr. Shine & Mr. Bright | 3700 | Stock: 1 | Battlefield | Normal | "normal", Low | Mario | 1 | Normal | 47 | |||||||||
| 390 | Arwing | 9300 | Stock: 1 | Venom | Battlefield | "normal", Low | Mega Man | 5 | Normal | 74 | |||||||||
| 391 | Great Fox | 13700 | Stock: 1 | Battlefield | Normal | "normal", Low | Mario | 1 | Normal | 99 | |||||||||
| 393 | Walker | 3800 | Stock: 1 | Midgar | Normal | "normal3", Low | R.O.B. | 1 | Normal | 47 | |||||||||
| 400 | Andross | 3900 | Stock: 1 | Corneria | Normal | "normal", Low | Falco | 7 | Normal | 47 | |||||||||
| 402 | Andross (True Form) | 13600 | Stock: 1 | Battlefield | Normal | "normal2", Low | Mario | 1 | Normal | 99 | |||||||||
| 451 | Mega Kangaskhan | 9300 | Stock: 1 | Battlefield | Normal | "normal", Low | Mario | 1 | Normal | 74 | |||||||||
| 467 | Togepi | 3600 | Stock: 1 | Battlefield | Normal | "normal", Low | Mario | 1 | Normal | 47 | |||||||||
| 476 | Scizor | 4400 | Stock: 1 | Kalos Pokémon League | Normal | "normal3", Low | •Metal Killer | Lucario | 1 | Metal | Metal | 47 | |||||||
| 497 | Primal Kyogre | 8700 | Stock: 1 (enemy: 99) | Dracula's Castle | Normal | "normal", Low | •Giant Enemy for 10 seconds at 5 second intervals | •Giant Killer •KOs Heal Damage •Back Shield Equipped |
King K. Rool | 1 | Stay | 4 | |||||||
| 499 | Primal Groudon | 8700 | Stock: 1 (enemy: 99) | Battlefield | Normal | "normal", Low | •Curry-Filled Everyone for 10 seconds at 5 second intervals | •Fire/Explosion Resist ↑ •Super Armor •Healing Shield •Shield Durability ↑ •Slow Super Armor •KOs Heal Damage •Back Shield Equipped |
Mario | 1 | Stay | 4 | |||||||
| 501 | Jirachi | 13700 | Stock: 1 Time: 180 |
Pokémon Stadium | Normal | "normal2", Low | Rosalina & Luma | 1 | •Critical Immunity •Critical Immunity •Critical Immunity |
Normal | 99 | ||||||||
| 513 | Giratina (Origin Forme) | 12400 | Stock: 99 | Dracula's Castle | Normal | "normal", Low | •Wind (Left) Lv. 1 at 5 second intervals | •Strong-Wind Immunity •Strong-Wind Resist •Move Speed ↑ •Trade-Off Speed ↑ •KOs Heal Damage •Back Shield Equipped •Rocket Belt Equipped •Lightweight •Jump ↑ •Bunny Hood Equipped |
Mario | 1 | Stay | 5 | |||||||
| 518 | Shaymin (Sky Forme) | 12400 | Stock: 99 | Battlefield | Normal | "normal", Low | •Everyone Defense ↑↑↑ for 15 seconds at 5 second intervals | •KOs Heal Damage •Back Shield Equipped |
Mario | 1 | Stay | 5 | |||||||
| 532 | Kyurem (Black Kyurem) | 8600 | Stock: 99 | Battlefield | Normal | "normal", Low | •Screen Flip for 10 seconds at 5 second intervals | •Screen-Flip Immunity •KOs Heal Damage •Back Shield Equipped |
Mario | 1 | Stay | 4 | |||||||
| 533 | Kyurem (White Kyurem) | 8600 | Stock: 99 | Battlefield | Normal | "normal", Low | •Player Input Reverse for 10 seconds at 5 second intervals | •Irreversible Controls •KOs Heal Damage •Back Shield Equipped |
Mario | 1 | Stay | 4 | |||||||
| 535 | Keldeo (Resolute Form) | 12300 | Stock: 99 | Battlefield | Normal | "normal", Low | •Invisible Everyone for 10 seconds at 5 second intervals | •Lip's Stick Equipped •Black Hole Equipped •Beastball Equipped •KOs Heal Damage •Back Shield Equipped |
Mario | 1 | Stay | 5 | |||||||
| 545 | Zygarde (Complete Forme) | 12500 | Stock: 99 | Battlefield | Normal | "normal", Low | •Metal Everyone for 15 seconds at 5 second intervals | •Metal Killer •KOs Heal Damage •Back Shield Equipped |
Mario | 1 | Stay | 5 | |||||||
| 547 | Mega Diancie | 13500 | Stock: 1 | Battlefield | Normal | "normal", Low | Mario | 1 | Normal | 99 | |||||||||
| 549 | Hoopa (Unbound) | 9500 | Stock: 1 | Battlefield | Normal | "normal", Low | Mario | 1 | Normal | 74 | |||||||||
| 577 | Mr. Saturn | 9400 | Stock: 1 | Onett | Normal | Mr. Saturn, Max | •Thrown Items ↑ •Shield Damage ↑ •Healing Shield •Shield Durability ↑ |
Ness | 2 | •Thrown Items ↑ •Shield Damage ↑ |
Normal | 74 | |||||||
| 594 | Samurai Goroh | 13300 | Stock: 1 | Battlefield | Normal | "normal2", Low | Mario | 1 | Normal | 99 | |||||||||
| 631 | Tiki (Naga's Voice) | 9300 | Stock: 1 | Battlefield | Normal | "normal", Low | Mario | 1 | Normal | 74 | |||||||||
| 634 | Sirius | 13600 | Stock: 1 | Battlefield | Normal | "normal3", Low | Mario | 1 | Normal | 99 | |||||||||
| 638 | Alm & Celica | 9300 | Stock: 1 | Battlefield | Normal | "normal2", Low | Marth | 1 | Normal | 74 | |||||||||
| 646 | Lyn (Blade Lord) | 13500 | Stock: 1 | Battlefield | Normal | "normal", Low | Mario | 1 | Normal | 99 | |||||||||
| 654 | Ephraim | 9500 | Stock: 1 | Battlefield | Normal | "normal3", Low | Mario | 1 | Normal | 74 | |||||||||
| 662 | Queen Elincia | 13400 | Stock: 1 | Battlefield | Normal | "normal2", Low | Mario | 1 | Normal | 99 | |||||||||
| 665 | Black Knight | 13700 | Stock: 1 | Battlefield | Normal | "normal2", Low | Mario | 1 | Normal | 99 | |||||||||
| 666 | Micaiah | 9300 | Stock: 1 | Battlefield | Normal | "normal3", Low | Mario | 1 | Normal | 74 | |||||||||
| 669 | Cordelia | 3700 | HP: 120 | Arena Ferox | Normal | "normal3", Low | •Stamina ↑ •Critical-Health Healing •Autoheal •Great Autoheal •Death's Scythe Equipped |
Chrom | 1 | 80 | Normal | 47 | |||||||
| 682 | Xander | 13800 | HP: 120 | Coliseum | Normal | "normal2", Low | •Stamina ↑ •Critical-Health Healing •Autoheal •Great Autoheal •Lip's Stick Equipped •Strong Throw •Ray Gun Equipped •Super Scope Equipped •Staff Equipped •Banana Gun Equipped •Boomerang Equipped •Death's Scythe Equipped |
Corrin | 1 | 80 | •Autoheal •Slash Attack ↑ •Slow Super Armor |
Normal | 99 | ||||||
| 688 | Tsubasa Oribe (Carnage Form) | 9300 | Stock: 1 | Moray Towers | Normal | "normal2", Low | •Enemy Sudden Final Smash immediately | •Critical Immunity •Critical-Health Healing •Easier Dodging |
Daisy | 1 | Normal | 74 | |||||||
| 695 | Helmet | 1700 | Stock: 1 | Flat Zone X | Battlefield | "normal", Low | Pac-Man | 1 | Normal | 41 | |||||||||
| 697 | Parachute | 3600 | Stock: 1 | Flat Zone X | Normal | "normal2", Low | Mario | 1 | Normal | 47 | |||||||||
| 698 | Octopus | 13700 | Stock: 1 | Flat Zone X | Normal | "normal3", Low | Mario | 1 | Normal | 99 | |||||||||
| 699 | Chef (Game & Watch) | 9300 | Stock: 1 | Flat Zone X | Normal | "normal3", Low | Mario | 1 | Normal | 74 | |||||||||
| 706 | Pit (Original) | 9400 | Stock: 1 | Skyworld | Normal | "normal3", Low | Pit | 1 | Normal | 74 | |||||||||
| 711 | Medusa (Kid Icarus: Uprising) | 13600 | Stock: 1 | Battlefield | Normal | "normal", Low | Mario | 1 | Normal | 99 | |||||||||
| 711 | Amazon Pandora | 9500 | Stock: 1 | Battlefield | Normal | "normal", Low | Mario | 1 | Normal | 74 | |||||||||
| 718 | Hades (Final Form) | 13700 | Stock: 1 | Battlefield | Normal | "normal2", Low | Mario | 1 | Normal | 99 | |||||||||
| 724 | Phosphora | 9300 | Stock: 1 | Battlefield | Normal | "normal", Low | Mario | 1 | Normal | 74 | |||||||||
| 731 | Jimmy T. | 9200 | Stock: 1 | Battlefield | Normal | "normal", Low | Mario | 1 | Normal | 74 | |||||||||
| 732 | Mona | 9300 | Stock: 1 | Mario Bros. | Normal | "normal", Low | Wario | 4 | •Side Special ↑ •Side Special ↑ •Move Speed ↑ |
Normal | 74 | ||||||||
| 742 | 5-Volt (Angry) | 9400 | Stock: 1 | Battlefield | Normal | "normal2", Low | Mario | 1 | Normal | 74 | |||||||||
| 759 | Big Boss | 13700 | Stock: 1 | Battlefield | Normal | "normal", Low | Mario | 1 | Normal | 99 | |||||||||
| 763 | Revolver Ocelot (Metal Gear Solid V) | 9800 | Stock: 1 | Shadow Moses Island | Battlefield | Zap-Floor | Shooting, Max | •Zap-Floor Immunity •Rocket Belt Equipped •Additional Midair Jump •Super Leaf Equipped •Screw Attack Equipped •Shooting Items ↑ •Shooting Attack ↑ •Franklin Badge Equipped •Easier Dodging •Slow Super Armor •Armor Knight |
Fox | 5 | •Shooting Attack ↑ •Strong Throw •Zap-Floor Immunity |
Item Shoot | 74 | ||||||
| 765 | Raiden | 13500 | Stock: 1 | Battlefield | Normal | "normal", Low | Mario | 1 | Normal | 99 | |||||||||
| 773 | Sahelanthropus | 9200 | Stock: 1 | Battlefield | Normal | "normal", Low | Mario | 1 | Normal | 74 | |||||||||
| 774 | Cardboard Box | 2000 | Stock: 1 | Shadow Moses Island | Battlefield | "normal", Low | Olimar | 1 | Normal | 41 | |||||||||
| 781 | Knuckles | 9300 | Stock: 1 | Battlefield | Normal | "normal", Low | Mario | 1 | Normal | 74 | |||||||||
| 787 | Hero Chao | 9500 | Stock: 1 | Battlefield | Normal | "normal", Low | Mario | 1 | Normal | 74 | |||||||||
| 789 | Super Shadow | 13700 | Stock: 1 | Battlefield | Normal | "normal", Low | Mario | 1 | Normal | 99 | |||||||||
| 794 | Jet the Hawk | 3100 | Stock: 99 | Battlefield | Normal | "normal", Low | •Flower Everyone for 15 seconds at 5 second intervals | •Autoheal •Great Autoheal •Critical-Health Attack ↑ •Critical-Health Defense ↑ •Critical-Health Stats ↑ •Critical-Health Stats ↑↑ •Critical Immunity •KOs Heal Damage •Back Shield Equipped •Undamaged Attack ↑ •Undamaged Speed ↑ •Undamaged Attack & Speed ↑ |
Mario | 1 | Stay | 3 | |||||||
| 800 | Louie | 9300 | Stock: 1 | Battlefield | Normal | "normal", Low | Mario | 1 | Normal | 74 | |||||||||
| 811 | Empress Bulblax | 13300 | Stock: 1 | Battlefield | Normal | "normal2", Low | Mario | 1 | Normal | 99 | |||||||||
| 814 | Plasm Wraith | 9400 | Stock: 1 | Battlefield | Normal | "normal2", Low | Mario | 1 | Normal | 74 | |||||||||
| 823 | Stack-Up | 3800 | Stock: 1 | Battlefield | Normal | "normal2", Low | Mario | 1 | Normal | 47 | |||||||||
| 829 | Tom Nook (Nookington's) | 9100 | Stock: 1 | Battlefield | Normal | "normal", Low | Mario | 1 | Normal | 74 | |||||||||
| 832 | K.K. Slider | 9500 | Stock: 1 | Battlefield | Normal | "normal3", Low | Mario | 1 | Normal | 74 | |||||||||
| 833 | Resetti | 9700 | Stock: 1 | Smashville | Normal | Hammer, Max | •Jump ↑ •Additional Midair Jump •Shield Durability ↑ •Move Speed ↑ •Rocket Belt Equipped |
King Dedede | 1 | Normal | 99 | ||||||||
| 839 | Pete | 9300 | Stock: 1 | Battlefield | Normal | "normal2", Low | Mario | 1 | Normal | 74 | |||||||||
| 845 | Tortimer | 9300 | Stock: 1 | Battlefield | Normal | "normal3", Low | Mario | 1 | Normal | 74 | |||||||||
| 865 | Proto Man | 13500 | Stock: 1 | Battlefield | Normal | "normal", Low | Mario | 1 | Normal | 99 | |||||||||
| 869 | Rush | 9200 | Stock: 1 | Battlefield | Normal | "normal", Low | Mario | 1 | Normal | 74 | |||||||||
| 882 | Yellow Devil | 9400 | Stock: 1 | Battlefield | Normal | "normal", Low | Mario | 1 | Normal | 74 | |||||||||
| 894 | Drill Man | 1700 | Stock: 1 | Battlefield | Normal | "normal", Low | Mario | 1 | Normal | 41 | |||||||||
| 906 | Full Armor X | 13700 | Stock: 1 | Battlefield | Normal | "normal", Low | Mario | 1 | Normal | 99 | |||||||||
| 908 | Zero (Z-Saber) | 13700 | Stock: 1 | Battlefield | Normal | "normal", Low | Mario | 1 | Normal | 99 | |||||||||
| 917 | Star Force Mega Man | 8600 | Stock: 99 | Battlefield | Normal | "normal", Low | •Low Gravity for 15 seconds at 5 second intervals | •Gravity-Change Immunity •Air Defense ↑ •Easier Dodging •Instadrop •Air Attack ↑ •KOs Heal Damage •Back Shield Equipped |
Mario | 1 | Stay | 4 | |||||||
| 920 | Model ZX | 3900 | Stock: 1 | Battlefield | Normal | "normal", Low | Mario | 1 | 300 | Normal | 47 | ||||||||
| 924 | Pet | 1600 | Stock: 1 | Wii Fit Studio | Normal | "normal", Low | Mario | 1 | Normal | 41 | |||||||||
| 928 | Tree | 9300 | Stock: 1 | Duck Hunt | Normal | "normal2", Low | Wii Fit Trainer | 1 | Normal | 74 | |||||||||
| 930 | Warrior | 3900 | Stock: 1 | Wii Fit Studio | Normal | "normal3", Low | Mario | 1 | Normal | 47 | |||||||||
| 940 | Super Macho Man | 13800 | Stock: 1 | Boxing Ring (Punch-Out!! version) | Normal | "normal3", Low | •Giant Killer | Incineroar | 1 | Giant | •Critical Hit ↑ | Metal | 99 | ||||||
| 947 | Mother Fairy | 9500 | Stock: 1 | Pac-Land | Battlefield | "normal2", Low | Rosalina & Luma | 2 | Normal | 74 | |||||||||
| 960 | Metal Face | 13700 | Stock: 1 | Battlefield | Normal | "normal2", Low | Mario | 1 | Normal | 99 | |||||||||
| 965 | Formula | 3900 | Stock: 1 | Battlefield | Normal | "normal", Low | Mario | 1 | Normal | 47 | |||||||||
| 979 | E. Honda | 3700 | Stock: 1 | Battlefield | Normal | "normal", Low | •Everyone Jump Power ↓↓↓ after 1 second | •Jump ↑ •Additional Midair Jump •Bunny Hood Equipped •Rocket Belt Equipped •Lightweight |
Mario | 1 | Normal | 47 | |||||||
| 981 | Chun-Li | 9400 | HP: 120 | Battlefield | Normal | "normal", Low | •Everyone Jump Power ↓↓↓ after 1 second | •Jump ↑ •Additional Midair Jump •Bunny Hood Equipped •Rocket Belt Equipped •Lightweight •Stamina ↑ •Critical-Health Healing •Autoheal •Great Autoheal •Death's Scythe Equipped |
Mario | 1 | 180 | Normal | 74 | ||||||
| 985 | Dhalsim | 9200 | HP: 120 | Battlefield | Normal | "normal", Low | •Everyone Jump Power ↓↓↓ after 1 second | •Jump ↑ •Additional Midair Jump •Bunny Hood Equipped •Rocket Belt Equipped •Lightweight •Stamina ↑ •Critical-Health Healing •Autoheal •Great Autoheal •Death's Scythe Equipped |
Mario | 1 | 160 | Normal | 74 | ||||||
| 1001 | Ibuki | 3800 | HP: 120 | Battlefield | Normal | "normal", Low | •Everyone Jump Power ↓↓↓ after 1 second | •Jump ↑ •Additional Midair Jump •Bunny Hood Equipped •Rocket Belt Equipped •Lightweight •Stamina ↑ •Critical-Health Healing •Autoheal •Great Autoheal •Death's Scythe Equipped |
Mario | 1 | 140 | Normal | 47 | ||||||
| 1002 | Yun & Yang | 3800 | HP: 120 | Battlefield | Normal | "normal", Low | •Everyone Jump Power ↓↓↓ after 1 second | •Jump ↑ •Additional Midair Jump •Bunny Hood Equipped •Rocket Belt Equipped •Lightweight •Stamina ↑ •Critical-Health Healing •Autoheal •Great Autoheal •Death's Scythe Equipped |
Mario | 1 | 140 | Normal | 47 | ||||||
| 1011 | Cutie J | 13700 | Stock: 1 | Battlefield | Normal | "normal", Low | Mario | 1 | Normal | 99 | |||||||||
| 1012 | Rodin | 9300 | Stock: 1 | Battlefield | Normal | "normal", Low | Ganondorf | 1 | Normal | 74 | |||||||||
| 1013 | Rodin, the Infinite One | 13700 | Stock: 1 | Battlefield | Normal | "normal", Low | Mario | 1 | Normal | 99 | |||||||||
| 1018 | Father Balder | 9400 | Stock: 1 | Battlefield | Normal | "normal", Low | Mario | 1 | Normal | 74 | |||||||||
| 1027 | Inkling Squid | 9600 | HP: 120 Time: 180 |
Moray Towers | Normal | "normal3", Low | •Stamina ↑ •Critical-Health Healing •Autoheal •Great Autoheal •Death's Scythe Equipped |
Inkling | 1 | 160 | •Easier Dodging | Normal | 74 | ||||||
| 1028 | Judd | 13600 | Stock: 1 | Battlefield | Normal | "normal2", Low | Mario | 1 | Normal | 99 | |||||||||
| 1036 | Spyke | 3700 | Stock: 1 | Battlefield | Normal | "normal3", Low | Mario | 1 | Normal | 47 | |||||||||
| 1037 | Flow | 3700 | Stock: 1 | Battlefield | Normal | "normal3", Low | Mario | 1 | Normal | 47 | |||||||||
| 1043 | DJ Octavio | 3700 | Stock: 1 | Battlefield | Normal | "normal", Low | Kirby | 1 | Normal | 47 | |||||||||
| 1044 | Octobot King | 9500 | Stock: 1 | Battlefield | Normal | "normal", Low | Mario | 1 | Normal | 74 | |||||||||
| 1049 | Super Sea Snail | 1600 | Stock: 1 | Battlefield | Normal | "normal3", Low | Mario | 1 | Normal | 41 | |||||||||
| 1054 | Maria Renard (Symphony of the Night) | 9500 | Stock: 1 | Reset Bomb Forest | Normal | "normal", Low | Mario | 1 | Normal | 74 | |||||||||
| 1075 | Dracula | 9500 | Stock: 1 | Battlefield | Normal | "normal", Low | Ganondorf | 1 | Normal | 74 | |||||||||
| 1076 | Soma Cruz | 13700 | Stock: 1 | Battlefield | Normal | "normal", Low | Mario | 1 | Normal | 99 | |||||||||
| 1088 | Plane | 3600 | Stock: 1 | Wuhu Island | Normal | "normal2", Low | R.O.B. | 1 | Normal | 47 | |||||||||
| 1104 | Master Core | 13700 | Stock: 1 | Battlefield | Normal | "normal2", Low | Mario | 1 | Normal | 99 | |||||||||
| 1111 | Roturret | 1700 | Stock: 1 | Battlefield | Normal | "normal2", Low | Mario | 1 | Normal | 41 | |||||||||
| 1113 | Subspace Bomb | 3700 | Stock: 1 | Battlefield | Normal | "normal2", Low | Mario | 1 | Normal | 47 | |||||||||
| 1115 | Sheriff | 13300 | Stock: 1 | Battlefield | Normal | "normal3", Low | Mario | 1 | Normal | 99 | |||||||||
| 1131 | Donbe & Hikari (Shin Onigashima Kouhen) | 9500 | Stock: 1 | Battlefield | Normal | "normal", Low | Mario | 1 | Normal | 74 | |||||||||
| 1144 | Prince of Sablé | 13600 | Stock: 1 | Battlefield | Normal | "normal", Low | Mario | 1 | Normal | 99 | |||||||||
| 1161 | Ray Mk III | 9300 | Stock: 1 | Battlefield | Normal | "normal", Low | Mario | 1 | Normal | 74 | |||||||||
| 1169 | Isaac (Dark Dawn) | 13600 | Stock: 1 | Battlefield | Normal | "normal", Low | Mario | 1 | Normal | 99 | |||||||||
| 1181 | Starfy | 9400 | Stock: 1 | Battlefield | Normal | "normal", Low | Mario | 1 | Normal | 74 | |||||||||
| 1190 | Jill & the Drill Dozer | 3700 | Stock: 1 | Wrecking Crew | Normal | Drill, Max | •Franklin Badge Equipped | Bowser Jr. | 1 | •Drill Equipped •Shooting Items ↑ |
Normal | 47 | |||||||
| 1193 | The Wandering Samurai | 3600 | Stock: 1 | Battlefield | Normal | "normal", Low | Ike | 1 | Normal | 47 | |||||||||
| 1194 | Wandering Samurai (Rhythm Heaven Fever) | 9300 | Stock: 1 | Battlefield | Normal | "normal", Low | Mario | 1 | Normal | 74 | |||||||||
| 1207 | Super Chibi-Robo | 9400 | Stock: 1 | Battlefield | Normal | "normal", Low | Mario | 1 | Normal | 74 | |||||||||
| 1211 | Barbara the Bat | 9300 | Stock: 1 | Battlefield | Normal | "normal", Low | Mario | 1 | Normal | 74 | |||||||||
| 1215 | Dr. Kawashima (Concentration Training) | 13300 | Stock: 1 | Battlefield | Normal | "normal", Low | Mario | 1 | Normal | 99 | |||||||||
| 1243 | Captain Rainbow | 9100 | Stock: 1 | Battlefield | Normal | "normal", Low | Mario | 1 | Normal | 74 | |||||||||
| 1245 | Beetle | 1700 | Stock: 1 | Battlefield | Normal | "normal", Low | Mario | 1 | Normal | 41 | |||||||||
| 1257 | BlueShark | 1900 | Stock: 1 | Pirate Ship | Normal | "normal2", Low | •Franklin Badge Equipped | Snake | 1 | •Ray Gun Equipped •Shooting Items ↑ |
Normal | 41 | |||||||
| 1264 | Shovel Knight | 9400 | Stock: 1 | Mario Bros. | Normal | "normal3", Low | •Weapon Resist ↑ | Meta Knight | 1 | •Instadrop •Weapon Attack ↑ •Shield Damage ↑ |
Normal | 74 | |||||||
| 1265 | Shield Knight | 4000 | Stock: 1 | Mario Bros. | Normal | "normal2", Low | •Enemy Defense ↑↑↑ after 3 seconds for 30 seconds | •Strong Throw •Ray Gun Equipped •Staff Equipped •Super Scope Equipped •Banana Gun Equipped •Mouthful of Curry |
Corrin | 1 | Reflect | •Back Shield Equipped •Healing Shield |
Normal | 47 | |||||
| 1283 | Wonder-Red | 3700 | Stock: 1 | New Donk City Hall | Normal | "normal3", Low | •Fire/Explosion Resist ↑ | Captain Falcon | 1 | •Fist Attack ↑ •Fire & Explosion Attack ↑ •Unflinching Charged Smashes |
Normal | 47 |
Spirits updated after original release[edit]
Only Poppi α, Ribbon Girl and Ninjara became Spirit Battles following Pyra's and Min Min's releases with some differences besides placeholder values is that Ninjara's spirit battle being a Shield types in development but became a Grab type in the final build while Poppi α's spirit battle was a Grab type in development but became a Shield type in the final build. Coincidentally, Ribbon Girl's is set on a Battlefield form of a stage, Poppi α's is set on Midgar with hazards off rendering it as a Battlefield-type stage, and all three spirits have the same battle power in the final build.
| # | Image | Name | Power | Rules | Stage | Stage form | Enviro. | Items | Events | Recommended abilities | Fighter | Color | Start HP / Dmg. | Status | Abilities | Type | Stats | CPU Mode | CPU Lv. |
|---|---|---|---|---|---|---|---|---|---|---|---|---|---|---|---|---|---|---|---|
| 971 | Poppi α | 3800 | Stock: 1 | Battlefield | Normal | "normal2", Low | Mario | 1 | Normal | 47 | |||||||||
| 1288 | Ribbon Girl | 3600 | Stock: 1 | Battlefield | Normal | "normal", Low | Mario | 1 | Normal | 47 | |||||||||
| 1291 | Ninjara | 3600 | Stock: 1 | Battlefield | Normal | "normal", Low | Mario | 1 | Normal | 47 |
Fighter Spirits with Spirit Battles[edit]
| # | Image | Name | Power | Rules | Stage | Stage form | Enviro. | Items | Events | Recommended abilities | Fighter | Color | Start HP / Dmg. | Status | Abilities | Type | Stats | CPU Mode | CPU Lv. |
|---|---|---|---|---|---|---|---|---|---|---|---|---|---|---|---|---|---|---|---|
| Builder Mario | 0 | Stock: 1 | Battlefield | Normal | "normal2", Low | Mario | 1 | Normal | 1 | ||||||||||
| Yoshi (Yoshi's Crafted World) | 0 | Stock: 1 | Final Destination | Normal | "normal", Low | Mario | 1 | Normal | 1 | ||||||||||
| Pikachu Libre | 0 | Stock: 1 | Battlefield | Normal | "normal", Low | Pikachu | 1 | Normal | 1 |
Dummy battles[edit]
There are at least 21 battles in the game which are not assigned to any spirit or fighter battle, which were likely used for testing battle effects during development. One of these battles is "default", while the other twenty are "dummy".
All of these battles:
- Have only one opponent.
- Have stage hazards on, except for "Dummy 2".
- Do not use any special behavior for their stages.
- Have the normal victory condition, except for "Dummy 1", which is set to have the condition of also protecting a CPU ally.
- Do not specify a music track, except for:
- "Dummy 1", which uses Ground Theme - Super Mario Bros. (Brawl).
- "Dummy 2", which uses Underwater Theme - Super Mario Bros.
- "Dummy 5", which uses Fortress Boss - Super Mario Bros. 3.
| Name | Power | Rules | Stage | Stage form | Enviro. | Items | Events | Recommended abilities | Fighter | Color | Start HP / Dmg. | Status | Abilities | Type | Stats | CPU Mode | CPU Lv. |
|---|---|---|---|---|---|---|---|---|---|---|---|---|---|---|---|---|---|
| Default | 1200 | Stock: 1 | Battlefield | Normal | "normal3", Low | Mario | 1 | 300 | Normal | 1 | |||||||
| Dummy 1 | 1500 | Stock: 1 | Coliseum | Normal | Assist Trophies, Medium | •Enemy Healing Lv. 1 at 65% damage •Enemy Healing Lv. 1 at 65% damage |
Mario | 1 | Normal | 1 | |||||||
| Dummy 2 | 1200 | Stock: 1 | Midgar | Normal | "normal3", Medium | •Enemy Attack ↑↑ at 60% damage •Enemy Defense ↑ at 60% damage •Enemy Speed ↑ at 60% damage |
Mario | 1 | •Lava-Floor Immunity | Normal | 1 | ||||||
| Dummy 3 | 1200 | Stock: 1 | Battlefield | Normal | "normal2", Medium | •Player Speed ↓↓↓ after 1 second | Mario | 1 | Stay | 1 | |||||||
| Dummy 4 | 1200 | Stock: 1 | Battlefield | Normal | "normal3", Medium | •Player Jump Power ↓↓↓ after 1 second | Mario | 1 | Stay | 1 | |||||||
| Dummy 5 | 1200 | Stock: 1 | Unova Pokémon League | Battlefield | "normal", None | Squirtle | 5 | 300 | Normal | 1 | |||||||
| Dummy 6 | 1200 | Stock: 1 | Battlefield | Normal | "normal2", Medium | •"dark" for 15 seconds at 5 second intervals | Mario | 1 | 300 | Stay | 1 | ||||||
| Dummy 7 | 1200 | Stock: 1 | Battlefield | Normal | "normal3", Medium | •Wind (Left) Lv. 1 after 1 second | Mario | 1 | 300 | •Strong-Wind Immunity | Stay | 1 | |||||
| Dummy 8 | 1200 | Stock: 1 | Battlefield | Normal | "normal2", Medium | •Earthquake for 1 second at 3 second intervals | Mario | 1 | 300 | Stay | 1 | ||||||
| Dummy 9 | 1700 | Stock: 1 | Battlefield | Normal | Sticky Floor | "normal2", Medium | Mario | 1 | Stay | 1 | |||||||
| Dummy 10 | 1200 | Stock: 1 | Battlefield | Normal | "normal3", Medium | •Enemy Damage Lv. 1 at 1 second intervals, 30 times | Mario | 1 | Stay | 1 | |||||||
| Dummy 11 | 1200 | Stock: 1 | Dream Land | Normal | "normal3", Medium | Mario | 1 | 300 | Normal | 1 | |||||||
| Dummy 12 | 1200 | Stock: 1 | Battlefield | Normal | "normal2", Medium | Mario | 1 | Stay | 1 | ||||||||
| Dummy 13 | 1200 | Stock: 1 | Battlefield | Normal | "normal", Medium | Mario | 1 | Stay | 1 | ||||||||
| Dummy 14 | 1200 | Stock: 1 | Battlefield | Normal | "normal3", Medium | Mario | 1 | Stay | 1 | ||||||||
| Dummy 15 | 1200 | Stock: 1 | Battlefield | Normal | "normal2", Medium | Mario | 1 | Stay | 1 | ||||||||
| Dummy 16 | 1200 | Stock: 1 | Battlefield | Normal | "normal3", Medium | Mario | 1 | Stay | 1 | ||||||||
| Dummy 17 | 1200 | Stock: 1 | Battlefield | Normal | "normal3", Medium | Mario | 1 | Stay | 1 | ||||||||
| Dummy 18 | 1200 | Stock: 1 | Battlefield | Normal | "normal3", Medium | Mario | 1 | Stay | 1 | ||||||||
| Dummy 19 | 1200 | Stock: 1 | Battlefield | Normal | "normal3", Medium | Mario | 1 | Stay | 1 | ||||||||
| Dummy 20 | 1200 | Stock: 1 | Battlefield | Normal | "normal", Medium | •Enemy Attack ↑↑↑ after 10 seconds •Giant Enemy after 10 seconds for 100 seconds •Invincible Enemy after 10 seconds for 100 seconds |
Mario | 1 | 300 | Stay | 1 |
