Ness (SSBB): Difference between revisions
mNo edit summary |
|||
| (14 intermediate revisions by 7 users not shown) | |||
| Line 13: | Line 13: | ||
|ranking = 26 | |ranking = 26 | ||
}} | }} | ||
'''Ness''' ({{ja|ネス|Nesu}}, ''Ness'') is a playable character in ''[[Super Smash Bros. Brawl]]''. Ness | '''Ness''' ({{ja|ネス|Nesu}}, ''Ness'') is a playable character in ''[[Super Smash Bros. Brawl]]''. Confirmation of Ness's inclusion in ''Brawl'' was leaked on January 18th, 2008 through a promotional video on the Japanese Wii website about [[sticker]] power ups. He was officially confirmed on February 1st, 2008 on the ''Smash Dojo'' website. He is once again voiced by Makiko Ōmoto, with mostly recycled voice clips from ''Melee'', while providing some new ones. | ||
Ness is ranked 26th out of 38 on the [[tier list]], a | Ness is currently ranked 26th out of 38 on the [[tier list]], a decent improvement from his placement in ''Melee'', where he was ranked 23rd out of 26 characters. Ness possesses a strong aerial game with very useful [[aerial attack]]s, as well as effective [[tilt]]s, effective [[throw]]s, a projectile with great trapping and damage potential in [[PK Fire]], a versatile projectile capable of very early KOs and [[mindgame]]s in [[PK Thunder]], and multiple powerful, reliable finishers (such as his back throw and back aerial). Ness is greatly hindered, however, by his exploitable recovery, the rather poor [[reach]] in most of his attacks, possessing one of the worst ground games in the game (due to his aforementioned poor range, his almost non-existent approach options on the ground, sluggish mobility and poor smash attacks), and by the 10 additional frames of [[lag]] he suffers when [[grab release]]d, leaving him extremely vulnerable to grab release followups from almost every character, as well as [[infinite]] and zero to death grab release [[chain grab]]s (most infamously from {{SSBB|Marth}} and {{SSBB|Donkey Kong}}). Ness overall has below-average matchups with several [[Counter (matchup)|counters]], and he has had average [[tournament]] results. | ||
==How to unlock== | ==How to unlock== | ||
| Line 26: | Line 26: | ||
==Attributes== | ==Attributes== | ||
Generalizing Ness is difficult. He | Generalizing Ness is difficult. He generally runs a unique, versatile role, employing three different projectiles with differing purposes. Generally, the moves have modest lag and decent knockback, his [[PK Fire]] leads well into other attacks, and his PK Thunder can trap opponents and lead into [[PK Thunder 2]], one of the strongest attacks in the game. Also, PK Thunder and PK Flash both leave Ness very vulnerable because he can't move or attack when controlling these projectiles. Ness can use his [[PSI Magnet]] to absorb any energy projectile. The best for Ness, however, are his powerful throws, most notably his back throw, the only throw in Brawl that can reliably KO under 150% without relying on being on the edge and bad DI. Combining these with proper projectile use and appropriate Smash timing, and Ness can be a powerful foe. Shield grabs tend to be a problem for Ness since he has the shortest standing grab range in the game. He's fairly balanced in the areas of weight, falling speed, and air speed with none of them being particularly good nor particularly bad. | ||
Ness | Ness' true game can be found by utilizing his aerials. Ness is one of the very few characters in the game who can perform two aerials in one shorthop (Double Aerial Shuffle). This requires practice though because one needs to do the aerial immediately when one jumps off the ground. Looking at his aerials individually, his neutral aerial is fast and a great combo and defensive move. His forward aerial can set up into itself, making it good at damage-racking. His back aerial deals powerful knockback when sweetspotted, making it his best aerial finisher, while it can be used for a wall of pain when sourspotted. His up aerial is a very strong vertical KO move with a decent amount of range. Lastly, his clean down aerial is among the best meteor smashes in the game, and when hit late, it has strong horizontal knockback, making it good for edgeguarding. | ||
However, his ground game is underwhelming. With slow dash speed and short range tilts, he suffers in matchups against characters with disjointed hitboxes such as Ike or Marth. The only upside of his tilts are that they come out very quickly, which can be used to rack up damage. His forward smash is slow and needs to be sweetspotted for it to reliably KO under 100%. His up smash is very weak in terms of knockback, being among the weakest in the game, although it is one of the only two smash attacks able to damage people while charging, the other being Ness's down smash. All of Ness's smashes also give Ness some much needed range in his ground game, although their lack of speed and KO power limit their use. | |||
Ness' | Ness's major problems are his awful ground grab release and recovery. He and {{SSBB|Lucas}} both suffer from having extremely long grab release animations. Most characters have some sort of ground grab release on Ness, and/or Lucas, leading to chaingrabs, infinities in walls, and other moderate to major problems. Two examples of this would be {{SSBB|Marth}} and {{SSBB|Donkey Kong}}'s 0-death on Ness and Lucas. Another example is {{SSBB|Wario}} using his forward smash out of the grab release, which Ness can't avoid. As mentioned above, Ness's other major problem is his atrocious recovery. Although Ness has a very large 2nd jump (second only to Yoshi's in terms of height), his PK Thunder, though faster than Lucas' PK Thunder, has a much wider turning angle, thus requiring more room for Ness to recover than Lucas. Its PK Thunder 2 also travels less distance than Lucas' version. In addition, his PK Thunder will stop in its tracks when it hits most projectiles, walls, or a character. As such, some opponents may take a risk and jump in front of PK Thunder's path to intercept Ness's recovery, giving Ness little to no hope of making it back onstage, which is easier with disjointed moves. However, this is a risky way of intercepting Ness's recovery, due to his recovery move having an extreme amount of knockback, KOing below 50% in most situations, although a projectile could still be used to halt his recovery, especially if it's controllable. | ||
Ness's double jump has a unique quality that sets it apart from others in the game. It consists of four PSI flashes that propel him upward. If Ness uses an aerial or [[air dodge]] at the beginning of the jump, he will obtain a directional boost depending on the aerial used and if it is used on the first or second flash (his up aerial gives the longest boost, and the boost is longer if activated on the first flash). He can also use his double jump from the ground if the jump button is pressed during lag, which is helpful for starting up aerial combos. Using an aerial will make Ness move up faster, which complies for his slow double-jump and floatiness. After this, he will take a small pause in the air as a "filler" for the frames lost by the faster double-jump. | |||
Ness' | |||
==Changes from ''[[Super Smash Bros. Melee]]''== | ==Changes from ''[[Super Smash Bros. Melee]]''== | ||
Ness has received a mix of buffs and nerfs, but given that he was one of the worst characters in ''Melee'', he was noticeably buffed overall in the transition to ''Brawl''. While he has seen relatively few direct changes compared to other characters, he has nevertheless seen improvements. His aerial game has seen noticeable improvements as his aerial mobility has improved, most of his aerials have less landing lag, his forward aerial while weaker connects more reliably making it a more effective spacing tool and his up and down aerials have more range and are overall more effective KO moves due to the changes to ''Brawl'''s mechanics. His recovery, while still poor, is more reliable due to his higher air speed, lower falling speed, and the removal of [[double jump cancel]]ing. A number of moves have stronger knockback; some examples being his up and down aerials, his smash attacks, and [[PK Thunder]] 2. These give him more reliable and stronger KO potential. | |||
However, he also received several drastic nerfs that magnify his flaws, the most significant of which being the 10 extra frames added to his grounded grab release animation. This is detrimental for Ness as it makes him vulnerable to inescapable kill confirms and even infinite [[chain grab]]s from some characters. His combo potential is also significantly lower due to the introduction of [[hitstun canceling]], the universally decreased falling speeds and the removal of double jump cancelling. Furthermore, many of his notable buffs have failed to completely alleviate many of his most glaring flaws; his barely improved recovery remains glaringly easy to gimp or edgeguard, while his marginally better overall range is still short relative to the cast, which is exacerbated by the loss of his powerful yo-yo glitch. This, alongside his overall slow mobility, still makes him heavily struggle in approaching most of his opponents. Finally, while his KOing ability is much better than in ''Melee'', Ness still struggles KO foes consistently, as his slightly better smash attacks are still sluggish and somewhat weak compared to the rest of the cast, while his other most powerful KO moves still suffer from his aforementioned poor range. | |||
Overall, he is considered to be improved from his ''Melee'' incarnation, but his longer grounded grab release, watered down combo game and retained flaws keep him from moving into higher tiers. | |||
===Aesthetics=== | ===Aesthetics=== | ||
*{{change|The overall | *{{change|The overall graphics boost from ''Melee'' to ''Brawl'' gives Ness much more detail.}} | ||
*{{change|Ness has a new [[tumbling]] animation.}} | |||
*{{change|Ness uses a different voice clip when using PK Fire.}} | |||
*{{change|Double jump has a different sound effect.}} | |||
*{{change|Ness | *{{change|Ness has received two new alternate costumes.}} | ||
*{{change| | |||
*{{change|Ness has received two new | |||
===Attributes=== | ===Attributes=== | ||
*{{buff|Ness [[ | *{{buff|Ness' [[walking speed]] is slightly faster (0.84 → 0.86).}} | ||
*{{buff|Ness' | *{{buff|Ness' traction is lower (0.06 → 0.0546), going from the 15th highest to the 24th highest. Compared with the returning veterans, however, Ness's traction is higher, making it easier for him to punish out of shield.}} | ||
*{{nerf|Ness [[dash]]es slightly slower (1.4 → 1.393).}} | *{{nerf|Ness [[dash]]es slightly slower (1.4 → 1.393).}} | ||
*{{buff|Ness' [[air speed]] is higher (0.093 → 0.09588).}} | *{{buff|Ness' [[air speed]] is higher (0.093 → 0.09588).}} | ||
*{{buff|Ness' [[air acceleration]] is | *{{buff|Ness' [[air acceleration]] is higher (0.06 → 0.1).}} | ||
*{{nerf|Ness' [[ | *{{nerf|Ness' [[Jump]]squat is longer (4 frames → 5).}} | ||
*{{change|As with the returning veterans, Ness' [[falling speed]] was reduced (1.83 → 1.31). Compared to the returning veterans, however, Ness falls faster. While this improves his endurance, it worsens his recovery and makes him more vulnerable to combos.}} | |||
*{{change|As with the returning veterans, Ness' [[falling speed]] | *{{change|Ness' gravity is lower (0.09 → 0.0711).}} | ||
*{{change|Ness' | *{{change|The removal of double jump cancelling greatly hinders his already poor approach and weakens his combo ability, but significantly improves his recovery's safety.}} | ||
*{{change|The removal of | *{{buff|[[Spot dodge]] has a longer duration (frames 2-18 → 2-20) and less ending lag (FAF 28 → 26).}} | ||
*{{nerf|Ness' grounded [[grab release]] animation is 10 frames longer, which makes him vulnerable to chain grab releases and combos as the entire cast now has a 10 frame advantage when they ground release him (instead of just {{SSBM|Bowser}} who now has a 20 frame advantage over Ness due to this). He is also more vulnerable to aerial grab release followups due to the general changes to aerial grab releases.}} | |||
*{{buff|[[Spot dodge]] | |||
===Ground attacks=== | ===Ground attacks=== | ||
*[[Neutral attack]]: | *[[Neutral attack]]: | ||
**{{buff|The third hit of neutral attack has increased base knockback (16 → 40). | **{{buff|The third hit of [[neutral attack]] has increased base knockback (16 → 40). The introduction of [[jab lock]]ing also improves the first hit's utility.}} | ||
*[[Down tilt]]: | *[[Down tilt]]: | ||
**{{buff|Down tilt deals more damage (3% → 4%) | **{{buff|[[Down tilt]] is better at racking up damage as it deals more damage (3% → 4%) with reduced knockback (4 (base), 50 (scaling) → 3/20), has less ending lag if Ness performs another down tilt (frame 8 → 6) and it has a 30% [[tripping]] chance.}} | ||
**{{nerf|Down tilt has a shorter duration (frames 3-5 → 3-4).}} | **{{nerf|Down tilt has a shorter duration (frames 3-5 → 3-4).}} | ||
*[[Dash attack]]: | *[[Dash attack]]: | ||
**{{buff|Dash attack deals more damage due to changes to [[stale | **{{buff|[[Dash attack]] deals more damage due to changes to [[stale move negation]] (12% → 13%) and it connects more reliably.}} | ||
*[[Forward smash]]: | *[[Forward smash]]: | ||
**{{buff|Forward smash has much more | **{{buff|[[Forward smash]] has much more range (2.3436 u → 2.9 u), (2.9295 u → 3.6 u), (3.1248 u → 3.8 u), (3.3201 u → 4.1 u).}} | ||
**{{nerf|Forward smash has more startup (frame 16 → 22) and ending lag (FAF 50 → 56).}} | **{{nerf|[[Forward smash]] has more startup (frame 16 → 22) and ending lag (FAF 50 → 56).}} | ||
**{{change|Forward smash now produces a more realistic sound of a bat hitting a baseball instead of using | **{{change|Forward smash now produces a more realistic sound of a bat hitting a baseball instead of using the [[Home-Run Bat]] sound effect.}} | ||
* | *Yo-yo ([[up smash|up]] and [[down smash]]): | ||
**{{buff|Both up and down smashes have stronger knockback and are now able to KO at very high percentages (though the former is still among the weakest up smashes, while down smash is now a down smash of average power). They also have a longer duration (frames 12-31 → 13-35 (down), 13-36 (up)). Down smash also has less end lag (FAF 62 → 57).}} | |||
**{{buff|Both up and down smashes | **{{nerf|Both his up and down smash no longer increase in damage or knockback when charging. They also have more startup lag (frame 12 → 13) and up smash has more end lag (FAF 49 → 64).}} | ||
**{{bugfix|[[Yo-yo glitch|Yoyo/Jacket glitch]] has been fixed.}} | |||
**{{nerf|The removal of the [[Yo-yo glitch|Yoyo/Jacket glitch]] has significantly hindered his already poor range.}} | |||
**{{change|His yo-yo has gained a new design.}} | |||
**{{nerf|Both up and | |||
**{{bugfix| | |||
**{{change|His yo-yo has gained | |||
===Aerial attacks=== | ===Aerial attacks=== | ||
*{{buff|All aerials | *{{buff|All aerials except down aerial have less landing lag (22 frames → 18 (neutral), 18 frames → 12 (forward/back/up)) although due to the removal of [[L-canceling]], their landing lag was not fully compensated.}} | ||
*[[Neutral aerial]]: | *[[Neutral aerial]]: | ||
**{{buff|Neutral aerial has increased base knockback (15 → 20 (clean), 0 → 10 (late)) | **{{buff|Neutral aerial has increased base knockback (15 → 20 (clean), 0 → 10 (late)).}} | ||
**{{nerf| | **{{nerf|Neutral aerial's sourspot deals 1% less damage (8% → 7%) although its base knockback was compensated.}} | ||
*[[Forward aerial]]: | *[[Forward aerial]]: | ||
**{{buff|Forward aerial's multi | **{{buff|Forward aerial's multi hits have reduced knockback scaling (100 → 60) allowing them to connect more reliably.}} | ||
**{{change|Forward aerial has a lower | **{{change|Forward aerial has a lower hitlag multiplier (1x → 0.5x) and the multi hits have a higher SDI multiplier (1x → 1.5x). This makes the move harder to SDI but makes SDI more effective against it.}} | ||
**{{nerf| | **{{nerf|Forward aerial deals much less damage (3%/2% → 2% (loop hits), 5% → 3% (final hit), 15.74% → 11% (total)) although the final hit's knockback scaling was somewhat compensated (135 → 145). It also has less range due to only having one hitbox per hit although it is larger than the previous hitboxes (6.8u/4u → 8.1u (loop hits), 9u (final)).}} | ||
*[[Back aerial]]: | *[[Back aerial]]: | ||
**{{buff|Back aerial has a slightly bigger sweet-spot compared to ''Melee'' version. And its sourspot is also much larger, greatly increasing the move's overall range.}} | **{{buff|Back aerial has a slightly bigger sweet-spot compared to ''Melee'' version. And its sourspot is also much larger, greatly increasing the move's overall range.}} | ||
**{{nerf|Back aerial deals less damage (16% (clean), 10% (late) → 15%/8%) hindering its KO potential.}} | **{{nerf|Back aerial deals less damage (16% (clean), 10% (late) → 15%/8%) hindering its KO potential.}} | ||
*[[Up aerial]]: | *[[Up aerial]]: | ||
**{{buff|Up aerial has a larger hitbox (5.964u → 7.2u) | **{{buff|Up aerial has a larger hitbox (5.964u → 7.2u) and has more KO potential due to the universally decreased falling speeds, allowing it to used as a effective vertical finisher.}} | ||
***{{nerf|The universally decreased falling speeds and the removal of double jump cancelling has significantly hindered his up aerial's juggling ability.}} | |||
* | |||
**{{nerf|The | |||
*[[Down aerial]]: | *[[Down aerial]]: | ||
**{{buff| | **{{buff|Down aerial is more effective due to the changes to [[meteor canceling]] and the universally reduced falling speeds, has much better range (5.452u → 6.54u), making it easier to meteor smash. It also has a powerful sourspot which sends opponents horizontally which can KO grounded opponents earlier.}} | ||
**{{nerf|Down aerial's sourspot deals less damage (12% → 9%).}} | |||
**{{nerf| | |||
===Throws/other attacks=== | ===Throws/other attacks=== | ||
*[[Grab]]s: | *[[Grab]]s: | ||
**{{buff| | **{{buff|Grabs have less startup lag (frame 8 (standing)/10 (dash) → 6/8).}} | ||
***{{buff|In addition to this, Ness now possesses a frame | ***{{buff|In addition to this, Ness now possesses a frame 6 pivot grab which is the fastest in the game.}} | ||
**{{buff|Dash grab has less ending lag (FAF 41 → 36).}} | **{{buff|Dash grab has less ending lag (FAF 41 → 36).}} | ||
**{{buff|Ness' grabs are larger (3.32u/2.34u (standing)/3.32u/2.73u/2.32u (dash) → (4u/3.5u)/(4u/3.5u/3.5u)) and the furthest grabboxes are positioned further outwards (z offset: 6.65 (standing)/7.81 (dash) → 6.8/8), slightly improving their range.}} | |||
**{{buff|Ness' grabs | |||
**{{nerf|Standing grab has more ending lag (FAF 31 → 35).}} | **{{nerf|Standing grab has more ending lag (FAF 31 → 35).}} | ||
*{{nerf|The | *{{nerf|The universally decreased fall speeds and changes to hitstun remove [[up throw]] and down throw's ability to combo and chaingrab.}} | ||
*[[Pummel]]: | *[[Pummel]]: | ||
**{{buff|Pummel has much less startup (frame 16 → 3) and ending lag (FAF 25 → 10 | **{{buff|Pummel has much less startup (frame 16 → 3) and ending lag (FAF 25 → 10).}} | ||
**{{change| | **{{change|Pummel's hitbox is now static, rather than being attached to Ness' head.}} | ||
**{{nerf| | **{{nerf|Pummel deals less damage (3% → 1%).}} | ||
**{{nerf| | **{{nerf|Pummel has a smaller hitbox (6.25u → 5u).}} | ||
*[[Back throw]]: | *[[Back throw]]: | ||
**{{change|Back throw now | **{{change|Back throw now makes the same sound effect as [[PSI Magnet]].}} | ||
*[[Down throw]]: | *[[Down throw]]: | ||
**{{buff|Down throw's hitboxes are larger (3.51u → 4.32u), resulting in them now connecting against | **{{buff|Down throw's hitboxes are larger (3.51u → 4.32u), resulting in them now connecting against every character.}} | ||
===Special moves=== | ===Special moves=== | ||
**{{buff|Ness | **{{buff|Ness can now [[B-reverse]] all his specials except for [[PK Thunder]].}} | ||
*[[PK Flash]]: | *[[PK Flash]]: | ||
**{{ | **{{change|PK Flash activates faster, charges and travels further and deals slightly more damage when fully charged (36% → 37%), but it no longer activates automatically once it hits the ground, hits in a smaller radius and an uncharged PK Flash deals 2% less damage.}} | ||
**{{change|PK Flash is more blueish instead of green and has a different sound effect.}} | |||
**{{change|PK Flash | |||
*[[PK Fire]]: | *[[PK Fire]]: | ||
**{{buff|PK Fire activates faster and can trap opponents more | **{{buff|PK Fire activates faster and can trap opponents more effectively.}} | ||
*[[PK Thunder]]: | *[[PK Thunder]]: | ||
**{{buff|PK Thunder travels | **{{buff|PK Thunder travels in a tighter arc, making it easier to hit himself. PK Thunder 2 has drastically less ending lag, is significantly stronger (60 (base), 70 (scaling) → 83/80), now KOing at around 50% and the late hitbox deals 1% more damage (20% → 21%) with more knockback scaling (65 → 70) allowing it to KO under 100%.}} | ||
**{{change|The camera no longer follows the ball of lightning as it moves away from Ness. The lightning ball is now indigo instead of blue in color.}} | |||
**{{change|The camera no longer follows the ball of lightning as it moves away from Ness. | |||
*[[PSI Magnet]]: | *[[PSI Magnet]]: | ||
**{{buff|PSI Magnet now has a weak | **{{buff|PSI Magnet now has a weak windbox when released, making it slightly safer, as well giving it a bit of extra utility.}} | ||
**{{buff|PSI Magnet has a shorter ending animation (20 frames → 19).}} | **{{buff|PSI Magnet has a shorter ending animation (20 frames → 19).}} | ||
**{{buff|After absorbing a | **{{buff|After absorbing a projectile, PSI Magnet can now be cancelled with a roll, spot dodge or jump. This greatly improves PSI Magnet's safety as it not only heavily limits the opponent's ability to punish Ness if he absorbs a projectile but it can even allow Ness to punish opponents after absorbing projectiles if he is close enough.}} | ||
**{{change|PSI Magnet is now colored indigo instead of blue. It also has a different sound effect}} | **{{change|PSI Magnet is now colored indigo instead of blue. It also has a different sound effect}} | ||
**{{nerf|PSI Magnet heals less damage (x2.0 → x1.6) and it can now only heal up to 30% damage.}} | |||
*[[PK Starstorm]]: | *[[PK Starstorm]]: | ||
**{{Change| | **{{Change|Ness now has a [[Final Smash]]: PK Starstorm. He uses his PK energy to summon multiple meteorites from the sky which each deal 20% to opponents.}} | ||
==Moveset== | ==Moveset== | ||
| Line 200: | Line 145: | ||
|neutral2dmg=2% | |neutral2dmg=2% | ||
|neutral3dmg=4% | |neutral3dmg=4% | ||
|neutraldesc= | |neutraldesc=Ness punches twice, then kicks. | ||
|ftiltname= | |ftiltname= | ||
|ftiltangles=3 | |ftiltangles=3 | ||
| Line 206: | Line 151: | ||
|ftiltsidedmg=11% | |ftiltsidedmg=11% | ||
|ftiltdowndmg=10% | |ftiltdowndmg=10% | ||
|ftiltdesc= | |ftiltdesc=Ness kicks with a foot forward. Can be angled. | ||
|utiltname= | |utiltname= | ||
|utiltdmg=7% | |utiltdmg=7% | ||
|utiltdesc= | |utiltdesc=Ness pushes upward with both hands. | ||
|dtiltname= | |dtiltname= | ||
|dtiltdmg=4% | |dtiltdmg=4% | ||
|dtiltdesc= | |dtiltdesc=Ness swiftly kicks out in front of him. Extremely spammable. Has a chance of making the opponent trip. | ||
|dashname= | |dashname= | ||
|dashdmg=5% (hit 1), 4% (hits 2-3) | |dashdmg=5% (hit 1), 4% (hits 2-3) | ||
|dashdesc= | |dashdesc=Sends three PSI sparks out in front of him with the third spark knocking the opponent up into the air. Each hit sends the opponent in a different direction, with different knockback. Great, disjointed range. If all hits connect, it can be followed up by an aerial combo. | ||
|fsmashname= | |fsmashname= | ||
|fsmashdmg={{ChargedSmashDmgSSBB|18}} (body), {{ChargedSmashDmgSSBB|20}} (bat base), {{ChargedSmashDmgSSBB|22}} (bat mid), {{ChargedSmashDmgSSBB|24}} (bat tip) | |fsmashdmg={{ChargedSmashDmgSSBB|18}} (body), {{ChargedSmashDmgSSBB|20}} (bat base), {{ChargedSmashDmgSSBB|22}} (bat mid), {{ChargedSmashDmgSSBB|24}} (bat tip) | ||
|fsmashdesc= | |fsmashdesc=Ness swings his bat. There are four hitboxes on the bat, dealing 18%, 20%, 22% and 24% uncharged, the strongest part being at the tip of his bat. The bat will [[reflect]] incoming projectiles when he swings it. | ||
|usmashname=Around The World ({{ja|シャトルループ|Shatoru Rūpu}}, ''Shuttle Loop'') | |usmashname=Around The World ({{ja|シャトルループ|Shatoru Rūpu}}, ''Shuttle Loop'') | ||
|usmashdmg=4% (startup & charge), 9% (front), 13% (back) | |usmashdmg=4% (startup & charge), 9% (front), 13% (back) | ||
|usmashdesc= | |usmashdesc=Ness sends his yo-yo forward and performs "around-the-world" over himself. Interestingly, when it's 'charging', it doesn't increase in damage or knockback. | ||
|dsmashname=Walk the Dog ({{ja|ヨーヨーショット|Yōyō Shotto}}, ''Yo-Yo Shot'') | |dsmashname=Walk the Dog ({{ja|ヨーヨーショット|Yōyō Shotto}}, ''Yo-Yo Shot'') | ||
|dsmashdmg=4% (startup & charge), 13% (attack) | |dsmashdmg=4% (startup & charge), 13% (attack) | ||
|dsmashdesc= | |dsmashdesc=Ness sends his yo-yo backwards and "walks-the-dog" with it before pulling the yo-yo back. Similar to his up smash, the yo-yo doesn't increase in damage or in knockback when it's "charging". | ||
|nairname= | |nairname= | ||
|nairdmg=11% (clean), 7% (late) | |nairdmg=11% (clean), 7% (late) | ||
|nairdesc=Spins diagonally in the air with arms outstretched | |nairdesc=Spins diagonally in the air with arms outstretched. | ||
|fairname= | |fairname= | ||
|fairdmg=2% (hits 1-4), 3% (hit 5) | |fairdmg=2% (hits 1-4), 3% (hit 5) | ||
|fairdesc= | |fairdesc=Ness sticks out his palms out, sending a stream of PSI sparks in front of him. | ||
|bairname= | |bairname= | ||
|bairdmg=15% (clean), 8% (late) | |bairdmg=15% (clean), 8% (late) | ||
|bairdesc= | |bairdesc=Ness kicks out backwards with both feet. If sweetspotted, it electrifies the opponent and semi-spikes them with extreme power. | ||
|uairname= | |uairname= | ||
|uairdmg=13% | |uairdmg=13% | ||
|uairdesc= | |uairdesc=Ness headbutts up into the air. | ||
|dairname= | |dairname= | ||
|dairdmg=12% (clean), 9% (late) | |dairdmg=12% (clean), 9% (late) | ||
|dairdesc= | |dairdesc=Ness pulls his legs to his body before stomping down into the air. This attack can [[meteor smash]] in the first frame of the move. Somewhat laggy in the startup. | ||
|grabname= | |grabname= | ||
|grabdesc= | |grabdesc=Grabs opponent with both hands. | ||
|pummelname= | |pummelname= | ||
|pummeldmg=1% | |pummeldmg=1% | ||
|pummeldesc= | |pummeldesc=Ness quickly headbutts the opponent. Very fast. | ||
|fthrowname= | |fthrowname= | ||
|fthrowdmg=11% | |fthrowdmg=11% | ||
|fthrowdesc=Ness psychokinetically swings his opponent in a small circle in front of himself before sending them off forward | |fthrowdesc=Ness psychokinetically swings his opponent in a small circle in front of himself before sending them off forward. | ||
|bthrowname= | |bthrowname= | ||
|bthrowdmg=11% | |bthrowdmg=11% | ||
|bthrowdesc=Ness psychokinetically swings the opponent | |bthrowdesc=Ness psychokinetically swings the opponent over his head before sending them off backwards, in a diagonally upwards motion. Has extremely low base knockback but very high knockback scaling. Has the highest KO potential of all throws. | ||
|uthrowname= | |uthrowname= | ||
|uthrowdmg=10% | |uthrowdmg=10% | ||
|uthrowdesc=Ness psychokinetically spins the opponent above his head before sending them | |uthrowdesc=Ness psychokinetically spins the opponent above his head before sending them up. Leads into many PK Thunder tricks and juggles. Good knockback for an up throw, though the opponent will have to be around 200% to actually KO. | ||
|dthrowname= | |dthrowname= | ||
|dthrowdmg=1% (hits 1-5), 4% (throw) | |dthrowdmg=1% (hits 1-5), 4% (throw) | ||
|dthrowdesc=Ness throws his opponent onto the ground and scorches them with [[PK Fire]]. | |dthrowdesc=Ness throws his opponent onto the ground and scorches them with [[PK Fire]]. Combined with pummeling and [[PK Fire]], it can be used to rack up a high amount of damage quickly. | ||
|floorfname= | |floorfname= | ||
|floorfdmg=6% | |floorfdmg=6% | ||
|floorfdesc= | |floorfdesc=Gets up and kicks both sides of himself. | ||
|floorbname= | |floorbname= | ||
|floorbdmg=6% | |floorbdmg=6% | ||
|floorbdesc= | |floorbdesc=Gets up and kicks both sides of himself. | ||
|floortname= | |floortname= | ||
|floortdmg=5% | |floortdmg=5% | ||
|floortdesc= | |floortdesc=Gets up and kicks both sides of himself. | ||
|edgefname= | |edgefname= | ||
|edgefdmg=8% (leg), 6% (body) | |edgefdmg=8% (leg), 6% (body) | ||
|edgefdesc=Flips onto the stage and | |edgefdesc=Flips onto the stage and does a sweep kick. | ||
|edgesname= | |edgesname= | ||
|edgesdmg=10% | |edgesdmg=10% | ||
|edgesdesc= | |edgesdesc=Slowly pulls himself up and delivers a powerful punch. | ||
|nsname=PK Flash | |nsname=PK Flash | ||
|nsdmg=9-37% | |nsdmg=9-37% | ||
|nsdesc=Ness generates a | |nsdesc=Ness generates a green pulse of energy that is sent upwards, then explodes. It can be charged, increasing damage and knockback while causing it to curve downwards, and it can be moved sideways. | ||
|ssname=PK Fire | |ssname=PK Fire | ||
|ssdmg=4% (lightning), 1-2% (fire) | |ssdmg=4% (lightning), 1-2% (fire) | ||
|ssdesc=Fires a yellow, lightning-bolt shaped projectile, that travels in a straight line until it hits an | |ssdesc=Fires a yellow, lightning-bolt shaped projectile, that travels in a straight line until it hits an enemy or destructible portion of a stage, at which point it explodes into flames. When used in midair, Ness fires the bolt at a 45° angle. | ||
|usname=PK Thunder | |usname=PK Thunder | ||
|usdmg=PK Thunder: 8% (head), 1% (tail);<br />PK Thunder 2: 25% (clean), 21% (late) | |usdmg=PK Thunder: 8% (head), 1% (tail);<br />PK Thunder 2: 25% (clean), 21% (late) | ||
|usdesc= | |usdesc=Ness creates a stream of lightning that can be aimed into opponents to deal damage with the head and stun with the tail. Aiming the head into Ness himself will launch him in a trajectory opposite to the side he was hit on, which is referred to as [[PK Thunder 2]]. PK Thunder 2 has invincibility frames during the first half of the move. | ||
|dsname=PSI Magnet | |dsname=PSI Magnet | ||
|dsdmg=0%, heals x1.6 the damage of absorbed projectiles. | |dsdmg=0%, heals x1.6 the damage of absorbed projectiles. | ||
|dsdesc= | |dsdesc=Creates a blue energy field around himself which allows him to absorb all energy-based projectiles. It can be held in order to use it repeatedly. The move pushes nearby opponents when the button is released. | ||
|fsname=PK Starstorm | |fsname=PK Starstorm | ||
|fsdmg=20% (each star) | |fsdmg=20% (each star) | ||
|fsdesc= | |fsdesc=Ness calls down a rain of stars from the sky, yelling "PK... Starstorm!". | ||
}} | |||
===Stats=== | |||
{{technical data|Needs short hop and double jump heights}} | |||
{{Attributes | |||
|cast = 39 | |||
|weight = 94 | |||
|rweight = 20-22 | |||
|dash = 1.3 | |||
|rdash = 29-35 | |||
|run = 1.393 | |||
|rrun = 26 | |||
|walk = 0.86 | |||
|rwalk = 29-30 | |||
|trac = 0.0546 | |||
|rtrac = 24 | |||
|airfric = 0.0225 | |||
|rairfric = 3 | |||
|air = 0.9588 | |||
|rair = 18 | |||
|baseaccel = 0.01 | |||
|rbaseaccel = 7-36 | |||
|addaccel = 0.09 | |||
|raddaccel = 4-7 | |||
|gravity = 0.0711 | |||
|rgravity = 27 | |||
|fall = 1.31 | |||
|rfall = 24 | |||
|ff = 1.834 | |||
|rff = 27 | |||
|jumpsquat = 5 | |||
|rjumpsquat = 11-26 | |||
|jumpheight = 34.48515332 | |||
|rjumpheight= 14 | |||
|shorthop = ? | |||
|rshorthop = ? | |||
|djump = ? | |||
|rdjump = ? | |||
}} | }} | ||
| Line 304: | Line 287: | ||
===[[On-screen appearance]]=== | ===[[On-screen appearance]]=== | ||
{{Appearance | {{Appearance | ||
|desc=Ness teleports | |desc=Ness teleports onscreen using PSI Teleport, then shakes off the soot gathered after crashing. | ||
|char=Ness | |char=Ness | ||
|game=SSBB}} | |game=SSBB}} | ||
| Line 311: | Line 294: | ||
{{Taunt/SSBB | {{Taunt/SSBB | ||
|char=Ness | |char=Ness | ||
|desc-up= | |desc-up=Ness bows and says "Okay." Ness' Up taunt is a reference to the naming screen in Ness' game ''[[EarthBound]]''. When one confirms the name one is giving a character, one hears a sound effect of the game's creator, [[Shigesato Itoi]], say "Ok desu ka." which means "Is this okay?" in Japanese. | ||
|desc-side= | |desc-side=Ness points his bat outward and says "HUM!" | ||
|desc-down= | |desc-down=Ness creates PSI sparkles on his fingers while saying "Tra!"}} | ||
===[[Idle pose]]s=== | ===[[Idle pose]]s=== | ||
{{Idle | {{Idle | ||
|desc-1=Closes his eyes and places his | |desc-1=Closes his eyes and places his finger to his forehead, similar to Lucas' Down taunt. | ||
|desc-2= | |desc-2=Frowns and looks around cautiously. | ||
|image-1=Ness Idle Pose 1 Brawl.png | |image-1=Ness Idle Pose 1 Brawl.png | ||
|image-2=Ness Idle Pose 2 Brawl.png}} | |image-2=Ness Idle Pose 2 Brawl.png}} | ||
| Line 334: | Line 317: | ||
{{Victory/SSBB | {{Victory/SSBB | ||
|victory-theme=MotherUniverseTheme.ogg | |victory-theme=MotherUniverseTheme.ogg | ||
|victory-desc=A | |victory-desc=A fast-paced cover of a portion of the opening theme from ''Mother''. | ||
|desc-up= | |desc-up=He jumps up and down twice, swinging his arms, before quickly nodding twice towards the screen with arms akimbo. | ||
|desc-left= | |desc-left=He looks to his sides quickly before facing the screen, putting his hand on the back of his head. (His animation when chosen in ''Super Smash Bros.'') | ||
|desc-right= | |desc-right=He swings his bat many times before holding the bat with his right hand, outstretched and pointing diagonally upwards. | ||
|char=Ness}} | |char=Ness}} | ||
==In [[competitive play]]== | ==In [[competitive play]]== | ||
===Notable players=== | ===Notable players=== | ||
:''See also: [[:Category:Ness players (SSBB)]] | :''See also: [[:Category:Ness players (SSBB)]] | ||
*{{sm|FOW|USA}} - Considered one of the best Ness mains in the world before switching to {{SSBB|Meta Knight}}. | *{{sm|FOW|USA}} - Considered one of the best Ness mains in the world before switching to {{SSBB|Meta Knight}}. | ||
| Line 349: | Line 331: | ||
===Tier placement and history=== | ===Tier placement and history=== | ||
Ness' | Ness' standing in the metagame initially had not changed much, in spite of his buffs in the transition. He was originally seen as a low tier character, lying at 31st. Players at the time immediately noticed the presence of the 10 extra frames to his grab release animation, making him very vulnerable his grab release combos by many characters in the cast, where common characters like {{SSBB|Marth}} could easily exploit such detriments, resulting in his quality-of-life buffs being insufficient to alleviate his most significant problems (most notably his atrocious recovery, his barely improved mobility, range, and KO power and his horrible neutral game), as well as the loss of double jump canceling, the overall slower falling speeds and the ability to act out of hitstun having severely decreased his combo ability. However, he did increase to 27th by the third tier list as new Ness professionals were discovered, and he stayed there for every single tier list in ''Brawl'', until the last one, where he was slightly bolstered by one tier. | ||
However, Ness had heavily struggled throughout the game’s competitive lifespan, as aside from making approaches {{SSBB|Olimar}} difficult, his amplified consequences upon getting punished made it extremely hard for him to approach the rest of the cast. | |||
==Role in [[The Subspace Emissary]]== | ==Role in [[The Subspace Emissary]]== | ||
[[File:Subspace ness.PNG|thumb|250px|Ness in ''[[SSE]]''.]] | [[File:Subspace ness.PNG|thumb|250px|Ness in ''[[SSE]]''.]] | ||
Ness shows up | Ness shows up saving {{SSBB|Lucas}} from the giant [[Pig King Statue]], which is soon revealed to be their mutual nemesis, [[Porky Minch]]. Ness and Lucas team up to defeat Porky and his machine. Afterward, {{SSBB|Wario}} attacks him with his [[Dark Cannon]], but Ness successfully dodges each shot. Wario, however, then aims at Lucas, forcing Ness to push Lucas out of harm's way and take the arrow from the Dark Cannon, which turns him into a trophy. As Lucas is too scared to face Wario, he leaves Ness behind as Wario cackles in the rain. Most of Lucas's story in SSE involves getting revenge on Wario and trying to find Ness. | ||
As Wario is driving his [[Cargo]] with Ness' and Peach/Zelda's trophies on board, he finds {{SSBB|Luigi}}'s trophy and prepares to take it until he is ambushed by an army of [[Waddle Dee]]s, who throw Luigi's trophy into the cargo, which is stolen by {{SSBB|King Dedede}}. At his hideout, Dedede puts a [[Dedede Badge|badge]] on Luigi's, Ness', and Peach/Zelda's trophies before the roof collapses on them, turning Dedede into a trophy in the process, and {{SSBB|Bowser}} takes Peach/Zelda's trophy. Soon afterward the Ancient Minister detonates a Subspace Bomb that consumes Dedede's castle along with Ness', Luigi's and Dedede's trophies by Subspace. | |||
Upon | Ness is not seen again until much later in the story, where he and Luigi are revived thanks to the Dedede Badges. Upon inspecting Luigi's badge, he notices that it looks like Dedede, and, assuming that Dedede made them, proceeds to revive him. Upon being revived, King Dedede gives both of them a hug before they team up and rescue Lucas, along with most of the other characters. Kirby, who was revived by the Dedede brooch he swallowed earlier, revives whatever characters that Ness' group did not come across, including Wario. Wario then bashes Dedede in the head as revenge for Dedede stealing his cargo and trophies. He is then surprised to see Ness and Luigi on Dedede's side. They offer to let Wario join them, and he agrees and rides his bike up to the entrance of The Great Maze. Ness, along with {{SSBB|Sonic}} and the other characters team up to defeat [[Tabuu]]. | ||
===Playable appearances=== | ===Playable appearances=== | ||
Ness was captured by {{SSBB|Wario}} during [[The Ruined Zoo]], and he is brought into {{SSBB|King Dedede}}'s castle after he previously stole Wario's trophy cart. | Ness was captured by {{SSBB|Wario}} during [[The Ruined Zoo]], and he is brought into {{SSBB|King Dedede}}'s castle after he previously stole Wario's trophy cart. But after [[The Cave]], a Subspace Bomb was detonated near his castle, bringing Ness into Subspace. | ||
*[[The Ruined Zoo]] | *[[The Ruined Zoo]] | ||
| Line 370: | Line 349: | ||
*[[The Great Maze]] | *[[The Great Maze]] | ||
==In [[Event | ==In Solo Modes== | ||
===Solo Events=== | ==={{SSBB|Classic Mode}}=== | ||
In Classic Mode, Ness can appear as an opponent or ally in Stage 4 if he has been unlocked along with {{SSBB|Marth}}, {{SSBB|Ike}}, and {{SSBB|Lucas}} on [[Castle Siege]] or [[New Pork City]]. Ness can also appear as an opponent in Stage 11, but only if he hasn't appeared in Stage 4. | |||
===[[All-Star Mode]]=== | |||
In All-Star Mode, Ness is fought in Stage 10 alongside {{SSBB|Lucas}} on [[New Pork City]]. | |||
===[[Event Match]]es=== | |||
====Solo Events==== | |||
*'''[[Event 21: Visit to Onett]]''': The player controls {{SSBB|Lucas}} and must defeat Ness on [[Onett]]. | *'''[[Event 21: Visit to Onett]]''': The player controls {{SSBB|Lucas}} and must defeat Ness on [[Onett]]. | ||
*'''[[Event 25: The Aura Is With Me]]''': As {{SSBB|Lucario}} at 182% damage, the player must defeat {{SSBB|Sheik}} and Ness on [[Spear Pillar]]. | *'''[[Event 25: The Aura Is With Me]]''': As {{SSBB|Lucario}} at 182% damage, the player must defeat {{SSBB|Sheik}} and Ness on [[Spear Pillar]]. | ||
| Line 377: | Line 363: | ||
*'''[[Event 29: All-Star Semifinal Regulars]]''': Ness is one of the opponents fought in this event. All opponents are characters that were unlockable from the original ''[[Super Smash Bros.]]'' game. | *'''[[Event 29: All-Star Semifinal Regulars]]''': Ness is one of the opponents fought in this event. All opponents are characters that were unlockable from the original ''[[Super Smash Bros.]]'' game. | ||
===Co- | ====Co-Op Events==== | ||
*'''[[Co-Op Event 9: Those Who Wait in Onett]]''': {{SSBB|Lucas}} and Ness must defeat {{SSBB|Luigi}} and {{SSBB|Yoshi}} on [[Onett]]. | *'''[[Co-Op Event 9: Those Who Wait in Onett]]''': {{SSBB|Lucas}} and Ness must defeat {{SSBB|Luigi}} and {{SSBB|Yoshi}} on [[Onett]]. | ||
*'''[[Co-Op Event 16: Jigglypuff's Great Comeback]]''': {{SSBB|Jigglypuff}} and {{SSBB|Mr. Game & Watch}}, who are tiny, must defeat {{SSBB|Lucas}} and Ness, who are giant, on [[Castle Siege]]. As the stage changes to different backgrounds, Jigglypuff will grow and Lucas and Ness will shrink. | *'''[[Co-Op Event 16: Jigglypuff's Great Comeback]]''': {{SSBB|Jigglypuff}} and {{SSBB|Mr. Game & Watch}}, who are tiny, must defeat {{SSBB|Lucas}} and Ness, who are giant, on [[Castle Siege]]. As the stage changes to different backgrounds, Jigglypuff will grow and Lucas and Ness will shrink. | ||
*'''[[Co-Op Event 21: The True All-Star Battle]]''': Both players select a character and take on the entire roster on {{SSBB|Battlefield}}. | *'''[[Co-Op Event 21: The True All-Star Battle]]''': Both players select a character and take on the entire roster on {{SSBB|Battlefield}}. | ||
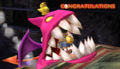
===[[Congratulations_screen#Super_Smash_Bros._Brawl|Ending Images]]=== | |||
<center> | |||
<gallery> | |||
Ness Congratulations Screen Classic Mode Brawl.png|Classic Mode | |||
Ness Congratulations Screen All-Star Brawl.png|All-Star Mode | |||
</gallery> | |||
</center> | |||
==[[Trophies]]== | ==[[Trophies]]== | ||
| Line 427: | Line 421: | ||
==Trivia== | ==Trivia== | ||
*Despite being the | *Ness was briefly considered being cut from ''Brawl'', but ''Mother 3'' only releasing in Japan resulted in both Ness and Lucas being included. <ref>https://twitter.com/pushdustin/status/1626015096781836288</ref> | ||
*Strangely, Ness | *Despite being the first character unlocked through playing Brawls, Ness is one of the last characters unlocked by playing ''The Subspace Emissary''. He is also the first unlockable character to be playable in ''The Subspace Emissary'', despite not joining the player's team until near the end of the game. | ||
* | *Strangely, Ness has visible teeth during the cutscenes of the Subspace Emissary, but not during the actual gameplay. {{SSBB|Lucas}} has this distinction as well. | ||
*Ness' yo-yo | *When in metal form, Ness' bat is also metal, but his yo-yo is not. | ||
*Ness and {{SSBB|Captain Falcon}} are the only two characters to have their unlockability status change between ''Melee'' and ''Brawl''. | *Ness' yo-yo says "Super Nintendo 2008" along the top, above "MOTHER." | ||
*Ness is the only fighter to | *Ness and {{SSBB|Captain Falcon}} are the only two characters to have their unlockability status change between ''Melee'' and ''Brawl''. | ||
**This was also the case for the transition between ''Smash 64'' and ''Melee''. | |||
*Ness is the only fighter to have his trophy list another ''Super Smash Bros.'' game for his game appearances. This is most likely due to the fact that outside of the ''{{b|Super Smash Bros.|series}}'' series, he only made a playable appearance in ''{{b|EarthBound|game}}''. {{forwiiu}} instead lists the second appearance as ''Mother 1+2'', released in 2003 for the Game Boy Advance. | |||
*Ness is the only character to be fought on a [[Melee Stage]] ([[Onett]]) when being unlocked. | *Ness is the only character to be fought on a [[Melee Stage]] ([[Onett]]) when being unlocked. | ||
*Ness is one of the only four unlockable characters to | *Ness is one of the only four unlockable characters to appear in the opening cinematic of ''Brawl''. The three others sharing this attribute are {{SSBB|Marth}}, {{SSBB|Snake}}, and {{SSBB|Sonic}}. | ||
==External links== | ==External links== | ||
*[http://www.smashbros.com/wii/en_us/characters/hidden01.html DOJO!! page] | *[http://www.smashbros.com/wii/en_us/characters/hidden01.html DOJO!! page] | ||
*[http://www.smashboards.com/showthread.php?t=169865 Ness Character Guide on SmashBoards] | *[http://www.smashboards.com/showthread.php?t=169865 Ness Character Guide on SmashBoards] | ||
Latest revision as of 16:38, March 8, 2024
| Ness in Super Smash Bros. Brawl | |
|---|---|
 
| |
| Universe | EarthBound |
| Other playable appearances | in SSB in Melee in SSB4 in Ultimate |
| Availability | Unlockable |
| Final Smash | PK Starstorm |
| Tier | D (26) |
Ness (ネス, Ness) is a playable character in Super Smash Bros. Brawl. Confirmation of Ness's inclusion in Brawl was leaked on January 18th, 2008 through a promotional video on the Japanese Wii website about sticker power ups. He was officially confirmed on February 1st, 2008 on the Smash Dojo website. He is once again voiced by Makiko Ōmoto, with mostly recycled voice clips from Melee, while providing some new ones.
Ness is currently ranked 26th out of 38 on the tier list, a decent improvement from his placement in Melee, where he was ranked 23rd out of 26 characters. Ness possesses a strong aerial game with very useful aerial attacks, as well as effective tilts, effective throws, a projectile with great trapping and damage potential in PK Fire, a versatile projectile capable of very early KOs and mindgames in PK Thunder, and multiple powerful, reliable finishers (such as his back throw and back aerial). Ness is greatly hindered, however, by his exploitable recovery, the rather poor reach in most of his attacks, possessing one of the worst ground games in the game (due to his aforementioned poor range, his almost non-existent approach options on the ground, sluggish mobility and poor smash attacks), and by the 10 additional frames of lag he suffers when grab released, leaving him extremely vulnerable to grab release followups from almost every character, as well as infinite and zero to death grab release chain grabs (most infamously from Marth and Donkey Kong). Ness overall has below-average matchups with several counters, and he has had average tournament results.
How to unlock[edit]
Complete one of the following:
- Play 5 VS. matches.
- Reflect 10 projectiles.
- Have Ness join the player's party in the Subspace Emissary (Subspace (Part I)).
With the exception of the third method, Ness must then be defeated on Onett.
Attributes[edit]
Generalizing Ness is difficult. He generally runs a unique, versatile role, employing three different projectiles with differing purposes. Generally, the moves have modest lag and decent knockback, his PK Fire leads well into other attacks, and his PK Thunder can trap opponents and lead into PK Thunder 2, one of the strongest attacks in the game. Also, PK Thunder and PK Flash both leave Ness very vulnerable because he can't move or attack when controlling these projectiles. Ness can use his PSI Magnet to absorb any energy projectile. The best for Ness, however, are his powerful throws, most notably his back throw, the only throw in Brawl that can reliably KO under 150% without relying on being on the edge and bad DI. Combining these with proper projectile use and appropriate Smash timing, and Ness can be a powerful foe. Shield grabs tend to be a problem for Ness since he has the shortest standing grab range in the game. He's fairly balanced in the areas of weight, falling speed, and air speed with none of them being particularly good nor particularly bad.
Ness' true game can be found by utilizing his aerials. Ness is one of the very few characters in the game who can perform two aerials in one shorthop (Double Aerial Shuffle). This requires practice though because one needs to do the aerial immediately when one jumps off the ground. Looking at his aerials individually, his neutral aerial is fast and a great combo and defensive move. His forward aerial can set up into itself, making it good at damage-racking. His back aerial deals powerful knockback when sweetspotted, making it his best aerial finisher, while it can be used for a wall of pain when sourspotted. His up aerial is a very strong vertical KO move with a decent amount of range. Lastly, his clean down aerial is among the best meteor smashes in the game, and when hit late, it has strong horizontal knockback, making it good for edgeguarding.
However, his ground game is underwhelming. With slow dash speed and short range tilts, he suffers in matchups against characters with disjointed hitboxes such as Ike or Marth. The only upside of his tilts are that they come out very quickly, which can be used to rack up damage. His forward smash is slow and needs to be sweetspotted for it to reliably KO under 100%. His up smash is very weak in terms of knockback, being among the weakest in the game, although it is one of the only two smash attacks able to damage people while charging, the other being Ness's down smash. All of Ness's smashes also give Ness some much needed range in his ground game, although their lack of speed and KO power limit their use.
Ness's major problems are his awful ground grab release and recovery. He and Lucas both suffer from having extremely long grab release animations. Most characters have some sort of ground grab release on Ness, and/or Lucas, leading to chaingrabs, infinities in walls, and other moderate to major problems. Two examples of this would be Marth and Donkey Kong's 0-death on Ness and Lucas. Another example is Wario using his forward smash out of the grab release, which Ness can't avoid. As mentioned above, Ness's other major problem is his atrocious recovery. Although Ness has a very large 2nd jump (second only to Yoshi's in terms of height), his PK Thunder, though faster than Lucas' PK Thunder, has a much wider turning angle, thus requiring more room for Ness to recover than Lucas. Its PK Thunder 2 also travels less distance than Lucas' version. In addition, his PK Thunder will stop in its tracks when it hits most projectiles, walls, or a character. As such, some opponents may take a risk and jump in front of PK Thunder's path to intercept Ness's recovery, giving Ness little to no hope of making it back onstage, which is easier with disjointed moves. However, this is a risky way of intercepting Ness's recovery, due to his recovery move having an extreme amount of knockback, KOing below 50% in most situations, although a projectile could still be used to halt his recovery, especially if it's controllable. Ness's double jump has a unique quality that sets it apart from others in the game. It consists of four PSI flashes that propel him upward. If Ness uses an aerial or air dodge at the beginning of the jump, he will obtain a directional boost depending on the aerial used and if it is used on the first or second flash (his up aerial gives the longest boost, and the boost is longer if activated on the first flash). He can also use his double jump from the ground if the jump button is pressed during lag, which is helpful for starting up aerial combos. Using an aerial will make Ness move up faster, which complies for his slow double-jump and floatiness. After this, he will take a small pause in the air as a "filler" for the frames lost by the faster double-jump.
Changes from Super Smash Bros. Melee[edit]
Ness has received a mix of buffs and nerfs, but given that he was one of the worst characters in Melee, he was noticeably buffed overall in the transition to Brawl. While he has seen relatively few direct changes compared to other characters, he has nevertheless seen improvements. His aerial game has seen noticeable improvements as his aerial mobility has improved, most of his aerials have less landing lag, his forward aerial while weaker connects more reliably making it a more effective spacing tool and his up and down aerials have more range and are overall more effective KO moves due to the changes to Brawl's mechanics. His recovery, while still poor, is more reliable due to his higher air speed, lower falling speed, and the removal of double jump canceling. A number of moves have stronger knockback; some examples being his up and down aerials, his smash attacks, and PK Thunder 2. These give him more reliable and stronger KO potential.
However, he also received several drastic nerfs that magnify his flaws, the most significant of which being the 10 extra frames added to his grounded grab release animation. This is detrimental for Ness as it makes him vulnerable to inescapable kill confirms and even infinite chain grabs from some characters. His combo potential is also significantly lower due to the introduction of hitstun canceling, the universally decreased falling speeds and the removal of double jump cancelling. Furthermore, many of his notable buffs have failed to completely alleviate many of his most glaring flaws; his barely improved recovery remains glaringly easy to gimp or edgeguard, while his marginally better overall range is still short relative to the cast, which is exacerbated by the loss of his powerful yo-yo glitch. This, alongside his overall slow mobility, still makes him heavily struggle in approaching most of his opponents. Finally, while his KOing ability is much better than in Melee, Ness still struggles KO foes consistently, as his slightly better smash attacks are still sluggish and somewhat weak compared to the rest of the cast, while his other most powerful KO moves still suffer from his aforementioned poor range.
Overall, he is considered to be improved from his Melee incarnation, but his longer grounded grab release, watered down combo game and retained flaws keep him from moving into higher tiers.
Aesthetics[edit]
 The overall graphics boost from Melee to Brawl gives Ness much more detail.
- Ness has a new tumbling animation.
- Ness uses a different voice clip when using PK Fire.
- Double jump has a different sound effect.
- Ness has received two new alternate costumes.
Attributes[edit]
 Ness' walking speed is slightly faster (0.84 → 0.86).
- Ness' traction is lower (0.06 → 0.0546), going from the 15th highest to the 24th highest. Compared with the returning veterans, however, Ness's traction is higher, making it easier for him to punish out of shield.
 Ness dashes slightly slower (1.4 → 1.393).
- Ness' air speed is higher (0.093 → 0.09588).
- Ness' air acceleration is higher (0.06 → 0.1).
- Ness' Jumpsquat is longer (4 frames → 5).
- As with the returning veterans, Ness' falling speed was reduced (1.83 → 1.31). Compared to the returning veterans, however, Ness falls faster. While this improves his endurance, it worsens his recovery and makes him more vulnerable to combos.
- Ness' gravity is lower (0.09 → 0.0711).
- The removal of double jump cancelling greatly hinders his already poor approach and weakens his combo ability, but significantly improves his recovery's safety.
- Spot dodge has a longer duration (frames 2-18 → 2-20) and less ending lag (FAF 28 → 26).
- Ness' grounded grab release animation is 10 frames longer, which makes him vulnerable to chain grab releases and combos as the entire cast now has a 10 frame advantage when they ground release him (instead of just Bowser who now has a 20 frame advantage over Ness due to this). He is also more vulnerable to aerial grab release followups due to the general changes to aerial grab releases.
Ground attacks[edit]
- Neutral attack:
- The third hit of neutral attack has increased base knockback (16 → 40). The introduction of jab locking also improves the first hit's utility.
- Down tilt:
- Dash attack:
- Dash attack deals more damage due to changes to stale move negation (12% → 13%) and it connects more reliably.
- Forward smash:
- Forward smash has much more range (2.3436 u → 2.9 u), (2.9295 u → 3.6 u), (3.1248 u → 3.8 u), (3.3201 u → 4.1 u).
- Forward smash has more startup (frame 16 → 22) and ending lag (FAF 50 → 56).
- Forward smash now produces a more realistic sound of a bat hitting a baseball instead of using the Home-Run Bat sound effect.
- Yo-yo (up and down smash):
- Both up and down smashes have stronger knockback and are now able to KO at very high percentages (though the former is still among the weakest up smashes, while down smash is now a down smash of average power). They also have a longer duration (frames 12-31 → 13-35 (down), 13-36 (up)). Down smash also has less end lag (FAF 62 → 57).
- Both his up and down smash no longer increase in damage or knockback when charging. They also have more startup lag (frame 12 → 13) and up smash has more end lag (FAF 49 → 64).
 Yoyo/Jacket glitch has been fixed.
- The removal of the Yoyo/Jacket glitch has significantly hindered his already poor range.
- His yo-yo has gained a new design.
Aerial attacks[edit]
- All aerials except down aerial have less landing lag (22 frames → 18 (neutral), 18 frames → 12 (forward/back/up)) although due to the removal of L-canceling, their landing lag was not fully compensated.
- Neutral aerial:
- Neutral aerial has increased base knockback (15 → 20 (clean), 0 → 10 (late)).
- Neutral aerial's sourspot deals 1% less damage (8% → 7%) although its base knockback was compensated.
- Forward aerial:
- Forward aerial's multi hits have reduced knockback scaling (100 → 60) allowing them to connect more reliably.
- Forward aerial has a lower hitlag multiplier (1x → 0.5x) and the multi hits have a higher SDI multiplier (1x → 1.5x). This makes the move harder to SDI but makes SDI more effective against it.
- Forward aerial deals much less damage (3%/2% → 2% (loop hits), 5% → 3% (final hit), 15.74% → 11% (total)) although the final hit's knockback scaling was somewhat compensated (135 → 145). It also has less range due to only having one hitbox per hit although it is larger than the previous hitboxes (6.8u/4u → 8.1u (loop hits), 9u (final)).
- Back aerial:
- Back aerial has a slightly bigger sweet-spot compared to Melee version. And its sourspot is also much larger, greatly increasing the move's overall range.
- Back aerial deals less damage (16% (clean), 10% (late) → 15%/8%) hindering its KO potential.
- Up aerial:
- Up aerial has a larger hitbox (5.964u → 7.2u) and has more KO potential due to the universally decreased falling speeds, allowing it to used as a effective vertical finisher.
- The universally decreased falling speeds and the removal of double jump cancelling has significantly hindered his up aerial's juggling ability.
- Down aerial:
- Down aerial is more effective due to the changes to meteor canceling and the universally reduced falling speeds, has much better range (5.452u → 6.54u), making it easier to meteor smash. It also has a powerful sourspot which sends opponents horizontally which can KO grounded opponents earlier.
- Down aerial's sourspot deals less damage (12% → 9%).
Throws/other attacks[edit]
- Grabs:
- Grabs have less startup lag (frame 8 (standing)/10 (dash) → 6/8).
- In addition to this, Ness now possesses a frame 6 pivot grab which is the fastest in the game.
- Dash grab has less ending lag (FAF 41 → 36).
- Ness' grabs are larger (3.32u/2.34u (standing)/3.32u/2.73u/2.32u (dash) → (4u/3.5u)/(4u/3.5u/3.5u)) and the furthest grabboxes are positioned further outwards (z offset: 6.65 (standing)/7.81 (dash) → 6.8/8), slightly improving their range.
- Standing grab has more ending lag (FAF 31 → 35).
- The universally decreased fall speeds and changes to hitstun remove up throw and down throw's ability to combo and chaingrab.
- Pummel:
- Pummel has much less startup (frame 16 → 3) and ending lag (FAF 25 → 10).
- Pummel's hitbox is now static, rather than being attached to Ness' head.
- Pummel deals less damage (3% → 1%).
- Pummel has a smaller hitbox (6.25u → 5u).
- Back throw:
- Back throw now makes the same sound effect as PSI Magnet.
- Down throw:
- Down throw's hitboxes are larger (3.51u → 4.32u), resulting in them now connecting against every character.
Special moves[edit]
- Ness can now B-reverse all his specials except for PK Thunder.
- PK Flash:
- PK Flash activates faster, charges and travels further and deals slightly more damage when fully charged (36% → 37%), but it no longer activates automatically once it hits the ground, hits in a smaller radius and an uncharged PK Flash deals 2% less damage.
- PK Flash is more blueish instead of green and has a different sound effect.
- PK Fire:
- PK Fire activates faster and can trap opponents more effectively.
- PK Thunder:
- PK Thunder travels in a tighter arc, making it easier to hit himself. PK Thunder 2 has drastically less ending lag, is significantly stronger (60 (base), 70 (scaling) → 83/80), now KOing at around 50% and the late hitbox deals 1% more damage (20% → 21%) with more knockback scaling (65 → 70) allowing it to KO under 100%.
- The camera no longer follows the ball of lightning as it moves away from Ness. The lightning ball is now indigo instead of blue in color.
- PSI Magnet:
- PSI Magnet now has a weak windbox when released, making it slightly safer, as well giving it a bit of extra utility.
- PSI Magnet has a shorter ending animation (20 frames → 19).
- After absorbing a projectile, PSI Magnet can now be cancelled with a roll, spot dodge or jump. This greatly improves PSI Magnet's safety as it not only heavily limits the opponent's ability to punish Ness if he absorbs a projectile but it can even allow Ness to punish opponents after absorbing projectiles if he is close enough.
- PSI Magnet is now colored indigo instead of blue. It also has a different sound effect
- PSI Magnet heals less damage (x2.0 → x1.6) and it can now only heal up to 30% damage.
- PK Starstorm:
- Ness now has a Final Smash: PK Starstorm. He uses his PK energy to summon multiple meteorites from the sky which each deal 20% to opponents.
Moveset[edit]
| Name | Damage | Description | ||
|---|---|---|---|---|
| Neutral attack | 3% | Ness punches twice, then kicks. | ||
| 2% | ||||
| 4% | ||||
| Forward tilt | ↗ | 12% | Ness kicks with a foot forward. Can be angled. | |
| → | 11% | |||
| ↘ | 10% | |||
| Up tilt | 7% | Ness pushes upward with both hands. | ||
| Down tilt | 4% | Ness swiftly kicks out in front of him. Extremely spammable. Has a chance of making the opponent trip. | ||
| Dash attack | 5% (hit 1), 4% (hits 2-3) | Sends three PSI sparks out in front of him with the third spark knocking the opponent up into the air. Each hit sends the opponent in a different direction, with different knockback. Great, disjointed range. If all hits connect, it can be followed up by an aerial combo. | ||
| Forward smash | 18% (body), 20% (bat base), 22% (bat mid), 24% (bat tip) | Ness swings his bat. There are four hitboxes on the bat, dealing 18%, 20%, 22% and 24% uncharged, the strongest part being at the tip of his bat. The bat will reflect incoming projectiles when he swings it. | ||
| Up smash | Around The World (シャトルループ, Shuttle Loop) | 4% (startup & charge), 9% (front), 13% (back) | Ness sends his yo-yo forward and performs "around-the-world" over himself. Interestingly, when it's 'charging', it doesn't increase in damage or knockback. | |
| Down smash | Walk the Dog (ヨーヨーショット, Yo-Yo Shot) | 4% (startup & charge), 13% (attack) | Ness sends his yo-yo backwards and "walks-the-dog" with it before pulling the yo-yo back. Similar to his up smash, the yo-yo doesn't increase in damage or in knockback when it's "charging". | |
| Neutral aerial | 11% (clean), 7% (late) | Spins diagonally in the air with arms outstretched. | ||
| Forward aerial | 2% (hits 1-4), 3% (hit 5) | Ness sticks out his palms out, sending a stream of PSI sparks in front of him. | ||
| Back aerial | 15% (clean), 8% (late) | Ness kicks out backwards with both feet. If sweetspotted, it electrifies the opponent and semi-spikes them with extreme power. | ||
| Up aerial | 13% | Ness headbutts up into the air. | ||
| Down aerial | 12% (clean), 9% (late) | Ness pulls his legs to his body before stomping down into the air. This attack can meteor smash in the first frame of the move. Somewhat laggy in the startup. | ||
| Grab | — | Grabs opponent with both hands. | ||
| Pummel | 1% | Ness quickly headbutts the opponent. Very fast. | ||
| Forward throw | 11% | Ness psychokinetically swings his opponent in a small circle in front of himself before sending them off forward. | ||
| Back throw | 11% | Ness psychokinetically swings the opponent over his head before sending them off backwards, in a diagonally upwards motion. Has extremely low base knockback but very high knockback scaling. Has the highest KO potential of all throws. | ||
| Up throw | 10% | Ness psychokinetically spins the opponent above his head before sending them up. Leads into many PK Thunder tricks and juggles. Good knockback for an up throw, though the opponent will have to be around 200% to actually KO. | ||
| Down throw | 1% (hits 1-5), 4% (throw) | Ness throws his opponent onto the ground and scorches them with PK Fire. Combined with pummeling and PK Fire, it can be used to rack up a high amount of damage quickly. | ||
| Floor attack (front) | 6% | Gets up and kicks both sides of himself. | ||
| Floor attack (back) | 6% | Gets up and kicks both sides of himself. | ||
| Floor attack (trip) | 5% | Gets up and kicks both sides of himself. | ||
| Edge attack (fast) | 8% (leg), 6% (body) | Flips onto the stage and does a sweep kick. | ||
| Edge attack (slow) | 10% | Slowly pulls himself up and delivers a powerful punch. | ||
| Neutral special | PK Flash | 9-37% | Ness generates a green pulse of energy that is sent upwards, then explodes. It can be charged, increasing damage and knockback while causing it to curve downwards, and it can be moved sideways. | |
| Side special | PK Fire | 4% (lightning), 1-2% (fire) | Fires a yellow, lightning-bolt shaped projectile, that travels in a straight line until it hits an enemy or destructible portion of a stage, at which point it explodes into flames. When used in midair, Ness fires the bolt at a 45° angle. | |
| Up special | PK Thunder | PK Thunder: 8% (head), 1% (tail); PK Thunder 2: 25% (clean), 21% (late) |
Ness creates a stream of lightning that can be aimed into opponents to deal damage with the head and stun with the tail. Aiming the head into Ness himself will launch him in a trajectory opposite to the side he was hit on, which is referred to as PK Thunder 2. PK Thunder 2 has invincibility frames during the first half of the move. | |
| Down special | PSI Magnet | 0%, heals x1.6 the damage of absorbed projectiles. | Creates a blue energy field around himself which allows him to absorb all energy-based projectiles. It can be held in order to use it repeatedly. The move pushes nearby opponents when the button is released. | |
| Final Smash | PK Starstorm | 20% (each star) | Ness calls down a rain of stars from the sky, yelling "PK... Starstorm!". | |
Stats[edit]

| Stats | Weight | Dash speed | Walk speed | Traction | Air friction | Air speed | Air acceleration | Gravity | Falling speed | Jumpsquat | Jump Height | Double jump Height |
|---|---|---|---|---|---|---|---|---|---|---|---|---|
| Value | 94 | 1.3 – Initial dash 1.393 – Run |
0.86 | 0.0546 | 0.0225 | 0.9588 | 0.01 – Base 0.09 – Additional |
0.0711 | 1.31 – Base 1.834 – Fast-fall |
5 | 34.48515332 - Base ? - Short hop |
? |
Announcer call[edit]

English/Japanese
French
German
Italian
Spanish
Wii Remote selection sound[edit]
- Ness says "Okay." like his up taunt.
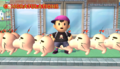
On-screen appearance[edit]
- Ness teleports onscreen using PSI Teleport, then shakes off the soot gathered after crashing.

|
|---|
Taunts[edit]
- Up taunt: Ness bows and says "Okay." Ness' Up taunt is a reference to the naming screen in Ness' game EarthBound. When one confirms the name one is giving a character, one hears a sound effect of the game's creator, Shigesato Itoi, say "Ok desu ka." which means "Is this okay?" in Japanese.
- Side taunt: Ness points his bat outward and says "HUM!"
- Down taunt: Ness creates PSI sparkles on his fingers while saying "Tra!"
| Up taunt | Side taunt | Down taunt |
|---|---|---|

|

|

|
Idle poses[edit]
- Closes his eyes and places his finger to his forehead, similar to Lucas' Down taunt.
- Frowns and looks around cautiously.
 |

|
|---|
Crowd cheer[edit]
| English | Japanese | |
|---|---|---|
| Cheer | ||
| Description | Ness Ness Ness OOOO! | Ness Ness Ne-su! |
| Pitch | Group chant | Group chant |
Victory poses[edit]
- Up: He jumps up and down twice, swinging his arms, before quickly nodding twice towards the screen with arms akimbo.
- Left: He looks to his sides quickly before facing the screen, putting his hand on the back of his head. (His animation when chosen in Super Smash Bros.)
- Right: He swings his bat many times before holding the bat with his right hand, outstretched and pointing diagonally upwards.
| Up | Left | Right |
|---|---|---|

|

|

|
In competitive play[edit]
Notable players[edit]
- See also: Category:Ness players (SSBB)
 FOW - Considered one of the best Ness mains in the world before switching to Meta Knight.
 Fsann - Japan's top Ness player.
- Shaky - Considered the undisputed best Ness following FOW's switch to Meta Knight.
Tier placement and history[edit]
Ness' standing in the metagame initially had not changed much, in spite of his buffs in the transition. He was originally seen as a low tier character, lying at 31st. Players at the time immediately noticed the presence of the 10 extra frames to his grab release animation, making him very vulnerable his grab release combos by many characters in the cast, where common characters like Marth could easily exploit such detriments, resulting in his quality-of-life buffs being insufficient to alleviate his most significant problems (most notably his atrocious recovery, his barely improved mobility, range, and KO power and his horrible neutral game), as well as the loss of double jump canceling, the overall slower falling speeds and the ability to act out of hitstun having severely decreased his combo ability. However, he did increase to 27th by the third tier list as new Ness professionals were discovered, and he stayed there for every single tier list in Brawl, until the last one, where he was slightly bolstered by one tier. However, Ness had heavily struggled throughout the game’s competitive lifespan, as aside from making approaches Olimar difficult, his amplified consequences upon getting punished made it extremely hard for him to approach the rest of the cast.
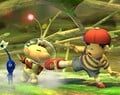
Role in The Subspace Emissary[edit]

Ness shows up saving Lucas from the giant Pig King Statue, which is soon revealed to be their mutual nemesis, Porky Minch. Ness and Lucas team up to defeat Porky and his machine. Afterward, Wario attacks him with his Dark Cannon, but Ness successfully dodges each shot. Wario, however, then aims at Lucas, forcing Ness to push Lucas out of harm's way and take the arrow from the Dark Cannon, which turns him into a trophy. As Lucas is too scared to face Wario, he leaves Ness behind as Wario cackles in the rain. Most of Lucas's story in SSE involves getting revenge on Wario and trying to find Ness.
As Wario is driving his Cargo with Ness' and Peach/Zelda's trophies on board, he finds Luigi's trophy and prepares to take it until he is ambushed by an army of Waddle Dees, who throw Luigi's trophy into the cargo, which is stolen by King Dedede. At his hideout, Dedede puts a badge on Luigi's, Ness', and Peach/Zelda's trophies before the roof collapses on them, turning Dedede into a trophy in the process, and Bowser takes Peach/Zelda's trophy. Soon afterward the Ancient Minister detonates a Subspace Bomb that consumes Dedede's castle along with Ness', Luigi's and Dedede's trophies by Subspace.
Ness is not seen again until much later in the story, where he and Luigi are revived thanks to the Dedede Badges. Upon inspecting Luigi's badge, he notices that it looks like Dedede, and, assuming that Dedede made them, proceeds to revive him. Upon being revived, King Dedede gives both of them a hug before they team up and rescue Lucas, along with most of the other characters. Kirby, who was revived by the Dedede brooch he swallowed earlier, revives whatever characters that Ness' group did not come across, including Wario. Wario then bashes Dedede in the head as revenge for Dedede stealing his cargo and trophies. He is then surprised to see Ness and Luigi on Dedede's side. They offer to let Wario join them, and he agrees and rides his bike up to the entrance of The Great Maze. Ness, along with Sonic and the other characters team up to defeat Tabuu.
Playable appearances[edit]
Ness was captured by Wario during The Ruined Zoo, and he is brought into King Dedede's castle after he previously stole Wario's trophy cart. But after The Cave, a Subspace Bomb was detonated near his castle, bringing Ness into Subspace.
In Solo Modes[edit]
Classic Mode[edit]
In Classic Mode, Ness can appear as an opponent or ally in Stage 4 if he has been unlocked along with Marth, Ike, and Lucas on Castle Siege or New Pork City. Ness can also appear as an opponent in Stage 11, but only if he hasn't appeared in Stage 4.
All-Star Mode[edit]
In All-Star Mode, Ness is fought in Stage 10 alongside Lucas on New Pork City.
Event Matches[edit]
Solo Events[edit]
- Event 21: Visit to Onett: The player controls Lucas and must defeat Ness on Onett.
- Event 25: The Aura Is With Me: As Lucario at 182% damage, the player must defeat Sheik and Ness on Spear Pillar.
- Event 26: The Slow and Easy Life: Ness must defeat three tiny Olimars on Smashville before K.K. Slider's song ends.
- Event 29: All-Star Semifinal Regulars: Ness is one of the opponents fought in this event. All opponents are characters that were unlockable from the original Super Smash Bros. game.
Co-Op Events[edit]
- Co-Op Event 9: Those Who Wait in Onett: Lucas and Ness must defeat Luigi and Yoshi on Onett.
- Co-Op Event 16: Jigglypuff's Great Comeback: Jigglypuff and Mr. Game & Watch, who are tiny, must defeat Lucas and Ness, who are giant, on Castle Siege. As the stage changes to different backgrounds, Jigglypuff will grow and Lucas and Ness will shrink.
- Co-Op Event 21: The True All-Star Battle: Both players select a character and take on the entire roster on Battlefield.
Ending Images[edit]
Classic Mode
All-Star Mode


Trophies[edit]
Ness's main and Final Smash trophies can be obtained by clearing Classic Mode and All-Star mode respectively with Ness.

- Ness
- An average boy whose life changed when he found a meteor and an alien on a nearby mountain. The alien warned him of a future threat, and adventure ensued. He can use psychic energy known as PSI and also wields a bat and yo-yo. This brave youth gives his all to defeat the evil Giygas.

 : EarthBound
 : Super Smash Bros.
- : EarthBound (Japan and US Only)
- : Super Smash Bros.
_-_Brawl_Trophy.png)
- PK Starstorm (Ness)
- Ness as he calls down a host of damage-dealing stars in his Final Smash. Everyone on the screen must dodge like crazy to avoid getting hurt, but that's no easy task. This attack appeared in the Mother series, but it was Poo, not Ness, who wielded it. Perhaps Poo taught Ness the secret of the attack for use in Super Smash Bros. Brawl.
 : Super Smash Bros. Brawl
Alternate costumes[edit]
.png)
| |||||
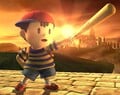
Gallery[edit]

Using his up smash on Smashville.
Using his forward tilt on Olimar on Distant Planet.
Taunting on Bridge of Eldin.


Trivia[edit]
- Ness was briefly considered being cut from Brawl, but Mother 3 only releasing in Japan resulted in both Ness and Lucas being included. [1]
- Despite being the first character unlocked through playing Brawls, Ness is one of the last characters unlocked by playing The Subspace Emissary. He is also the first unlockable character to be playable in The Subspace Emissary, despite not joining the player's team until near the end of the game.
- Strangely, Ness has visible teeth during the cutscenes of the Subspace Emissary, but not during the actual gameplay. Lucas has this distinction as well.
- When in metal form, Ness' bat is also metal, but his yo-yo is not.
- Ness' yo-yo says "Super Nintendo 2008" along the top, above "MOTHER."
- Ness and Captain Falcon are the only two characters to have their unlockability status change between Melee and Brawl.
- This was also the case for the transition between Smash 64 and Melee.
- Ness is the only fighter to have his trophy list another Super Smash Bros. game for his game appearances. This is most likely due to the fact that outside of the Super Smash Bros. series, he only made a playable appearance in EarthBound. Super Smash Bros. for Wii U instead lists the second appearance as Mother 1+2, released in 2003 for the Game Boy Advance.
- Ness is the only character to be fought on a Melee Stage (Onett) when being unlocked.
- Ness is one of the only four unlockable characters to appear in the opening cinematic of Brawl. The three others sharing this attribute are Marth, Snake, and Sonic.
External links[edit]
| Fighters in Super Smash Bros. Brawl | |
|---|---|
| Veterans | Bowser · Captain Falcon · Donkey Kong · Falco · Fox · Ganondorf · Ice Climbers · Jigglypuff · Kirby · Link · Luigi · Mario · Marth · Mr. Game & Watch · Ness · Peach · Pikachu · Samus · Yoshi · Zelda / Sheik |
| Newcomers | Diddy Kong · Ike · King Dedede · Lucario · Lucas · Meta Knight · Olimar · Pit · Pokémon Trainer (Charizard · Ivysaur · Squirtle) · R.O.B. · Snake · Sonic · Toon Link · Wario · Wolf · (Zero Suit Samus) |
|
| |
|---|---|
| Fighters | Ness (SSB · SSBM · SSBB · SSB4 · SSBU) · Lucas (SSBB · SSB4 · SSBU) |
| Assist Trophies | Jeff · Starman |
| Bosses | Porky Statue · Porky |
| Stages | Onett · Fourside · New Pork City · Magicant |
| Items | Mr. Saturn · Franklin Badge · Ramblin' Evil Mushroom |
| Enemies | Devil Car · Starman |
| Other | Boney · Flying Man · Kumatora · Paula · Poo · Rope Snake · Ultimate Chimera |
| Trophies, Stickers and Spirits | Trophies (SSBM · SSBB · SSB4) · Stickers · Spirits |
| Music | Brawl · SSB4 · Ultimate |
| Masterpiece | EarthBound |