Category:Stages (SSBU): Difference between revisions
From SmashWiki, the Super Smash Bros. wiki
Jump to navigationJump to search
Jigglypoof21 (talk | contribs) (New Page: Stages found in ''Super Smash Bros. Ultimate''. Category:Stages) |
m (Text replacement - ". [[Category:" to ". [[Category:") |
||
| Line 1: | Line 1: | ||
Stages found in ''[[Super Smash Bros. Ultimate]]''. | Stages found in ''[[Super Smash Bros. Ultimate]]''. | ||
[[Category:Stages]] | [[Category:Stages]] | ||
Latest revision as of 12:56, September 1, 2021
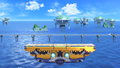
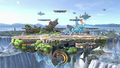
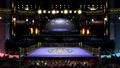
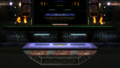
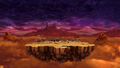
Stages found in Super Smash Bros. Ultimate.
Pages in category "Stages (SSBU)"
The following 127 pages are in this category, out of 127 total.
B
F
G
M
P
S
V
Ω
Media in category "Stages (SSBU)"
The following 200 files are in this category, out of 432 total.
(previous page) (next page) Backface tower fixed.jpeg 1,280 × 720; 197 KB
 Backface tower.jpeg 1,280 × 720; 204 KB
 Backface wall.jpeg 1,280 × 720; 235 KB
 Clock Tower Timelapse SSBU.gif 480 × 270; 5.33 MB
 Coliseum boundary.jpg 1,280 × 720; 277 KB
 ControlsTestSSBU.png 1,920 × 1,080; 412 KB
 CustomTestSSBU.png 1,920 × 1,080; 752 KB
 Dive to the HeartBattlefield.png 1,280 × 720; 892 KB
 Dive to the HeartOmega.png 1,280 × 720; 897 KB
 Dragon Quest XI Anniv.jpg 1,200 × 675; 87 KB
 Final Destination SSBU Dark.jpeg 1,280 × 720; 189 KB
 Flat Zone X PAL.jpeg 1,280 × 720; 187 KB
 Floating tree.jpeg 1,280 × 720; 265 KB
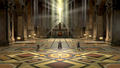
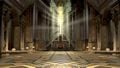 Garreg Cathedral.jpg 1,200 × 675; 174 KB
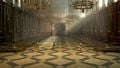 Garreg Mach Monestary.jpg 1,280 × 720; 265 KB
 GMMBridge.png 1,280 × 720; 1.61 MB
 GMMCathedral.png 1,280 × 720; 1.16 MB
 GMMTransition.png 1,280 × 720; 1.31 MB
 Great Plateau Tower CoL SSBU.png 1,920 × 1,080; 2.17 MB
 Mementos CoL 1 SSBU.png 1,920 × 1,080; 1.44 MB
 Mementos CoL 2 SSBU.png 1,920 × 1,080; 1.5 MB
 Mementos CoL 3 SSBU.png 1,920 × 1,080; 1.39 MB
 Mementos Persona 3.PNG 1,600 × 900; 2.07 MB
 Mementos Persona 4.PNG 1,600 × 900; 2.04 MB
 MinecraftWorld8PlayerΩ.jpg 1,280 × 720; 244 KB
 MishimaDojoBrokenWalls.jpg 1,920 × 1,080; 499 KB
 Moray Towers (Splatfest Battlefield Form).jpg 1,280 × 720; 267 KB
 Moray Towers (Splatfest Omega Form).jpg 1,280 × 720; 254 KB
 Mute City SNES full view.jpg 1,920 × 1,080; 828 KB
 NDCH Upper Middle 1.png 1,280 × 720; 1.28 MB
 NDCH Upper Middle 2.png 1,280 × 720; 1.27 MB
 NDCH Upper Middle 3.png 1,280 × 720; 1.22 MB
 NDCH Upper Middle 4.png 1,280 × 720; 1.35 MB
 Peach's Castle button.jpg 1,920 × 1,080; 336 KB
 Pellet glitch.gif 1,200 × 675; 899 KB
 Rainbow Cruise full view.jpg 1,920 × 1,080; 1.45 MB
 SSBU - Smashville at dawn.jpg 1,280 × 720; 201 KB
 SSBU - Smashville at day.jpg 1,280 × 720; 202 KB
 SSBU - Smashville at evening.jpg 1,280 × 720; 196 KB
 SSBU - Smashville at night.jpg 1,280 × 720; 154 KB
 SSBU Dream Land BC stitch.png 2,033 × 887; 364 KB
 SSBU Dream Land FI stitch.png 3,035 × 887; 776 KB
 SSBU Dream Land GG stitch.png 4,038 × 887; 1,001 KB
 SSBU Northern Cave.png 1,280 × 720; 1.35 MB
 SSBU Prism Tower Middle Stop.png 1,280 × 720; 1.13 MB
 SSBU Reset Bomb Forest 2nd form.jpg 1,280 × 720; 327 KB
 SSBU-3D Land.png 1,920 × 1,080; 1.92 MB
 SSBU-3D LandBattlefield.png 1,280 × 720; 1.19 MB
 SSBU-3D LandOmega.png 1,280 × 720; 1.18 MB
 SSBU-75m.png 1,920 × 1,080; 648 KB
 SSBU-75mBattlefield.png 1,280 × 720; 279 KB
 SSBU-75mOmega.png 1,280 × 720; 263 KB
 SSBU-Arena Ferox.png 1,920 × 1,080; 1.68 MB
 SSBU-Arena FeroxBattlefield.png 1,280 × 720; 1.02 MB
 SSBU-Arena FeroxOmega.png 1,280 × 720; 1.02 MB
 SSBU-Balloon Fight.png 1,920 × 1,080; 939 KB
 SSBU-Balloon FightBattlefield.png 1,280 × 720; 307 KB
 SSBU-Balloon FightOmega.png 1,280 × 720; 260 KB
 SSBU-Battlefield.png 1,366 × 768; 1.33 MB
 SSBU-BattlefieldOmega.png 1,280 × 720; 1.12 MB
 SSBU-Big Blue.png 1,280 × 720; 1.07 MB
 SSBU-Big BlueBattlefield.png 1,280 × 720; 1,015 KB
 SSBU-Big BlueOmega.png 1,280 × 720; 1,007 KB
 SSBU-Big-Battlefield.png 1,920 × 1,080; 2.23 MB
 SSBU-Boxing Ring 1.png 1,920 × 1,080; 2.18 MB
 SSBU-Boxing Ring.png 1,920 × 1,080; 2 MB
 SSBU-Boxing RingBattlefield (Punch-Out!!).png 1,280 × 720; 1.02 MB
 SSBU-Boxing RingBattlefield.png 1,280 × 720; 924 KB
 SSBU-Boxing RingOmega (Punch-Out!!).png 1,280 × 720; 1.01 MB
 SSBU-Boxing RingOmega.png 1,280 × 720; 917 KB
 SSBU-Bridge of Eldin 2.png 1,280 × 720; 1.34 MB
 SSBU-Bridge of Eldin 3.png 1,280 × 720; 1.3 MB
 SSBU-Bridge of Eldin.png 1,280 × 720; 1.35 MB
 SSBU-Bridge of EldinBattlefield.png 1,280 × 720; 1.3 MB
 SSBU-Bridge of EldinOmega.png 1,280 × 720; 1.3 MB
 SSBU-Brinstar 2.jpg 1,280 × 720; 152 KB
 SSBU-Brinstar Depths.png 1,280 × 720; 1.48 MB
 SSBU-Brinstar DepthsBattlefield.png 1,280 × 720; 1.06 MB
 SSBU-Brinstar DepthsOmega.png 1,280 × 720; 1.05 MB
 SSBU-Brinstar.png 1,920 × 1,080; 2.1 MB
 SSBU-BrinstarBattlefield.png 1,280 × 720; 1.24 MB
 SSBU-BrinstarOmega.png 1,280 × 720; 1.23 MB
 SSBU-Castle Siege.png 1,920 × 1,080; 2.04 MB
 SSBU-Castle SiegeBattlefield.png 1,280 × 720; 1.18 MB
 SSBU-Castle SiegeOmega.png 1,280 × 720; 1.17 MB
 SSBU-Cloud Sea of Alrest.jpg 1,280 × 720; 120 KB
 SSBU-Cloud Sea of AlrestBattlefield.png 1,280 × 720; 1.04 MB
 SSBU-Cloud Sea of AlrestOmega.png 1,280 × 720; 1.02 MB
 SSBU-Coliseum.png 1,280 × 720; 1.51 MB
 SSBU-ColiseumBattlefield.png 1,280 × 720; 1.41 MB
 SSBU-ColiseumOmega.png 1,280 × 720; 1.41 MB
 SSBU-Corneria.png 1,920 × 1,080; 2.43 MB
 SSBU-CorneriaBattlefield.png 1,280 × 720; 1.28 MB
 SSBU-CorneriaOmega.png 1,280 × 720; 1.28 MB
 SSBU-Delfino Plaza.jpg 1,920 × 1,080; 398 KB
 SSBU-Delfino PlazaBattlefield.png 1,280 × 720; 1.55 MB
 SSBU-Delfino PlazaOmega.png 1,280 × 720; 1.55 MB
 SSBU-Distant Planet.png 1,920 × 1,080; 2.11 MB
 SSBU-Distant PlanetBattlefield.png 1,280 × 720; 1.03 MB
 SSBU-Distant PlanetOmega.png 1,280 × 720; 1.01 MB
 SSBU-Dive to the Heart.jpg 1,920 × 1,080; 308 KB
 SSBU-Dracula's Castle.png 1,920 × 1,080; 1.67 MB
 SSBU-Dracula's CastleBattlefield.png 1,280 × 720; 664 KB
 SSBU-Dracula's CastleOmega.png 1,280 × 720; 646 KB
 SSBU-Dream Land (3DS).png 1,920 × 1,080; 704 KB
 SSBU-Dream Land (3DS)Battlefield.png 1,280 × 720; 419 KB
 SSBU-Dream Land (3DS)Omega.png 1,280 × 720; 414 KB
 SSBU-Dream Land.png 1,920 × 1,080; 2.02 MB
 SSBU-Dream LandBattlefield.png 1,280 × 720; 1.13 MB
 SSBU-Dream LandOmega.png 1,280 × 720; 1.14 MB
 SSBU-Duck Hunt.png 1,920 × 1,080; 589 KB
 SSBU-Duck HuntBattlefield.png 1,280 × 720; 227 KB
 SSBU-Duck HuntOmega.png 1,280 × 720; 224 KB
 SSBU-Final Destination.jpg 1,920 × 1,080; 314 KB
 SSBU-Final DestinationBattlefield.png 1,280 × 720; 823 KB
 SSBU-Find Mii 2.jpg 1,920 × 1,080; 146 KB
 SSBU-Find Mii.png 1,920 × 1,080; 1.64 MB
 SSBU-Find MiiBattlefield.png 1,280 × 720; 928 KB
 SSBU-Find MiiOmega.png 1,280 × 720; 917 KB
 SSBU-Flat Zone X 2.png 1,280 × 720; 1,001 KB
 SSBU-Flat Zone X 3.png 1,280 × 720; 983 KB
 SSBU-Flat Zone X 4.png 1,280 × 720; 1 MB
 SSBU-Flat Zone X 5.png 1,280 × 720; 945 KB
 SSBU-Flat Zone X.png 1,280 × 720; 983 KB
 SSBU-Flat Zone XBattlefield.png 1,280 × 720; 419 KB
 SSBU-Flat Zone XOmega.png 1,280 × 720; 409 KB
 SSBU-Fountain of Dreams.png 1,920 × 1,080; 3.71 MB
 SSBU-Fountain of DreamsBattlefield.png 1,280 × 720; 925 KB
 SSBU-Fountain of DreamsOmega.png 1,280 × 720; 913 KB
 SSBU-Fourside.jpg 1,280 × 720; 231 KB
 SSBU-FoursideBattlefield.png 1,280 × 720; 1.07 MB
 SSBU-FoursideOmega.png 1,280 × 720; 1.05 MB
 SSBU-Frigate Orpheon.png 1,280 × 720; 1.21 MB
 SSBU-Frigate OrpheonBattlefield.png 1,280 × 720; 974 KB
 SSBU-Frigate OrpheonOmega.png 1,280 × 720; 961 KB
 SSBU-Gamer.png 1,920 × 1,080; 950 KB
 SSBU-GamerBattlefield.png 1,280 × 720; 422 KB
 SSBU-GamerOmega.png 1,280 × 720; 368 KB
 SSBU-Garden of Hope.png 1,920 × 1,080; 2.83 MB
 SSBU-Garden of HopeBattlefield.png 1,280 × 720; 1.3 MB
 SSBU-Garden of HopeOmega.png 1,280 × 720; 1.3 MB
 SSBU-Garreg Mach Monastery.jpg 1,920 × 1,080; 560 KB
 SSBU-Garreg Mach MonasteryBattlefield.png 1,280 × 720; 1.73 MB
 SSBU-Garreg Mach MonasteryOmega.png 1,280 × 720; 1.73 MB
 SSBU-Gaur Plain.png 1,920 × 1,080; 3.08 MB
 SSBU-Gaur PlainBattlefield.png 1,280 × 720; 1.62 MB
 SSBU-Gaur PlainOmega.png 1,280 × 720; 1.62 MB
 SSBU-Gerudo Valley 2.jpg 1,920 × 1,080; 286 KB
 SSBU-Gerudo Valley.png 1,920 × 1,080; 2.66 MB
 SSBU-Gerudo ValleyBattlefield.png 1,280 × 720; 1.5 MB
 SSBU-Gerudo ValleyOmega.png 1,280 × 720; 1.49 MB
 SSBU-Golden Plains.png 1,920 × 1,080; 1.95 MB
 SSBU-Golden PlainsBattlefield.png 1,280 × 720; 924 KB
 SSBU-Golden PlainsOmega.png 1,280 × 720; 890 KB
 SSBU-Great Bay.jpg 1,280 × 720; 270 KB
 SSBU-Great BayBattlefield.png 1,280 × 720; 1.34 MB
 SSBU-Great BayOmega.png 1,280 × 720; 1.34 MB
 SSBU-Great Plateau Tower 2.jpg 1,920 × 1,080; 298 KB
 SSBU-Great Plateau Tower.jpg 1,920 × 1,080; 271 KB
 SSBU-Great Plateau TowerBattlefield.png 1,280 × 720; 962 KB
 SSBU-Great Plateau TowerOmega.png 1,280 × 720; 936 KB
 SSBU-Green Greens.png 1,280 × 720; 1.36 MB
 SSBU-Green GreensBattlefield.png 1,280 × 720; 1.07 MB
 SSBU-Green GreensOmega.png 1,280 × 720; 1.07 MB
 SSBU-Green Hill Zone.png 1,280 × 720; 993 KB
 SSBU-Green Hill ZoneBattlefield.png 1,280 × 720; 1.09 MB
 SSBU-Green Hill ZoneOmega.png 1,280 × 720; 1.08 MB
 SSBU-Halberd 2.png 1,280 × 720; 1.29 MB
 SSBU-Halberd 3.png 1,280 × 720; 1.28 MB
 SSBU-Halberd.png 1,280 × 720; 1,023 KB
 SSBU-HalberdBattlefield.png 1,280 × 720; 977 KB
 SSBU-HalberdOmega.png 1,280 × 720; 984 KB
 SSBU-Hanenbow.png 1,920 × 1,080; 672 KB
 SSBU-HanenbowBattlefield.png 1,280 × 720; 108 KB
 SSBU-HanenbowOmega.png 1,280 × 720; 81 KB
 SSBU-Hollow Bastion.jpg 1,920 × 1,080; 270 KB
 SSBU-Hollow BastionBattlefield.png 1,280 × 720; 995 KB
 SSBU-Hollow BastionOmega.png 1,280 × 720; 984 KB
 SSBU-Hyrule Castle.png 1,920 × 1,080; 1.58 MB
 SSBU-Hyrule CastleBattlefield.png 1,280 × 720; 793 KB
 SSBU-Hyrule CastleOmega.png 1,280 × 720; 782 KB
 SSBU-Jungle Japes.png 1,920 × 1,080; 2.42 MB
 SSBU-Jungle JapesBattlefield.png 1,280 × 720; 1.16 MB
 SSBU-Jungle JapesOmega.png 1,280 × 720; 1.16 MB
 SSBU-Kalos Pokémon League.png 1,920 × 1,080; 2.11 MB
 SSBU-Kalos Pokémon LeagueBattlefield.png 1,280 × 720; 1.23 MB
 SSBU-Kalos Pokémon LeagueOmega.png 1,280 × 720; 1.22 MB
 SSBU-King of Fighters Stadium.jpg 1,280 × 720; 225 KB
 SSBU-King of Fighters StadiumBattlefield.png 1,280 × 720; 1.33 MB
 SSBU-King of Fighters StadiumOmega.png 1,280 × 720; 1.34 MB
 SSBU-Kongo Falls.jpg 1,920 × 1,080; 416 KB
 SSBU-Kongo FallsBattlefield.png 1,280 × 720; 1.41 MB
 SSBU-Kongo FallsOmega.png 1,280 × 720; 1.39 MB
 SSBU-Kongo Jungle.png 1,920 × 1,080; 1.47 MB
 SSBU-Kongo JungleBattlefield.png 1,280 × 720; 807 KB
 SSBU-Kongo JungleOmega.png 1,280 × 720; 790 KB
 SSBU-Living Room 2.jpg 1,920 × 1,080; 223 KB
 SSBU-Living Room 3.jpg 1,280 × 720; 217 KB
 SSBU-Living Room.png 1,920 × 1,080; 1.96 MB
 SSBU-Living RoomBattlefield.png 1,280 × 720; 1.06 MB


.jpg)
.jpg)


.png)

.png)


.png)
Battlefield.png)
Omega.png)


&diff=prev&oldid=1613894&filefrom=SSBU-Living+RoomOmega.png#mw-category-media)