Little Mac (SSB4)
| Little Mac in Super Smash Bros. 4 | |
|---|---|
 
| |
| Universe | Punch-Out!! |
| Availability | Starter |
| Final Smash | Giga Mac |
| Tier | E (43) |
| “ | Little Mac Punches In! | ” |
| —Introduction Tagline | ||
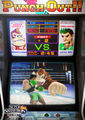
Little Mac (リトル・マック, Little Mac) is a playable character in Super Smash Bros. 4. He was revealed on February 13th, 2014 during a Nintendo Direct to commemorate the 30th anniversary of the Punch-Out!! series, which debuted in Japan in 1983, but later debuted in the West in 1984.[1] Instead of retaining Brawl's 3D version of his original design from the NES version of Punch-Out!!, Little Mac now sports his updated design from the Wii version of Punch-Out!! Despite this, he is now voiced by Kōsuke Toriumi instead of Matt Harty, the latter of whom voiced him in the Wii version of Punch-Out!!
Little Mac is currently ranked 43rd out of 58 in the tier list, placing him in the upper portion of the E tier. Little Mac's playstyle is significantly focused on strong, ground-oriented offense, with unarguably the best grounded attributes in the game: he possesses extremely fast grounded movement and dodging speeds, while his traction is among the highest in the game. These traits allow him to position himself quickly and effectively while also heavily complimenting his grounded frame data, which is the overall fastest in the game.
Despite being a lightweight, Little Mac is notable for his array of finishers, which in turn grants him a very effective punishment game. In particular, his KO Uppercut grants him notable comeback potential, as it can be performed from multiple set-ups even at low percents and can KO the entire cast extremely early. In addition to his outstanding power, Little Mac possesses an effective grounded combo game: his neutral attack is particularly notable for being one of the best in the game due to its high priority and very fast speed, while his neutral and tilt attacks also benefit from anti-rebounding priority.
Little Mac's most advertised flaw, however, is his extremely ineffective aerial abilities. He is burdened with a deliberately weak air game, while his off-stage endurance is infamously terrible due to his status as a fast-falling lightweight with extremely unimpressive recovery options and below average aerial mobility. As such, Little Mac's ability to KO quickly is counterbalanced by his glaring susceptibility to gimping, juggling, aggressive edgeguarding, and combos, each of which can result in him being KO'd quickly.
Although Little Mac's grounded attacks boast impressive power, several of them lack the shieldstun necessary to prevent punishment despite their nearly unrivaled speed, in addition to dealing minimal shield damage. This makes characters with fast movement speeds and/or long ranges difficult for Mac to safely approach even if he spaces correctly, while his lackluster grab game makes him unable to reliably punish opponents who frequently use their shields. Finally, Little Mac's excellent ground game is offset by his sheer reliance on staying grounded, giving him extreme difficulty with contending against platform camping and ground-hugging projectiles, especially if he is required to waste his second jump.
Ultimately, Little Mac is deceptively difficult to master; while his fighting style is straightforward, his polarized attributes and dangerously risky playstyle forces him to optimize every recovery and opening, due to a single well-placed attack being capable of gimping him instantly. As a result, he maintains only an average level of representation, with only a handful of his playerbase being dedicated mains. Despite this, Little Mac has managed to achieve success at varying levels, with Cagt achieving several top 10 placings and a few top 25 placings at the local and regional levels respectively, and Destany winning several local tournaments in both singles and doubles play along with achieving a handful of high placings at the regional level. Lastly, dedicated mains such as Sol, Vash, and Alphicans have each achieved a few respectable placings in singles play and a few high placings in doubles play at the regional and national levels.
Attributes
As displayed in his trailer, Little Mac is a lightweight who performs optimally on the ground, but cannot fight effectively in the air. His mobility is measured in a way that reflects this: he has the eighth fastest walking speed, the third fastest dashing speed, and is tied with Zero Suit Samus and Wario for the third highest traction. Altogether, these attributes give him arguably the best out of shield game of any character. His grounded presence is further supplemented by his sidestep and rolls being the fastest in the game, with the latter also being long-distanced. His dash's animation compliments his short frame, as it consists of him lunging forward and thus allows him to avoid attacks with high hitboxes or certain projectiles such as Hadoken and uncharged Water Shuriken. His below average gravity and fast falling speed also give him exceptional vertical survivability for a lightweight, while his fast air dodge (surpassed only by Mewtwo's) and high wall jump (surpassed only by Lucario's) give him decent protection against edge-guarders so long as he is near the stage. Conversely, Little Mac's aerial traits are notably subpar; while his air speed is average, he is burdened with the fourth lowest jumps and the second slowest air acceleration, making it mandatory for him to stay on the ground whenever possible.
Little Mac's greatest strength is his incredibly powerful ground game. He possesses the overall fastest set of grounded attacks, with none of them having more than 15 frames of start-up and only one (his up smash) having more than 30 frames of ending lag. Additionally, all of his ground moves have high utility, with his weakest ground attacks being effective combo starters, while his strongest attacks have little overall lag despite their high power, making them difficult to punish. This makes Little Mac's ground game immensely useful due to his ability to easily find openings before racking up damage and KOing opponents very quickly, which forces his opponents to play very cautiously. His jab canceled neutral attack, up tilt and down tilt are great combo starters, with his down tilt being especially effective due to its vertical launching angle and low knockback scaling allowing it to combo into any move except his back aerial, down aerial, and Straight Lunge. Altogether, these moves grant him a very fast and unique grounded combo game, in addition to giving him an abundance of grounded KO moves.
The speed of Little Mac's tilt attacks can even allow him to perform shield break combos by pressuring his opponent to keep their shield up while whittling down its health. However, if this is not possible to do in a given situation, the speed can instead initiate shield stabbing on many characters, with a prominent example being Ganondorf. He additionally possesses a very fast semi-spike in his down smash, giving him a deadly edge-guarding move. Lastly, some of his moves have high hitlag, most notably his downward angled forward smash, which makes said moves difficult to punish out of shield.
In addition to their strength, Little Mac's grounded attacks are nearly impossible to interrupt. His neutral attack and tilt attacks, in particular, boast a form of priority known as anti-rebounding priority. This means that when an opponent's attack within priority range clanks with any of these attacks, Little Mac's attack will continue uninterrupted while the opponent's attack is not only canceled out, but also results in them suffering from lag relative to how powerful the attack they used was. However, this trait only applies to grounded attacks. With this level of priority, Little Mac can take advantage of the opponent's more powerful attacks, hindering them with large amounts of lag while allowing Mac to punish immediately due to the low ending lag of his neutral attack and tilt attacks. Besides these, his smash attacks are also difficult to interrupt as well. While they follow standard rules of priority, they have super armor from start-up to the end of their final hitboxes, making them impossible to interrupt during this period of time and allowing Mac to effectively tank an opponent's attack as a unique way of punishing them. All these factors make Little Mac arguably the most difficult opponent to deal with on the ground.
Little Mac's special moves also have some very useful options. Straight Lunge can be long-ranged, boasts very high power and grants damage-based launch resistance when it is sufficiently charged, allowing him to tank low damage attacks and retaliate immediately afterward. It can also be used to escape some weak multiple hit moves, such as neutral attacks, Witch Twist, and Greninja's up aerial, in the event he gets caught in the middle of them. It can also be used as a situational move mid-match to enforce a bad approach or input from a reckless opponent. However, Straight Lunge is held back by its very slow speed and considerable ending lag even if uncharged, limiting its usage and making it easily intercepted in almost every other case, which offsets its overwhelmingly high strength. Jolt Haymaker is a strong leaping attack that travels far, can be unleashed on command and grants intangibility during start-up, making it ideal for tech-chasing, re-positioning, and escaping/punishing laggier moves. Despite this, it should not be used excessively, as it does not stop at an edge upon performing it, which can inadvertently lead to an inevitable self-destruct if used near an edge.
Rising Uppercut covers fairly long vertical distance and grants brief intangibility upon start-up if used on the ground, making it Little Mac's most reliable aerial finisher and a very good out of shield option. Its last hit also deals extremely high knockback, making it quite a potent finisher, especially when used as a follow-up from his up tilt or his down throw. Its extremely fast start-up and initial intangibility also allows Mac to use it out of even the smallest pause between an opponent's combos, and thus potentially shift momentum in his favor. Slip Counter is overall the fastest counterattack in the game and grants intangibility at both start-up and during its counterattack. In addition, it is great for escaping pressure (especially aerial combos), and is one of the few that slides a distance before attacking.
Lastly, the Power Meter is a mechanic unique to Little Mac. It is a visible meter that charges by either dealing or receiving damage. When it is fully charged, Straight Lunge is replaced by the KO Uppercut, which is strong enough to KO any character at roughly 30%. It also has fast start-up, is unblockable (except on Witch Time), and can be used as a follow-up from Little Mac's tilts for almost guaranteed KO combos, allowing it to easily turn the tide of a match upon a successful hit. However, it is lost after holding it for 4 seconds and then being tumbled by any move (except footstooling), which enforces quick and precise use. Additionally, Little Mac must either receive 100% or deal 333% (assuming the player is never hit) in order to be granted the usage of KO Uppercut, while KO Uppercut itself has considerable ending lag regardless of whether or not it hits, making it a "high-risk, high-reward" attack.
Despite his impressive strengths, Little Mac is held back by two very easily exploitable weaknesses. The most serious and notorious of the two is his recovery. As mentioned earlier, Little Mac's aerial mobility significantly hinders him, with his horizontal survivability being one of, if not the shortest among the cast, along with his aerial mobility being unarguably one of the most unrewarding among the entire cast. His very fast falling speed makes meteor smashes, semi-spikes and even footstool jumps capable of almost instantaneously gimping him, even at 0% and especially if he cannot use his double jump. His special moves also receive drastic downgrades when used in the air, further worsening his air game. Straight Lunge loses its long distance and high power, to the point where it cannot KO even well beyond 150%, and suffers from drastically higher ending lag, to the point where one would not be able to recover even after jumping from the edge of a stage and using it. By extension, KO Uppercut loses the majority of its power, to the point that it only KOs around 150%. Jolt Haymaker loses half of its momentum and start-up intangibility, Rising Uppercut loses half of its distance, and Slip Counter's counterattack loses its intangibility.
The severe lack of aerial distance for both Jolt Haymaker and Rising Uppercut burden his already poor off-stage survivability. Additionally, they are further compounded by their small edge sweetspots and lack of invincibility frames until they conclude. These two traits result in Mac being unable to grab an edge unless he is directly beside it, and an opponent being able to launch him away before he grabs on, even if his arm pokes above the edge. Even though Straight Lunge and Slip Counter can be used as recovery options, they are very situational as such and require extremely precise timing in order to be properly used for recovering. Unsurprisingly, these traits collectively result in Little Mac having the most difficulty with recovering out of any character in the game, which in turn results in him being commonly cited as having the overall worst recovery in the game.
Furthermore, Little Mac has an infamously weak air game. All of his aerials can auto-cancel with a short hop, while each one has certain perks: neutral aerial can initiate intricate combos, forward and back aerials are semi-spikes, up aerial is a fast anti-air attack, and down aerial is the fastest meteor smash in the game. However, they are all overwhelmingly offset by a combination of high landing lag, very short ranges, and abysmal power, which results in Mac's aerial moveset having the lowest damage output in the game. These factors make Little Mac an easy target in the air, as he has no means of defending himself outside of point-blank range. This is further compounded by the fact that none of his aerials make the opponents reliably flinch until medium to high percents. Additionally, his down aerial is unable to reliably meteor smash opponents until around very high percents, while its sweetspot only lasts for 1 frame. Unsurprisingly, Little Mac has no way of reliably KOing in the air without Jolt Haymaker, Rising Uppercut or, in extreme cases, Slip Counter, all of which are very likely to result in inevitable sacrificial KOs if used off-stage.
Compounding his aerial weaknesses are his low survivability and vulnerability to combos. While his below-average gravity and fast falling speed gives him high vertical endurance for a character of his weight class, these (when combined with his previously mentioned attributes) make him extremely susceptible to combos and juggling, with one or two short combos being enough to force him to KO percentage due to his low weight and weak recovery. The super armor granted by his smash attacks are also a double-edged sword, as tanking an attack simply tacks on even more damage that can be game-ending in the future. As a result, Little Mac is very prone to momentum shifts, as his underwhelming aerial presence can allow opponents to combo him very easily, and in some extreme situations, zero-to-death him with a single attack or combo even if he has been dominating the entire match. These issues are what force Little Mac to almost always stay grounded, as he cannot afford to be trapped within aerial combos and dragged offstage just for initiating an aerial approach.
Lastly, even though Little Mac's ground game is immensely effective, it has its flaws. The most apparent one is his grab game, which has very minimal utility. While his throws deal respectable damage and his pummel is fairly fast, Little Mac is tied with Cloud for the third shortest grab range among the cast. The ending lag and knockback values of his throws also prevent them from starting combos of any sort under normal circumstances: down throw is able to combo into aerial Jolt Haymaker for damage, or Rising Uppercut to potentially score a KO, but can be avoided with DI, while forward throw is able to combo into a dash attack or Jolt Haymaker, but only if the opponent misses a tech. As such, Little Mac's throws are generally only used to deal damage, as he cannot add any grab options that can truly give him the upper hand when an opponent is shielding.
While Little Mac's attacks have decent ranges and fast speeds, spacing is still essential for him to avoid getting punished. Neutral attack, up tilt and dash attack are particularly prone to this, as they lack hitlag and have just enough ending lag to be punished out of shield. With the exception of his downward angled forward smash and sweetspotted up smash, none of his attacks deal extra shield damage, making it deceptively difficult to get free punishes on opponents who overuse their shield. Characters with counterattacks can also be detrimental to Little Mac, as a countered smash attack is often enough to be fatal due to the high power of his smash attacks (although the super armor granted by both up and down smashes last long enough to endure quicker counterattacks, such as forward-held Vision). Lastly, Little Mac is the character most adversely affected by stale-move negation and projectiles; as only half of his moveset has a respectable level of utility, Mac may find his finishers KOing later than usual compared to other powerhouses, while his dependence on being grounded leaves him comparatively vulnerable to ground-hugging projectiles without the use of his fast dodges and Jolt Haymaker.
Little Mac has a number of useful custom moves at his disposal. True to its name, Flaming Straight Lunge is a flaming variation that also hits multiple times and is a semi-spike that charges almost twice as quickly, but is considerably weaker and covers less distance. Stunning Straight Lunge is an electrical variation that travels farther and faster than Straight Lunge, but at the cost of damage and launch resistance. Grounding Blow moves higher and can bury grounded opponents or meteor smash aerial opponents, but its lower power and downward momentum make it much less effective for recovering. Compact Counter is weaker and faster, opening up opportunities for follow-ups, but lacks the default version's immense power and one-hit KO potential. Dash Counter is a double-edged sword, since its added momentum can either greatly help or greatly hinder his recovery. It should be noted, however, that none of these moves are unarguably better than Little Mac's default special moves. As such, the best option depends entirely on the player's preference.
Ultimately, optimal Little Mac play requires the user to think just like a boxer: keeping constant control of the middle of the stage and effectively reacting to the slightest openings, minimizing any damage taken with his extreme ground mobility, and staying out of the air as much as possible. Little Mac has just as many strengths as he does weaknesses, though due to them being polarizing, his potential can be deceptively difficult to use to the fullest despite his straightforward fighting style, as even a single mistake is often enough to completely shut down his momentum. These aspects have resulted in Little Mac attaining average tournament representation, although he has achieved varying levels of success: Cagt and Destany consistently place very well at regional tournaments, with the latter having also won several regional tournaments, while Sol, Vash and Alphicans have managed to achieve a few high placings at national tournaments.
Update history
Little Mac has received a mix of buffs and nerfs via game updates, both directly and indirectly, but is overall considered to be buffed. His recovery was noticeably nerfed in update 1.0.4, though he has received minor buffs since update 1.0.6, such as giving some his specials longer lasting hitboxes, and also receiving knockback increases on Jolt Haymaker, making it a reliable KO option, even when stale. However, the changes to shield mechanics brought about in updates 1.1.0 and 1.1.1 have also considerably affected Little Mac for the better, as they improve his ability to pressure his opponents on shield, or even break shields more reliably.
Little Mac was further buffed in update 1.1.4, in which the damage outputs of his smash attacks were increased. While their knockback was compensated, their increased damage outputs make them even more devastating on hit than they already were, as well as safer on shield. In particular, his downward angled forward smash now possesses enough shieldstun to combo into his down or forward tilts, which in turn can break full shields. In addition, his up tilt's start-up was decreased by 1 frame while its duration was increased by 1 frame, which eliminated the blind spot it had near the front of Mac's torso.
Overall, Little Mac's ground game has been improved, making his most dominant trait even more imposing. However, the worsening of his already terrible recovery has resulted in it becoming even more exploitable.
 The period Little Mac can be at his maximum fall speed before using hard landing lag has been shortened: 4 → 3 frames.
- End of roll intangibility: frame 17 → 15.
- All hits of neutral attack except the first deal less damage: 3% → 2% (second), 8% → 7% (third), 1% → 0.7% (infinite).
 Due to their lower damage, neutral attack's second hit and infinite connect better into the following hits.
 The first hitbox of forward tilt's each hit has a lower X-offset: -5 → -3.8
- Neutral aerial's SDI multiplier increased: 1x → 2x.
- Aerial Jolt Haymaker's distance decreased by 10% and its speed decreased.
- Aerial KO Uppercut's duration decreased: frames 9-13 → 9-12.
- Jolt Haymaker and Grounding Blow's knockback increased: 25 (base)/95 (scaling) → 33/98, improving their KO potentials.
- Neutral infinite finisher's start-up lag decreased: frame 6 → 5.
- Straight Lunge improved. Its fully charged start-up lag decreased: frame 7 → 6, its early hit's duration increased: frame 123 → 123-125 and its late hits' durations increased: frames 42-45 (uncharged)/frames 133-153 (fully charged) → 42-49/133-157.
- Jolt Haymaker's duration increased: frames 8-13 → 8-15.
- Uncharged Stunning Straight Lunge deals 1% more damage: 10% → 11%.
- Fully charged Stunning Straight Lunge's knockback scaling increased: 60 → 70, improving its KO potential.
- Up tilt has less startup (frame 5 → 4) and lasts one more frame (6 frames → 7).
- Up tilt angle: 85° → 88°
- Forward smash deals 1% more damage: 19%/17% (up and side), 22% (down) → 20%/18%, 24% with compensated knockback (85/22 → 81/21).
- Up smash deals 1% more damage: 20%/15% → 21%/16% with compensated knockback (80/100 → 76/96)
- Down smash deals 1% more damage: 12% → 13% with compensated knockback (100 → 96).
Moveset
- Little Mac can wall jump.
| Name | Damage | Description | ||
|---|---|---|---|---|
| Neutral attack | 2% | A jab, followed by a hook, followed by an uppercut. If button mashed, Little Mac performs an extremely fast flurry of punches followed by an uppercut that deals high knockback, but can only be initiated if first two hits connect with an opponent. Due to coming out on frame 1, it is tied with Zero Suit Samus' neutral attack as both the fastest neutral attack in the game, and the fastest attack of any kind, making it extremely useful as an out of shield option or to cover whiffed attacks. In addition to its speed, its anti-rebounding priority enables it to out-prioritize attacks within priority range and go on uninterrupted, such as negating Fox Illusion's hitbox. Due to its outstanding speed and quick interruptibility, it can be jab canceled for almost guaranteed KOs at high percents, including Rising Uppercut and KO Uppercut, or pressure opponents to keep their shield up, which can lead to shield break combos. | ||
| 2% | ||||
| 7% | ||||
| 1% (loop), 3% (last) | ||||
| Forward tilt | 4% (hit 1), 8% (hit 2) | A one-two combo. It has the best range out of Little Mac's tilt attacks, has anti-rebounding priority, and is the fastest forward tilt in the game, due to it coming out on frame 4. Its second hit's knockback is also comparable to a smash attack, and when coupled with its fast speed, it is a reliable KOing option at high percents. It is based on the two alternating jabs Mac used as an Assist Trophy in Brawl. | ||
| Up tilt | 9% | An overhead arcing backfist. It covers the entirety of Little Mac's body, which allows him to use it as a quick option to cover his attacks. It can also combo into itself and Rising Uppercut at low percents if the opponent is close to him, and is useful for punishing rolls. It can also function as a somewhat safe approach option when it is pivoted while dashing, thanks to its anti-rebounding priority. It resembles Don Flamenco's Twirling Backhand used during Title Defense Mode in the Wii version of Punch-Out!!, albeit performed vertically rather than horizontally. | ||
| Down tilt | 8% | A crouching short straight-punch. Due to coming out on frame 3, it is tied with Lucas, Ness, Meta Knight and R.O.B.'s down tilts as the fastest down tilt in the game. It slightly launches opponents up into the air, and is often considered one of the best down tilts in the game, as its speed and excellent combo potential make it able to combo into almost all his attacks, most notably itself, forward smash, forward aerial, Jolt Haymaker and KO Uppercut at low to medium percents, and Jolt Haymaker or Rising Uppercut at high percents. Like forward and up tilts, it has anti-rebounding priority. | ||
| Dash attack | 10% | A lunging overhand. If counting its windbox (which comes out on frame 1), it is the fastest dash attack in the game. Its sheer speed, wide range and low ending lag allows it to combo into itself against heavier characters and fast-fallers, and it can be used as a quick punishment option when an opponent is stuck in ending lag. However, it is notoriously risky as an approach option due to its ending lag making it extremely punishable on shield, especially when near an edge due to Little Mac's inability to recover well if he is grabbed and thrown off-stage even at 0%. | ||
| Forward smash | ↗ | 20% (hand), 18% (arm) | Steps forward and throws one of three punch variations depending on the angle of the attack. Extremely fast start-up for its strength and respectable ending lag. However, this move can miss if the opponent is touching Little Mac due to him stepping forward to perform it.
Up: An uppercut. Launches opponents vertically and has the largest hitbox out of all three punch variations, which makes it the easiest to connect. Grants super armor on frames 8-15. It resembles Little Mac's Star Punch and One-Star Punch in the NES and Wii versions of Punch-Out!!, respectively. Forward: A cross. Deals high knockback, with its sweetspot dealing higher knockback and slightly higher damage than his arm, KOing around 90% center stage against middleweights. When spaced correctly, it is safe on shield against slower characters. Useful overall, but loses power quickly if used repeatedly. Grants super armor on frames 8-15. It resembles the cross Little Mac hits King Hippo with during the cutscene in which he defeats Hippo in the Wii version of Punch-Out!! Down: A body hook. Deals more damage and shield damage, but less knockback. It is safer on shield due to its high shieldstun and breaks shields more reliably than any of Little Mac's other attacks, to the point that it can almost break a full shield when fully charged. As of update 1.1.4, its deals enough damage and shieldstun to break full shields if a forward tilt is used immediately after it. Grants super armor on frames 9-15. | |
| → | 20% (hand), 18% (arm) | |||
| ↘ | 24% | |||
| Up smash | 21% (clean), 16% (late) | An uppercut. Its first frame has a sweetspot that deals flame damage and significant shield damage. Great for aerial protection or chasing down an opponent, as grounded opponents are likely to be hit by the sweetspot. It has noticeable ending lag, having the highest ending lag of all his grounded moves (35 frames), making it punishable if shielded. Despite its appearance, it can only hit in front of Mac, although its sourspot can reach an opponent standing on Battlefield's low platforms. It also slightly moves Little Mac backward when used. Grants super armor on frames 8-11. | ||
| Down smash | 13% | Spins 180° to perform a quick, downward angled hook that hits quickly in both directions. While it deals noticeably less damage compared to his other smash attacks, it is his fastest one, due to coming out on frame 10 and having low ending lag. It also hits on both sides and has long range, making it difficult to punish and even capable of hitting opponents attempting to grab the edge. If an opponent is caught by the hitbox of Mac's upper arm, it is possible to drag them into the second hit at low percents, although this is difficult. Due to being a semi-spike, it is also one of Little Mac's only reliable edge-guarding moves, as it can hit off-stage opponents who exhaust their edge invincibility. Grants super armor on frames 7-10 and 15-17. | ||
| Neutral aerial | 2% | A downward angled jab. It is the fastest neutral aerial in the game due to coming out on frame 2, but it has limited use due to its short range and abysmal damage output. However, its incredible speed allows it be used as a combo breaker of sorts when in the air. It is also useful for dragging aerial opponents back onto the ground with its quick speed or starting intricate footstool jump combos. It can also be used after an edge jump to stop an opponent standing at the edge from reacting while Little Mac returns onto the stage. | ||
| Forward aerial | 5% (hand), 4% (arm) | A hook. It has slight start-up and a low damage output. Can combo after a down tilt, although this can be difficult to perform. Its speed and semi-spike angle can make it useful for edge-guarding, especially against characters with poor recoveries, but it is limited at doing so due to its point-blank range. | ||
| Back aerial | 6% (hand), 4% (arm) | A backfist. Slightly stronger than forward aerial and less start-up than it, but has more ending and landing lag compared to it. Like forward aerial, the move's quick speed and semi-spike angle can be used either to edge-guard or as a way to fend off opponents, although its minuscule hitbox makes this difficult to do so reliably. | ||
| Up aerial | 5% (hand), 4% (arm) | An upward arcing hook. Due to coming out on frame 5, it is tied for the second fastest up aerial in the game, making it a somewhat useful aerial combo move. However, its considerable ending lag and high landing lag makes it punishable if missed. If used while near the ground, it can combo into up tilt and Rising Uppercut at high percents. It resembles the jump Little Mac performs during his victory animation in the Wii version of Punch-Out!! | ||
| Down aerial | 5% (hand), 4% (arm) | A downward palm thrust. It is the second fastest down aerial in the game due to coming out on frame 7, and its middle hitbox can meteor smash, which also makes it the fastest meteor smash in the game. However, it is also the weakest meteor smash in the game, and thus extremely ineffective against anyone but fast-fallers unless Little Mac footstool jumps on the opponent immediately after. Experienced players can use it to jab reset opponents by short hopping and then hitting a floored opponent before finishing them with any of Little Mac's attacks. | ||
| Grab | — | Clinches the opponent. One of the most ineffective grabs in the game due to its moderate ending lag and extremely short range, as it is tied with Cloud's for having the third shortest range. However, Little Mac's pivot grab has longer range, which is useful and easy to perform thanks to Mac's outstanding ground speed. Another option to alleviate his grab's poor range is to perform a roll cancel grab, which is a very useful tool to catch the opponent during unexpected combos. | ||
| Pummel | 2.1% | A short straight-punch. A fairly fast pummel. | ||
| Forward throw | 4% (hit 1), 4% (throw) | Rears his arm back and throws an overhand. Has low knockback scaling, which can allow it to combo into Jolt Haymaker or dash attack at low percents if the opponent misses a tech. It can also reliably set up edge-guards. | ||
| Back throw | 4% (hit 1), 5% (throw) | Spins the opponent around and throws an uppercut. Has the highest knockback scaling out of all of his throws, which allows it to KO near the edge. However, it only begins KOing at very high percents due to its throw hitbox's low damage output. | ||
| Up throw | 4% (hit 1), 3% (throw) | An uppercut. Has very minimal use compared to Little Mac's other throws, due to being his least damaging throw, being largely impractical for combos due to its base knockback and ending lag, and being virtually unable to KO due to its throw hitbox's very low damage output. It can lead into an aerial attack if the player reads the opponent's reaction correctly, although this is largely unrewarding due to Mac's abysmal air game. | ||
| Down throw | 4% (hit 1), 5% (throw) | A double axe handle. A decent combo starter, as it can be followed up with a short-hopped Jolt Haymaker at 0%, or Rising Uppercut up to 200%, the latter of which is a KO combo. It can also combo into a forward aerial at medium percents, which can extend to a down tilt for additional combos or a down aerial lock if an opponent misses the tech. However, these combos are effective only if the opponent does not DI away. It resembles King Hippo's Hippo Squeeze 'n Squash used during Title Defense Mode in the Wii version of Punch-Out!! | ||
| Floor attack (front) | 7% | Gets up while throwing a punch behind himself, then in front of himself. Very fast for a get-up attack. | ||
| Floor attack (back) | 7% | Gets up while throwing a punch in front of himself, then behind himself. | ||
| Floor attack (trip) | 5% | Gets up while throwing a punch in front of himself, then behind himself. | ||
| Edge attack | 7% | Throws a lunging punch while climbing up. | ||
| Neutral special | Default | Straight Lunge | 14%/12%/9% (uncharged grounded), 25%/20% (fully charged grounded), 10%/7% (uncharged aerial), 15% (fully charged aerial), 35% (grounded KO Uppercut), 13% (aerial KO Uppercut) | Rears his arm back and throws a cross. It is chargeable, grants minimal heavy armor while charging, and moves Little Mac forward. Although it covers more distance the longer it is charged, its damage output does not increase unless it is fully charged. When fully charged, it is one of the strongest moves in the game, making it optimal to use after a shield break. However, the fully charged version requires crucial positioning, due to having a blind spot at its beginning and high ending lag. If the Power Meter is fully charged, it becomes the KO Uppercut, an extremely fast and powerful uppercut. Despite its name, is not a true one-hit KO, but instead KOs at roughly 30% while also granting super armor on frames 8-9. However, KO Uppercut possesses a considerable amount of ending lag, making it punishable regardless if it hits or not. |
| Custom 1 | Flaming Straight Lunge | 1.5%/3% (uncharged grounded loop/last), 1.8%/6% (fully charged grounded loop/last), 1.2%/3% (uncharged aerial loop/last), 1.4%/5% (fully charged aerial loop/last), 35% (grounded KO Uppercut), 13% (aerial KO Uppercut) | A flaming version that charges faster and hits multiple times, but does not travel as far. It can be used as for horizontal recovery if timed properly. | |
| Custom 2 | Stunning Straight Lunge | 11%/7% (uncharged grounded), 20%/18% (fully charged grounded), 8%/5% (uncharged aerial), 12% (fully charged aerial), 35% (grounded KO Uppercut), 13% (aerial KO Uppercut) | Travels much farther and faster, and paralyzes targets when fully charged before its knockback activates, but grants no super armor and deals slightly less damage. It propels Little Mac forward with horizontal momentum if partially charged, giving him a relatively useful recovery option that does not render him helpless. | |
| Side special | Default | Jolt Haymaker | 14% | An overhand version of the Superman punch. It can be used almost instantly by pressing the special button immediately after first pressing it. It propels Little Mac quite a distance, and the grounded version grants intangibility during frames 5-8/5-14 (if used early/late). It is advised not to use this attack around the edge of a stage, since it renders him helpless. However, it can be one of Mac's more useful recovery options off-stage, since it will quickly snap the edge. It is noticeably worse when used in the air, as it grants less distance, especially if the punch is thrown early, and loses its intangibility. |
| Custom 1 | Grounding Blow | 9% | Leaps much higher and buries opponents if performed on the ground. While in midair, it will result in a meteor smash if it hits an opponent. However, it is even worse for recovery, as it grants less horizontal movement and propels Little Mac downward while off-stage. | |
| Custom 2 | Guard Breaker | 18% | Grants super armor and is unblockable, though it travels slower and cannot be made to attack early. It also does not grant Little Mac any distance if used immediately out of hitstun. | |
| Up special | Default | Rising Uppercut | 1% (loop), 3% (last) | A right-handed, jumping corkscrew uppercut followed immediately by a left-handed uppercut. The first uppercut hits multiple times while the second uppercut hits once and deals respectable knockback. Goes higher with more maneuverability if used on the ground, while it only grants half the distance and maneuverability if used in the air. Grants 3 frames of intangibility on start-up. Deceptively powerful, to the point that it can reliably KO at high percents, and is one of Little Mac's only reliable aerial finishers along with Jolt Haymaker. Conversely, it is extremely ineffective as a recovery, as it grants some of the lowest distance and horizontal maneuverability of any recovery move, and it only snaps to the edge if it starts or ends right next to one. It resembles Little Mac's Three-Star Punch in the Wii version of Punch-Out!! |
| Custom 1 | Tornado Uppercut | 3%/4% | Travels farther with better movement and has a push effect due to emitting a gust of wind, but deals set knockback and overall less damage. | |
| Custom 2 | Rising Smash | 16% (hit 1), 4% (hit 2) | An electrical version that deals noticeably more damage and knockback, but only hits twice with high start-up and ending lag, as well as covering considerably less distance unless used immediately out of a double jump. | |
| Down special | Default | Slip Counter | 1.3x (min 10%) | Assumes a full crouch stance and, if hit, immediately counterattacks by slipping inside to throw an uppercut. Due to coming out on frame 5, it is tied with Double Team and Witch Time as the fastest counterattack in the entire game. In the air, it can be used for horizontal recovery due to Mac being propelled forward during the slip, although this can be risky. It resembles Glass Joe's Delayed Right Hook used during Title Defense Mode in the Wii version of Punch-Out!! |
| Custom 1 | Compact Counter | 0.8x (min 4%) | Has a lower damage multiplier and deals less knockback, but is faster overall, which allows Little Mac to initiate follow-ups and improves its speed as a recovery option. | |
| Custom 2 | Dash Counter | 1.1x (min 7%) | Has a slightly lower damage multiplier and its counter window does not last as long, but Little Mac dashes forward upon counterattacking. The dash results in Mac being unable to attack opponents directly in front of him due to the dash generating a windbox, but it is more useful for both countering projectiles in order to close the gap between Mac and as a horizontal recovery option. | |
| Final Smash | Giga Mac | — | Transforms into Giga Mac, his powered up transformation from the Wii version of Punch-Out!! Giga Mac's attacks are considerably stronger, to the point that his non-angled and upward angled forward smash, sweetspotted up smash, and clean Straight Lunge are capable of one-hit KOing opponents when they are fully charged. Even his back throw and aerial attacks becomes viable KOing options: the former is stronger than Ness' back throw, while the latter are capable of KOing around 90%-100% while near the edge. | |
Power Meter
As shown in his trailer, Little Mac has a unique mechanic called the Power Meter. When fully charged, it replaces his neutral special with the KO Uppercut, an extremely powerful uppercut. Although it was claimed by Masahiro Sakurai to be a one-hit KO attack, this is not true. Nevertheless, it is strong enough to KO opponents at extremely low percents, depending on their weight. In keeping with Little Mac's abysmal air game, an aerial KO Uppercut deals significantly lower damage and knockback, to the point that it cannot KO an aerial opponent unless they are at least around 150%.
The Power Meter charges when Little Mac deals and/or receives damage. However, when he is attacked, the Power Meter will fill by double to quadruple the amount compared to if he hits an opponent. The Power Meter will also be maxed out if Mac receives exactly 100%. The uppercut can be canceled by another character's attack, blocked by a perfect shield or dodged, meaning that you have to catch opponents off-guard to guarantee it hits.
On-screen appearance
- Walks onto the stage while throwing a series of punches before tossing his hooded sweatsuit off. If either of his sweatsuit alternate costumes are being used, he will still perform the tossing animation while keeping his sweatsuit on.

|
|---|
Taunts
- Up taunt: Turns his back to the screen, bends down, then raises his fist triumphantly. Doc Louis may say "Hit 'em, baby!" (叩け!マック!, Thrash! Mac!)
- Side taunt: Pulls the string of his right boxing glove tight with his teeth, then resumes his boxing stance while scoffing. Doc Louis may say "Let 'em have it, Mac!" (ぶちかませ!マック!, Hit them hard! Mac!)
- Down taunt: Performs a series of punches while facing the screen. Doc Louis may say "Show 'em what you've got, Mac baby!" (お前のパンチを見せてやれ!, Let them see your punch!)
| Up taunt | Side taunt | Down taunt |
|---|---|---|

|

|

|
Idle poses
- Shuffles his feet.
- Shifts his head back and forth in front of his fists.
 |

|
|---|
Crowd cheer
| English | Japanese | |
|---|---|---|
| Cheer | ||
| Description | Little Mac! Get 'em back! | Go! Go! Mac! |
| Pitch | Group chant | Male |
Victory poses

- Doc Louis holds up Little Mac's arm like a referee would after a boxing match, and cheers him on.
- Shadowboxes with Doc Louis, then turns to the camera while holding his fist up triumphantly while Louis cheers him on.
- Runs and turns his back towards the camera, briefly shuffles his feet, then spins before throwing a triumphant uppercut while Doc Louis cheers him on.
 |
 |

|
|---|
Unless the match is a Team Battle, all of Little Mac's victory poses involve Doc Louis. If Little Mac's team is victorious but he does not have the most points, Doc Louis will not appear and Mac will perform his second victory pose.
In all of Little Mac's victory poses, Doc Louis will say one of the following at random:
- "(in tandem with the announcer) And the winner is... Little Mac! Hahaha!"
- "Y'know, that belt looks good on you, son."
- "Ya got what it takes, Mac!"
- "Nice work, Mac. You got it all figured out."
- "Way to go, Mac! You're the champ, baby!"
- "Awesome win, Mac. Way to go!"
- "You win, Mac!"
- "Alright! I think I hear a chocolate bar callin'."
- "Was that a little too easy for ya, son?"
- "World Circuit's all yours, Mac!"
- "Ahh, winnin' feels good, don't it?"
In all of Wireframe Mac's victory poses, Doc Louis will say one of the following at random:
- "Nice moves, Mac. I could barely keep my eyes on ya, son."
- "Ain't you flashy? You making my eyes water, son."
- "You're lookin' mighty good, son. Just like old times, huh?"
In competitive play
Official Custom Moveset Project
| Character | Custom sets available | ||||
|---|---|---|---|---|---|
| 2111 | 2113 | 2112 | 2211 | 2213 | |
| 2212 | 2311 | 2313 | 2312 | 2121 | |
Notable players
Active
 //
// Achillis
 Alphicans
 Cagt
Cagt Chota
Chota Destany
- Duffo
- JCC
- Lazyboredom - Notably defeated CaptainZack at MomoCon 2017.
- Naoto
- Pu55yk1ng
 Rekzius
- Senpai
- Sol
- Vash
- ZekkenB
- Literal Bacon - Ranked 1st on the Google+ Smash Rankings.
Inactive
Tier placement and history
Since SSB4's release, Little Mac has been a very contentious character among casual and hardcore players alike. He was very controversial among less experienced players who struggled against him (most notably on For Glory), due to his excellent grounded game, abundance of KOing options and outstanding frame data. However, he has never been considered a serious threat in competitive play due to his abysmal recovery and nearly useless air game, making his endurance and aerial escape options significantly poor in a highly-skilled environment where flaws were heavily capitalized upon. Players were quick to note that Mac's vulnerability to juggling and gimping would allow a competent opponent to swiftly KO him more often than not, and with his inability to move safely between platforms, he was derided as only being able to fight effectively on Final Destination.
With a lack of high-level results during SSB4's early days and the gradually shifting perceptions of the community, Little Mac's popularity diminished immensely, due to being frequently perceived as a gimmicky character in competitive play, especially after he was nerfed in update 1.0.4. This was reflected in him being tied with Duck Hunt for the 43rd/44th place on the first tier list.
However, the efforts of dedicated Little Mac players like Sol have shown that Little Mac can perform well when played intelligently, even on stages with platforms, and proved that Mac's comeback potential was significant enough to be a considerable mindgame despite his aerial weaknesses. Furthermore, the buffs Little Mac received from game updates made his grounded moves even more rewarding and granted him more reliable combo potential from his grounded game. Improvements in Little Mac's metagame also resulted in newfound techniques for him, which further reinforced his fearsome comeback potential. While he is still considered too polarized to be truly viable in singles play, Little Mac is considered to fare much better in doubles play, thanks to a teammate covering his weaknesses and assisting him in setting up his powerful attacks.
These traits, combined with the expansion to his metagame and better, albeit still rare results, resulted in him being ranked 39th on the second tier list. While he has since dropped back to 43rd on the third and current tier list, Little Mac's tier placement remains very contentious even within the current metagame, due to his results being relatively sparse and volatile.
Reveal trailer
<youtube>gmtrmAvL5aw</youtube>
Trophies
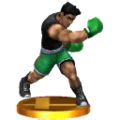
- Little Mac
 This little boxer from the Punch-Out!! series makes up in heart what he lacks in height. He wasn't afraid to take on the boxing champs, and he's not afraid of the Nintendo stars. In Smash Bros., he packs a serious punch. When his KO Meter fills up, wade in and trigger a devastating uppercut.
 The little guy from Punch-Out!! has come a long way since his humble beginnings fighting the almost literal boxing giants. Above his damage display, you'll notice he has a little meter that fills up as he fights. When it's full, you'll see a flashing "KO" there. That means you can unleash a devastating uppercut!
 : Punch-Out!! (10/1987)
 : Punch-Out!! (05/2009)
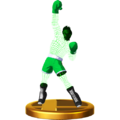
- Little Mac (Alt.)
- No matter his opponent, Little Mac always puts his best fist forward. He enters a charge state before unleashing his Straight Lunge special and can unleash it while charging by pressing the button again. He won't flinch while charging. At max charge, the launching power of this move is scary!
- Little Mac always puts his best fist forward, especially when you use Straight Lunge! You start by charging, then unleash the punch whenever you press the button again. Charge it to the max and its launching power is formidable! Also, attacks won't make you flinch while you're charging or once you've fully charged the move.
- : Punch-Out!! (10/1987)
- : Punch-Out!! (05/2009)
- Giga Mac
- This Final Smash turns Little Mac into a hulking monster of a man. In Punch-Out!! for Wii, Little Mac could take this form by building up the gauge with some well-timed blows. In this game, it seriously powers up his attacks and makes him even faster. He'll completely dominate on the ground, but air battles are outside his weight class.
Classic (3DS)
- LittleMacAllStarTrophy3DS.png
Alt. (3DS)

Classic (Wii U)
Alt. (Wii U)


In Event Matches
Solo Events
- Below the Belt: As Mario, the player must protect a damaged Little Mac from a giant Little Mac. Little Mac will be at 60% on Easy, 80% on Normal and 100% on Hard.
- New Challengers 1: Little Mac is one of the seven opponents fought in this event, alongside Rosalina & Luma, Wii Fit Trainer, Villager, Duck Hunt, Bowser Jr., and Lucina.
- No Mere Sparring Match: A damaged Little Mac must defeat three Wireframe Macs. The Wireframe Macs have three stocks on Easy, four on Normal and five on Hard.
Co-op Events
- Getting Healthy: Little Mac and Wii Fit Trainer must defeat Kirby and Pac-Man.
- The Ultimate Battle: Two players select a character and must defeat the entire roster.
Alternate costumes
Little Mac has sixteen alternate costumes, half of which sport a wireframe design based on the original arcade version of Punch-Out!![2]
.png)
| |||||||
_Palette_(SSB4).png)
| |||||||
 
|
 
|
 
|
 
|
 
|
 
|
 
|
 
|
Gallery
Punch-Out!!-inspired artwork.

Little Mac's splash art.
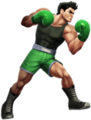
Artwork of Little Mac from the boxart of Super Smash Bros. for Nintendo 3DS.
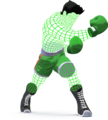
Little Mac's "Wireframe Mac" alternate costume.

Little Mac's amiibo.
The Pic of the Day revealing Little Mac.
Two of Little Mac's alternate costumes. One is his signature hooded sweatsuit, while the other is his attire in Contender Mode when fighting in the World Circuit in the Wii version of Punch-Out!!
A second picture posted on the initial Miiverse post, displaying what happens when his Power Meter is fully charged.
Using Straight Lunge in Super Smash Bros. for Nintendo 3DS.
The first hit of his neutral attack on Link.

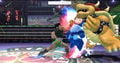
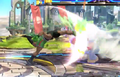
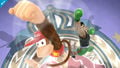
Using a fully charged Straight Lunge.
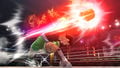
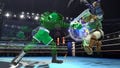
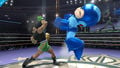
Using KO Uppercut on Mega Man and Bowser.
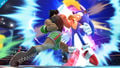
Using KO Uppercut on Sonic.

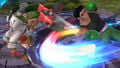
Using Rising Uppercut.

Using Rising Uppercut on Link.

However, Rising Uppercut does not provide much recovery.
Using Slip Counter against Mario.

Little Mac on Smash Ball standby.
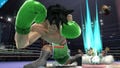
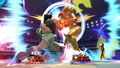
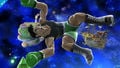
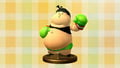
Using his Final Smash, Giga Mac.

The second hit of his neutral attack on Mario.
Using his down smash on Fox.
Using his dash attack.
Little Mac tumbling.

Little Mac facing the screen.
Using his dash attack against Villager's neutral attack.
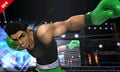
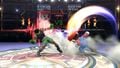
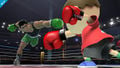
"Little Mac can deliver some solid punches while fighting on the ground."
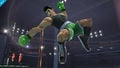
"...However, he's not the strongest fighter while airborne."

Little Mac taunting alongside Samus.
Using Rising Uppercut alongside Diddy Kong's up smash.
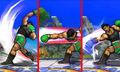
The three different variations of Little Mac's forward smash.
A trophy of Little Mac as he appeared in Captain Rainbow.
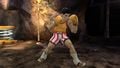
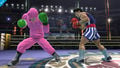
Little Mac wearing his World Video Boxing Association (WVBA) Champion alternate costume and sporting battle damage.


Trivia
- Little Mac makes a number of references to his home series:
- The pose he strikes for his reveal trailer's splash art is directly based on a piece of promotional artwork for the Wii version of Punch-Out!!. By extension, his official artwork for SSB4 pose is a modified version of this pose, with a better center of gravity and his stance being shifted to the right, along with his arms being positioned differently.
- His alternate costumes include his signature hooded sweatsuit used during his training segments with Doc Louis, his World Video Boxing Association (WVBA) Champion attire from the Wii version of Punch-Out!!, a design based on the blond protagonist of Super Punch-Out!!, and a wireframe design based on the first-person perspective from the arcade version of Punch-Out!!
- As a result, Little Mac also has the most alternate costumes in the series, with a total of 16. Oddly, his wireframe alternate costumes do not appear in hordes in Special Orders in Super Smash Bros. for Wii U or Classic Mode in Super Smash Bros. for Nintendo 3DS.
- He is the only character to display visual battle damage, although this feature is only shown in Super Smash Bros. for Wii U. Upon reaching or passing 100%, or upon being screen KO'd, bandages and bruises appear on his face. This is a reference to the Wii version of Punch-Out!!, where Little Mac will gradually begin looking bruised and battered if he gets hit too many times.
- His official poster showing him fighting Donkey Kong references DK's appearance as a secret opponent during Mac's Last Stand in the Wii version of Punch-Out!!
- He wears the World Video Boxing Association (WVBA) championship belt for all three of his victory poses.
- His KO Uppercut is a reference to the Star Punch, his signature move in the Punch-Out!! series. By extension, his Power Meter originated from the arcade version of Punch-Out!!
- His Final Smash, Giga Mac, is a transformation that can be used in the two-player mode of the Wii version of Punch-Out!!
- According to Masahiro Sakurai, Little Mac has the lowest online win ratio of all characters as of November 2014.[3]
- Prior to update 1.0.5 in Super Smash Bros. for Nintendo 3DS and update 1.0.6 in Super Smash Bros. for Wii U, Little Mac could not properly hold Hammers, as they would be positioned at his sides instead of between his hands.
- Interestingly, Little Mac shares a few animations with Captain Falcon. This includes some of his poses when knocked back with a weak attack, swing animations for battering items such as a Beam Sword or a Home Run Bat, and animations while buried or stunned. This has led many to believe that Captain Falcon's model was used as a base for creating Little Mac's model.
- In regard to Little Mac's model, his mouth will jarringly close when his shadowboxing and shuffling victory poses conclude.
- Little Mac and Cloud are the only characters who have special moves that affect the in-game camera, with both KO Uppercut and all of Cloud's Limit Break moves (barring Limit Break Blade Beam) zooming in and slowing down time upon hitting their targets. Coincidentally, both moves involve dealing or receiving damage in order to be available for use.
- Despite being symmetrical in some instances, such as his during taunts and on-screen appearance, Little Mac is not mirrored when he faces left and right. This is because he uses an orthodox stance in his home series.
- Due to mostly inexperienced For Glory players infamously using Jolt Haymaker too close to a stage's edge and thus inadvertently self-destructing, the move itself became something of a meme among the community shortly after SSB4's release, with the phrases "Jolt Haymaker to Victory", "Side B Off the Stage", or "For Glory Little Mac" being used to commonly describe inexperienced or mistake-prone Little Mac players.
References
- ^ Back to the 80s: Punch-Out!! arcade game introduced in 1984
- ^ Masahiro Sakurai (2014-05-12). Director's Room. Miiverse. Retrieved on 2016-02-05. “Pic of the day. Here's wire frame Little Mac--re-envisioned from the original Punch-Out!! game. The man that actually drew the pixel art wire frame in the original was none other than Shigeru Miyamoto. He said he drew the pixels for the wire frame on graph paper.”
- ^ Little Mac is Smash Bros.' Biggest Loser
| Fighters in Super Smash Bros. 4 | |
|---|---|
| Veterans | Bowser · Captain Falcon · Charizard · Diddy Kong · Donkey Kong · Dr. Mario · Falco · Fox · Ganondorf · Ike · Jigglypuff · King Dedede · Kirby · Link · Lucario · Lucas · Luigi · Mario · Marth · Meta Knight · Mewtwo · Mr. Game & Watch · Ness · Olimar · Peach · Pikachu · Pit · R.O.B. · Roy · Samus · Sheik · Sonic · Toon Link · Wario · Yoshi · Zelda · Zero Suit Samus |
| Newcomers | Bayonetta · Bowser Jr. · Cloud · Corrin · Dark Pit · Duck Hunt · Greninja · Little Mac · Lucina · Mega Man · Mii Fighter (Mii Brawler · Mii Gunner · Mii Swordfighter) · Pac-Man · Palutena · Robin · Rosalina & Luma · Ryu · Shulk · Villager · Wii Fit Trainer |
|
| |
|---|---|
| Fighter | Little Mac (SSB4 · SSBU) |
| Assist Trophy | Little Mac |
| Stage | Boxing Ring |
| Other | Doc Louis |
| Trophies and Spirits | Trophies · Spirits |
| Music | SSB4 · Ultimate |
| Masterpiece | Punch-Out!! Featuring Mr. Dream |