From SmashWiki, the Super Smash Bros. wiki
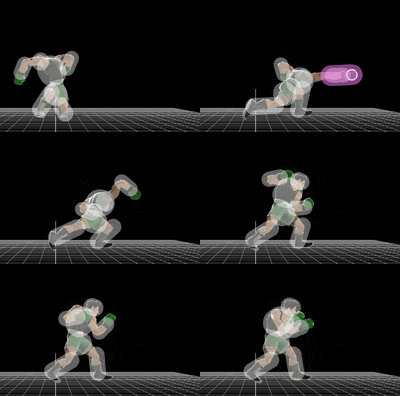
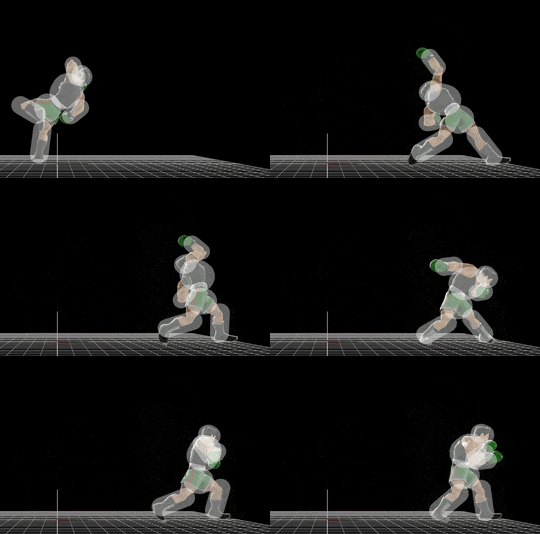
 Hitbox visualization showing Little Mac's uncharged grounded straight lunge.  Hitbox visualization showing Little Mac's fully charged grounded straight lunge. |
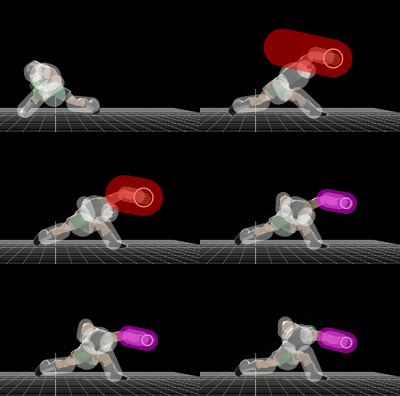
 Hitbox visualization showing Little Mac's uncharged aerial straight lunge.  Hitbox visualization showing Little Mac's fully charged aerial straight lunge. |

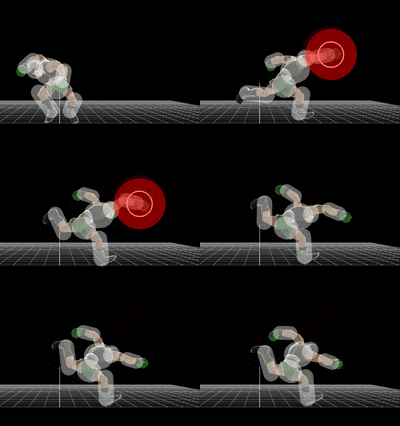
Hitbox visualization showing Little Mac's KO Punch.
Overview[edit]
Straight Lunge[edit]
Little Mac's neutral special move is called Straight Lunge. True to its name, it involves Little Mac charging a punch and unleashing it forwards. Unlike other chargeable moves, its power stays the same regardless of charge; instead, the distance granted increases. The entire move has minimal heavy armor, meaning that Little Mac cannot be hit out of it if a move deals less than 8%. The clean hit from a fully charged move is Little Mac's strongest attack, as well as one of the strongest moves in the game, KOing any character at 55% from the center of Final Destination and dealing heavy damage to shields. However, the move has very low speed in general, with the earliest hit starting at frame 40. Its fully charged variant also has 75 frames of ending lag. As such, this move is never used in competitive play unless the opponent is vulnerable (for instance, after a shield break).
KO Uppercut[edit]
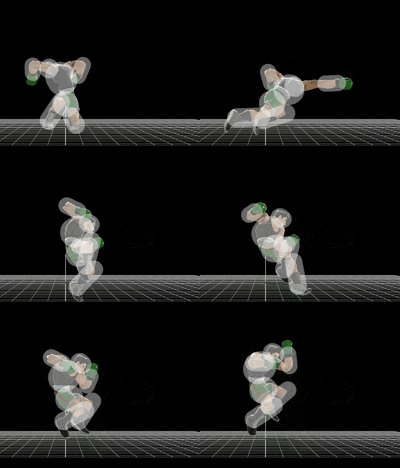
If Little Mac's Power Meter is full, the move is converted into the KO Uppercut, an unblockable uppercut with enough power to reliably KO any character at 35%. It has very quick startup as well, hitting on frame 9. It is generally considered one of the (if not the) most powerful comeback moves in the game. However, it has 86 frames of ending lag, making it extremely easy to punish if it misses. Little Mac is also unable to keep it indefinitely, as the Power Meter can be emptied by any move that causes tumbling (with the exception of footstool jumps). Its usage in competitive play revolves around mindgames, since opponents will be forced to play cautiously if they wish to not get knocked out. What makes it even more threatening is Little Mac's ability to combo into the move. If the opponent is at 25-35%, down tilt will lead into an inevitable KO Uppercut. Alternatively, Little Mac can jab cancel his neutral attack. This works at percentages as high as 110%, at the cost of its increased difficulty in doing so. Little Mac can also jab reset his opponent with a down aerial, but since the opponent has to miss a tech first, it is not seen as commonly. Finally, the move can be used immediately after a dash, if the button is pressed within a few frames of the dash ending. If mistimed, Little Mac will have to endure the dash's ending lag before he can punch.
Hitboxes[edit]
Straight Lunge[edit]

|
This article or section may require additional technical data.
You can discuss this issue on the talk page or edit this page to improve it.
|
KO Uppercut[edit]
| ID |
Part |
Rehit rate |
Damage |
SD |
Angle |
BK |
KS |
FKV |
Radius |
Bone |
Offset |
SDIx |
H× |
T% |
Clang |
Rebound |
Type |
Effect |
G |
A |
Sound |
Direct |
Hit bits |
Blockable |
Reflectable |
Absorbable |
Piercing |
Heedless |
No GFX |
Flinchless |
Stretch
|
| Windbox (frame 4)
|
| 0 |
0 |
0 |
0% |
0 |
 |
Standard |
0 |
100 |
100 |
4.0 |
0 |
0.0 |
6.0 |
4.0 |
0x |
None |
0% |
 |
 |
 |
 |
 |
 |
 None None |
 |
63 |
 |
 |
 |
 |
 |
 |
 |
—
|
| Uppercut (frame 9)
|
| 0 |
0 |
0 |
35% |
0 |
 |
Standard |
25 |
100 |
0 |
4.5 |
22 |
3.0 |
0.0 |
0.0 |
1.0x |
1.5x |
0% |
 |
 |
 |
 |
 |
 |
 Kick Kick |
 |
63 |
 |
 |
 |
 |
 |
 |
 |
—
|
| 1 |
0 |
0 |
35% |
0 |
 |
Standard |
25 |
100 |
0 |
4.5 |
0 |
0.0 |
9.0 |
5.0 |
1.0x |
1.5x |
0% |
 |
 |
 |
 |
 |
 |
 Kick Kick |
 |
63 |
 |
 |
 |
 |
 |
 |
 |
—
|
| ID |
Part |
Damage |
SD |
Angle |
BK |
KS |
FKV |
Radius |
Bone |
Offset |
SDIx |
H× |
T% |
Clang |
Rebound |
Type |
Effect |
G |
A |
Sound |
Direct
|
| 0 |
0 |
13% |
0 |
 |
40 |
80 |
0 |
5.0 |
22 |
3.0 |
0.0 |
0.0 |
1.0x |
1.5x |
0% |
 |
 |
 |
 |
 |
 |
 Kick Kick |

|
| 1 |
0 |
13% |
0 |
 |
40 |
80 |
0 |
3.0 |
22 |
-1.0 |
0.0 |
0.0 |
1.0x |
1.5x |
0% |
 |
 |
 |
 |
 |
 |
 Kick Kick |

|
| 2 |
0 |
13% |
0 |
 |
40 |
80 |
0 |
3.0 |
21 |
0.0 |
0.0 |
0.0 |
1.0x |
1.5x |
0% |
 |
 |
 |
 |
 |
 |
 Kick Kick |

|

|
This article or section may require additional technical data.
You can discuss this issue on the talk page or edit this page to improve it.
|
Straight Lunge[edit]
| Clean hit
|
40-41 (uncharged), 123-125 (fully charged)
|
| Middle hit
|
42-45 (uncharged), 126-132 (fully charged)
|
| Late hit
|
46-53 (uncharged), 133-157 (fully charged)
|
| Interruptible
|
? (uncharged), 232 (fully charged)
|
| Animation length
|
?
|
KO Uppercut[edit]
| Armor
|
8-9 (grounded), N/A (aerial)
|
| Hitboxes
|
9-11 (grounded), 9-12 (aerial)
|
| Interruptible
|
97 (grounded), 76 (aerial)
|
| Animation length
|
?
|
|
 |

|
Little Mac's moveset
|
|
