Link (SSB): Difference between revisions
m (oops) |
m (→Attributes) |
||
| Line 18: | Line 18: | ||
==Attributes== | ==Attributes== | ||
[[File:Linkending.jpg|thumb|250px|Link's ending picture in ''Super Smash Bros.'']] | [[File:Linkending.jpg|thumb|250px|Link's ending picture in ''Super Smash Bros.'']] | ||
In general, Link's attacks are slow, long-ranged, and powerful. This gives him good KOing ability, with his down aerial and forward smash being especially powerful finishers. However, his moves are laggy and easy to [[punish]] if they aren't landed. His [[grab]] is also ranged, being one of the three tether grabs in the game, but it is also very slow and leaves Link very vulnerable if it misses. Link himself is also rather slow, with the second lowest [[dashing]] speed in the game and very short jumps. Despite this, his [[air speed]] and [[walking]] speed are above average, but it isn't enough to make up for his very poor dashing speed and jumps. Link is also very stable in terms of gameplay | In general, Link's attacks are slow, long-ranged, and powerful. This gives him good KOing ability, with his down aerial and forward smash being especially powerful finishers. However, his moves are laggy and easy to [[punish]] if they aren't landed. His [[grab]] is also ranged, being one of the three tether grabs in the game, but it is also very slow and leaves Link very vulnerable if it misses. Link himself is also rather slow, with the second lowest [[dashing]] speed in the game and very short jumps. Despite this, his [[air speed]] and [[walking]] speed are above average, but it isn't enough to make up for his very poor dashing speed and jumps. Link is also very stable in terms of gameplay. | ||
Link is known for relying on his two [[projectile]]s (his [[Boomerang]] and [[Bomb (Link)|bomb]]) to keep his opponents away and prevent them from [[approach]]ing. This is much easier on [[Hyrule Castle]] than it is on {{SSB|Dream Land}}, meaning Link is much more effective on the former stage than the latter. His projectiles can which can lead to some very aesthetic combos. They can also be used to [[edgeguard]]. However, while Link can camp well himself, he has trouble dealing with [[projectile camping]] from some characters (especially {{SSB|Fox}}), due to his poor mobility and jumps. | Link is known for relying on his two [[projectile]]s (his [[Boomerang]] and [[Bomb (Link)|bomb]]) to keep his opponents away and prevent them from [[approach]]ing. This is much easier on [[Hyrule Castle]] than it is on {{SSB|Dream Land}}, meaning Link is much more effective on the former stage than the latter. His projectiles can which can lead to some very aesthetic combos. They can also be used to [[edgeguard]]. However, while Link can camp well himself, he has trouble dealing with [[projectile camping]] from some characters (especially {{SSB|Fox}}), due to his poor mobility and jumps. | ||
Revision as of 13:59, May 18, 2015
| Link in Super Smash Bros. | |
|---|---|
 
| |
| Universe | The Legend of Zelda |
| Other playable appearances | in Melee in Brawl in SSB4 |
| Availability | Starter |
| Tier | C (11) |
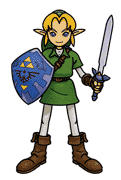
Link (リンク, Link) appears as a starter character in Super Smash Bros. He is the sole representative of The Legend of Zelda series. Having many disjointed melee attacks and two projectile weapons, Link can be a hassle to approach. However, his lack of speed and maneuverability cause problems for Link in approaching an opponent. In fact, much of Link's strategy consists of standing back, throwing a few projectiles, and waiting for an opening. Due to his slow ground movements and attacks, it is imperative that Link players be able to not only short hop but be able to input an attack immediately afterward.
Link is known in high level competitive play as a very defensive character, relying on bombs and boomerangs to prevent gimps and using back aerial, up tilt, and up aerial for combos while using down aerial, forward smash, down smash, and projectiles for edgeguarding. Link's recovery is so poor that he can never be close to a ledge. Link's poor recovery and the fact that he is very easily comboed make it difficult for him to win. Link has poor match-ups due to this and is usually considered the worst character to use on Dream Land. For this he is ranked 11th on the tier list, outranking only Luigi. On Hyrule Castle however, Link is generally considered to be 6th or 5th due to his ability to easily projectile camp with enough room, like Fox. Link is also slightly better in the PAL version and much better in the Japanese version of Smash 64. In the PAL version, this is due to having faster air speed (improving his recovery and some of his combo ability), and his forward smash dealing 4% more damage. While in the Japanese version, Link's up tilt has more reliable combo ability and sends opponents on a more favourable angle to combo, as well as his bombs being much easier to use in combos.
Attributes
In general, Link's attacks are slow, long-ranged, and powerful. This gives him good KOing ability, with his down aerial and forward smash being especially powerful finishers. However, his moves are laggy and easy to punish if they aren't landed. His grab is also ranged, being one of the three tether grabs in the game, but it is also very slow and leaves Link very vulnerable if it misses. Link himself is also rather slow, with the second lowest dashing speed in the game and very short jumps. Despite this, his air speed and walking speed are above average, but it isn't enough to make up for his very poor dashing speed and jumps. Link is also very stable in terms of gameplay.
Link is known for relying on his two projectiles (his Boomerang and bomb) to keep his opponents away and prevent them from approaching. This is much easier on Hyrule Castle than it is on Dream Land, meaning Link is much more effective on the former stage than the latter. His projectiles can which can lead to some very aesthetic combos. They can also be used to edgeguard. However, while Link can camp well himself, he has trouble dealing with projectile camping from some characters (especially Fox), due to his poor mobility and jumps.
Link is also heavy, which means he is harder to KO than normal, but it along with his size also makes him easier to combo. Link has some combo moves himself, including his up tilt, back aerial, and up aerial, as well as his aforementioned projectiles. His down aerial, forward smash, down smash, and projectiles are his main edgeguarding moves. He is one of the only two characters in the game (along with Pikachu) to not have a meteor smash, which can give him some minor trouble edgeguarding.
Link's biggest problem is his recovery. His very short jumps, fast falling speed (the second fastest in the game) and extremely poor distance given by Spin Attack (it even descends before the animation is over) makes his recovery arguably the worst in the game, with no options to extend it. Link is also edgeguarded and gimped extremely easy.
Link is very low on the tier list because he is very easy to combo and edgeguard, which allows many characters to get him offstage quickly and finish him off there, if not zero-deathing him outright. Link relies solely on his projectile camping to avoid this. Due to the easiness of doing this on Hyrule Castle, however, Link's matchups are much better there than on Dream Land (where he is possibly the worst character).
Moveset
Taunt
In Competitive playMatchupsInternational versions
Japanese version
Notable players
In Single-player
TechniquesExtended BoomerangLink's boomerang (neutral special attack) goes farther if it is treated as a smash attack. Quickly tap the control stick to the side while hitting B to extend the range. Extended boomerang ledge boostLink's extended boomerang, if used at the right distance from a ledge to allow Link to maintain momentum after dashing, results in Link going significantly further in midair during the boomerang throw animation. This is useful when performing a combo on an opponent who is slightly too far for the boomerang to hit. Bomb giftLightly throwing a bomb so that it lands on a platform near a spawning opponent is a popular mindgame as the latter will often be tempted to pick the bomb up. This results in the player losing the invincibility frames granted by the spawn. Invisibomb glitchLink pulls out a bomb and places the bomb on the ground without having it explode. When the bomb will near the explosion point while being out of explosion range, Link will have just a few frames to grab the bomb (now invisible) after the explosion. All bombs thrown by Link will become invisible. Off ledge Spin AttackPerforming a grounded Spin Attack right after Link's initial dash while running off a ledge will result in Link continuing his spin attack in midair without the animation changing to his aerial spin attack. This rarely has any uses outside top Link players using it to edgeguard or complete combos. Bomb recoveryLike Samus, Link can use his bombs to aid his recovery. However, unlike Samus, Link must use a bit of technical skill and timing. While recovering, one should pull out a bomb and drop it slowly below Link, then continue to DI towards the stage, and use a back aerial. This will cause Link to explode toward the platform. One should then use his Up B and land back safely. Note that Link will not be able to grab the edge because the explosion causes him to face the other direction. To counter this, throw his boomerang before using his Up B. This technique is extremely situational and extremely difficult to perform. Even if one could perform it, it poorly helps to recover in very few cases. DescriptionFrom the GameLink is the valiant boy hero of "Legend of Zelda" series in which he fights against the evil Ganon to recover the Triforce. Though his tools may change with each adventure, his strength and righteousness remain constant. With his trusty sword and a variety of weapons, he takes his adventures head on! Works:
From the Instruction BookletLink is the young fighter who protects the peace in the world of Hyrule. His skills with the sword are both varied and powerful. Alternate costumesTrivia
|
||||||||||||||||||||||||||||||||||||||||||||||||||||||||||||||||||||||||||||||||||||||||||||||||||||||||||||||||||||||||||||||||||||||||||||||||||||||||||||||||||||||||||||||||||||||||||||||||||||||||||||||||||||||||||||||||||||||||||||||||||||||||||||||||||||||||||||||||||||||||||||||||||||||||||||||||||||||||||||||


