Dracula's Castle (World of Light): Difference between revisions
mNo edit summary |
m (→Boss) |
||
| (47 intermediate revisions by 16 users not shown) | |||
| Line 2: | Line 2: | ||
{{disambig2|the [[World of Light]] sub-area|the stage|Dracula's Castle}} | {{disambig2|the [[World of Light]] sub-area|the stage|Dracula's Castle}} | ||
[[File:DraculaCastleCharacterLocations.jpg|300px|thumb|Full map of Dracula's Castle.]] | [[File:DraculaCastleCharacterLocations.jpg|300px|thumb|Full map of Dracula's Castle.]] | ||
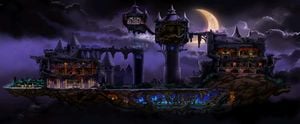
'''Dracula's Castle''' ({{ja|ドラキュラ城|Dorakyura-jō}}, ''Dracula Castle'') is a sub-world found in | '''Dracula's Castle''' ({{ja|ドラキュラ城|Dorakyura-jō}}, ''Dracula Castle'') is a sub-world found in [[The Dark Realm]] within [[Adventure Mode: World of Light|Adventure Mode]] in ''[[Super Smash Bros. Ultimate]]''. It is located at the end of the east path. Its structure is modeled after that of the world map from the original ''Castlevania''. At the end of the path is this sub-world's boss, [[Dracula]]. | ||
Evil ghosts are scattered throughout. Touching them will revert the player back to a certain area. The ghosts can only be defeated by acquiring a | Evil ghosts, resembling the demon from the [[Difficulty|intensity]] selection screen in {{for3ds}}'s {{SSB4-3DS|Classic Mode}} in its 3.0–3.9 form, are scattered throughout. Touching them will revert the player back to a certain area. The ghosts can only be defeated by acquiring a silver cannonball and firing them from a cannon. The silver cannonballs can bounce off of gold walls depending on its angle. Players can interact with the hourglass to reset the wall alignments as well as causing the ghosts and cannonballs to respawn if the player isn't satisfied with the firing results. | ||
When the player is in the main halls | Various music tracks from the Castlevania series play throughout the area. When the player is in the main halls, ''{{SSBUMusicLink|Castlevania|Vampire Killer (Remix)|Vampire Killer (Remix)}}'' plays. When the player is in the chapel, the outer wall, or underground, ''{{SSBUMusicLink|Castlevania|Starker / Wicked Child}}'' plays. When the player is in the dungeon, ''{{SSBUMusicLink|Castlevania|Vampire Killer|Vampire Killer}}'' plays. When the player is in the clock tower, ''{{SSBUMusicLink|Castlevania|Out of Time}}'' plays. Finally, when the player is at the castle keep, ''{{SSBUMusicLink|Castlevania|Nothing to Lose}}'' plays. For the most part, this song selection directly reflects the original ''Castlevania'' soundtrack, albeit with ''Starker / Wicked Child'' in lieu of ''Walking on the Edge'' in the underground and ''Vampire Killer'' in lieu of ''Heart of Fire'' in the dungeon (despite a remix of ''Heart of Fire'' being included in ''{{SSBUMusicLink|Castlevania|Can't Wait Until Night}}''). | ||
==Spirits== | ==Spirits== | ||
The | The spirits found here are generally associated with darkness, fitting with the classic monsters from the ''Castlevania'' series. The locations of several spirits appear to represent specific enemies in the original ''Castlevania'', such as the Houndoom (in place of the Black Leopards in the main halls) and Zora (in place of the Fish Men in the underground); likewise, ''Castlevania'' boss spirits are placed in their respective locations in the game. Some spirits are also heroic characters, similar to the Belmont clan and their allies. Spirits are ordered by when they are encountered in the sub-world. | ||
{|class="wikitable sortable" style="width:100%;" | {|class="wikitable sortable" style="width:100%;" | ||
! colspan=4|Spirit | ! colspan=4|Spirit | ||
! colspan=7|Battle parameters | ! colspan=7|Battle parameters | ||
| Line 19: | Line 18: | ||
! style="width:5%;"|Image | ! style="width:5%;"|Image | ||
! Name | ! Name | ||
! | ! Series | ||
! Enemy Fighter(s) | ! Enemy Fighter(s) | ||
! style="width:5%;"|Type | ! style="width:5%;"|Type | ||
| Line 29: | Line 28: | ||
|- | |- | ||
|204 | |204 | ||
|{{SpiritTableName|ReDead|size=64}} | |||
|{{ | |''The Legend of Zelda'' Series | ||
| | |•{{SSBU|Mewtwo}} Team {{Head|Mewtwo|g=SSBU|s=20px|cl=Purple}}×4 (50 HP) | ||
|•{{SSBU|Mewtwo}} {{Head|Mewtwo|g=SSBU|s=20px|cl=Purple}} ( | |{{SpiritType|Grab}} | ||
| | |||
|2,100 | |2,100 | ||
|[[Hyrule Castle]] ([[Battlefield form]]) | |[[Hyrule Castle]] ([[Battlefield form]]) | ||
|N/A | |N/A | ||
|•The enemy has super armor but moves slower<br>•[[Stamina battle]]<br>•The enemy favors down specials | |•The enemy has super armor but moves slower<br>•[[Stamina battle]]<br>•The enemy favors down specials | ||
| | |{{SSBUMusicLink|The Legend of Zelda|Song of Storms}} | ||
|- | |- | ||
|479 | |479 | ||
|{{SpiritTableName|Houndoom|size=64}} | |||
|{{ | |''Pokémon'' Series | ||
| | |||
|•Curry {{SSBU|Wolf}} {{Head|Wolf|g=SSBU|s=20px|cl=Black}} | |•Curry {{SSBU|Wolf}} {{Head|Wolf|g=SSBU|s=20px|cl=Black}} | ||
| | |{{SpiritType|Attack}} | ||
|4,100 | |4,100 | ||
|[[Kalos Pokémon League]] | |[[Kalos Pokémon League]] (Blazing Chamber only) | ||
|N/A | |N/A | ||
|•The enemy breathes fire | |•The enemy breathes fire | ||
| | |{{SSBUMusicLink|Pokémon|Pokémon Gold / Pokémon Silver Medley}} | ||
|- | |- | ||
|900 | |900 | ||
| | |{{SpiritTableName|Knight Man|size=64}} | ||
|''Mega Man'' Series | |||
| | |•Metal {{SSBU|Simon}} {{Head|Simon|g=SSBU|s=20px|cl=Blue}} (120 HP) | ||
|•Metal {{SSBU|Simon}} {{Head|Simon|g=SSBU|s=20px|cl=Blue}} | |{{SpiritType|Shield}} | ||
| | |||
|2,500 | |2,500 | ||
|[[Castle Siege]] (Throne Room) | |[[Castle Siege]] (Throne Room) | ||
|N/A | |N/A | ||
|•[[Stamina battle]]<br>•The enemy favors smash attacks<br>•The enemy is metal | |•[[Stamina battle]]<br>•The enemy favors smash attacks<br>•The enemy is metal | ||
| | |{{SSBUMusicLink|Mega Man|Mega Man 4-6 Retro Medley}} | ||
|- | |- | ||
|1,068 | |1,068 | ||
| | |{{SpiritTableName|Medusa Head|size=64}} | ||
|Medusa Head | |''Castlevania'' Series | ||
| | |•{{SSBU|Meta Knight}} {{Head|Meta Knight|g=SSBU|s=20px|cl=Navy}}<br>•Tiny {{SSBU|Mewtwo}} {{Head|Mewtwo|g=SSBU|s=20px|cl=Cyan}}×5 | ||
|•{{SSBU|Meta Knight}} {{Head|Meta Knight|g=SSBU|s=20px|cl=Navy}}<br> | |{{SpiritType|Attack}} | ||
| | |||
|3,600 | |3,600 | ||
|[[Dracula's Castle]] | |[[Dracula's Castle]] | ||
|•Move Speed ↓ | |•Move Speed ↓ | ||
|•You have reduced move speed after a little while<br | |•You have reduced move speed after a little while<br>•The enemy falls slowly<br>•Defeat an army of fighters | ||
| | |{{SSBUMusicLink|Castlevania|Starker / Wicked Child}} | ||
|- | |- | ||
|63 | |63 | ||
|[[ | |{{SpiritTableName|Dry Bowser|customname=Dry [[Bowser]]|size=64}} | ||
| | |''Super Mario'' Series | ||
| | |||
|•{{SSBU|Bowser}} {{Head|Bowser|g=SSBU|s=20px|cl=Grey}} | |•{{SSBU|Bowser}} {{Head|Bowser|g=SSBU|s=20px|cl=Grey}} | ||
| | |{{SpiritType|Shield}} | ||
|13,500 | |13,500 | ||
|[[Reset Bomb Forest]] ([[Battlefield form]]) | |[[Reset Bomb Forest]] ([[Battlefield form]]) | ||
|•Defense ↑<br> | |•Defense ↑<br>•Curry-Filled<br>•Hazard: Lava Floor | ||
|•The floor is lava<br>•The enemy breathes fire after a little while<br>•The enemy has increased defense after a while | |•The floor is lava<br>•The enemy breathes fire after a little while<br>•The enemy has increased defense after a little while | ||
| | |{{SSBUMusicLink|Super Mario Bros.|King Bowser - Super Mario Bros. 3}} | ||
|- | |- | ||
|720 | |720 | ||
|{{ | |{{SpiritTableName|Reaper & Reapette|link=y|size=64}} | ||
|''Kid Icarus'' Series | |||
| | |•{{SSBU|Ganondorf}} {{Head|Ganondorf|g=SSBU|s=20px|cl=Purple}}<br>•Tiny {{SSBU|Ganondorf}} {{Head|Ganondorf|g=SSBU|s=20px|cl=Green}}×8 | ||
|•{{SSBU|Ganondorf}} {{Head|Ganondorf|g=SSBU|s=20px|cl=Purple}}<br>•Tiny {{SSBU|Ganondorf}} {{Head|Ganondorf|g=SSBU|s=20px|cl=Green}} | |{{SpiritType|Grab}} | ||
| | |||
|8,900 | |8,900 | ||
|[[Spear Pillar]] ([[Ω form]]) | |[[Spear Pillar]] ([[Ω form]]) | ||
|N/A | |N/A | ||
|•Defeat the main fighter to win<br>•The enemy can deal damage by dashing into you<br>•Reinforcements will appear after an enemy is KO'd | |•Defeat the main fighter to win<br>•The enemy can deal damage by dashing into you<br>•Reinforcements will appear after an enemy is KO'd | ||
| | |{{SSBUMusicLink|Kid Icarus|Underworld}} | ||
|- | |- | ||
|1,022 | |1,022 | ||
| | |{{SpiritTableName|Inspired|size=64}} | ||
| | |''Bayonetta'' Series | ||
|•{{SSBU|Mewtwo}} Team {{Head|Mewtwo|g=SSBU|s=20px|cl=Pink}}×4 | |||
|•{{SSBU|Mewtwo}} {{Head|Mewtwo|g=SSBU|s=20px|cl=Pink}} | |{{SpiritType|Grab}} | ||
| | |||
|1,900 | |1,900 | ||
|[[Umbra Clock Tower]] | |[[Umbra Clock Tower]] | ||
|N/A | |N/A | ||
|•The enemy's physical attacks have increased power<br>•The enemy starts the battle with a [[Rocket Belt]] | |•The enemy's physical attacks have increased power<br>•The enemy starts the battle with a [[Rocket Belt]] | ||
| | |{{SSBUMusicLink|Bayonetta|One Of A Kind}} | ||
|- | |- | ||
|896 | |896 | ||
|{{ | |{{SpiritTableName|Skull Man|size=64}} | ||
|''Mega Man'' Series | |||
| | |•Reflect {{SSBU|Samus}} {{Head|Samus|g=SSBU|s=20px|cl=White}} (140 HP) | ||
|•Reflect {{SSBU|Samus}} {{Head|Samus|g=SSBU|s=20px|cl=White}} | |{{SpiritType|Shield}} | ||
| | |||
|3,900 | |3,900 | ||
|[[Wily Castle]] ([[Ω form]]) | |[[Wily Castle]] ([[Ω form]]) | ||
|•Reflect-Damage Buffed | |•Reflect-Damage Buffed | ||
|•The enemy reflects projectiles<br | |•The enemy reflects projectiles<br>•[[Stamina battle]]<br>•All fighters' reflected projectiles have increased power | ||
| | |{{SSBUMusicLink|Mega Man|Mega Man 4 Medley}} | ||
|- | |- | ||
|1,069 | |1,069 | ||
| | |{{SpiritTableName|Mummy|size=64}} | ||
|''Castlevania'' Series | |||
| | |•{{SSBU|Sheik}} {{Head|Sheik|g=SSBU|s=20px|cl=Yellow}}×2 (80 HP) | ||
|•{{SSBU|Sheik}} {{Head|Sheik|g=SSBU|s=20px|cl=Yellow}} ( | |{{SpiritType|Grab}} | ||
| | |||
|3,600 | |3,600 | ||
|[[Dracula's Castle]] ([[Ω form]]) | |[[Dracula's Castle]] ([[Ω form]]) | ||
|N/A | |N/A | ||
|•The enemy's throws have increased power<br>•The enemy has [[super armor]] but moves slower<br>•[[Stamina battle]] | |•The enemy's throws have increased power<br>•The enemy has [[super armor]] but moves slower<br>•[[Stamina battle]] | ||
| | |{{SSBUMusicLink|Castlevania|Mad Forest}} | ||
|- | |- | ||
|199 | |199 | ||
|{{SpiritTableName|Zora|size=64}} | |||
|{{ | |''The Legend of Zelda'' Series | ||
| | |||
|•{{SSBU|Greninja}} {{Head|Greninja|g=SSBU|s=20px|cl=Violet}} | |•{{SSBU|Greninja}} {{Head|Greninja|g=SSBU|s=20px|cl=Violet}} | ||
| | |{{SpiritType|Shield}} | ||
|1,800 | |1,800 | ||
|[[Great Bay]] | |[[Great Bay]] | ||
|N/A | |N/A | ||
|•The enemy's neutral special has increased power | |•The enemy's neutral special has increased power | ||
| | |{{SSBUMusicLink|The Legend of Zelda|Ocarina of Time Medley}} | ||
|- | |- | ||
|1,271 | |1,271 | ||
|{{ | |{{SpiritTableName|Allen|size=64}} | ||
|''Culdcept'' Series | |||
|''Culdcept | |||
|•{{SSBU|Shulk}} {{Head|Shulk|g=SSBU|s=20px|cl=Black}}<br>•{{SSBU|King K. Rool}} {{Head|King K. Rool|g=SSBU|s=20px|cl=Black}}<br>•{{SSBU|Ridley}} {{Head|Ridley|g=SSBU|s=20px|cl=Red}} | |•{{SSBU|Shulk}} {{Head|Shulk|g=SSBU|s=20px|cl=Black}}<br>•{{SSBU|King K. Rool}} {{Head|King K. Rool|g=SSBU|s=20px|cl=Black}}<br>•{{SSBU|Ridley}} {{Head|Ridley|g=SSBU|s=20px|cl=Red}} | ||
| | |{{SpiritType|Neutral}} | ||
|3,500 | |3,500 | ||
|[[Arena Ferox]] | |[[Arena Ferox]] | ||
|•Item: [[Assist Trophy]] | |•Item: [[Assist Trophy]] | ||
|•Defeat the main fighter to win<br>•Reinforcements will appear during the battle | |•Defeat the main fighter to win<br>•Reinforcements will appear during the battle | ||
| | |{{SSBUMusicLink|Other|Worthy Rival Battle}} | ||
|- | |- | ||
|379 | |379 | ||
|{{SpiritTableName|Knuckle Joe|link=y|size=64}} | |||
|{{ | |''Kirby'' Series | ||
| | |||
|•{{SSBU|Ryu}} {{Head|Ryu|g=SSBU|s=20px|cl=Blue}} | |•{{SSBU|Ryu}} {{Head|Ryu|g=SSBU|s=20px|cl=Blue}} | ||
| | |{{SpiritType|Attack}} | ||
|9,100 | |9,100 | ||
|[[Find Mii]] ([[Ω form]]) | |[[Find Mii]] ([[Ω form]]) | ||
|•Assist Trophy Enemies ( | |•Assist Trophy Enemies (Knuckle Joe) | ||
|•The enemy's punches and elbow strikes have increased power<br>•The enemy's | |•The enemy's punches and elbow strikes have increased power<br>•The enemy's kicks and knee strikes have increased power<br>•The enemy's physical attacks have increased power | ||
| | |{{SSBUMusicLink|Kirby|Butter Building (Brawl)}} | ||
|- | |- | ||
|1,053 | |1,053 | ||
| | |{{SpiritTableName|Maria Renard|size=64}} | ||
|Maria Renard | |''Castlevania'' Series | ||
| | |||
|•{{SSBU|Zelda}} {{Head|Zelda|g=SSBU|s=20px|cl=Purple}}<br>•{{SSBU|Falco}} {{Head|Falco|g=SSBU|s=20px|cl=White}}<br>•{{SSBU|Charizard}} {{Head|Charizard|g=SSBU|s=20px|cl=Blue}}<br>•{{SSBU|Incineroar}} {{Head|Incineroar|g=SSBU|s=20px|cl=White}} | |•{{SSBU|Zelda}} {{Head|Zelda|g=SSBU|s=20px|cl=Purple}}<br>•{{SSBU|Falco}} {{Head|Falco|g=SSBU|s=20px|cl=White}}<br>•{{SSBU|Charizard}} {{Head|Charizard|g=SSBU|s=20px|cl=Blue}}<br>•{{SSBU|Incineroar}} {{Head|Incineroar|g=SSBU|s=20px|cl=White}} | ||
| | |{{SpiritType|Grab}} | ||
|3,700 | |3,700 | ||
|[[Reset Bomb Forest]] | |[[Reset Bomb Forest]] (hazards off) | ||
|N/A | |N/A | ||
|•The enemy starts the battle with a [[Cucco]] | |•The enemy starts the battle with a [[Cucco]] | ||
| | |{{SSBUMusicLink|Castlevania|Slash}} | ||
|- | |- | ||
|1,070 | |1,070 | ||
| | |{{SpiritTableName|The Creature & Flea Man|size=64}} | ||
|The Creature & Flea Man | |''Castlevania'' Series | ||
| | |•Giant {{SSBU|Mii Brawler}} {{Head|Mii Brawler|g=SSBU|s=20px}} (Moveset [[Shot Put|1]][[Suplex|3]][[Thrust Uppercut|3]][[Counter Throw|3]], Hockey Mask, Business Outfit, Low Voice Type 11)<br>•{{SSBU|Diddy Kong}} {{Head|Diddy Kong|g=SSBU|s=20px|cl=Yellow}} | ||
|•Giant {{SSBU|Mii Brawler}} {{Head|Mii Brawler|g=SSBU|s=20px}} (Hockey Mask, Business Outfit)<br>•{{SSBU|Diddy Kong}} {{Head|Diddy Kong|g=SSBU|s=20px|cl=Yellow}} | |{{SpiritType|Shield}} | ||
| | |||
|4,500 | |4,500 | ||
|[[Dracula's Castle]] ([[Battlefield form]]) | |[[Dracula's Castle]] ([[Battlefield form]]) | ||
|•Hazard: Zap Floor | |•Hazard: Zap Floor | ||
|•The floor is electrified<br>•The enemy is giant | |•The floor is electrified<br>•The enemy is giant | ||
| | |{{SSBUMusicLink|Castlevania|Out of Time}} | ||
|- | |- | ||
|994 | |994 | ||
| | |{{SpiritTableName|Akuma|size=64}} | ||
| | |''Street Fighter'' Series | ||
|•{{SSBU|Ryu}} {{Head|Ryu|g=SSBU|s=20px|cl=Black}} (180 HP) | |||
|•{{SSBU|Ryu}} {{Head|Ryu|g=SSBU|s=20px|cl=Black}} | |{{SpiritType|Attack}} | ||
| | |||
|13,700 | |13,700 | ||
|[[Suzaku Castle]] ([[Ω form]]) | |[[Suzaku Castle]] ([[Ω form]]) | ||
|•Defense ↓<br>•Jump Power ↓ | |•Defense ↓<br>•Jump Power ↓ | ||
|•The enemy's special moves have increased power<br>•[[Stamina battle]]<br>•All fighters have reduced jump power | |•The enemy's special moves have increased power<br>•[[Stamina battle]]<br>•All fighters have reduced jump power | ||
| | |{{SSBUMusicLink|Street Fighter|M. Bison Stage Type B}} | ||
|- | |- | ||
|1,058 | |1,058 | ||
| | |{{SpiritTableName|Hugh Baldwin|size=64}} | ||
| | |''Castlevania'' Series | ||
|•{{SSBU|Marth}} {{Head|Marth|g=SSBU|s=20px|cl=White}} | |•{{SSBU|Marth}} {{Head|Marth|g=SSBU|s=20px|cl=White}} | ||
| | |{{SpiritType|Attack}} | ||
|2,000 | |2,000 | ||
|[[Find Mii]] | |[[Find Mii]] | ||
|N/A | |N/A | ||
|•The enemy's melee weapons have increased power<br>•The enemy has increased jump power | |•The enemy's melee weapons have increased power<br>•The enemy has increased jump power | ||
| | |{{SSBUMusicLink|Castlevania|Awake}} | ||
|- | |- | ||
|1,251 | |1,251 | ||
|{{ | |{{SpiritTableName|Calista|size=64}} | ||
|''The Last Story'' | |''The Last Story'' | ||
|•{{SSBU|Lucina}} {{Head|Lucina|g=SSBU|s=20px|cl=White}}<br>•{{SSBU|Simon}} {{Head|Simon|g=SSBU|s=20px|cl=Blue}} | |•{{SSBU|Lucina}} {{Head|Lucina|g=SSBU|s=20px|cl=White}}<br>•{{SSBU|Simon}} {{Head|Simon|g=SSBU|s=20px|cl=Blue}} | ||
| | |{{SpiritType|Grab}} | ||
|3,700 | |3,700 | ||
|[[Reset Bomb Forest]] | |[[Reset Bomb Forest]] | ||
|N/A | |N/A | ||
|•Take your strongest team into this no-frills battle | |•Take your strongest team into this no-frills battle | ||
| | |{{SSBUMusicLink|Other|Battle Scene / Final Boss - Golden Sun}} | ||
|- | |- | ||
|622 | |622 | ||
|{{SpiritTableName|Draug|iw=fireemblem|size=64}} | |||
|{{ | |''Fire Emblem'' Series | ||
| | |•{{SSBU|King K. Rool}} {{Head|King K. Rool|g=SSBU|s=20px|cl=Blue}} (120 HP) | ||
|•{{SSBU|King K. Rool}} {{Head|King K. Rool|g=SSBU|s=20px|cl=Blue}} | |{{SpiritType|Shield}} | ||
| | |||
|2,400 | |2,400 | ||
|[[Castle Siege]] | |[[Castle Siege]] (hazards off) | ||
|•Defense ↑ | |•Defense ↑ | ||
|•The enemy has super armor but moves slower<br>•[[Stamina battle]]<br>•The enemy has increased defense | |•The enemy has super armor but moves slower<br>•[[Stamina battle]]<br>•The enemy has increased defense | ||
| | |{{SSBUMusicLink|Fire Emblem|Under This Banner}} | ||
|- | |- | ||
|48 | |48 | ||
|{{SpiritTableName|Boo|link=y|size=64}} | |||
|{{ | |''Super Mario'' Series | ||
| | |||
|•{{SSBU|Kirby}} {{Head|Kirby|g=SSBU|s=20px|cl=White}} | |•{{SSBU|Kirby}} {{Head|Kirby|g=SSBU|s=20px|cl=White}} | ||
| | |{{SpiritType|Neutral}} | ||
|1,800 | |1,800 | ||
|[[Mushroom Kingdom U]] (Slide Lift Tower) | |[[Mushroom Kingdom U]] (Slide Lift Tower) | ||
|•Invisibility | |•Invisibility | ||
|•The enemy is invisible<br>•The enemy's shield has extra durability | |•The enemy is invisible<br>•The enemy's shield has extra durability | ||
| | |{{SSBUMusicLink|Super Mario Bros.|Main Theme - Luigi's Mansion (Brawl)}} | ||
|- | |- | ||
|1,071 | |1,071 | ||
| | |{{SpiritTableName|Death|size=64}} | ||
| | |''Castlevania'' Series | ||
|•{{SSBU|Robin}} {{Head|Robin|g=SSBU|s=20px|cl=Blue}} | |•{{SSBU|Robin}} {{Head|Robin|g=SSBU|s=20px|cl=Blue}} | ||
| | |{{SpiritType|Attack}} | ||
|9,400 | |9,400 | ||
|[[Dracula's Castle]] | |[[Dracula's Castle]] | ||
|•Hard to Launch<br | |•Hard to Launch<br>•Sudden Damage | ||
|•You take serious damage after a little while<br | |•You take serious damage after a little while<br>•You are hard to launch<br>•The enemy starts the battle with a [[Death's Scythe]] | ||
| | |{{SSBUMusicLink|Castlevania|Nothing to Lose}} | ||
|- | |- | ||
|1,061 | |1,061 | ||
|[ | |{{SpiritTableName|Leon Belmont|customname=[https://castlevania.fandom.com/wiki/Leon_Belmont Leon Belmont]|size=64}} | ||
| | |''Castlevania'' Series | ||
| | |||
|•{{SSBU|Richter}} {{Head|Richter|g=SSBU|s=20px|cl=White}} | |•{{SSBU|Richter}} {{Head|Richter|g=SSBU|s=20px|cl=White}} | ||
| | |{{SpiritType|Grab}} | ||
|3,800 | |3,800 | ||
|[[Unova Pokémon League]] | |[[Unova Pokémon League]] (hazards off) | ||
|•Strengthen Weapon | |•Strengthen Weapon | ||
|•The enemy can heal by shielding attacks<br>•All fighters' melee weapons have increased power | |•The enemy can heal by shielding attacks<br>•All fighters' melee weapons have increased power | ||
| | |{{SSBUMusicLink|Castlevania|Lament of Innocence}} | ||
|- | |- | ||
|212 | |212 | ||
|{{SpiritTableName|Happy Mask Salesman|size=64}} | |||
|{{ | |''The Legend of Zelda'' Series | ||
| | |||
|•{{SSBU|Young Link}} {{Head|Young Link|g=SSBU|s=20px|cl=Black}} | |•{{SSBU|Young Link}} {{Head|Young Link|g=SSBU|s=20px|cl=Black}} | ||
| | |{{SpiritType|Shield}} | ||
|4,300 | |4,300 | ||
|[[Umbra Clock Tower]] | |[[Umbra Clock Tower]] | ||
|•Attack Power ↑<br>•Move Speed ↑<br>•Jump Power ↑ | |•Attack Power ↑<br>•Move Speed ↑<br>•Jump Power ↑ | ||
|•Timed battle<br>•All fighters have increased jump power<br>•All fighters have increased move speed after a little while | |•Timed battle (1:30)<br>•All fighters have increased jump power<br>•All fighters have increased move speed after a little while | ||
| | |{{SSBUMusicLink|The Legend of Zelda|Song of Storms}} | ||
|- | |- | ||
|1,073 | |1,073 | ||
| | |{{SpiritTableName|Werewolf|size=64}} | ||
|''Castlevania'' Series | |||
| | |||
|•{{SSBU|Wolf}} {{Head|Wolf|g=SSBU|s=20px|cl=Black}} | |•{{SSBU|Wolf}} {{Head|Wolf|g=SSBU|s=20px|cl=Black}} | ||
| | |{{SpiritType|Attack}} | ||
|3,600 | |3,600 | ||
|[[Luigi's Mansion]] ([[Battlefield form]]) | |[[Luigi's Mansion]] ([[Battlefield form]]) | ||
|N/A | |N/A | ||
|•The enemy's physical attacks have increased power<br | |•The enemy's physical attacks have increased power<br>•The enemy has increased move speed | ||
| | |{{SSBUMusicLink|Castlevania|Crash in the Dark Night}} | ||
|- | |- | ||
|1,055 | |1,055 | ||
| | |{{SpiritTableName|Alucard|link=y|size=64}} | ||
| | |''Castlevania'' Series | ||
|•{{SSBU|Simon}} {{Head|Simon|g=SSBU|s=20px|cl=Indigo}} | |•{{SSBU|Simon}} {{Head|Simon|g=SSBU|s=20px|cl=Indigo}} | ||
| | |{{SpiritType|Shield}} | ||
|13,500 | |13,500 | ||
|[[Dracula's Castle]] | |[[Dracula's Castle]] | ||
|•Assist Trophy Enemies ( | |•Assist Trophy Enemies (Alucard) | ||
|•Hostile assist trophies will appear | |•Hostile assist trophies will appear | ||
| | |{{SSBUMusicLink|Castlevania|Dracula's Castle}} | ||
|} | |||
===Boss spirits=== | |||
{| class="wikitable" | |||
! No. !! Image !! Name !! Type !! Class !! Slots | |||
! Base [[File:Equipment Icon Power Badge.png|20px|Power]] | |||
! Max [[File:Equipment Icon Power Badge.png|20px|Power]] | |||
! Base [[File:Equipment Icon Brawn Badge.png|20px|Attack]] | |||
! Max [[File:Equipment Icon Brawn Badge.png|20px|Attack]] | |||
! Base [[File:Equipment Icon Protection Badge.png|20px|Defense]] | |||
! Max [[File:Equipment Icon Protection Badge.png|20px|Defense]] | |||
! Ability !! Series | |||
|- | |||
| 1,075 || {{SpiritTableName|Dracula|size=64}} || {{SpiritType|Neutral}} || ★★★ || 3 || 2925 || 8800 || 1594 || 4796 || 1331 || 4004 || {{Rollover|Can Be Enhanced at Lv. 99|Soma Cruz|?}} || ''Castlevania'' Series | |||
|} | |||
{|class="wikitable" | |||
! No. !! Image !! Name !! Type !! Class !! Cost !! Ability !! Series | |||
|- | |||
| 1,077 || {{SpiritTableName|Dracula (2nd Form)|size=64}} || {{SpiritType|Support}} || ★★★ || 2 || Unflinching Charged Smashes || ''Castlevania'' Series | |||
|} | |} | ||
==Boss== | ==Boss== | ||
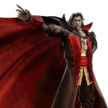
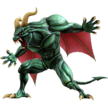
The boss of this sub-world is Dracula. In order to reach his location, the player must defeat the [[Alucard]] spirit (and | The boss of this sub-world is Dracula. In order to reach his location, the player must defeat the [[Alucard]] spirit (and {{SSBU|Richter}} if the player destroys all of the ghosts). | ||
{|class="wikitable sortable" | {|class="wikitable sortable" | ||
|- | |- | ||
! style="width:5%;"| | ! style="width:5%;"|Images | ||
! Name | ! Name | ||
! style="width:5%;"|Type | ! style="width:5%;"|Type | ||
| Line 329: | Line 321: | ||
! Music | ! Music | ||
|- | |- | ||
|1 | |[[File:Dracula Phase 1 SSBU.png|center|108x108px]]<br>[[File:Dracula Phase 2 SSBU.png|center|108x108px]] | ||
|[[File:Dracula | |||
|[[Dracula]] | |[[Dracula]] | ||
| | |{{SpiritType|Neutral}} <center>{{color|#796581|Neutral}}</center> | ||
|??? | |??? | ||
|??? | |??? | ||
| Line 350: | Line 341: | ||
! Music | ! Music | ||
|- | |- | ||
| | | 13<sup>ε</sup> | ||
| [[File:Daisy SSBU.png|center|108x108px]] | | [[File:Daisy SSBU.png|center|108x108px]] | ||
| {{SSBU|Daisy}} | | {{SSBU|Daisy}} | ||
| | | {{SpiritType|Attack}} <center>{{color|#dc1029|Attack}}</center> | ||
| 10,600 | | 10,600 | ||
| [[Mushroom Kingdom U]] (Slide Lift Tower) | | [[Mushroom Kingdom U]] (Slide Lift Tower) | ||
| Line 361: | Line 352: | ||
| [[File:Wario SSBU.png|center|108x108px]] | | [[File:Wario SSBU.png|center|108x108px]] | ||
| {{SSBU|Wario}} | | {{SSBU|Wario}} | ||
| | | {{SpiritType|Attack}} <center>{{color|#dc1029|Attack}}</center> | ||
| 10,100 | | 10,100 | ||
| [[WarioWare, Inc.]] [[Ω form|Ω]] | | [[WarioWare, Inc.]] [[Ω form|Ω]] | ||
| Line 369: | Line 360: | ||
| [[File:Ridley SSBU.png|center|108x108px]] | | [[File:Ridley SSBU.png|center|108x108px]] | ||
| {{SSBU|Ridley}} | | {{SSBU|Ridley}} | ||
| | | {{SpiritType|Attack}} <center>{{color|#dc1029|Attack}}</center> | ||
| 10,600 | | 10,600 | ||
| [[Brinstar Depths]] [[Ω form|Ω]] | | [[Brinstar Depths]] [[Ω form|Ω]] | ||
| ''{{SSBUMusicLink|Metroid|Vs. Ridley (Brawl)}}'' | | ''{{SSBUMusicLink|Metroid|Vs. Ridley (Brawl)}}'' | ||
|- | |- | ||
| | | 60<sup>ε</sup> | ||
| [[File:Ken SSBU.png|center|108x108px]] | | [[File:Ken SSBU.png|center|108x108px]] | ||
| {{SSBU|Ken}} | | {{SSBU|Ken}} | ||
| | | {{SpiritType|Neutral}} <center>{{color|#796581|Neutral}}</center> | ||
| 10,600 | | 10,600 | ||
| [[Boxing Ring]] [[Ω form|Ω]] | | [[Boxing Ring]] [[Ω form|Ω]] | ||
| ''{{SSBUMusicLink|Street Fighter|Ken Stage}}'' | | ''{{SSBUMusicLink|Street Fighter|Ken Stage}}'' | ||
|- | |- | ||
| | | 28<sup>ε</sup> | ||
| [[File:Dark Pit SSBU.png|center|108x108px]] | | [[File:Dark Pit SSBU.png|center|108x108px]] | ||
| {{SSBU|Dark Pit}} | | {{SSBU|Dark Pit}} | ||
| | | {{SpiritType|Shield}} <center>{{color|#18aef5|Shield}}</center> | ||
| 11,200 | | 11,200 | ||
| [[Reset Bomb Forest]] [[Ω form|Ω]] | | [[Reset Bomb Forest]] [[Ω form|Ω]] | ||
| Line 393: | Line 384: | ||
| [[File:Robin SSBU.png|center|108x108px]] | | [[File:Robin SSBU.png|center|108x108px]] | ||
| {{SSBU|Robin}} | | {{SSBU|Robin}} | ||
| | | {{SpiritType|Grab}} <center>{{color|#17ba17|Grab}}</center> | ||
| 10,700 | | 10,700 | ||
| [[Castle Siege]] [[Ω form|Ω]] | | [[Castle Siege]] [[Ω form|Ω]] | ||
| ''{{SSBUMusicLink|Fire Emblem|Prelude (Ablaze)}}'' | | ''{{SSBUMusicLink|Fire Emblem|Prelude (Ablaze)}}'' | ||
|- | |- | ||
| | | 66<sup>ε</sup> | ||
| [[File:Richter SSBU.png|center|108x108px]] | | [[File:Richter SSBU.png|center|108x108px]] | ||
| {{SSBU|Richter}} | | {{SSBU|Richter}} | ||
| | | {{SpiritType|Grab}} <center>{{color|#17ba17|Grab}}</center> | ||
| 11,800 | | 11,800 | ||
| [[Dracula's Castle]] [[Ω form|Ω]] | | [[Dracula's Castle]] [[Ω form|Ω]] | ||
| ''{{SSBUMusicLink|Castlevania|Divine Bloodlines}}'' | | ''{{SSBUMusicLink|Castlevania|Divine Bloodlines}}'' | ||
|} | |} | ||
==Names in other languages== | |||
{{langtable | |||
|ja={{ja|ドラキュラ城|Dorakyura-jō}} | |||
|jaM=Dracula Castle | |||
|en=Dracula's Castle | |||
|fr=Château de Dracula | |||
|frM=Dracula's Castle | |||
|es=Castillo de Drácula | |||
|esM=Dracula's Castle | |||
|de=Schloss Dracula | |||
|deM=Dracula Castle | |||
|it=Castello di Dracula | |||
|itM=Dracula's Castle | |||
|nl=Dracula's Kasteel | |||
|nlM=Dracula's Castle | |||
|ru={{rollover|Замок Дракулы|Zamok Drakuly|?}} | |||
|ruM=Dracula Castle | |||
|ko={{rollover|드라큘라 성|Deurakyulla Seong|?}} | |||
|koM=Dracula Castle | |||
|zh=Dracula's Castle | |||
}} | |||
==Trivia== | |||
*Assuming the player does not destroy all the evil ghosts, Dracula's Castle is the only sub-world in the Dark Realm where none of its captured fighters are required to be unlocked to beat the World of Light. | |||
*Dracula's Castle is the only sub-world in World of Light to have more than one [[Echo Fighter]] in it, with a total of four out of seven ({{SSBU|Dark Pit}}, {{SSBU|Richter}}, {{SSBU|Daisy}}, and {{SSBU|Ken}}). | |||
*Due to the presence of [[ladder (stage element)|ladders]] on this sub-area's map, this is the only instance where [[Pokémon Trainer]]'s climbing animations can be seen. | |||
{{World of Light areas}} | {{World of Light areas}} | ||
{{Castlevania universe}} | {{Castlevania universe}} | ||
[[Category:Super Smash Bros. Ultimate]] | [[Category:Super Smash Bros. Ultimate]] | ||
[[Category: | [[Category:Castlevania universe]] | ||
Latest revision as of 22:34, January 12, 2023
Dracula's Castle (ドラキュラ城, Dracula Castle) is a sub-world found in The Dark Realm within Adventure Mode in Super Smash Bros. Ultimate. It is located at the end of the east path. Its structure is modeled after that of the world map from the original Castlevania. At the end of the path is this sub-world's boss, Dracula.
Evil ghosts, resembling the demon from the intensity selection screen in Super Smash Bros. for Nintendo 3DS's Classic Mode in its 3.0–3.9 form, are scattered throughout. Touching them will revert the player back to a certain area. The ghosts can only be defeated by acquiring a silver cannonball and firing them from a cannon. The silver cannonballs can bounce off of gold walls depending on its angle. Players can interact with the hourglass to reset the wall alignments as well as causing the ghosts and cannonballs to respawn if the player isn't satisfied with the firing results.
Various music tracks from the Castlevania series play throughout the area. When the player is in the main halls, Vampire Killer (Remix) plays. When the player is in the chapel, the outer wall, or underground, Starker / Wicked Child plays. When the player is in the dungeon, Vampire Killer plays. When the player is in the clock tower, Out of Time plays. Finally, when the player is at the castle keep, Nothing to Lose plays. For the most part, this song selection directly reflects the original Castlevania soundtrack, albeit with Starker / Wicked Child in lieu of Walking on the Edge in the underground and Vampire Killer in lieu of Heart of Fire in the dungeon (despite a remix of Heart of Fire being included in Can't Wait Until Night).
Spirits[edit]
The spirits found here are generally associated with darkness, fitting with the classic monsters from the Castlevania series. The locations of several spirits appear to represent specific enemies in the original Castlevania, such as the Houndoom (in place of the Black Leopards in the main halls) and Zora (in place of the Fish Men in the underground); likewise, Castlevania boss spirits are placed in their respective locations in the game. Some spirits are also heroic characters, similar to the Belmont clan and their allies. Spirits are ordered by when they are encountered in the sub-world.
| Spirit | Battle parameters | |||||||||
|---|---|---|---|---|---|---|---|---|---|---|
| No. | Image | Name | Series | Enemy Fighter(s) | Type | Power | Stage | Rules | Conditions | Music |
| 204 | ReDead | The Legend of Zelda Series | •Mewtwo Team |
2,100 | Hyrule Castle (Battlefield form) | N/A | •The enemy has super armor but moves slower •Stamina battle •The enemy favors down specials |
Song of Storms | ||
| 479 | Houndoom | Pokémon Series | •Curry Wolf |
4,100 | Kalos Pokémon League (Blazing Chamber only) | N/A | •The enemy breathes fire | Pokémon Gold / Pokémon Silver Medley | ||
| 900 | Knight Man | Mega Man Series | •Metal Simon |
2,500 | Castle Siege (Throne Room) | N/A | •Stamina battle •The enemy favors smash attacks •The enemy is metal |
Mega Man 4-6 Retro Medley | ||
| 1,068 | Medusa Head | Castlevania Series | •Meta Knight •Tiny Mewtwo |
3,600 | Dracula's Castle | •Move Speed ↓ | •You have reduced move speed after a little while •The enemy falls slowly •Defeat an army of fighters |
Starker / Wicked Child | ||
| 63 | Dry Bowser | Super Mario Series | •Bowser |
13,500 | Reset Bomb Forest (Battlefield form) | •Defense ↑ •Curry-Filled •Hazard: Lava Floor |
•The floor is lava •The enemy breathes fire after a little while •The enemy has increased defense after a little while |
King Bowser - Super Mario Bros. 3 | ||
| 720 | Reaper & Reapette | Kid Icarus Series | •Ganondorf •Tiny Ganondorf |
8,900 | Spear Pillar (Ω form) | N/A | •Defeat the main fighter to win •The enemy can deal damage by dashing into you •Reinforcements will appear after an enemy is KO'd |
Underworld | ||
| 1,022 | Inspired | Bayonetta Series | •Mewtwo Team |
1,900 | Umbra Clock Tower | N/A | •The enemy's physical attacks have increased power •The enemy starts the battle with a Rocket Belt |
One Of A Kind | ||
| 896 | Skull Man | Mega Man Series | •Reflect Samus |
3,900 | Wily Castle (Ω form) | •Reflect-Damage Buffed | •The enemy reflects projectiles •Stamina battle •All fighters' reflected projectiles have increased power |
Mega Man 4 Medley | ||
| 1,069 | Mummy | Castlevania Series | •Sheik |
3,600 | Dracula's Castle (Ω form) | N/A | •The enemy's throws have increased power •The enemy has super armor but moves slower •Stamina battle |
Mad Forest | ||
| 199 | Zora | The Legend of Zelda Series | •Greninja |
1,800 | Great Bay | N/A | •The enemy's neutral special has increased power | Ocarina of Time Medley | ||
| 1,271 | Allen | Culdcept Series | •Shulk •King K. Rool •Ridley |
3,500 | Arena Ferox | •Item: Assist Trophy | •Defeat the main fighter to win •Reinforcements will appear during the battle |
Worthy Rival Battle | ||
| 379 | Knuckle Joe | Kirby Series | •Ryu |
9,100 | Find Mii (Ω form) | •Assist Trophy Enemies (Knuckle Joe) | •The enemy's punches and elbow strikes have increased power •The enemy's kicks and knee strikes have increased power •The enemy's physical attacks have increased power |
Butter Building (Brawl) | ||
| 1,053 | Maria Renard | Castlevania Series | •Zelda •Falco •Charizard •Incineroar |
3,700 | Reset Bomb Forest (hazards off) | N/A | •The enemy starts the battle with a Cucco | Slash | ||
| 1,070 | The Creature & Flea Man | Castlevania Series | •Giant Mii Brawler •Diddy Kong |
4,500 | Dracula's Castle (Battlefield form) | •Hazard: Zap Floor | •The floor is electrified •The enemy is giant |
Out of Time | ||
| 994 | Akuma | Street Fighter Series | •Ryu |
13,700 | Suzaku Castle (Ω form) | •Defense ↓ •Jump Power ↓ |
•The enemy's special moves have increased power •Stamina battle •All fighters have reduced jump power |
M. Bison Stage Type B | ||
| 1,058 | Hugh Baldwin | Castlevania Series | •Marth |
2,000 | Find Mii | N/A | •The enemy's melee weapons have increased power •The enemy has increased jump power |
Awake | ||
| 1,251 | Calista | The Last Story | •Lucina •Simon |
3,700 | Reset Bomb Forest | N/A | •Take your strongest team into this no-frills battle | Battle Scene / Final Boss - Golden Sun | ||
| 622 | Draug | Fire Emblem Series | •King K. Rool |
2,400 | Castle Siege (hazards off) | •Defense ↑ | •The enemy has super armor but moves slower •Stamina battle •The enemy has increased defense |
Under This Banner | ||
| 48 | Boo | Super Mario Series | •Kirby |
1,800 | Mushroom Kingdom U (Slide Lift Tower) | •Invisibility | •The enemy is invisible •The enemy's shield has extra durability |
Main Theme - Luigi's Mansion (Brawl) | ||
| 1,071 | Death | Castlevania Series | •Robin |
9,400 | Dracula's Castle | •Hard to Launch •Sudden Damage |
•You take serious damage after a little while •You are hard to launch •The enemy starts the battle with a Death's Scythe |
Nothing to Lose | ||
| 1,061 | Leon Belmont | Castlevania Series | •Richter |
3,800 | Unova Pokémon League (hazards off) | •Strengthen Weapon | •The enemy can heal by shielding attacks •All fighters' melee weapons have increased power |
Lament of Innocence | ||
| 212 | Happy Mask Salesman | The Legend of Zelda Series | •Young Link |
4,300 | Umbra Clock Tower | •Attack Power ↑ •Move Speed ↑ •Jump Power ↑ |
•Timed battle (1:30) •All fighters have increased jump power •All fighters have increased move speed after a little while |
Song of Storms | ||
| 1,073 | Werewolf | Castlevania Series | •Wolf |
3,600 | Luigi's Mansion (Battlefield form) | N/A | •The enemy's physical attacks have increased power •The enemy has increased move speed |
Crash in the Dark Night | ||
| 1,055 | Alucard | Castlevania Series | •Simon |
13,500 | Dracula's Castle | •Assist Trophy Enemies (Alucard) | •Hostile assist trophies will appear | Dracula's Castle | ||
Boss spirits[edit]
| No. | Image | Name | Type | Class | Slots | Base |
Max |
Base |
Max |
Base |
Max |
Ability | Series |
|---|---|---|---|---|---|---|---|---|---|---|---|---|---|
| 1,075 | Dracula | ★★★ | 3 | 2925 | 8800 | 1594 | 4796 | 1331 | 4004 | Can Be Enhanced at Lv. 99 | Castlevania Series |
| No. | Image | Name | Type | Class | Cost | Ability | Series |
|---|---|---|---|---|---|---|---|
| 1,077 | Dracula (2nd Form) | ★★★ | 2 | Unflinching Charged Smashes | Castlevania Series |
Boss[edit]
The boss of this sub-world is Dracula. In order to reach his location, the player must defeat the Alucard spirit (and Richter if the player destroys all of the ghosts).
| Images | Name | Type | Power | Stage | Music |
|---|---|---|---|---|---|
| Dracula | ??? | ??? | Nothing to Lose (first form) Black Night (second form) |
Captured Fighters[edit]
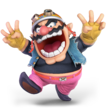
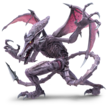
Most of the fighters in this sub-world are accessed normally. However, Ridley appears after defeating The Creature & Flea Man spirit, while Richter only appears if all the purple evil ghosts are destroyed with cannonballs.
| No. | Image | Name | Type | Power | Stage | Music |
|---|---|---|---|---|---|---|
| 13ε | Daisy | 10,600 | Mushroom Kingdom U (Slide Lift Tower) | Underground Theme - Super Mario Land | ||
| 30 | Wario | 10,100 | WarioWare, Inc. Ω | WarioWare, Inc. | ||
| 65 | Ridley | 10,600 | Brinstar Depths Ω | Vs. Ridley (Brawl) | ||
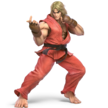
| 60ε | Ken | 10,600 | Boxing Ring Ω | Ken Stage | ||
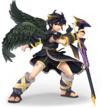
| 28ε | Dark Pit | 11,200 | Reset Bomb Forest Ω | Dark Pit's Theme | ||
| 56 | Robin | 10,700 | Castle Siege Ω | Prelude (Ablaze) | ||
| 66ε | Richter | 11,800 | Dracula's Castle Ω | Divine Bloodlines |
Names in other languages[edit]
Trivia[edit]
- Assuming the player does not destroy all the evil ghosts, Dracula's Castle is the only sub-world in the Dark Realm where none of its captured fighters are required to be unlocked to beat the World of Light.
- Dracula's Castle is the only sub-world in World of Light to have more than one Echo Fighter in it, with a total of four out of seven (Dark Pit, Richter, Daisy, and Ken).
- Due to the presence of ladders on this sub-area's map, this is the only instance where Pokémon Trainer's climbing animations can be seen.
|
| |
|---|---|
| Fighters | Simon (SSBU) · Richter (SSBU) |
| Assist Trophy | Alucard |
| Boss | Dracula |
| Stage | Dracula's Castle |
| Item | Death's Scythe |
| Other | Dracula's Castle |
| Spirits | Spirits |
| Music | Ultimate |
