Down smash: Difference between revisions
Sm4shmeister (talk | contribs) (→Types) |
m (Undid edit by 152.172.7.232: You can't just negate something and call it there) |
||
| (147 intermediate revisions by 71 users not shown) | |||
| Line 1: | Line 1: | ||
{{ArticleIcons| | {{ArticleIcons|series=y}} | ||
[[File:Mario Down Smash SSBM.gif|thumb|200px|Mario's down smash in ''Melee''.]] | [[File:Mario Down Smash SSBM.gif|thumb|200px|Mario's down smash in ''Melee''.]] | ||
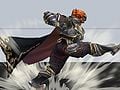
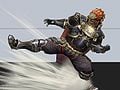
[[File:SSB4 - Olimar Screen-5.jpg|thumb|200px|{{SSB4|Olimar}}'s down smash in ''[[Super Smash Bros. 4]]''.]] | |||
'''Down smash''' (abbreviated '''d-smash''') or '''down smash attack''' ({{ja|下スマッシュ攻撃|Shita sumasshu kōgeki}}, ''Down/lower/under smash attack'') is a [[smash attack]] performed by any character by tapping the Control Stick downward and pressing A at the same time or by pressing down on the [[C-stick]]. | '''Down smash''' (abbreviated '''d-smash''') or '''down smash attack''' ({{ja|下スマッシュ攻撃|Shita sumasshu kōgeki}}, ''Down/lower/under smash attack'') is a [[smash attack]] performed by any character by [[tapping]] the Control Stick downward and pressing A at the same time or by pressing down on the [[C-stick]]. In ''[[Super Smash Bros. Melee]]'', the C-stick cannot be used in one-player mode. | ||
Since ''Super Smash Bros. Melee'', | Since ''Super Smash Bros. Melee'', all smash attacks can be charged by holding down the A button for up to one second, multiplying [[damage]] and [[knockback]] by up to 1.4. In ''Ultimate'', with some exceptions, these charges can be held for up to 3 seconds (or 180 frames), but the attack stops increasing in strength after the 1 second mark. | ||
Down smashes are generally the fastest, weakest smash attack in a character's arsenal, and almost all of them hit on both sides of the character, making them useful for coverage or [[punish]]ing [[roll]]s. While not universal, some down smashes hit in front then behind, with the back hit being stronger to reward punishing rolls or dodges, such as [[Ike]]'s; other down smashes will instead have a first hit which sends at an angle that combos into the second stronger hit, such as [[Ganondorf]]'s. Many down smashes can be described as "on the ground" attacks (usually abbreviated to OTG), meaning they are specifically designed to hit opponents lying on the ground. | |||
Prior to ''Ultimate'', down smashes were not as flexible to use as the other smash attacks; they couldn't be used out of a [[dash]] or [[out of shield]] like [[up smash]]es can, nor could they be used in the first few [[frame]]s of a dash or out of a [[pivot]] like [[forward smash]]es. | |||
==List of down smashes | ==List of down smashes== | ||
{|class="wikitable" | {| class="wikitable" | ||
|- | |- | ||
! Character !! Description | |||
|- | |- | ||
| | |[[Banjo]] & [[Kazooie]]||Kazooie opens her wings and slams them on the ground. | ||
|- | |- | ||
| | |[[Bayonetta]]||Stomps on the ground in front of herself, then uses her Wicked Weaves to summon Madama Butterfly's foot for a near-immediate followup stomp in front of herself. | ||
|- | |- | ||
|{{ | |[[Bowser]]||{{GameIcon|SSBM}}{{GameIcon|SSBB}}{{GameIcon|SSB4}} Retreats to his shell and spins around rapidly to strike with his spikes.<br/>{{GameIcon|SSBU}} Crouches slightly and slashes low to the ground with his claws in front of himself and then behind himself. | ||
|- | |- | ||
| | |[[Bowser Jr.]]||Deploys two wrecking balls from the Junior Clown Car and slams them onto the ground on either side of himself. | ||
|- | |- | ||
| | |[[Byleth]]||Performs a spinning sweep with Aymr. | ||
|- | |- | ||
|{{ | |[[Captain Falcon]]||{{GameIcon|SSB}} Hops up and performs a 360° roundhouse kick, striking both in front of and behind himself.<br/>{{GameIcon|SSBM}}{{GameIcon|SSBB}}{{GameIcon|SSB4}}{{GameIcon|SSBU}} Throws a straight kick, then uses the same leg for a back kick behind himself. | ||
|- | |- | ||
| | |[[Charizard]]||Stomps on the ground, shaking the earth for a heavy hit. | ||
|- | |- | ||
| | |[[Chrom]]||Slashes low to the ground in front of himself, then behind himself. | ||
|- | |- | ||
| | |[[Cloud]]||Jabs the hilt of the Buster Sword forwards and leads that into a reverse-grip stab behind himself. | ||
|- | |- | ||
| | |[[Corrin]]||Leans forwards on one leg and stabs with Omega Yato while morphing their other leg into a draconic lance and stabbing it backwards. | ||
|- | |- | ||
| | |[[Daisy]]||Crouches and spins, rapidly attacking with the hem of her dress. | ||
|- | |- | ||
| | |[[Dark Pit]]||Slashes outwards with one of his blades in front of himself, then stabs backwards in reverse grip with the other one. | ||
|- | |- | ||
| | |[[Dark Samus]]||Sweeps her leg low in a circle around herself. | ||
|- | |- | ||
| | |[[Diddy Kong]]||Performs a breakdancing sweep kick. | ||
|- | |- | ||
|{{ | |[[Donkey Kong]]||{{GameIcon|SSB}} Extends his legs and performs a spin to sweep with them all around himself.<br/>{{GameIcon|SSBM}}{{GameIcon|SSBB}}{{GameIcon|SSB4}}{{GameIcon|SSBU}} Slams both his fists onto the ground. | ||
|- | |- | ||
| | |[[Dr. Mario]]||Performs a breakdancing sweep kick. It resembles Mario's Sweep Kick move from ''Super Mario 64''. | ||
|- | |- | ||
| | |[[Duck Hunt]]||The gunman to fires in front of the dog and duck, then behind them, and then in front of them again, sending the duo into a panic. | ||
|- | |- | ||
| | |[[Falco]]||Performs a quick split kick. | ||
|- | |- | ||
| | |[[Fox]]||Performs a quick split kick. | ||
|- | |- | ||
|{{ | |[[Ganondorf]]||{{GameIcon|SSBM}}{{GameIcon|SSBB}}{{GameIcon|SSB4}} Throws a straight kick, then uses the same leg for a back kick behind himself.<br/>{{GameIcon|SSBU}} Takes out the SpaceWorld 2000 sword, jabs its pommel forwards along the ground, and then stabs backwards with it. | ||
|- | |- | ||
| | |[[Greninja]]||Swipes inwards with a pair of watery blades, covering both sides. | ||
|- | |- | ||
| | |[[Hero]]||Slashes low to the ground in front of himself, then behind himself. | ||
|- | |- | ||
|{{ | |[[Ice Climbers]]||{{GameIcon|SSBM}}{{GameIcon|SSBB}} Hop up while swiping their hammers in a circle around the ground.<br/>{{GameIcon|SSBU}} The leader swings their hammer inwards in front of themselves, while the follower does the same in the opposite direction. | ||
|- | |- | ||
| | |[[Ike]]||Slashes low to the ground in front of himself, then behind himself. | ||
|- | |- | ||
| | |[[Incineroar]]||Hops up a short distance and then performs a body splash as it lands on the ground. Can dodge particularly low-profile attacks if timed correctly. | ||
|- | |- | ||
| | |[[Inkling]]||Swings the Slosher in a circle at their feet, striking both with the weapon and its ink. | ||
|- | |- | ||
| | |[[Isabelle]]||Swings a small bucket of water in a circle around her feet. | ||
|- | |- | ||
| | |[[Ivysaur]]||Swipes inwards with both of its vines, covering both in front and behind. | ||
|- | |- | ||
| | |[[Jigglypuff]]||Spins around before puffing itself downwards, striking with a foot-inflating split kick. | ||
|- | |- | ||
| | |[[Joker]]||Swings his knife low to the ground in a circle around his feet. | ||
|- | |- | ||
|[[Kazuya]]||Karate chops downwards in his demon form. Can meteor smash. | |||
| | |||
|- | |- | ||
|[[Ken]]||Performs a fast, low leg sweep in front of himself. | |||
| | |||
|- | |- | ||
|[[King Dedede]]||Sweeps his hammer in a circle around himself. | |||
| | |||
|- | |- | ||
|[[King K. Rool]]||Jumps up and then belly-flops onto the ground, causing a quake. Can dodge particularly low-profile attacks if timed correctly. | |||
|| | |||
|- | |- | ||
|[[Kirby]]||Performs a spinning two-footed sweep kick. | |||
| | |||
|- | |- | ||
|[[Link]]||Slashes low to the ground in front of himself, then behind himself. | |||
| | |||
|- | |- | ||
|[[Little Mac]]||Hangs low to the ground and quickly punches on either side of himself. | |||
| | |||
|- | |- | ||
|[[Lucario]]||Performs a pair of simultaneous outward aura-powered palm thrusts. | |||
| | |||
|- | |- | ||
|[[Lucas]]||Points to the ground in front of himself, firing off three successive blasts of PSI energy. | |||
| | |||
|- | |- | ||
|[[Lucina]]||Slashes low to the ground in front of herself, then behind herself. | |||
|| | |||
|- | |- | ||
|[[Luigi]]||Performs a breakdancing sweep kick. It resembles Mario's Sweep Kick from ''Super Mario 64''. | |||
| | |||
|- | |- | ||
|[[Mario]]||Performs a breakdancing sweep kick. It resembles his Sweep Kick from ''Super Mario 64''. | |||
|| | |||
|- | |- | ||
|[[Marth]]||Slashes low to the ground in front of himself, then behind himself. | |||
| | |||
|- | |- | ||
|[[Mega Man]]||Uses Flame Blast, which releases a pillar of flame from each of his Mega Busters, causing them to overheat. | |||
| | |||
|- | |- | ||
|[[Meta Knight]]||Slashes low to the ground in front of himself, then behind himself. | |||
| | |||
|- | |- | ||
|[[Mewtwo]]||Points at the ground, unleashing an explosion of darkness. | |||
| | |||
|- | |- | ||
|[[Mii Brawler]]||Stands on one leg while throwing a jab forwards and a kick backwards. | |||
| | |||
|- | |- | ||
|[[Mii Gunner]]||Blasts their cannon in front of themselves, then spins around and blasts again behind them. | |||
| | |||
|- | |- | ||
|[[Mii Swordfighter]]||Slashes low to the ground in front of themselves, then behind themselves. | |||
| | |||
|- | |- | ||
|[[Min Min]]||Performs a quick split kick. | |||
| | |||
|- | |- | ||
|[[Mr. Game & Watch]]||Slams two hammers onto the ground simultaneously. | |||
| | |||
|- | |- | ||
|[[Mythra]]||Spins on one leg, kicking behind herself with the other and swinging the Aegis Sword in front then vice versa. | |||
| | |||
|- | |- | ||
|[[Ness]]||"Walks the dog" with his yo-yo. | |||
| | |||
|- | |- | ||
|[[Olimar]]||Points on either side of himself, commanding his first and second-ordered Pikmin to perform simultaneous headbutts along the ground on either side of himself. The damage and knockback depend on the Pikmin commanded. | |||
| | |||
|- | |- | ||
|[[Pac-Man]]||Holds his palms out, unleashing Pinky and Clyde to strike on both sides of himself. | |||
|- | |- | ||
|[[Palutena]]||Swings downwards with a pair of light wings. | |||
| | |||
|- | |- | ||
|[[Peach]]||Crouches and spins, rapidly attacking with the hem of her dress. | |||
| | |||
|- | |- | ||
|[[Pichu]]||{{GameIcon|SSBM}} Rapidly spins on the ground.<br/>{{GameIcon|SSBU}} Rapidly spins on the ground while emitting electricity. | |||
|| | |||
| | |||
|- | |- | ||
|[[Pikachu]]||{{GameIcon|SSB}} Performs a breakdancing sweep kick.<br/>{{GameIcon|SSBM}}{{GameIcon|SSBB}}{{GameIcon|SSB4}}{{GameIcon|SSBU}} Rapidly spins on the ground while emitting electricity. | |||
|| | |||
|| | |||
| | |||
|- | |- | ||
|[[Piranha Plant]]||Holds its head in place, pivoting its body around it to strike on both sides with its pot. | |||
|| | |||
|- | |- | ||
|[[Pit]]||Slashes outwards with one of his blades in front of himself, then stabs backwards in reverse grip with the other one. | |||
| | |||
|- | |- | ||
|[[Pyra]]||Spins on one leg, kicking behind herself with the other and swinging the Aegis Sword in front then vice versa. | |||
| | |||
|- | |- | ||
|[[R.O.B.]]||Lowers his arms and rapidly spins them to strike several times. | |||
| | |||
|- | |- | ||
|[[Richter]]||Spins, sweeping the Vampire Killer along the ground in a wide circle. | |||
| | |||
|- | |- | ||
|[[Ridley]]||Hops up, then drops back down wings-first. | |||
| | |||
|- | |- | ||
|[[Robin]]||Swings the equipped sword straight downwards onto the ground, emitting an electric shock that travels along the ground if the Levin Sword is equipped. | |||
|| | |||
|- | |- | ||
| | |[[Rosalina]] & [[Luma]]||''Rosalina:'' Performs an alternating pair of low standing shin kicks, creating a small swirl of space dust at her feet for each one.<br/>''Luma:'' Throws a spinning one-footed kick behind itself, then in front as it completes its spin. | ||
| | |||
|- | |- | ||
|[[Roy]]||Slashes low to the ground in front of himself, then behind himself. | |||
| | |||
|- | |- | ||
|[[Ryu]]||Performs a fast, low leg sweep in front of himself. | |||
|| | |||
|- | |- | ||
|[[Samus]]||Sweeps her leg low in a circle around herself. | |||
| | |||
|- | |- | ||
|[[Sephiroth]]||Performs a downward-angled stab directly in front of him with Masamune. | |||
|| | |||
|- | |- | ||
|[[Sheik]]||Performs a rapid series of spinning kicks while balancing on her back. | |||
| | |||
|- | |- | ||
|[[Shulk]]||Lays the Monado low to the ground, then spins around with it, striking several times. | |||
| | |||
|- | |- | ||
|[[Simon]]||Spins, sweeping the Vampire Killer along the ground in a wide circle. | |||
| | |||
|- | |- | ||
|[[Snake]]||{{GameIcon|SSBB}} Plants a landmine in the ground at his feet, which then explodes if attacked or walked over.<br/>{{GameIcon|SSBU}} Performs a quick pair of low shin kicks while standing. | |||
| | |||
| | |||
|- | |- | ||
|[[Sonic]]||{{GameIcon|SSBB}} Assumes his ball form and quickly zips forwards, then backwards along the ground.<br/>{{GameIcon|SSB4}}{{GameIcon|SSBU}} Performs a quick split kick. | |||
| | |||
| | |||
|- | |- | ||
|[[Sora]]||Hops into the air and stabs the ground with his Keyblade, causing a shockwave. Can dodge particularly low-profile attacks if timed correctly. | |||
| | |||
|- | |- | ||
|[[Squirtle]]||Retreats to its shell for a spin attack. | |||
|| | |||
|- | |- | ||
|[[Steve]]||Pours a bucket of lava out in front of himself, then behind. Briefly affected by gravity. | |||
| | |||
|- | |- | ||
|[[Terry]]||A low kick in front of himself. | |||
|| | |||
|- | |- | ||
|[[Toon Link]]||Slashes low to the ground in front of himself, then behind himself. | |||
| | |||
|- | |- | ||
|[[Villager]]||Uses a shovel to strike the ground in front of and then behind themselves, [[bury]]ing opponents. | |||
|| | |||
|- | |- | ||
|[[Wario]]||Lays on the ground and spins around. | |||
| | |||
|- | |- | ||
|[[Wii Fit Trainer]]||Kneels on the ground, then performs an Arm and Leg Lift to strike forwards with a spearhand and backwards with a back kick. | |||
| | |||
|- | |- | ||
|[[Wolf]]||Slashes across the ground with his claws in front of and then behind himself. | |||
|| | |||
|- | |- | ||
|[[Yoshi]]||Crouches and sweeps his tail forwards, then backwards. | |||
| | |||
|- | |- | ||
|[[Young Link]]||Slashes low to the ground in front of himself, then behind himself. | |||
|| | |||
|- | |- | ||
|[[Zelda]]||Performs a quick, short-ranged shin kick in front of herself, then behind herself with the same leg. | |||
| | |||
|- | |- | ||
|[[Zero Suit Samus]]||Aims her Paralyzer at a downwards diagonal angle and fires it at the ground in front of herself. | |||
| | |||
|} | |} | ||
==Notable down smashes== | ==Notable down smashes== | ||
[[File:PeachDownSmashSSBM.gif|thumb|{{SSBM|Peach}}'s down smash in ''Melee''.]] | [[File:PeachDownSmashSSBM.gif|thumb|{{SSBM|Peach}}'s down smash in ''Melee''.]] | ||
* | *While most down smashes are designed to hit on both sides of a character, there are a small number of characters with one-sided down smashes, including [[Mewtwo]], [[Zero Suit Samus]], [[Lucas]], [[Ryu]], [[Ken]], [[Bayonetta]], [[Terry]], [[Sephiroth]], and [[Kazuya]]. In addition, [[Robin]]'s down smash only hits on one side with the Bronze Sword equipped, but sends out an electric wave which reaches backwards with the Levin Sword equipped. [[Olimar]]'s down smash also fails to hit behind him if he only has one available Pikmin. Furthermore, as of ''Ultimate'', both of the [[Ice Climbers]] individually have one-sided down smashes, but when the climbers are together, they will succeed in covering both sides. | ||
*From ''Melee'' onward, but not in ''Smash 4'', [[Ness]]'s down smash can hit opponents while charging as the yo-yo comes to rest on the stage behind him. This is especially dangerous in ''Ultimate'', where the yo-yo can fall down and hang off of ledges and hits multiple times, allowing it to lead into the attack properly. It is the only down smash to have a hitbox while charging. Ness's similarly-functioning [[up smash]] is the only up smash to have such a distinction, while [[Corrin]] possesses the only such [[forward smash]]. Also notable is that Ness, and [[Luma]] are the only characters with down smashes to hit first behind and then in front, as opposed to first in front and then behind. In Ness's case, this is presumably to give more utility to the charging hitbox, as his up smash already covers his front. | |||
*{{SSBM| | *In ''Brawl'', {{SSBB|Snake}}'s down smash causes him to plant a mine in the ground. Once planted, it will explode if struck by any hitbox or touched by any character, including Snake, which grants it incredible versatility for stage control. This is the only [[projectile]] down smash. Also unique to the move is that, as it is [[charge]]d, the mine becomes increasingly difficult to see in addition to becoming stronger. | ||
*[[Villager]] and, in ''Ultimate'', {{SSBU|Mr. Game & Watch}}, are the only characters whose down smashes can [[bury]] opponents. | |||
*[[Ridley]], [[Incineroar]], [[King K. Rool]] and [[Sora]] all perform a short upwards hop during the startup of their down smashes, which allow them to dodge certain attacks and punish them heavily. This leads them to sometimes be humorously labeled "[[spot dodge]]s with [[hitbox]]es". Of particular note is King K. Rool's, which possesses his characteristic [[Belly Super Armor]]. | |||
*{{SSBB| | *In ''Melee'', {{SSBM|Peach}}'s down smash is a fearsome attack by any measure. Unlike most multi-hit attacks, all of its hits deal individually high [[damage]] and [[knockback]]. At low percentages, especially against a [[crouch cancel]]ling opponent, it can deal astonishingly high damage. Its high [[semi-spike]] knockback and fast speed also makes it a great tool for [[edge-guarding]]. Since ''Brawl'', however, the attack has been [[nerf]]ed, and is now a fairly standard multi-hit attack. | ||
* | *In ''Brawl'', the {{SSBB|Ice Climbers}}'s down smashes are capable of dealing extreme damage. As both Ice Climbers perform their own down smashes and the animation involves them both performing a front and back sweep, the move is capable of hitting up to four times if the opponent is very close, which deals 42% (the second highest out of any down smash in ''Brawl''). This move was nerfed heavily in ''Ultimate'', as the Ice Climbers now individually perform a sweep in each direction, and even if both hits land, it only deals around half the damage of the original attack (22.7%). | ||
*In ''Brawl'', {{SSBB|Meta Knight}}'s down smash is both among his fastest attacks and strongest KO options, and is notoriously difficult to punish due to its long range and [[transcendent priority]]. It comes out on frame 4 and it has a total duration of 33 frames, being tied for the lowest in both categories. In later games, its power and range were reduced in addition to the move receiving more ending lag although it still remains an extremely fast down smash. | |||
*[[ | **In ''Brawl'' and ''Smash 4'', Meta Knight's down smash has a strange property. If Meta Knight buffers a down smash just before finishing a different animation, the down smash will be performed one frame faster than if he performs a raw down smash. This is because the move starts charging on frame 1 so if he performs it out of an interruptible action, it will charge the move for 1 frame but if he buffers it out of another animation, this charge frame will be skipped. The non buffered version comes out on frame 5 (frame 10 for the second hit) and it has 34 total frames in ''Brawl'' and 38 in ''Smash 4'' but when buffered, it comes out one frame faster and ends one frame sooner. This was changed in ''Ultimate'' with the move now charging a frame later, on frame 2, making its speed consistent regardless of if the move was buffered or not. | ||
*Zero Suit Samus' down smash has been a staple of her moveset in all three games she has appeared in. Despite having high startup lag, it has very low ending lag, large hitboxes, and [[paralyze]]s the opponent which allows her to follow up with one of her KO options at high percents or start combos at low percents. Although it is very useful in all three games, the move is most effective in ''Brawl'' compared to its successors. | |||
**This is because its ''Brawl'' incarnation has the lowest ending lag, the largest hitboxes, the longest paralysis duration, the highest damage and the lowest knockback. The move can easily chain into itself multiple times and much like a projectile, it only applies [[hitlag]] to the opponent rather than both fighters (which is still the case in ''Smash 4'', but not in ''Ultimate'' where both fighters suffer hitlag). When combined with its very low ending lag, this not only gives Zero Suit Samus minimal lag after hitting the opponent but it also made the move completely safe on shield, especially if charged. The move can also be [[absorb]]ed, which makes it a very effective tool in doubles when Zero Suit Samus is paired with a teammate with an absorption move. This aspect was nerfed in later games both due to the move's lower damage/higher ending lag and the halved damage when a projectile is absorbed by a teammate. | |||
*{{ | *{{SSBU|Mr. Game & Watch}}'s down smash in ''Ultimate'' is considered one of the best in the game as while it does not have very fast startup, it has low ending lag, long range, it is very safe on shield and hard to punish when spaced due to these points, its sourspot is a strong semi-spike, its sweetspot has strong vertical knockback against aerial opponents and the sweetspot has a long-lasting bury duration against grounded opponents, which can lead into early KOs with forward smash or at the very least, can deal very high damage. | ||
**It was also a very effective move in ''Brawl'' as while it had higher startup lag and lacked a bury effect, it had lower ending lag, a stronger sourspot and a sweetspot with even stronger vertical knockback. | |||
*{{ | *{{SSBU|Wolf}}'s down smash in ''Ultimate'' is also considered to be one of the best in the game due to its large hitbox that hits below the stage, giving it amazing [[2 frame punish]] potential, while its very high power (even when sourspotted, although its sweetspot is still much stronger) allows it to kill at 60% from the ledge. It also has a rather low endlag despite its moderate startup. This makes it one of Wolf's best edgeguarding tools as well as one of his most reliable KO options. | ||
*{{ | *{{SSBU|Byleth}}'s down smash is notorious for being one of the strongest down smashes in the game as well as dealing massive shield damage. Although this move has much more startup and ending lag, it can be used to set up shield breaks, such as hitting an opponent's shield with any attack and performing an uncharged down smash if the opponent shields more often. This is one of Byleth's best finishers against shielding opponents. | ||
*{{SSBU|Sephiroth}}'s down smash has the same property, although the move can only connect when the tip of his sword hits the ground and hits in front of him. It is essentially more useful since he can punish shielding opponents or by setting up a fully-charged [[Shadow Flare]] which forces opponents to shield an attack. | |||
**Additionally, Sephiroth's down smash is the only move in the game which has its properties altered depending on whether the hitbox touches the ground or not. Specifically, if the tip of Masamune is planted on the ground, it will be stronger and launch debris into the air, which increases its range. Conversely, if the tip of the sword does not find solid ground (usually if Sepheroth is close to and facing the ledge or on small platforms) the move will be weaker and lack the extra range. | |||
*[[Bayonetta]] and {{SSBU|Kazuya}}’s down smashes are the only down smashes that can [[Meteor Smash]] opponents. | |||
** | |||
* | |||
==Gallery== | |||
<gallery> | |||
Down Smash1.jpg|The first part of Ganondorf's down smash, he kicks in front of him | |||
Down Smash2.jpg|The second part, Ganondorf kicks behind him. | |||
</gallery> | |||
== See also == | == See also == | ||
*[[Forward smash]] | *[[Forward smash]] | ||
| Line 749: | Line 228: | ||
[[Category:Game controls]] | [[Category:Game controls]] | ||
[[Category:Down smashes]] | [[Category:Down smashes|*]] | ||
[[Category:Smash attacks]] | |||
[[es:Ataque Smash hacia abajo]] | |||
Latest revision as of 22:09, March 24, 2024


Down smash (abbreviated d-smash) or down smash attack (下スマッシュ攻撃, Down/lower/under smash attack) is a smash attack performed by any character by tapping the Control Stick downward and pressing A at the same time or by pressing down on the C-stick. In Super Smash Bros. Melee, the C-stick cannot be used in one-player mode.
Since Super Smash Bros. Melee, all smash attacks can be charged by holding down the A button for up to one second, multiplying damage and knockback by up to 1.4. In Ultimate, with some exceptions, these charges can be held for up to 3 seconds (or 180 frames), but the attack stops increasing in strength after the 1 second mark.
Down smashes are generally the fastest, weakest smash attack in a character's arsenal, and almost all of them hit on both sides of the character, making them useful for coverage or punishing rolls. While not universal, some down smashes hit in front then behind, with the back hit being stronger to reward punishing rolls or dodges, such as Ike's; other down smashes will instead have a first hit which sends at an angle that combos into the second stronger hit, such as Ganondorf's. Many down smashes can be described as "on the ground" attacks (usually abbreviated to OTG), meaning they are specifically designed to hit opponents lying on the ground.
Prior to Ultimate, down smashes were not as flexible to use as the other smash attacks; they couldn't be used out of a dash or out of shield like up smashes can, nor could they be used in the first few frames of a dash or out of a pivot like forward smashes.
List of down smashes[edit]
| Character | Description |
|---|---|
| Banjo & Kazooie | Kazooie opens her wings and slams them on the ground. |
| Bayonetta | Stomps on the ground in front of herself, then uses her Wicked Weaves to summon Madama Butterfly's foot for a near-immediate followup stomp in front of herself. |
| Bowser | |
| Bowser Jr. | Deploys two wrecking balls from the Junior Clown Car and slams them onto the ground on either side of himself. |
| Byleth | Performs a spinning sweep with Aymr. |
| Captain Falcon | |
| Charizard | Stomps on the ground, shaking the earth for a heavy hit. |
| Chrom | Slashes low to the ground in front of himself, then behind himself. |
| Cloud | Jabs the hilt of the Buster Sword forwards and leads that into a reverse-grip stab behind himself. |
| Corrin | Leans forwards on one leg and stabs with Omega Yato while morphing their other leg into a draconic lance and stabbing it backwards. |
| Daisy | Crouches and spins, rapidly attacking with the hem of her dress. |
| Dark Pit | Slashes outwards with one of his blades in front of himself, then stabs backwards in reverse grip with the other one. |
| Dark Samus | Sweeps her leg low in a circle around herself. |
| Diddy Kong | Performs a breakdancing sweep kick. |
| Donkey Kong | |
| Dr. Mario | Performs a breakdancing sweep kick. It resembles Mario's Sweep Kick move from Super Mario 64. |
| Duck Hunt | The gunman to fires in front of the dog and duck, then behind them, and then in front of them again, sending the duo into a panic. |
| Falco | Performs a quick split kick. |
| Fox | Performs a quick split kick. |
| Ganondorf | |
| Greninja | Swipes inwards with a pair of watery blades, covering both sides. |
| Hero | Slashes low to the ground in front of himself, then behind himself. |
| Ice Climbers | |
| Ike | Slashes low to the ground in front of himself, then behind himself. |
| Incineroar | Hops up a short distance and then performs a body splash as it lands on the ground. Can dodge particularly low-profile attacks if timed correctly. |
| Inkling | Swings the Slosher in a circle at their feet, striking both with the weapon and its ink. |
| Isabelle | Swings a small bucket of water in a circle around her feet. |
| Ivysaur | Swipes inwards with both of its vines, covering both in front and behind. |
| Jigglypuff | Spins around before puffing itself downwards, striking with a foot-inflating split kick. |
| Joker | Swings his knife low to the ground in a circle around his feet. |
| Kazuya | Karate chops downwards in his demon form. Can meteor smash. |
| Ken | Performs a fast, low leg sweep in front of himself. |
| King Dedede | Sweeps his hammer in a circle around himself. |
| King K. Rool | Jumps up and then belly-flops onto the ground, causing a quake. Can dodge particularly low-profile attacks if timed correctly. |
| Kirby | Performs a spinning two-footed sweep kick. |
| Link | Slashes low to the ground in front of himself, then behind himself. |
| Little Mac | Hangs low to the ground and quickly punches on either side of himself. |
| Lucario | Performs a pair of simultaneous outward aura-powered palm thrusts. |
| Lucas | Points to the ground in front of himself, firing off three successive blasts of PSI energy. |
| Lucina | Slashes low to the ground in front of herself, then behind herself. |
| Luigi | Performs a breakdancing sweep kick. It resembles Mario's Sweep Kick from Super Mario 64. |
| Mario | Performs a breakdancing sweep kick. It resembles his Sweep Kick from Super Mario 64. |
| Marth | Slashes low to the ground in front of himself, then behind himself. |
| Mega Man | Uses Flame Blast, which releases a pillar of flame from each of his Mega Busters, causing them to overheat. |
| Meta Knight | Slashes low to the ground in front of himself, then behind himself. |
| Mewtwo | Points at the ground, unleashing an explosion of darkness. |
| Mii Brawler | Stands on one leg while throwing a jab forwards and a kick backwards. |
| Mii Gunner | Blasts their cannon in front of themselves, then spins around and blasts again behind them. |
| Mii Swordfighter | Slashes low to the ground in front of themselves, then behind themselves. |
| Min Min | Performs a quick split kick. |
| Mr. Game & Watch | Slams two hammers onto the ground simultaneously. |
| Mythra | Spins on one leg, kicking behind herself with the other and swinging the Aegis Sword in front then vice versa. |
| Ness | "Walks the dog" with his yo-yo. |
| Olimar | Points on either side of himself, commanding his first and second-ordered Pikmin to perform simultaneous headbutts along the ground on either side of himself. The damage and knockback depend on the Pikmin commanded. |
| Pac-Man | Holds his palms out, unleashing Pinky and Clyde to strike on both sides of himself. |
| Palutena | Swings downwards with a pair of light wings. |
| Peach | Crouches and spins, rapidly attacking with the hem of her dress. |
| Pichu | |
| Pikachu | |
| Piranha Plant | Holds its head in place, pivoting its body around it to strike on both sides with its pot. |
| Pit | Slashes outwards with one of his blades in front of himself, then stabs backwards in reverse grip with the other one. |
| Pyra | Spins on one leg, kicking behind herself with the other and swinging the Aegis Sword in front then vice versa. |
| R.O.B. | Lowers his arms and rapidly spins them to strike several times. |
| Richter | Spins, sweeping the Vampire Killer along the ground in a wide circle. |
| Ridley | Hops up, then drops back down wings-first. |
| Robin | Swings the equipped sword straight downwards onto the ground, emitting an electric shock that travels along the ground if the Levin Sword is equipped. |
| Rosalina & Luma | Rosalina: Performs an alternating pair of low standing shin kicks, creating a small swirl of space dust at her feet for each one. Luma: Throws a spinning one-footed kick behind itself, then in front as it completes its spin. |
| Roy | Slashes low to the ground in front of himself, then behind himself. |
| Ryu | Performs a fast, low leg sweep in front of himself. |
| Samus | Sweeps her leg low in a circle around herself. |
| Sephiroth | Performs a downward-angled stab directly in front of him with Masamune. |
| Sheik | Performs a rapid series of spinning kicks while balancing on her back. |
| Shulk | Lays the Monado low to the ground, then spins around with it, striking several times. |
| Simon | Spins, sweeping the Vampire Killer along the ground in a wide circle. |
| Snake | |
| Sonic | |
| Sora | Hops into the air and stabs the ground with his Keyblade, causing a shockwave. Can dodge particularly low-profile attacks if timed correctly. |
| Squirtle | Retreats to its shell for a spin attack. |
| Steve | Pours a bucket of lava out in front of himself, then behind. Briefly affected by gravity. |
| Terry | A low kick in front of himself. |
| Toon Link | Slashes low to the ground in front of himself, then behind himself. |
| Villager | Uses a shovel to strike the ground in front of and then behind themselves, burying opponents. |
| Wario | Lays on the ground and spins around. |
| Wii Fit Trainer | Kneels on the ground, then performs an Arm and Leg Lift to strike forwards with a spearhand and backwards with a back kick. |
| Wolf | Slashes across the ground with his claws in front of and then behind himself. |
| Yoshi | Crouches and sweeps his tail forwards, then backwards. |
| Young Link | Slashes low to the ground in front of himself, then behind himself. |
| Zelda | Performs a quick, short-ranged shin kick in front of herself, then behind herself with the same leg. |
| Zero Suit Samus | Aims her Paralyzer at a downwards diagonal angle and fires it at the ground in front of herself. |
Notable down smashes[edit]

- While most down smashes are designed to hit on both sides of a character, there are a small number of characters with one-sided down smashes, including Mewtwo, Zero Suit Samus, Lucas, Ryu, Ken, Bayonetta, Terry, Sephiroth, and Kazuya. In addition, Robin's down smash only hits on one side with the Bronze Sword equipped, but sends out an electric wave which reaches backwards with the Levin Sword equipped. Olimar's down smash also fails to hit behind him if he only has one available Pikmin. Furthermore, as of Ultimate, both of the Ice Climbers individually have one-sided down smashes, but when the climbers are together, they will succeed in covering both sides.
- From Melee onward, but not in Smash 4, Ness's down smash can hit opponents while charging as the yo-yo comes to rest on the stage behind him. This is especially dangerous in Ultimate, where the yo-yo can fall down and hang off of ledges and hits multiple times, allowing it to lead into the attack properly. It is the only down smash to have a hitbox while charging. Ness's similarly-functioning up smash is the only up smash to have such a distinction, while Corrin possesses the only such forward smash. Also notable is that Ness, and Luma are the only characters with down smashes to hit first behind and then in front, as opposed to first in front and then behind. In Ness's case, this is presumably to give more utility to the charging hitbox, as his up smash already covers his front.
- In Brawl, Snake's down smash causes him to plant a mine in the ground. Once planted, it will explode if struck by any hitbox or touched by any character, including Snake, which grants it incredible versatility for stage control. This is the only projectile down smash. Also unique to the move is that, as it is charged, the mine becomes increasingly difficult to see in addition to becoming stronger.
- Villager and, in Ultimate, Mr. Game & Watch, are the only characters whose down smashes can bury opponents.
- Ridley, Incineroar, King K. Rool and Sora all perform a short upwards hop during the startup of their down smashes, which allow them to dodge certain attacks and punish them heavily. This leads them to sometimes be humorously labeled "spot dodges with hitboxes". Of particular note is King K. Rool's, which possesses his characteristic Belly Super Armor.
- In Melee, Peach's down smash is a fearsome attack by any measure. Unlike most multi-hit attacks, all of its hits deal individually high damage and knockback. At low percentages, especially against a crouch cancelling opponent, it can deal astonishingly high damage. Its high semi-spike knockback and fast speed also makes it a great tool for edge-guarding. Since Brawl, however, the attack has been nerfed, and is now a fairly standard multi-hit attack.
- In Brawl, the Ice Climbers's down smashes are capable of dealing extreme damage. As both Ice Climbers perform their own down smashes and the animation involves them both performing a front and back sweep, the move is capable of hitting up to four times if the opponent is very close, which deals 42% (the second highest out of any down smash in Brawl). This move was nerfed heavily in Ultimate, as the Ice Climbers now individually perform a sweep in each direction, and even if both hits land, it only deals around half the damage of the original attack (22.7%).
- In Brawl, Meta Knight's down smash is both among his fastest attacks and strongest KO options, and is notoriously difficult to punish due to its long range and transcendent priority. It comes out on frame 4 and it has a total duration of 33 frames, being tied for the lowest in both categories. In later games, its power and range were reduced in addition to the move receiving more ending lag although it still remains an extremely fast down smash.
- In Brawl and Smash 4, Meta Knight's down smash has a strange property. If Meta Knight buffers a down smash just before finishing a different animation, the down smash will be performed one frame faster than if he performs a raw down smash. This is because the move starts charging on frame 1 so if he performs it out of an interruptible action, it will charge the move for 1 frame but if he buffers it out of another animation, this charge frame will be skipped. The non buffered version comes out on frame 5 (frame 10 for the second hit) and it has 34 total frames in Brawl and 38 in Smash 4 but when buffered, it comes out one frame faster and ends one frame sooner. This was changed in Ultimate with the move now charging a frame later, on frame 2, making its speed consistent regardless of if the move was buffered or not.
- Zero Suit Samus' down smash has been a staple of her moveset in all three games she has appeared in. Despite having high startup lag, it has very low ending lag, large hitboxes, and paralyzes the opponent which allows her to follow up with one of her KO options at high percents or start combos at low percents. Although it is very useful in all three games, the move is most effective in Brawl compared to its successors.
- This is because its Brawl incarnation has the lowest ending lag, the largest hitboxes, the longest paralysis duration, the highest damage and the lowest knockback. The move can easily chain into itself multiple times and much like a projectile, it only applies hitlag to the opponent rather than both fighters (which is still the case in Smash 4, but not in Ultimate where both fighters suffer hitlag). When combined with its very low ending lag, this not only gives Zero Suit Samus minimal lag after hitting the opponent but it also made the move completely safe on shield, especially if charged. The move can also be absorbed, which makes it a very effective tool in doubles when Zero Suit Samus is paired with a teammate with an absorption move. This aspect was nerfed in later games both due to the move's lower damage/higher ending lag and the halved damage when a projectile is absorbed by a teammate.
- Mr. Game & Watch's down smash in Ultimate is considered one of the best in the game as while it does not have very fast startup, it has low ending lag, long range, it is very safe on shield and hard to punish when spaced due to these points, its sourspot is a strong semi-spike, its sweetspot has strong vertical knockback against aerial opponents and the sweetspot has a long-lasting bury duration against grounded opponents, which can lead into early KOs with forward smash or at the very least, can deal very high damage.
- It was also a very effective move in Brawl as while it had higher startup lag and lacked a bury effect, it had lower ending lag, a stronger sourspot and a sweetspot with even stronger vertical knockback.
- Wolf's down smash in Ultimate is also considered to be one of the best in the game due to its large hitbox that hits below the stage, giving it amazing 2 frame punish potential, while its very high power (even when sourspotted, although its sweetspot is still much stronger) allows it to kill at 60% from the ledge. It also has a rather low endlag despite its moderate startup. This makes it one of Wolf's best edgeguarding tools as well as one of his most reliable KO options.
- Byleth's down smash is notorious for being one of the strongest down smashes in the game as well as dealing massive shield damage. Although this move has much more startup and ending lag, it can be used to set up shield breaks, such as hitting an opponent's shield with any attack and performing an uncharged down smash if the opponent shields more often. This is one of Byleth's best finishers against shielding opponents.
- Sephiroth's down smash has the same property, although the move can only connect when the tip of his sword hits the ground and hits in front of him. It is essentially more useful since he can punish shielding opponents or by setting up a fully-charged Shadow Flare which forces opponents to shield an attack.
- Additionally, Sephiroth's down smash is the only move in the game which has its properties altered depending on whether the hitbox touches the ground or not. Specifically, if the tip of Masamune is planted on the ground, it will be stronger and launch debris into the air, which increases its range. Conversely, if the tip of the sword does not find solid ground (usually if Sepheroth is close to and facing the ledge or on small platforms) the move will be weaker and lack the extra range.
- Bayonetta and Kazuya’s down smashes are the only down smashes that can Meteor Smash opponents.
Gallery[edit]
The first part of Ganondorf's down smash, he kicks in front of him
The second part, Ganondorf kicks behind him.


See also[edit]
| Attacks in the Super Smash Bros. series | |
|---|---|
| Standard ground attacks | Neutral attack · Dash attack |
| Tilt attacks | Forward tilt · Up tilt · Down tilt · Crouching attack |
| Smash attacks | Forward smash · Up smash · Down smash |
| Aerial attacks | Neutral aerial · Forward aerial · Back aerial · Up aerial · Down aerial · Grab aerial · Glide attack |
| Throws | Grab · Pummel · Forward throw · Back throw · Up throw · Down throw |
| Get-up attacks | Floor attack · Edge attack |
| Special moves | Neutral special move · Side special move · Up special move · Down special move · Command-input move · Final Smash |