Down aerial: Difference between revisions
(→List of down aerials: Samus DAir starts behind her. It has done that since Smash 64.) |
|||
| (153 intermediate revisions by 74 users not shown) | |||
| Line 1: | Line 1: | ||
{{ArticleIcons| | {{ArticleIcons|series=y}} | ||
[[File:Mario Sonic and Mega Man.jpg|thumb|250px|Sonic's down aerial in {{forwiiu}}.]] | |||
[[File: | [[File:Lucario D-air Brawl.png|thumb|250px|Lucario's down aerial in ''Brawl''.]] | ||
[[File: | [[File:MarthDownAerialSSBM.gif|thumb|Animation of {{SSBM|Marth}}'s down aerial in ''Melee''.]] | ||
[[File: | The '''down aerial''' ({{ja|下空中攻撃|Shita kūchū kōgeki}}, ''Down/lower/under midair attack''; commonly abbreviated as '''Dair''' or '''d-air''', and referred to as '''AttackAirLw''' internally) is an [[aerial attack]] that is performed in midair by pressing the attack button while tilting the [[control stick]] downward. Its official term varies between titles, where it is known as a '''down midair attack''' in ''[[Super Smash Bros. Melee]]'', and a '''down air attack''' from ''[[Super Smash Bros. Brawl]]'' onward. Many of these moves are [[meteor smash]]es, and typically either are single or multi-hit attacks directly below the character, or are [[stall-then-fall]]s where the character briefly hovers in the air, then rockets downwards. | ||
The '''down aerial''' ( | |||
==List of down aerials | ==List of down aerials== | ||
Unless stated otherwise, all down aerials are assumed to have the ability to [[meteor smash]], with most of them requiring a clean hit or {{b|sweetspot|hitbox}} to be landed. | |||
{| class="wikitable" | |||
{|class="wikitable" | |||
|- | |- | ||
! Character !! Description | |||
|- | |- | ||
| | |[[Banjo]] & [[Kazooie]]||Performs the Beak Buster, where Banjo flips upside-down and Kazooie pounds the ground with her beak. | ||
|- | |- | ||
| | |[[Bayonetta]]||Somersaults and performs a falling axe kick with her legs split. Possesses a landing hitbox. | ||
|- | |- | ||
|{{SSBM| | |[[Bowser]]||{{GameIcon|SSBM}}{{GameIcon|SSBB}} Retreats into his shell and spins horizontally with his spikes pointing downward, hitting multiple times. Possesses a landing hitbox.<br/>{{GameIcon|SSB4}}{{GameIcon|SSBU}} Retreats into his shell and rises slightly with his spikes pointing downward, then performs a spinning dive. Possesses a landing hitbox. | ||
|- | |- | ||
| | |[[Bowser Jr.]]||Rotates a drill from the [[Koopa Clown Car]] below himself, hitting multiple times. Cannot meteor smash conventionally. Possesses a landing hitbox. | ||
|- | |- | ||
| | |[[Byleth]]||Swings downward with Aymr. | ||
|- | |- | ||
| | |[[Captain Falcon]]||Stomps with both legs. | ||
|- | |- | ||
|{{ | |[[Charizard]]||{{GameIcon|SSBB}} Stomps with both legs.<br/>{{GameIcon|SSB4}}{{GameIcon|SSBU}} Stomps with one leg. | ||
|- | |- | ||
| | |[[Chrom]]||Performs a two-handed takedown slash. | ||
|- | |- | ||
| | |[[Cloud]]||Performs a lingering downward thrust with the Buster Sword. | ||
|- | |- | ||
| | |[[Corrin]]||Transforms both legs into spears and does a diving kick, hitting multiple times. Possesses a landing hitbox. | ||
|- | |- | ||
| | |[[Daisy]]||Rapidly kicks at a diagonally downward angle four times. Cannot meteor smash. | ||
|- | |- | ||
| | |[[Dark Pit]]||Slashes downward in an arc starting from the front. | ||
|- | |- | ||
| | |[[Dark Samus]]||Turns upside down and swings her Arm Cannon in an arc starting from the back. | ||
|- | |- | ||
| | |[[Diddy Kong]]||Performs a [[Wikipedia:Professional wrestling attacks#Double axe handle|double axe handle]] swing. | ||
|- | |- | ||
|{{SSBM| | |[[Donkey Kong]]||{{GameIcon|SSB}} Stomps with both legs.<br/>{{GameIcon|SSBM}}{{GameIcon|SSBB}}{{GameIcon|SSB4}}{{GameIcon|SSBU}} Stomps with one leg. | ||
|- | |- | ||
|{{SSBM| | |[[Dr. Mario]]||{{GameIcon|SSBM}}{{GameIcon|SSB4}} Performs a drill kick at a slight diagonal angle. Possesses a landing hitbox but cannot meteor smash.<br/>{{GameIcon|SSBU}} Stretches his body and stomps with both legs. | ||
|- | |- | ||
| | |[[Duck Hunt]]||The dog turns towards the screen and performs a somersaulting headbutt, then thrusts his lower back to propel the duck downward, who performs a somersaulting peck. | ||
|- | |- | ||
| | |[[Falco]]||Performs a single-hitting drill kick at a slight diagonal angle. | ||
|- | |- | ||
| | |[[Fox]]||Performs a multi-hitting drill kick at a slight diagonal angle. From ''Smash 4'' onward, it possesses a landing hitbox, but cannot meteor smash conventionally. | ||
|- | |- | ||
| | |[[Ganondorf]]||Stomps with both legs, producing an [[electric]] effect on hit. | ||
|- | |- | ||
| | |[[Greninja]]||Performs a diving kick with both legs, bouncing off upon hitting an opponent. | ||
|- | |- | ||
| | |[[Hero]]||Thrusts his sword downward with one hand. | ||
|- | |- | ||
|{{ | |[[Ice Climbers]]||{{GameIcon|SSBM}} Perform a lingering downward thrust with their hammers. Cannot meteor smash.<br/>{{GameIcon|SSBB}}{{GameIcon|SSBU}} Perform a diving thrust with their hammers. Cannot meteor smash. | ||
|- | |- | ||
| | |[[Ike]]||Performs a two-handed takedown slash. | ||
|- | |- | ||
| | |[[Incineroar]]||Stomps with both legs. | ||
|- | |- | ||
| | |[[Inkling]]||Thrusts the Splattershot downward. | ||
|- | |- | ||
| | |[[Isabelle]]||Thrusts two turnips downward. | ||
|- | |- | ||
| | |[[Ivysaur]]||Turns upside down and blasts pollen from its bulb, stalling briefly in midair afterwards. | ||
|- | |- | ||
| | |[[Jigglypuff]]||Performs a drill kick at a slight diagonal angle, hitting multiple times. Cannot meteor smash conventionally from ''Melee'' onward. | ||
|- | |- | ||
| | |[[Joker]]||Turns upside down and slashes in an arc starting from behind. If active, Arsene stomps with one leg after Joker's attack. Only Arsene's attack can meteor smash. | ||
|- | |- | ||
| | |[[Kazuya Mishima|Kazuya]]||Performs Demon Scissors, a somersault before swinging his leg downward, landing on his back. Cannot meteor smash. | ||
|- | |- | ||
|{{ | |[[Ken]]||Throws out a {{iw|wikipedia|cross|boxing}} at a diagonally downward angle. | ||
|- | |- | ||
|{{SSBB | |[[King Dedede]]||{{GameIcon|SSBB}} Twirls his hammer below himself, hitting multiple times. Cannot meteor smash.<br/>{{GameIcon|SSB4}}{{GameIcon|SSBU}} Swings his hammer downward. | ||
|- | |- | ||
| | |[[King K. Rool]]||Stomps with both legs. | ||
|- | |- | ||
| | |[[Kirby]]||Performs a drill kick at a slight diagonal angle, hitting multiple times. Possesses a landing hitbox. | ||
|- | |- | ||
| | |[[Link]]||Performs a lingering downward thrust with the Master Sword. Upon hitting an opponent, Link bounces off and can hit them again. Cannot meteor smash prior to ''Smash 4''. | ||
|- | |- | ||
| | |[[Little Mac]]||Weakly punches downward. | ||
|- | |- | ||
| | |[[Lucario]]||Stomps with one leg after the other, releasing aura from its feet and stalling briefly in midair. Cannot meteor smash. | ||
|- | |- | ||
|[[Lucas]]||Performs four consecutive stomps, releasing PSI sparks from his feet. | |||
|- | |- | ||
| | |[[Lucina]]||Somersaults horizontally and slashes in an arc starting from behind. | ||
|- | |- | ||
|{{ | |[[Luigi]]||{{GameIcon|SSB}} Performs a multi-hitting drill kick at a slight diagonal angle.<br/>{{GameIcon|SSBM}}{{GameIcon|SSBB}}{{GameIcon|SSB4}}{{GameIcon|SSBU}}Performs a single-hitting drill kick at a slight diagonal angle. | ||
|- | |- | ||
|{{ | |[[Mario]]||{{GameIcon|SSB}}{{GameIcon|SSBM}} Performs a multi-hitting drill kick at a slight diagonal angle. In ''Melee'', it possesses a landing hitbox, but cannot meteor smash.<br/>{{GameIcon|SSBB}}{{GameIcon|SSB4}}{{GameIcon|SSBU}} Performs the [[Mario Tornado]], previously his [[down special]]; he spins horizontally with his arms extended, hitting multiple times, then fully outstretches his body for a final hit. It possesses a landing hitbox, but cannot meteor smash. | ||
|- | |- | ||
|{{SSBB| | |[[Marth]]||{{GameIcon|SSBM}}{{GameIcon|SSBB}} Slashes downward in an arc starting from the front.<br/>{{GameIcon|SSB4}}{{GameIcon|SSBU}} Somersaults horizontally and slashes in an arc starting from behind. | ||
|- | |- | ||
| | |[[Mega Man]]||Uses the Hard Knuckle, firing one fist as a projectile below himself. | ||
|- | |- | ||
| | |[[Meta Knight]]||Slashes downward in an arc starting from the front. Cannot meteor smash. | ||
|- | |- | ||
|{{ | |[[Mewtwo]]||{{GameIcon|SSBM}} Somersaults horizontally and stomps with one leg.<br/>{{GameIcon|SSB4}}{{GameIcon|SSBU}} Somersaults horizontally and stomps with one leg, releasing a small blast of dark energy from its foot. | ||
|- | |- | ||
| | |[[Mii Brawler]]||Performs a double axe handle swing. | ||
|- | |- | ||
| | |[[Mii Gunner]]||Thrusts their arm cannon downward and releases a blast from it. | ||
|- | |- | ||
| | |[[Mii Swordfighter]]||Turns upside down and performs a twirling stab, hitting multiple times. Possesses a landing hitbox. | ||
|- | |- | ||
| | |[[Min Min]]||Performs a diagonal divekick. | ||
|- | |- | ||
|{{ | |[[Mr. Game & Watch]]||{{GameIcon|SSBM}} Thrusts a key downward. Possesses a landing hitbox.<br/>{{GameIcon|SSBB}}{{GameIcon|SSB4}}{{GameIcon|SSBU}} Performs a diving thrust with a key. Possesses a landing hitbox. | ||
|- | |- | ||
| | |[[Mythra]]||Slashes the Aegis Sword below herself in a wide arc starting in front of herself. Cannot meteor smash. | ||
|- | |- | ||
|{{ | |[[Ness]]||{{GameIcon|SSB}}{{GameIcon|SSBM}}{{GameIcon|SSBB}} Stomps with one leg.<br/>{{GameIcon|SSB4}}{{GameIcon|SSBU}} Stomps with one leg after a spin, releasing a PSI spark from his foot. | ||
|- | |- | ||
| | |[[Olimar]]||Grabs his leading Pikmin by its stem and swings it downward. If no Pikmin are following Olimar, he still performs the move, but it has no effect. | ||
|- | |- | ||
| | |[[Pac-Man]]||Performs four consecutive stomps. Cannot meteor smash. | ||
|- | |- | ||
| | |[[Palutena]]||Performs a roundhouse kick downward. | ||
|- | |- | ||
| | |[[Peach]]||Rapidly kicks downward four times. Cannot meteor smash. | ||
|- | |- | ||
| | |[[Pichu]]||Turns upside down and spins in a corkscrew, releasing electricity from its head. Causes [[recoil damage]] to Pichu, and possesses a landing hitbox. Cannot meteor smash in ''Melee''. | ||
|- | |- | ||
| | |[[Pikachu]]||Turns upside down and spins in a corkscrew, releasing electricity from its head. Possesses a landing hitbox. Cannot meteor smash prior to ''Ultimate''. | ||
|- | |- | ||
| | |[[Piranha Plant]]||Thrusts its pot downward. | ||
|- | |- | ||
| | |[[Pit]]||Slashes downward in an arc starting from the front. Cannot meteor smash in ''Brawl''. | ||
|- | |- | ||
| | |[[Pyra]]||Slashes the Aegis Sword below herself in a wide arc starting in front of herself. | ||
|- | |- | ||
| | |[[R.O.B.]]||Points his base at a slight diagonal angle and activates his thrusters, rising slightly afterwards. | ||
|- | |- | ||
| | |[[Richter]]||Performs a diagonal divekick, bouncing off upon hitting an opponent. | ||
|- | |- | ||
| | |[[Ridley]]||Performs a divekick straight downward with both legs. | ||
|- | |- | ||
| | |[[Robin]]||Slashes downward with either the Bronze Sword or Levin Sword. Meteor smashes if the Levin Sword is used. | ||
|- | |- | ||
| | |[[Rosalina]] & [[Luma]]||''Rosalina:'' Summons a falling planetary ring below herself with a stomp.<br/>''Luma:'' Stomps with one leg. Cannot meteor smash. | ||
|- | |- | ||
|{{ | |[[Roy]]||{{GameIcon|SSBM}} Slashes downward in an arc starting from the front.<br/>{{GameIcon|SSB4}} Performs a two-handed takedown slash.<br/>{{GameIcon|SSBU}} Performs a two-handed takedown slash with the Binding Blade set ablaze. | ||
|- | |- | ||
| | |[[Ryu]]||Throws out a cross at a diagonally downward angle. | ||
|- | |- | ||
| | |[[Samus]]||Turns upside down and swings her Arm Cannon in an arc starting from the back. | ||
|- | |- | ||
| | |[[Sephiroth]]||Performs Hell's Gate, a diving thrust with Masamune. | ||
|- | |- | ||
|{{ | |[[Sheik]]||{{GameIcon|SSBM}} Performs a lingering kick at a diagonally downward angle. Cannot meteor smash.<br/>{{GameIcon|SSBB}}{{GameIcon|SSB4}}{{GameIcon|SSBU}} Performs a diagonal divekick. Cannot meteor smash in ''Brawl'', and possesses a landing hitbox from ''Smash 4'' onward. | ||
|- | |- | ||
| | |[[Shulk]]||Thrusts the Monado downward, then activates its beam blade for a second hit. | ||
|- | |- | ||
| | |[[Simon]]||Performs a diagonal divekick, bouncing off upon hitting an opponent. | ||
|- | |- | ||
| | |[[Snake]]||Performs four consecutive stomps, rising slightly upon its use. Cannot meteor smash conventionally. | ||
|- | |- | ||
| | |[[Sonic]]||Performs a diagonal divekick. Cannot meteor smash in ''Brawl''. | ||
|- | |- | ||
|{{ | |[[Sora]]||Performs {{iw|khwiki|Hurricane Blast}}. Moonsaults downwards with the Keyblade multiple times. Cannot meteor smash. | ||
|- | |- | ||
| | |[[Squirtle]]||Thrusts its tail downward and spins horizontally, hitting multiple times. Cannot meteor smash. | ||
|- | |- | ||
| | |[[Steve]]||Places anvil below him and descends downwards, which can be escaped. Cannot meteor smash. | ||
|- | |- | ||
| | |[[Terry]]||A downward punch. Has a meteor effect if sweetspotted, launching opponents at a very diagonal angle akin to a spike. | ||
|- | |- | ||
| | |[[Toon Link]]||Performs a diving thrust with the Master Sword. In ''Brawl'', upon hitting an opponent, Toon Link bounces off and can hit them again. | ||
|- | |- | ||
| | |[[Villager]]||Thrust one, two, or three turnips downward, with the amount being [[random]]. Can only meteor smash with three turnips in ''Smash 4''. | ||
|- | |- | ||
|{{ | |[[Wario]]||{{GameIcon|SSBB}}{{GameIcon|SSB4}} Turns upside down and spins horizontally, hitting multiple times with his head. Cannot meteor smash conventionally.<br/>{{GameIcon|SSBU}} Turns upside down and spins horizontally with his hands below his head, hitting multiple times. Cannot meteor smash conventionally. | ||
|- | |- | ||
| | |[[Wii Fit Trainer]]||Assumes the Chair pose to stomp with both legs. | ||
|- | |- | ||
| | |[[Wolf]]||Swings both arms downward simultaneously, slashing with his claws. | ||
|- | |- | ||
| | |[[Yoshi]]||Performs a flutter kick with both legs, hitting multiple times. From ''Smash 4'' onward, it possesses a landing hitbox, but cannot meteor smash conventionally. | ||
|- | |- | ||
| | |[[Young Link]]||Performs a lingering downward thrust with the Kokiri Sword. Upon hitting an opponent, Young Link bounces off and can hit them again. Cannot meteor smash in ''Ultimate''. | ||
|- | |- | ||
| | |[[Zelda]]||Stomps with one leg. | ||
|- | |- | ||
| | |[[Zero Suit Samus]]||Performs a diagonal divekick. Possesses a landing hitbox. | ||
|} | |} | ||
==Notable down aerials== | ==Notable down aerials== | ||
[[ | *The down aerials of [[Banjo]] & [[Kazooie]], [[Bayonetta]], [[Bowser]], [[Corrin]], [[Greninja]], [[Ice Climbers]], [[Kazuya]], [[Min Min]], [[Mr. Game & Watch]], [[Richter]], [[Ridley]], [[Sephiroth]], [[Simon]], [[Sheik]], [[Sonic]], [[Sora]], [[Steve]], [[Toon Link]], and [[Zero Suit Samus]] all function as [[stall-then-fall]]s, except in ''Melee'' (and ''Brawl'' for Bowser). | ||
*The down aerials of [[Link]], [[Toon Link]] (in ''Brawl'' only), and [[Young Link]] cause them to bounce a short distance up and away from the opponent upon hitting them or their shield. The hitbox remains active when this happens and he is able to hit the opponent again for extra damage. | |||
*[[ | **Similarly, Greninja, Simon, and Richter's down aerials cause them to jump off the opponent upon hitting them or their shield with their down aerials. Unlike the Links' down aerials, these jumps end the move and allow them to perform any action, including combos into other attacks. | ||
* | *The down aerials of [[Mega Man]] and [[Steve]] are the only ones that are [[projectile]]s, and thus can be [[reflect]]ed or [[Pocket]]ed. | ||
* | *[[Lucario]], [[Ivysaur]], and [[R.O.B.]]'s down aerials stop their movement in the air, unless they were experiencing [[knockback]] before their use. | ||
*In ''Melee'', the down aerials of {{SSBM|Captain Falcon}}, {{SSBM|Falco}}, {{SSBM|Fox}}, and {{SSBM|Marth}} can all [[spike]] opponents. | |||
* | **Captain Falcon's down aerial possesses a hitbox in his upper body that powerfully spikes opponents, colloquially known as the [[nipple spike]]. | ||
*[[Marth]]'s down aerial, specifically in ''Melee'', is possibly the most feared with its speed, range, and ability to spike. Its effectiveness has been reduced in ''Brawl'', though it | **Falco's down aerial is very fast for a spike (coming out on frame 5), and a vital component to his [[pillar]] combos. However, it was nerfed in the [[PAL]] version of the game, as only the clean hit spikes instead of the entire move, making it less effective for [[edgeguarding]] and beating [[crouch cancel]]ing. | ||
*[[Yoshi]]'s down aerial | **Fox's down aerial is additionally notorious for its use in his [[waveshine infinite]] combo. | ||
* | *[[Ganondorf]]'s down aerial is the strongest [[meteor smash]] among playable characters in ''Brawl'', as well as one of the strongest meteor smashes and down aerials as a whole in the series, dealing particularly high damage and enough knockback to KO reliably onstage. In ''SSB4'', it is one of the only two meteor smashes that cannot be [[tech]]ed on the ground, due to its high amount of [[freeze frames]]. | ||
*[[Marth]]'s down aerial, specifically in ''Melee'', is possibly the most feared with its speed, range, and ability to spike. Its effectiveness has been reduced in the PAL version, and later in ''Brawl'', where it can be [[meteor cancel]]ed, though it still retains a large part of its utility. In ''SSB4'', however, it was severely [[nerf]]ed with reduced range, weaker sourspots, increased startup, meteor smashing only at the middle of the swing, and having a reversed animation (starting from behind Marth rather than in front of him), making it significantly harder to land. | |||
*[[Yoshi]]'s down aerial is the most damaging in all of its appearances, dealing a maximum of 56% in ''Smash 64'', 53% in ''Melee'', 35% in ''Brawl'', 32.2% in ''SSB4'', and 28% in ''Ultimate''. This allows it to easily bring opponents to KO percentages, especially those with large [[hurtbox]]es. In ''Smash 64'', it comes out on frame 4 and it deals enough damage to [[shield]]s to outright break them if all hits connect, making it highly effective. Although it deals the least damage in ''Ultimate'', it connects much more reliably than in previous games to its looping hits using the [[autolink angle]]. | |||
**In ''Melee'', it is also a simple way to win the Paper Mario [[trophy]] in [[Home-Run Contest]], as it can easily rack up a lot of damage on the [[Sandbag]] without the need of [[bat drop]]ping. | |||
*{{SSBU|Ivysaur}}'s and {{SSBU|Pyra}}'s down aerials in ''Ultimate'' are both notorious for their large, disjointed hitboxes and their ability to consistently meteor smash opponents, making both of them excellent for edgeguarding. | |||
*[[Snake]]'s down aerial is notable for its extremely fast startup and high power. It comes out on frame 3, making it the fastest down aerial in the series, and deals 28% in ''Brawl'' and 20% in ''Ultimate'' if all of the hits connect while it also possesses strong knockback, making it a potential KO move. Although its power and knockback were considerably toned down from ''Brawl'', the move is much more effective in ''Ultimate'' due to its linking hits connecting much more reliably as well as its lower landing lag, being able to autocancel in a short hop, and Snake's significantly faster jumpsquat, the latter making it very reliable as a fast and highly damaging out of shield option. | |||
==Gallery== | |||
<gallery> | |||
MarioDairSSBM.gif|{{SSBM|Mario}}'s down aerial in ''Melee''. | |||
</gallery> | |||
{{Attacks}} | {{Attacks}} | ||
[[Category:Game controls]] | |||
[[Category:Game | [[es:Ataque aéreo hacia abajo]] | ||
Latest revision as of 23:29, May 10, 2024


The down aerial (下空中攻撃, Down/lower/under midair attack; commonly abbreviated as Dair or d-air, and referred to as AttackAirLw internally) is an aerial attack that is performed in midair by pressing the attack button while tilting the control stick downward. Its official term varies between titles, where it is known as a down midair attack in Super Smash Bros. Melee, and a down air attack from Super Smash Bros. Brawl onward. Many of these moves are meteor smashes, and typically either are single or multi-hit attacks directly below the character, or are stall-then-falls where the character briefly hovers in the air, then rockets downwards.
List of down aerials[edit]
Unless stated otherwise, all down aerials are assumed to have the ability to meteor smash, with most of them requiring a clean hit or sweetspot to be landed.
| Character | Description |
|---|---|
| Banjo & Kazooie | Performs the Beak Buster, where Banjo flips upside-down and Kazooie pounds the ground with her beak. |
| Bayonetta | Somersaults and performs a falling axe kick with her legs split. Possesses a landing hitbox. |
| Bowser | |
| Bowser Jr. | Rotates a drill from the Koopa Clown Car below himself, hitting multiple times. Cannot meteor smash conventionally. Possesses a landing hitbox. |
| Byleth | Swings downward with Aymr. |
| Captain Falcon | Stomps with both legs. |
| Charizard | |
| Chrom | Performs a two-handed takedown slash. |
| Cloud | Performs a lingering downward thrust with the Buster Sword. |
| Corrin | Transforms both legs into spears and does a diving kick, hitting multiple times. Possesses a landing hitbox. |
| Daisy | Rapidly kicks at a diagonally downward angle four times. Cannot meteor smash. |
| Dark Pit | Slashes downward in an arc starting from the front. |
| Dark Samus | Turns upside down and swings her Arm Cannon in an arc starting from the back. |
| Diddy Kong | Performs a double axe handle swing. |
| Donkey Kong | |
| Dr. Mario | |
| Duck Hunt | The dog turns towards the screen and performs a somersaulting headbutt, then thrusts his lower back to propel the duck downward, who performs a somersaulting peck. |
| Falco | Performs a single-hitting drill kick at a slight diagonal angle. |
| Fox | Performs a multi-hitting drill kick at a slight diagonal angle. From Smash 4 onward, it possesses a landing hitbox, but cannot meteor smash conventionally. |
| Ganondorf | Stomps with both legs, producing an electric effect on hit. |
| Greninja | Performs a diving kick with both legs, bouncing off upon hitting an opponent. |
| Hero | Thrusts his sword downward with one hand. |
| Ice Climbers | |
| Ike | Performs a two-handed takedown slash. |
| Incineroar | Stomps with both legs. |
| Inkling | Thrusts the Splattershot downward. |
| Isabelle | Thrusts two turnips downward. |
| Ivysaur | Turns upside down and blasts pollen from its bulb, stalling briefly in midair afterwards. |
| Jigglypuff | Performs a drill kick at a slight diagonal angle, hitting multiple times. Cannot meteor smash conventionally from Melee onward. |
| Joker | Turns upside down and slashes in an arc starting from behind. If active, Arsene stomps with one leg after Joker's attack. Only Arsene's attack can meteor smash. |
| Kazuya | Performs Demon Scissors, a somersault before swinging his leg downward, landing on his back. Cannot meteor smash. |
| Ken | Throws out a cross at a diagonally downward angle. |
| King Dedede | |
| King K. Rool | Stomps with both legs. |
| Kirby | Performs a drill kick at a slight diagonal angle, hitting multiple times. Possesses a landing hitbox. |
| Link | Performs a lingering downward thrust with the Master Sword. Upon hitting an opponent, Link bounces off and can hit them again. Cannot meteor smash prior to Smash 4. |
| Little Mac | Weakly punches downward. |
| Lucario | Stomps with one leg after the other, releasing aura from its feet and stalling briefly in midair. Cannot meteor smash. |
| Lucas | Performs four consecutive stomps, releasing PSI sparks from his feet. |
| Lucina | Somersaults horizontally and slashes in an arc starting from behind. |
| Luigi | |
| Mario | |
| Marth | |
| Mega Man | Uses the Hard Knuckle, firing one fist as a projectile below himself. |
| Meta Knight | Slashes downward in an arc starting from the front. Cannot meteor smash. |
| Mewtwo | |
| Mii Brawler | Performs a double axe handle swing. |
| Mii Gunner | Thrusts their arm cannon downward and releases a blast from it. |
| Mii Swordfighter | Turns upside down and performs a twirling stab, hitting multiple times. Possesses a landing hitbox. |
| Min Min | Performs a diagonal divekick. |
| Mr. Game & Watch | |
| Mythra | Slashes the Aegis Sword below herself in a wide arc starting in front of herself. Cannot meteor smash. |
| Ness | |
| Olimar | Grabs his leading Pikmin by its stem and swings it downward. If no Pikmin are following Olimar, he still performs the move, but it has no effect. |
| Pac-Man | Performs four consecutive stomps. Cannot meteor smash. |
| Palutena | Performs a roundhouse kick downward. |
| Peach | Rapidly kicks downward four times. Cannot meteor smash. |
| Pichu | Turns upside down and spins in a corkscrew, releasing electricity from its head. Causes recoil damage to Pichu, and possesses a landing hitbox. Cannot meteor smash in Melee. |
| Pikachu | Turns upside down and spins in a corkscrew, releasing electricity from its head. Possesses a landing hitbox. Cannot meteor smash prior to Ultimate. |
| Piranha Plant | Thrusts its pot downward. |
| Pit | Slashes downward in an arc starting from the front. Cannot meteor smash in Brawl. |
| Pyra | Slashes the Aegis Sword below herself in a wide arc starting in front of herself. |
| R.O.B. | Points his base at a slight diagonal angle and activates his thrusters, rising slightly afterwards. |
| Richter | Performs a diagonal divekick, bouncing off upon hitting an opponent. |
| Ridley | Performs a divekick straight downward with both legs. |
| Robin | Slashes downward with either the Bronze Sword or Levin Sword. Meteor smashes if the Levin Sword is used. |
| Rosalina & Luma | Rosalina: Summons a falling planetary ring below herself with a stomp. Luma: Stomps with one leg. Cannot meteor smash. |
| Roy | |
| Ryu | Throws out a cross at a diagonally downward angle. |
| Samus | Turns upside down and swings her Arm Cannon in an arc starting from the back. |
| Sephiroth | Performs Hell's Gate, a diving thrust with Masamune. |
| Sheik | |
| Shulk | Thrusts the Monado downward, then activates its beam blade for a second hit. |
| Simon | Performs a diagonal divekick, bouncing off upon hitting an opponent. |
| Snake | Performs four consecutive stomps, rising slightly upon its use. Cannot meteor smash conventionally. |
| Sonic | Performs a diagonal divekick. Cannot meteor smash in Brawl. |
| Sora | Performs Hurricane Blast. Moonsaults downwards with the Keyblade multiple times. Cannot meteor smash. |
| Squirtle | Thrusts its tail downward and spins horizontally, hitting multiple times. Cannot meteor smash. |
| Steve | Places anvil below him and descends downwards, which can be escaped. Cannot meteor smash. |
| Terry | A downward punch. Has a meteor effect if sweetspotted, launching opponents at a very diagonal angle akin to a spike. |
| Toon Link | Performs a diving thrust with the Master Sword. In Brawl, upon hitting an opponent, Toon Link bounces off and can hit them again. |
| Villager | Thrust one, two, or three turnips downward, with the amount being random. Can only meteor smash with three turnips in Smash 4. |
| Wario | |
| Wii Fit Trainer | Assumes the Chair pose to stomp with both legs. |
| Wolf | Swings both arms downward simultaneously, slashing with his claws. |
| Yoshi | Performs a flutter kick with both legs, hitting multiple times. From Smash 4 onward, it possesses a landing hitbox, but cannot meteor smash conventionally. |
| Young Link | Performs a lingering downward thrust with the Kokiri Sword. Upon hitting an opponent, Young Link bounces off and can hit them again. Cannot meteor smash in Ultimate. |
| Zelda | Stomps with one leg. |
| Zero Suit Samus | Performs a diagonal divekick. Possesses a landing hitbox. |
Notable down aerials[edit]
- The down aerials of Banjo & Kazooie, Bayonetta, Bowser, Corrin, Greninja, Ice Climbers, Kazuya, Min Min, Mr. Game & Watch, Richter, Ridley, Sephiroth, Simon, Sheik, Sonic, Sora, Steve, Toon Link, and Zero Suit Samus all function as stall-then-falls, except in Melee (and Brawl for Bowser).
- The down aerials of Link, Toon Link (in Brawl only), and Young Link cause them to bounce a short distance up and away from the opponent upon hitting them or their shield. The hitbox remains active when this happens and he is able to hit the opponent again for extra damage.
- Similarly, Greninja, Simon, and Richter's down aerials cause them to jump off the opponent upon hitting them or their shield with their down aerials. Unlike the Links' down aerials, these jumps end the move and allow them to perform any action, including combos into other attacks.
- The down aerials of Mega Man and Steve are the only ones that are projectiles, and thus can be reflected or Pocketed.
- Lucario, Ivysaur, and R.O.B.'s down aerials stop their movement in the air, unless they were experiencing knockback before their use.
- In Melee, the down aerials of Captain Falcon, Falco, Fox, and Marth can all spike opponents.
- Captain Falcon's down aerial possesses a hitbox in his upper body that powerfully spikes opponents, colloquially known as the nipple spike.
- Falco's down aerial is very fast for a spike (coming out on frame 5), and a vital component to his pillar combos. However, it was nerfed in the PAL version of the game, as only the clean hit spikes instead of the entire move, making it less effective for edgeguarding and beating crouch canceling.
- Fox's down aerial is additionally notorious for its use in his waveshine infinite combo.
- Ganondorf's down aerial is the strongest meteor smash among playable characters in Brawl, as well as one of the strongest meteor smashes and down aerials as a whole in the series, dealing particularly high damage and enough knockback to KO reliably onstage. In SSB4, it is one of the only two meteor smashes that cannot be teched on the ground, due to its high amount of freeze frames.
- Marth's down aerial, specifically in Melee, is possibly the most feared with its speed, range, and ability to spike. Its effectiveness has been reduced in the PAL version, and later in Brawl, where it can be meteor canceled, though it still retains a large part of its utility. In SSB4, however, it was severely nerfed with reduced range, weaker sourspots, increased startup, meteor smashing only at the middle of the swing, and having a reversed animation (starting from behind Marth rather than in front of him), making it significantly harder to land.
- Yoshi's down aerial is the most damaging in all of its appearances, dealing a maximum of 56% in Smash 64, 53% in Melee, 35% in Brawl, 32.2% in SSB4, and 28% in Ultimate. This allows it to easily bring opponents to KO percentages, especially those with large hurtboxes. In Smash 64, it comes out on frame 4 and it deals enough damage to shields to outright break them if all hits connect, making it highly effective. Although it deals the least damage in Ultimate, it connects much more reliably than in previous games to its looping hits using the autolink angle.
- In Melee, it is also a simple way to win the Paper Mario trophy in Home-Run Contest, as it can easily rack up a lot of damage on the Sandbag without the need of bat dropping.
- Ivysaur's and Pyra's down aerials in Ultimate are both notorious for their large, disjointed hitboxes and their ability to consistently meteor smash opponents, making both of them excellent for edgeguarding.
- Snake's down aerial is notable for its extremely fast startup and high power. It comes out on frame 3, making it the fastest down aerial in the series, and deals 28% in Brawl and 20% in Ultimate if all of the hits connect while it also possesses strong knockback, making it a potential KO move. Although its power and knockback were considerably toned down from Brawl, the move is much more effective in Ultimate due to its linking hits connecting much more reliably as well as its lower landing lag, being able to autocancel in a short hop, and Snake's significantly faster jumpsquat, the latter making it very reliable as a fast and highly damaging out of shield option.
Gallery[edit]
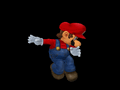
Mario's down aerial in Melee.

| Attacks in the Super Smash Bros. series | |
|---|---|
| Standard ground attacks | Neutral attack · Dash attack |
| Tilt attacks | Forward tilt · Up tilt · Down tilt · Crouching attack |
| Smash attacks | Forward smash · Up smash · Down smash |
| Aerial attacks | Neutral aerial · Forward aerial · Back aerial · Up aerial · Down aerial · Grab aerial · Glide attack |
| Throws | Grab · Pummel · Forward throw · Back throw · Up throw · Down throw |
| Get-up attacks | Floor attack · Edge attack |
| Special moves | Neutral special move · Side special move · Up special move · Down special move · Command-input move · Final Smash |