Little Mac (SSB4): Difference between revisions
(Grammar tweaks) |
|||
| Line 64: | Line 64: | ||
|neutral3dmg=7% | |neutral3dmg=7% | ||
|neutralinfdmg=1% (loop), 3% (last) | |neutralinfdmg=1% (loop), 3% (last) | ||
|neutraldesc=A jab followed by a hook that | |neutraldesc=A jab followed by a hook that followed by either an uppercut (if the attack button is pressed slowly) or a neutral infinite that is followed by an uppercut (only if the jab hits while the attack button is held down). One of the two fastest neutral attacks in the game, along with {{SSB4|Zero Suit Samus}}'. It has unusually high [[priority]], allowing the move to clash against significantly stronger attacks or out-prioritize them. Due to its outstanding speed, it can be chained with other attacks for almost guaranteed KOs at high percentages, including KO Uppercut and Rising Uppercut. | ||
|ftiltname= | |ftiltname= | ||
|ftiltdmg=4% (hit 1), 8% (hit 2) | |ftiltdmg=4% (hit 1), 8% (hit 2) | ||
Revision as of 21:12, October 20, 2015
| Little Mac in Super Smash Bros. 4 | |
|---|---|
 
| |
| Universe | Punch-Out!! |
| Availability | Starter |
| Final Smash | Giga Mac |
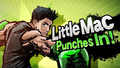
| “ | Little Mac Punches In! | ” |
| —Introduction Tagline | ||
Little Mac (リトル・マック, Little Mac) is a newcomer in Super Smash Bros. 4. He was revealed on February 13th, 2014 during a Nintendo Direct, commemorating the 30th anniversary of the Punch Out!! franchise, which had debuted in Japan in 1983, but later debuted in North America and Europe in 1984.[1]
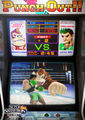
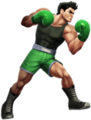
Little Mac is voiced by Kosuke Toriumi in all versions of SSB4. His design is primarily based off his appearance in Punch Out!! for the Wii, and has alternate costumes in the form of "Wireframe Mac" based on the protagonist from the original arcade version of Punch-Out!!, whom the player saw from a first person perspective. When in Wireframe form, Little Mac's voice clips are replaced by 8-bit noises.
Attributes
Little Mac, like Jigglypuff, has extremely polarized attributes. He has a quick walking speed, the third fastest dashing speed, very quick rolls and sidesteps (the former of which is also long distanced), and all three of his smash attacks possess super armor. Conversely, he is tied for the fifth fastest falling speed, has mediocre air speed, the lowest air acceleration in the game, low jumps (which are only higher than Jigglypuff's and Kirby's) and weight, along with the most ineffective aerial attacks and recovery moves in the game. These traits essentially forces Little Mac to fight with extreme dominance on the ground, while being almost useless in the air and off-stage.
Although a grounded melee fighter with average reach, Little Mac has one of the most dominant approach options in the neutral game, due to his incredible ground mobility. As he also has the best overall frame data when grounded, including the fastest neutral attack, forward tilt and down tilt in the game, this allows him to easily catch up with opponents and attack before retreating safely, or pressure opponents with multiple low-lag attacks. If he is unable to find an opening, Little Mac can also space quite efficiently, as most other characters are unable to match his speed and find an opening themselves.
Once he successfully wins in the neutral, Little Mac often has no problem racking up damage, as he can do so on all non-lightweight characters until medium percents so long as they are grounded thanks to his quick neutral attack and down tilt, with the former possessing the ability to be jab cancelled, and he can use them to chain into finishers at medium to high percents, granting him many reliable KO set-ups. His special attacks also hit hard, and allow him to keep pressure off of him: Jolt Haymaker gives him intangibility if started on the ground and can be unleashed at any time while he lunges forward, making this an excellent tech-chase option or retaliation move if an opponent is unable to move due to a move's ending lag. Rising Uppercut can shock opponents that do not expect him to leave the ground, and can KO reliably at 100%. He also possesses Slip Counter, a counterattack that can be used as a response to an opponent's strong attack, or give him a horizontal boost if he counters offstage.
Mac is not vulnerable when cornered either: his punishing game is deadly, as all of of his smash attacks produce extreme knockback (with his down smash also being capable of semi-spiking) and gain infinite super armor during their start-up, allowing him to dish out deadly hits even if an opponent retaliates with an attack of their own. Any damage given or taken also fills Mac's Power Meter. When it is full, Little Mac can perform the KO Uppercut, an unblockable attack that can take a stock early should they be careless. As its charge increases from damage gained and taken, Little Mac can potentially turn the tides even if he has been knocked around, giving him one of the most potent comeback options of any character. Because of his outstanding punishing game, any mistake Mac's opponent makes will often decide the outcome of the match.
Despite his impressive strengths, Little Mac's notoriously terrible aerial traits give him one significant flaw: anything that deprives him of his double jump off-stage will effectively end his stock instantly. Without it, he simply cannot recover, as his recovery moves gain almost no distance. Even if he still has his double jump, trying to grab ledges is generally unsafe, as his recoveries have small ledge sweetspots and no invincibility, making it easy to barely miss, and makes him extreme vulnerable to gimping. While he is surprisingly gifted with the second highest wall jump and can gain a horizontal boost with Slip Counter and KO Uppercut, they are situational and have long ending lag, which makes Mac's off-stage survivability one of the worst in the game (along with Ganondorf's). Hence, even if he has been dominating the entire match, one error on his part can end his stock as fast as he can end his opponent's.
Outside of his recovery, Little Mac's aerial attacks have crippling reach and almost no power, making it almost impossible for him to counter attacks in the air. His only reliable aerial and off-stage KOing options are Jolt Haymaker and Rising Uppercut, which can only lead to a sacrificial KO, and he has no reliable edge-guarding options apart from a down smash. While his aerials can actually combo, jab reset and gimp fighters with bad recoveries due to their speed and auto-canceling capabilities, they require frame-perfect accuracy and carry extreme risk.
His melee-oriented playstyle also makes him prone to grabs, which can send him airborne where he is powerless to retaliate. Opponents with great reach or tether grabs can easily counter him from a safe distance and make it difficult for him to keep close. His own grab is lackluster, as it has mediocre range and speed, no guaranteed throw follow-ups, and his KO throw, his back throw, is among the weakest. In addition, all his standard attacks barring his downward-aimed forward smash deal negative shield damage, while his attacks are somewhat unsafe on shield even when spaced well, making his attacks punishable if whiffed, especially against faster characters. If KO Uppercut is unavailable, Straight Lunge is situational at best, as it has a very long charging time and has low super armor while charging.
Finally, as he cannot hold back spacing and camping options in the air, Mac has a predictable approach, as he is essentially forced to stay grounded to make the best of his traits. This makes him the character who has the most trouble dealing with projectiles, as he will more than likely get hit by them (something that can also remove his KO Uppercut if available). Platformed stages also give him considerable trouble due to his aforementioned aerial problems.
Customs give Little Mac more options, although most of them do not improve his aerial game or recovery. Flaming Straight Lunge is a more readily available attack, and can sometimes be used as a horizontal recovery. However, it gives no super armor, is drastically weaker and can be SDIed out of. Stunning Straight Lunge has more reach and speed with less charge, but the stun cannot be capitalized on. Grounding Blow gives Mac his only strong meteor smash, and opens up follow-ups since it buries opponents, though it gives no intangibility and does not improve his recovery. Guard Breaker is a slow and powerful unblockable blow which can surprise opponents and also makes his recovery more difficult to interrupt. However, the attack cannot be unleashed on command and gives no distance at all if used after hitstun, making offstage use risky. Tornado Uppercut improves Little Mac's abysmal recovery, but it removes his main aerial KOing option. Rising Smash is much stronger, but is incredibly sluggish and covers even less distance. Compact Counter gives Little Mac follow-up options, but it takes away a very powerful move that can potentially one-hit KO. Dash Counter can improving his reach and/or recovery, but it cannot hit opponents at point-blank, and can potentially send him rocketing offstage if Mac counters an attack in the wrong direction.
In essence, Little Mac can be fear-inducing when handled properly. His polarized playstyle makes him extreme example of a "high risk, high reward" character, as he can be one of the most frightening opponents at one moment, yet suddenly the most powerless in the next. Possibly due to high-level players being able to easily take advantage of his terrible aerial game, Little Mac's tournament results have been average at best. Regardless, although his aerial game is possibly the worst in the series, he is far from vulnerable, as his dominating ground game is not to be underestimated.
Update history
Little Mac has been slightly nerfed overall via game updates. His recovery was nerfed in update 1.0.4, though he has received minor buffs since 1.0.6, such as giving some his specials longer lasting hitboxes. However, the changes to game mechanics brought about in updates 1.1.0 and 1.1.1 have also affected Little Mac for the better; while his rolls have less invincibility, they still remain good compared to the rest of the cast, and his ground game allows him to pressure his opponents on shield more reliably due to the changes to shieldstun.
![]() 1.0.4
1.0.4
 Neutral attack's second and last hits deal 1% less damage: 3% → 2% (second), 8% → 7% (last).
 Forward tilt's first hit's second hitbox x-offset decreased: -5.0 → -3.8.
- Forward tilt's second hit's first hitbox x-offset decreased: -5.0 → -3.8
- Neutral aerial's SDI multiplier increased: 1x → 2x.
- Aerial Jolt Haymaker's distance decreased by 10% and its speed decreased.
![]() 1.0.6
1.0.6
 Jolt Haymaker's knockback increased.
![]() 1.1.0
1.1.0
- Neutral infinite's finisher comes out 1 frame faster.
- Fully charged Straight Lunge's start-up decereased: 7 frames → 6.
- Straight Lunge's early sweetspot and later hitbox duration increased by 2 and 4 frames, respectively.
- Jolt Haymaker's hitbox duration increased: 5 frames → 7.
![]() 1.1.1
1.1.1
- Uncharged Stunning Straight Lunge deals 1% more damage: 10% → 11%.
- Fully charged Stunning Straight Lunge's knockback growth increased: 60 → 70.
Moveset
| Name | Damage | Description | ||
|---|---|---|---|---|
| Neutral attack | 2% | A jab followed by a hook that followed by either an uppercut (if the attack button is pressed slowly) or a neutral infinite that is followed by an uppercut (only if the jab hits while the attack button is held down). One of the two fastest neutral attacks in the game, along with Zero Suit Samus'. It has unusually high priority, allowing the move to clash against significantly stronger attacks or out-prioritize them. Due to its outstanding speed, it can be chained with other attacks for almost guaranteed KOs at high percentages, including KO Uppercut and Rising Uppercut. | ||
| 2% | ||||
| 7% | ||||
| 1% (loop), 3% (last) | ||||
| Forward tilt | 4% (hit 1), 8% (hit 2) | Two alternating jabs. The second fastest forward tilt, beaten out only by Mega Man's. Both hits have the best range of Mac's tilts, and have strong knockback. An extremely dependable KO move at high percents. Based on the double punch combo he possessed in Brawl as an Assist Trophy. | ||
| Up tilt | 9% | A backfist performed in an overhead arcing motion. Covers Mac's entire body, allowing him to use this tilt as a weaker and faster option to cover his attacks. Can combo into itself at low percents if the opponent is close to him, and is also useful for catching rolls. | ||
| Down tilt | 8% | A crouching punch. Comes out in 3 frames, tied with Lucas, Ness, Meta Knight and R.O.B. for being the fastest down tilt in the game. This move pops opponents up into the air and is Little Mac's best combo starter, being able to lead into almost all his attacks, not limited to any of his ground moves, Jolt Haymaker or KO Uppercut. | ||
| Dash attack | 10% | A swinging overhead punch. Highly recommended not to be used as an approach option due to it being very punishable on shield, especially when near a ledge due to Little Mac being almost guaranteed to lose a stock if he is grabbed even at 0%. However, its sheer speed and low ending lag can be used as a decent combo tool at low percents against heavier characters, or as a quick attacking option when an opponent is stuck in ending lag. | ||
| Forward smash | ↗ | 19% (hand), 17% (arm) | Steps forward and deals a single punch of different variants depending on the angle of attack.
Up: An uppercut with vertical knockback. Useful for KOing light opponents. Forward: A cross with high knockback. Useful for any situation. Down: A body hook with more damage and shield damage, but less knockback. Breaks shields more reliably than any of Little Mac's other attacks, and can almost break a full shield when fully charged. All his smash attacks have infinite super armor, making them good for plowing through other opponent's attacks as a unique punish. | |
| → | 19% (hand), 17% (arm) | |||
| ↘ | 22% | |||
| Up smash | 20% (clean), 15% (late) | An uppercut which only hits in front. The first frame of the attack has a sweetspot that deals stronger flame damage. Great for aerial protection or chasing down an opponent, as grounded foes are likely to be hit by the sweetspot. | ||
| Down smash | 12% | A 180° spinning hook. It hits quickly in both directions. While weak compared to his other smash attacks, it can semi-spike, making it useful for edge-guarding. The move can hit opponents about to grab onto a ledge too, making it useful for hitting off-stage opponents who exhaust their ledge invincibility while near an edge. | ||
| Neutral aerial | 2% | A downward angled jab. It is the second fastest neutral aerial in the game, losing out only to Mega Man's. However, it has limited use thanks to its low range and low damage output. Its incredible speed allows it to drag aerial opponents back onto the ground with its quick hits or start intricate footstool jump combos. | ||
| Forward aerial | 5% (hand), 4% (arm) | A low-ranged hook. It has slight start-up and a low damage output. Can combo after a down tilt, although this can be difficult to perform. Its speed can make it useful for edge-guarding, especially against fighters with bad recoveries. | ||
| Back aerial | 6% (hand), 4% (arm) | A backfist. Functions similarly to forward aerial, though with less start-up. Because it comes out incredibly quickly, skilled players can use it either to edge-guard or as a way to fend off opponents, although its minuscule hitbox makes this difficult to do reliably. | ||
| Up aerial | 5% (hand), 4% (arm) | An upward hook. Its start-up lag is non-existent, making it a somewhat useful aerial combo move, but its terrible ending and landing lag makes it punishable if missed. | ||
| Down aerial | 5% (hand), 4% (arm) | A palm thrust. The middle hitbox can meteor smash, though it is extremely ineffective against anyone but fast-fallers. However, experienced players can jab reset opponents by short hopping and then hitting a floored opponent before finishing them off with any of Mac's attacks. | ||
| Grab | — | Clinches the opponent. One of the most mediocre grabs in the game due to its moderate ending lag and extremely low range, to the point that it sometimes requires Mac to actually be touching the opponent. Pivot grabbing increases the grab's range, which is useful thanks Mac's outstanding ground speed. | ||
| Pummel | 2.1% | A body punch. A decent pummel with good speed. | ||
| Forward throw | 4% (hit 1), 4% (throw) | Quickly hooks the opponent forward. Low knockback scaling. | ||
| Back throw | 4% (hit 1), 5% (throw) | Turns around with the opponent and uppercuts them. Can KO at extremely high percentages near the edge. | ||
| Up throw | 4% (hit 1), 3% (throw) | Quickly uppercuts the opponent. | ||
| Down throw | 4% (hit 1), 5% (throw) | A double axe handle. Can combo into Rising Uppercut depending on the opponent's DI. | ||
| Forward roll Back roll Spot dodge Air dodge |
— | — | ||
| Techs | — | — | ||
| Floor attack (front) Floor getups (front) |
7% | |||
| Floor attack (back) Floor getups (back) |
7% | |||
| Floor attack (trip) Floor getups (trip) |
5% | |||
| Edge attack Edge getups |
7% | |||
| Neutral special | Default | Straight Lunge | 14%/12%/9% (uncharged ground), 25%/20% (fully charged ground), 10%/7% (uncharged air), 15% (fully charged air), 35% (KO ground), 13% (KO air) | A chargeable, dashing cross which covers more distance the longer it is charged. If the Power Meter is fully charged, it turns into the KO Uppercut instead. This attack has low super armor while charging and high ending lag when fully charged, but it becomes one of the strongest moves in SSB4 if fully charged. |
| Custom 1 | Flaming Straight Lunge | 1.5%/3% (uncharged ground loop/last), 1.8%/6% (fully charged ground loop/last), 1.2%/3% (uncharged air loop/last), 1.4%/5% (fully charged air loop/last), 35% (KO ground), 13% (KO air) | A flaming version that charges faster and deals multiple hits, but does not travel as far. Can be used as a horizontal recovery if timed properly. | |
| Custom 2 | Stunning Straight Lunge | 10%/7% (uncharged ground), 20%/18% (fully charged ground), 8%/5% (uncharged air), 12% (fully charged air), 35% (KO ground), 13% (KO air) | Travels farther and faster, and stuns targets when fully charged before knockback kicks in, but has no super armor and deals slightly less damage. | |
| Side special | Default | Jolt Haymaker | 14% | A Superman punch. The attack can be executed early by pressing the button again. It propels Mac quite a distance and grants intangibility in the first few frames. When used in midair, it travels slower and covers less distance. It is advised not to use this attack around the edge of a stage, since it sends him into helplessness. |
| Custom 1 | Grounding Blow | 9% | Leaps much higher and buries opponents if done on the ground. While in midair, it will result in a meteor smash if it connects with an opponent. Grants less horizontal movement and rockets Little Mac downwards when off-stage. Safer to use near edges. | |
| Custom 2 | Guard Breaker | 18% | Gives Mac super armor and is unblockable, though it travels slower and cannot be made to attack early. Does not give Mac any distance if used immediately out of hitstun. | |
| Up special | Default | Rising Uppercut | 1% (loop), 3% (last) | A jumping corkscrew . Goes higher with more maneuverability if used on the ground. Conversely, it grants half the distance and maneuverability if used in the air. Deceptively powerful and Little Mac's only reliable aerial finisher. |
| Custom 1 | Tornado Uppercut | 3%/4% | Travels farther with better movement, but deals set knockback. A gust of wind shoves back opponents on the ground. | |
| Custom 2 | Rising Smash | 16% (hit 1), 4% (hit 2) | An electrical version with more knockback and damage, but only hits twice with high start-up and ending lag, as well as covering considerably less distance. | |
| Down special | Default | Slip Counter | 1.3x (min 10%) | Dodges backward to avoid a hit, then counterattacks with an invincible uppercut. In the air, this can be used to either give Mac a better recovery or hinder him due to its slide and the direction his opponent is at. |
| Custom 1 | Compact Counter | 0.8x (min 4%) | Does less damage and knockback, but is faster overall and thus can provide Mac with a faster recovery option as well. Can be used to initiate follow-ups. | |
| Custom 2 | Dash Counter | 1.1x (min 7%) | The window does not last as long, but Mac dashes forwards upon countering, giving him a far better recovery than before if used in the air. | |
| Final Smash | Giga Mac | — | Little Mac transforms into Giga Mac, which is even more powerful than his normal form. Some attacks with Giga Mac can one-hit KO opponents at full charge, namely his forward smash angled up or to the side, his sweetspotted up smash, and a clean hit from Straight Lunge. His back throw also becomes stronger than Ness's. | |
Power Meter
As stated in the introduction, Little Mac has a Power Meter. When fully charged, it replaces his neutral special with a single-use attack.
- Neutral special: KO Uppercut; an extremely powerful uppercut that can KO opponents as low as 12%, though the higher the character's weight, the more damage is needed to KO them. The attack has drastically lower knockback and damage when used in the air, and it cannot KO unless the opponent has at least around 150% damage. It was claimed by Masahiro Sakurai to have the power to one-hit KO opponents.
- The Power Meter charges by dealing and/or receiving damage. When Little Mac is attacked, it is double to quadruple the amount he would if he would hit an opponent, his meter goes to maximum if taken damage from exactly 100%.
Taunts
- LittleMacUpTauntSSB4.jpg
- LittleMacSideTauntSSB4.jpg
- LittleMacDownTauntSSB4.jpg
- Up Taunt: Turns his back to the screen, bends down, then raises his fist triumphantly. Doc Louis may say "Hit 'em, baby!". (叩け!マック!, Strike! Mac!)
- Side Taunt: Adjusts his boxing gloves while crossing his fists and scoffing. Doc Louis may say "Let 'em have it, Mac!". (ぶちかませ!マック!, Hit them hard! Mac!)
- Down Taunt: Performs a series of punches while facing the screen. Doc Louis may say "Show 'em what you've got, Mac baby!". (お前のパンチを見せてやれ!, Show them your punch!)
Idle Poses
- Shuffles his feet.
- Shifts his head back and forth in front of his fists.
Cheer
Little Mac! Get 'em back!
On-Screen Appearance
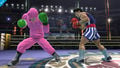
Enters the stage pulling a series of flashy punches before tossing his pink sweatsuit off himself and into the sky. If one of his sweatsuit costumes are selected, he will still do the tossing animation, but Little Mac will still keep his sweatsuit on.
Victory Fanfare
A remix of the Won Match! theme from the original Punch-Out!! for the NES.
Victory Poses
- LittleMacPose1WiiU.png
- LittleMacPose2WiiU.png
- LittleMacPose3WiiU.png
Little Mac wears a championship belt in all three of his victory poses.
- Doc Louis holds up Little Mac's arm like a referee would after a boxing match.
- Does a few punches towards Doc Louis, warming up with him.
- Runs and gives his back towards the camera, then turns around, looks above and strikes a pose, while Doc Louis cheers him on.
In all of Little Mac's victory poses, Doc Louis will say one of the following at random:
- "(in tandem with the announcer) And the winner is... Little Mac! Hahaha!"
- "Y'know, that belt looks good on you, son."
- "Ya got what it takes, Mac!"
- "Nice work, Mac. You got it all figured out."
- "Way to go, Mac! You're the champ, baby!"
- "Awesome win, Mac. Way to go!"
- "You win, Mac!"
- "Alright! I think I hear a chocolate bar callin'."
- "Was that a little too easy for ya, son?"
- "World Circuit's all yours, Mac!"
- "Ahh, winnin' feels good, don't it?"
If Little Mac is using one of the Wireframe palette swaps:
- "Nice moves, Mac. I could barely keep my eyes on ya, son."
- "Ain't you flashy? You making my eyes water, son."
- "You're lookin' mighty good, son. Just like old times, huh?"
In competitive play
Official Custom Moveset Project
| Character | Custom sets available | ||||
|---|---|---|---|---|---|
| 2111 | 2113 | 2112 | 2211 | 2213 | |
| 2212 | 2311 | 2313 | 2312 | 2121 | |
Notable players
Trophies
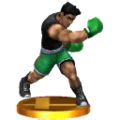
- Little Mac
 This little boxer from the Punch-Out!! series makes up in heart what he lacks in height. He wasn't afraid to take on the boxing champs, and he's not afraid of the Nintendo stars. In Smash Bros., he packs a serious punch. When his KO Meter fills up, wade in and trigger a devastating uppercut.
 The little guy from Punch-Out!! has come a long way since his humble beginnings fighting the almost literal boxing giants. Above his damage display, you'll notice he has a little meter that fills up as he fights. When it's full, you'll see a flashing "KO" there. That means you can unleash a devastating uppercut!
 : Punch-Out!! (10/1987)
 : Punch-Out!! (05/2009)
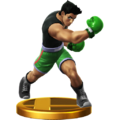
- Little Mac (Alt.)
- No matter his opponent, Little Mac always puts his best fist forward. He enters a charge state before unleashing his Straight Lunge special and can unleash it while charging by pressing the button again. He won't flinch while charging. At max charge, the launching power of this move is scary!
- Little Mac always puts his best fist forward, especially when you use Straight Lunge! You start by charging, then unleash the punch whenever you press the button again. Charge it to the max and its launching power is formidable! Also, attacks won't make you flinch while you're charging or once you've fully charged the move.
- : Punch-Out!! (10/1987)
- : Punch-Out!! (05/2009)
- Giga Mac
- This Final Smash turns Little Mac into a hulking monster of a man. In Punch-Out!! for Wii, Little Mac could take this form by building up the gauge with some well-timed blows. In this game, it seriously powers up his attacks and makes him even faster. He'll completely dominate on the ground, but air battles are outside his weight class.
Classic (3DS)
- LittleMacAllStarTrophy3DS.png
Alt. (3DS)
Classic (Wii U)
Alt. (Wii U)


Gameplay Trailer
<youtube>gmtrmAvL5aw</youtube>
In Event Matches
Solo Events
- Below the Belt: The player, as Mario, must protect a damaged Little Mac from a giant Little Mac.
- New Challengers 1: Little Mac is one of the seven opponents fought in this event, alongside Villager, Wii Fit Trainer, Rosalina & Luma, Lucina, Bowser Jr., and Duck Hunt.
- No Mere Sparring Match: The player controls a Little Mac with boosted damage, and must defeat 3 other Little Macs in a stock battle.
Co-op Events
- Getting Healthy: Wii Fit Trainer and Little Mac must defeat Kirby and Pac-Man.
- The Ultimate Battle: Two players select a character and must defeat the entire roster.
Alternate costumes
.png)
| |||||||
_Palette_(SSB4).png)
| |||||||
 
|
 
|
 
|
 
|
 
|
 
|
 
|
 
|
Gallery
Artwork of Little Mac used on the website.
Little Mac's introduction picture.
Artwork of Little Mac from the 3DS version's boxart.
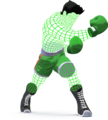
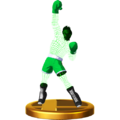
Wireframe Little Mac alternate costume.

Little Mac's amiibo.
The pic of the day shown during Little Mac's reveal.
Sweatshirt Little Mac alternate costume.
A second pic posted on the initial Miiverse post pointing out what happens when his Power Meter gets fully charged up.
Little Mac in Super Smash Bros. for Nintendo 3DS
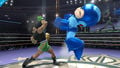
Wireframe Little Mac punching Link.

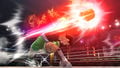
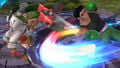
Little Mac's Straight Lunge attack fully charged.
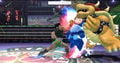
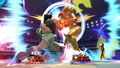
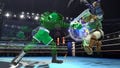
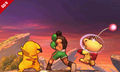
Little Mac using the KO Uppercut on Mega Man and Bowser.
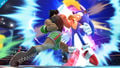
Using the KO Uppercut on Sonic.

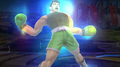
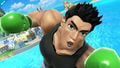
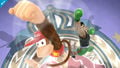
Little Mac begins to spin...

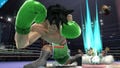
...and finishes with an uppercut.

However, the move does not offer very strong recovery.
- Little Mac Counter.png
His counterattack.
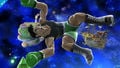
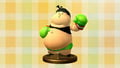
About to transform into Giga Mac.
His Final Smash, Giga Mac.
A jab.
His down smash.
Little Mac tumbling.
Little Mac facing the screen.
Punching with Villager.
A size comparison.
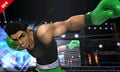
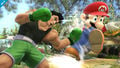
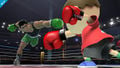
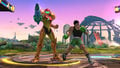
"Little Mac can deliver some solid punches while fighting on the ground."
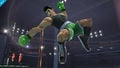
"...However, he's not the strongest fighter while airborne."
Side by side with Samus.
With Diddy Kong.
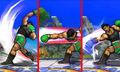
The three different variations of Little Mac's forward smash.
A trophy depicting Little Mac in Captain Rainbow.
Little Mac above 100% damage in SSB4-U
- Stock Battles (Game!).jpg
Little Mac scoring the final KO in a stock battle.


Trivia
- Little Mac's promotional poster image is a reference to both the arcade Punch-Out!!, and Punch-Out!! Wii, where Donkey Kong appeared as a hidden fighter. Coincidentally, he was revealed on the same day that Donkey Kong Country: Tropical Freeze was released in Japan.
- Samus's appearance in Little Mac's introduction trailer is a reference to an image of her and Little Mac on his Assist Trophy Character profile, with her questioning his ability to fight due to his small size (in the trailer, she pats his head and examines him from an angle, seeming to pose a similar question).
- According to Masahiro Sakurai, Little Mac has the lowest online win ratio of all characters as of November 2014.
- Although being "no air fighter", Little Mac's neutral air is surprisingly fast, and skilled players can use it to perform intricate combos, as publicized by some montages.
- In past versions of SSB4, whenever Little Mac grabs a Hammer, he will not properly hold the hammer as it will be on the side of him instead of between his hands. This was fixed in the 1.0.5 patch in Super Smash Bros. for Nintendo 3DS and in the 1.0.6 patch in Super Smash Bros. for Wii U.
- Oddly, Little Mac shares a few animations with Captain Falcon. This includes some of his poses when knocked back with a weak attack, swing animations for battering items such as the Beam Sword and Home Run Bat, being buried and while stunned. Due to them sharing some similar animations, it is possible that Captain Falcon's model was the basis for Little Mac's, with it being shrunk down and given a custom model along with significantly different animations to make an entirely different character.
- Little Mac has the most Alternate Costumes out of any fighter, with 16 instead of the standard 8 per character.
- Little Mac is the only character in Smash 4 to get visual "battle damage" as he gets damaged and KO'd: bandages and bruises appear on his head the more he gets hit. This is a reference to the Wii version of Punch-Out!!, where Little Mac will gradually begin getting bruised and battered if he fights against an opponent and gets hit too many times.
- Though Little Mac has the third-lowest jump height in the game, he has the second-highest wall jump in the game, which is surpassed only by Lucario.
- Little Mac possesses some of the fastest attacks in Smash 4: this includes his jab (tied with Zero Suit Samus), down tilt (tied with Lucas, R.O.B., and Meta Knight) along with his forward tilt and neutral aerial (second to Mega Man).
- Little Mac, Sonic, Ryu, and Meta Knight are the only characters whose entirety of default special moves can aid their recoveries.
- Little Mac's newcomer poster features the least amount of playable fighters out of all of the posters, with only himself and Donkey Kong. The second-least is Palutena and Dark Pit's, which features four.
References
| Fighters in Super Smash Bros. 4 | |
|---|---|
| Veterans | Bowser · Captain Falcon · Charizard · Diddy Kong · Donkey Kong · Dr. Mario · Falco · Fox · Ganondorf · Ike · Jigglypuff · King Dedede · Kirby · Link · Lucario · Lucas · Luigi · Mario · Marth · Meta Knight · Mewtwo · Mr. Game & Watch · Ness · Olimar · Peach · Pikachu · Pit · R.O.B. · Roy · Samus · Sheik · Sonic · Toon Link · Wario · Yoshi · Zelda · Zero Suit Samus |
| Newcomers | Bayonetta · Bowser Jr. · Cloud · Corrin · Dark Pit · Duck Hunt · Greninja · Little Mac · Lucina · Mega Man · Mii Fighter (Mii Brawler · Mii Gunner · Mii Swordfighter) · Pac-Man · Palutena · Robin · Rosalina & Luma · Ryu · Shulk · Villager · Wii Fit Trainer |
|
| |
|---|---|
| Fighter | Little Mac (SSB4 · SSBU) |
| Assist Trophy | Little Mac |
| Stage | Boxing Ring |
| Other | Doc Louis |
| Trophies and Spirits | Trophies · Spirits |
| Music | SSB4 · Ultimate |
| Masterpiece | Punch-Out!! Featuring Mr. Dream |