User:The Other Jared/April Fools 2023
This is a workshop and archive for a 2023 april fools prank.
Voxer Elafiel[edit]
Voxer Elafiel (ヴォクサー エラフィエル Voxer Elafiel) is a fictional character in the Bird Haven franchise created by online personality Shenpai.[1]
Voxer made his Super Smash Bros. debut in Super Smash Bros. Ultimate as a playable character via downloadable content on April 1st, 2023.
Origin[edit]
The history of Voxer goes farther back than many realize. Born within the world that never was, Voxer somehow managed to travel across universes
In Super Smash Bros. Ultimate[edit]
Voxer appears as a newcomer in Super Smash Bros. Ultimate, via a stealth launch on April 1st, 2023.[2] He is the thirteenth DLC character of Ultimate.
Masahiro Sakurai felt like including Voxer, so he did.
Trivia[edit]
- Voxer is the first character in the Super Smash Bros. series to:
- Insert unique aspect of Voxer here. Remove if none are found.
References[edit]
Voxer (SSBU)[edit]
| Voxer Elafiel | |
|---|---|

| |
| Universe | none |
| Availability | Downloadable |
| “ | Ma'am, I am gay. | ” |
| —Introduction tagline | ||
Voxer Elafiel (ヴォクサー エラフィエル Voxer Elafiel) is a playable character in Super Smash Bros. Ultimate. He was dropped with no prior warning on April 1, 2023. He is fighter #90.
Rather than being voiced by Toshihide Tsuchiya, who voiced the character in Donkey Kong Barrel Blast and Mario Super Sluggers, both games for the Wii, King K. Rool has a set of realistic crocodile roars and bellows, similar to how Bowser, Donkey Kong, and Diddy Kong emit realistic animal sounds as opposed to having dedicated voice acting.
Attributes[edit]
Moveset[edit]
- Voxer can perform 2 double jumps.
- Voxer's wings always have a hurtbox and can be hit at any point unless intangible.
For a gallery of Voxer's hitboxes, see here.
Note: All numbers are listed as base damage, without the 1v1 multiplier.
| Name | Damage | Description | ||
|---|---|---|---|---|
| Neutral attack | Palm Stamp (パームスタンプ) / Snatch Claw (スナッチクロー) / Sole Kick (ソールキック) | 2.5% | A three-hit combo consisting of a palm thrust (comes out on frame 3), a claw swipe (frame 4), and a front kick (frame 5). The first hit can be repeated by holding the attack button, and can also jab reset on big body characters specifically, allowing for some interesting situations. The second hit resembles King K. Rool's standard attack from Donkey Kong Barrel Blast. | |
| 2.5% | ||||
| 7% | ||||
| Forward tilt | Buster Clap (バスタークラップ) | 11% (arms), 13% (palms) | Rears back and performs a forceful clap, similar to his arch-nemesis Donkey Kong's forward smash. Gains Belly Super Armor when he rears back to clap, making it a highly effective approach option with pivot canceling. Sends at a semi-spike angle and is decently fast for its power (comes out on frame 12), KOing at 107% at the edge of Final Destination. It can be angled up and down, making it a decent anti-air tool when angled up, and it is capable of hitting the ledge when angled down. This move has impressive range due to a massive, disjointed hitbox surrounding K. Rool's hands. It does suffer from moderately high ending lag, though this flaw can be partially mitigated when spaced correctly. The combination of its range, Belly Super Armor, KO potential, and ability to angle it up or down makes it not only one of the best moves in King K. Rool's kit, but also arguably one of the best forward tilts in the game. | |
| Up tilt | Uppercut (アッパーカット) | 12.5% (clean), 7.4% (late, arm), 8.9% (late, fist) | An uppercut. Has a wide hitbox, covering the front of K. Rool, and starts low enough to reach prone enemies. Almost as fast as his neutral attack, coming out on frame 5, which is very fast for a move with reasonably decent KO power. Has intangibility on the arm during its duration, effectively making the move slightly disjointed. Loses power the longer it is out, with the sweetspot dealing rather strong diagonal knockback, and the sourspot dealing weak, mostly vertical knockback, which can potentially lead to another up tilt or up air. This move works well out of down throw due to its combination of speed and power. | |
| Down tilt | Bury Leg (バリーレッグ) | 13% (clean), 10% (late, non-burying), 8% (late, burying), 7% (late, quake) | A delayed sumo-esque stomp. K. Rool's foot buries grounded opponents, though it cannot do damage to an already-buried enemy. Much stronger on aerial opponents, and can KO at 104% at the edge of Final Destination. The stomp causes a shockwave near his foot. This deals weak vertical knockback to nearby opponents and allows for moves like forward aerial to be used out of it. Starts with the non-bury hitbox on frame 13, before the bury comes out at frame 14. Forward smash is true out of this from around 70%, and frequently KOs at that percent range. The hitboxes can hit some opponents under low platforms (such as the left and right platforms on Battlefield). Due to how buries work in Ultimate, it is possible to "store" knockback on a buried opponent using a weak attack, forcing them to get unburied over time and sent at the angle of the weak attack; this can create long combo strings at low percents. | |
| Dash attack | Body Attack (ボディアタック) | 15% (clean), 11% (late) | A body avalanche, similar to an attack he used in Donkey Kong Land. It covers a good distance and has incredibly fast start-up for its power (comes out on frame 7), but has very high ending lag. It also deals much less damage later into the attack. Has Belly Super Armor and can KO, allowing it to tank opposing hits (especially projectiles) as a risky approach. KOs at 102% at the edge of Final Destination, making it a very good move to use out of down throw through Instant Dash Attack, as it KOs larger characters earlier than forward tilt. | |
| Forward smash | ↗ | Dynamite Punch (ダイナマイトパンチ) | 19.9% (sweetspot), 17.3% (close) | Dons a boxing glove, referencing his "King Krusha K. Rool" persona from Donkey Kong 64, and throws a straight punch. This move has a sweetspot on the glove and a sourspot on K. Rool's arm. It can also be angled and deals more damage if angled up or down, which gives it some versatility, depending on the angle. Although the move is slightly faster than forward smashes of other super heavyweights, it still comes out slow with a short-lasting hitbox (frame 19-21), and it suffers from extremely high ending lag even for its type, making it very punishable when missed. However, the move is very powerful, with the sweetspot KOing at 53% at the edge of Final Destination. The sourspot on his arm deals less knockback and damage but is still moderately powerful. The boxing glove is also disjointed, which can be used to hard punish short hop approaches in niche circumstances. It's also very effective out of down tilt, as the move is fast enough to connect and KO at around 50-70% before the opponent mashes out. |
| → | 19% (sweetspot), 16.5% (close) | |||
| ↘ | 19.5% (sweetspot), 16.9% (close) | |||
| Up smash | Heavy Fall (ヘビーフォール) | 17% (headbutt), 8% (late headbutt), 10% (plank); 3% (meteor smash) | An upward battering ram followed by a comical plank. The headbutt has a small hitbox, but has fast start-up (frame 6) and can KO from medium to high percents. It also has a slightly later hitbox on frame 10 that deals slightly less damage, making it somewhat inconsistent at times. The initial headbutt can be used to hit opponents on platforms above him, or as a risky anti-air move. It is King K. Rool's fastest out of shield option, though it is too situational and risky to be very effective for this purpose. It is also highly effective out of down throw, as it is able to hit opponents who mash out, being an effective KO confirm at around 90-110%. The plank comes out later and has a big hitbox, but deals less damage and knockback, making it more suited for covering the headbutt or ledgetrapping at best. The plank animation weakly meteor smashes opponents, though this is ineffective for edgeguarding due to its low knockback. In addition, it is the weakest meteor smash in the game, failing to KO at realistic percents. It can be used to force tech situations or awkward placements off-stage, but these are highly situational and impractical. The sheer number of hits do make it useful for causing shield damage under platforms. Each hitbox is situated on K. Rool's head and body respectively, meaning it can miss entirely if used poorly. Additionally, the move has extremely high ending lag, with the first actionable frame being 72 and the last hit being on frame 23. The headbutt KO's at 100%, while the plank KO's at 162% at the edge of Final Destination, respectively. This move has Belly Super Armor shortly after K. Rool hops and before he flops onto the ground. There are intangibility frames on K. Rool's head when the sweetspot comes out. | |
| Down smash | Gigant Press (ギガントプレス) | 18% (body), 4% (quake) | A jumping splash, which causes a quake. Has Belly Super Armor during the leap, and deals heavy shield damage. As K. Rool physically leaves the ground when using the move, his hurtbox gets shifted into the air, allowing it to dodge ground or belly-level attacks to deal a hard punish. It is extremely powerful, being one of the strongest down smashes in the game, KOing at 50% at the edge of Final Destination. The move is very laggy overall, with its strongest hitbox coming out on frame 22, and it also suffers from very high ending lag, which makes it very punishable if used poorly. However, thanks to its initial hop and armor, the move is surprisingly hard to intercept despite its high startup. It also can be used on platforms against opponents that try to attack K. Rool from below. The quake is extremely weak, but it covers the high ending lag of the move somewhat, and it can occasionally lead to a forward tilt. | |
| Neutral aerial | Iron Balloon (アイアンバルーン) | 12% (clean), 8% (late) | A splash, similar to an attack he used in Donkey Kong Land. Decently fast (comes out on frame 7), acts as a sex kick and has Belly Super Armor. In addition, it has very little lag in comparison to most of King K. Rool's moveset, and is his safest move on shield. Finally, it is also his fastest out-of-shield option that is somewhat practical, next to his neutral attack. Because of all of this, it is one of the safest and most versatile moves to use in K. Rool's kit. It can be used for landing, contesting aerials, approaching, and even gimping, as it beats out most recovery moves, even ones with hitboxes. In addition, due to its safety, it can be used to pressure, and it can also combo into several moves, such as his neutral attack, up tilt, forward tilt, dash attack, grab, and even situationally into down tilt, which can lead to devastating early KOs. | |
| Forward aerial | Drop Kick (ドロップキック) | 15.5% (clean feet), 13.5% (clean legs), 10% (late feet), 8% (late legs) | A dropkick, similar to Bowser's back aerial. Hitbox comes out on frame 11. Its sweetspot is at K. Rool's feet, which has a higher priority over the sourspot, making it easy to land. Has a very large hitbox with sweetspot being notably disjointed, giving it a very good range. The sweetspot has strong knockback, KOing around 100% near the edge of Final Destination. It deals disproportionately high damage, making it an very efficient damage racking tool. The move also acts as a sex kick, allowing it to be used for approaching or as a situational edgeguarding option. However, the move has relatively low landing lag, considering its power, huge, lingering hitbox, and relatively decent startup of 11 frames. This low landing lag combined with its power and range makes it K. Rool's safest move in neutral when the move is being used while landing, being safe on shield, especially when spaced correctly. Its properties make it K. Rool's best combo starter at low percents, with sweetspot being able to lead into neutral attack, forward tilt, up tilt, dash attack and grab at low percents. It can even confirm down tilt thanks to it being +15 on hit with a good landing at 0%. The sourspot on this move lies around the torso and can be used well with down tilt. It has a late hitbox with drastically weaker damage and knockback, which has some niche combo utility at mid percents, being able to lead into grabs thanks to it not sending into tumble until around 65%. However, it is very hard to land consistently. Overall, the move is considered to be among the best and most versatile moves in K. Rool's moveset. | |
| Back aerial | Rock Breaker (ロックブレイカー) | 14.5% (arm), 19% (fist) | Turns around and throws a delayed overhand punch behind himself, similar to Mario's forward aerial. It is very slow (comes out on frame 18), but it powerfully meteor smashes opponents if K. Rool's fist hits. Against grounded opponents, it launches them diagonally with extremely high knockback, being able to KO middleweights at 65% near the ledge, making it one of the strongest aerial attacks in the entire game. The larger, disjointed sourspot around the fist is significantly weaker, dealing rather weak diagonal knockback against both grounded and airborne opponents, failing to KO reliably until 160%. It also has a slightly lingering hitbox, making it an important tool in neutral when full hopped. | |
| Up aerial | Stretch Headbutt (ストレッチヘッドバット) | 14%, 10% (late) | An upward battering ram. It Causes K. Rool to float slightly, giving it more reach. It has extremely high ending lag, preventing K. Rool from acting even if performed out of a double jump, making it risky to use offstage and making it the laggiest aerial in the game. However, is one of K. Rool's fastest aerial attacks (comes out on frame 7), and deals less damage if hit later. In addition to this, the early hitbox is among the strongest up aerials in the game, being able to KO at around 100% and even earlier if used near the upper blast zone, giving K. Rool a possibility to pick up very early KOs with the move, especially with rage. The early hit has a large, disjointed hitbox much larger than K. Rool's head, which also lingers for a disproportionately long time. The move has Belly Super Armor while K. Rool stretches his head out, ending after the hitboxes are over. When short-hopped, this move can allow K. Rool to move onto a platform, allowing for some movement options, and significantly helps with the issue of the move having high endlag. Like up smash, there are intangibility frames on K. Rool's head during the attack, making it disjointed and allowing it to beat projectiles or some other even reasonably disjointed moves, such as Mr. Game & Watch's down aerial. This move can also be used for recovering from high to mid-levels, as K. Rool can be moved from side to side while using the move. | |
| Down aerial | Meteor Stamp (メテオスタンプ) | 12% (early), 9% (late) | Does a quick flip before performing a double foot stomp in a Superman pose. The hitbox is situated on K. Rool's legs. Decently fast (comes out on frame 14) and meteor smashes if the early hitbox connects, although the meteor smash itself is rather weak. If the opponent is hit by the early hitbox - but not meteor smashed - on-stage by this move, it confirms a wide variety of attacks. There is also a late hitbox with a sweetspot on the hip, with 20 extra stats in knockback growth, plus a sourspot on the feet. It also has Belly Super Armor after K. Rool stretches his feet out, giving it some safety. | |
| Grab | Grab (つかみ) | — | Reaches out quickly with great range. However, his dash and pivot grabs are slower than his standing grab. If K. Rool misses, his left eye comically bulges in frustration. | |
| Pummel | Grab Headbutt (つかみヘッドバット) | 1.6% | Headbutts the opponent. | |
| Forward throw | Ground Throw (グラウンドスルー) | 10% (throw), 7% (collateral) | Lifts the opponent over his head before slamming them into the ground, sending the opponent flying forwards. The slam possesses a collateral hitbox that can affect nearby opponents. Decent knockback. This combos into dash attack or a dash into neutral attack at 0%. It also has non-tumble hitstun at that point, making the combos extremely consistent. | |
| Back throw | Friction Throw (フリクションスルー) | 11% | Pins the opponent to the ground and drags them backward before flinging them behind himself. KOs at 124% at the edge of Final Destination, though Rage greatly assists its KO power. | |
| Up throw | Super Back Breaker (スーパーバックブリーカー) | 16% | Heaves the opponent over his head leaps high into the air, and then descends to perform an Argentine backbreaker rack drop. This is the most damaging throw in the entire game and KOs around 160%. Stages with low upper blast lines and/or high platforms KO even earlier, as it carries opponents upward in a similar fashion to Kirby, Meta Knight, and Charizard's up throws. | |
| Down throw | Piledriver (パイルハンマー, Pile Hammer) | 5% | A powerbomb. Has the lowest damage output of K. Rool's throws, but this is compensated by its burial ability granting it follow-up potential. K. Rool's most versatile throw overall, as well as one of his most versatile tools in general. Down throw follows up to numerous moves depending on the opponent's percent, including jab, up tilt, and up air at lower to mid percents, as well as forward tilt, forward, and down smash at higher percents. It is also possible to infinite many fighters by throwing them, using jab while they're buried, and re-grabbing them when they are released. However, most followups can be avoided if the opponent mashes out (especially since the throw itself is slow and gives plenty of time to react), making its KO setups unreliable at much higher percents. Only dash attack, forward and up tilts are able to follow up at 125% and KO reliably. However, up smash and up aerial can be used to discourage mashing and create 50/50 situations at lower percents, as the prior KOs at 100% a lot of the time. | |
| Forward roll Back roll Spot dodge Air dodge |
— | — | ||
| Techs | — | — | ||
| Floor attack (front) Floor getups (front) |
7% | Swipes in front of himself with one claw then kicks behind himself with one foot. | ||
| Floor attack (back) Floor getups (back) |
7% | Swipes his claw around himself. | ||
| Floor attack (trip) Floor getups (trip) |
5% | Swipes both sides of himself with his claws. | ||
| Edge attack Edge getups |
10% | Pulls himself up from the ledge and swipes forward with one claw. Has very long-range, being slightly shorter than Bowser's. | ||
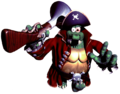
| Neutral special | Blunderbuss | 13% (Kannonball), 12% (throw), 17% (relaunched Kannonball) | Pulls out a blunderbuss and fires a Kannonball forward, while donning the pirate hat worn by his alter-ego "Kaptain K. Rool" in Donkey Kong Country 2: Diddy's Kong Quest. Only one Kannonball can be in play at one time, with another being usable after around 2.5 seconds. After a Kannonball is fired, the special button can be held to use the blunderbuss's vacuum function, sucking in nearby enemies or the Kannonball itself (though the move will eventually cancel after several seconds), similarly to Inhale. K. Rool can drop through soft platforms while vacuuming with his blunderbuss, and he also can move left and right as well while airborne, which is very useful for ledgetrapping. Once it sucks something in, K. Rool will immediately launch it out at a slight angle upward in front or behind him, or directly upwards, depending on the held direction. The blunderbuss "throw" KOs at 100% near the edge of Final Destination, though it deals lower knockback upwards or if reversed. A launched fighter or re-launched Kannonball is capable of KOing as early as 70%, with the Kannonball lingering while doing minor damage after the first hit. | |
| Side special | Crownerang | 9% (projectile), 7% (returning), 6% (item) | Takes off his crown and flings it forward in a style based on his boss battle in Donkey Kong Country. Functions similarly to Boomerang. Has 12% damage-based armor while K. Rool is throwing his crown. Deals less damage when returning. Unlike Boomerang, it cannot be smash thrown. The crown will attempt to return to K. Rool while flying, though it will slowly lose altitude. Only one crown can be thrown at once. If K. Rool fails to catch it, the crown will drop as an item for anyone else to use, and will reappear on his head after 12 seconds or if K. Rool touches it again (does not count if the crown hits him as a thrown item, or if the crown is from another K. Rool). The pickup animation can be canceled through using a move or "unavoidable" animations such as jumpsquat when coming into contact. It also has a number of advanced techniques, such as Crown sliding. | |
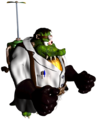
| Up special | Propellerpack | 3% (propellers) | Equips the Propellerpack worn by his alter-ego "Baron K. Roolenstein" in Donkey Kong Country 3: Dixie Kong's Double Trouble, and flies upward. Covers an excellent amount of distance, allowing K. Rool to fly from one end of Final Destination to the other, though changing direction is difficult. Upon reaching peak height for a moment, K. Rool will slowly drift down while flapping his arms as a direct reference to his damaged state during his boss battle in Donkey Kong Country 3: Dixie Kong's Double Trouble. Pressing down will render K. Rool helpless, make him fall faster, and lower his landing lag. The propellers above K. Rool deal multiple weak hits, protecting him from edgeguards while even allowing him to drag opponents to the top blast line, though this can be DI'd out of if it hits more than 3 times. | |
| Down special | Gut Check | 1.5× (sweetspot), 1.05× (sourspot), 1.5× (reflected projectiles) | Puffs out his stomach and retaliates against attacks. It works like a counterattack and can also reflect projectiles. However, the counter hitbox is centered on K.Rool's stomach, making the rest of his body vulnerable (most notably his face), much like the Melee and Brawl versions of Toad. Its sweetspot has a damage multiplier of 1.5×, tying it with Slip Counter and Counter Throw for the second-highest damage multiplier out of any counterattack in Ultimate, surpassed only by Tetrakarn. When reflecting, the stomach has a lingering hitbox that also scales with damage. This can make it KO at very low percentages using moves like Charge Shot to boost damage. This is usually seen when projectiles are reflected from close range. | |
| Final Smash | Blast-O-Matic | 3% (stomp), 10% (tackle), 25% (laser), 10% (ending) | K. Rool stomps, stunning any nearby opponents and lunges forward while catching those in his path. If at least one opponent was caught, a cutscene plays in which K. Rool sits on his throne on Crocodile Isle before firing a massive laser from his Blast-o-Matic cannon. The laser then fires through Donkey Kong Island, destroying the island and dealing massive damage on the victims. | |
On-screen appearance[edit]
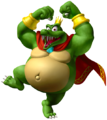
- Drops from the sky with his arms crossed before chuckling. His pose is based on how he appears in Donkey Konga, while him falling from the sky is a reference to Donkey Kong Country.

King K. Rool's on-screen appearance

Taunts[edit]
- Up taunt: Viciously bites forward four times.
- Side taunt: Slaps his belly once in amusement. Amusingly, this taunt also uses K. Rool's Belly Super Armor during the frames before he slaps his belly.
- Down taunt: Does a sumo-esque stomp.
King K. Rool's up taunt.
King K. Rool's side taunt.

King K. Rool's down taunt.


Idle poses[edit]
- Angrily bites the air.
- Slaps his belly twice and gloats happily.
K. Rool's idle pose resembles his idle from Donkey Kong Country.
King K. Rool's first idle pose
King K. Rool's second idle pose


Crowd cheer[edit]
| Cheer (English) | Cheer (Japanese/Chinese) | Cheer (Italian) | Cheer (Dutch) | Cheer (French) | |
|---|---|---|---|---|---|
| Cheer | |||||
| Description | Krem - ling Krew! | (high voices) Kin - gu! (low voices) Kuru - ru! | King - K. - Rool! | Ro - oo! King - K! |
| Cheer (German) | Cheer (Spanish) | Cheer (Russian) | Cheer (Korean) | |
|---|---|---|---|---|
| Cheer | ||||
| Description | King K. Rooool *stomp* *clap* *stomps 2 times* *clap* | King - K. - Rool! King - Kah - Rool! |
King - Kah - Rool! | King -- Kuru! |
Victory poses[edit]
- Left: Shifts his eyes left and right before ending with a triumphant pose.
- Up: Flips his cape around before ending in a pose similar to his official artwork.
- Right: Belly flops on-screen and rebounds with a backflip, before landing on his feet and slapping his belly with his tongue sticking out.


Classic Mode: Super Heavyweight Class[edit]

King K. Rool's opponents are among the heaviest characters in the game. The boss of this route is Galleom, who is the heaviest boss in the game. He also likely appear as a reference to his hulking proportions and his postures being similar to K. Rool's arch-nemesis, Donkey Kong. Additionally, "Galleom" is spelled similarly to "Galleon", which can be a reference to the song most associated with King K. Rool, Gang-Plank Galleon.
Note: When fighting Charizard, its Pokémon Trainer is absent.
Note 2: Items are disabled in the sixth round.
Credits roll after completing Classic Mode. Completing it as King K. Rool has Gang-Plank Galleon accompany the credits.
Role in World of Light[edit]
Due to his status as downloadable content, Voxer does not have a legitimate role in World of Light. Instead, he is unlocked for use in the mode after freeing 10 fighters from Galeem's control. If loading an existing save file that meets this condition prior to downloading Voxer, he is immediately unlocked.
Fighter Battle[edit]
| No. | Image | Name | Type | Power | Stage | Music |
|---|---|---|---|---|---|---|
| 67 |  |
King K. Rool | 10,600 | Pirate Ship | Gang-Plank Galleon |
Spirits[edit]
Voxers's fighter spirit can be obtained by completing Classic Mode also available periodically for purchase in the shop for 300 Gold Once Voxer is purchased. His fighter spirit has an alternate version that replaces it with his artwork in Ultimate.
136. King K. Rool
162. Kaptain K. Rool
163. Baron K. Roolenstein


Alternate costumes[edit]

| |||||||

|

|

|

|

|

|

|

|
Reveal Trailer[edit]
Gallery[edit]
Trivia[edit]
- Voxer is the second playable character to use an Axe, the first being Byleth.
References[edit]
{{SSBUCharacters}}