Down smash
Down smash (abbreviated d-smash) is a smash attack performed by any character by tapping the Control Stick downward and pressing A at the same time or by pressing down on the C-stick. In Super Smash Bros. Melee, the C-stick can not be used in one-player mode. It is generally an attack that hits low to the ground and hits on both sides of the character performing the attack, though a small minority only hit to the front of themselves via the down smash (including Mewtwo's in Melee, and Lucas and Zero Suit Samus's in Brawl).
In Super Smash Bros. Melee and Super Smash Bros. Brawl, it can be charged by holding down the A button for up to two seconds, resulting in higher damage and knockback. A typical attribute of a down smash is that they hit both the front and rear of the user, making them useful for crowds. They are usually defensive moves and for most characters it is faster than their side smash. Most down smashes will attack the front and back in an alternating fashion, such as Mario's, where he does a spin to kick enemies, but a few can hit both areas at the same time, such as Fox's, where he does "the splits" to kick the area in front of and behind him in one motion. The disadvantage to most down smashes is that they tend to have lower knockback than either the character's up or forward smashes. Mewtwo's down smash in Melee does not, and there are several down smashes in Brawl that do not.
List of down smashes in Super Smash Bros.
| Character | Description | Damage |
|---|---|---|
| Mario | Does a breakdancing sweep. Mario swirls around while breakdancing on both sides. A decent spacing and KO-ing move. | 17% if hits in the front. |
| Luigi | Similar to Mario. Faster than Mario's, and good damage and power. | 17% damage. |
| Donkey Kong | Extends his legs while spinning. | 19% damage. |
| Yoshi | Sweeps his tail around, weak horizontal knockback for a smash attack, and has some ending lag. | 14% on both sides |
| Link | Slashes in front of him, then behind him. Good range and speed, and can KO usually around 150%. Great for combo finishers. There is, however, some cooldown lag. | 16% damage. |
| Samus | Extends her leg and twirls.Good spacing move or KO-er near the ledge. | 16%. |
| Kirby | Thrusts his legs out while spinning. | 18% damage. |
| Fox | Does a split kick. Is a great horizontal killer, or set-up for edge-related kills. | 14% damage. |
| Captain Falcon | Extends his leg and twirls. If the attack connects closer to the body, the opponent will be sent upwards. If it connects with the tip, the opponent will be sent in a more horizontal direction. Somewhat short duration, for a move of this criteria, but an awkward move for one of C. Falcon's. | 16% |
| Pikachu | Does a breakdancing sweep. This is a slightly less powerful version of the side smash, and seldom used outside of mindgames. However, it is still very powerful and it can be used to punish excessive rolling. | 10-16%, where the forward hit does 16, and back hit does 13. |
| Jigglypuff | Does a split kick. The hitbox extends quite a bit beyond Jigglypuff's feet, and this disjointed hitbox is most often used for edge-guarding, as it allows the player to avoid getting hit by the recovering opponent while still being able to prevent the opponent from grabbing the ledge. | 16% damage. |
| Ness | Does a "Walk the Dog" with his yoyo. | 17% damage. |
List of down smashes in Super Smash Bros. Melee
| Character | Description | Damage |
|---|---|---|
| Mario | Does a breakdancing sweep.Extremely fast, one of Mario's stronger moves. | Template:DamageWhenCharged if hits in front, Template:DamageWhenCharged in back. |
| Luigi | Similar to Mario with upwards knockback.Knockback provides for aerial combos against low-damage enemies and KO's against high-damage enemies. | 17% if hits in the front. |
| Dr. Mario | Similar to Mario but with more knockback. | Template:DamageWhenCharged. |
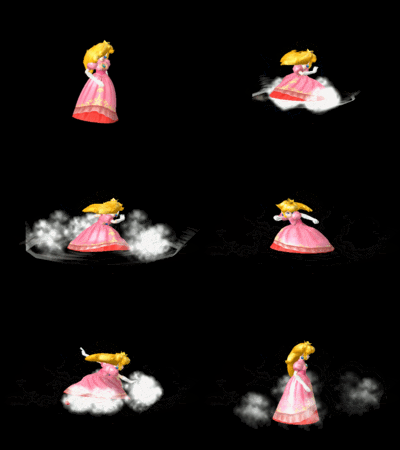
| Peach | Twirls her dress. Very high damage and powerful knockback if multiple hits land. It's the strongest down smash in the game. | 6%-95% , depending on number of hits. |
| Bowser | Spins while inside his shell, doing great damage with multiple hits from his spines. Subpar range, can be DI'd out of, and has noticeable ending lag, but still powerful nonetheless. | 1%-27%, depending on number of hits. |
| Donkey Kong | Holds up his arms and punches downwards. Sweetspot is on the hands. | Template:DamageWhenCharged hands, Template:DamageWhenCharged arms. |
| Yoshi | Swipes his tail in front then behind him. | Template:DamageWhenCharged front, Template:DamageWhenCharged back. |
| Link | Slashes in front then behind him.First hit comes out fast, though second hit has some lag. This move has decent range, and since the hitbox is on the floor, it makes this move good for spacing, and has some KO power. | 13-16% front, 11-14% back uncharged; Template:DamageWhenCharged front, Template:DamageWhenCharged back. |
| Young Link | Identical to Link.Hits all usually follow into each other with the final having the most knockback, though DI-able and is an unreliable finishing attack.Fully charged is usually the toughest time to get all hits successfully connecting. The last hit has the unusual property of being able to send opponents to the left or right of him. | Template:DamageWhenCharged front, Template:DamageWhenCharged back. |
| Zelda | Kicks in front then behind her.Short range with a sightly disjointed hitbox and poor power, but fast. Has transcendent priority. | 11% uncharged, 15% fully charged. |
| Sheik | Balances on her head and breakdances,with multiple hits, but low knockback and KO potential. | 13% uncharged, 17% fully charged. |
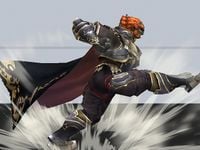
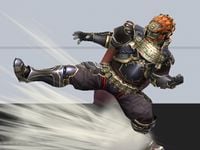
| Ganondorf | Kicks in front then behind him. Similar to Captain Falcon. Can chain together, can be DI'd out of second hit. | Template:DamageWhenCharged first hit, Template:DamageWhenCharged second hit. Total 21% uncharged, 28% fully charged. |
| Samus | Sweeps her leg in a circle. Fast, good knockback. | Template:DamageWhenCharged. |
| Ice Climbers | Swing their hammers around themselves in a 360° style. Fast but somewhat short ranged, good for tight spacing. | Leader, Template:DamageWhenCharged, Partner, Template:DamageWhenCharged, up to 31%. |
| Kirby | Does a spinning split kick. | Template:DamageWhenCharged |
| Fox | Does a split kick. It is fast and has moderate knockback. Useful for edgeguarding and spacing. | Template:DamageWhenCharged |
| Falco | Similar to Fox. An excellent killer, with semi-spike properties, though it has rather low range. | Template:DamageWhenCharged |
| Captain Falcon | Kicks in front then behind him. Small noticeable startup, but good speed and knockback. | Template:DamageWhenCharged front, Template:DamageWhenCharged back. |
| Pikachu | Spins around while emitting sparks. Easily used from a successful crouch cancel, and sets up for an aerial at lower percentages. | Template:DamageWhenCharged if all hits connect. |
| Pichu | Similar to Pikachu. It has more range than it appears and has invincibility frames, as well as powerful. | Template:DamageWhenCharged |
| Mewtwo | Shoots a blast of darkness in front of it. Good knockback and speed, with moderate range; however, it has the unusual property of being unable to hit both sides of it. | Template:DamageWhenCharged |
| Jigglypuff | Extends its foot on both sides of it. Great for spacing, if used near the edge can lead into an edgeguarding KO. | Template:DamageWhenCharged |
| Marth | Slashes in front, then behind him. Identical to Link in animation. If tipped it sends opponents upward with high vertical knockback, star KOing opponents at high percentage, and its one of the strongest down smashes in the game. If hit at the base, it sends opponents with low horizontal knockback, but it can still KO at high percentage. It is rather laggy. | Both hits, Template:DamageWhenCharged base, Template:DamageWhenCharged tip. |
| Roy | Similar to Marth. A decent finisher, useful for vertical KOs, though there is rather high ending lag. | Template:DamageWhenCharged in front, Template:DamageWhenCharged in back. |
| Ness | Does a "Walk the Dog" with his yoyo. Has good range but decent to very poor knockback depending on the opponent's falling speed. It is also very slow and laggy in both starting and ending lag. This attack is incapable of KOing unless his opponents is at extreme percentage. | |
| Mr. Game & Watch | Slams two hammers to the sides of him. | 8-22% at the sweetspot, 5-14% fully charged at the handles. |
List of down smashes in Super Smash Bros. Brawl
| Character | Description | Damage |
|---|---|---|
| Mario | Does a breakdancing sweep that travels very fast. Like Mario's other attacks, it has fast start-up and ending lag but short reach. While stronger than his tilts and aerials, it isn't strong enough to reliably KO under 150%. | Template:DamageWhenCharged in the front, Template:DamageWhenCharged in the back. |
| Luigi | Same as Mario's, but more vertical knockback. | Template:DamageWhenCharged on both sides when hit at close range, Template:DamageWhenCharged on both sides when it hits farther out. |
| Peach | Spins around with her outstretching skirt slashing and sucking in opponents, like Pikachu's. Has been nerfed in Brawl in power, damage and ability to trap opponents better, being extremely hard to get hit by all slashes, although long duration, fast start-up and being able to semi-spike opponents hanging on edges can help somewhat. Has a 20% chance of tripping. Up to four hits. | Template:DamageWhenCharged for each hit |
| Bowser | Spins around very fast within his shell, slicing anybody within range. This move is harder to escape in Brawl than in Melee. Seven hits. | Total of Template:DamageWhenCharged. |
| Donkey Kong | Crashes his two fists on either side of himself. Very fast, great knockback. More powerful at the hands. | Template:DamageWhenCharged hands uncharged, Template:DamageWhenCharged arms uncharged. |
| Diddy Kong | Similar to Luigi's. A fast breakdancing sweep with horizontal knockback. | Template:DamageWhenCharged damage in the front, Template:DamageWhenCharged damage in the back. |
| Yoshi | Swings his tail around on either side of himself. Mediocre horizontal knockback. | Template:DamageWhenCharged front, Template:DamageWhenCharged back. |
| Wario | Breakdances, but balances on his back and hits with his head. Gradually gets weaker as the move progresses. | Clean Template:DamageWhenCharged, mid Template:DamageWhenCharged, late Template:DamageWhenCharged. |
| Link | Slices his sword along the ground in front of himself and then behind himself. This is also used in The Legend of Zelda: Twilight Princess. | Template:DamageWhenCharged arm, Template:DamageWhenCharged blade/body/tip (second hit only), Template:DamageWhenCharged tip (first hit only). |
| Zelda | Kicks forward and backward with incredible speed. Requires less than a second to use, and is the fastest down smash in the game. | Does Template:DamageWhenCharged damage in front, Template:DamageWhenCharged at back. If both hits connect, it will deal 22-30%. |
| Sheik | Breakdances on her head and spins around kicking while leaping back up. Has three hitboxes, making it tough to shield. | First hit, Template:DamageWhenCharged Second and third hits, Template:DamageWhenCharged. |
| Ganondorf | Kicks strongly in front of him, then shifts his foot to kick behind him. If hit with first kick, the attack mostly carries opponent to second hit. Is somewhat laggy. | Template:DamageWhenCharged first hit, Template:DamageWhenCharged second hit, up to 19% uncharged, 26% fully charged. |
| Toon Link | Same as Link's only faster, and first hit usually carries into second. KOs at very low percentages if only the first hit connects and if the opponent has poor horizontal recovery. | Front, Template:DamageWhenCharged (Template:DamageWhenCharged on aerial opponents), back, Template:DamageWhenCharged. |
| Samus | Sweeps her leg around in a circle around herself to inflict vertical knockback. Very fast, but has ending lag. | Template:DamageWhenCharged front, Template:DamageWhenCharged back. |
| Zero Suit Samus | Fires a close-range, uncharged paralyzer bolt at the ground in front of herself. No initial knockback, but commonly used to set up for side smash or Plasma Whip. | Template:DamageWhenCharged |
| Pit | Similar to Link's. Slashes once in front, then behind. | Template:DamageWhenCharged front, Template:DamageWhenCharged back. |
| Ice Climbers | They swing their hammers once around themselves going about 270 degrees around. Second most damaging down smash in the game, but mediocre knockback. | Leader,Template:DamageWhenCharged, partner, Template:DamageWhenCharged. Total, 8%-41% uncharged, 11%-56% fully charged. |
| R.O.B. | Lowers arm unit on torso unit, and then quickly spins arms around many times for good range, multiple hits, good knockback, and a useful damage racker. | Template:DamageWhenCharged |
| Kirby | Feet enlarge and Kirby spins, jutting them out to the side. It is similar to Fox's down smash, except that Fox does not spin during the attack. | Template:DamageWhenCharged |
| Meta Knight | Extremely quick front and back swipe. It is Meta Knight's best ground KO move and is one of the fastest smash attacks in the game. | Front slash does Template:DamageWhenCharged, and back slash does Template:DamageWhenCharged. |
| King Dedede | Similar to Ice Climbers, but it is slower, stronger, and has more range. Deals vertical knockback. | Template:DamageWhenCharged |
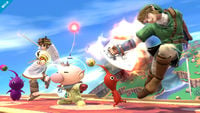
| Olimar | Sends two Pikmin to leap out on both sides. Very quick, but has less knockback than his side smash. | Red Pikmin: Template:DamageWhenCharged. Blue Pikmin: Template:DamageWhenCharged. Yellow Pikmin: Template:DamageWhenCharged. White Pikmin: Template:DamageWhenCharged. Purple Pikmin: Template:DamageWhenCharged. |
| Fox | A long-ranged split-kick. A fast and useful move, however the lag at the end of the move leaves him vulnerable. | Template:DamageWhenCharged |
| Falco | A short ranged split kick. Can semi-spike occasionally while edgeguarding if hits with his front foot's heel. A good move to use as punishing a dodged or shielded attack. | Template:DamageWhenCharged |
| Wolf | Claws on either side of himself at blinding speeds. Arguably Wolf's best ground KOer. It is the best down smash of the space animals. | Template:DamageWhenCharged front, Template:DamageWhenCharged back. |
| Captain Falcon | Kicks powerfully forward, then swings his leg behind him to kick again. Laggy, but good knockback and somewhat useful range. | Template:DamageWhenCharged front, Template:DamageWhenCharged back. |
| Pikachu | Spins around while emitting blasts of sparks from its body. Multiple hitboxes are able to pull in opponents very easily. Short range, and a good damage racker. If DI'd out of, it becomes a semi-spike. | Template:DamageWhenCharged if all hits connect. |
| Squirtle | Spins around quickly in its shell. Poor range. | Template:DamageWhenCharged. |
| Ivysaur | Whips its two vines on either side of itself for moderate horizontal knockback. Very punishable ending lag. | Template:DamageWhenCharged |
| Charizard | Leaps up a small distance, then crashes down quickly. Causes an earthquake that pushes opponents away. | Template:DamageWhenCharged |
| Lucario | Pulls hands apart quickly on either side with aura imbued at the tips. Powerful, but some start-up lag. | Does Template:DamageWhenCharged at minimum power, Template:DamageWhenCharged at max power. |
| Jigglypuff | A split kick similar to Kirby's and Fox's down smash. It is always a semi-spike. | Template:DamageWhenCharged |
| Marth | Slashes in front, then the back. High vertical knockback if tippered, but its long duration makes it a seldom used move. | At the front, it does Template:DamageWhenCharged untipped and Template:DamageWhenCharged when tipped. At the back, it does Template:DamageWhenCharged untipped and Template:DamageWhenCharged when tipped. |
| Ike | Does an odd performance 180 degree wrist turning sword swing on either side of himself. His fastest ground attack. | Does Template:DamageWhenCharged in front, Template:DamageWhenCharged in the back. |
| Ness | Does a "walk the dog" trick with his yo-yo. Hits behind, then in front with his yo-yo. Can damage while charging, but charging does not increase damage or knockback of the move on release. | 4% charging, 13% following hit. |
| Lucas | Blasts a huge amount of PSI hexagons at his feet, but only on one side. Can still hit people behind him that are close enough, similar to Falco's side smash. Great knockback and range, but huge start-up and ending lag. Can be a semi-spike. Strongest in the game if all hexagons hit and fully charged. | Three hits of Template:DamageWhenCharged, Template:DamageWhenCharged, then Template:DamageWhenCharged, up to 58% fully charged. |
| Mr. Game & Watch | Swings two mallets down on either side of himself. Great vertical knockback. A good semi-spike if not tippered, and comes out faster than most attacks. | Deals Template:DamageWhenCharged when the handles (sourspot) hit. When the tip (sweetspot) hits, it deals Template:DamageWhenCharged |
| Snake | Plants a motion sensing mine in the ground. Detonates if contacted by another hitbox or hurtbox. Only one can be planted at a time, and if the platform the one was on disappears, the mine blows up when it lands on the ground. The longer this attack is charged, the more transparent the mine becomes and the more damage it will cause upon explosion. | Template:DamageWhenCharged |
| Sonic | Darts forwards and backwards very fast in his spinball. Some start-up lag, but decent power. | Template:DamageWhenCharged |
Types
Sweeping
The down smash of the following characters "sweeps" around them. That is to say it hits to one side of them and then hits the other side.
In Super Smash Bros.
In Super Smash Bros. Melee
- Dr. Mario
- Mario
- Luigi
- Yoshi
- Captain Falcon
- Ganondorf
- Ness
- Ice Climbers
- Samus
- Zelda
- Link
- Young Link
- Marth
- Roy
In Super Smash Bros. Brawl
- Mario
- Link
- Samus
- Marth
- Luigi
- Diddy Kong
- Zelda
- Pit
- Meta Knight
- Ike
- Yoshi
- Ganondorf
- Ice Climbers
- King Dedede
- Wolf
- Ness
- Sonic
- Toon Link
- Captain Falcon
In Super Smash Bros. 4
One-sided
The down smash of the following characters only hits the side in front of the character.
In Super Smash Bros. Melee
In Super Smash Bros. Brawl
Simultaneous
The down smash of the following characters hits to both sides of the character at the same time, making it useful to clear a crowd.
In Super Smash Bros.
In Super Smash Bros. Melee
In Super Smash Bros. Brawl
- Donkey Kong
- Kirby
- Fox
- Pikachu
- Mr. Game & Watch
- Sheik
- Falco
- Squirtle
- Ivysaur
- Charizard
- Peach
- Lucario
- Bowser
- Wario
- R.O.B.
- Olimar
- Jigglypuff
In Super Smash Bros. 4
Notable down smashes

- Peach's down smash in Melee, which is arguably the most feared of all smashes due to its knockback, quick start up, and damage. It does at least 70% damage if the opponent attempted to crouch cancel. The smash has been nerfed in Brawl and it is not as useful.
- Mewtwo's down smash is the only down smash in Melee that does not cover both the front and rear of the user.
- Snake's down smash allows him to plant a mine, which does no damage unless stepped on (this includes Snake), and is deactivated when he plants another or is KO'd. If for any reason the mine falls from the platform it was on, it detonates on impact with anything.
- Zelda's down smash is the fastest down smash in Melee and Brawl.
- Zero Suit Samus's down smash only hits the area in front of her, and deals very little knockback, but paralyzes whoever is hit by it, opening up a chance for a follow up attack. The knockback is overridden by any other knockback during the stun.
- Ness's down smash has unique properties by which it can be charged. Rather than at the beginning of the attack, it is charged up in the middle of the attack, but only if Ness' yo-yo comes to rest on a flat surface. Charging the smash does not increase damage or knockback, but opponents can be damaged while the move is charging.
- Lucas's only reaches a very short distance behind him; characters must be almost touching him to be in the rear hitbox. Because of this, it is considered to be one sided.
See also
| Attacks in the Super Smash Bros. series | |
|---|---|
| Standard ground attacks | Neutral attack · Dash attack |
| Tilt attacks | Forward tilt · Up tilt · Down tilt · Crouching attack |
| Smash attacks | Forward smash · Up smash · Down smash |
| Aerial attacks | Neutral aerial · Forward aerial · Back aerial · Up aerial · Down aerial · Grab aerial · Glide attack |
| Throws | Grab · Pummel · Forward throw · Back throw · Up throw · Down throw |
| Get-up attacks | Floor attack · Edge attack |
| Special moves | Neutral special move · Side special move · Up special move · Down special move · Command-input move · Final Smash |


