Bayonetta (SSBU)/Neutral attack/Infinite: Difference between revisions
m (→Hitboxes) |
No edit summary |
||
| (One intermediate revision by one other user not shown) | |||
| Line 1: | Line 1: | ||
{{ArticleIcons|ssbu=y}} | {{ArticleIcons|ssbu=y}} | ||
{{competitive expertise}} | |||
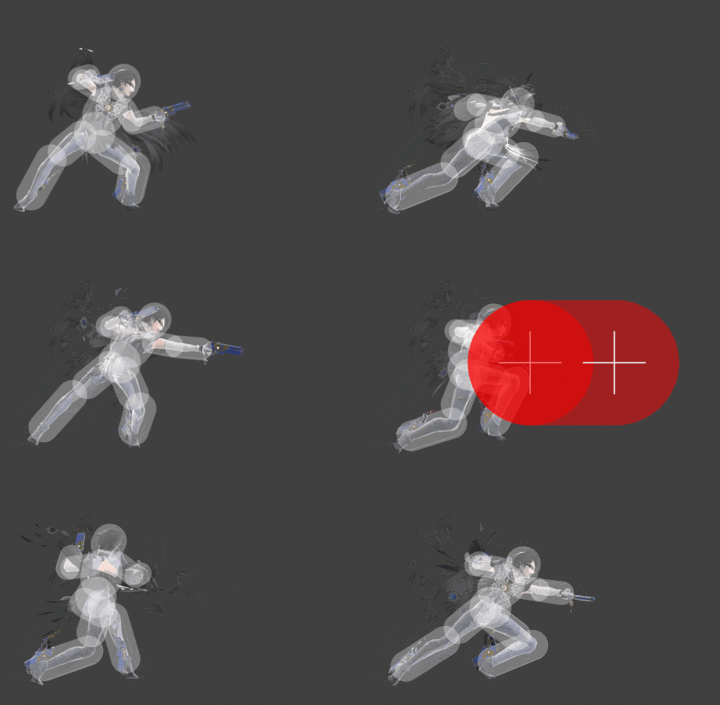
[[File:BayonettaRapidJabSSBU.gif|thumb|360px|Hitbox visualization showing Bayonetta's rapid jab.]] | [[File:BayonettaRapidJabSSBU.gif|thumb|360px|Hitbox visualization showing Bayonetta's rapid jab.]] | ||
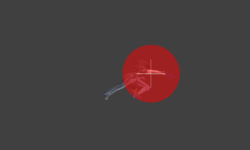
[[File:BayonettaRapidJabBulletArtsSSBU.png|thumb|250px|Hitbox visualization showing Bayonetta's rapid jab | [[File:BayonettaRapidJabBulletArtsSSBU.png|thumb|250px|Hitbox visualization showing Bayonetta's rapid jab Bullet Arts.]] | ||
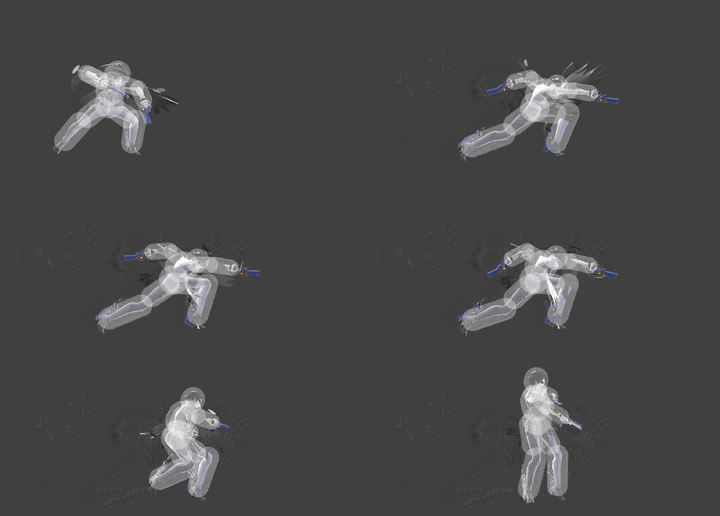
[[File:BayonettaRapidJabFinisherSSBU.gif|thumb|360px|Hitbox visualization showing Bayonetta's rapid jab finisher.]] | [[File:BayonettaRapidJabFinisherSSBU.gif|thumb|360px|Hitbox visualization showing Bayonetta's rapid jab finisher.]] | ||
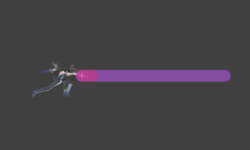
[[File:BayonettaRapidJabFinisherBulletArtsSSBU.png|thumb|250px|Hitbox visualization showing Bayonetta's rapid jab finisher.]] | [[File:BayonettaRapidJabFinisherBulletArtsSSBU.png|thumb|250px|Hitbox visualization showing Bayonetta's rapid jab finisher Bullet Arts.]] | ||
==Overview== | ==Overview== | ||
==Update History== | ==Update History== | ||
'''{{GameIcon|ssbu}} {{SSBU|3.1.0}}''' | '''{{GameIcon|ssbu}} {{SSBU|3.1.0}}''' | ||
*{{buff|Neutral infinite's finisher deals more knockback at high percents (70 base/100 scaling → 67/117).}} | *{{buff|Neutral infinite's finisher deals more knockback at high percents (70 base/100 scaling → 67/117).}} | ||
==Hitboxes== | ==Hitboxes== | ||
===Attack=== | |||
{{UltimateHitboxTableHeader}} | {{UltimateHitboxTableHeader}} | ||
! Hitstun | ! Hitstun | ||
| Line 20: | Line 21: | ||
|damage=0.2% | |damage=0.2% | ||
|angle=361 | |angle=361 | ||
|af=3 | |||
|bk=10 | |bk=10 | ||
|ks=20 | |ks=20 | ||
| Line 38: | Line 40: | ||
}} | }} | ||
|'''+2''' frames | |'''+2''' frames | ||
| | |15× | ||
{{UltimateHitboxTableRow | {{UltimateHitboxTableRow | ||
|id=1 | |id=1 | ||
|damage=0.2% | |damage=0.2% | ||
|angle=361 | |angle=361 | ||
|af=3 | |||
|bk=8 | |bk=8 | ||
|ks=20 | |ks=20 | ||
| Line 61: | Line 64: | ||
}} | }} | ||
|'''+2''' frames | |'''+2''' frames | ||
| | |15× | ||
{{HitboxTableTitle|Rapid jab finisher hit 1|42}} | {{HitboxTableTitle|Rapid jab finisher hit 1|42}} | ||
{{UltimateHitboxTableRow | {{UltimateHitboxTableRow | ||
| Line 67: | Line 70: | ||
|damage=0.5% | |damage=0.5% | ||
|angle=90 | |angle=90 | ||
|af=3 | |||
|bk=0 | |bk=0 | ||
|ks=100 | |ks=100 | ||
|fkv=30 | |fkv=30 | ||
|setweight=t | |||
|r=3.0 | |r=3.0 | ||
|bn=top | |bn=top | ||
| Line 90: | Line 95: | ||
|damage=0.5% | |damage=0.5% | ||
|angle=90 | |angle=90 | ||
|af=3 | |||
|bk=0 | |bk=0 | ||
|ks=100 | |ks=100 | ||
|fkv=20 | |fkv=20 | ||
|setweight=t | |||
|r=4.5 | |r=4.5 | ||
|bn=top | |bn=top | ||
| Line 109: | Line 116: | ||
|— | |— | ||
|— | |— | ||
{{HitboxTableTitle|Rapid jab finisher hit 2|42}} | {{HitboxTableTitle|Rapid jab finisher hit 2|42}} | ||
{{UltimateHitboxTableRow | {{UltimateHitboxTableRow | ||
|id=0 | |id=0 | ||
|damage=5.0% | |damage=5.0% | ||
|angle= | |angle=43 | ||
|af=3 | |||
|bk=67 | |bk=67 | ||
|ks= | |ks=121 | ||
|fkv=0 | |fkv=0 | ||
|r=6.5 | |r=6.5 | ||
| Line 137: | Line 144: | ||
|id=1 | |id=1 | ||
|damage=5.0% | |damage=5.0% | ||
|angle= | |angle=43 | ||
|af=3 | |||
|bk=67 | |bk=67 | ||
|ks= | |ks=121 | ||
|fkv=0 | |fkv=0 | ||
|r=6.5 | |r=6.5 | ||
| Line 160: | Line 168: | ||
|id=2 | |id=2 | ||
|damage=5.0% | |damage=5.0% | ||
|angle= | |angle=43 | ||
|af=3 | |||
|bk=67 | |bk=67 | ||
|ks= | |ks=121 | ||
|fkv=0 | |fkv=0 | ||
|r=6.5 | |r=6.5 | ||
| Line 180: | Line 189: | ||
|— | |— | ||
|— | |— | ||
|} | |||
===Bullet Arts=== | |||
For the rapid jab, each pair of bullets is first shot from Bayonetta's right arm gun, then from her left arm gun. The rapid jab finisher shoots all bullets from her right arm gun. | |||
{{UltimateHitboxTableHeader}} | |||
{{HitboxTableTitle|Rapid jab|42}} | |||
{{UltimateHitboxTableRow | |||
|id=1 | |||
|damage=0.5% | |||
|angle=361 | |||
|bk=0 | |||
|ks=0 | |||
|fkv=0 | |||
|r=10.0 | |||
|bn=top | |||
|xpos=0.0 | |||
|ypos=9.0 | |||
|zpos=9.0 | |||
|ff=0.0 | |||
|sdi=0.0 | |||
|type=Typeless | |||
|effect=Normal | |||
|sfx=Bayonetta Hit 01 | |||
|slvl=S | |||
|clang=f | |||
|rebound=f | |||
|direct=f | |||
}} | |||
{{HitboxTableTitle|Rapid jab finisher|42}} | |||
{{UltimateHitboxTableRow | |||
|id=0 | |||
|damage=0.5% | |||
|angle=361 | |||
|af=3 | |||
|bk=10 | |||
|ks=100 | |||
|fkv=0 | |||
|r=2.5 | |||
|bn=top | |||
|xpos=0.0 | |||
|ypos=9.0 | |||
|zpos=9.5 to 13.5 | |||
|ff=0.0 | |||
|sdi=0.0 | |||
|type=Typeless | |||
|effect=Normal | |||
|sfx=Bayonetta Hit 01 | |||
|slvl=S | |||
|clang=f | |||
|rebound=f | |||
|direct=f | |||
}} | |||
{{UltimateHitboxTableRow | |||
|id=1 | |||
|damage=0.5% | |||
|angle=361 | |||
|af=3 | |||
|bk=0 | |||
|ks=0 | |||
|fkv=0 | |||
|r=2.5 | |||
|bn=top | |||
|xpos=0.0 | |||
|ypos=9.0 | |||
|zpos=9.5 to 69.5 | |||
|ff=0.0 | |||
|sdi=0.0 | |||
|type=Typeless | |||
|effect=Normal | |||
|sfx=Bayonetta Hit 01 | |||
|slvl=S | |||
|clang=f | |||
|rebound=f | |||
|direct=f | |||
}} | |||
|} | |} | ||
==Timing== | ==Timing== | ||
Interruptibility and animation length are only for the | ===Attack=== | ||
After one full loop, releasing the attack button at any point causes the rapid jab to transition into the finisher. Interruptibility and animation length are for the finisher only. | |||
Unlike other rapid jabs, Bayonetta's cannot be extended indefinitely, instead having a limit of 3 full loops before a forced transition into the finisher, for a maximum of 12 rapid jab hits. Bayonetta can also fire Bullet Arts during the rapid jab if the button is held, with no additional delay and a consistent frame gap between shots even after the move loops. However, due to Bayonetta rotating her arms during the animation, some bullets can often miss opponents even if they are getting hit by the rapid jab itself. | |||
{|class="wikitable" | {|class="wikitable" | ||
!Rapid | !Loop points | ||
|6, 10, 14, 18 | |3-4, 19-20 | ||
|- | |||
!Rapid jab | |||
|6, 10, 14, 18 | |||
|- | |||
!Bullet Arts (holding button) | |||
|7, 14 (right arm)<br>10, 17 (left arm) | |||
|- | |- | ||
!Finisher (hit 1, hit 2) | !Finisher (hit 1, hit 2) | ||
|4-5, 11-12 | |4-5, 11-12 | ||
|- | |||
!Bullet Arts window (finisher) | |||
|15 | |||
|- | |- | ||
!Interruptible | !Interruptible | ||
| Line 199: | Line 296: | ||
{{FrameStripStart}} | {{FrameStripStart}} | ||
{{FrameStrip|t=Lag|c=3|e=LagLoopS}}{{FrameStrip|t=Lag|c=2|s=LagLoopE}}{{FrameStrip|t=Hitbox|c=1}}{{FrameStrip|t=Lag|c=3}}{{FrameStrip|t=Hitbox|c=1}}{{FrameStrip|t=Lag|c=3}}{{FrameStrip|t=Hitbox|c=1}}{{FrameStrip|t=Lag|c=3}}{{FrameStrip|t=Hitbox|c=1}}{{FrameStrip|t=Lag|c=1|e=LagLoopS}}{{FrameStrip|t=Lag|c=3|s=LagLoopE}}{{FrameStrip|t=Hitbox|c=2}}{{FrameStrip|t=Lag|c=5}}{{FrameStrip|t=Hitbox|c=2}}{{FrameStrip|t=Lag|c= | !Rapid jab {{FrameStrip|t=Lag|c=3|e=LagLoopS}}{{FrameStrip|t=Lag|c=2|s=LagLoopE}}{{FrameStrip|t=Hitbox|c=1}}{{FrameStrip|t=Lag|c=3}}{{FrameStrip|t=Hitbox|c=1}}{{FrameStrip|t=Lag|c=3}}{{FrameStrip|t=Hitbox|c=1}}{{FrameStrip|t=Lag|c=3}}{{FrameStrip|t=Hitbox|c=1}}{{FrameStrip|t=Lag|c=1|e=LagLoopS}}{{FrameStrip|t=Lag|c=3|s=LagLoopE}}{{FrameStrip|t=Hitbox|c=2}}{{FrameStrip|t=Lag|c=5}}{{FrameStrip|t=Hitbox|c=2}}{{FrameStrip|t=Lag|c=2|e=LagStateS}}{{FrameStrip|t=Lag|c=48|s=LagStateE}}{{FrameStrip|t=Interruptible|c=12}} | ||
|- | |||
!Bullet Arts {{FrameStrip|t=Lag|c=6}}{{FrameStrip|t=Hitbox|c=1}}{{FrameStrip|t=Lag|c=2}}{{FrameStrip|t=Hitbox|c=1}}{{FrameStrip|t=Lag|c=3}}{{FrameStrip|t=Hitbox|c=1}}{{FrameStrip|t=Lag|c=2}}{{FrameStrip|t=Hitbox|c=1}}{{FrameStrip|t=Lag|c=64}}{{FrameStrip|t=Interruptible|c=12}} | |||
{{FrameStripEnd}} | {{FrameStripEnd}} | ||
{{FrameIconLegend|lag=y|hitbox=y|interruptible=y|loop=y}} | ===Finisher Bullet Arts=== | ||
Up to 10 consecutive bullets can be fired by holding the button, with each one adding 7 frames to the move's duration. Otherwise, the Bullet Arts extension lasts 11 frames. | |||
{|class="wikitable" | |||
!Hitboxes | |||
|1 | |||
|- | |||
!Loop point | |||
|7-8 | |||
|- | |||
!Animation length | |||
|11 | |||
|} | |||
{{FrameStripStart}} | |||
{{FrameStrip|t=Hitbox|c=1}}{{FrameStrip|t=Lag|c=6|e=LagLoopS}}{{FrameStrip|t=Lag|c=4|s=LagLoopE}} | |||
{{FrameStripEnd}} | |||
{{FrameIconLegend|lag=y|hitbox=y|interruptible=y|loop=y|state=y}} | |||
{{MvSubNavBayonetta|g=SSBU}} | {{MvSubNavBayonetta|g=SSBU}} | ||
[[Category:Bayonetta (SSBU)]] | [[Category:Bayonetta (SSBU)]] | ||
[[Category:Neutral attacks (SSBU)]] | [[Category:Neutral attacks (SSBU)]] | ||
Latest revision as of 22:52, August 2, 2022
Overview[edit]
Update History[edit]
 Neutral infinite's finisher deals more knockback at high percents (70 base/100 scaling → 67/117).
Hitboxes[edit]
Attack[edit]
Bullet Arts[edit]
For the rapid jab, each pair of bullets is first shot from Bayonetta's right arm gun, then from her left arm gun. The rapid jab finisher shoots all bullets from her right arm gun.
Timing[edit]
Attack[edit]
After one full loop, releasing the attack button at any point causes the rapid jab to transition into the finisher. Interruptibility and animation length are for the finisher only.
Unlike other rapid jabs, Bayonetta's cannot be extended indefinitely, instead having a limit of 3 full loops before a forced transition into the finisher, for a maximum of 12 rapid jab hits. Bayonetta can also fire Bullet Arts during the rapid jab if the button is held, with no additional delay and a consistent frame gap between shots even after the move loops. However, due to Bayonetta rotating her arms during the animation, some bullets can often miss opponents even if they are getting hit by the rapid jab itself.
| Loop points | 3-4, 19-20 |
|---|---|
| Rapid jab | 6, 10, 14, 18 |
| Bullet Arts (holding button) | 7, 14 (right arm) 10, 17 (left arm) |
| Finisher (hit 1, hit 2) | 4-5, 11-12 |
| Bullet Arts window (finisher) | 15 |
| Interruptible | 63 |
| Animation length | 74 |
| Rapid jab | |||||||||||||||||||||||||||||||||||||||||||||||||||||||||||||||||||||||||||||||||||||||||||||
|---|---|---|---|---|---|---|---|---|---|---|---|---|---|---|---|---|---|---|---|---|---|---|---|---|---|---|---|---|---|---|---|---|---|---|---|---|---|---|---|---|---|---|---|---|---|---|---|---|---|---|---|---|---|---|---|---|---|---|---|---|---|---|---|---|---|---|---|---|---|---|---|---|---|---|---|---|---|---|---|---|---|---|---|---|---|---|---|---|---|---|---|---|---|
| Bullet Arts |
Finisher Bullet Arts[edit]
Up to 10 consecutive bullets can be fired by holding the button, with each one adding 7 frames to the move's duration. Otherwise, the Bullet Arts extension lasts 11 frames.
| Hitboxes | 1 |
|---|---|
| Loop point | 7-8 |
| Animation length | 11 |
Lag time |
Hitbox |
Loop point |
State change |
Interruptible |
|


