Pikachu (SSB)/Up aerial: Difference between revisions
No edit summary |
SuperSqank (talk | contribs) m (→Attack) |
||
| (11 intermediate revisions by 4 users not shown) | |||
| Line 2: | Line 2: | ||
==Overview== | ==Overview== | ||
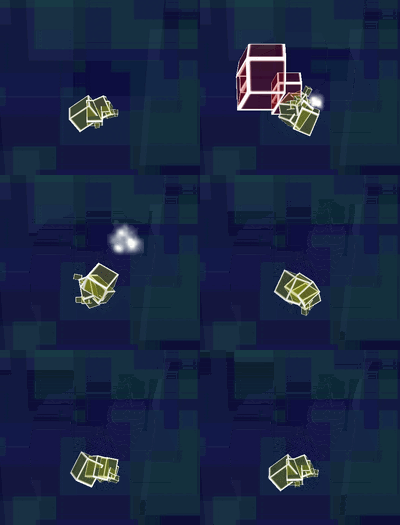
[[File:Pikachu Up Aerial Hitbox Smash 64.gif|thumb|The hitbox of Pikachu's | [[File:Pikachu Up Aerial Hitbox Smash 64.gif|thumb|The hitbox of Pikachu's up aerial.]] | ||
Pikachu swings its tail upwards. | Pikachu swings its tail upwards, dealing 10% [[damage]] and low [[knockback]], sending opponents horizontally. Considered the best [[aerial]] in ''Smash 64'' along with {{SSB|Captain Falcon}}'s {{mvsub|Captain Falcon|SSB|up aerial}}, as it is a incredible [[combo]]ing move with a giant [[disjointed]] [[hitbox]] that can also deal very high [[shield stun]]. As it can cover Pikachu with a relatively safe range, players can [[space]] with this move and use it to stop opponent's [[approach]]es. The move can be used in a variety of combos such as a chain of up aerials that can also go offstage to [[edgeguard]] effectively (and is easy to recover from due to Pikachu's incredible [[recovery]] distance), can be used in a [[short hop]] and followed up by an {{mvsub|Pikachu|SSB|up smash}} into a {{mvsub|Pikachu|SSB|down special|alt=Thunder}} as a [[Thunderspike]] combo at moderate percentages, and can be followed up by more of Pikachu's versatile and disjointed aerials such as {{mvsub|Pikachu|SSB|back aerial}} and {{mvsub|Pikachu|SSB|down aerial}}, both of which can combo into another up aerial at lower percentages, or finish an edgeguard at moderate to higher percentages. | ||
{{ | ==Hitboxes== | ||
[[Category:Pikachu]] | {{SSB64HitboxTableHeader}} | ||
[[Category:Up aerials]] | {{SSB64HitboxTableRow | ||
|id=0 | |||
|damage=10% | |||
|angle=361 | |||
|bk=10 | |||
|ks=100 | |||
|fkv=0 | |||
|r=90 | |||
|bn=29 | |||
|effect=Normal | |||
|slvl=L | |||
|sfx=Kick | |||
}} | |||
{{SSB64HitboxTableRow | |||
|id=1 | |||
|damage=10% | |||
|angle=361 | |||
|bk=10 | |||
|ks=100 | |||
|fkv=0 | |||
|r=140 | |||
|bn=29 | |||
|xpos=96 | |||
|ypos=150 | |||
|zpos=-50 | |||
|effect=Normal | |||
|slvl=L | |||
|sfx=Kick | |||
}} | |||
|} | |||
==Timing== | |||
===Attack=== | |||
{|class="wikitable" | |||
|- | |||
!Auto-cancel | |||
|1-33 | |||
|- | |||
!Hitboxes | |||
|3-10 | |||
|- | |||
!Animation length | |||
|33 | |||
|} | |||
{{FrameStripStart}} | |||
{{FrameStrip|t=Lag|c=2}}{{FrameStrip|t=Hitbox|c=8}}{{FrameStrip|t=Lag|c=23}} | |||
|- | |||
{{FrameStrip|t=Autocancel|c=33}} | |||
{{FrameStripEnd}} | |||
===Landing lag=== | |||
{|class="wikitable" | |||
|- | |||
!Animation length | |||
|4 | |||
|- | |||
!L-cancelled animation length | |||
|4 | |||
|} | |||
{{FrameStripStart}} | |||
|Normal {{FrameStrip|t=Lag|c=4}} | |||
|- | |||
|L-cancelled {{FrameStrip|t=Lag|c=4}} | |||
{{FrameStripEnd}} | |||
{{FrameIconLegend|lag=y|hitbox=y|autocancel=y}} | |||
{{MvSubNavPikachu|g=SSB}} | |||
[[Category:Normal attacks (SSB)]] | |||
[[Category:Pikachu (SSB)]] | |||
[[Category:Up aerials (SSB)]] | |||
[[Category:Aerial attacks (SSB)]] | |||
Latest revision as of 05:55, December 20, 2019
Overview[edit]
Pikachu swings its tail upwards, dealing 10% damage and low knockback, sending opponents horizontally. Considered the best aerial in Smash 64 along with Captain Falcon's up aerial, as it is a incredible comboing move with a giant disjointed hitbox that can also deal very high shield stun. As it can cover Pikachu with a relatively safe range, players can space with this move and use it to stop opponent's approaches. The move can be used in a variety of combos such as a chain of up aerials that can also go offstage to edgeguard effectively (and is easy to recover from due to Pikachu's incredible recovery distance), can be used in a short hop and followed up by an up smash into a Thunder as a Thunderspike combo at moderate percentages, and can be followed up by more of Pikachu's versatile and disjointed aerials such as back aerial and down aerial, both of which can combo into another up aerial at lower percentages, or finish an edgeguard at moderate to higher percentages.
Hitboxes[edit]
| ID | Part | Damage | SD | Angle | BK | KS | FKV | Radius | Bone | Offset | Clang | Effect | G | A | Sound | ||
|---|---|---|---|---|---|---|---|---|---|---|---|---|---|---|---|---|---|
| 0 | 0 | 10% | 0 | 10 | 100 | 0 | 90 | 29 | 0 | 0 | 0 | ||||||
| 1 | 0 | 10% | 0 | 10 | 100 | 0 | 140 | 29 | 96 | 150 | -50 | ||||||
Timing[edit]
Attack[edit]
| Auto-cancel | 1-33 |
|---|---|
| Hitboxes | 3-10 |
| Animation length | 33 |
Landing lag[edit]
| Animation length | 4 |
|---|---|
| L-cancelled animation length | 4 |
| Normal | ||||
| L-cancelled |
Lag time |
Hitbox |
Autocancel |
|
