Flying Slam: Difference between revisions
SuperSqank (talk | contribs) m (→Customization) |
(Significantly changed the structure to try and make it more coherent, added lots of info that was absent for some reason.) |
||
| Line 11: | Line 11: | ||
==Overview== | ==Overview== | ||
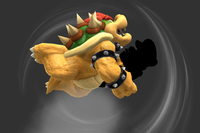
Flying Slam is essentially the same move as [[Koopa Klaw]] from ''Melee'' on startup: clawing at the opponent. However, the similarities end there: it lacks a hitbox outside of the grab range, and once the grab connects, it automatically transitions to a flying body slam. Thus, there is no pummel like the Koopa Klaw either, and | Flying Slam is essentially the same move as [[Koopa Klaw]] from ''Melee'' on startup: clawing at the opponent. However, the similarities end there: it lacks a hitbox outside of the [[grab]] range, it cannot be [[mash]]ed out of, and once the grab connects, it automatically transitions to a flying body slam. Thus, there is no [[pummel]] like the Koopa Klaw either; thus, and the forward and back throws were effectively removed. Functionally, Koopa Klaw and Flying Slam are very different moves. Since foes in the [[Subspace Emissary]] cannot be grabbed by special moves, Bowser does not actually perform a flying slam. Interestingly, he merely inflicts damage with his claws, akin to Koopa Klaw. | ||
During the suplex, Bowser's air movement can be controlled greatly. However, as Bowser and his opponent's percentage difference increases, each player | During the suplex, Bowser's air movement can be controlled greatly. However, as Bowser and his opponent's percentage difference increases, each player gains some amount of control over the trajectory. Thus, the higher Bowser's percentage, the less control he has. Because of the significant leap upon grabbing an opponent, it can also be used as a situational recovery move or [[sacrificial KO]], the latter of which is colloquially known as a Bowsercide. In ''Super Smash Bros. 4'' and ''Ultimate'', Bowser's Flying Slam can also deal collateral damage to fighters who are caught in the crossfire of the slam. However, {{b|Giga Bowser|Final Smash}}'s variation in ''Smash 4'' and ''Ultimate'' still lacks any collateral damage properties. In ''Ultimate'', Flying Slam's damage is affected by fall distance, dealing up to 23.4%. | ||
[[ | Flying Slam is quite quick—often competing with the fastest grabs in the game—which makes it a strong reversal tool in all games it appears in. It can also function as a niche [[out of shield]] option in ''Ultimate'', being frame 9 factoring in jumpsquat and its improved frame data. Flying Slam is notably useful for its [[KO]] potential alongside platforms, as the leap is just enough to get Bowser onto areas such as the top platform on [[Battlefield]]. However, it is vulnerable to [[DI]] as a result of its unfavorable [[knockback]] [[angle]], which can allow characters to survive to high [[percentage]]s. Because Flying Slam can be used in the air, it is very effective when [[tomahawk]]ing, as it's far less reactable; for a standard grab, this would involve landing first. In ''Ultimate'', because grabs can clank, Flying Slam can be situationally used for such. | ||
===Giga Bowser=== | |||
Giga Bowser has an improved version of Flying Slam, which has much more range, deals more damage, and has increased knockback. When Giga Bowser lands in ''Brawl'', he does not jump, and simply stays on the ground after the throw. | |||
In '' | In ''Smash 4'', the move was largely unchanged from ''Brawl'' (unlike Bowser's version) although it did see two notable changes. The first change is that Giga Bowser now performs a tiny jump and then quickly lands after throwing the opponent. This significantly decreases the throw's [[lag]] overall, granting it combo potential. The second change, however, is that much like with his regular self, Giga Bowser can no longer perform Koopa Hopping, hindering the move's utility. Unlike Bowser's buff in ''Smash 4'', Giga Bowser's Flying Slam does not deal collateral damage. | ||
In ''Ultimate'', the grounded version is drastically slower and the throw has less range, both on the ground and especially in the air. Its damage was also reduced, now being only slightly higher than Bowser's. Giga Bowser also performs a much higher jump after landing the throw, significantly increasing the throw's overall lag. | |||
In '' | ===Bowsercide=== | ||
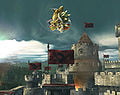
[[File:Sacrificial KO Bowser Brawl.gif|thumb|right|250px|Flying Slam used as a [[sacrificial KO]].]] | |||
In ''Brawl'' and {{for3ds}} versions older than 1.0.4, Flying Slam can be used to easily cause a [[sacrificial KO]], commonly known as a "Bowsercide". Bowsercides can be beneficial in the event of tightening [[stock]] leads or making up for [[percentage]] deficits, as well as punishing poor edgeguard attempts, allowing Bowser to take down the opponent with him and even out the situation. However, if Bowser's percentage is high, opponents can force a Bowsercide should it be beneficial to them. | |||
Interestingly, the [[DOJO!!]] has stated that if one uses this move to do a sacrificial KO while both are on their last [[stock]], the game would be called in Bowser's favor. However, this only happens when Bowser's [[Port priority|controller port]] is lower—such as if Bowser is player 1 and the opponent is player 2—but if Bowser's port is higher, [[Sudden Death]] occurs. A common tournament rule gives the victory to Bowser in this situation, regardless of what the game's result screen says, as Bowser is above the player during the move. Others, however, go by what the results screen states, to avoid conflicts. In 3DS version 1.0.4 and beyond and {{forwiiu}}, Bowser would instead get KO'd first, making him lose if he and his opponent are on their last stocks. Additionally, the opponent would also get released after Bowser gets KO'd, giving them the possibility to recover back to the stage, though characters like {{SSB4|Roy}} have significant trouble doing so due to how low it leaves them. This change remains in ''Ultimate'', but until around 4.0.0, it could sometimes cause a Sudden Death like in ''Smash 4''. | |||
In ''Brawl'', when Bowser is in the [[Port priority|higher control port]], his death after a [[Bowsercide]] can be stalled by mashing the jump button while holding the [[control stick]] in one side-direction. This will cause him to perform a second jump, not unlike the motion of a [[shorthop]]. This can be extended further by using [[Whirling Fortress]], and can be used to survive a Bowsercide on stages like [[Castle Siege]] when the stage is about to change and [[Norfair]] when the lava is at its lowest point. | |||
===Koopa Hopping=== | ===Koopa Hopping=== | ||
'''Koopa Hopping''' is a [[technique]] in ''Brawl'' that allows Bowser to jump continuously from [[platform]]s without the delay of landing. This is achieved by inputting a jump during an aerial Flying Slam the frame before landing. Hopping increases Bowser's airborne mobility, allowing him to fade in and out with aerials or Flying Slams. Koopa Hopping is a form of [[Second Jump Recovery]], as it restores Bowser's midair jump. | '''Koopa Hopping''' is a [[technique]] in ''Brawl'' that allows Bowser to jump continuously from [[platform]]s without the delay of landing. This is achieved by inputting a jump during an aerial Flying Slam the frame before landing. Hopping increases Bowser's airborne mobility, allowing him to fade in and out with aerials or Flying Slams. Koopa Hopping is a form of [[Second Jump Recovery]], as it restores Bowser's midair jump. | ||
==Instructional quotes== | ==Instructional quotes== | ||
Revision as of 08:48, October 5, 2021
| Flying Slam | |
|---|---|
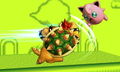
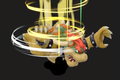
 Flying Slam in Super Smash Bros. Ultimate. | |
| User | Bowser Giga Bowser |
| Universe | Mario |
Flying Slam (ダイビングプレス, Diving Press) is Bowser's side special move since Super Smash Bros. Brawl, replacing the Koopa Klaw in Melee.
Overview
Flying Slam is essentially the same move as Koopa Klaw from Melee on startup: clawing at the opponent. However, the similarities end there: it lacks a hitbox outside of the grab range, it cannot be mashed out of, and once the grab connects, it automatically transitions to a flying body slam. Thus, there is no pummel like the Koopa Klaw either; thus, and the forward and back throws were effectively removed. Functionally, Koopa Klaw and Flying Slam are very different moves. Since foes in the Subspace Emissary cannot be grabbed by special moves, Bowser does not actually perform a flying slam. Interestingly, he merely inflicts damage with his claws, akin to Koopa Klaw.
During the suplex, Bowser's air movement can be controlled greatly. However, as Bowser and his opponent's percentage difference increases, each player gains some amount of control over the trajectory. Thus, the higher Bowser's percentage, the less control he has. Because of the significant leap upon grabbing an opponent, it can also be used as a situational recovery move or sacrificial KO, the latter of which is colloquially known as a Bowsercide. In Super Smash Bros. 4 and Ultimate, Bowser's Flying Slam can also deal collateral damage to fighters who are caught in the crossfire of the slam. However, Giga Bowser's variation in Smash 4 and Ultimate still lacks any collateral damage properties. In Ultimate, Flying Slam's damage is affected by fall distance, dealing up to 23.4%.
Flying Slam is quite quick—often competing with the fastest grabs in the game—which makes it a strong reversal tool in all games it appears in. It can also function as a niche out of shield option in Ultimate, being frame 9 factoring in jumpsquat and its improved frame data. Flying Slam is notably useful for its KO potential alongside platforms, as the leap is just enough to get Bowser onto areas such as the top platform on Battlefield. However, it is vulnerable to DI as a result of its unfavorable knockback angle, which can allow characters to survive to high percentages. Because Flying Slam can be used in the air, it is very effective when tomahawking, as it's far less reactable; for a standard grab, this would involve landing first. In Ultimate, because grabs can clank, Flying Slam can be situationally used for such.
Giga Bowser
Giga Bowser has an improved version of Flying Slam, which has much more range, deals more damage, and has increased knockback. When Giga Bowser lands in Brawl, he does not jump, and simply stays on the ground after the throw.
In Smash 4, the move was largely unchanged from Brawl (unlike Bowser's version) although it did see two notable changes. The first change is that Giga Bowser now performs a tiny jump and then quickly lands after throwing the opponent. This significantly decreases the throw's lag overall, granting it combo potential. The second change, however, is that much like with his regular self, Giga Bowser can no longer perform Koopa Hopping, hindering the move's utility. Unlike Bowser's buff in Smash 4, Giga Bowser's Flying Slam does not deal collateral damage.
In Ultimate, the grounded version is drastically slower and the throw has less range, both on the ground and especially in the air. Its damage was also reduced, now being only slightly higher than Bowser's. Giga Bowser also performs a much higher jump after landing the throw, significantly increasing the throw's overall lag.
Bowsercide

In Brawl and Super Smash Bros. for Nintendo 3DS versions older than 1.0.4, Flying Slam can be used to easily cause a sacrificial KO, commonly known as a "Bowsercide". Bowsercides can be beneficial in the event of tightening stock leads or making up for percentage deficits, as well as punishing poor edgeguard attempts, allowing Bowser to take down the opponent with him and even out the situation. However, if Bowser's percentage is high, opponents can force a Bowsercide should it be beneficial to them.
Interestingly, the DOJO!! has stated that if one uses this move to do a sacrificial KO while both are on their last stock, the game would be called in Bowser's favor. However, this only happens when Bowser's controller port is lower—such as if Bowser is player 1 and the opponent is player 2—but if Bowser's port is higher, Sudden Death occurs. A common tournament rule gives the victory to Bowser in this situation, regardless of what the game's result screen says, as Bowser is above the player during the move. Others, however, go by what the results screen states, to avoid conflicts. In 3DS version 1.0.4 and beyond and Super Smash Bros. for Wii U, Bowser would instead get KO'd first, making him lose if he and his opponent are on their last stocks. Additionally, the opponent would also get released after Bowser gets KO'd, giving them the possibility to recover back to the stage, though characters like Roy have significant trouble doing so due to how low it leaves them. This change remains in Ultimate, but until around 4.0.0, it could sometimes cause a Sudden Death like in Smash 4.
In Brawl, when Bowser is in the higher control port, his death after a Bowsercide can be stalled by mashing the jump button while holding the control stick in one side-direction. This will cause him to perform a second jump, not unlike the motion of a shorthop. This can be extended further by using Whirling Fortress, and can be used to survive a Bowsercide on stages like Castle Siege when the stage is about to change and Norfair when the lava is at its lowest point.
Koopa Hopping
Koopa Hopping is a technique in Brawl that allows Bowser to jump continuously from platforms without the delay of landing. This is achieved by inputting a jump during an aerial Flying Slam the frame before landing. Hopping increases Bowser's airborne mobility, allowing him to fade in and out with aerials or Flying Slams. Koopa Hopping is a form of Second Jump Recovery, as it restores Bowser's midair jump.
Instructional quotes
| Grab a foe, leap up, and crush them under Bowser's weight. | ||
| Grab foes, jump up, and body-slam them. | ||
| Grabs an opponent, jumps into the air, and then slams them to the ground. |
Customization
Special Move customization was added in Super Smash Bros. 4. These are the variations:
| 1. Flying Slam | 2. Dash Slam | 3. Dash Slash |
|---|---|---|
 |
 |
 |
| "Grab an opponent, jump into the air, and slam them to the ground." | "Dash and grab an opponent. The jump isn't high, but there's more sideways movement." | "Charge and slash opponents with your claws. Low damage, but high launch power." |
- Flying Slam: Default.
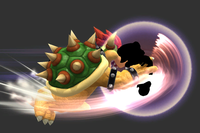
- Dash Slam: Dash forward and slam someone with less vertical distance. Does horizontal based knock back, 12% damage, and the ending lag is identical to the regular Flying Slam, although it has somewhat increased startup. If this move is used near a Spring, Bowser and his victim will be pushed a huge distance, about 1/3 of The Great Cave Offensive. Less effective at KOing, but can KO at the ledge due to its lower launch angle.
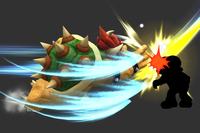
- Dash Slash: Dash forward and slashes opponents similar to the Koopa Klaw, but without the grab. Bowser goes about halfway the length of Battlefield. The move does 8% damage, has high base knockback (but has almost no KO power), and has low endlag. Flying Slam's complete autocancel property in Smash 4 greatly benefits the aerial version of Dash Slash more than the other variants, allowing for safe approaches and potential combos. If Bowser lands with the move just before the hitbox comes out, he will slide similarly to Melee's wavedash technique, giving him an excellent approach. Since it isn't a grab, it can be punished when shielded properly. If still suffering knockback when using this move, he won't dash as far or at all.
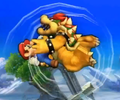
Dash Slam in Super Smash Bros. for Nintendo 3DS
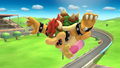
Dash Slash in Super Smash Bros. for Nintendo 3DS


Origin
Bowser has never done a suplex in any Mario game before; however, he does perform a piledriver in Mario & Luigi: Superstar Saga. During a fight where he teams up with Popple, he may execute a "Bros. Attack", where he grabs Popple, throws him into the air, jumps up to catch up, then piledrives Popple directly into the ground, creating multiple shockwaves to attack Mario and Luigi indirectly. Though not identical, this attack shares the same fundamental concept with Flying Slam, being a grabbing move, followed by a jump, followed by a wrestling move, and ending in a hard landing.
The exact manoeuvre of a diving splash looks very similar to how Bowser flies backwards off the spiky bombs if Mario throws him onto one of them and lands on his front in Super Mario 64, not to mention Bowser's ability to jump high back onto the platform if Mario fails to launch him into the spiky bombs. Bowser also performs a similar attack in Mario & Luigi: Dream Team during his giant battle, though without grabbing Luigi first. However, Mario and Luigi: Dream Team was released after Super Smash Bros. Brawl, and its inclusion here was likely a reference to Super Mario 64 and/or Brawl.
Gallery
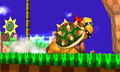
Flying Slam in Brawl.
Flying Slam in Super Smash Bros. for Nintendo 3DS.
Flying Slam in Super Smash Bros. for Wii U.
Flying Slam as shown by the Move List in Ultimate.


Names in other languages
| Language | Name |
|---|---|
| ダイビングプレス, Diving Press | |
| Flying Slam | |
| Plaquage volant | |
| Wrestlingattacke | |
| Martinete giratorio | |
| Spezzaschiena | |
| 俯冲重压 | |
| 俯衝重壓 | |
| 다이빙 프레스, Diving Press | |
| Bowser-slam | |
| Летучий пресс |