Captain Falcon (SSB)/Down aerial: Difference between revisions
mNo edit summary |
SuperSqank (talk | contribs) No edit summary |
||
| (17 intermediate revisions by 5 users not shown) | |||
| Line 2: | Line 2: | ||
==Overview== | ==Overview== | ||
Captain Falcon | [[File:Captain Falcon Down Aerial Hitbox Smash 64.gif|thumb|The [[hitbox]] of Captain Falcon's down aerial.]] | ||
[[File:SSB64 Falcon Ken Combo.gif|thumb|A string of up aerials, with a down aerial being used to finish the combo.]] | |||
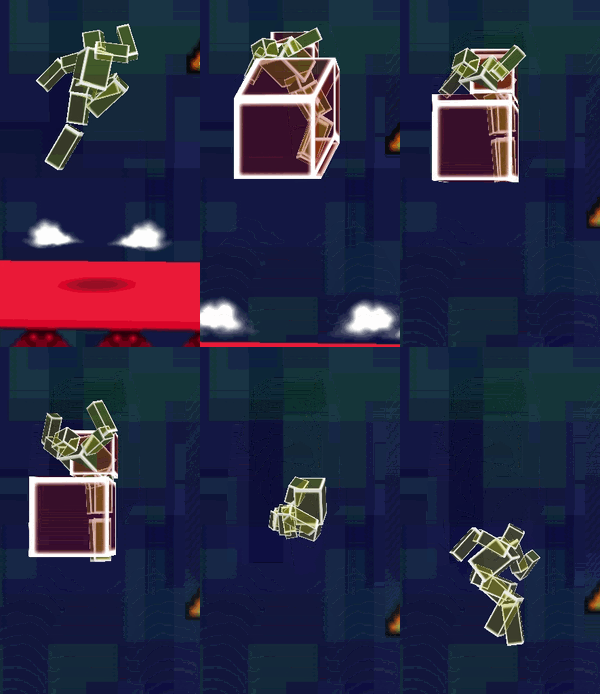
Captain Falcon [[stomp (archetype)|stomp]]s below him, dealing 14% [[damage]]. The move's hitbox lasts a very long time, but it has very quick [[startup]]. The move functions as a [[meteor smash]], striking airborne opponents downwards when they are hit by the move. The move's [[reach]] is also extended by a small [[hitbox]] above Captain Falcon's legs. The move is a powerful meteor smash (even if it hits during the latter frames), and it can KO at moderately low percentages offstage. Due to the move having high power throughout the entire duration, it can easily be used after an [[edge]] drop and a [[midair jump]] to cover the area around Falcon, being very difficult for most [[recover]]ing characters to get past. If the move is used on a grounded opponent, it produces very weak knockback that only just lifts them off the ground at around 80-90%, though at around 80% it can lead into an {{mvsub|Captain Falcon|SSB|up smash}} to get the opponent into the air, and at around 100-150% (depending on the falling speed of the opponent) it can lead straight into a {{mvsub|Captain Falcon|SSB|back aerial}} or occasionally a {{mvsub|Captain Falcon|SSB|neutral aerial}} for a KO. Used on a grounded opponent at lower to moderate percentages, it can also [[tech-chase]] rather easily. This can be performed out of a [[short hop]] or after an aerial down aerial onstage. In addition to this, it can be used effectively with the help of [[platform]]s; for example, Falcon can use it almost immediately after dropping through a [[soft platform]]. Additionally, a down aerial can be used on a grounded opponent right next to the edge of the stage to combo into another down aerial, a {{mvsub|Captain Falcon|SSB|forward smash}}, or even a {{mvsub|Captain Falcon|SSB|neutral special|alt=Falcon Punch}}. | |||
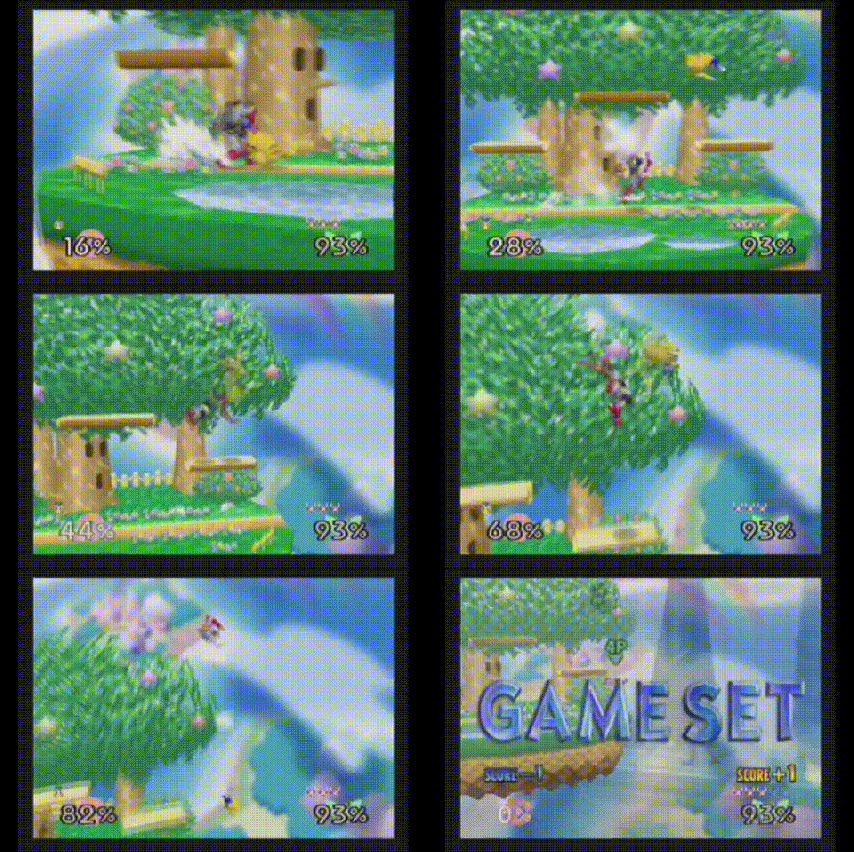
{{ | Captain Falcon can also perform a [[Ken Combo]] variation by jumping, using his back aerial (at lower percentages) or {{mvsub|Captain Falcon|SSB|forward aerial}} (at moderate percentages), jumping again and using a down aerial to meteor smash the opponent. A down aerial can also be used to finish a string of {{mvsub|Captain Falcon|SSB|up aerial}}s. According to {{Sm|Ken}} himself, the Ken Combo was initially developed in ''Smash 64'' using an up aerial → down aerial combo with Captain Falcon. | ||
[[Category:Captain Falcon]] | ==Hitboxes== | ||
[[Category:Down aerials]] | {{SSB64HitboxTableHeader}} | ||
{{SSB64HitboxTableRow | |||
|id=0 | |||
|damage=14% | |||
|angle=-80 | |||
|bk=0 | |||
|ks=100 | |||
|fkv=0 | |||
|r=165 | |||
|bn=26 | |||
|xpos=0 | |||
|ypos=120 | |||
|effect=Normal | |||
|slvl=L | |||
|sfx=Kick | |||
}} | |||
{{SSB64HitboxTableRow | |||
|id=1 | |||
|damage=14% | |||
|angle=-80 | |||
|bk=0 | |||
|ks=100 | |||
|fkv=0 | |||
|r=95 | |||
|bn=5 | |||
|xpos=0 | |||
|ypos=30 | |||
|effect=Normal | |||
|slvl=L | |||
|sfx=Kick | |||
}} | |||
|} | |||
==Timing== | |||
===Attack=== | |||
{|class="wikitable" | |||
|- | |||
!Initial auto-cancel | |||
|1-6 | |||
|- | |||
!Hitboxes | |||
|7-24 | |||
|- | |||
!Ending auto-cancel | |||
|25- | |||
|- | |||
!Animation length | |||
|39 | |||
|} | |||
{{FrameStripStart}} | |||
{{FrameStrip|t=Lag|c=6}}{{FrameStrip|t=Hitbox|c=18}}{{FrameStrip|t=Lag|c=15}} | |||
|- | |||
{{FrameStrip|t=Autocancel|c=6}}{{FrameStrip|t=Blank|c=18}}{{FrameStrip|t=Autocancel|c=15}} | |||
{{FrameStripEnd}} | |||
===Landing lag=== | |||
{|class="wikitable" | |||
|- | |||
!Animation length | |||
|28 | |||
|- | |||
!L-cancelled animation length | |||
|4 | |||
|} | |||
{{FrameStripStart}} | |||
|Normal {{FrameStrip|t=Lag|c=28}} | |||
|- | |||
|L-cancelled {{FrameStrip|t=Lag|c=4}}{{FrameStrip|t=Blank|c=24}} | |||
{{FrameStripEnd}} | |||
{{FrameIconLegend|lag=y|hitbox=y|autocancel=y}} | |||
{{MvSubNavCaptainFalcon|g=SSB}} | |||
[[Category:Captain Falcon (SSB)]] | |||
[[Category:Down aerials (SSB)]] | |||
[[Category:Meteor smashes (SSB)]] | |||
[[Category:Normal attacks (SSB)]] | |||
[[Category:Stomps (SSB)]] | |||
[[Category:Aerial attacks (SSB)]] | |||
Latest revision as of 12:33, May 3, 2020
Overview[edit]

Captain Falcon stomps below him, dealing 14% damage. The move's hitbox lasts a very long time, but it has very quick startup. The move functions as a meteor smash, striking airborne opponents downwards when they are hit by the move. The move's reach is also extended by a small hitbox above Captain Falcon's legs. The move is a powerful meteor smash (even if it hits during the latter frames), and it can KO at moderately low percentages offstage. Due to the move having high power throughout the entire duration, it can easily be used after an edge drop and a midair jump to cover the area around Falcon, being very difficult for most recovering characters to get past. If the move is used on a grounded opponent, it produces very weak knockback that only just lifts them off the ground at around 80-90%, though at around 80% it can lead into an up smash to get the opponent into the air, and at around 100-150% (depending on the falling speed of the opponent) it can lead straight into a back aerial or occasionally a neutral aerial for a KO. Used on a grounded opponent at lower to moderate percentages, it can also tech-chase rather easily. This can be performed out of a short hop or after an aerial down aerial onstage. In addition to this, it can be used effectively with the help of platforms; for example, Falcon can use it almost immediately after dropping through a soft platform. Additionally, a down aerial can be used on a grounded opponent right next to the edge of the stage to combo into another down aerial, a forward smash, or even a Falcon Punch.
Captain Falcon can also perform a Ken Combo variation by jumping, using his back aerial (at lower percentages) or forward aerial (at moderate percentages), jumping again and using a down aerial to meteor smash the opponent. A down aerial can also be used to finish a string of up aerials. According to Ken himself, the Ken Combo was initially developed in Smash 64 using an up aerial → down aerial combo with Captain Falcon.
Hitboxes[edit]
| ID | Part | Damage | SD | Angle | BK | KS | FKV | Radius | Bone | Offset | Clang | Effect | G | A | Sound | ||
|---|---|---|---|---|---|---|---|---|---|---|---|---|---|---|---|---|---|
| 0 | 0 | 14% | 0 | 0 | 100 | 0 | 165 | 26 | 0 | 120 | 0 | ||||||
| 1 | 0 | 14% | 0 | 0 | 100 | 0 | 95 | 5 | 0 | 30 | 0 | ||||||
Timing[edit]
Attack[edit]
| Initial auto-cancel | 1-6 |
|---|---|
| Hitboxes | 7-24 |
| Ending auto-cancel | 25- |
| Animation length | 39 |
Landing lag[edit]
| Animation length | 28 |
|---|---|
| L-cancelled animation length | 4 |
| Normal | ||||||||||||||||||||||||||||
| L-cancelled |
Lag time |
Hitbox |
Autocancel |
|
