SSBU Icon.png

King K. Rool (SSBU)/Neutral attack/Hit 2: Difference between revisions

From SmashWiki, the Super Smash Bros. wiki
Jump to navigationJump to search
m (Added hitstun)
(→‎Overview: citation)
Line 3: Line 3:


==Overview==
==Overview==
King K. Rool does a quick claw swipe. Coming out Frame 3, this is King K. Rool's fastest move in general, although due to Jab 1's transition it is technically Frame 9. Like Hit 1, this deals 4 extra frames of hitstun in addition to the usual amount. Due to the reasonably quick frame data and good active frames considering Hit 1, it's a niche option for baiting opponents trying to punish Hit 1. It is also slightly [[disjointed]] for the same reason as Hit 1: the lack of hand hurtboxes.  
King K. Rool does a quick claw swipe. Coming out Frame 3, this is King K. Rool's fastest move in general, although due to Hit 1's transition, it is technically Frame 9. Like Hit 1, this deals 4 extra frames of hitstun in addition to the usual amount. Due to the reasonably quick frame data and good active frames considering Hit 1, it's a niche option for baiting opponents trying to punish Hit 1. It is also slightly [[disjointed]] for the same reason as Hit 1: the lack of hand hurtboxes.  


Hitting lower than Hit 1 means Hit 2 is better at [[lock]]ing than the prior. This is important in some matchups, although it takes time to set up and thus tends to lose to [[getup attack]]. Outside of this, the best use of Hit 2 is in niche spacing scenarios where you need more hitboxes, or going into Hit 3.  
Hitting lower than Hit 1 means Hit 2 is better at [[lock]]ing<ref>https://docs.google.com/spreadsheets/d/1BU1v14JpuTQEWmhYLzJn5KEBnKRN6GoAvs6g4QUhiag/edit?usp=sharing</ref> or hitting buried opponents <ref>https://docs.google.com/spreadsheets/d/113W9WQAmUCBukC0gNI09o3giIjTVnG9rHbUyg-aV3l8/edit?usp=sharing</ref>than the prior. This is important in some matchups, although it takes time to set up and thus tends to lose to [[getup attack]]. Outside of this, the best use of Hit 2 is in niche spacing scenarios where you need more hitboxes, or going into Hit 3.


==Hitboxes==
==Hitboxes==

Revision as of 17:48, November 16, 2020

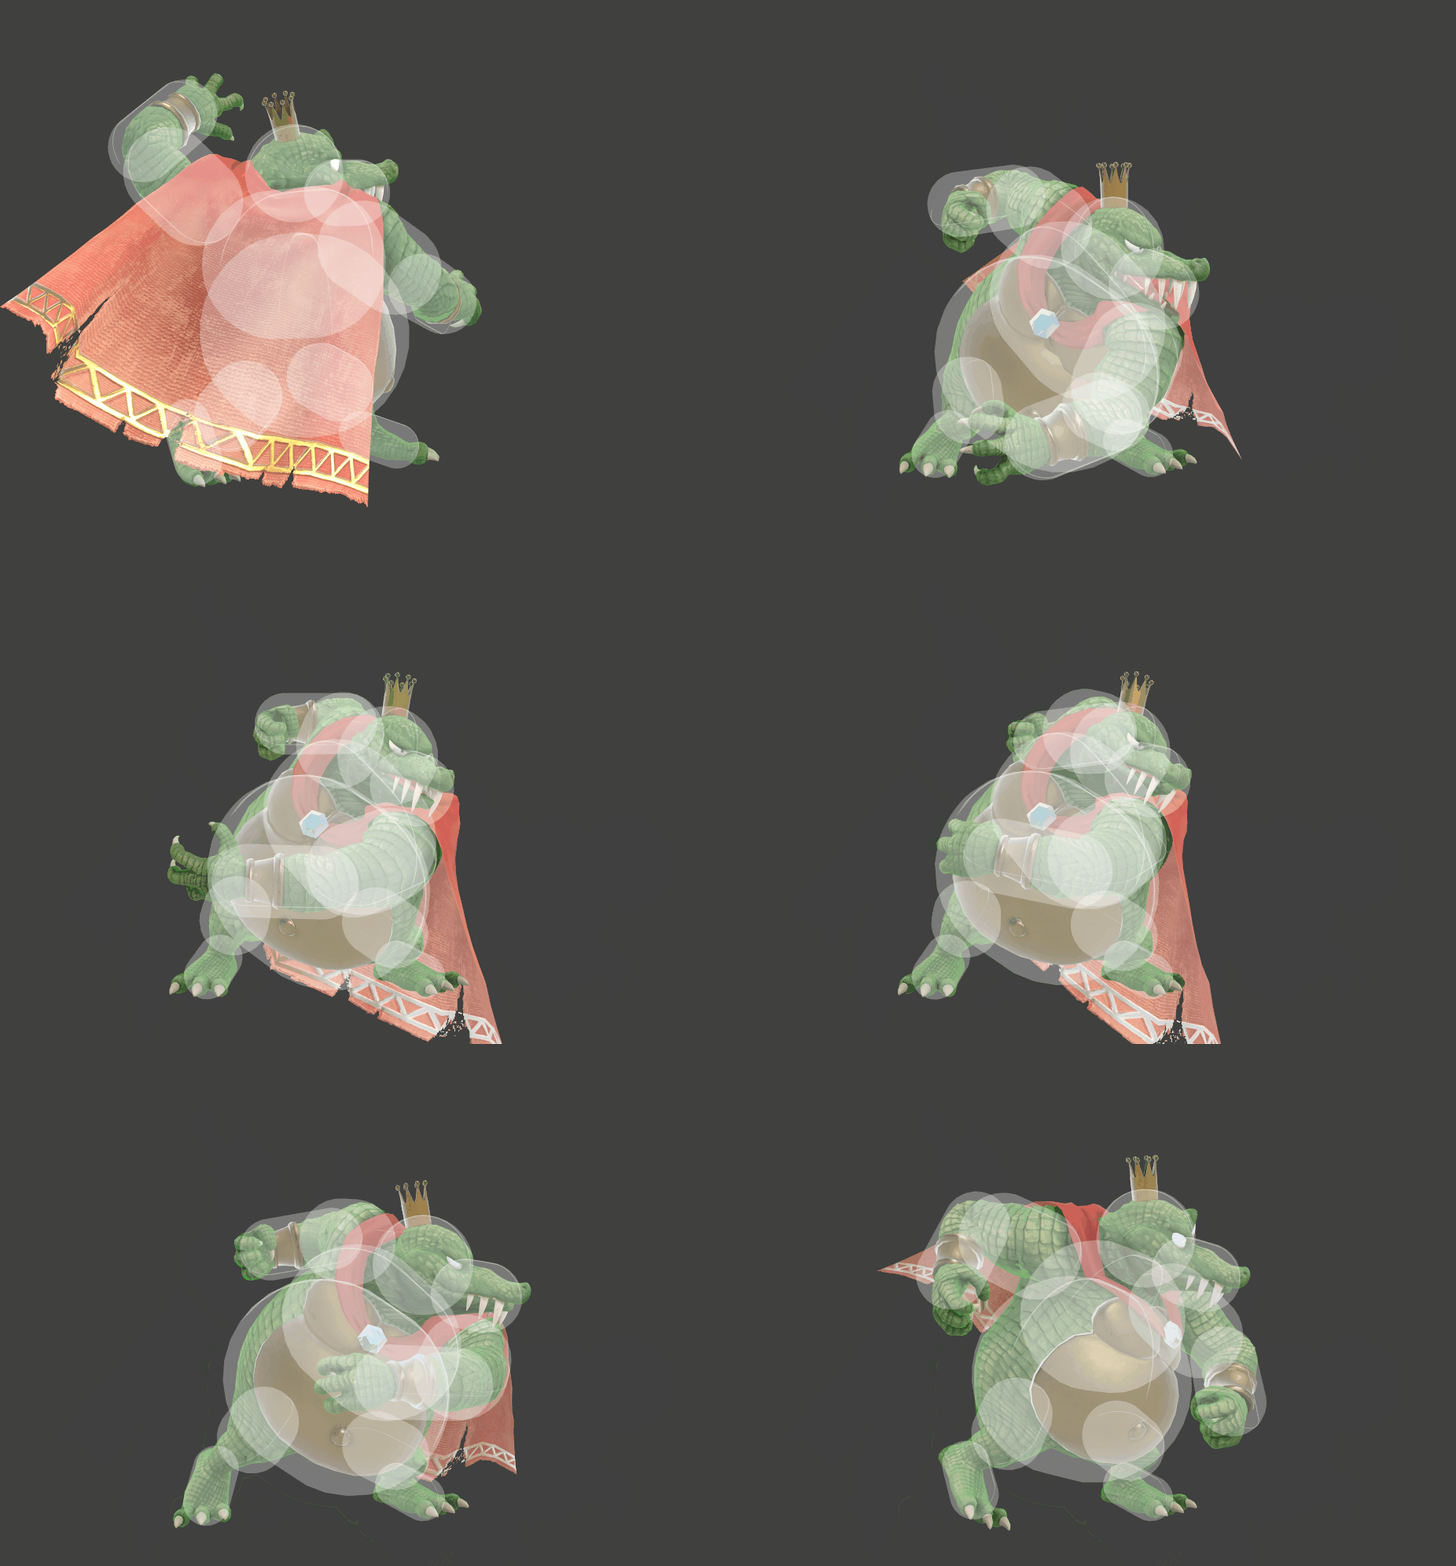
Hitbox visualization showing King K. Rool's Hit 2 of neutral attack.

Overview

King K. Rool does a quick claw swipe. Coming out Frame 3, this is King K. Rool's fastest move in general, although due to Hit 1's transition, it is technically Frame 9. Like Hit 1, this deals 4 extra frames of hitstun in addition to the usual amount. Due to the reasonably quick frame data and good active frames considering Hit 1, it's a niche option for baiting opponents trying to punish Hit 1. It is also slightly disjointed for the same reason as Hit 1: the lack of hand hurtboxes.

Hitting lower than Hit 1 means Hit 2 is better at locking[1] or hitting buried opponents [2]than the prior. This is important in some matchups, although it takes time to set up and thus tends to lose to getup attack. Outside of this, the best use of Hit 2 is in niche spacing scenarios where you need more hitboxes, or going into Hit 3.

Hitboxes

ID Part Rehit rate Damage SD Angle Angle type BK KS FKV Set weight Radius Bone Offset SDI× T% Clang Rebound Effect Type G A Sound Direct Hit bits Hit part Blockable Reflectable Absorbable Flinchless No GFX Heedless Hitstun
0 0 0 2.5% 0 Sakurai angle Standard 25 30 0 HitboxTableIcon(False).png 2.8 top 0.0 8.5 10.0 1.2× 1.0× 0% HitboxTableIcon(Clang).png HitboxTableIcon(Rebound).png EffectIcon(Normal).png TypeIcon(Hand).png HitboxTableIcon(GroundedTrue).png HitboxTableIcon(AerialTrue).png M Kick SpecialsDirect.png All All HitboxTableIcon(Blockable).png HitboxTableIcon(Unreflectable).png HitboxTableIcon(Unabsorbable).png HitboxTableIcon(False).png HitboxTableIcon(False).png HitboxTableIcon(False).png +4 frames
1 0 0 2.5% 0 Sakurai angle Standard 25 30 0 HitboxTableIcon(False).png 2.8 top 0.0 8.5 13.0 1.2× 1.0× 0% HitboxTableIcon(Clang).png HitboxTableIcon(Rebound).png EffectIcon(Normal).png TypeIcon(Hand).png HitboxTableIcon(GroundedTrue).png HitboxTableIcon(AerialTrue).png M Kick SpecialsDirect.png All All HitboxTableIcon(Blockable).png HitboxTableIcon(Unreflectable).png HitboxTableIcon(Unabsorbable).png HitboxTableIcon(False).png HitboxTableIcon(False).png HitboxTableIcon(False).png +4 frames
2 0 0 2.5% 0 Sakurai angle Standard 25 30 0 HitboxTableIcon(False).png 2.8 top 0.0 8.5 16.5 1.2× 1.0× 0% HitboxTableIcon(Clang).png HitboxTableIcon(Rebound).png EffectIcon(Normal).png TypeIcon(Hand).png HitboxTableIcon(GroundedTrue).png HitboxTableIcon(AerialTrue).png M Kick SpecialsDirect.png All All HitboxTableIcon(Blockable).png HitboxTableIcon(Unreflectable).png HitboxTableIcon(Unabsorbable).png HitboxTableIcon(False).png HitboxTableIcon(False).png HitboxTableIcon(False).png +4 frames
3 0 0 2.5% 0 AngleIcon180.png Standard 20 15 0 HitboxTableIcon(False).png 3.0 top 0.0 8.5 21.0 1.2× 1.0× 0% HitboxTableIcon(Clang).png HitboxTableIcon(Rebound).png EffectIcon(Normal).png TypeIcon(Hand).png HitboxTableIcon(GroundedTrue).png HitboxTableIcon(AerialTrue).png M Kick SpecialsDirect.png All All HitboxTableIcon(Blockable).png HitboxTableIcon(Unreflectable).png HitboxTableIcon(Unabsorbable).png HitboxTableIcon(False).png HitboxTableIcon(False).png HitboxTableIcon(False).png +4 frames
4 0 0 2.5% 0 Sakurai angle Standard 20 15 0 HitboxTableIcon(False).png 3.0 top 0.0 8.5 21.0 1.2× 1.0× 0% HitboxTableIcon(Clang).png HitboxTableIcon(Rebound).png EffectIcon(Normal).png TypeIcon(Hand).png HitboxTableIcon(GroundedTrue).png HitboxTableIcon(AerialTrue).png M Kick SpecialsDirect.png All All HitboxTableIcon(Blockable).png HitboxTableIcon(Unreflectable).png HitboxTableIcon(Unabsorbable).png HitboxTableIcon(False).png HitboxTableIcon(False).png HitboxTableIcon(False).png +4 frames

Timing

Hitboxes 3-4
Earliest continuable frame 9
Interruptible 28
Animation length 51
FrameIcon(Lag).png FrameIcon(Lag).png FrameIcon(Hitbox).png FrameIcon(Hitbox).png FrameIcon(Lag).png FrameIcon(Lag).png FrameIcon(Lag).png FrameIcon(LagContinuableS).png FrameIcon(LagContinuableE).png FrameIcon(Lag).png FrameIcon(Lag).png FrameIcon(Lag).png FrameIcon(Lag).png FrameIcon(Lag).png FrameIcon(Lag).png FrameIcon(Lag).png FrameIcon(Lag).png FrameIcon(Lag).png FrameIcon(Lag).png FrameIcon(Lag).png FrameIcon(Lag).png FrameIcon(Lag).png FrameIcon(Lag).png FrameIcon(Lag).png FrameIcon(Lag).png FrameIcon(Lag).png FrameIcon(Lag).png FrameIcon(Interruptible).png FrameIcon(Interruptible).png FrameIcon(Interruptible).png FrameIcon(Interruptible).png FrameIcon(Interruptible).png FrameIcon(Interruptible).png FrameIcon(Interruptible).png FrameIcon(Interruptible).png FrameIcon(Interruptible).png FrameIcon(Interruptible).png FrameIcon(Interruptible).png FrameIcon(Interruptible).png FrameIcon(Interruptible).png FrameIcon(Interruptible).png FrameIcon(Interruptible).png FrameIcon(Interruptible).png FrameIcon(Interruptible).png FrameIcon(Interruptible).png FrameIcon(Interruptible).png FrameIcon(Interruptible).png FrameIcon(Interruptible).png FrameIcon(Interruptible).png FrameIcon(Interruptible).png FrameIcon(Interruptible).png
Legend (1 square = 1 frame)
FrameIcon(Lag).png
Lag time
FrameIcon(Hitbox).png
Hitbox
FrameIcon(BlankContinuableS).pngFrameIcon(BlankContinuableE).png
Earliest continuable point
FrameIcon(Interruptible).png
Interruptible

Trivia

  • Despite being a "punch" attack, this attack uses kick SFX.
  • Hitbox ID 4 is effectively only used for launching away items, as ID 3 can only hit fighters, to avoid launching items towards King K. Rool, hitting him.