Raul Retana (talk | contribs) m (Added update history) |
No edit summary |
||
| (One intermediate revision by one other user not shown) | |||
| Line 1: | Line 1: | ||
{{ArticleIcons|ssbu=y}} | {{ArticleIcons|ssbu=y}} | ||
{{competitive expertise}} | |||
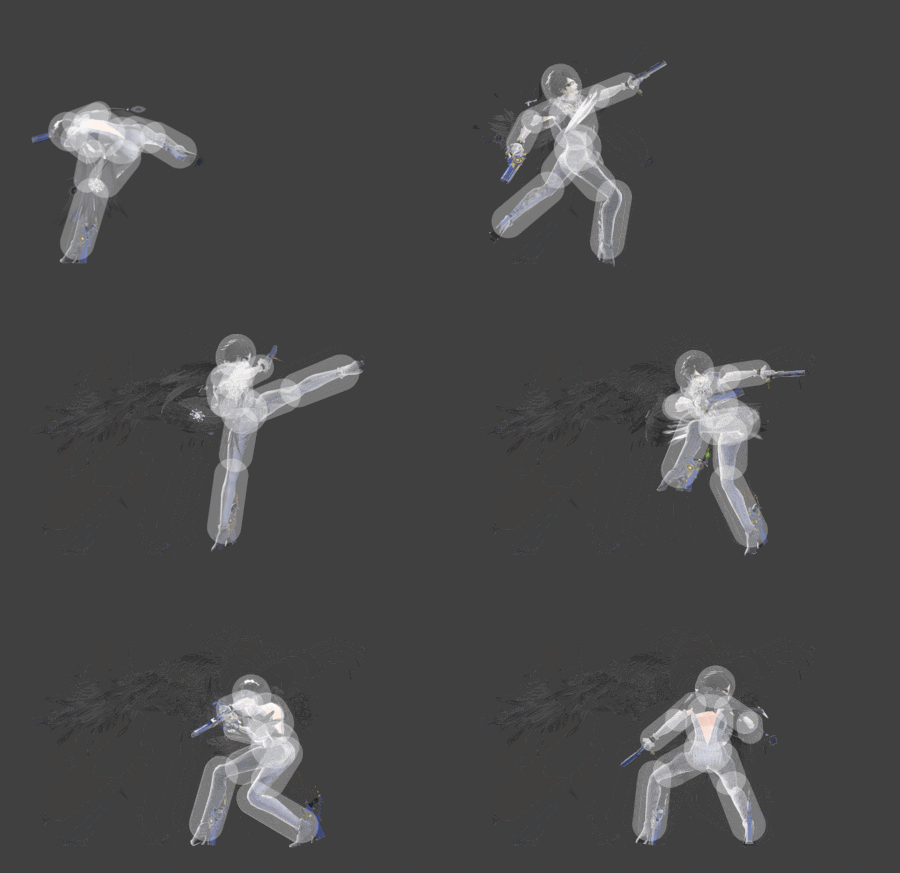
[[File:BayonettaFTilt2SSBU.gif|thumb|450px|Hitbox visualization showing Bayonetta's forward tilt 2.]] | [[File:BayonettaFTilt2SSBU.gif|thumb|450px|Hitbox visualization showing Bayonetta's forward tilt 2.]] | ||
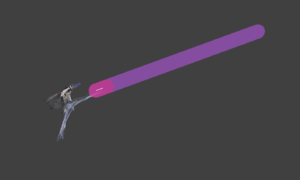
[[File:BayonettaFTilt2BulletArtsSSBU.png|thumb|300px|Hitbox visualization showing Bayonetta's forward tilt 2 | [[File:BayonettaFTilt2BulletArtsSSBU.png|thumb|300px|Hitbox visualization showing Bayonetta's forward tilt 2 Bullet Arts.]] | ||
==Overview== | ==Overview== | ||
==Update History== | ==Update History== | ||
'''{{GameIcon|ssbu}} {{SSBU|8.0.0}}''' | '''{{GameIcon|ssbu}} {{SSBU|8.0.0}}''' | ||
*{{change|The second hit has a slightly wider jostle area.}} | *{{change|The second hit has a slightly wider jostle area.}} | ||
==Hitboxes== | ==Hitboxes== | ||
===Attack=== | |||
{{UltimateHitboxTableHeader}} | {{UltimateHitboxTableHeader}} | ||
{{UltimateHitboxTableRow | {{UltimateHitboxTableRow | ||
| Line 13: | Line 16: | ||
|damage=3.0% | |damage=3.0% | ||
|angle=48 | |angle=48 | ||
|af=3 | |||
|bk=42 | |bk=42 | ||
|ks=25 | |ks=25 | ||
|fkv=0 | |fkv=0 | ||
|setweight=t | |||
|r=6.5 | |r=6.5 | ||
|bn=top | |bn=top | ||
| Line 31: | Line 36: | ||
|damage=3.0% | |damage=3.0% | ||
|angle=62 | |angle=62 | ||
|af=3 | |||
|bk=46 | |bk=46 | ||
|ks=25 | |ks=25 | ||
|fkv=0 | |fkv=0 | ||
|setweight=t | |||
|r=6.5 | |r=6.5 | ||
|bn=top | |bn=top | ||
| Line 45: | Line 52: | ||
|slvl=M | |slvl=M | ||
}} | }} | ||
|} | |} | ||
===Bullet Arts=== | |||
The bullet is shot from Bayonetta's left leg gun. | |||
{{UltimateHitboxTableHeader}} | |||
{{UltimateHitboxTableRow | |||
|id=0 | |||
|damage=0.5% | |||
|angle=20 | |||
|af=3 | |||
|bk=10 | |||
|ks=100 | |||
|fkv=0 | |||
|r=2.5 | |||
|bn=top | |||
|xpos=0.0 | |||
|ypos=18.0 to 19.4 | |||
|zpos=9.5 to 13.3 | |||
|ff=0.0 | |||
|sdi=0.0 | |||
|type=Typeless | |||
|effect=Normal | |||
|sfx=Bayonetta Hit 01 | |||
|slvl=S | |||
|clang=f | |||
|rebound=f | |||
|direct=f | |||
}} | |||
{{UltimateHitboxTableRow | |||
|id=1 | |||
|damage=0.5% | |||
|angle=20 | |||
|af=3 | |||
|bk=0 | |||
|ks=0 | |||
|fkv=0 | |||
|r=2.5 | |||
|bn=top | |||
|xpos=0.0 | |||
|ypos=18.0 to 38.5 | |||
|zpos=9.5 to 65.9 | |||
|ff=0.0 | |||
|sdi=0.0 | |||
|type=Typeless | |||
|effect=Normal | |||
|sfx=Bayonetta Hit 01 | |||
|slvl=S | |||
|clang=f | |||
|rebound=f | |||
|direct=f | |||
}} | |||
|} | |||
==Timing== | ==Timing== | ||
===Attack=== | |||
{|class="wikitable" | {|class="wikitable" | ||
!Hitboxes | !Hitboxes | ||
|12 | |12 | ||
|- | |- | ||
! | !Bullet Arts window | ||
| | |13 | ||
|- | |||
!Continuability window | |||
|16-39 | |||
|- | |- | ||
!Interruptible | !Interruptible | ||
| Line 63: | Line 125: | ||
{{FrameStripStart}} | {{FrameStripStart}} | ||
{{FrameStrip|t=Lag|c=11}}{{FrameStrip|t=Hitbox|c=1}}{{FrameStrip|t=Lag|c= | {{FrameStrip|t=Lag|c=11}}{{FrameStrip|t=Hitbox|c=1|e=HitboxStateS}}{{FrameStrip|t=Lag|c=3|s=LagStateE|e=LagContinuableS}}{{FrameStrip|t=Lag|c=24|s=LagContinuableE}}{{FrameStrip|t=Interruptible|c=22}} | ||
|- | |||
{{FrameStrip|t=Blank|c=15}}{{FrameStrip|t=Continuable|c=24}}{{FrameStrip|t=Blank|c=22}} | |||
{{FrameStripEnd}} | |||
===Bullet Arts=== | |||
Up to 10 consecutive bullets can be fired by holding the button, with each one adding 7 frames to the move's duration. Otherwise, the Bullet Arts extension lasts 11 frames. | |||
{|class="wikitable" | |||
!Hitboxes | |||
|1 | |||
|- | |||
!Loop point | |||
|7-8 | |||
|- | |||
!Animation length | |||
|11 | |||
|} | |||
{{FrameStripStart}} | |||
{{FrameStrip|t=Hitbox|c=1}}{{FrameStrip|t=Lag|c=6|e=LagLoopS}}{{FrameStrip|t=Lag|c=4|s=LagLoopE}} | |||
{{FrameStripEnd}} | {{FrameStripEnd}} | ||
{{FrameIconLegend|lag=y|hitbox=y|earliestcontinuable=y|interruptible=y}} | {{FrameIconLegend|lag=y|hitbox=y|earliestcontinuable=y|continuable=y|loop=y|state=y|interruptible=y}} | ||
{{MvSubNavBayonetta|g=SSBU}} | {{MvSubNavBayonetta|g=SSBU}} | ||
[[Category:Bayonetta (SSBU)]] | [[Category:Bayonetta (SSBU)]] | ||
[[Category:Forward tilts (SSBU)]] | [[Category:Forward tilts (SSBU)]] | ||
Latest revision as of 23:02, August 2, 2022
OverviewEdit
Update HistoryEdit
- The second hit has a slightly wider jostle area.
HitboxesEdit
AttackEdit
Bullet ArtsEdit
The bullet is shot from Bayonetta's left leg gun.
TimingEdit
AttackEdit
| Hitboxes | 12 |
|---|---|
| Bullet Arts window | 13 |
| Continuability window | 16-39 |
| Interruptible | 40 |
| Animation length | 61 |
Bullet ArtsEdit
Up to 10 consecutive bullets can be fired by holding the button, with each one adding 7 frames to the move's duration. Otherwise, the Bullet Arts extension lasts 11 frames.
| Hitboxes | 1 |
|---|---|
| Loop point | 7-8 |
| Animation length | 11 |
| Lag time |
Hitbox |
Loop point |
State change |
Continuable |
Earliest continuable point |
Interruptible |
|


