SSBM Icon.png

Fox (SSBM)/Up smash: Difference between revisions

From SmashWiki, the Super Smash Bros. wiki
Jump to navigationJump to search
No edit summary
Line 3: Line 3:
==Overview==
==Overview==
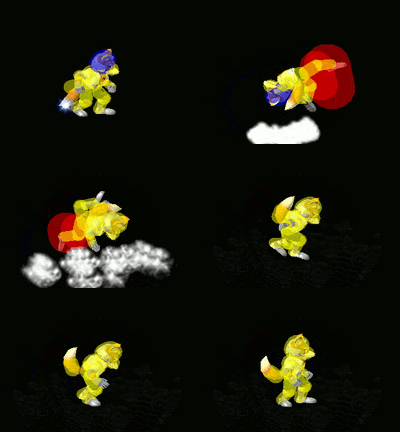
[[File:Fox Up Smash Hitbox Melee.gif|thumb|The hitbox of Fox's up smash.]]
[[File:Fox Up Smash Hitbox Melee.gif|thumb|The hitbox of Fox's up smash.]]
Fox does a fast kick flip. It can also hit behind him with his foot, though this does far weaker knockback. As Fox's most reliable finisher, it has very quick speed, very high vertical knockback, and decent [[range]]. It can reliably KO below 100% damage (KOing most characters in the 75% to 90% range), and it's the third most powerful up smash in the game behind {{mvsub|Pikachu|SSBM|up smash|alt=Pikachu's}} and {{mvsub|Sheik|SSBM|up smash|alt=Sheik's}} and tied with {{mvsub|Peach|SSBM|up smash|alt=Peach's}}. What makes Fox's up smash truly frightening, is Fox's multitude of options to [[combo]] into it. [[Waveshining]] can combo directly into an up smash and Fox's fast [[dashing]] speed allows him to do a running, jump-canceled up smash to followup [[L-cancel]]led {{mvsub|Fox|SSBM|neutral aerial}}s and {{mvsub|Fox|SSBM|back aerial}}s. Against [[fastfaller]]s, an uncharged up smash is often used as a followup to an {{mvsub|Fox|SSBM|up throw}} at low percentages, and at higher percentages, Fox can similarly combo into a charged up smash with an up throw. Overall, a very good move, and considered to be, by far, the best [[up smash]] in the game.
Fox does a bicycle kick. It can also hit behind him with his foot, though this does far weaker knockback. As Fox's most reliable finisher, it has very quick speed, very high vertical knockback, and decent [[range]]. It can reliably KO below 100% damage (KOing most characters in the 75% to 90% range), and it's the third most powerful up smash in the game behind {{mvsub|Pikachu|SSBM|up smash|alt=Pikachu's}} and {{mvsub|Sheik|SSBM|up smash|alt=Sheik's}} and tied with {{mvsub|Peach|SSBM|up smash|alt=Peach's}}. What makes Fox's up smash truly frightening, is Fox's multitude of options to [[combo]] into it. [[Waveshining]] can combo directly into an up smash and Fox's fast [[dashing]] speed allows him to do a running, jump-canceled up smash to followup [[L-cancel]]led {{mvsub|Fox|SSBM|neutral aerial}}s and {{mvsub|Fox|SSBM|back aerial}}s. Against [[fastfaller]]s, an uncharged up smash is often used as a followup to an {{mvsub|Fox|SSBM|up throw}} at low percentages, and at higher percentages, Fox can similarly combo into a charged up smash with an up throw. Overall, a very good move, and considered to be, by far, the best [[up smash]] in the game.


During the first few frames, Fox's head (but not his snout) will be [[intangible]].

Revision as of 10:44, July 27, 2017

Overview

The hitbox of Fox's up smash.

Fox does a bicycle kick. It can also hit behind him with his foot, though this does far weaker knockback. As Fox's most reliable finisher, it has very quick speed, very high vertical knockback, and decent range. It can reliably KO below 100% damage (KOing most characters in the 75% to 90% range), and it's the third most powerful up smash in the game behind Pikachu's and Sheik's and tied with Peach's. What makes Fox's up smash truly frightening, is Fox's multitude of options to combo into it. Waveshining can combo directly into an up smash and Fox's fast dashing speed allows him to do a running, jump-canceled up smash to followup L-cancelled neutral aerials and back aerials. Against fastfallers, an uncharged up smash is often used as a followup to an up throw at low percentages, and at higher percentages, Fox can similarly combo into a charged up smash with an up throw. Overall, a very good move, and considered to be, by far, the best up smash in the game.

During the first few frames, Fox's head (but not his snout) will be intangible.

Hitboxes

NTSC

ID Part Damage SD Angle BK KS FKV Radius Bone Offset Clang Rebound Effect G A Sound
Clean
0 0 18% 0 AngleIcon80.png 30 112 0 3.327912 13 0.0 0.0 0.0 HitboxTableIcon(Clang).png HitboxTableIcon(Rebound).png EffectIcon(Normal).png HitboxTableIcon(GroundedTrue).png HitboxTableIcon(AerialTrue).png L Kick
1 0 18% 0 AngleIcon80.png 30 112 0 4.655952 13 2.327976 0.0 0.0 HitboxTableIcon(Clang).png HitboxTableIcon(Rebound).png EffectIcon(Normal).png HitboxTableIcon(GroundedTrue).png HitboxTableIcon(AerialTrue).png L Kick
Late
0 0 13% 0 Sakurai angle 10 100 0 3.327912 13 0.0 0.0 0.0 HitboxTableIcon(Clang).png HitboxTableIcon(Rebound).png EffectIcon(Normal).png HitboxTableIcon(GroundedTrue).png HitboxTableIcon(AerialTrue).png M Kick
1 0 13% 0 Sakurai angle 10 100 0 3.82788 13 2.327976 0.0 0.0 HitboxTableIcon(Clang).png HitboxTableIcon(Rebound).png EffectIcon(Normal).png HitboxTableIcon(GroundedTrue).png HitboxTableIcon(AerialTrue).png M Kick

PAL

ID Part Damage SD Angle BK KS FKV Radius Bone Offset Clang Rebound Effect G A Sound
Clean
0 0 17% 0 AngleIcon80.png 26 108 0 3.327912 13 0.0 0.0 0.0 HitboxTableIcon(Clang).png HitboxTableIcon(Rebound).png EffectIcon(Normal).png HitboxTableIcon(GroundedTrue).png HitboxTableIcon(AerialTrue).png L Kick
1 0 17% 0 AngleIcon80.png 26 108 0 4.655952 13 2.327976 0.0 0.0 HitboxTableIcon(Clang).png HitboxTableIcon(Rebound).png EffectIcon(Normal).png HitboxTableIcon(GroundedTrue).png HitboxTableIcon(AerialTrue).png L Kick
Late
0 0 13% 0 Sakurai angle 10 100 0 3.327912 13 0.0 0.0 0.0 HitboxTableIcon(Clang).png HitboxTableIcon(Rebound).png EffectIcon(Normal).png HitboxTableIcon(GroundedTrue).png HitboxTableIcon(AerialTrue).png M Kick
1 0 13% 0 Sakurai angle 10 100 0 3.82788 13 2.327976 0.0 0.0 HitboxTableIcon(Clang).png HitboxTableIcon(Rebound).png EffectIcon(Normal).png HitboxTableIcon(GroundedTrue).png HitboxTableIcon(AerialTrue).png M Kick

Summary

  • Nerf Clean hit deals -1% damage.
  • Nerf Clean hit has less base knockback and knockback scaling (-4 for each).

Timing

Head (not snout) intangible 1-9
Charges between 2-3
Clean hit 7-9
Late hit 10-17
Animation length 41
Interruptible 49
Hitboxes  FrameIcon(Lag).png FrameIcon(LagChargeS).png FrameIcon(LagChargeE).png FrameIcon(Lag).png FrameIcon(Lag).png FrameIcon(Lag).png FrameIcon(Hitbox).png FrameIcon(Hitbox).png FrameIcon(HitboxChangeS).png FrameIcon(HitboxChangeE).png FrameIcon(Hitbox).png FrameIcon(Hitbox).png FrameIcon(Hitbox).png FrameIcon(Hitbox).png FrameIcon(Hitbox).png FrameIcon(Hitbox).png FrameIcon(Hitbox).png FrameIcon(Lag).png FrameIcon(Lag).png FrameIcon(Lag).png FrameIcon(Lag).png FrameIcon(Lag).png FrameIcon(Lag).png FrameIcon(Lag).png FrameIcon(Lag).png FrameIcon(Lag).png FrameIcon(Lag).png FrameIcon(Lag).png FrameIcon(Lag).png FrameIcon(Lag).png FrameIcon(Lag).png FrameIcon(Lag).png FrameIcon(Lag).png FrameIcon(Lag).png FrameIcon(Lag).png FrameIcon(Lag).png FrameIcon(Lag).png FrameIcon(Lag).png FrameIcon(Lag).png FrameIcon(Lag).png FrameIcon(Lag).png
Head (not snout)  FrameIcon(Intangible).png FrameIcon(Intangible).png FrameIcon(Intangible).png FrameIcon(Intangible).png FrameIcon(Intangible).png FrameIcon(Intangible).png FrameIcon(Intangible).png FrameIcon(Intangible).png FrameIcon(Intangible).png FrameIcon(Vulnerable).png FrameIcon(Vulnerable).png FrameIcon(Vulnerable).png FrameIcon(Vulnerable).png FrameIcon(Vulnerable).png FrameIcon(Vulnerable).png FrameIcon(Vulnerable).png FrameIcon(Vulnerable).png FrameIcon(Vulnerable).png FrameIcon(Vulnerable).png FrameIcon(Vulnerable).png FrameIcon(Vulnerable).png FrameIcon(Vulnerable).png FrameIcon(Vulnerable).png FrameIcon(Vulnerable).png FrameIcon(Vulnerable).png FrameIcon(Vulnerable).png FrameIcon(Vulnerable).png FrameIcon(Vulnerable).png FrameIcon(Vulnerable).png FrameIcon(Vulnerable).png FrameIcon(Vulnerable).png FrameIcon(Vulnerable).png FrameIcon(Vulnerable).png FrameIcon(Vulnerable).png FrameIcon(Vulnerable).png FrameIcon(Vulnerable).png FrameIcon(Vulnerable).png FrameIcon(Vulnerable).png FrameIcon(Vulnerable).png FrameIcon(Vulnerable).png FrameIcon(Vulnerable).png
Legend (1 square = 1 frame)
FrameIcon(Lag).png
Lag time
FrameIcon(LagChargeS).pngFrameIcon(LagChargeE).png
Charge interval
FrameIcon(Hitbox).png
Hitbox
FrameIcon(HitboxChangeS).pngFrameIcon(HitboxChangeE).png
Hitbox change
FrameIcon(Vulnerable).png
Vulnerable
FrameIcon(Intangible).png
Intangible
FrameIcon(Interruptible).png
Interruptible

Similar moves