SSB4 Icon.png

Ganondorf (SSB4)/Forward smash

From SmashWiki, the Super Smash Bros. wiki
Jump to navigationJump to search
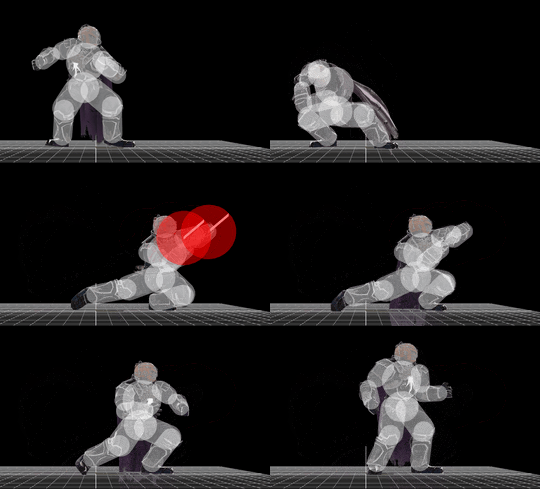
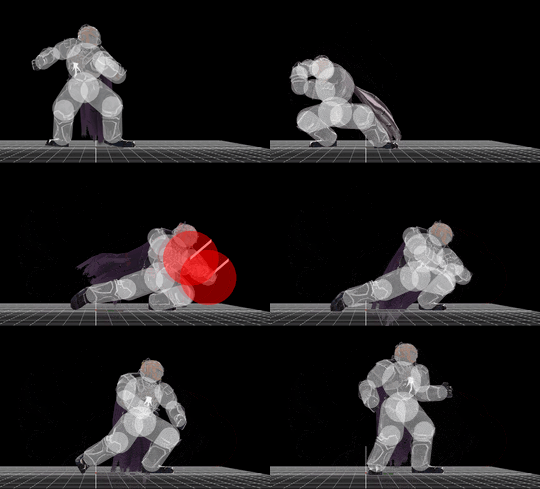
Ganondorf forward smash hitbox visualization
GanondorfFSmashUp.gif
GanondorfFSmash.gif
GanondorfFSmashDown.gif

Overview[edit]

Ganondorf performs a forceful elbow thrust very similar to Captain Falcon's forward smash, but with a dark effect. It has very slow startup and cooldown, but has the strongest knockback of all of his smash attacks, especially when hit with the sweetspot close to Ganondorf. These properties make it a very high-risk and high-reward option, useful when the Ganondorf player has a hard read or a large punish opportunity.
The move has three versions: upwards, forwards, and downwards angles. The upwards version is useful when attacking aerial opponents, while the forwards version has the greatest horizontal reach. The downwards version can potentially help when reaching over a ledge or the edge of a platform to connect further below Ganondorf.
This move's very high damage means it is dangerous to shielding opponents. Although punishable, an uncharged forward smash will take more than half of a shield's health; a fully charged one will cause an instant shield break. It also allows the move to destroy most projectiles, and out-prioritise most attacks.

Hitboxes[edit]

ID Part Damage SD Angle BK KS FKV Radius Bone Offset SDIx T% Clang Rebound Type Effect G A Sound Direct
0 0 24% 0 AngleIcon40.png 35 83 0 5.0 15 0.0 0.0 0.0 1.0x 1.0x 0% HitboxTableIcon(Clang).png HitboxTableIcon(Rebound).png TypeIcon(Elbow).png EffectIcon(Darkness).png HitboxTableIcon(GroundedTrue).png HitboxTableIcon(AerialTrue).png L Burn SpecialsDirect.png
1 0 24% 0 AngleIcon40.png 30 75 0 5.0 16 0.0 0.0 0.0 1.0x 1.0x 0% HitboxTableIcon(Clang).png HitboxTableIcon(Rebound).png TypeIcon(Elbow).png EffectIcon(Darkness).png HitboxTableIcon(GroundedTrue).png HitboxTableIcon(AerialTrue).png L Burn SpecialsDirect.png

Timing[edit]

Charges between 9-10
Hitboxes 21-26
Interruptible 60
Animation length 66
FrameIcon(Lag).png FrameIcon(Lag).png FrameIcon(Lag).png FrameIcon(Lag).png FrameIcon(Lag).png FrameIcon(Lag).png FrameIcon(Lag).png FrameIcon(Lag).png FrameIcon(LagChargeS).png FrameIcon(LagChargeE).png FrameIcon(Lag).png FrameIcon(Lag).png FrameIcon(Lag).png FrameIcon(Lag).png FrameIcon(Lag).png FrameIcon(Lag).png FrameIcon(Lag).png FrameIcon(Lag).png FrameIcon(Lag).png FrameIcon(Lag).png FrameIcon(Hitbox).png FrameIcon(Hitbox).png FrameIcon(Hitbox).png FrameIcon(Hitbox).png FrameIcon(Hitbox).png FrameIcon(Hitbox).png FrameIcon(Lag).png FrameIcon(Lag).png FrameIcon(Lag).png FrameIcon(Lag).png FrameIcon(Lag).png FrameIcon(Lag).png FrameIcon(Lag).png FrameIcon(Lag).png FrameIcon(Lag).png FrameIcon(Lag).png FrameIcon(Lag).png FrameIcon(Lag).png FrameIcon(Lag).png FrameIcon(Lag).png FrameIcon(Lag).png FrameIcon(Lag).png FrameIcon(Lag).png FrameIcon(Lag).png FrameIcon(Lag).png FrameIcon(Lag).png FrameIcon(Lag).png FrameIcon(Lag).png FrameIcon(Lag).png FrameIcon(Lag).png FrameIcon(Lag).png FrameIcon(Lag).png FrameIcon(Lag).png FrameIcon(Lag).png FrameIcon(Lag).png FrameIcon(Lag).png FrameIcon(Lag).png FrameIcon(Lag).png FrameIcon(Lag).png FrameIcon(Interruptible).png FrameIcon(Interruptible).png FrameIcon(Interruptible).png FrameIcon(Interruptible).png FrameIcon(Interruptible).png FrameIcon(Interruptible).png FrameIcon(Interruptible).png
Legend (1 square = 1 frame)
FrameIcon(Lag).png
Lag time
FrameIcon(LagChargeS).pngFrameIcon(LagChargeE).png
Charge interval
FrameIcon(Hitbox).png
Hitbox
FrameIcon(Interruptible).png
Interruptible