Mario (SSB4)/Down aerial: Difference between revisions
No edit summary |
m (Text replacement - "|right|thumbnail" to "|thumb") |
||
| (14 intermediate revisions by 8 users not shown) | |||
| Line 1: | Line 1: | ||
{{ | {{ArticleIcons|ssb4=y}} | ||
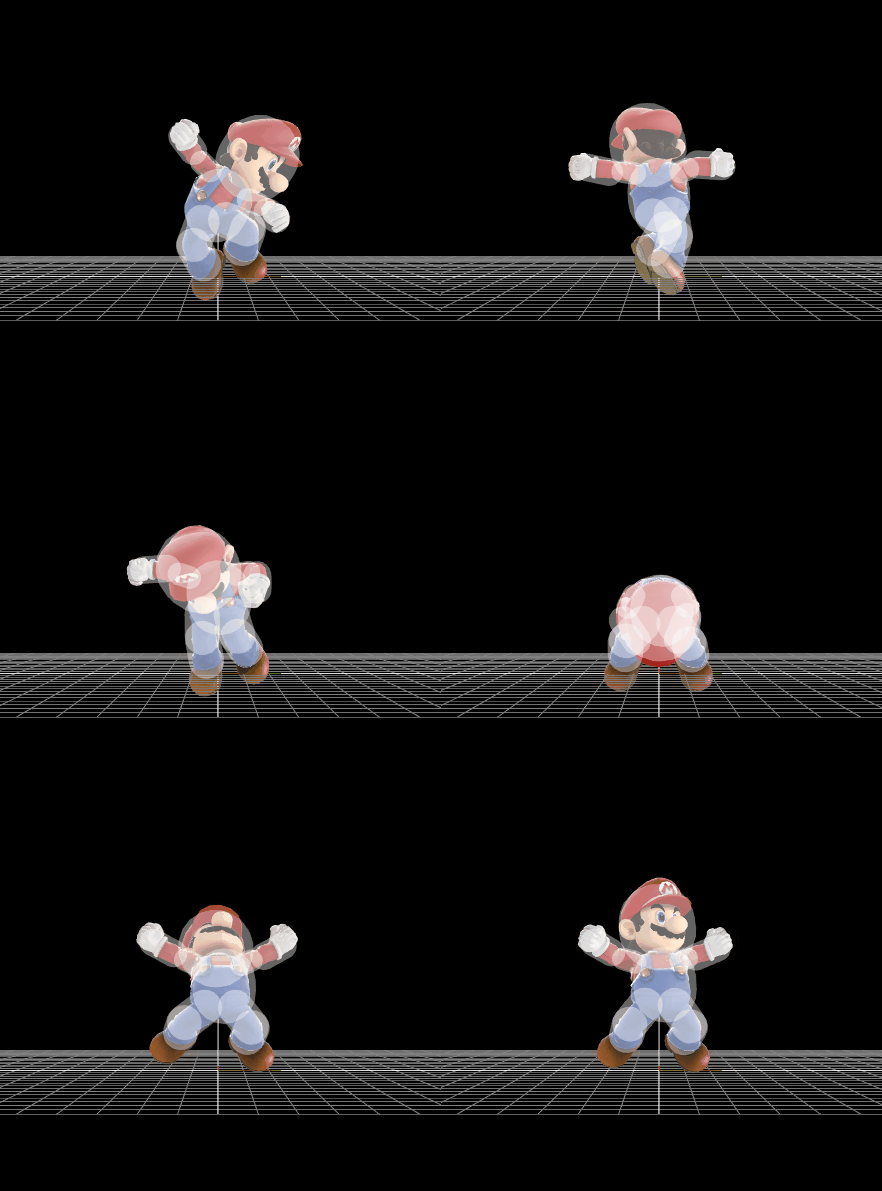
[[File:MarioDAir.gif|270px|thumb|Hitbox visualization of Mario's down aerial.]] | |||
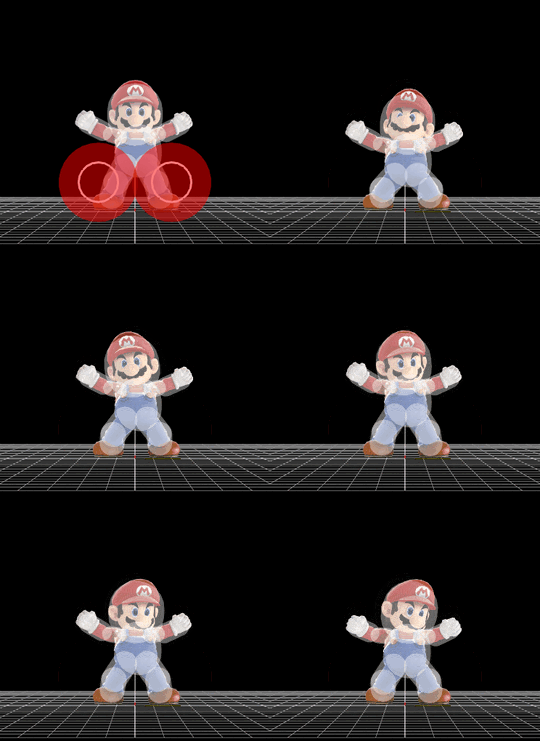
Mario's down aerial is the [[Mario Tornado]] | [[File:MarioDAirLanding.gif|270px|thumb|Hitbox visualization of Mario's down aerial upon landing.]] | ||
==Overview== | |||
Mario's down aerial is the [[Mario Tornado]]; a move where he attacks opponents with [[Wikipedia:Professional wrestling attacks|discus spinning clotheslines ending with a backfist body-stretch]], whilst shouting "Yahoo!". It is likely based on the {{s|mariowiki|Spin Jump}} that originated in ''[[Super Mario World]]''. The move deals five hits of 1% damage with [[set knockback]], then a sixth one inflicting 5% damage that launches them away vertically. | |||
Like all of Mario's [[aerial attack]]s aside from [[Mario (SSB4)/Forward aerial|his forward aerial]], his down aerial has very fast startup, at frame 5; it is tied with {{SSB4|Fox}}'s for the second fastest down aerial in the game, losing only to {{SSB4|Lucario}} and {{SSB4|Meta Knight}}'s. It also deals moderate damage (10% total), can [[autocancel]] in a [[short hop]], and its first five hits have decreased [[SDI]] multipliers, while the last hit has surprisingly high base knockback succeeded by low ending lag (12 frames). All of these traits make Mario's down aerial a useful move for approaching, comboing, racking up damage and protecting Mario from [[juggling]]. When landing with the move, it has moderate landing lag (19 frames), but produces a hitbox that deals 2% damage with set knockback and benefits it from [[frame canceling]], reducing the landing lag and allowing Mario to followup with a [[Mario (SSB4)/Neutral attack|neutral attack]], [[tilt]], [[Mario (SSB4)/Down smash|down smash]] or [[grab]] at close enough range. At low percentages, this down aerial's low ending lag enables it to combo into [[Super Jump Punch]] or any other aerial, with the effectiveness depending on the target's [[weight]] and [[falling speed]]. Due to the last hit's high knockback, it is also a surprisingly effective KO move near the upper [[blast line]], KOing middleweights under 120% with no [[rage]] and under 80% with max rage. | |||
{{ | Despite its plethora of advantages, one notable flaw Mario's down aerial possesses is the long delay between its penultimate hit and last hit, which combined with the low set knockback of the former enables characters with an aerial attack faster than frame 4 to hit Mario out of the move, and allows any character other than {{SSB4|Bowser}}, {{SSB4|Donkey Kong}}, {{SSB4|Ganondorf}}, {{SSB4|Jigglypuff}}, {{SSB4|King Dedede}} or {{SSB4|Ryu}} to [[air dodge]] out of it (though escaping with an air dodge is punishable). Its landing hit is also unsafe on [[shield]], rendering the move punishable if the player relies too much on its frame canceling ability. However, if Mario doesn't trap the opponent into the down aerial too high up from the ground, they will receive landing lag if they try air dodging out of it, enabling him to [[punish]] and potentially initiate a combo; this scenario is most commonly set up from a followup into down aerial out of an [[Mario (SSB4)/Up throw|up throw]], where fastfallers are unable to air dodge without receiving landing lag. Rage can alleviate this escapability issue as well; when Mario is at 70% or more, the penultimate hit deals minimally higher yet enough knockback to prevent middleweights' air dodges from coming out before the last hit. | ||
Overall, like the rest of his aerials, Mario's down aerial is a highly useful move to his metagame, and due to its outstanding advantages, it is often considered one of the best down aerials in the game. | |||
==Hitboxes== | |||
{{SSB4HitboxTableHeader}} | |||
{{HitboxTableTitle|Hits 1-5|24}} | |||
{{SSB4HitboxTableRow | |||
|id=0 | |||
|damage=1% | |||
|angle=94 | |||
|bk=0 | |||
|ks=100 | |||
|fkv=10 | |||
|r=7.0 | |||
|bn=0 | |||
|ypos=6.0 | |||
|sdi=0.8 | |||
|trip=0 | |||
|type=Hand | |||
|effect=Normal | |||
|clang=t | |||
|rebound=t | |||
|slvl=S | |||
|sfx=Kick | |||
}} | |||
{{SSB4HitboxTableRow | |||
|id=1 | |||
|damage=1% | |||
|angle=94 | |||
|bk=0 | |||
|ks=100 | |||
|fkv=10 | |||
|r=5.0 | |||
|bn=0 | |||
|ypos=3.0 | |||
|sdi=0.8 | |||
|trip=0 | |||
|type=Hand | |||
|effect=Normal | |||
|clang=t | |||
|rebound=t | |||
|slvl=S | |||
|sfx=Kick | |||
}} | |||
{{SSB4HitboxTableRow | |||
|id=2 | |||
|damage=1% | |||
|angle=94 | |||
|bk=0 | |||
|ks=100 | |||
|fkv=10 | |||
|r=5.0 | |||
|bn=0 | |||
|ypos=-1.0 | |||
|sdi=0.8 | |||
|trip=0 | |||
|type=Hand | |||
|effect=Normal | |||
|clang=t | |||
|rebound=t | |||
|slvl=S | |||
|sfx=Kick | |||
}} | |||
{{HitboxTableTitle|Hit 6|24}} | |||
{{SSB4HitboxTableRow | |||
|id=0 | |||
|damage=5% | |||
|angle=75 | |||
|bk=80 | |||
|ks=100 | |||
|fkv=0 | |||
|r=11.0 | |||
|bn=0 | |||
|ypos=6.8 | |||
|trip=0 | |||
|type=Hand | |||
|effect=Normal | |||
|clang=t | |||
|rebound=t | |||
|slvl=L | |||
|sfx=Kick | |||
}} | |||
{{HitboxTableTitle|Landing hit|24}} | |||
{{SSB4HitboxTableRow | |||
|id=0 | |||
|damage=2% | |||
|angle=361 | |||
|bk=0 | |||
|ks=100 | |||
|fkv=60 | |||
|r=4.32 | |||
|bn=0 | |||
|ypos=3.2 | |||
|zpos=4.0 | |||
|trip=0 | |||
|type=Foot | |||
|effect=Normal | |||
|clang=t | |||
|rebound=t | |||
|slvl=L | |||
|sfx=Kick | |||
}} | |||
{{SSB4HitboxTableRow | |||
|id=1 | |||
|damage=2% | |||
|angle=361 | |||
|bk=0 | |||
|ks=100 | |||
|fkv=60 | |||
|r=4.32 | |||
|bn=0 | |||
|ypos=3.2 | |||
|zpos=-4.0 | |||
|trip=0 | |||
|type=Foot | |||
|effect=Normal | |||
|clang=t | |||
|rebound=t | |||
|slvl=L | |||
|sfx=Kick | |||
}} | |||
|} | |||
==Timing== | |||
===Attack=== | |||
{|class="wikitable" | |||
!Initial autocancel | |||
|1-4 | |||
|- | |||
!Hits 1-5 | |||
|5, 7, 9, 11, 13 | |||
|- | |||
!Hit 6 | |||
|25 | |||
|- | |||
!Ending autocancel | |||
|33- | |||
|- | |||
!Interruptible | |||
|38 | |||
|- | |||
!Animation length | |||
|44 | |||
|} | |||
{{FrameStripStart}} | |||
{{FrameStrip|t=Lag|c=4}}{{FrameStrip|t=Hitbox|c=1}}{{FrameStrip|t=Lag|c=1}}{{FrameStrip|t=Hitbox|c=1}}{{FrameStrip|t=Lag|c=1}}{{FrameStrip|t=Hitbox|c=1}}{{FrameStrip|t=Lag|c=1}}{{FrameStrip|t=Hitbox|c=1}}{{FrameStrip|t=Lag|c=1}}{{FrameStrip|t=Hitbox|c=1}}{{FrameStrip|t=Lag|c=11}}{{FrameStrip|t=Hitbox|c=1}}{{FrameStrip|t=Lag|c=12}}{{FrameStrip|t=Interruptible|c=7}} | |||
|- | |||
{{FrameStrip|t=Autocancel|c=4}}{{FrameStrip|t=Blank|c=28}}{{FrameStrip|t=Autocancel|c=12}} | |||
{{FrameStripEnd}} | |||
===[[Landing lag]]=== | |||
{|class="wikitable" | |||
!Hitboxes | |||
|1-3 | |||
|- | |||
!Animation length | |||
|19 | |||
|} | |||
{{FrameStripStart}} | |||
{{FrameStrip|t=Hitbox|c=3}}{{FrameStrip|t=Lag|c=16}} | |||
{{FrameStripEnd}} | |||
{{FrameIconLegend|lag=y|hitbox=y|autocancel=y|interruptible=y}} | |||
{{MvSubNavMario|g=SSB4}} | {{MvSubNavMario|g=SSB4}} | ||
[[Category:Mario (SSB4)]] | |||
[[Category:Down aerials (SSB4)]] | |||
Latest revision as of 09:20, April 12, 2023
Overview[edit]
Mario's down aerial is the Mario Tornado; a move where he attacks opponents with discus spinning clotheslines ending with a backfist body-stretch, whilst shouting "Yahoo!". It is likely based on the Spin Jump that originated in Super Mario World. The move deals five hits of 1% damage with set knockback, then a sixth one inflicting 5% damage that launches them away vertically.
Like all of Mario's aerial attacks aside from his forward aerial, his down aerial has very fast startup, at frame 5; it is tied with Fox's for the second fastest down aerial in the game, losing only to Lucario and Meta Knight's. It also deals moderate damage (10% total), can autocancel in a short hop, and its first five hits have decreased SDI multipliers, while the last hit has surprisingly high base knockback succeeded by low ending lag (12 frames). All of these traits make Mario's down aerial a useful move for approaching, comboing, racking up damage and protecting Mario from juggling. When landing with the move, it has moderate landing lag (19 frames), but produces a hitbox that deals 2% damage with set knockback and benefits it from frame canceling, reducing the landing lag and allowing Mario to followup with a neutral attack, tilt, down smash or grab at close enough range. At low percentages, this down aerial's low ending lag enables it to combo into Super Jump Punch or any other aerial, with the effectiveness depending on the target's weight and falling speed. Due to the last hit's high knockback, it is also a surprisingly effective KO move near the upper blast line, KOing middleweights under 120% with no rage and under 80% with max rage.
Despite its plethora of advantages, one notable flaw Mario's down aerial possesses is the long delay between its penultimate hit and last hit, which combined with the low set knockback of the former enables characters with an aerial attack faster than frame 4 to hit Mario out of the move, and allows any character other than Bowser, Donkey Kong, Ganondorf, Jigglypuff, King Dedede or Ryu to air dodge out of it (though escaping with an air dodge is punishable). Its landing hit is also unsafe on shield, rendering the move punishable if the player relies too much on its frame canceling ability. However, if Mario doesn't trap the opponent into the down aerial too high up from the ground, they will receive landing lag if they try air dodging out of it, enabling him to punish and potentially initiate a combo; this scenario is most commonly set up from a followup into down aerial out of an up throw, where fastfallers are unable to air dodge without receiving landing lag. Rage can alleviate this escapability issue as well; when Mario is at 70% or more, the penultimate hit deals minimally higher yet enough knockback to prevent middleweights' air dodges from coming out before the last hit.
Overall, like the rest of his aerials, Mario's down aerial is a highly useful move to his metagame, and due to its outstanding advantages, it is often considered one of the best down aerials in the game.
Hitboxes[edit]
Timing[edit]
Attack[edit]
| Initial autocancel | 1-4 |
|---|---|
| Hits 1-5 | 5, 7, 9, 11, 13 |
| Hit 6 | 25 |
| Ending autocancel | 33- |
| Interruptible | 38 |
| Animation length | 44 |
Landing lag[edit]
| Hitboxes | 1-3 |
|---|---|
| Animation length | 19 |
Lag time |
Hitbox |
Autocancel |
Interruptible |
|

