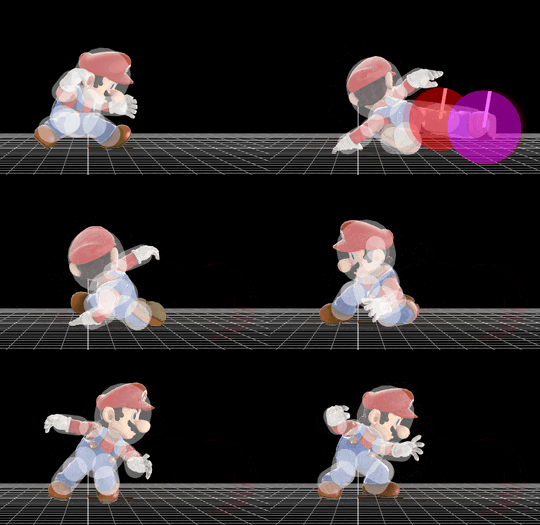
Mario (SSB4)/Down tilt
Overview[edit]
Mario's down tilt is a sweeping kick across the floor with one leg. It comes out noticeably fast like his other tilts (on frame 5), has a vertical launch angle and moderate ending lag (27 total frames), allowing it to combo into neutral attack, other tilts (including multiple down tilts against fastfallers), or up aerials. In comparison to his up tilt, it also has longer horizontal range. Mario's down tilt has two different hitboxes, a sweetspot and sourspot, the latter which deals less damage, is located on Mario's foot and outprioritizes the sweetspot. The sweetspot can combo up to around 90%-100%, while the sourspot can do so until around 130%-140%.
While being a versatile combo move overall, Mario's down tilt is not used as often as his up tilt, as it only hits in front of himself without much vertical range, while the latter can hit around himself, has longer lasting hitboxes, and can be comboed more reliably into from a down throw. Additionally, down tilt followups can be escaped at very low percentages by characters with fast enough aerials (such as another Mario with neutral aerial) or invincible special moves, and due to launching opponents slightly away from Mario (80°) rather than towards him (96°), they can be easier to escape with directional influence. Lastly, due to its sourspot taking priority over the sweetspot, down tilt often ends up dealing less damage than up tilt (5% compared to 5.5%). One advantage down tilt does have over it, however, is being able to hit opponents hanging on ledges, a situation where its combo ability can be taken better advantage of.
While Mario's down tilt has a trip chance programmed into its hitboxes, it is unable to actually trip opponents, due to its launch angle lifting them off the ground.
Hitboxes[edit]
Timing[edit]
| Hitbox | 5-7 |
|---|---|
| Interruptible | 28 |
| Animation length | 34 |
Lag time |
Hitbox |
Interruptible |
|
