SSB64 Icon.png

Captain Falcon (SSB)/Neutral special: Difference between revisions

From SmashWiki, the Super Smash Bros. wiki
Jump to navigationJump to search
(Doesn't cause the flame effect in this game; only in later games.)
Line 21: Line 21:
|bn=16
|bn=16
|xpos=100
|xpos=100
|effect=Flame
|effect=Normal
|type=Hand
|type=Hand
|sfx=Kick
|sfx=Kick
Line 37: Line 37:
|bn=14
|bn=14
|xpos=60
|xpos=60
|effect=Flame
|effect=Normal
|type=Hand
|type=Hand
|sfx=Kick
|sfx=Kick
Line 53: Line 53:
|bn=14
|bn=14
|xpos=-60
|xpos=-60
|effect=Flame
|effect=Normal
|type=Hand
|type=Hand
|sfx=Kick
|sfx=Kick
Line 70: Line 70:
|bn=16
|bn=16
|xpos=100
|xpos=100
|effect=Flame
|effect=Normal
|type=Hand
|type=Hand
|sfx=Kick
|sfx=Kick
Line 87: Line 87:
|bn=14
|bn=14
|xpos=60
|xpos=60
|effect=Flame
|effect=Normal
|type=Hand
|type=Hand
|sfx=Kick
|sfx=Kick
Line 104: Line 104:
|bn=14
|bn=14
|xpos=-60
|xpos=-60
|effect=Flame
|effect=Normal
|type=Hand
|type=Hand
|sfx=Kick
|sfx=Kick
Line 128: Line 128:
{{MvSubNavCaptainFalcon|g=SSB}}


[[Category:Flame attacks (SSB)]]
[[Category:Captain Falcon (SSB)]]
[[Category:Captain Falcon (SSB)]]
[[Category:Neutral special moves (SSB)]]
[[Category:Neutral special moves (SSB)]]

Revision as of 23:58, March 26, 2020

Overview

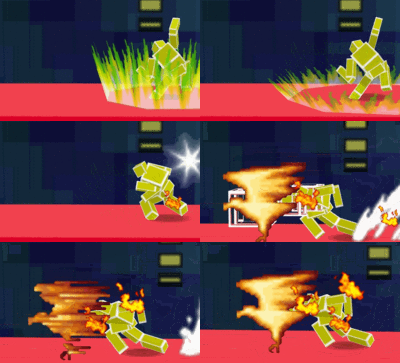
The hitbox of Captain Falcon's Falcon Punch in Smash 64.
The hitbox of Falcon Punch when used on the ground.
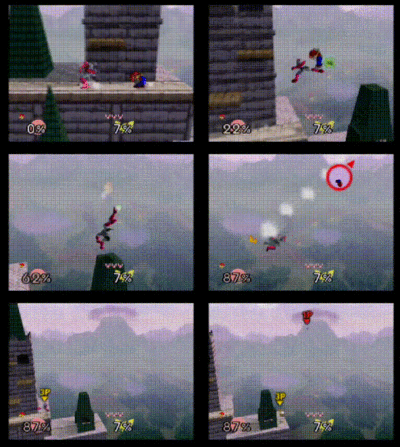
A Captain Falcon combo in Smash 64, using a forward aerial, then some up aerials, then a Falcon Punch as a finisher.
A combo ending with a Falcon Punch

Captain Falcon's neutral special in Smash 64 is Falcon Punch. Captain Falcon charges up with his fist and throws a powerful punch, with his fists engulfed in a flaming falcon shape, doing 24%-26% damage and advances slightly forward. It is one of the strongest moves in the game. In addition, the move is faster than it is in later Smash games, making the Smash 64 Falcon Punch deadly. It is often used as a combo finisher - the most notable way to combo into it is using an up aerial; unlike most of the useful followups to up aerial however, this one is usually performed using a Z-cancelled up aerial during a landing (possible after a move such as a forward aerial), then a full hop Falcon Punch. Other combos into the move include a forward throw on fastfallers or heavyweights at around the 50-70% range, and a down aerial on a grounded opponent at around 110-120%. Falcon can also use a Falcon Punch to gain him a little horizontal distance when recovering, and a little vertical distance as well if the move is angled up. In addition to this, Falcon Punch is stronger in the air and has larger hitboxes than the grounded version.

Hitboxes

ID Part Damage SD Angle BK KS FKV Radius Bone Offset Clang Effect G A Sound
Grounded
0 0 24% 0 Sakurai angle 30 120 0 125 16 100 0 0 HitboxTableIcon(Clang).png EffectIcon(Normal).png HitboxTableIcon(GroundedTrue).png HitboxTableIcon(AerialTrue).png L Kick
1 0 25% 0 Sakurai angle 30 120 0 100 14 60 0 0 HitboxTableIcon(Clang).png EffectIcon(Normal).png HitboxTableIcon(GroundedTrue).png HitboxTableIcon(AerialTrue).png L Kick
2 0 26% 0 Sakurai angle 30 120 0 90 14 -60 0 0 HitboxTableIcon(Clang).png EffectIcon(Normal).png HitboxTableIcon(GroundedTrue).png HitboxTableIcon(AerialTrue).png L Kick
Aerial
0 0 24% 4 Sakurai angle 40 120 0 160 16 100 0 0 HitboxTableIcon(Clang).png EffectIcon(Normal).png HitboxTableIcon(GroundedTrue).png HitboxTableIcon(AerialTrue).png L Kick
1 0 25% 4 Sakurai angle 40 120 0 135 14 60 0 0 HitboxTableIcon(Clang).png EffectIcon(Normal).png HitboxTableIcon(GroundedTrue).png HitboxTableIcon(AerialTrue).png L Kick
2 0 26% 4 Sakurai angle 40 120 0 120 14 -60 0 0 HitboxTableIcon(Clang).png EffectIcon(Normal).png HitboxTableIcon(GroundedTrue).png HitboxTableIcon(AerialTrue).png L Kick

Timing

Hitboxes 42-46
Animation length 89
FrameIcon(Lag).png FrameIcon(Lag).png FrameIcon(Lag).png FrameIcon(Lag).png FrameIcon(Lag).png FrameIcon(Lag).png FrameIcon(Lag).png FrameIcon(Lag).png FrameIcon(Lag).png FrameIcon(Lag).png FrameIcon(Lag).png FrameIcon(Lag).png FrameIcon(Lag).png FrameIcon(Lag).png FrameIcon(Lag).png FrameIcon(Lag).png FrameIcon(Lag).png FrameIcon(Lag).png FrameIcon(Lag).png FrameIcon(Lag).png FrameIcon(Lag).png FrameIcon(Lag).png FrameIcon(Lag).png FrameIcon(Lag).png FrameIcon(Lag).png FrameIcon(Lag).png FrameIcon(Lag).png FrameIcon(Lag).png FrameIcon(Lag).png FrameIcon(Lag).png FrameIcon(Lag).png FrameIcon(Lag).png FrameIcon(Lag).png FrameIcon(Lag).png FrameIcon(Lag).png FrameIcon(Lag).png FrameIcon(Lag).png FrameIcon(Lag).png FrameIcon(Lag).png FrameIcon(Lag).png FrameIcon(Lag).png FrameIcon(Hitbox).png FrameIcon(Hitbox).png FrameIcon(Hitbox).png FrameIcon(Hitbox).png FrameIcon(Hitbox).png FrameIcon(Lag).png FrameIcon(Lag).png FrameIcon(Lag).png FrameIcon(Lag).png FrameIcon(Lag).png FrameIcon(Lag).png FrameIcon(Lag).png FrameIcon(Lag).png FrameIcon(Lag).png FrameIcon(Lag).png FrameIcon(Lag).png FrameIcon(Lag).png FrameIcon(Lag).png FrameIcon(Lag).png FrameIcon(Lag).png FrameIcon(Lag).png FrameIcon(Lag).png FrameIcon(Lag).png FrameIcon(Lag).png FrameIcon(Lag).png FrameIcon(Lag).png FrameIcon(Lag).png FrameIcon(Lag).png FrameIcon(Lag).png FrameIcon(Lag).png FrameIcon(Lag).png FrameIcon(Lag).png FrameIcon(Lag).png FrameIcon(Lag).png FrameIcon(Lag).png FrameIcon(Lag).png FrameIcon(Lag).png FrameIcon(Lag).png FrameIcon(Lag).png FrameIcon(Lag).png FrameIcon(Lag).png FrameIcon(Lag).png FrameIcon(Lag).png FrameIcon(Lag).png FrameIcon(Lag).png FrameIcon(Lag).png FrameIcon(Lag).png FrameIcon(Lag).png
Legend (1 square = 1 frame)
FrameIcon(Lag).png
Lag time
FrameIcon(Hitbox).png
Hitbox