Pikachu (SSB)/Forward aerial: Difference between revisions
m (→Overview) |
|||
| (14 intermediate revisions by 7 users not shown) | |||
| Line 3: | Line 3: | ||
==Overview== | ==Overview== | ||
[[File:Pikachu Forward Aerial Hitbox Smash 64.gif|thumb|The hitbox of Pikachu's fair]] | [[File:Pikachu Forward Aerial Hitbox Smash 64.gif|thumb|The hitbox of Pikachu's fair]] | ||
Pikachu drills itself forward while surrounding itself in | Pikachu drills itself forward while surrounding itself in [[electric]]ity. The attack does 7 hits in total, and each hit does 3% [[damage]]; thus, the total amount of damage Pikachu can deal is 21%. The move possesses a landing hit with horizontal knockback if Pikachu does not [[Z-cancel]] the move. As a drill attack, the move has very weak set [[knockback]], and while it has a great damage output if all the hits are landed, the opponent can easily [[SDI]] away to avoid this. This can allow opponents to potentially avoid followups, although it is still a strong combo starter, being able to lead into {{mvsub|Pikachu|SSB|neutral aerial}} or {{mvsub|Pikachu|SSB|up aerial}} when used in the air. If Pikachu lands while using the move on an opponent and Z cancels it, it has even stronger followup potential, being able to lead into most of Pikachu's ground moves including his {{mvsub|Pikachu|SSB|up tilt}} and {{mvsub|Pikachu|SSB|up smash}} to lead into combos. It is overall a very solid move in Pikachu's kit, being a solid combo starter which can potentially also deal a lot of damage. | ||
{{ | ==Hitboxes== | ||
{{SSB64HitboxTableHeader}} | |||
{{HitboxTableTitle|Hits 1-7|26}} | |||
{{SSB64HitboxTableRow | |||
|id=0 | |||
|part=0 | |||
|damage=3% | |||
|angle=361 | |||
|bk=0 | |||
|ks=100 | |||
|fkv=30 | |||
|r=195 | |||
|bn=11 | |||
|Effect=Electric | |||
|ypos=65 | |||
|zpos=15 | |||
|sfx=Shock | |||
|slvl=M | |||
}} | |||
{{SSB64HitboxTableRow | |||
|id=1 | |||
|part=0 | |||
|damage=3% | |||
|angle=361 | |||
|bk=0 | |||
|ks=100 | |||
|fkv=30 | |||
|r=170 | |||
|bn=5 | |||
|Effect=Electric | |||
|sfx=Shock | |||
|slvl=M | |||
}} | |||
{{HitboxTableTitle|Landing|26}} | |||
{{SSB64HitboxTableRow | |||
|id=0 | |||
|part=0 | |||
|damage=6% | |||
|angle=361 | |||
|bk=30 | |||
|ks=100 | |||
|fkv=0 | |||
|r=180 | |||
|bn=11 | |||
|Effect=Electric | |||
|ypos=65 | |||
|zpos=15 | |||
|sfx=Shock | |||
|slvl=M | |||
}} | |||
|} | |||
[[Category:Electric attacks]] | ==Timing== | ||
===Attack=== | |||
{|class="wikitable" | |||
!Initial autocancel | |||
|1-6 | |||
|- | |||
!Hits 1-7 | |||
|7-8, 10-11, 13-14, 16-17, 19-20, 22-23, 25-26 | |||
|- | |||
!Ending autocancel | |||
|27- | |||
|- | |||
!Animation length | |||
|39 | |||
|} | |||
{{FrameStripStart}} | |||
{{FrameStrip|t=Lag|c=6}}{{FrameStrip|t=Hitbox|c=2}}{{FrameStrip|t=Lag|c=1}} | |||
{{FrameStrip|t=Hitbox|c=2}}{{FrameStrip|t=Lag|c=1}}{{FrameStrip|t=Hitbox|c=2}}{{FrameStrip|t=Lag|c=1}}{{FrameStrip|t=Hitbox|c=2}}{{FrameStrip|t=Lag|c=1}} | |||
{{FrameStrip|t=Hitbox|c=2}}{{FrameStrip|t=Lag|c=1}}{{FrameStrip|t=Hitbox|c=2}}{{FrameStrip|t=Lag|c=1}}{{FrameStrip|t=Hitbox|c=2}}{{FrameStrip|t=Lag|c=13}} | |||
|- | |||
{{FrameStrip|t=Autocancel|c=6}}{{FrameStrip|t=Blank|c=20}}{{FrameStrip|t=Autocancel|c=13}} | |||
{{FrameStripEnd}} | |||
===[[Landing lag]]=== | |||
{|class="wikitable" | |||
!Hitbox | |||
|1-2 | |||
|- | |||
!Animation length | |||
|16 | |||
|- | |||
!Z-cancelled animation length | |||
|4 | |||
|} | |||
{{FrameStripStart}} | |||
|Normal {{FrameStrip|t=Hitbox|c=2}}{{FrameStrip|t=Lag|c=14}} | |||
|- | |||
|Z-cancelled {{FrameStrip|t=Lag|c=4}}{{FrameStrip|t=Blank|c=12}} | |||
{{FrameStripEnd}} | |||
{{FrameIconLegend|lag=y|hitbox=y|autocancel=y}} | |||
{{MvSubNavPikachu|g=SSB}} | |||
[[Category:Electric attacks (SSB)]] | |||
[[Category:Pikachu (SSB)]] | [[Category:Pikachu (SSB)]] | ||
[[Category:Forward aerials]] | [[Category:Forward aerials (SSB)]] | ||
[[Category:Aerial attacks (SSB)]] | |||
Latest revision as of 14:18, January 18, 2024
Overview[edit]
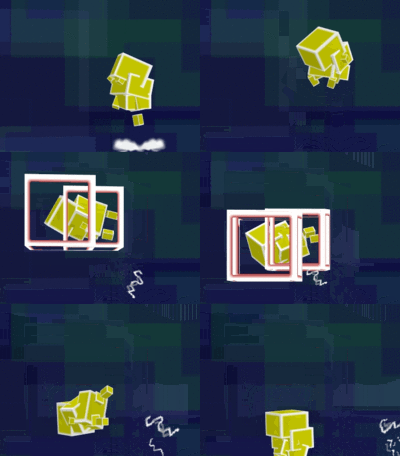
Pikachu drills itself forward while surrounding itself in electricity. The attack does 7 hits in total, and each hit does 3% damage; thus, the total amount of damage Pikachu can deal is 21%. The move possesses a landing hit with horizontal knockback if Pikachu does not Z-cancel the move. As a drill attack, the move has very weak set knockback, and while it has a great damage output if all the hits are landed, the opponent can easily SDI away to avoid this. This can allow opponents to potentially avoid followups, although it is still a strong combo starter, being able to lead into neutral aerial or up aerial when used in the air. If Pikachu lands while using the move on an opponent and Z cancels it, it has even stronger followup potential, being able to lead into most of Pikachu's ground moves including his up tilt and up smash to lead into combos. It is overall a very solid move in Pikachu's kit, being a solid combo starter which can potentially also deal a lot of damage.
Hitboxes[edit]
Timing[edit]
Attack[edit]
| Initial autocancel | 1-6 |
|---|---|
| Hits 1-7 | 7-8, 10-11, 13-14, 16-17, 19-20, 22-23, 25-26 |
| Ending autocancel | 27- |
| Animation length | 39 |
Landing lag[edit]
| Hitbox | 1-2 |
|---|---|
| Animation length | 16 |
| Z-cancelled animation length | 4 |
| Normal | ||||||||||||||||
| Z-cancelled |
Lag time |
Hitbox |
Autocancel |
