Terry (SSBU)/Command input/Command input 1
From SmashWiki, the Super Smash Bros. wiki
Jump to navigationJump to search
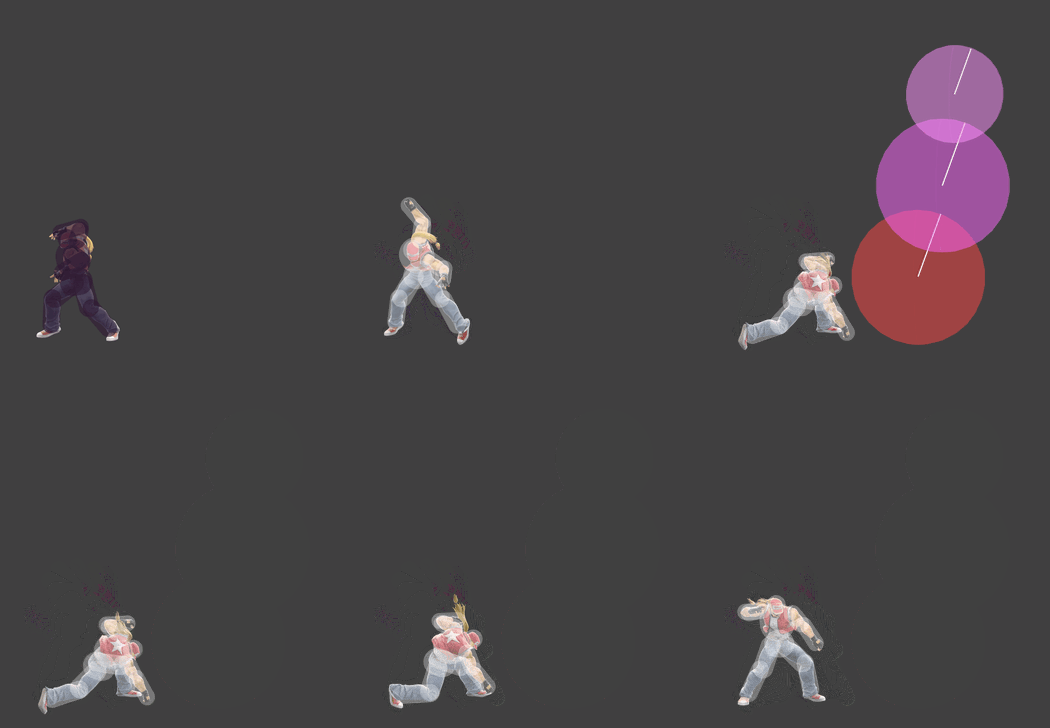
Hitbox visualization of Terry's Power Geyser.
Source: https://twitter.com/shippukenrc/status/1241588448852656128?s=21
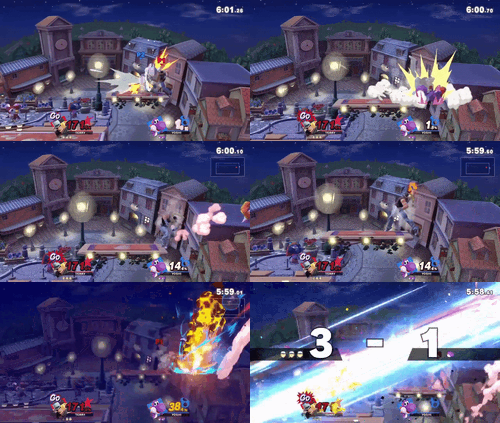
A drop cancelled Power Geyser being used to KO Yoshi.

Overview[edit]

Terry punches the ground and causes an explosion. Being a Super Special Move, Power Geyser can only be executed if Terry has sustained 100% damage, or if he's reached 30% of his HP in Stamina Mode, as well as requiring him to be on the ground. It can only be executed through a command input, specifically ↓ ↙ ← ↙ → + Attack / Special, but something as simple as ↓ ↙ ← → + Attack / Special is possible, making it easier to use than it seems. Like most command specials, the move is fairly easy to drop cancel, in part due to Terry's unnaturally long animation, making it easy to use on platforms. It can also hit the ledge and 2-frame, making it an unwieldy but amazing edgeguard option.

Power Geyser has a fairly long startup - 20 frames - but for its power, it remains exceptionally powerful. Furthermore, it has 5% damage-based armor on frames 1-14, allowing Terry to force his way through weak attacks from characters like Sheik. Considering that it comes out frame 1, this gives the move surprisingly flexible option value. Despite this slow nature, Power Geyser is fairly easy to confirm into through up tilt, which has its own set of confirms as well. Considering the high damage and ridiculous launch angle, Power Geyser can be used as a combo ender even if there isn't a KO.

Power Geyser is excellent for shield breaks thanks to the sheer amount of damage it deals. It can deal as much as 27.727 damage to a shield - just over half its HP - which can be used alongside Terry's various normals — particularly forward tilt — to force an option from the opponent. This is, oftentimes, enough for the shield break to occur, allowing for a massive punish that should ideally be a stock.

Thanks to its gigantic hitbox and extremely high KO potential, Power Geyser gives Terry one of the most effective punishes to jump-ins in the game, making it difficult to engage Terry with aerial attacks from afar. For characters that deal low damage - compounded by the 0.85× short hop damage multiplier - aerial approaches become much more difficult once Terry has reached 100%. Some characters, such as Jigglypuff, will try to gimp Terry early solely for a chance at avoiding a game with Power Geyser in play.

The main weakness of Power Geyser is how punishable it is. The move is extremely laggy, and -28 on shield from the first hit frame. As a result, using it raw can and will lead to punishment if it doesn't hit. As a result, using the move in that manner is not recommended, and it should strictly be used as a hard punish or combo ender. With Terry at 100%, whiffing or hitting shield with Power Geyser can absolutely be a death sentence against most characters in the game, making it high-risk, high-reward.

Hitboxes[edit]

ID Part Rehit rate Damage SD Angle Angle type BK KS FKV Set weight Radius Bone Offset SDI× T% Clang Rebound Effect Type G A Sound Direct Hit bits Hit part Blockable Reflectable Absorbable Flinchless No GFX Heedless
Early hit
0 0 0 26.0% -4.0 AngleIcon70.png Standard 100 41 0 HitboxTableIcon(False).png 1.0 top 0.0 2.0 -2.0 1.0× 1.0× 0% HitboxTableIcon(Clang).png HitboxTableIcon(Rebound).png EffectIcon(Normal).png TypeIcon(Energy).png HitboxTableIcon(GroundedTrue).png HitboxTableIcon(AerialTrue).png M Power Geyser SpecialsIndirect.png All All HitboxTableIcon(Blockable).png HitboxTableIcon(Unreflectable).png HitboxTableIcon(Unabsorbable).png HitboxTableIcon(False).png HitboxTableIcon(False).png HitboxTableIcon(False).png
1 0 0 26.0% -4.0 AngleIcon70.png Standard 100 41 0 HitboxTableIcon(False).png 3.0 top 0.0 3.0 -8.0 to 4.0 1.0× 1.0× 0% HitboxTableIcon(Clang).png HitboxTableIcon(Rebound).png EffectIcon(Normal).png TypeIcon(Energy).png HitboxTableIcon(GroundedTrue).png HitboxTableIcon(AerialTrue).png M Power Geyser SpecialsIndirect.png All All HitboxTableIcon(Blockable).png HitboxTableIcon(Unreflectable).png HitboxTableIcon(Unabsorbable).png HitboxTableIcon(False).png HitboxTableIcon(False).png HitboxTableIcon(False).png
Clean hit
0 0 0 26.0% -4.0 AngleIcon70.png Standard 100 41 0 HitboxTableIcon(False).png 11.0 top 0.0 10.0 -1.0 1.0× 1.0× 0% HitboxTableIcon(Clang).png HitboxTableIcon(Rebound).png EffectIcon(Normal).png TypeIcon(Energy).png HitboxTableIcon(GroundedTrue).png HitboxTableIcon(AerialTrue).png M Power Geyser SpecialsIndirect.png All All HitboxTableIcon(Blockable).png HitboxTableIcon(Unreflectable).png HitboxTableIcon(Unabsorbable).png HitboxTableIcon(False).png HitboxTableIcon(False).png HitboxTableIcon(False).png
1 0 0 23.0% -4.0 AngleIcon70.png Standard 100 42 0 HitboxTableIcon(False).png 11.0 top 0.0 25.0 3.0 1.0× 1.0× 0% HitboxTableIcon(Clang).png HitboxTableIcon(Rebound).png EffectIcon(Normal).png TypeIcon(Energy).png HitboxTableIcon(GroundedTrue).png HitboxTableIcon(AerialTrue).png M Power Geyser SpecialsIndirect.png All All HitboxTableIcon(Blockable).png HitboxTableIcon(Unreflectable).png HitboxTableIcon(Unabsorbable).png HitboxTableIcon(False).png HitboxTableIcon(False).png HitboxTableIcon(False).png
2 0 0 20.0% -4.0 AngleIcon70.png Standard 100 44 0 HitboxTableIcon(False).png 8.0 top 0.0 40.0 5.0 1.0× 1.0× 0% HitboxTableIcon(Clang).png HitboxTableIcon(Rebound).png EffectIcon(Normal).png TypeIcon(Energy).png HitboxTableIcon(GroundedTrue).png HitboxTableIcon(AerialTrue).png M Power Geyser SpecialsIndirect.png All All HitboxTableIcon(Blockable).png HitboxTableIcon(Unreflectable).png HitboxTableIcon(Unabsorbable).png HitboxTableIcon(False).png HitboxTableIcon(False).png HitboxTableIcon(False).png
Late hit
0 0 0 19.0% -4.0 AngleIcon70.png Standard 120 41 0 HitboxTableIcon(False).png 11.0 top 0.0 10.0 -1.0 1.0× 1.0× 0% HitboxTableIcon(Clang).png HitboxTableIcon(Rebound).png EffectIcon(Normal).png TypeIcon(Energy).png HitboxTableIcon(GroundedTrue).png HitboxTableIcon(AerialTrue).png M Power Geyser SpecialsIndirect.png All All HitboxTableIcon(Blockable).png HitboxTableIcon(Unreflectable).png HitboxTableIcon(Unabsorbable).png HitboxTableIcon(False).png HitboxTableIcon(False).png HitboxTableIcon(False).png
1 0 0 17.0% -4.0 AngleIcon70.png Standard 110 42 0 HitboxTableIcon(False).png 11.0 top 0.0 25.0 3.0 1.0× 1.0× 0% HitboxTableIcon(Clang).png HitboxTableIcon(Rebound).png EffectIcon(Normal).png TypeIcon(Energy).png HitboxTableIcon(GroundedTrue).png HitboxTableIcon(AerialTrue).png M Power Geyser SpecialsIndirect.png All All HitboxTableIcon(Blockable).png HitboxTableIcon(Unreflectable).png HitboxTableIcon(Unabsorbable).png HitboxTableIcon(False).png HitboxTableIcon(False).png HitboxTableIcon(False).png
2 0 0 15.0% -4.0 AngleIcon70.png Standard 100 44 0 HitboxTableIcon(False).png 8.0 top 0.0 40.0 5.0 1.0× 1.0× 0% HitboxTableIcon(Clang).png HitboxTableIcon(Rebound).png EffectIcon(Normal).png TypeIcon(Energy).png HitboxTableIcon(GroundedTrue).png HitboxTableIcon(AerialTrue).png M Power Geyser SpecialsIndirect.png All All HitboxTableIcon(Blockable).png HitboxTableIcon(Unreflectable).png HitboxTableIcon(Unabsorbable).png HitboxTableIcon(False).png HitboxTableIcon(False).png HitboxTableIcon(False).png

Timing[edit]

Data.png This article or section may require additional technical data.
The editor who added this tag elaborates: Frame Strip, FAF/AL
You can discuss this issue on the talk page or edit this page to improve it.
Early Hitboxes 20-23
Late Hitboxes 24-29
Interruptible ?
Animation length ?
Legend (1 square = 1 frame)
FrameIcon(Lag).png
Lag time
FrameIcon(Hitbox).png
Hitbox
FrameIcon(BlankContinuableS).pngFrameIcon(BlankContinuableE).png
Earliest continuable point
FrameIcon(Interruptible).png
Interruptible