Ganondorf (SSBM)/Neutral aerial
Overview[edit]
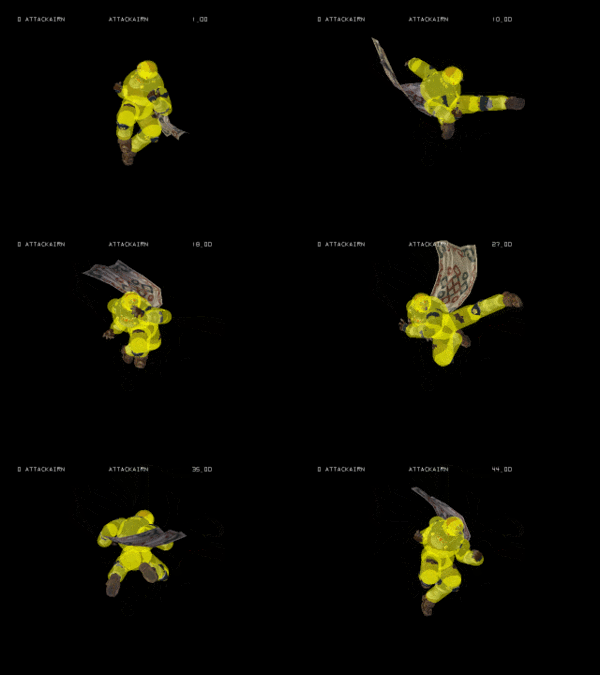
Ganondorf performs two aerial roundhouse kicks in rapid succession. At a cursory glance, the move appears to be a copy of Falcon's Rotary Kick with minor tweaks to better fit Ganondorf's character. As compared to Falcon's neutral air, it has the same startup and move duration, more end lag, landing lag, knockback, and damage (on both hits), and autocancels ³⁄₂₀ of a second sooner. Given this, one would think that it would behave similarly in neutral, being a combo-starter and approach tool.
However, there are a lot of flaws with the move that make themselves apparent after attempted use in competitive or semi-competitive matches. The most obvious nerf from Falcon's version is the grand total of 4 active frames split between the two hits, unlike Falcon's 16. In addition, the move has much worse range, barely covering his ankles instead of being slightly disjointed like Falcon. Combined with the over 1.5x higher landing lag, this makes the move terrible at approaching, and much more likely to be stuffed by the opponent. The move is also worse against shields. The best Ganon can be against shield with this move (assuming it's performed frame perfectly, which is an extremely difficult and awkward timing) is -2; his forward aerial and back aerial have much better range and shield pushback, allowing Ganon to pressure shields and attempt a shield poke without fearing the opponent's out of shield options. In the event that he lands the move on an opponent, Ganon is unlikely to get a combo: the 2nd hit is usually too strong and launches opponents too far away for a follow-up, and the 1st hit (unlike Falcon's) lacks fixed knockback, making it unlikely to combo into the 2nd hit at anything above low percents.
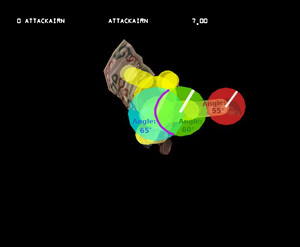
However, there is one niche that saves the move from being utterly unusable: extending combos. Ganondorf's moveset is full of strong, high-knockback aerials which are great for starting combos at low percents but terrible for keeping combos up at mid-percents until Ganon can successfully KO. 1st-hit-only neutral air, by contrast, is an amazing juggle tool, owing to the move's comparatively lower knockback and favorable angles, ranging from 55° on his foot to 65° on his hip (colored Blue in the hitbox image), keeping the opponent closer to Ganon. The hip angle can be difficult to land, as the knee hitbox outprioritizes it, requiring Ganon to land the hit while the opponent's hitbox is inside him, though this does allow him to perform a DI mixup by occasionally hitting with the reverse hitbox. Ideally, Ganon will launch the opponent with his down aerial, down smash, or down tilt, juggle the opponent with this move 1-to-4 times, and finish the combo with his forward or back air, leading to an edgeguard or outright killing them.
Update history[edit]
 The second hit has more startup lag (frame 16 → 20), now matching its animation.
 This decreases its ending lag as its total duration was unchanged.
 However, this also makes it auto-cancel 4 frames later (frame 22 → 26).
Hitboxes[edit]
Timing[edit]
1.0.0[edit]
| Initial autocancel | 1-3 |
|---|---|
| Hit 1 | 7-8 |
| Hit 2 | 16-17 |
| Ending autocancel | 22- |
| Animation length | 44 |
1.0.1+[edit]
| Initial autocancel | 1-3 |
|---|---|
| Hit 1 | 7-8 |
| Hit 2 | 20-21 |
| Ending autocancel | 26- |
| Animation length | 44 |
Landing lag[edit]
| Animation length | 25 |
|---|---|
| L-cancelled animation length | 12 |
| Normal | |||||||||||||||||||||||||
| L-cancelled |
Lag time |
Hitbox |
Autocancel |

