Steve (SSBU)/Side special: Difference between revisions
From SmashWiki, the Super Smash Bros. wiki
Jump to navigationJump to search
(Created page with "{{ArticleIcons|ssbu=y}} thumb|300px|Hitbox visualization showing Steve's side special, [[Minecart.]] File:SteveSSpecialFree.gif|thumb|300px|Hi...") |
m (Text replacement - "== ([^=])" to "== $1") |
||
| (6 intermediate revisions by 3 users not shown) | |||
| Line 1: | Line 1: | ||
{{ArticleIcons|ssbu=y}} | {{ArticleIcons|ssbu=y}} | ||
''This article is about the hitbox analysis of Steve’s side special in ''Super Smash Bros. Ultimate''. For the move itself, see [[Minecart]].'' | |||
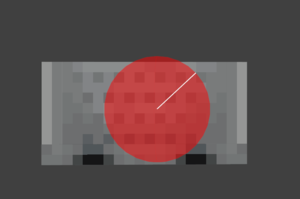
[[File:SteveSSpecialRide.png|thumb|300px|Hitbox visualization showing Steve's side special, [[Minecart]].]] | [[File:SteveSSpecialRide.png|thumb|300px|Hitbox visualization showing Steve's side special, [[Minecart]].]] | ||
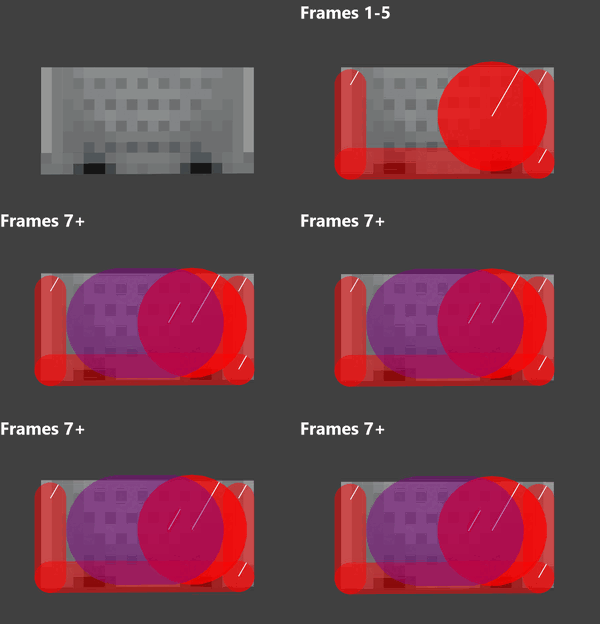
[[File:SteveSSpecialFree.gif|thumb|300px|Hitbox visualization showing Steve's side special, [[Minecart]], after Steve jumps out.]] | [[File:SteveSSpecialFree.gif|thumb|300px|Hitbox visualization showing Steve's side special, [[Minecart]], after Steve jumps out.]] | ||
{{competitive expertise}} | {{competitive expertise}} | ||
==Overview== | ==Overview== | ||
==Update History== | |||
'''{{GameIcon|ssbu}} 9.0.1''' | |||
*{{bugfix|Fixed an issue in which fighters could be frozen if hit with Minecart.}} | |||
*{{bugfix|Fixed an issue in which Minecart does not hit opponents when reflected off a wall.}} | |||
*{{bugfix|Fixed an issue in which a fighter caught by Minecart teleports to the position in which they were caught.}} | |||
==Hitboxes== | ==Hitboxes== | ||
===Ride=== | ===Ride=== | ||
{{UltimateHitboxTableHeader}} | {{UltimateHitboxTableHeader}} | ||
! {{rollover|Rehit rate|If not 0, hits again every X frames|y}} | |||
{{UltimateHitboxTableRow | {{UltimateHitboxTableRow | ||
|id=0 | |id=0 | ||
| Line 28: | Line 35: | ||
|rebound=f | |rebound=f | ||
}} | }} | ||
|60 | |||
|} | |} | ||
===Free=== | ===Free=== | ||
{{UltimateHitboxTableHeader}} | {{UltimateHitboxTableHeader}} | ||
{{HitboxTableTitle|Early hit| | ! {{rollover|Rehit rate|If not 0, hits again every X frames|y}} | ||
{{HitboxTableTitle|Early hit|25}} | |||
{{UltimateHitboxTableRow | {{UltimateHitboxTableRow | ||
|id=0 | |id=0 | ||
| Line 54: | Line 63: | ||
|g=f | |g=f | ||
}} | }} | ||
|60 | |||
{{UltimateHitboxTableRow | {{UltimateHitboxTableRow | ||
|id= | |id=1 | ||
|damage=7.0% | |damage=7.0% | ||
|angle=60 | |angle=60 | ||
| Line 76: | Line 86: | ||
|g=f | |g=f | ||
}} | }} | ||
|60 | |||
{{UltimateHitboxTableRow | {{UltimateHitboxTableRow | ||
|id=2 | |id=2 | ||
| Line 98: | Line 109: | ||
|g=f | |g=f | ||
}} | }} | ||
|60 | |||
{{UltimateHitboxTableRow | {{UltimateHitboxTableRow | ||
|id=3 | |id=3 | ||
| Line 119: | Line 131: | ||
|rebound=f | |rebound=f | ||
}} | }} | ||
|60 | |||
{{UltimateHitboxTableRow | {{UltimateHitboxTableRow | ||
|id=4 | |id=4 | ||
| Line 141: | Line 154: | ||
|a=f | |a=f | ||
}} | }} | ||
{{HitboxTableTitle|Late hit| | |60 | ||
{{HitboxTableTitle|Late hit|25}} | |||
{{UltimateHitboxTableRow | {{UltimateHitboxTableRow | ||
|id=0 | |id=0 | ||
| Line 164: | Line 178: | ||
|g=f | |g=f | ||
}} | }} | ||
|60 | |||
{{UltimateHitboxTableRow | {{UltimateHitboxTableRow | ||
|id= | |id=1 | ||
|damage=7.0% | |damage=7.0% | ||
|angle=60 | |angle=60 | ||
| Line 186: | Line 201: | ||
|g=f | |g=f | ||
}} | }} | ||
|60 | |||
{{UltimateHitboxTableRow | {{UltimateHitboxTableRow | ||
|id=2 | |id=2 | ||
| Line 208: | Line 224: | ||
|g=f | |g=f | ||
}} | }} | ||
|60 | |||
{{UltimateHitboxTableRow | {{UltimateHitboxTableRow | ||
|id=3 | |id=3 | ||
| Line 229: | Line 246: | ||
|rebound=f | |rebound=f | ||
}} | }} | ||
|60 | |||
{{UltimateHitboxTableRow | {{UltimateHitboxTableRow | ||
|id=4 | |id=4 | ||
| Line 251: | Line 269: | ||
|a=f | |a=f | ||
}} | }} | ||
|60 | |||
{{UltimateHitboxTableRow | {{UltimateHitboxTableRow | ||
|id=5 | |id=5 | ||
| Line 259: | Line 278: | ||
|fkv=0 | |fkv=0 | ||
|r=1.5 | |r=1.5 | ||
|bn= | |bn=top | ||
|xpos=0.0 | |xpos=0.0 | ||
|ypos=3.0 | |ypos=3.0 | ||
| Line 272: | Line 291: | ||
|rebound=f | |rebound=f | ||
|a=f | |a=f | ||
}} | |||
|60 | |||
|} | |||
===Grabbox=== | |||
{{UltimateGrabboxTableHeader}} | |||
{{HitboxTableTitle|Early|24}} | |||
{{UltimateGrabboxTableRow | |||
|id=0 | |||
|r=3.5 | |||
|bn=top | |||
|xpos=0.0 | |||
|ypos=3.0 | |||
|zpos=1.5 to -1.5 | |||
|a=f | |||
}} | |||
{{HitboxTableTitle|Late|24}} | |||
{{UltimateGrabboxTableRow | |||
|id=0 | |||
|r=3.5 | |||
|bn=top | |||
|xpos=0.0 | |||
|ypos=3.0 | |||
|zpos=1.5 to -1.5 | |||
|a=f | |||
}} | |||
{{UltimateGrabboxTableRow | |||
|id=1 | |||
|r=5.0 | |||
|bn=top | |||
|xpos=0.0 | |||
|ypos=5.0 | |||
|zpos=0.0 | |||
|g=f | |||
}} | }} | ||
|} | |} | ||
Latest revision as of 03:21, April 13, 2022
This article is about the hitbox analysis of Steve’s side special in Super Smash Bros. Ultimate. For the move itself, see Minecart.

Hitbox visualization showing Steve's side special, Minecart.

Hitbox visualization showing Steve's side special, Minecart, after Steve jumps out.
Overview[edit]
Update History[edit]
 Fixed an issue in which fighters could be frozen if hit with Minecart.
 Fixed an issue in which Minecart does not hit opponents when reflected off a wall.
 Fixed an issue in which a fighter caught by Minecart teleports to the position in which they were caught.
Hitboxes[edit]
Ride[edit]
Free[edit]
Grabbox[edit]
| ID | Radius | Bone | Offset | G | A | ||||||||||||||||||
|---|---|---|---|---|---|---|---|---|---|---|---|---|---|---|---|---|---|---|---|---|---|---|---|
| Early | |||||||||||||||||||||||
| 0 | 3.5 | top | 0.0 | 3.0 | 1.5 to -1.5 | ||||||||||||||||||
| Late | |||||||||||||||||||||||
| 0 | 3.5 | top | 0.0 | 3.0 | 1.5 to -1.5 | ||||||||||||||||||
| 1 | 5.0 | top | 0.0 | 5.0 | 0.0 | ||||||||||||||||||
|
