Captain Falcon (SSB)/Neutral special: Difference between revisions
HenCompany (talk | contribs) |
m (Text replacement - "== ([^=])" to "== $1") |
||
| (8 intermediate revisions by 5 users not shown) | |||
| Line 1: | Line 1: | ||
{{ArticleIcons|ssb=y}} | {{ArticleIcons|ssb=y}} | ||
{{disambig2|the hitbox visualization in ''[[Super Smash Bros.]]|the move itself|Falcon Punch}} | |||
==Overview== | ==Overview== | ||
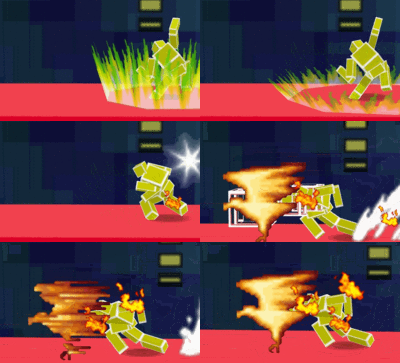
[[File:Captain Falcon Neutral Special Hitbox Smash 64.gif|thumb|The hitbox of | [[File:Captain Falcon Neutral Special Hitbox Smash 64.gif|thumb|The hitbox of Falcon Punch when used on the ground.]] | ||
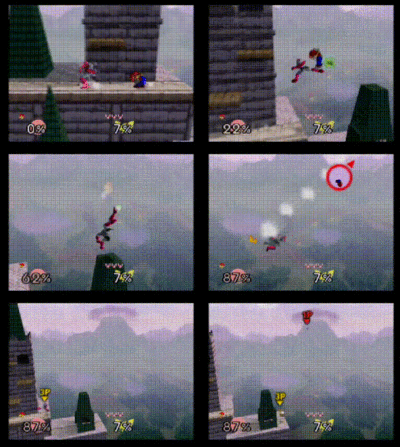
[[File:SSB64 Falcon Punch Combo.gif|thumb|A combo ending with a Falcon Punch]] | [[File:SSB64 Falcon Punch Combo.gif|thumb|A combo ending with a Falcon Punch]] | ||
Captain Falcon's neutral special in ''Smash 64'' is [[Falcon Punch]]. Captain Falcon charges up with his fist and throws a powerful punch, with his fists engulfed in a flaming falcon shape, doing 24%-26% damage and advances slightly forward. It is one of the strongest moves in the game. In addition, the move is faster than it is in later ''Smash'' games, making the ''Smash 64'' Falcon Punch deadly. It is often used as a [[combo]] finisher - the most notable way to combo into it is using an {{mvsub|Captain Falcon|SSB|up aerial}}; unlike most of the useful followups to up aerial however, this one is usually performed using a [[Z-cancel]]led up aerial during a landing (possible after a move such as a {{mvsub|Captain Falcon|SSB|forward aerial}}), then a full hop Falcon Punch. Other combos into the move include a {{mvsub|Captain Falcon|SSB|forward throw}} on [[fastfaller]]s or heavyweights at around the 50-70% range, and a {{mvsub|Captain Falcon|SSB|down aerial}} on a grounded opponent at around 110-120%. Falcon can also use a Falcon Punch to gain him a little horizontal distance when [[recover]]ing, and a little vertical distance as well if the move is angled up. In addition to this, Falcon Punch is stronger in the air and has larger hitboxes than the grounded version. | |||
{{ | ==Hitboxes== | ||
{{SSB64HitboxTableHeader}} | |||
{{HitboxTableTitle|Grounded|42}} | |||
{{SSB64HitboxTableRow | |||
|id=0 | |||
|part=0 | |||
|damage=24% | |||
|angle=361 | |||
|bk=30 | |||
|ks=120 | |||
|fkv=0 | |||
|r=125 | |||
|bn=16 | |||
|xpos=100 | |||
|effect=Normal | |||
|type=Hand | |||
|sfx=Kick | |||
|slvl=L | |||
}} | |||
{{SSB64HitboxTableRow | |||
|id=1 | |||
|part=0 | |||
|damage=25% | |||
|angle=361 | |||
|bk=30 | |||
|ks=120 | |||
|fkv=0 | |||
|r=100 | |||
|bn=14 | |||
|xpos=60 | |||
|effect=Normal | |||
|type=Hand | |||
|sfx=Kick | |||
|slvl=L | |||
}} | |||
{{SSB64HitboxTableRow | |||
|id=2 | |||
|part=0 | |||
|damage=26% | |||
|angle=361 | |||
|bk=30 | |||
|ks=120 | |||
|fkv=0 | |||
|r=90 | |||
|bn=14 | |||
|xpos=-60 | |||
|effect=Normal | |||
|type=Hand | |||
|sfx=Kick | |||
|slvl=L | |||
}} | |||
{{HitboxTableTitle|Aerial|42}} | |||
{{SSB64HitboxTableRow | |||
|id=0 | |||
|part=0 | |||
|damage=24% | |||
|sd=4 | |||
|bk=40 | |||
|ks=120 | |||
|fkv=0 | |||
|r=160 | |||
|bn=16 | |||
|xpos=100 | |||
|effect=Normal | |||
|type=Hand | |||
|sfx=Kick | |||
|slvl=L | |||
}} | |||
{{SSB64HitboxTableRow | |||
|id=1 | |||
|part=0 | |||
|damage=25% | |||
|sd=4 | |||
|angle=361 | |||
|bk=40 | |||
|ks=120 | |||
|fkv=0 | |||
|r=135 | |||
|bn=14 | |||
|xpos=60 | |||
|effect=Normal | |||
|type=Hand | |||
|sfx=Kick | |||
|slvl=L | |||
}} | |||
{{SSB64HitboxTableRow | |||
|id=2 | |||
|part=0 | |||
|damage=26% | |||
|sd=4 | |||
|angle=361 | |||
|bk=40 | |||
|ks=120 | |||
|fkv=0 | |||
|r=120 | |||
|bn=14 | |||
|xpos=-60 | |||
|effect=Normal | |||
|type=Hand | |||
|sfx=Kick | |||
|slvl=L | |||
}} | |||
|} | |||
==Timing== | |||
{|class="wikitable" | |||
!Hitboxes | |||
|42-46 | |||
|- | |||
!Animation length | |||
|89 | |||
|} | |||
{{FrameStripStart}} | |||
{{FrameStrip|t=Lag|c=41}}{{FrameStrip|t=Hitbox|c=5}}{{FrameStrip|t=Lag|c=43}} | |||
{{FrameStripEnd}} | |||
{{FrameIconLegend|lag=y|hitbox=y}} | |||
{{MvSubNavCaptainFalcon|g=SSB}} | {{MvSubNavCaptainFalcon|g=SSB}} | ||
[[Category:Captain Falcon (SSB)]] | [[Category:Captain Falcon (SSB)]] | ||
[[Category:Neutral special moves (SSB)]] | [[Category:Neutral special moves (SSB)]] | ||
Latest revision as of 22:42, April 12, 2022
Overview[edit]
Captain Falcon's neutral special in Smash 64 is Falcon Punch. Captain Falcon charges up with his fist and throws a powerful punch, with his fists engulfed in a flaming falcon shape, doing 24%-26% damage and advances slightly forward. It is one of the strongest moves in the game. In addition, the move is faster than it is in later Smash games, making the Smash 64 Falcon Punch deadly. It is often used as a combo finisher - the most notable way to combo into it is using an up aerial; unlike most of the useful followups to up aerial however, this one is usually performed using a Z-cancelled up aerial during a landing (possible after a move such as a forward aerial), then a full hop Falcon Punch. Other combos into the move include a forward throw on fastfallers or heavyweights at around the 50-70% range, and a down aerial on a grounded opponent at around 110-120%. Falcon can also use a Falcon Punch to gain him a little horizontal distance when recovering, and a little vertical distance as well if the move is angled up. In addition to this, Falcon Punch is stronger in the air and has larger hitboxes than the grounded version.
Hitboxes[edit]
Timing[edit]
| Hitboxes | 42-46 |
|---|---|
| Animation length | 89 |
Lag time |
Hitbox |
|

