Mii Swordfighter (SSBU)/Down tilt: Difference between revisions
From SmashWiki, the Super Smash Bros. wiki
Jump to navigationJump to search
(New Page: {{ArticleIcons|ssbu=y}} thumb|500px|Hitbox visualization showing Mii Swordfighter's down tilt. {{competitive expertise}} ==Overview== ==Hitboxes==...) |
Omega Tyrant (talk | contribs) mNo edit summary |
||
| (10 intermediate revisions by 5 users not shown) | |||
| Line 1: | Line 1: | ||
{{ArticleIcons|ssbu=y}} | {{ArticleIcons|ssbu=y}} | ||
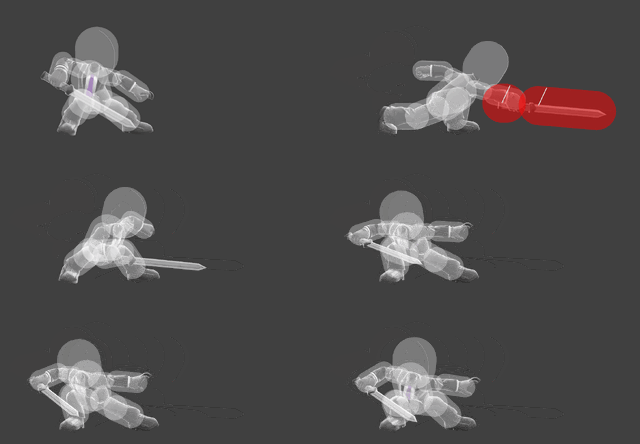
[[File:MiiSwordfighterDTiltSSBU.gif|thumb| | [[File:MiiSwordfighterDTiltSSBU.gif|thumb|320px|Hitbox visualization showing Mii Swordfighter's down tilt.]] | ||
{{competitive expertise}} | {{competitive expertise}} | ||
==Overview== | ==Overview== | ||
A swift downward stab. Along with its above-average [[reach]] making it an effective ranged option, its fast [[startup]] and low [[endlag]] also makes it effective in close quarters, though the move's [[hitbox]]es being small and close to the ground makes it easy for opponents to high-profile over it with [[aerial]]s. Down tilt's mostly vertical launch [[angle]] also makes it a decent damage racking tool, as it can combo into {{mvsub|Mii Swordfighter|SSBU|dash attack}}, {{mvsub|Mii Swordfighter|SSBU|grab}}, {{mvsub|Mii Swordfighter|SSBU|forward aerial}}, [[Mii Swordfighter (SSBU)/Up special/Custom 2|Hero's Spin]], and [[Mii Swordfighter (SSBU)/Down special/Custom 2|Power Thrust]] at low percents. However, since the move launches at 65 degrees, it is also vulnerable to [[LSI]], which knowledgeable opponents can utilize to make these followups more difficult to land. | |||
==Hitboxes== | ==Hitboxes== | ||
{{UltimateHitboxTableHeader}} | {{UltimateHitboxTableHeader}} | ||
| Line 10: | Line 13: | ||
|damage=8.0% | |damage=8.0% | ||
|angle=65 | |angle=65 | ||
|af=3 | |||
|bk=50 | |bk=50 | ||
|ks=80 | |ks=80 | ||
| Line 20: | Line 24: | ||
|ff=1.0 | |ff=1.0 | ||
|type=Sword | |type=Sword | ||
|effect= | |effect=Stab | ||
|sfx= | |sfx=Slash | ||
|slvl=M | |slvl=M | ||
}} | }} | ||
| Line 29: | Line 33: | ||
|damage=8.0% | |damage=8.0% | ||
|angle=65 | |angle=65 | ||
|af=3 | |||
|bk=50 | |bk=50 | ||
|ks=80 | |ks=80 | ||
| Line 39: | Line 44: | ||
|ff=1.0 | |ff=1.0 | ||
|type=Sword | |type=Sword | ||
|effect= | |effect=Stab | ||
|sfx= | |sfx=Slash | ||
|slvl=M | |slvl=M | ||
|clang=f | |||
|rebound=f | |||
}} | }} | ||
|} | |} | ||
==Timing== | ==Timing== | ||
{|class="wikitable" | {|class="wikitable" | ||
| Line 61: | Line 69: | ||
{{FrameIconLegend|lag=y|hitbox=y|interruptible=y}} | {{FrameIconLegend|lag=y|hitbox=y|interruptible=y}} | ||
==Trivia== | |||
*The move has a 30% [[trip]] chance that can never actually happen, due to its largely vertical launch angle. | |||
{{MvSubNavMiiSwordfighter|g=SSBU}} | {{MvSubNavMiiSwordfighter|g=SSBU}} | ||
[[Category:Mii Swordfighter (SSBU)]] | [[Category:Mii Swordfighter (SSBU)]] | ||
[[Category:Down tilts (SSBU)]] | [[Category:Down tilts (SSBU)]] | ||
Latest revision as of 20:55, August 12, 2023
Overview[edit]
A swift downward stab. Along with its above-average reach making it an effective ranged option, its fast startup and low endlag also makes it effective in close quarters, though the move's hitboxes being small and close to the ground makes it easy for opponents to high-profile over it with aerials. Down tilt's mostly vertical launch angle also makes it a decent damage racking tool, as it can combo into dash attack, grab, forward aerial, Hero's Spin, and Power Thrust at low percents. However, since the move launches at 65 degrees, it is also vulnerable to LSI, which knowledgeable opponents can utilize to make these followups more difficult to land.
Hitboxes[edit]
Timing[edit]
| Hitboxes | 5-6 |
|---|---|
| Interruptible | 20 |
| Animation length | 33 |
Lag time |
Hitbox |
Interruptible |
Trivia[edit]
- The move has a 30% trip chance that can never actually happen, due to its largely vertical launch angle.
|

