Meta Knight (SSBB)/Down throw: Difference between revisions
mNo edit summary |
No edit summary |
||
| Line 4: | Line 4: | ||
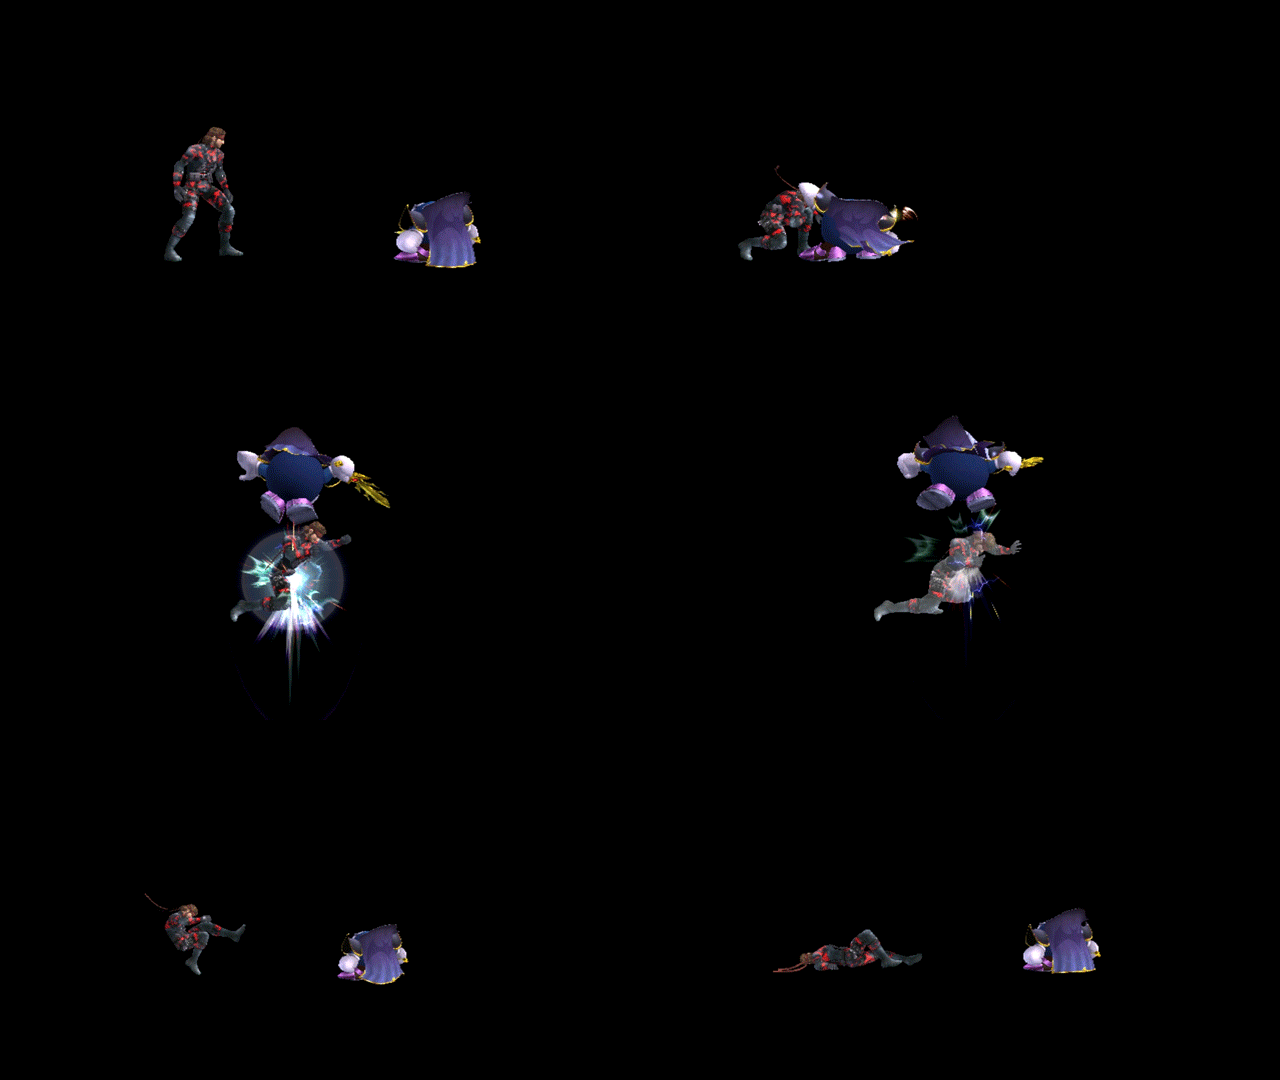
A [[multi-hit throw]] in which Meta Knight stomps the opponent nine times, then slams on top of them, knocking them horizontally with weak [[knockback]]. The stomps deal 1% [[damage]] each, and the slam deals 2% [[damage]], for a total of 11% (making this the second most damaging down throw in the game, behind {{mvsub|Kirby|SSBB|down throw|alt=Kirby's}}, {{mvsub|Bowser|SSBB|down throw|alt=Bowser's}}, and {{mvsub|Olimar|SSBB|down throw|alt=Olimar's}} (using a blue {{b|Pikmin|species}}), which each deal 12% [[damage]]). This [[throw]] has a similar animation to Kirby's down throw, but Meta Knight's deals 1% less damage, produces horizontal [[knockback]] instead of vertical, and has slower stomps. This [[throw]] is a useful [[damage]] racker in general, and is one of Meta Knight's more commonly used moves in competitive play. Meta Knight's down throw can be followed up with moves such as a {{mvsub|Meta Knight|SSBB|dash attack}} or [[short hop]]ped {{mvsub|Meta Knight|SSBB|neutral aerial}} to start [[combo]]s at lower percentages; or at higher percentages when near the [[edge]], a short hopped {{mvsub|Meta Knight|SSBB|up special|alt=Shuttle Loop}}. There are various other possible followups depending on the opponent's [[DI]] - against [[fastfaller]]s at low percentages, Meta Knight can [[chain grab]] using down throws, and in some situations, the move works as a pseudo-[[tech-chasing]] move. | A [[multi-hit throw]] in which Meta Knight stomps the opponent nine times, then slams on top of them, knocking them horizontally with weak [[knockback]]. The stomps deal 1% [[damage]] each, and the slam deals 2% [[damage]], for a total of 11% (making this the second most damaging down throw in the game, behind {{mvsub|Kirby|SSBB|down throw|alt=Kirby's}}, {{mvsub|Bowser|SSBB|down throw|alt=Bowser's}}, and {{mvsub|Olimar|SSBB|down throw|alt=Olimar's}} (using a blue {{b|Pikmin|species}}), which each deal 12% [[damage]]). This [[throw]] has a similar animation to Kirby's down throw, but Meta Knight's deals 1% less damage, produces horizontal [[knockback]] instead of vertical, and has slower stomps. This [[throw]] is a useful [[damage]] racker in general, and is one of Meta Knight's more commonly used moves in competitive play. Meta Knight's down throw can be followed up with moves such as a {{mvsub|Meta Knight|SSBB|dash attack}} or [[short hop]]ped {{mvsub|Meta Knight|SSBB|neutral aerial}} to start [[combo]]s at lower percentages; or at higher percentages when near the [[edge]], a short hopped {{mvsub|Meta Knight|SSBB|up special|alt=Shuttle Loop}}. There are various other possible followups depending on the opponent's [[DI]] - against [[fastfaller]]s at low percentages, Meta Knight can [[chain grab]] using down throws, and in some situations, the move works as a pseudo-[[tech-chasing]] move. | ||
== | ==Throw and Hitbox Data== | ||
{{ | ===Hitbox=== | ||
{{BrawlHitboxTableHeader|special=y}} | |||
{{HitboxTableTitle|Hits 1-9|38}} | |||
{{BrawlSpecialHitboxTableRow | |||
|bn=0 | |||
|id=0 | |||
|damage=1% | |||
|angle=270 | |||
|fkv=10 | |||
|ks=100 | |||
|sd=0 | |||
|bk=0 | |||
|r=300000 | |||
|xpos=0 | |||
|ypos=240000 | |||
|zpos=0 | |||
|trip=0 | |||
|ff=60000 | |||
|sdi=0 | |||
|rawflags=00110001100000110000010001000000 | |||
|rehit=0 | |||
|rawflags2=00101000010011111111111111000011 | |||
}} | |||
{{HitboxTableTitle|Hit 10|38}} | |||
{{BrawlSpecialHitboxTableRow | |||
|bn=0 | |||
|id=0 | |||
|damage=1% | |||
|angle=90 | |||
|fkv=0 | |||
|ks=200 | |||
|sd=0 | |||
|bk=50 | |||
|r=420000 | |||
|xpos=0 | |||
|ypos=240000 | |||
|zpos=0 | |||
|trip=0 | |||
|ff=60000 | |||
|sdi=60000 | |||
|rawflags=00110001100000110000010010000000 | |||
|rehit=0 | |||
|rawflags2=00001000010011111111111111000011 | |||
}} | |||
|} | |||
===Throw=== | |||
{{BrawlThrowTableHeader}} | |||
{{BrawlThrowTableRow | |||
|id=0 | |||
|damage=1% | |||
|af=3 | |||
|angle=50 | |||
|bk=60 | |||
|ks=110 | |||
|fkv=0 | |||
|bn=0 | |||
|noff=false | |||
|ff=1.0 | |||
|type=Throwing | |||
|effect=Normal | |||
|slvl=S | |||
|sfx=None | |||
}} | |||
{{BrawlThrowTableRow | |||
|id=1 | |||
|damage=3% | |||
|af=3 | |||
|angle=361 | |||
|bk=0 | |||
|ks=100 | |||
|fkv=100 | |||
|bn=0 | |||
|noff=false | |||
|ff=1.0 | |||
|type=Throwing | |||
|effect=Normal | |||
|slvl=S | |||
|sfx=None | |||
}} | |||
|} | |||
==Timing== | ==Timing== | ||
{{technical data}} | {{technical data}} | ||
Revision as of 22:08, April 25, 2020

Overview
A multi-hit throw in which Meta Knight stomps the opponent nine times, then slams on top of them, knocking them horizontally with weak knockback. The stomps deal 1% damage each, and the slam deals 2% damage, for a total of 11% (making this the second most damaging down throw in the game, behind Kirby's, Bowser's, and Olimar's (using a blue Pikmin), which each deal 12% damage). This throw has a similar animation to Kirby's down throw, but Meta Knight's deals 1% less damage, produces horizontal knockback instead of vertical, and has slower stomps. This throw is a useful damage racker in general, and is one of Meta Knight's more commonly used moves in competitive play. Meta Knight's down throw can be followed up with moves such as a dash attack or short hopped neutral aerial to start combos at lower percentages; or at higher percentages when near the edge, a short hopped Shuttle Loop. There are various other possible followups depending on the opponent's DI - against fastfallers at low percentages, Meta Knight can chain grab using down throws, and in some situations, the move works as a pseudo-tech-chasing move.
Throw and Hitbox Data
Hitbox
Throw
| ID | Damage | Angle | BK | KS | FKV | Bone | SDIx | FFx | T% | Type | Effect | Sound | |
|---|---|---|---|---|---|---|---|---|---|---|---|---|---|
| 0 | 1% | Forwards | 60 | 110 | 0 | 0 | 1.0x | 1.6666666666667E-5x | 0% | ||||
| 1 | 3% | Forwards | 0 | 100 | 100 | 0 | 1.0x | 1.6666666666667E-5x | 0% | ||||
Timing
Similar moves
|
