Meta Knight (SSBB)/Side special: Difference between revisions
TheWatcher (talk | contribs) |
m (→Rushing) |
||
| (4 intermediate revisions by 3 users not shown) | |||
| Line 1: | Line 1: | ||
{{ArticleIcons|ssbb=y}} | {{ArticleIcons|ssbb=y}} | ||
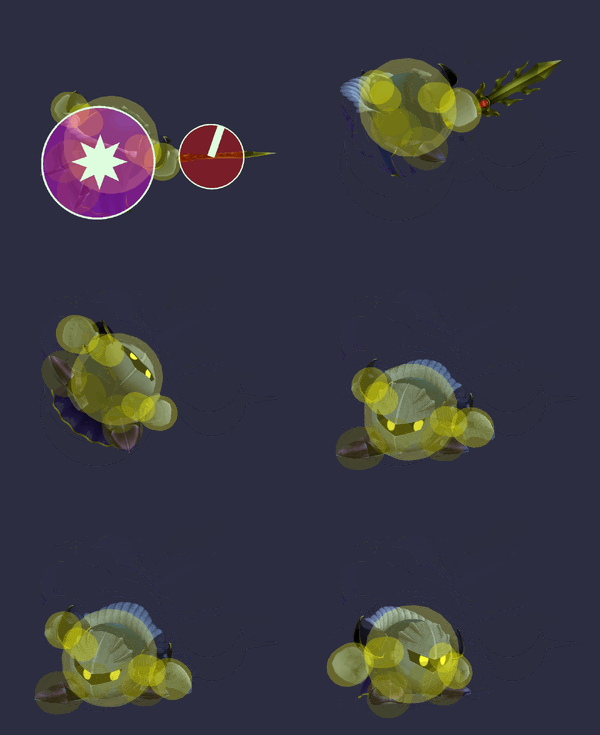
[[File:MetaKnightDrillRushSSBB.gif|thumb|400px|Hitbox visualization showing Meta Knight's Drill Rush.]] | |||
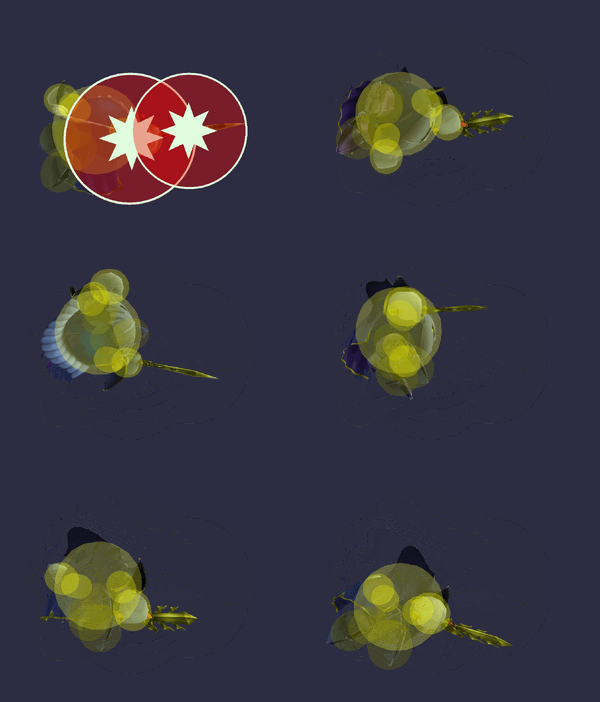
[[File:MetaKnightDrillRushEndGroundSSBB.gif|thumb|300px|Hitbox visualization showing the grounded finisher of Meta Knight's Drill Rush.]] | |||
[[File:MetaKnightDrillRushEndAirSSBB.gif|thumb|300px|Hitbox visualization showing the aerial finisher of Meta Knight's Drill Rush.]] | |||
==Overview== | ==Overview== | ||
Meta Knight leaps sideways with his blade outstretched. A multi-hit move covering a fairly large distance (it can also be tilted up and down) lasting a good two seconds, with the final hit producing upward diagonal [[knockback]] if used on an aerial opponent (it has some [[KO]] power at high percentages when used offstage close to the side [[blast line]], though this is rather risky due to the move making Meta Knight [[helpless]]). The move hits 10 times, dealing 1% [[damage]] per hit. Also, when the move's animation is finished in the air, Meta Knight pulls back a bit while gaining some vertical distance. The move lacks [[transcendent priority]], unlike most of Meta Knight's moveset. | Meta Knight leaps sideways with his blade outstretched. A multi-hit move covering a fairly large distance (it can also be tilted up and down) lasting a good two seconds, with the final hit producing upward diagonal [[knockback]] if used on an aerial opponent (it has some [[KO]] power at high percentages when used offstage close to the side [[blast line]], though this is rather risky due to the move making Meta Knight [[helpless]]). The move hits 10 times, dealing 1% [[damage]] per hit. Also, when the move's animation is finished in the air, Meta Knight pulls back a bit while gaining some vertical distance. The move lacks [[transcendent priority]], unlike most of Meta Knight's moveset. | ||
| Line 12: | Line 13: | ||
==Hitboxes== | ==Hitboxes== | ||
{{ | ===Rushing=== | ||
{{BrawlHitboxTableHeader}} | {{BrawlHitboxTableHeader|special=y}} | ||
{{ | {{BrawlSpecialHitboxTableRow | ||
| | |id=0 | ||
|rehit=6 | |||
|damage=1% | |||
|sd=0 | |||
|angle=365 | |||
|bk=60 | |||
|ks=50 | |||
|fkv=0 | |||
|r=240000 | |||
|bn=0 | |||
|ypos=840000 | |||
|zpos=240000 | |||
|sdi=48000 | |||
|rawflags=00111011010000110000011001000010 | |||
|rawflags2=00000000010011111111111111000011 | |||
}} | |||
{{BrawlSpecialHitboxTableRow | |||
|id=1 | |||
|rehit=6 | |||
|damage=1% | |||
|sd=0 | |||
|angle=78 | |||
|bk=100 | |||
|ks=50 | |||
|fkv=0 | |||
|r=210000 | |||
|bn=0 | |||
|sdi=48000 | |||
|ypos=120000 | |||
|zpos=240000 | |||
|rawflags=00111011010000110000011001000010 | |||
|rawflags2=00000000010011111111111111000011 | |||
}} | |||
{{BrawlSpecialHitboxTableRow | |||
|id=2 | |||
|rehit=6 | |||
|damage=1% | |||
|sd=0 | |||
|angle=70 | |||
|bk=50 | |||
|ks=50 | |||
|fkv=0 | |||
|r=300000 | |||
|bn=41 | |||
|xpos=210000 | |||
|sdi=48000 | |||
|rawflags=00111011010000110000011001000010 | |||
|rawflags2=00000000010011111111111111000011 | |||
}} | |||
|} | |||
===Grounded Final Hit=== | |||
{{BrawlHitboxTableHeader|special=y}} | |||
{{BrawlSpecialHitboxTableRow | |||
|id=0 | |||
|damage=3% | |||
|sd=0 | |||
|angle=70 | |||
|bk=30 | |||
|ks=130 | |||
|fkv=0 | |||
|r=240000 | |||
|bn=41 | |||
|xpos=360000 | |||
|rawflags=00111011010000110000011010000010 | |||
|rawflags2=00000000010011111111111111000011 | |||
}} | |||
{{BrawlSpecialHitboxTableRow | |||
|id=2 | |||
|damage=2% | |||
|sd=0 | |||
|angle=361 | |||
|bk=30 | |||
|ks=100 | |||
|fkv=0 | |||
|r=420000 | |||
|bn=41 | |||
|xpos=-480000 | |||
|rawflags=00111011010000110000011010000010 | |||
|rawflags2=00000000010011111111111111000011 | |||
}} | |||
|} | |||
===Aerial Final Hit=== | |||
{{BrawlHitboxTableHeader|special=y}} | |||
{{BrawlSpecialHitboxTableRow | |||
|id=0 | |id=0 | ||
|damage= | |damage=3% | ||
|sd=0 | |||
|angle=361 | |||
|bk=30 | |||
|ks=200 | |||
|fkv=0 | |||
|r=540000 | |||
|bn=41 | |||
|xpos=-120000 | |||
|rawflags=00111011010000110000011010000010 | |||
|rawflags2=00000000010011111111111111000011 | |||
}} | |||
{{BrawlSpecialHitboxTableRow | |||
|id=1 | |||
|damage=3% | |||
|sd=0 | |||
|angle=361 | |||
|bk=30 | |||
|ks=200 | |||
|fkv=0 | |||
|r=480000 | |||
|bn=41 | |||
|xpos=360000 | |||
|rawflags=00111011010000110000011010000010 | |||
|rawflags2=00000000010011111111111111000011 | |||
}} | |||
|} | |||
==Timing== | ==Timing== | ||
| Line 27: | Line 139: | ||
[[Category:Side special moves (SSBB)]] | [[Category:Side special moves (SSBB)]] | ||
[[Category:Slash attacks (SSBB)]] | [[Category:Slash attacks (SSBB)]] | ||
[[Category:Sword attacks]] | [[Category:Sword attacks (SSBB)]] | ||
Latest revision as of 20:20, May 28, 2024
Overview[edit]
Meta Knight leaps sideways with his blade outstretched. A multi-hit move covering a fairly large distance (it can also be tilted up and down) lasting a good two seconds, with the final hit producing upward diagonal knockback if used on an aerial opponent (it has some KO power at high percentages when used offstage close to the side blast line, though this is rather risky due to the move making Meta Knight helpless). The move hits 10 times, dealing 1% damage per hit. Also, when the move's animation is finished in the air, Meta Knight pulls back a bit while gaining some vertical distance. The move lacks transcendent priority, unlike most of Meta Knight's moveset.
Tilting the move upward gives Meta Knight great vertical distance when used during recovery, with the additional pull back after the move gaining even more vertical distance. Out of all of Meta Knight's recovery moves, Drill Rush gives the most vertical distance (even more than the initial upswing of Shuttle Loop).
It is possible to cancel the ending lag of the attack by making the end hit the edge of any platform, allowing it to be virtually lag-free, and allowing it to be used to rush opponents in on stages such as Battlefield - this is known as Drill Rush Canceling.
Overall, the move is very useful for recovery, but as an attack it is not too useful, as the move can be escaped before the final hit is landed, and it has little followup ability due to making Meta Knight helpless in the air and the ending lag (even when used on the ground, there is some ending lag).
Hitboxes[edit]
Rushing[edit]
Grounded Final Hit[edit]
Aerial Final Hit[edit]
Timing[edit]
|


