
Falco (SSBB)/Down aerial

Overview[edit]
Falco turns diagonally and spins. At the start of his attack and hitbox from knee to lower body part, he can execute a meteor smash at his spinning heel. The meteor smash hit does 13%, otherwise 8%. It has extremely fast start-up (being the fastest meteor smash in Brawl in terms of startup), with a long-lasting normal hitbox, and only has 12 frames of landing lag upon landing, making it good at initiating ground-based juggles (such as down aerial→down throw or down aerial→tap reset). It doesn't require the landing of specific hitboxes (like Marth's down aerial), which makes it much easier to land than other meteor smashes, while still having the power to be effective. If the opponent is hit with the meteor smash toward the ground and doesn't guard upon impact to the ground, they will bounce on the ground, allowing Falco to combo into any smash attack or start his laser lock. A down throw can lead into this move, this can be performed offstage to end a chaingrab or a way to setup a down aerial onstage to cause the opponent to bounce on the ground. It is especially effective at landing quick meteor smashes near the ledge and meteor smashing opponents recovering high (due to Falco's very high jumps). Like the other meteor smashes that were spikes in Melee, it additionally sends opponents at a slight diagonal angle instead of straight down; unlike many such moves however, the angle was altered to one that would have been a meteor smash in Melee regardless. Due to Falco's lackluster recovery and the move's rather high duration, this attack is a moderate risk to use offstage. The move only meteor smashes during its initial hitboxes; landing the later hitboxes hits the opponent away with weak horizontal knockback. The move also has low base knockback, which prevents it from KOing or gimping most characters at low percents (it has high knockback scaling though to be effective at higher percents).
Hitboxes[edit]
| ID | Part | Damage | SD | Angle | BK | KS | FKV | Radius | Bone | Offset | SDIx | H× | T% | Clang | Rebound | Type | Effect | G | A | Sound | Direct | ||
|---|---|---|---|---|---|---|---|---|---|---|---|---|---|---|---|---|---|---|---|---|---|---|---|
| Clean | |||||||||||||||||||||||
| 0 | 0 | 13% | 0 |  |
10 | 100 | 0 | 5.5 | 8 | -1.0 | -3.5 | 0.0 | 1.0x | 1.0x | 0% |  |
 |
 |
 |
 |
 |
.png) Kick Kick |

|
| Late | |||||||||||||||||||||||
| 0 | 0 | 8% | 0 |  |
20 | 90 | 0 | 5.5 | 8 | -1.0 | -3.5 | 0.0 | 1.0x | 1.0x | 0% | |
|
|
|
|
|
.png) Kick Kick |
|
Timing[edit]
Attack[edit]
| Initial autocancel | 1-4 |
|---|---|
| Clean hit | 5-7 |
| Late hit | 8-21 |
| Ending autocancel | 27- |
| Animation length | 49 |
 |
|
|
|
 |
|
 |
 |
|
|
|
|
|
|
|
|
|
|
|
|
|
|
|
|
|
|
|
|
|
|
|
|
|
|
|
|
|
|
|
|
|
|
|
|
|
|
|
|
|
 |
|
|
|
 |
|
|
|
|
|
|
|
|
|
|
|
|
|
|
|
|
|
|
|
|
|
|
|
|
|
|
|
|
|
|
|
|
|
|
|
|
|
|
|
|
|
|
|
|
Landing lag[edit]
| Animation length | 12 |
|---|
|
|
|
|
|
|
|
|
|
|
|
|
Lag time |
Hitbox |
.png) .png) Hitbox change |
Autocancel |
Gallery[edit]
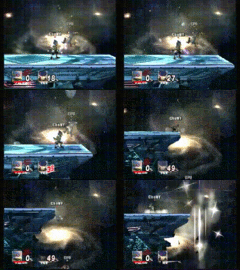
Down aerial used as a followup to a down throw chaingrab.


