Mr. Game & Watch (SSBU)/Forward smash: Difference between revisions
| Line 4: | Line 4: | ||
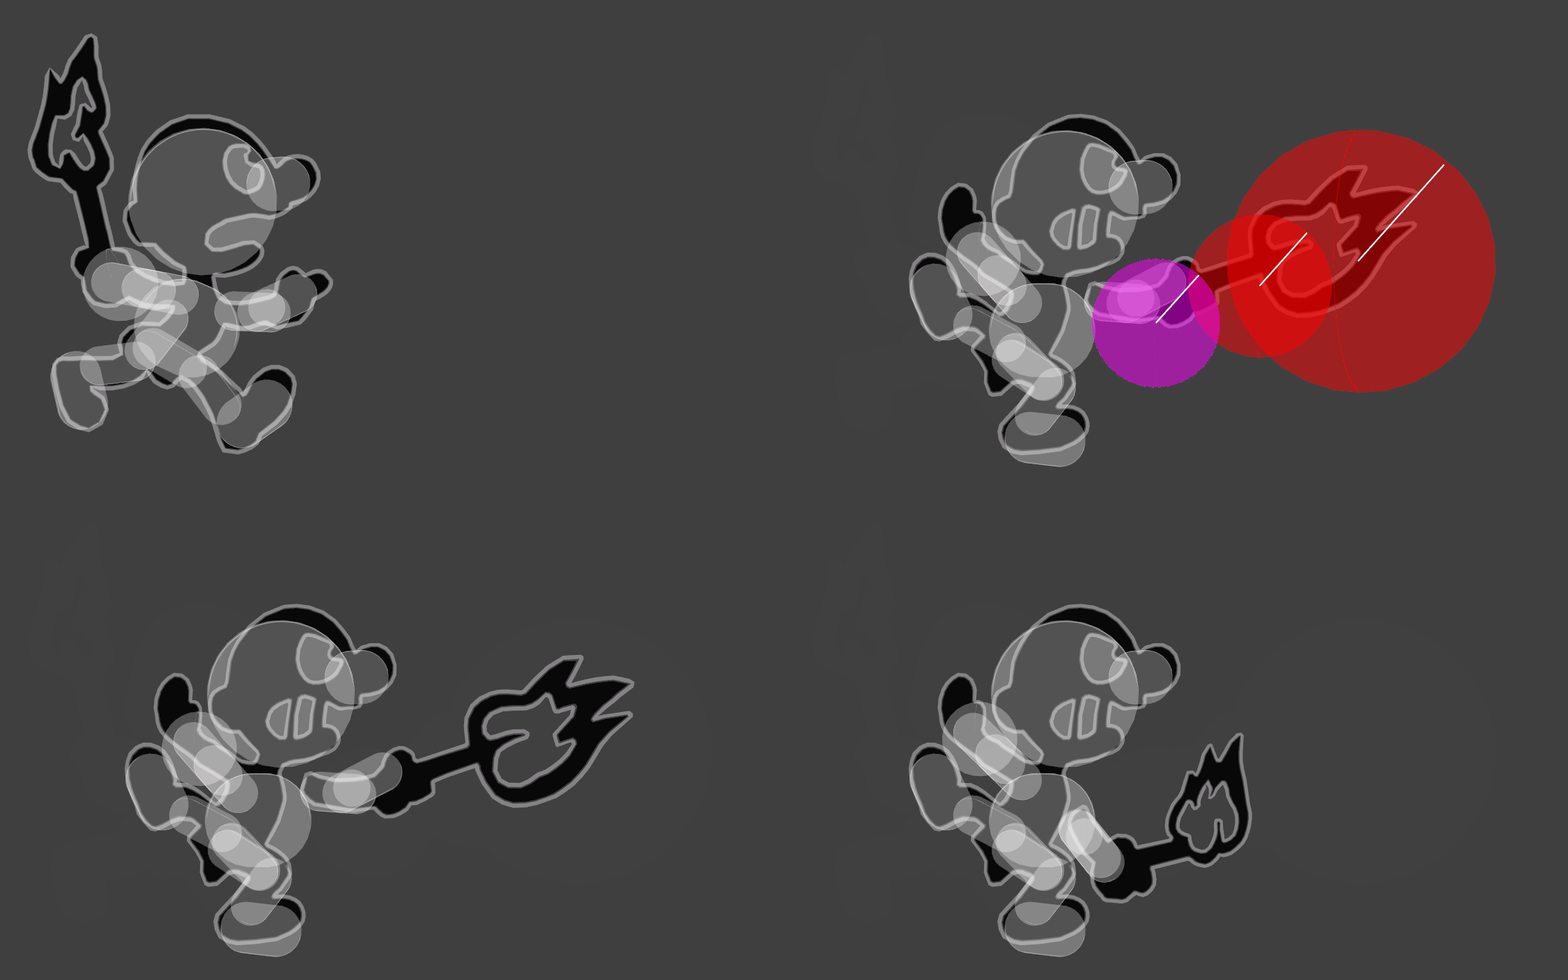
Mr. Game & Watch angrily thrusts a lit torch directly at his opponent, referencing his game ''Fire Attack''. The move has noticeable [[startup]] for a [[forward smash]] as it comes out on frame 17, but has low [[ending lag]] and good [[range]] due to its fully [[disjointed hitbox]]. Forward smash has a [[sweet spot (hitbox)|sweetspot]] at the flame of the torch that is one of the strongest forward smashes in the game, dealing massive [[flame|burning]] [[damage]] and [[knockback]] while also being safe on shield. The [[sourspot]] is located on the torch handle and is significantly weaker but is still potent enough to KO if the opponent is at a very high percent. | Mr. Game & Watch angrily thrusts a lit torch directly at his opponent, referencing his game ''Fire Attack''. The move has noticeable [[startup]] for a [[forward smash]] as it comes out on frame 17, but has low [[ending lag]] and good [[range]] due to its fully [[disjointed hitbox]]. Forward smash has a [[sweet spot (hitbox)|sweetspot]] at the flame of the torch that is one of the strongest forward smashes in the game, dealing massive [[flame|burning]] [[damage]] and [[knockback]] while also being safe on shield. The [[sourspot]] is located on the torch handle and is significantly weaker but is still potent enough to KO if the opponent is at a very high percent. | ||
What makes this move one of Mr. Game & Watch's best finishers is that it has a setup from his [[down smash]] [[bury]] which allows Mr. Game & Watch to KO at early percents near the ledge or center stage if he can land the setup. Overall, a very potent and rewarding move. | What makes this move one of Mr. Game & Watch's best finishers is that it has a setup from his [[down smash]] [[bury]] which allows Mr. Game & Watch to KO at early percents near the ledge or center-stage if he can land the setup. Overall, a very potent and rewarding move. | ||
==Update History== | ==Update History== | ||
Revision as of 20:24, December 3, 2021
Overview
Mr. Game & Watch angrily thrusts a lit torch directly at his opponent, referencing his game Fire Attack. The move has noticeable startup for a forward smash as it comes out on frame 17, but has low ending lag and good range due to its fully disjointed hitbox. Forward smash has a sweetspot at the flame of the torch that is one of the strongest forward smashes in the game, dealing massive burning damage and knockback while also being safe on shield. The sourspot is located on the torch handle and is significantly weaker but is still potent enough to KO if the opponent is at a very high percent.
What makes this move one of Mr. Game & Watch's best finishers is that it has a setup from his down smash bury which allows Mr. Game & Watch to KO at early percents near the ledge or center-stage if he can land the setup. Overall, a very potent and rewarding move.
Update History
 The feather from Mr. Game and Watch's forward smash animation was removed.
Hitboxes
Timing
| Charges between | 7-8 |
|---|---|
| Hitboxes | 17-18 |
| Interruptible | 43 |
| Animation length | 44 |
Lag time |
Charge interval |
Hitbox |
Interruptible |
|
