Min Min (SSBU)/Neutral attack/Infinite: Difference between revisions
From SmashWiki, the Super Smash Bros. wiki
Jump to navigationJump to search
(→Hitboxes: 9.0.0) |
No edit summary |
||
| (3 intermediate revisions by 2 users not shown) | |||
| Line 4: | Line 4: | ||
{{competitive expertise}} | {{competitive expertise}} | ||
==Overview== | ==Overview== | ||
==Update History== | |||
{{GameIcon|ssbu}} '''{{SSBU|9.0.0}}''' | |||
*{{buff|Rapid jab finisher has transcendent priority, preventing it from being canceled out by weak attacks.}} | |||
==Hitboxes== | ==Hitboxes== | ||
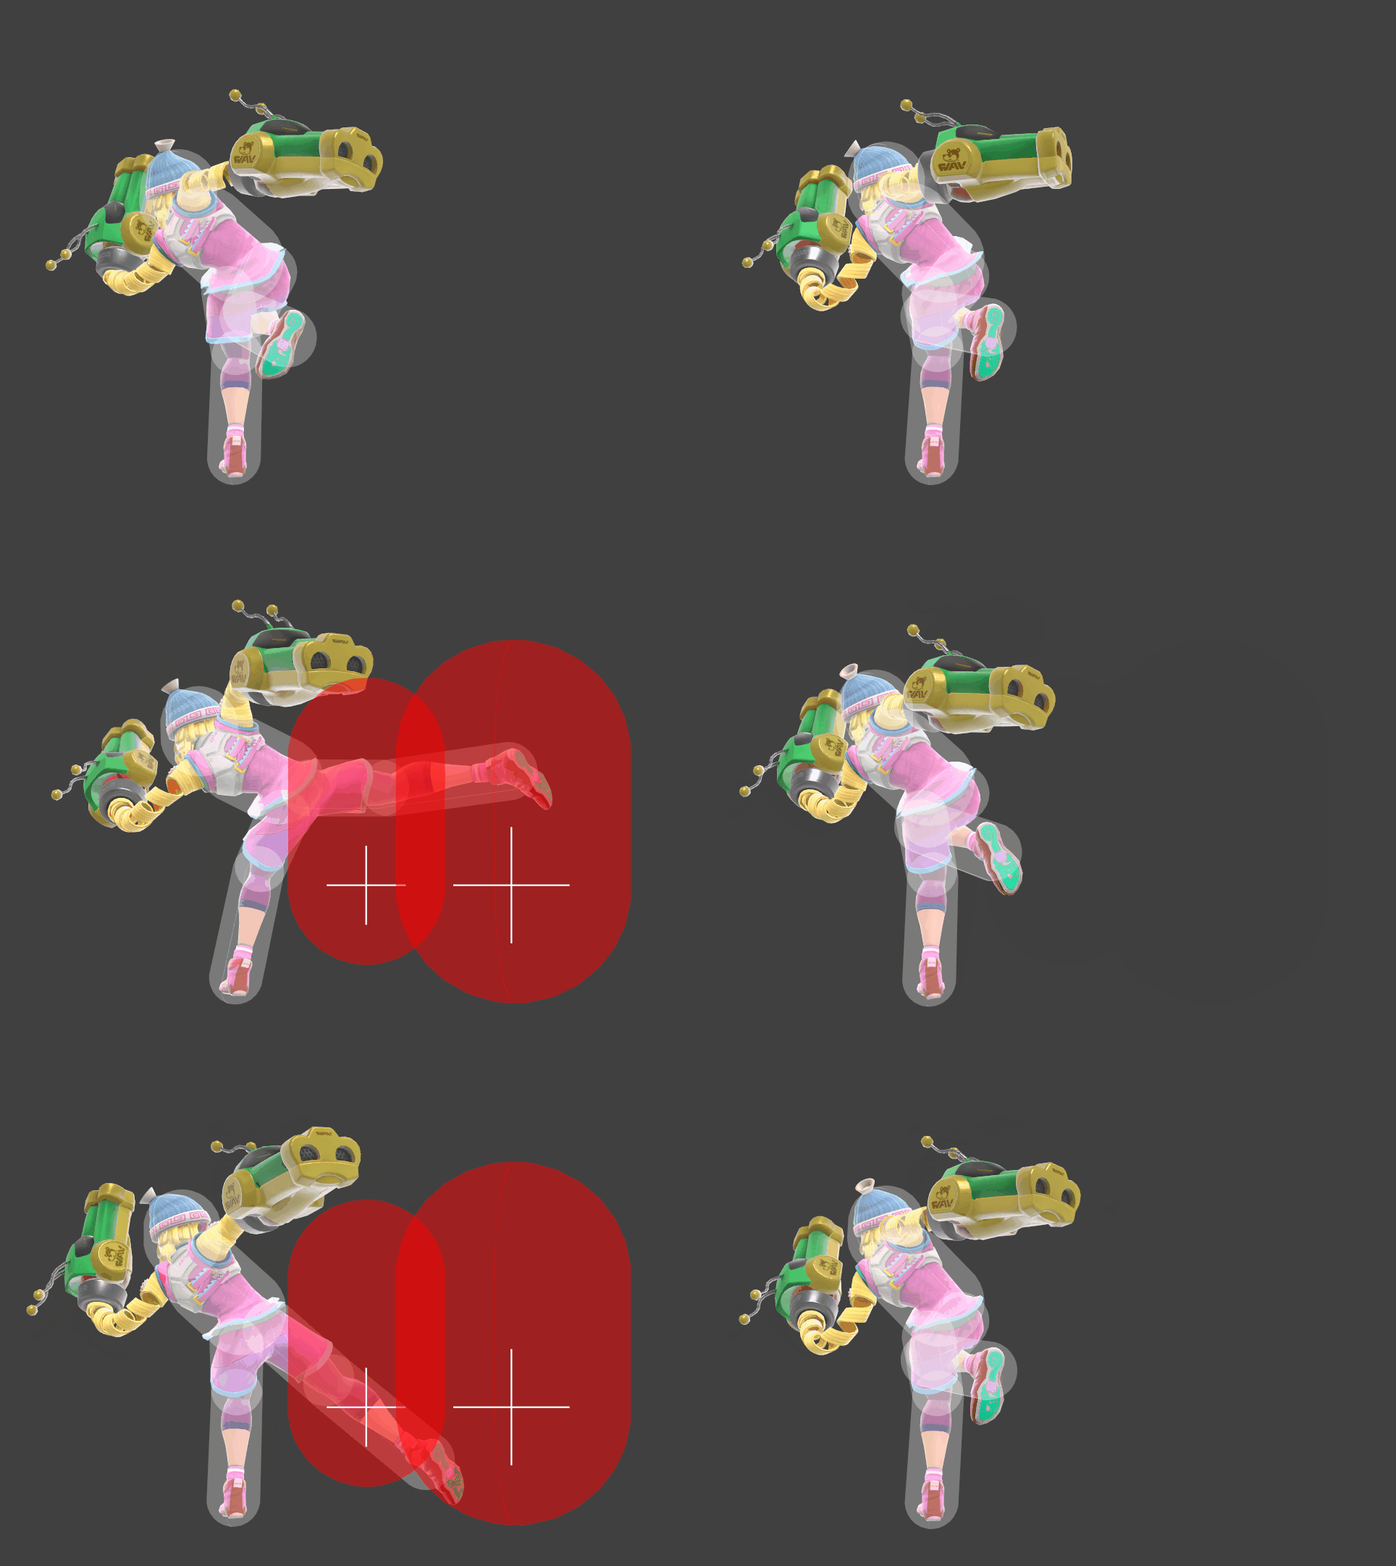
The scripts only specify hitstun and shieldstun modifiers for the ID 1 hitboxes of the rapid jab portion, as well as an ID 0 hitbox that does not exist. However, [[Hitstun#List of moves with hitstun modifiers|due to a glitch]] with hitstun and shieldstun modifiers, they also apply to the ID 2 hitbox regardless. | |||
{{UltimateHitboxTableHeader}} | {{UltimateHitboxTableHeader}} | ||
! Hitstun | ! Hitstun | ||
| Line 14: | Line 18: | ||
|damage=0.5% | |damage=0.5% | ||
|angle=361 | |angle=361 | ||
|af=3 | |||
|bk=12 | |bk=12 | ||
|ks=16 | |ks=16 | ||
| Line 20: | Line 25: | ||
|bn=top | |bn=top | ||
|xpos=0.0 | |xpos=0.0 | ||
|ypos=5. | |ypos=5.4 to 11.6 | ||
|zpos=7.0 | |zpos=7.0 | ||
|ff=1.0 | |ff=1.0 | ||
| Line 32: | Line 37: | ||
}} | }} | ||
|'''+3''' frames | |'''+3''' frames | ||
| | |9× | ||
{{UltimateHitboxTableRow | {{UltimateHitboxTableRow | ||
|id=2 | |id=2 | ||
|damage=0.5% | |damage=0.5% | ||
|angle=361 | |angle=361 | ||
|af=3 | |||
|bk=8 | |bk=8 | ||
|ks=16 | |ks=16 | ||
|fkv=0 | |fkv=0 | ||
|r=5. | |r=5.6 | ||
|bn=top | |bn=top | ||
|xpos=0.0 | |xpos=0.0 | ||
|ypos=5. | |ypos=5.4 to 11.6 | ||
|zpos=14.0 | |zpos=14.0 | ||
|ff=1.0 | |ff=1.0 | ||
| Line 54: | Line 60: | ||
|rebound=f | |rebound=f | ||
}} | }} | ||
|— | |||
|— | |||
{{HitboxTableTitle|Rapid jab finisher|42}} | {{HitboxTableTitle|Rapid jab finisher|42}} | ||
{{UltimateHitboxTableRow | {{UltimateHitboxTableRow | ||
| Line 59: | Line 67: | ||
|damage=5.0% | |damage=5.0% | ||
|angle=45 | |angle=45 | ||
|af=3 | |||
|bk=90 | |bk=90 | ||
|ks=60 | |ks=60 | ||
| Line 75: | Line 84: | ||
|rebound=f | |rebound=f | ||
}} | }} | ||
|— | |||
|— | |||
|} | |} | ||
==Timing== | ==Timing== | ||
Interruptibility and animation length are | After one full loop, releasing the attack button at any point causes the infinite to transition into the finisher. Interruptibility and animation length are for the finisher only. | ||
{|class="wikitable" | {|class="wikitable" | ||
!Rapid | !Loop points | ||
|6, 8, 10, 12 | |3-4, 19-20 | ||
|- | |||
!Rapid jab | |||
|6, 8, 10, 12, 14, 16, 18 | |||
|- | |- | ||
!Finisher | !Finisher | ||
Latest revision as of 17:16, August 6, 2022
Overview[edit]
Update History[edit]
 Rapid jab finisher has transcendent priority, preventing it from being canceled out by weak attacks.
Hitboxes[edit]
The scripts only specify hitstun and shieldstun modifiers for the ID 1 hitboxes of the rapid jab portion, as well as an ID 0 hitbox that does not exist. However, due to a glitch with hitstun and shieldstun modifiers, they also apply to the ID 2 hitbox regardless.
Timing[edit]
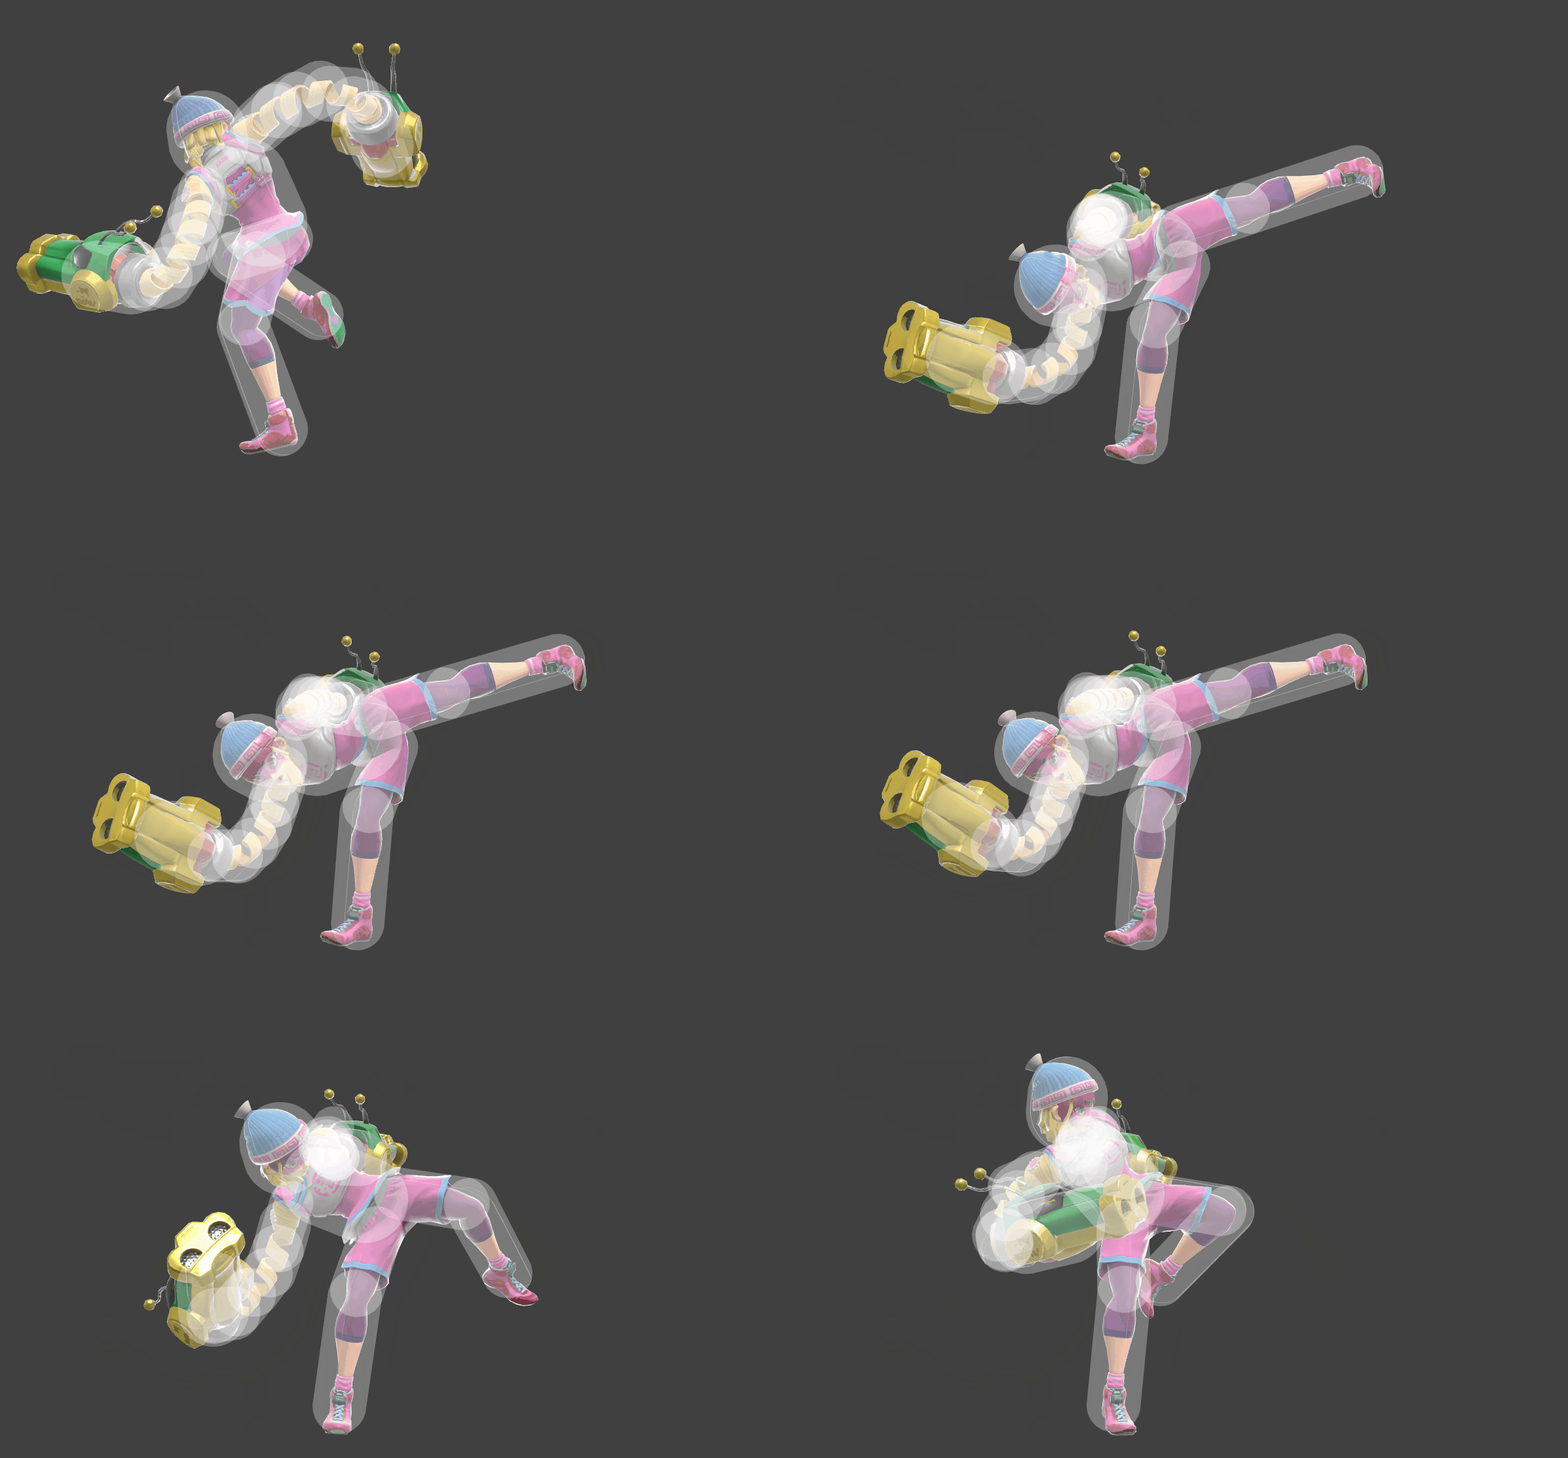
After one full loop, releasing the attack button at any point causes the infinite to transition into the finisher. Interruptibility and animation length are for the finisher only.
| Loop points | 3-4, 19-20 |
|---|---|
| Rapid jab | 6, 8, 10, 12, 14, 16, 18 |
| Finisher | 6-7 |
| Interruptible | 41 |
| Animation length | 55 |
Lag time |
Hitbox |
Loop point |
Interruptible |
|


